cookiemonste
-
Posts
62 -
Joined
-
Last visited
2 Followers

-

F-15C cockpit overhaul, hotfix, 23.02.2024
cookiemonste replied to cookiemonste's topic in DCS Modding
Hotfix for the unexpected texture update, this project is not dead, I just dont have the time. -
F-15C cockpit overhaul, hotfix, 23.02.2024
cookiemonste replied to cookiemonste's topic in DCS Modding
I originally wanted to darken the panels but I've had a GIMP crash and lost the HUD quadrant that has been done, I have it as unlayerd PNG from the DDS. Not sure if I want to redo it all over. Maybe another day. I am sorry for the lack of updates, I have been away on digital detox and still are but I can upload the latest version in the mean time. -
F-15C cockpit overhaul, hotfix, 23.02.2024
cookiemonste replied to cookiemonste's topic in DCS Modding
Most of the text for the dash has been created, the AoA gauge has also been completed. I am getting close to a 1.0 release. -
F-15C cockpit overhaul, hotfix, 23.02.2024
cookiemonste replied to cookiemonste's topic in DCS Modding
Update on the HUD quadrant:
-
F-15C cockpit overhaul, hotfix, 23.02.2024
cookiemonste replied to cookiemonste's topic in DCS Modding
If someone happens to have good photos of the AOA indicator, please send them my way. ED's is wrong, that's for sure. Oil pressure gauges have been updated. If anyone wants to help out, the text on the dash needs to be redone, texture 1 and 2. The font is "MS 33558,". -
F-15C cockpit overhaul, hotfix, 23.02.2024
cookiemonste replied to cookiemonste's topic in DCS Modding
Not sure if I will touch the side pannels. Redoing them would be a huge undertaking with no real benefit. The backup attitude indicator has been redone and is now correct:
-
F-15C cockpit overhaul, hotfix, 23.02.2024
cookiemonste replied to cookiemonste's topic in DCS Modding
Well, I struck gold. Now I should be able to see what ED did wrong and how to fix it:
-
F-15C cockpit overhaul, hotfix, 23.02.2024
cookiemonste replied to cookiemonste's topic in DCS Modding
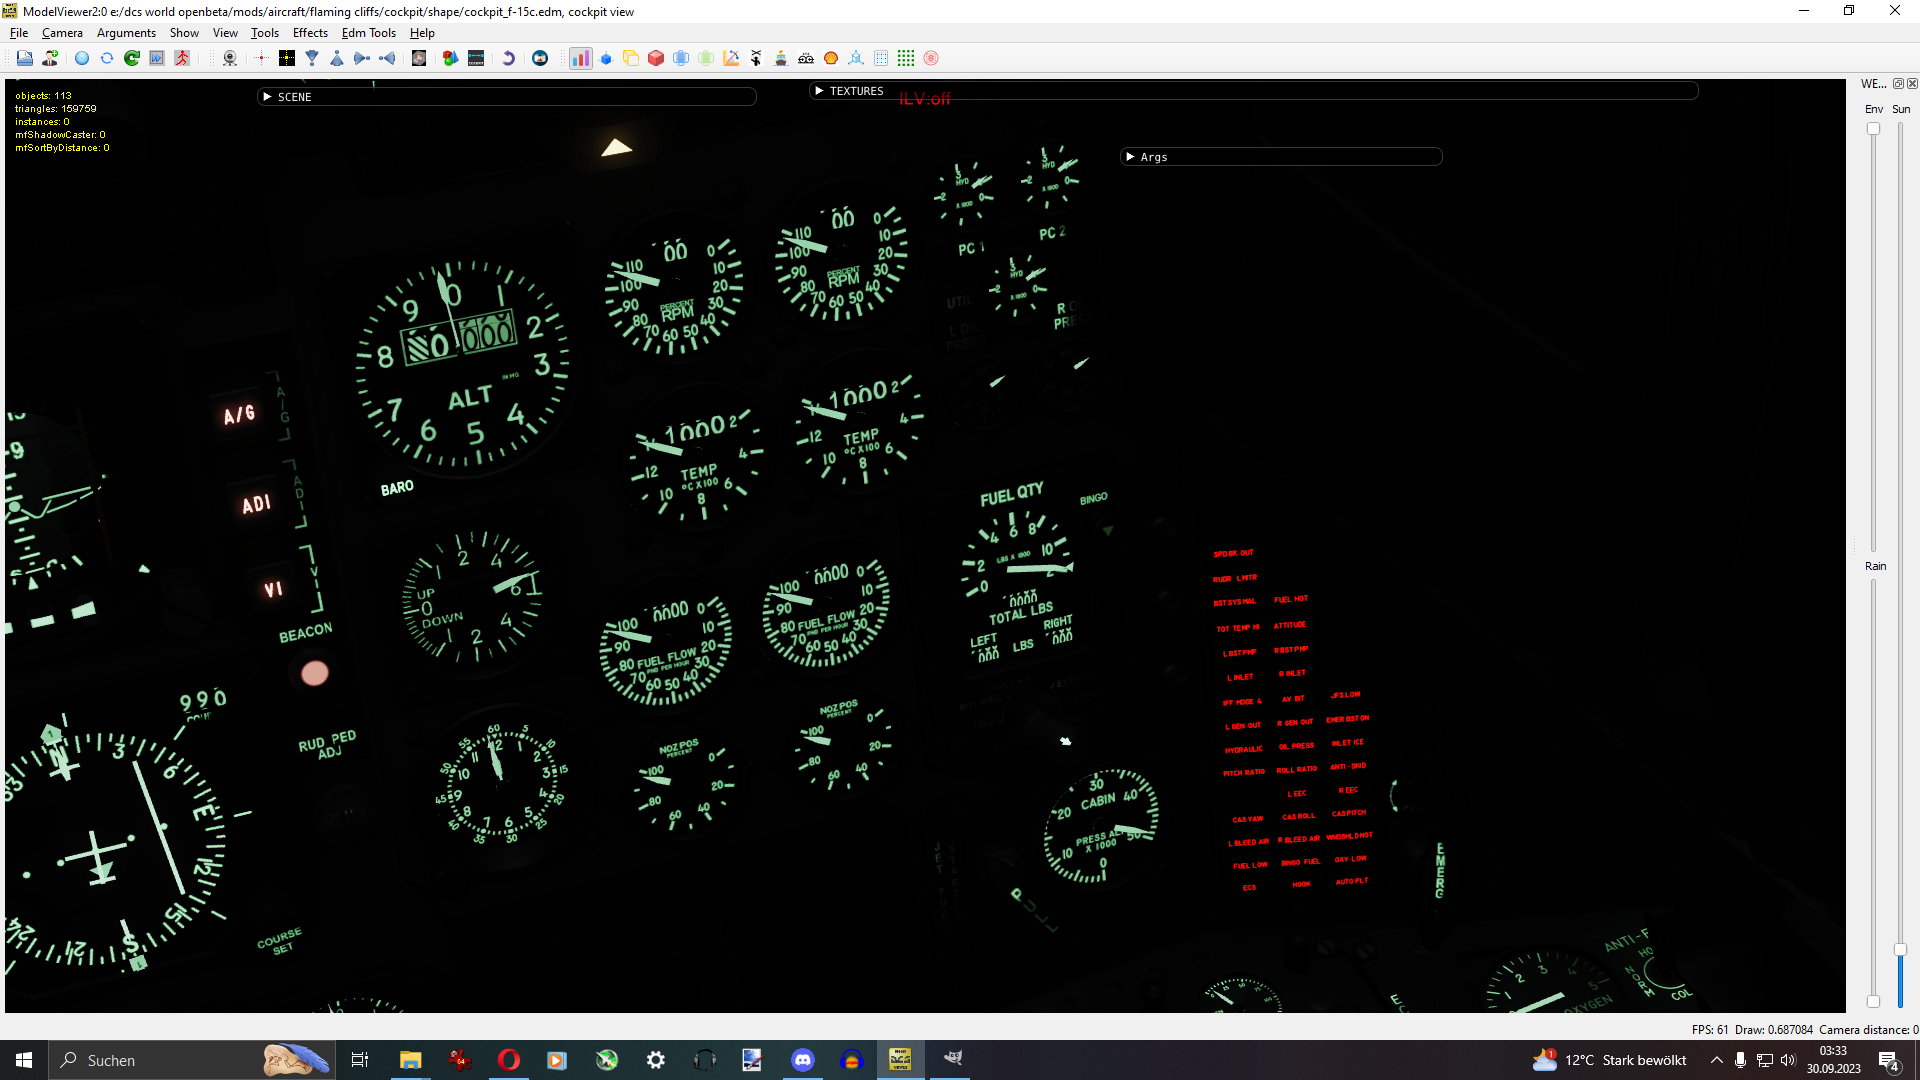
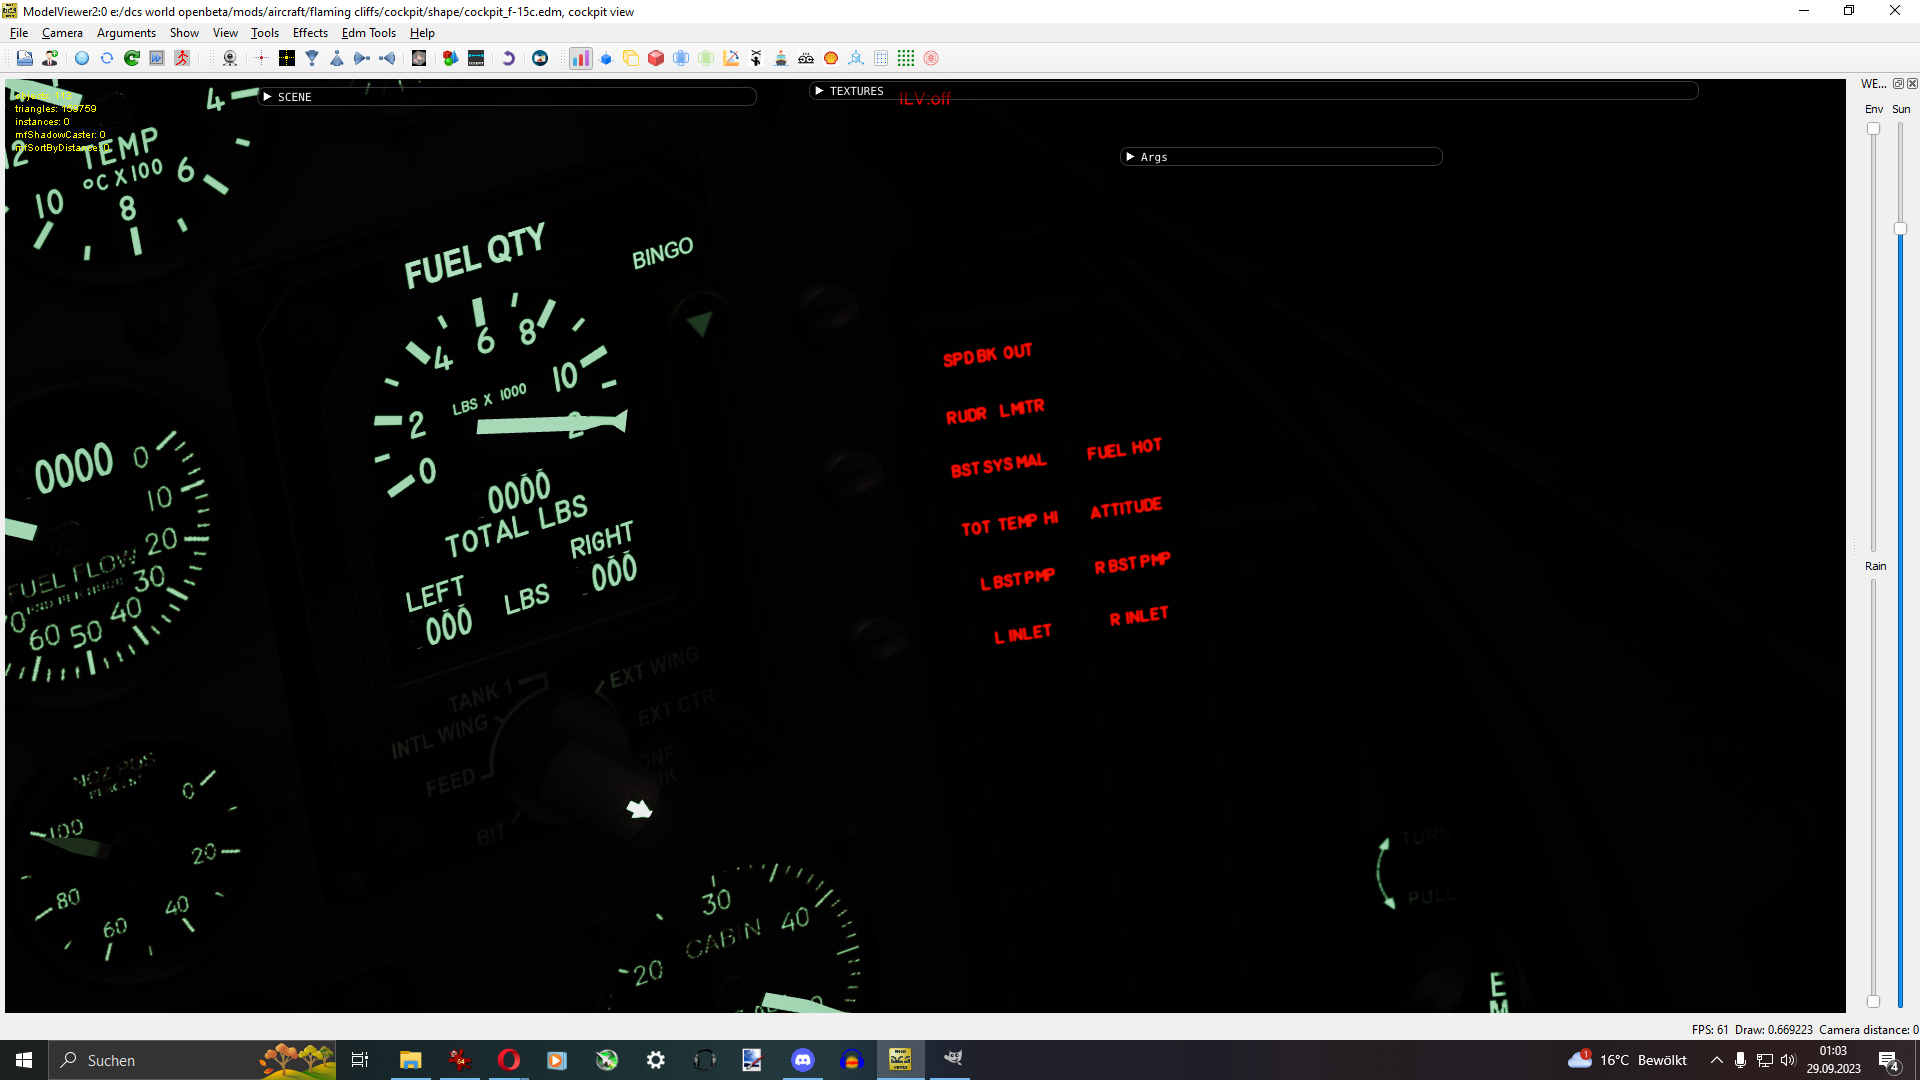
Most gauges on the right are finished, the caution pannel included: I have updated the download link at the beginning of the thread. The next step will be the artificial horizon. If you have any requests of what I should do next, post them here.
-
F-15C cockpit overhaul, hotfix, 23.02.2024
cookiemonste replied to cookiemonste's topic in DCS Modding
Some progress, I've reworked the fuel gauge and now im working on the caution pannel.
-
F-15C cockpit overhaul, hotfix, 23.02.2024
cookiemonste replied to cookiemonste's topic in DCS Modding
Oh my god, thank you, yes the project is still alive. However, work is progressing very slow. -
Hey @western_JPN, is it ok it I post my work in here? As long as it's connected to your mod?
-
I love mods like these, we need some civilian planes. And I'll sink my claws into it livery wise!
-
I have created my own roughmets, for AI aircraft as well. And I dont understand why the colour is that important to you, Do you paint your roughmets directly or what? Try german with us, since your english is no good, we can barely understand you.
-
Urbi, I have no idea what you are trying to say. Only that you don't use Gimp.
-
Hi Stackup, one more tip: Don't forget to generate mipmaps, it looks like you forgot to generate them. Makes it look much nicer at different distances. Removes the jittering from textures at a distance. And generally, I wouldn't recommend using Urbis method. It's inprecise. You should work in channels. Ignore the red channel for now. Green is the glossiness, it determines how shiny or matte your surface is. Stencils, Roundels, oil streaks for example. White means matte, black means gloss. The blue channel is the roughness. It determines how metallic (rough) something looks. White means less metall, black means more metall. Your best bet is to add a white and a black layer to the layer you want to edit, that's how you can tweak it the easiest to your liking. The lighter an area is, the more matte it will be. It's best to disect an existing roughmet in Gimp to see how its structured. Try this template, it's basic but it gets the job done. Because the thing Urbi gave you is no good. https://mega.nz/file/t64GnIJK#ol0y5jYlWUynAQM4A9KVi9AD770rgL2Qw0eJzYQhlUo


.png.3e719be57067ea945acf8947d428d975.png)
.png.a3192ff51a9ea0d5f3fd8f0305820bd7.png)
.png.48bdc62adfe4436e902a20ce78aa5aa7.png)
.png.88e4936a162e9b97a1f512d963fe6965.png)