Sydy
-
Posts
1317 -
Joined
-
Last visited
-
Days Won
1
Content Type
Profiles
Forums
Events
Posts posted by Sydy
-
-
Give a shot to this mod I made, it basicaly adds RSBN beacon to every airfield in Caucasus
https://www.digitalcombatsimulator.com/en/files/2451943/
Similar mod (including PRMG iirc) can be found also for NTTR.
This mod is excellent!!! You did a great job, tks!
-
Cool! do you have an MI-8 in the works? :-)
Hi Javelina,
Tks. What a shame I don't have the MI-8 module. I am sorry. Maybe in the future.
Take care,
Sydy
-
Hi Guys,
Included a new Weapons Quick Checklist to make the Albatros drivers` life easier.
L-39C and L-39ZA Weapons Quick Checklist
All the best,
Sydy
-
Hi guys,
Today the UH-1H Huey quick checlist was made available.
Enjoy it.
All the best
Sydy
-
 1
1
-
-
Talking about refueling probes...
I will leave this here.
Enjoy...
-
Guys,
Audio Levels were not good. I am uploading a new version with a better audio. Thanks for the feed back.
Sydy
-
Hi guys,
After so many nice things coming out for DCS, I finally took some time and came back to the ACM Campaign. Now it is mission 8, against 4 F-18C Hornets.
I had to practice that a lot. These guys turn a lot and easily get on your 6.
First engagement started as usual at 24kft, I sent my wingman to pincer left and when at 10NM range, I commanded him to engage bandits. I merged with the South guy and turned toward the North guy, the one engaging my wingman so we could bracket him. The problem is that the South guy would get on my 6 for sure. I just had to be fast.
The plan worked and I managed to put a sidewinder up his butt and broke hard left using flares to avoid being shot. Sure enough the south guy was already on my 6 and I kept slicing left. He changed his mind and committed to my wingie. In the process of turning, I got way lower than both of them.
They went pretty high and I tried to get to their alt but the started turning and burning and got lower as well. I managed to get on the hornet's tail. We turned some more but I saw it was going nowhere. I extended a bit so I´d be the bait. I did that but keeping an eye on him. The guy tried to shot me down with a Sidewinder but dropped a lot of flares and got lucky.
The enemy turned into my wingie and I moved in to get a tone. They went up in the sun, I got trigger happy and shot a missile on my wingman right at the moment blackjack said to terminate. I was lucky again and the missile didn´t impact. That was a close call.
Second engament was at 14kft, I tried the same opening move but got way too close to the north guy and had to go "TOPGUN" and switched to guns. The first shot was fair but lost the opportunity, then the pipper in range sign changed to foul. I didn´t notice during the engagement and nailed the guy anyway. I almost collided with his chute, after he ejected.
I was always dropping flares during the commitment to the north guy because I knew the south guy would try to get me. Sure enough when I saw the Tacview analysis, there was a shot on me with a missile but counter measures worked and I walked away from that.
After that, the South hornet changed his mind, like the first engagement, and went for my wingman. They went high again, but this time I had enough energy to go vertical, get a good tone and fire an AIM-9-P5 on the hornet. The missile tracked and impacted well. That was fast.
If you have the time, here goes the film of both engagements.
All the best,
Sydy
-
I'm stucked with the fulcrums. I'd been very close to suceed a couple of times but always something happens. They have better planes and weapons.
I ordered the oculus rift. Maybe with those will be easyer.
They sure are hard to beat!!! Go for it!
I did it!Still without oculus.
What Sabre said works fine. If you go to the headed bandid and forget about the one that is heading you, you got much more odds on your favor and with a liitle luck you got him. Afetar that 2 against one is much more easy to manage... Just don't lose the sight and you will be fine.
Cool! I am being beat by Migs today. Next post will be about the Hornets.
I am still resisting about buying Oculus Rift... I don´t know...
Take care.
Sydy
-
-
Hi guys,
Just finished the M-2000C Quick Checklist. I hope tomorrow it will be available on ED's User files.
All the best,
Sydy
-
Check if your CH HOTAS devices are plugged into USB 3.0 ports.
I had the same problem! fixed by connecting to USB 2.0 ports.
Hi cheetah,
Tks, but it was 2.0. Triple-checked it. Gave up on CH anyway... Now with TM WH.
Tks,
Sydy
-
How does one go about donating for your work? I looked around your blog and couldn't readily find it.
Same!! Do you have a link or paypal account?
All the best,
Sydy
-
Very useful stuff! Thank you! :)Great job buddy, thanks!
You're welcome guys!
Take care,
Sydy
-
Very cool thx:)That's great! Good job. :thumbup:Thank you so much for everything !!
Hi guys,
You're welcome! I am really glad to contribute to the DCS community! :thumbup:
BTW, today I updated it so your have better instructions and better format, besides that, I had some typos and ctrl+c/ctrl+v minor mistakes. Feel free to updated.
All the best,
Sydy
-
Hi guys,
Updated post 1 with Spit and F-5E Checklists
Spitifire LF MK. IX Quick Checklist
All the best,
Sydy
-
I will just leave this here...
zjXIos8pyk0
-
Guys,
A nice vide from Colombia Air Force:
Take care,
Sydy
-
yes and corsairs came on top most of the time......
far more successfull and by mid to late war the zero was regarded as mostly outclassed by the likes of the F4U1 Corsairs and late war designs like the P51, though the Hellcat also gave zeros a tough time and were bigger zero killer.
OFC different story as early on in the war the zeros wer far bigger threats when the navy had just F4F's..... and that was a better matchup comparison.
Hi Kev,
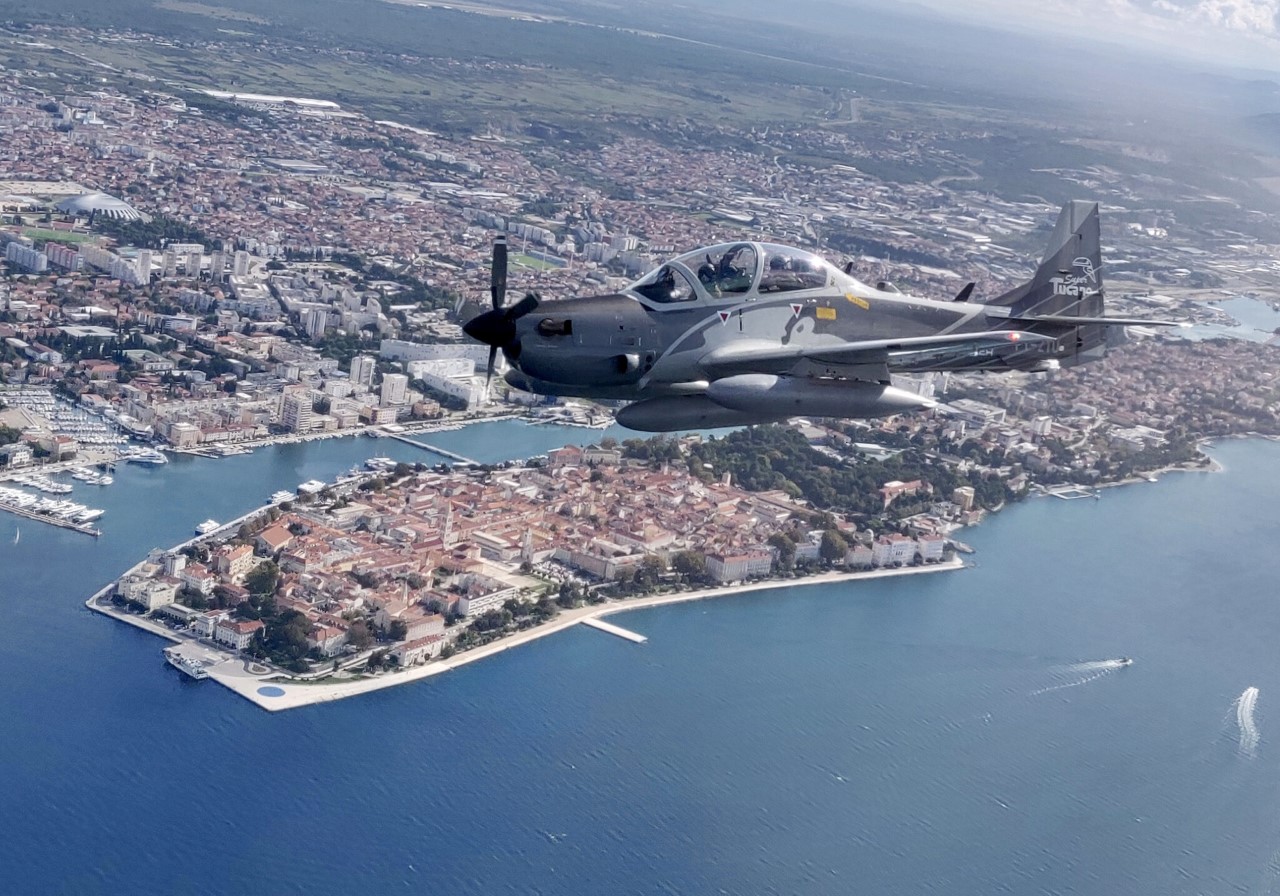
Some guys maybe still wondering about the A-29 role:
A-29A
Single-seater for attack and armed reconnaissance (on interdiction tasks), attack and cover (on close air support tasks), able to intercept and destroy low-performance aircraft, incorporates an additional fuel tank (+ 400 liters).
A-29B
Twin-seater for the same tasks as the single-seat version, also used in training and advanced aerial control (on monitoring tasks).
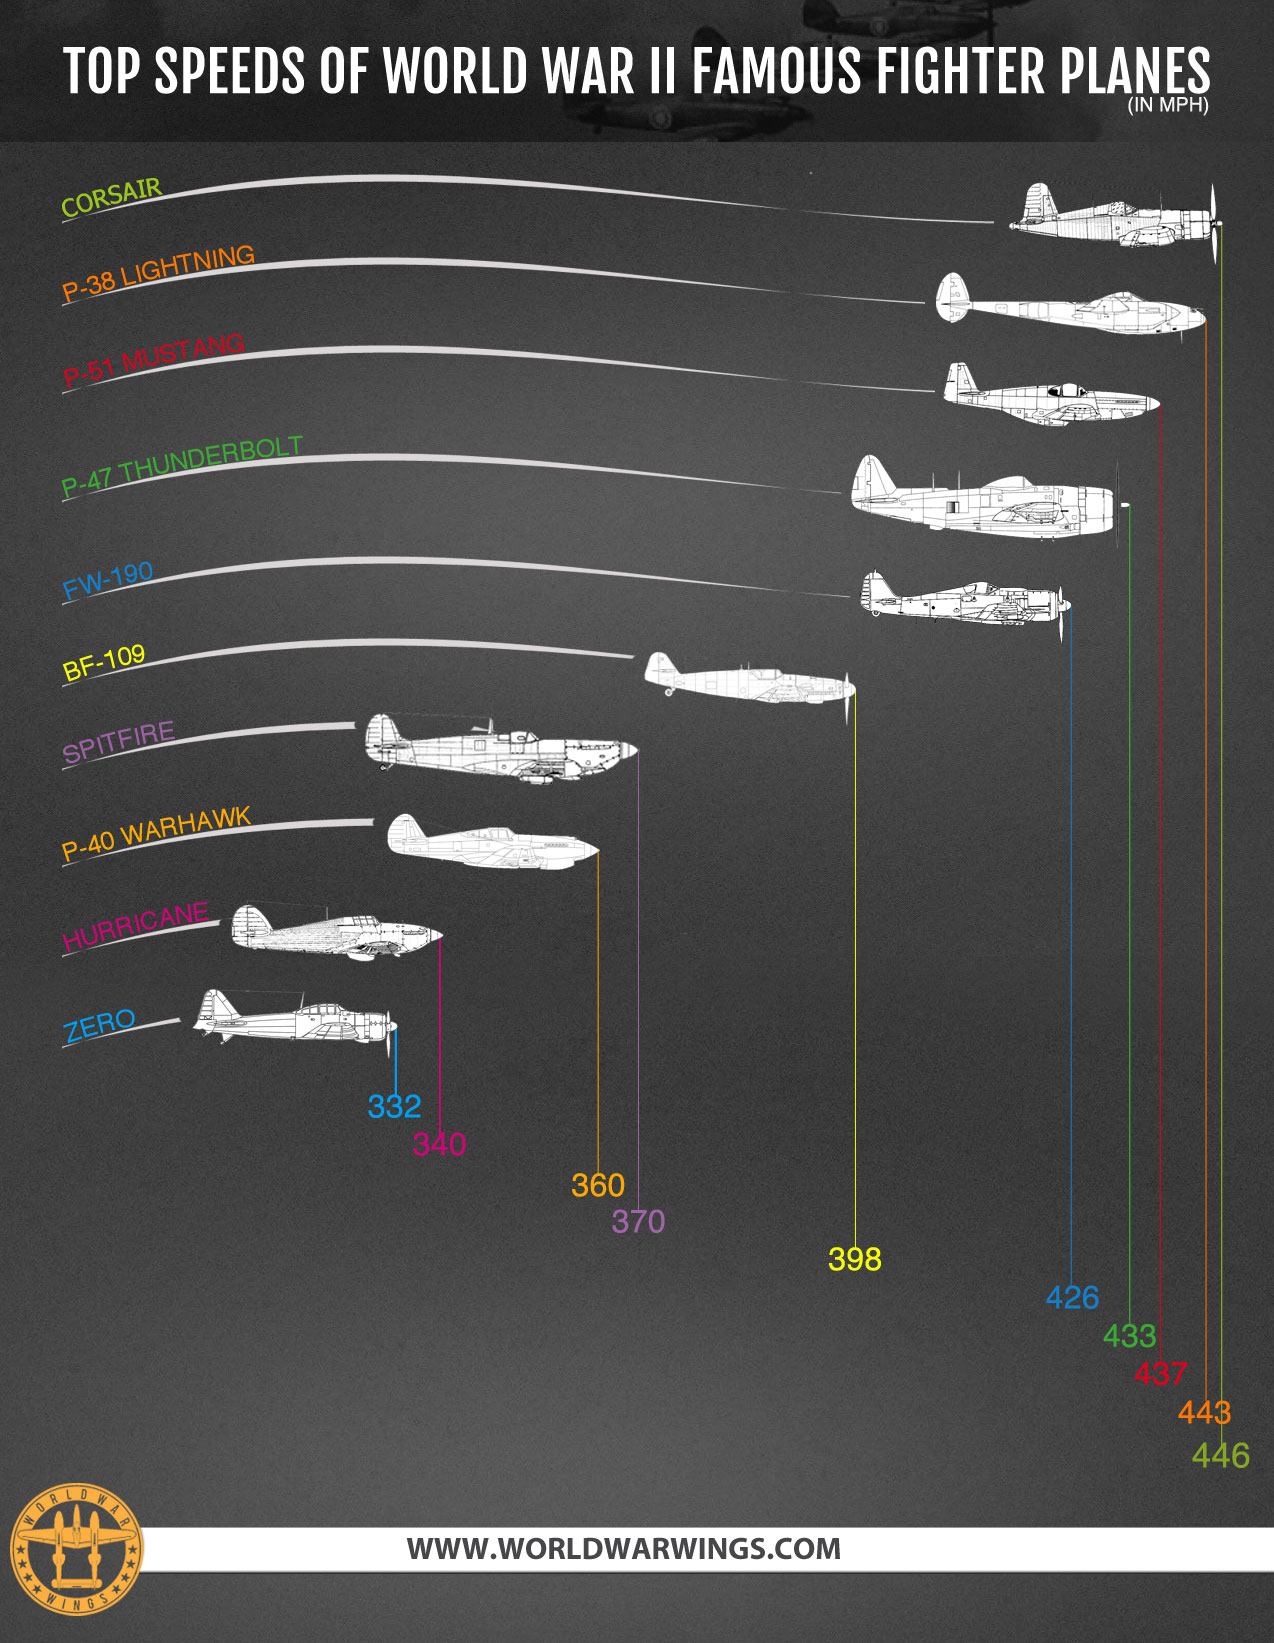
Max speed is 319kt (367mph).
If you guys want to compare banana with apple... :lol: The chart bellow is in mph.

The nice thing is the endurance of 8+hrs...
All the best,
Sydy
-
Guys,
Just to let you know I updated the Bf-109K-4 checklist with a couple items I forgot.
Sydy
-
the crew chief was that high?
-
I gave up using CH control manager as it would cause the BSOD on my system. Never could figure out why and neither could CH tech support.
Same thing with me... I just gave up CH completely. TMWH user now.
-
Hi Wilhelms,
Contact TM Support. Your POV is broken.
Take care,
Sydy
-
Good luck to the team! I am cheering for you guys!
-
Hi guys, good morning,
I had a small set of checklists that I use to help me to get the aircrafts ready for a flight and shared it with a squad mate. He loved it so much and insisted to get it public.
Ok, here is my "Quick Checklist Series" for you. As I say, It is far from the real one, but quick to get you flying. They will be on your individual aircraft Kneeboards.
Remember, you got better and more accurate options and this is a very humble checklist, almost amateurish, but it works. If you flew the airplane before, know where the stuff is and just want to get a checklist to help you because you've been away for way too long, this will help you.
One thing I should have included in all of them, was a "Flight Control Check", but I forgot it. So, remember to check controls, guys.
Anyway, use at your discretion.
Spitifire LF MK. IX Quick Checklist
L-39C and L-39ZA Weapons Quick Checklist
Mig-21bis - Weapons Quick Checklist
ASJ-37 Viggen- Quick Checklist
ps: Viggen has to be used in a different screen or print out.
AV-8B Harrier- Quick Checklist
C-101EB Aviojet Quick Checklist - Update vs 1.1(typo correction)
F/A-18C Quick Checklist and CV Approach Charts. (Update 1.5)
F/A-18C Quick Checklist and CV Approach Charts for Night Ops.
Normandy Airfield Radio Frequencies and Maps. (Habu_69 PDF Converted).
YAK-52 Quick Checklist. (bonus: Altimeter Conversion Table)
BTW, I use a term in the Spit checklist that some may not know. The act of pressing the COIL and STARTER at the same time was called, during BOB, the "V for Victory!", so I used the term as well.
I hope you like it and do good use of it.
All the best,
Sydy
-
1
-
When there is no TACAN signal
in F-5E Aggressors BFM Campaign
Posted
Hi,
Check pitot heat on since the after start. Fly higher to acquire tacan signal. I fly to the area around 28kft and come back 30+kft.
Good luck,
Sydy