wombat778
-
Posts
143 -
Joined
-
Last visited
-
Awesome, thank you so much for putting it up! Trying it now.
-
Hi thx, thanks for the feedback! Including the vJoy number in the option field may be tricky because of the way vJoy opens devices, but I am happy to look. So, I'm going to confess that I have never actually set up a Github repository before and haven't got the foggiest idea what's involved (I'm an old school -- and just old -- programmer). That said, I'm more than happy to share the source code and/or let you put it up on github if helpful! Just let me know
-
Try the fix I posted here and see if it helps:
-
I use a VKB Gunfighter mkiii, a Virpil throttle, a Loupedeck, and a TrackIR 5. Oh and I use Logitech g923 pedals as my rudder pedals.
-
Alright folks, here is a new version of the plugin. It's a complete rewrite of the prior version, and the basic workflow is totally different. Please read the README file for details and report any bugs! GameControlPlugin_0.5.zip
-
Sorry for the extreme slowness guys, but I’m now back in action. I’m currently actively working on a completely overhauled version that is a lot cleaner and simpler (and can handle different vjoy numbers). Hoping to put a version out this week.
-
Please try the fix I just posted here. Works perfect on my system so far.
-
All, I have been using DCS-ExportScript with my Stream Deck, and have been very frustrated by the microstutter that constantly occurs. I have spent the last few hours troubleshooting, and _think_ I have found a fix. Specifically, open the file \Saved Games\DCS\Scripts\DCS-ExportScript\lib\Tools.lua and then search for "settimeout(.001)" or just go to line 48. Then simply change the value .001 to 0, such that the line reads: "ExportScript.socket.try(ExportScript.UDPListener:settimeout(0)) -- set the timeout for reading the socket; 250 fps" Save the file and try to see if the stutters are gone and the Stream Deck works as normal. On my system, it seems smooth as butter, and everything seems to work, but I have NOT done extensive testing to see if this change has some side effects that I am not aware of. Please report your findings if it works.
-
I’m not sure I fully understand what the error is. Can you please post the excerpt of the log file?
-
Sounds good. My first collective build a year ago used 3d printed parts. But they always felt too flimsy to me and never gave me the feeling that it would last. That’s why for this build I went fully steel/oak and generally overbuilt it. But what I would have given for a CNC machine!!!
-
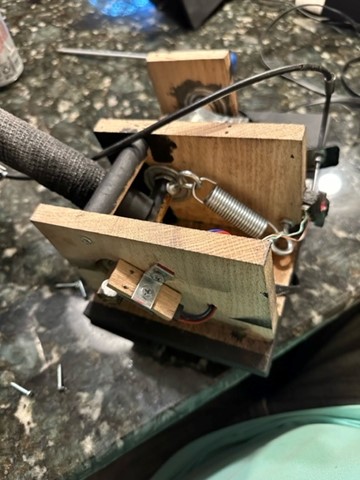
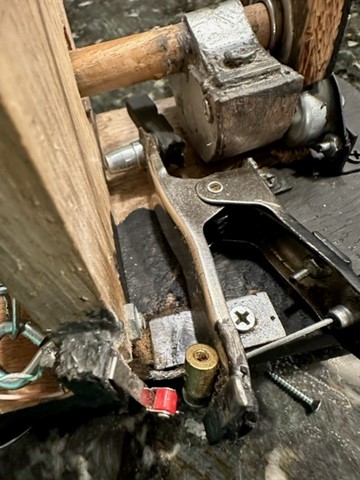
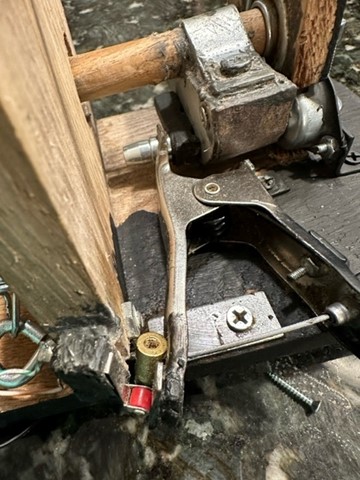
Absolutely, it works great! Two thoughts from experience: My original plan had been to use both sides of the clamp to grip the disc. This provided great grip strength but the problem was in mounting the clamp flexibly in such a way that one side of the clamp didn’t rub on the disc when open. In the end I couldn’t make it work and just cut one side off the clamp so the pressure was one sided. This in turn caused the disc/axle to flex, which is why I put a nylon bearing on the other side opposite the clamp (to “push back” against the clamp arm) I was surprised by how much force the clamp put on the disc/axle and how much deflection it caused. If I could do it again I’d probably use a thicker dowel for the axle (maybe a full inch instead of 5/8”) or something like steel
-
Alright folks, here is a VERY preliminary test version of the plugin. It does not have a lot of quality of life stuff like error checking etc. Now that I'm back up and running I plan to flesh it out. PLEASE do NOT use this except for testing purposes and please report feedback here: Instructions: First, install vJoy from here: https://sourceforge.net/projects/vjoystick/ . If you already use vJoy on your system there is no need to reinstall it. However, this plugin is currently hardcoded to use the first vJoy device so it may create conflicts with other devices that use vJoy. Allowing changing of the vJoy device is next up on my list Set up the first vJoy device per the attached screenshot Unpack the attached zip file into \AppData\Local\Loupedeck in your home folder Start up the latest version of the Loupedeck app and click the little settings slider on the right-hand pane. Hopefully you will see the GameControl plugin. You might have to tick the little eye icon to make it show. From there you should be able to use the commands from the GameControl plugin like any other commands and mix and match with built in functions. Hopefully the names of the commands are fairly self-explanatory but happy to explain if not. Note that the numbers in the various command names refer to the DX button(s) that will be sent when the command is activated I have also built an optional (and clunky) functionality to add custom labels to commands. To do this: first navigate to \AppData\Local\Loupedeck\PluginData Open CommandList.txt and identify the internal names of the commands that you want to assign labels to. I suggest copying them into notepad so you are sure you get the spelling exactly right Next, open LabelList.txt and add a new line for each label in the following format: "<Command Name>|<Label Test>|<Label Color>". For example, if you wanted to make the toggle the command "Toggles (On-Off):Toggle 1-Off" be named "Landing Gear" in Green, you would add the following line to LabelList.txt "Toggles (On-Off):Toggle 1-Off | Landing Gear | Green". I have included on example command for reference, which you can feel free to delete You likely need to restart the LoupeDeck service to make the labels activate. Please report any problems/questions! Wombat LoupeDeck Gamecontrol Plugin v 0.1.zip

-
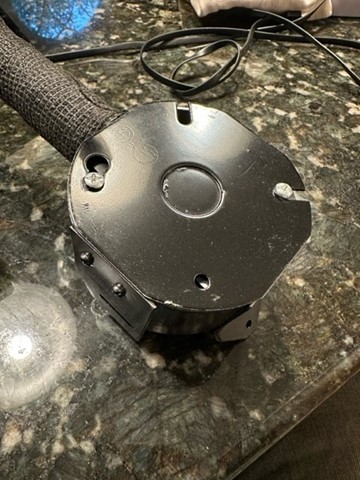
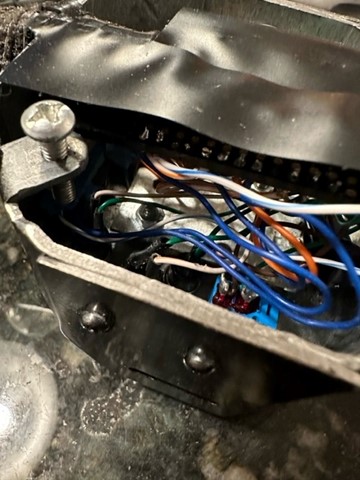
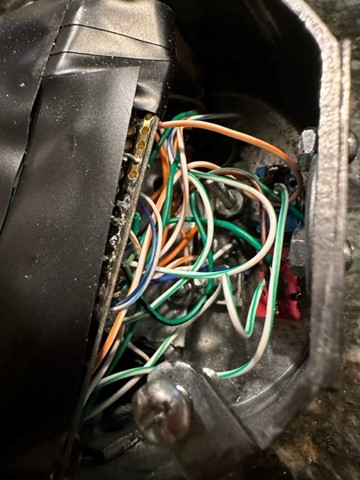
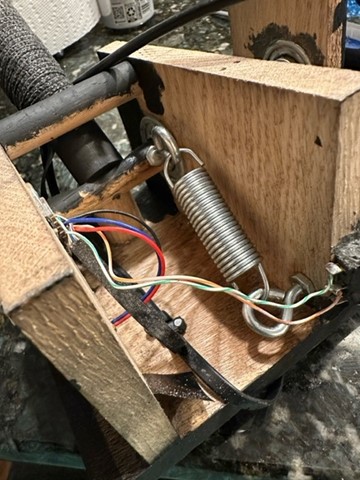
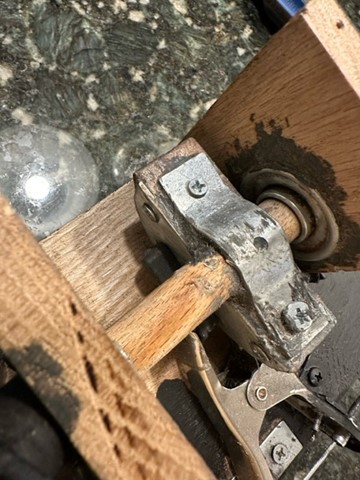
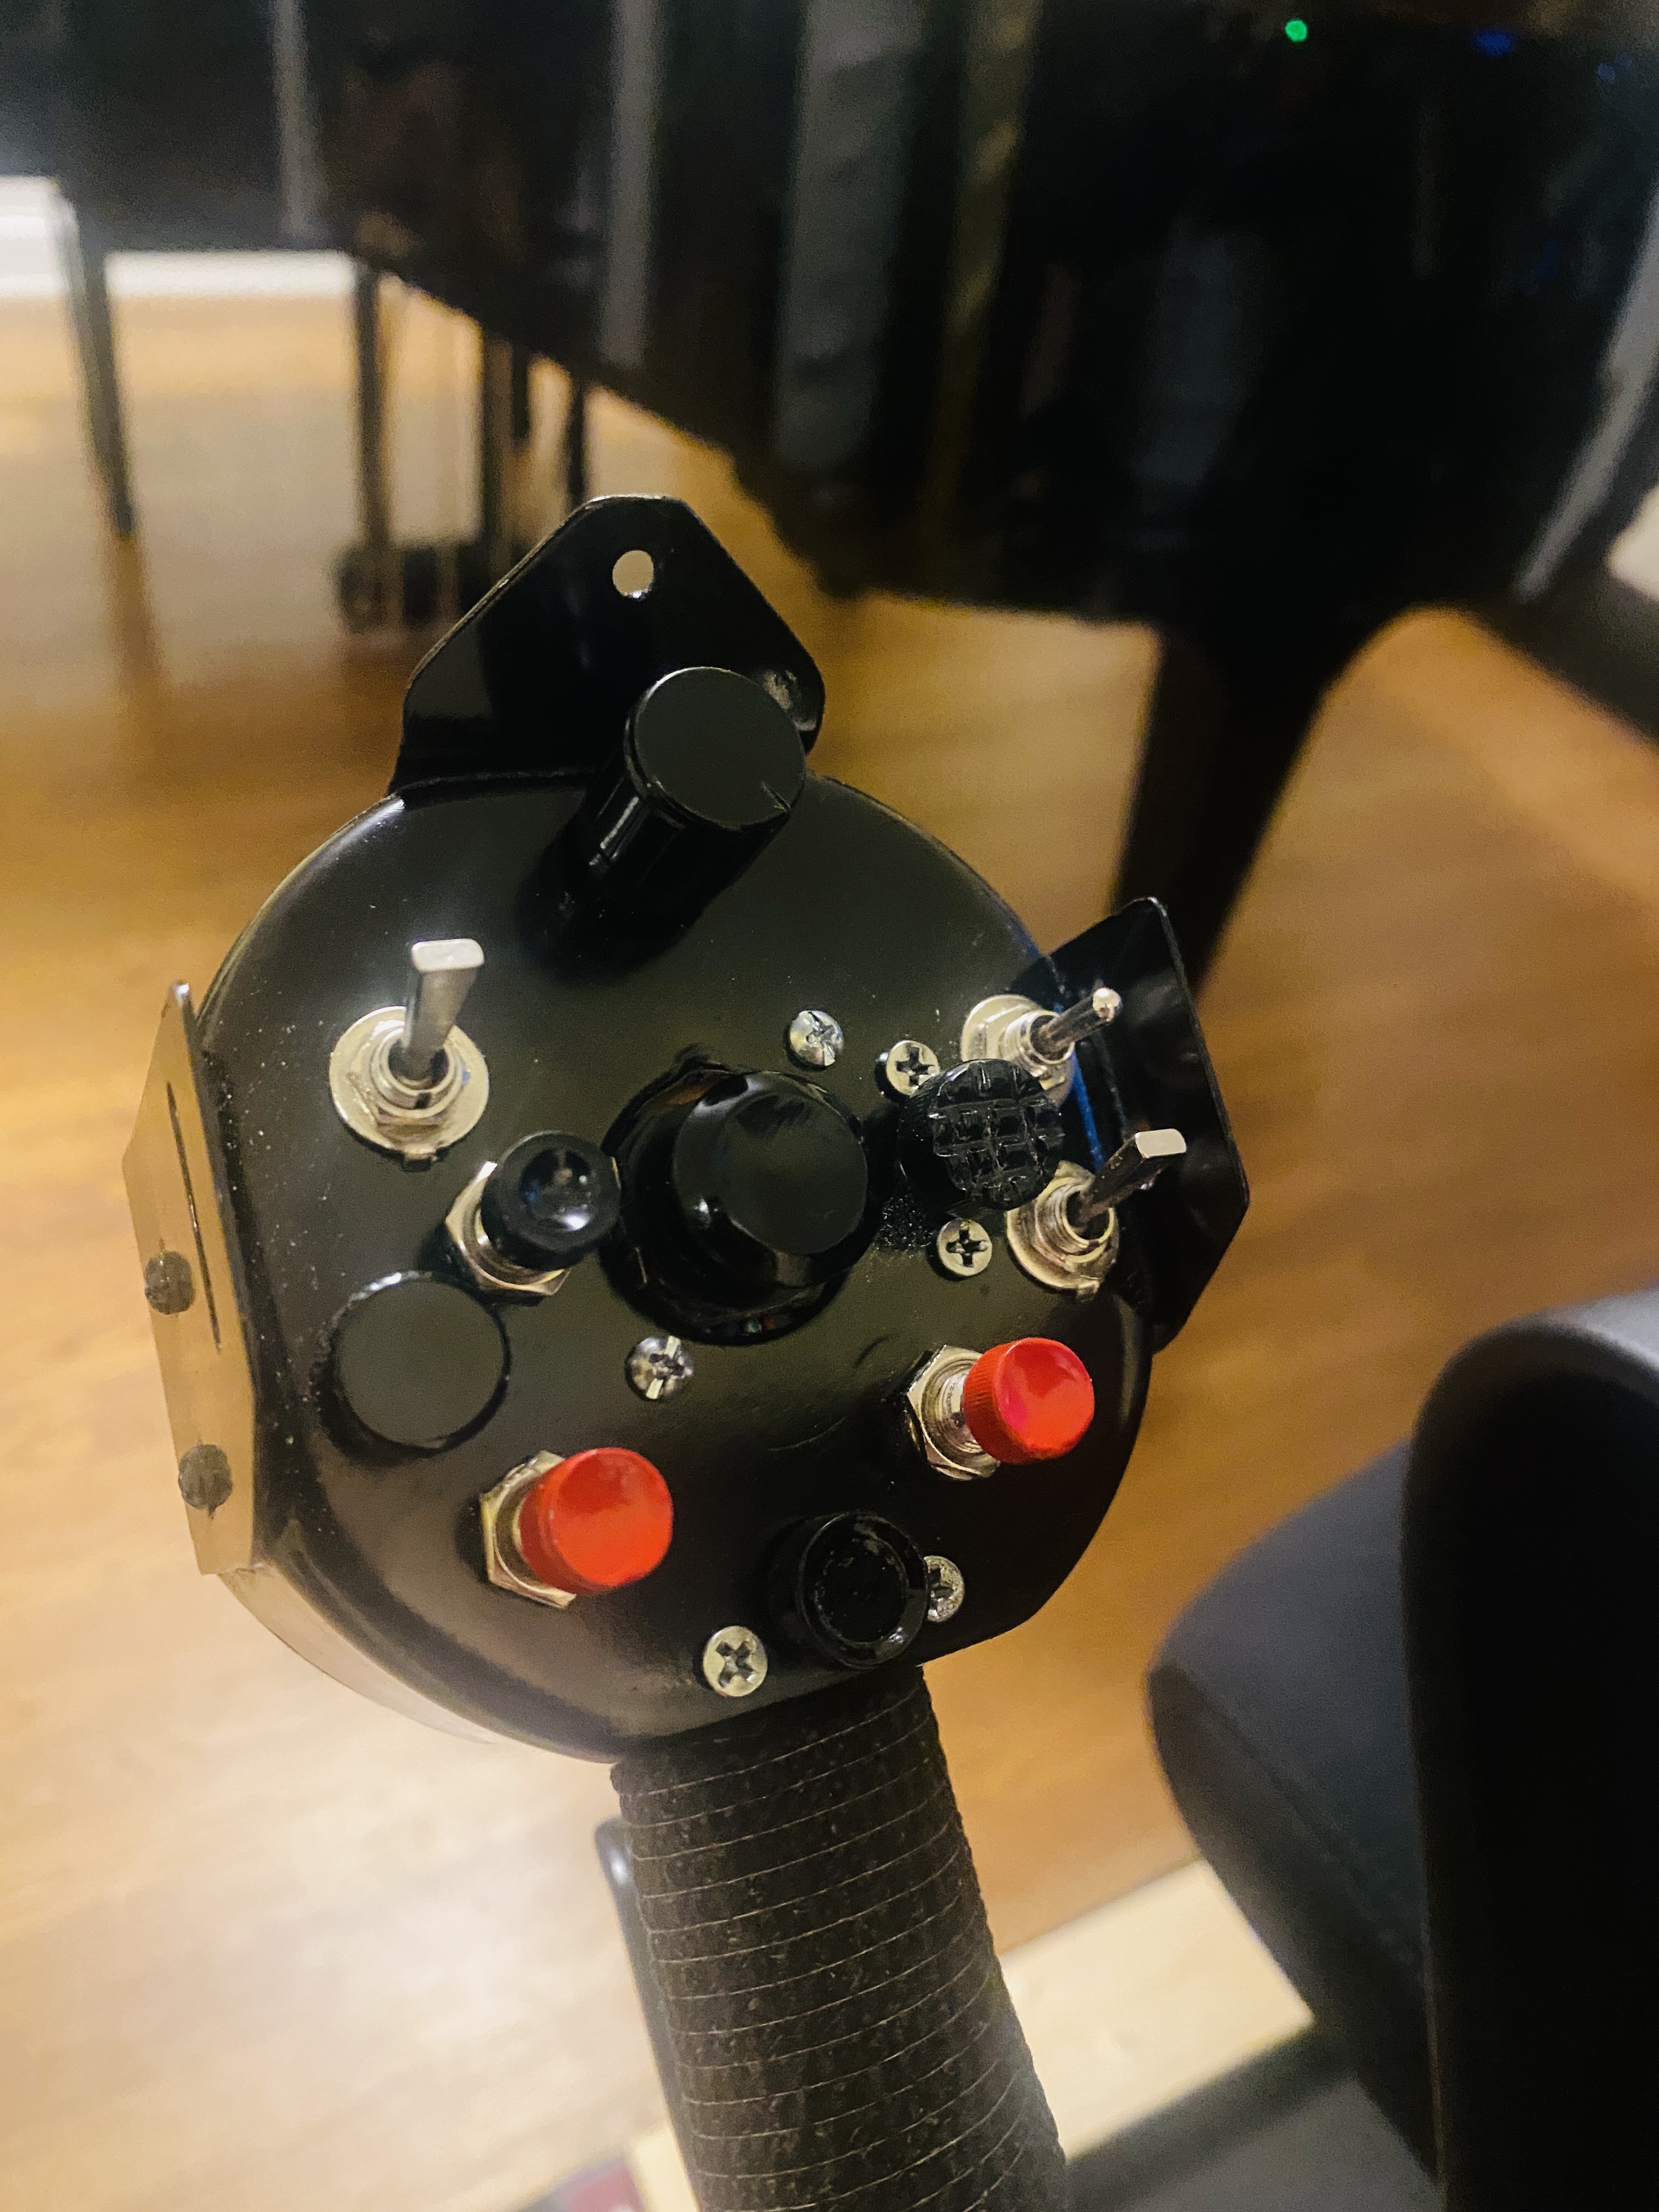
Sorry for the delay everyone. A combination of health issues and PC issues put me out of commission for awhile. In terms of how I used the RP2040, I did everything through Arduino because i'm most comfortable coding in C and not micropython. I just connected all the buttons and switches up to the various pins (first I put the rp2040 on a solderable perfboard). Happy to share my ugly code if helpful. In terms of pics of the head, here you go. It's a rats nest of wires so I am hesitant to disassemble it much more than this for fear of breaking a wire or solder joint. I have also attached pics of the insides (which are not very pretty) where you can see among other things: The Hall sensor and magnet used to detect the throttle position The spring clamp that forces the brake pad against the brake rotor A counterspring that dramatically "lightens" the handle such that the brake friction is enough to keep it in place The brake rotor itself, which is a wooden disc with very rough steel metal on the pad side for grip and very smooth/polished steel on the other side on which a nylon bearing runs The microswitch that detects when the brake has been presss/released Happy to answer any questions!
-
Hi all, I’m so sorry I’ve been MIA on this! First I had PC trouble that put my development machine out of action, then had surgery. I’m going to boot things back up again and try to get a development build out here in the next few days. Again my apologies!
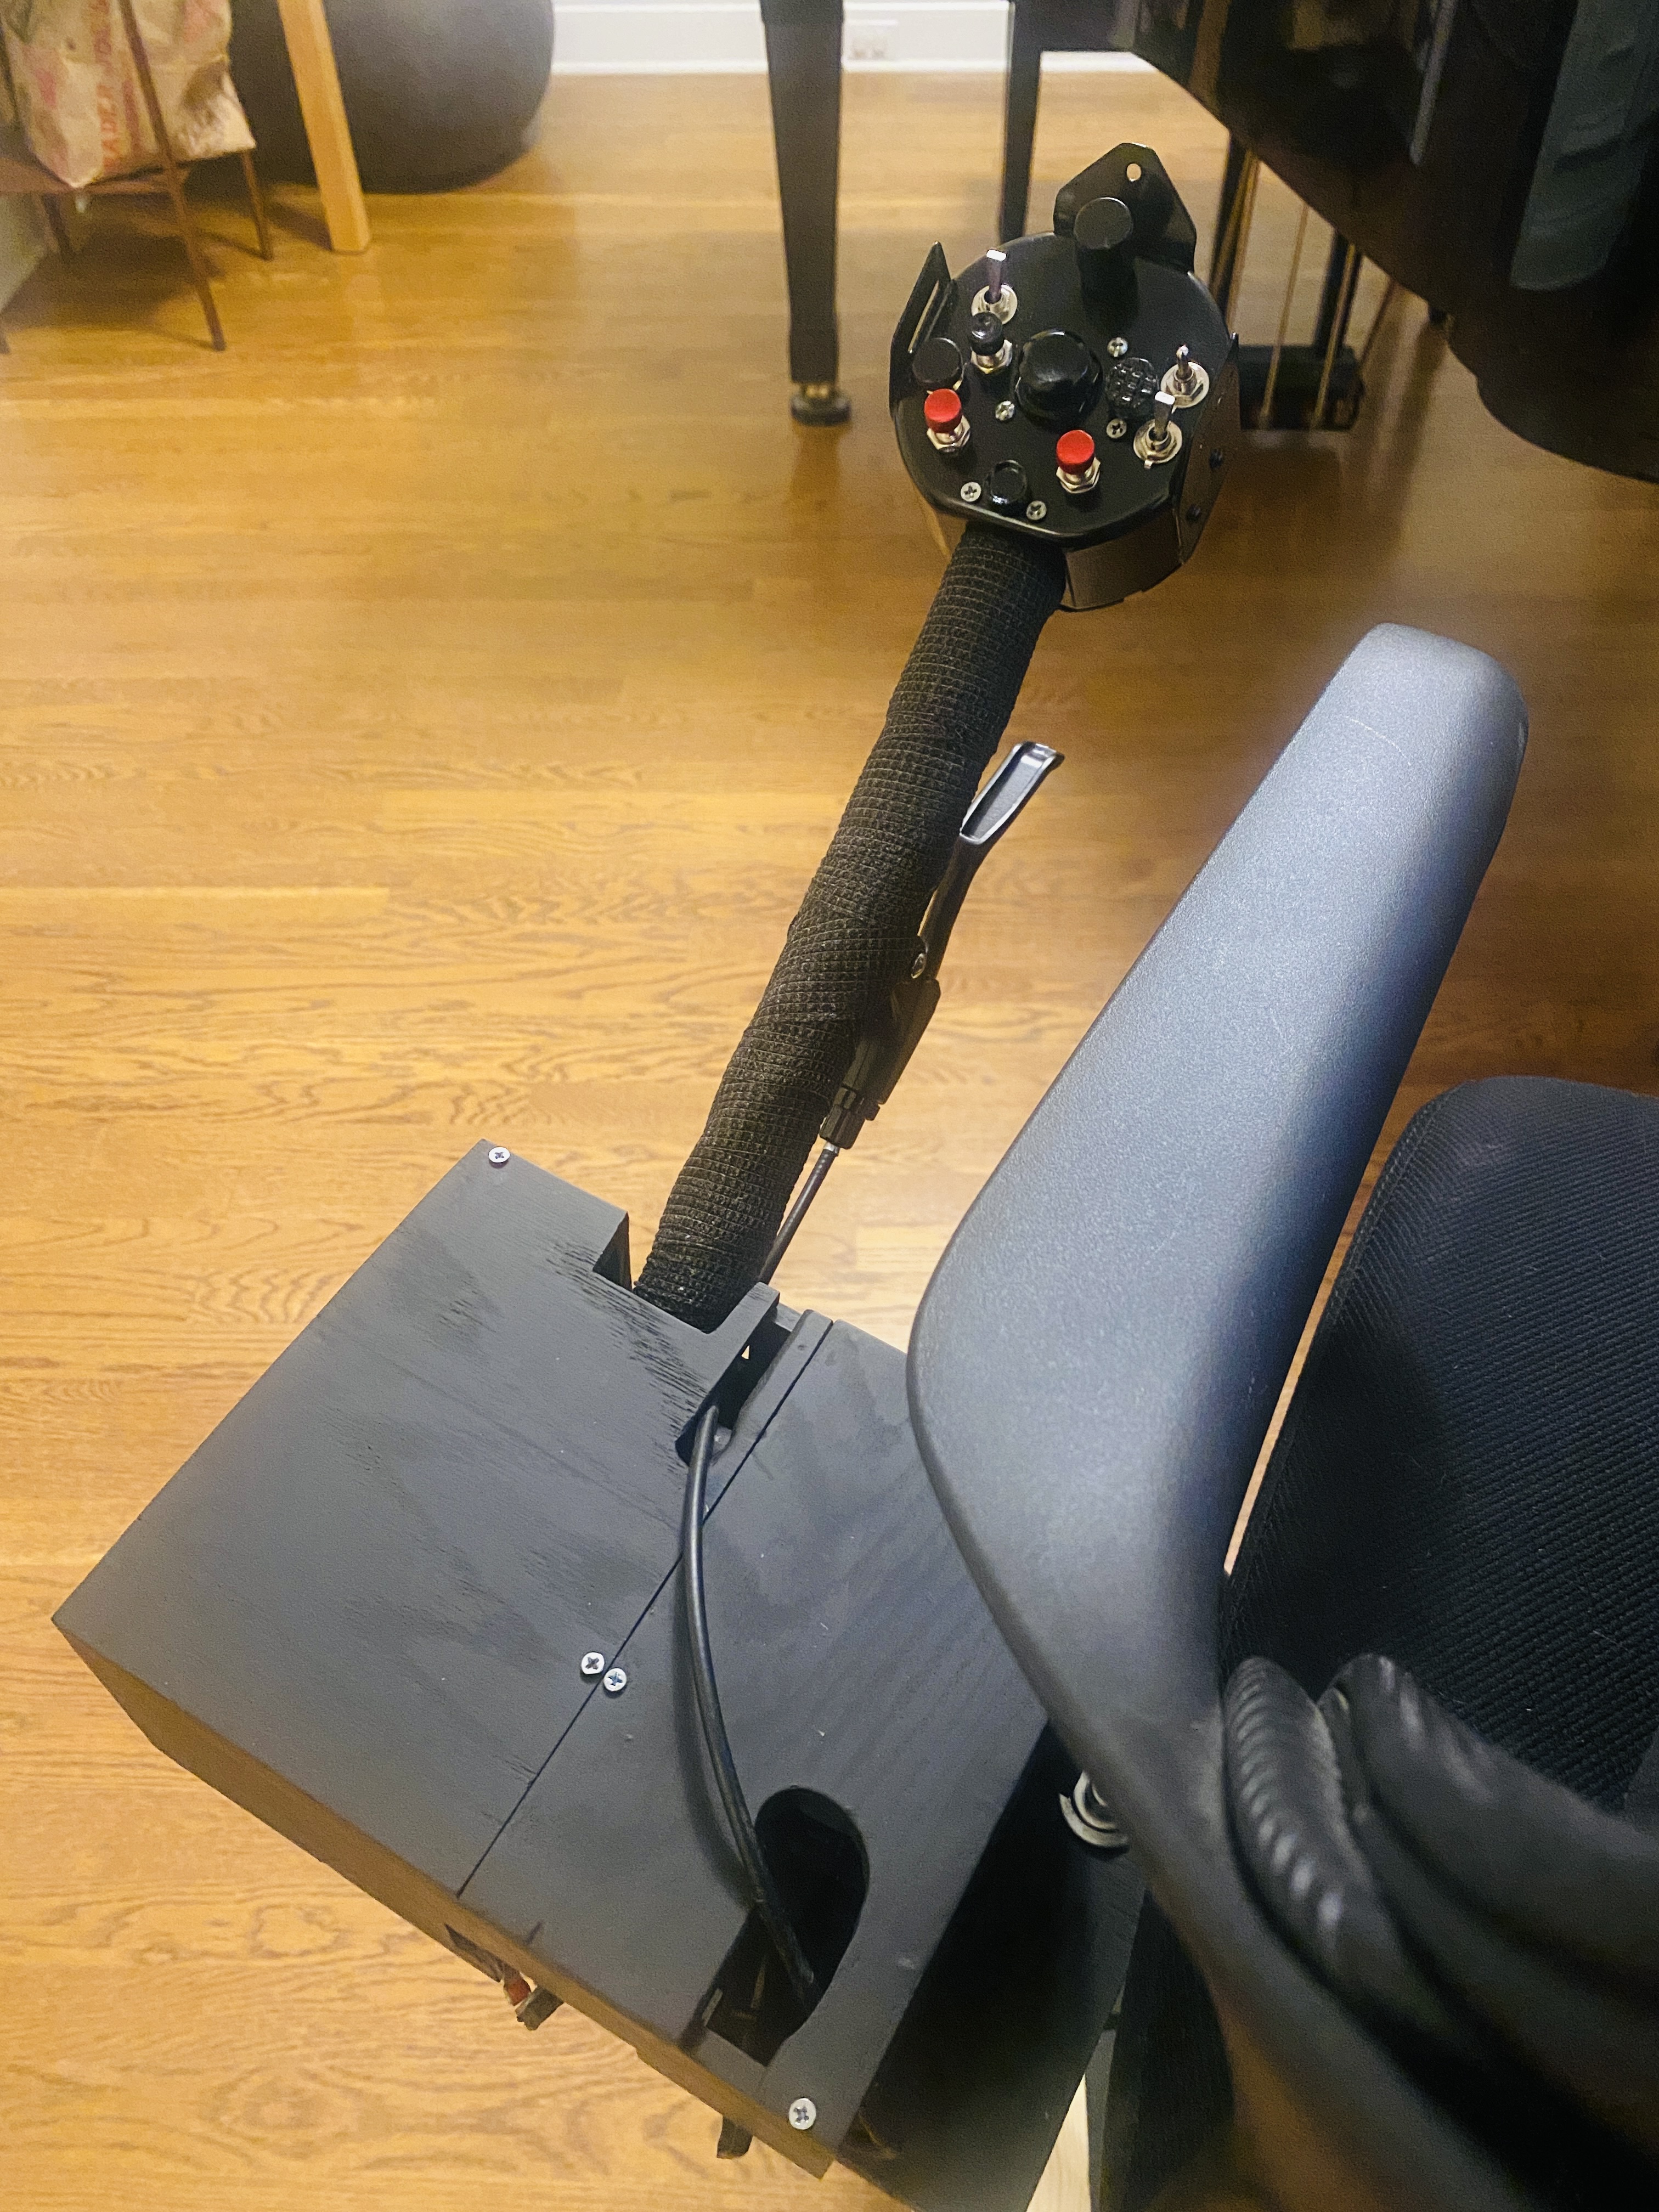
-
All, I just thought I’d quickly show off my new DIY collective controller. Couple of notes: Made of oak, steel and electronics. All buttons are metal (mostly steel bolts that have been ground into shape). Includes a physical collective brake mechanism (adapted from a bike brake) that holds the lever in place when released. When the brake is pulled, the movement is exceptionally smooth as it’s nearly frictionless and on ball bearings. When the brake is released it also sends a DX button to the sim. Controls are 2x 5-way hats, an analog stick (that also can act as a 4-way hat), 3x momentary buttons, 1x latching toggle button, 2x 2-way toggles, 1x 3-way toggle and 1x rotary encoder. The collective position is based off a contactless hall sensor and magnet. The whole thing runs off an RP2040 pico Attached to my chair with a DIY chair mount. So far works like a dream! Let me know if you have any interest in internal pics or more info!