escar
-
Posts
47 -
Joined
-
Last visited
-
Hihi. Yeah. Proboably it simply takes more patience and money to play sims. But I know a couple of kids who play them too and I'm pretty certain that the amount of younger ppl here is a bit higher, but maybe they don't show it. :) Ah, BTW, I didn't feel targeted. :D But for a moment there I thought that you implied what now I know you were not implying. :D I've been building things since I was a kid. And dismantling things, to know how they worked. In most cases it wasn't a cartoon scenario when after putting everything back together you have a ton of "spare parts". :D Of course in some cases it was just like that, so family had a ball trying to hide remote controlled cars, etc. from me when I was a really lil kid. My bro is the same. Even though it's a pity that some of his contraptions never come to a working order, it's still great to have someone with similar interest, if not for building something together, then at least to share the burden of paying for new tools. :P Hyhy. I know what you mean when you say "I used to" and "don't have time". I've started earning money when I was 15ten, yet I always had time for tinkering. However a time came after the university, when the combined "burden" of normal job, extra job and some other things (expl: woman :P ) made it impossible to find time for it. And for lots of other things. This wasn't good. If you put aside such things and leave only "imporant" things, at some point a person may just burn out. I'm not sayin' it'll happen to you, but... I'm young, yet I've been there and seen it happen. My old school coleague, who's 24 years old, had a heart attack last year. Another, after working 20 hrs/d in his firm, had something what might translate as "identity crisis". Another, very close friend, experienced a rather unpleasant episode of depression. Etc., Etc., Etc. I haven't went that far yet as they did, but some things were not so right either, so I slowed down, took a moment to look around myself and then a longer moment to actually find myself again. Sounds pretty psycho-bable, but it really makes sense, once you realize that recent stomacheaches are not stomacheaches but probable signs of ulcer. :> Without the psycho-bable, translated to plain human, it may simply mean... going back to tinkering, among other things. :) That's healthy. My granpa is 97. I doubt heavily if I'd be able to reach it if I didn't start... tinkering again. Another thing is finally learning how to balance work with life. And another thing is ... finding new places of peace in life (expl: spliting with gorgeous, but wicked one :P and falling for a even more gorgeous, but with a big heart one. :> ). Damn... when I start to write I can't stop. :> To sum up, I've learned from my experience that waiting for the right time to find time, doesn't work. Because everytime there'll be something new, more work, more challenges. Untill you decide that the time is now and find the time. Even enough time to take up another university course (still can't decide between psychology and some cultural studies :> ). ps: HAHAHA. Why don't you stick to the motto from you signature? :D You'd have all the time you want for tinkering. :D Haha. :)
-
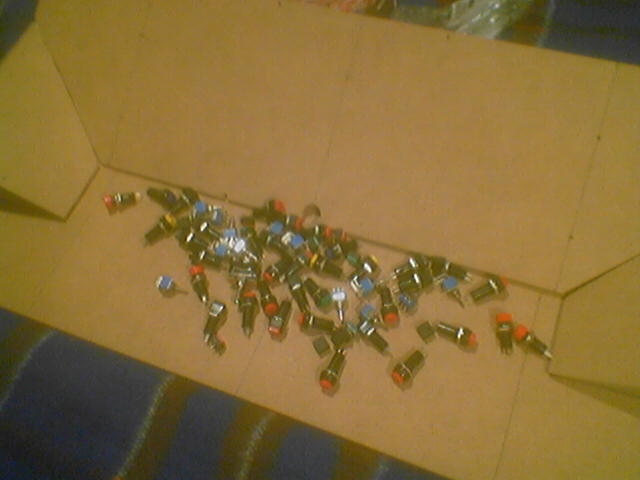
I could do it even now. I would require additional 61 buttons, another 30-40 m of cable and probably three evenings extra. :) All I'd have to do would be to solder wires to all pathways on the keyboard and then attaching those wires to the board. With all signals "out of the keyboard" I could loose the keyboard casing and hide the keyboard board entirely in the mini-pit casing. there's enough room in there to fit it in. If someone so desires, he/she might try to do it. :) I too at first wanted to make cables for all pathways, but I never wanted to put them all on the panel. That panel is a mini-pit and in a true plane you have no controls for... hihi, pause, time acceleration/deceleration, views, etc. :) I only wanted to put real aicraft functions on the panels. :) During the making of this mini-pit I finally resigned from the idea of having wires for all pathways (just in case they come in handy), because even now (although it may not be so clear on the pictures because they "flatten" the view a bit) there was a JUNGLE of cables. I actually had to make larger holes both in the pit and keyboard to fit them through. As for the materials, I used the following: 8 x 3 position, two section temporary switch = 24 zl 5 x 3 position, two section permanate switch = 12 zl 50 gr 1 x 3 postition, one section permanate switch = 2 zl 40 gr 30 m of TDYd 2x0.5mm cross red-white copper cable = 13 zl 20 gr 20 x temporary, square button = 20 zl 13 x temporary, round button = 11 zl 70 gr 8 x temporary, small square button = 8 zl 4 x temporary, larger square button = 4 zl 80 gr 1 x angular impulsator BCD = 12 zl 90 gr 1 x black knob for the impulsator = 4 zl 30 gr 0.40 x 1.82 m MDF board = 11 zl 90 gr 0.80 x 0.20 m particleboard = 2 zl 77 gr 3 x aluminium profiles (1 m long 10x10 mm ) = 15 zl 87 gr 1 x military gray pain in spray with enamel = 9 zl 95 gr 2 x gray metal handle = 9 zl 20 gr 0.150 kg x screws for cartoon-plaster boards = 2 zl 70 gr Total: 166 zl 19 gr Hmmm, a bit of correction here. 4 x temporary, larger square button = 4 zl 80 gr were actually round buttons. And I also replaced 8 small square buttons with the buttons of the same size as the previous bunch of 20. Small buttons were simply...tooo small. Ah... and I think I had to add one more button for a function I forgot about... One sec... (counting pieces on the mini pit)... there are now 46 buttons there and 14 switches. All buttons are temporary. 8 of the switches are temporary, the rest is permanate. :) Another note, I should've bought 40 m of cable instead of 30. I run short and had to cut old UTP-5 ethernet cable to scavenge some extra cable. You can also scratch one aluminium profile. Two were enought to get a nice mettalic look and I didn't cover all the edges, because I didn't feel the need to do so. Panels were made from the MDF board. It's a great thing to work with. You can cut it even with a kitches knife and yet, after painting it gray, it doesn't look like wood. :) You just have to be extra careful not to damage it during building, because it's prone to damage from sharp objects (well... you can cut it with a knife, so go figure :) ). I'd probably make it all out of MDF (it's prolly fibreboard in English), but the vertical walls had to be thicker (screws were too thick for MDF), so I used partical board. It made the whole thing much heavier, but I didn't want to complicate things by adding some extra profiles to connect the pieces. It was easier to just screw them all together with plain screws. :)
-
Lol. :D Who says I'm a kid? :D Pilotasso, I have a day time job and sort of a private practise too. There are days or even weekes when I work 12-16 hrs a day, day after day. :) But work is not everything and if it is, then one soon goes bananas. :) Making this mini-pit was a damn fine way of forgeting about work after a hard day of work. :D Try it. :P :D Hihi.
-
HAHAHA. :D That one was purely for fun. :D I suppose it MIGHT work, but it'd be really cumbersome and a player would have to sit very still. This solution is much better: http://forum.lockon.ru/showthread.php?t=14714&highlight=Cyborg+evo and yet it is still very cheap. :) I loved my "Redneck Throttle". :D Haha. It was meant as a joke, but it actually turned out to be working. :) I even used it for some time. As for this one, I was really inspired by the "My New Toy Thread". ~215 dolars for such a thing is too steep price for me. So I thought about making a thing with similar functionality, but for less money. I went over the board a bit with costs, because I wanted it to cost much less, but once I got into building part I really couldn't stop myself. :D So... basically the goal was to make a thread with complete instructions on how to make the cheapest "mini-pit" possible (note, I only came up with the name "mini-pit" yesterday... but it best describes the pictures :D ). I think however, that it may not be "the cheapest", because I have some ideas on how to really make the cheapest pit :P , but those ideas are... well, same shelf as "poor man's trackIR". :D While this... is really a sturdy piece of equipment. :)
-

OT: When was it your first time?
escar replied to Pilotasso's topic in Lock On: Flaming Cliffs 1 & 2
I can't remember what was the first RL thing that caught my attention regarding flying. I know that I was into sailing and flying for as long as I can remember. I do rember though my first flight sim. It was Ace and Ace 2 on Commodore 64. I used to force my brother to play with me in Ace 2 (it was "multiplayer"). He hated it. :D But it was so much better to have a human oponent then the computer controlled one. Then, still on C64, there was Solo Flight. You had to go from airport to airport using VORs to deliver mail. Scenery were just dashes and dots but this was first sim to feature a working cockpit. Then came Amiga and with it... a leap in technology. I played Wings II (I loved the climate of that game, music, everything), F-19 Stealth Fighter, F-15, GUNSHIP 2000, etc. (BTW, in parallel I was playing sub sims like Up Periscope, Silent Service I and II, i686 Attack Sub). Then I switched to a PC and it was... ugh... a bad experience after Amiga 500. First sim I bought for PC was... GUNSHIP 2000... and it look awful compared to Amiga's version. Time passed, there was no real sim in sight and then... Strike Commander came. This was not a pure sim, but still, I loved it. Played a couple of times. There of course also was F/A-18 Hornet Korea. And then... I was trying to choose a new sim when I read an article in gaming press, about a new great game from russia. Flanker was it's name. Author was semi enthusiastic, saying that the game rocks, but it's hard to play because cockpit is in Russian. LOL. That's when I got hooked with ED. The sad truth is, that each of my computer upgrades since then were motivated mainly by the need to play Flanker (LO-MAC) with better graphics and no stutters. :) ps: Not flight sims entirely, but I also remember playing X-wing all the time during IT classes in my primary school. And then TIE Fighter. And then, not at school but at home, the Wing Commander series. In "The Price Of Freedom" I was totally in awe, when flying my little craft around those great aircraft carriers. The list of games is loooooong... but these come to mind in first flashes, at least considering the topic of simming (Ah, for subs... Silent Hunter II!!!! With Destroyer Command. What a game. And Sub Command... man, I stopped playing because it got tooo complicated even for me. :) ). -
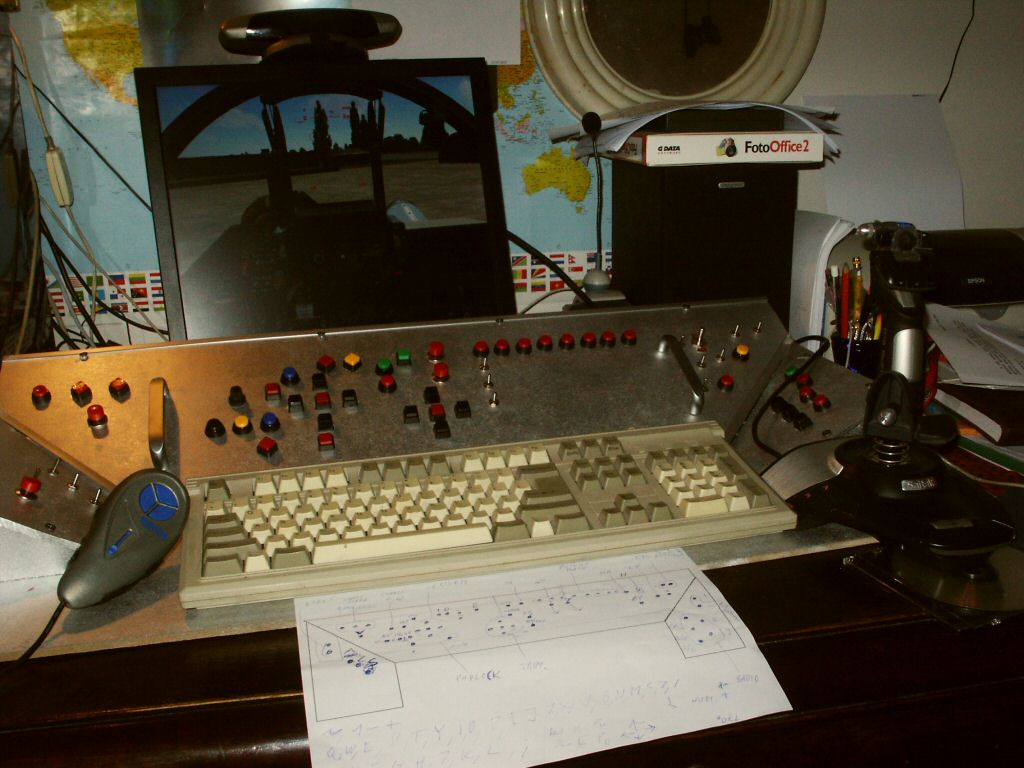
Ye, gods! It works! <Dr Frankenstein voice on> IT'S ALIVE!!! MUAHAHAHAHHAA! <off> :P All buttons work. I was pretty worried that some cables or solders might've been damaged at some point, but signal goes through all of them, so it works 100%. It's a bit hard to fly without the labels glued on yet (hence the A4 paper you see on the photo), but... after couple of minutes fiddling with it I had all right side controles memorized. BTW, I have an idea how to make good labels. :) In Polish it's called "kalkomania". You buy it in shops for kids. There's a set of color papers in it with letter profiles. You place a letter profile on the surface, then you put this paper to it, press a couple of times and a letter is "printed" on the surface. To sum up... this thread is now officially a complete guide on how to make a working mini-pit for ~44 euro! :D Enjoy. :D

-
FINISHED! :) Or at least the technical part is finished. All that is left to do now is to put some labels on it and add some sort of gauges or TV screen in the empty area. :) But technically... it's good to go. I'm taking it out for a spin now. :D Cheers!
-
Almost there...
-
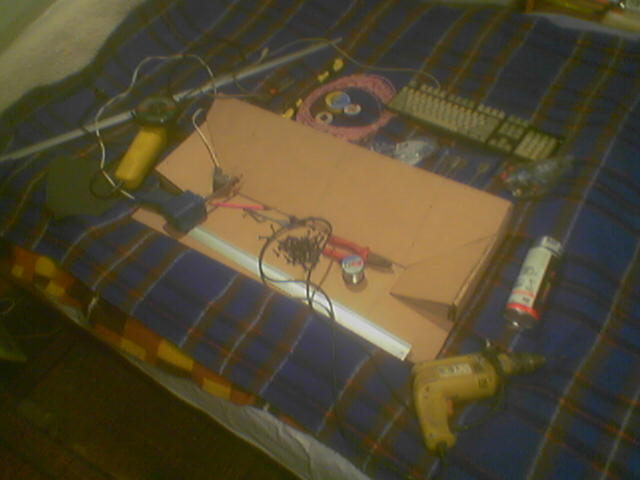
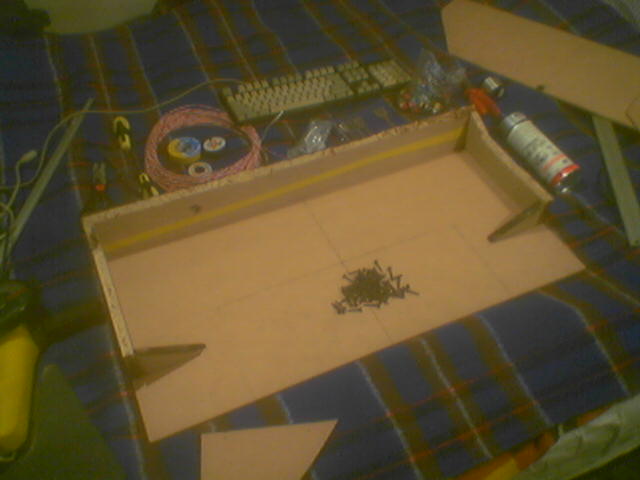
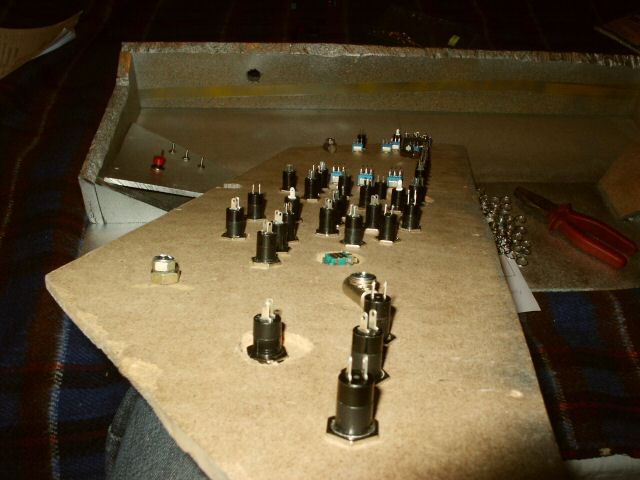
I managed to download the pictures I made with celular to my PC. Here they are showing the initial state of the gizmo. :)
-
Looking for two movies (Unleash Hell & Maximum G).
escar replied to escar's topic in Screenshots and Videos
I'd love to have the version with SFX too. :) So please upload it when you have the time. :) I've seen both movies and they are the ones I wanted. :) But here's another thing: The scene with lot's of bombers dropping their payload is not in those movies. The climate of Unleash Hell is very similar to the climate of that movie I remember. But in that movie there were REALLY long shots of B1B or Tu-160 dropping their payloads on cities. Does anyone remember which movie it was? I haven't been around for a year, so it has to be a movie dating back to 2004. Any hints? :) -
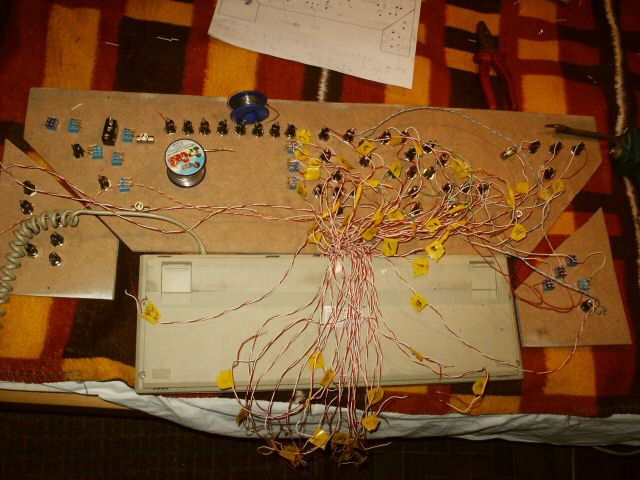
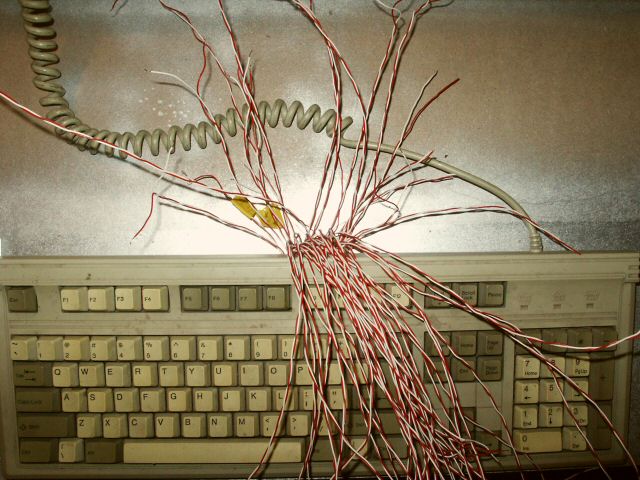
God DAMN IT!!! Only 6 cables left to solder to the keyboard and the damn soldering iron overheated so much that it stopped working! I'm trying to cool it down right now using a fan. I hope that it's not broken. If it is... damn, that would be a prefect case for the "Murphy's Laws" book. Only six cables... damn it! EDIT: It started to work again after cooling down. I'm attaching two pictures, one showing the keyboard's board with all the wires and another showing how they stuck out from the casing. So, soldering wires to the keyboard is finished. :) As you probably see, I only made the necessary wires, not for all the buttons. Why? I didn't have enought cable and to tell you the truth, I didn't have the patience to do the rest. Soldering those that are there took two evenings already! :) I'm finished with it for today. Since tomorrow I have some other plans, I'll prolly get back to it on weekend. With some luck perhaps I'll be able to finish it on Saturday and test how it works. :) I'm only affraid that I made some of the cables too short, but I'm not going to open the case and resolder longer pieces. I'll just lenghten those that will require it.
-
Wooow. Niceee one. Guy had to spend a lot of time building this. :O And money too. Hehe, I wouldn't mind if someone made such a pit as a present for me :P , hehe, but for the time being I only have time and money to build what I'm building. :) But... nice pit. :)
-
All buttons are momentary buttons. 8 switches are momentary switches. Two section, to avoid signal mixing. 6 switches are not momentary switches, but this is on purpose, because these will be for functions that require a held key, like refueling, fuel dumping and ejecting, etc. BTW, I'm writing this post on the semi dismanteled keyboard with already over a dozen wires sticking out of it. I have soldered wires for all buttons located on the left side of the panel. Hopefully I'll manage to solder wires for buttons up to the right handle, leaving only the mechanical and radio switches for tomorrow. The picture shows keyboard in it's current state. It may not look so on the picture, but there are already many wires sticking out, making it harder to work on the keyboard. The fact that my soldering iron is not designed for working with PC equipment, makes it hard to make proper solders (I keep making too big ones, which overlap over several pathways, causing some abnormal keyboard behaviour. :> EDIT: It's really late at night here, so time to go to bed. I'm replacing the photo with the most current one, showing present state of the keyboard. I think that over half of the wires are now already there. I still have to do mechanical systems, flight modes, radio and altimeter. Hopefully soldering all those wires to buttons will be easier then soldering them to the keyboard. :) If I keep up present speed ... I may be able to finish it tomorrow. :) Cheers. EDIT: Picture from this post was removed to make space for other pictures. See below for a picture of how the keyboard looks like with all cables attached.
-
Update: Whole project came to a sudden and painful stop yesterday, when I realised that I can't use the BTC keyboard for it, due to how the pathways on that keyboard are laid. This problem bugged me entire day at work and even after thinking about it for some time, I couldn't find a soultion. Luckily I have several keyboards in my junkyard. After returning home I gathered all of them and dismanteled them all with the help of my brother. It seems to me now, that finding a right keyboard is the most cruicial part of making such a device as mine. Some keyboards had the same pathway solution as BTC. Some had pathways embeded in RUBBER and couldn't be used either. Finally I came upon one keyboard (one!!, damn it, among so many), that ... was (and is) perfect. I mean it's better then I even hoped for, because it has A LOT of space underneath for the cables AND all imporant pathways are ended with a solder! So I don't even have to drill any holes. I just have to solder the wires to solders and voila. I'm happy, damn it. For half the day today I was almost convinced that I'll have to scrap everything. :) Here are the pics of the backs of the BTC keyboard and the other no-name keyboard. BTC keyboard is the one held closer to the camera on the picture. You can see, that there are very intricate pathways on the BTC and almost no solders sticking out, while on the other keyboard solders stick out in groups of threes. :) EDIT: Damn... I think I'll need more wire. Like ... mmm... 30 m more. :| EDIT2: Had to remove the picture of the BTC keyboard to make room for other pictures.
-
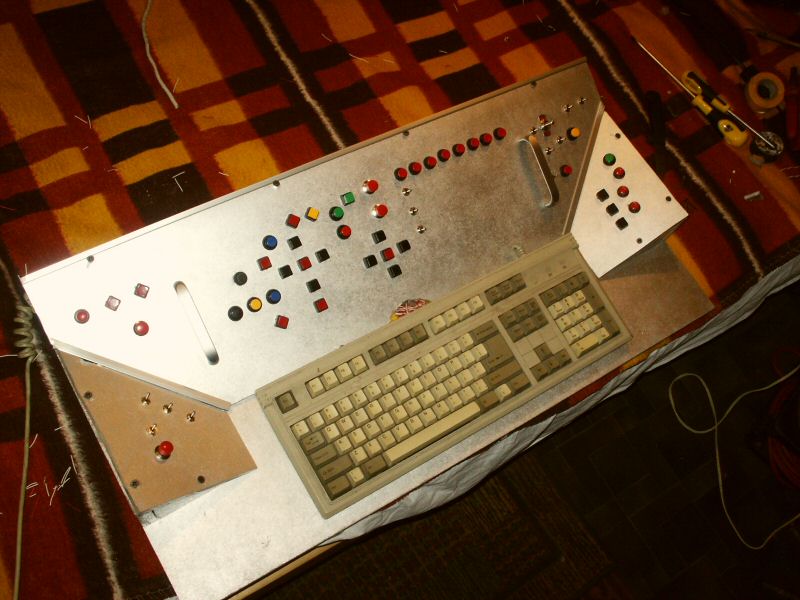
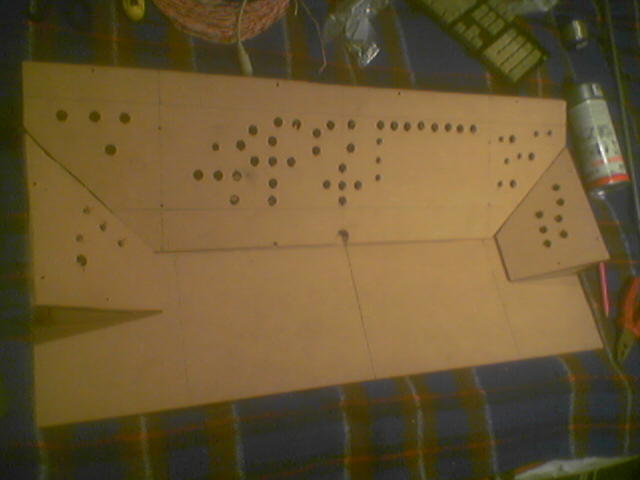
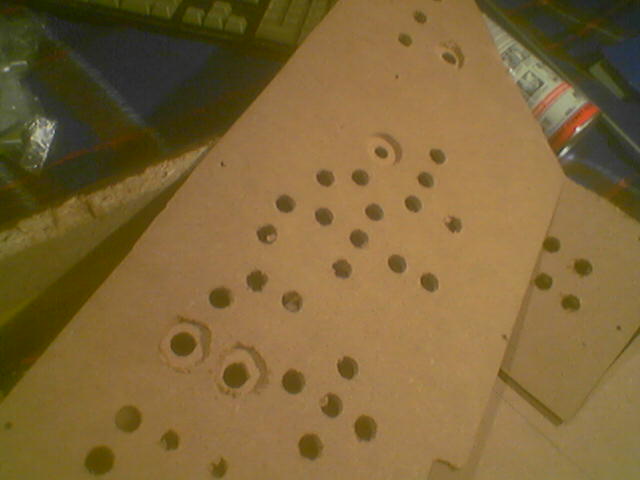
Some more pictures. All buttons are now attached. You may notice a large free area near the right handle. I'm thinking about attaching some sort of fake TV screen there. So far I came up with nothing. Do you people have any idea what might work as a TV screen imitation? :) If not TV... perhaps I'll try ... some gauges. Haha, maybe a small thermometer. :D You may also notice that there are no small buttons. I went to the store today and replaced them. Simple truth is, it would be too hard to mount them. I had some problems deciding which color should go where, but the final outcome seems ok. From the back, main panel looks now like the insides of a very old TV, like one of those with lamps. I hope that all buttons work. I'd hate to be forced to unmount some of them (nearly ripped off my fingernails mounting them). Do you guys have ANY idea how to make labels for the buttons? I mean, plain printout on the paper will look terrible on this "quasi-metal" surface. I don't want to paint or write on the panel itself, because there may come a time when I'll want to change button asignments. Any idea what to use? I'm thinking about taking several (4 maybe) pieces of A4 foil and printing the labels on them with laser printer and then putting those foils on the panel, of course with holes cut out in the foils for the buttons and switches. Is it a good idea? ... That's it for now, I guess. I suppose now came the time to leave the pit for a moment and take care of the keyboard itself. Which means I have 204 wires to solder to the keyboard board. :) Cheers.