

theperson
-
Posts
21 -
Joined
-
Last visited
Content Type
Profiles
Forums
Events
Posts posted by theperson
-
-
46 minutes ago, Digitalvole said:
Yeah, I’d take there word for it too

Think I’ll be getting the QP from Argos (got some vouchers) so handy they have the cable. Though I may shed a tear when I see the price. Thanks for the help @slughead

Don't do it! The fibre optic cable is not needed. I believe the reason for it is to make the cable slightly thinner and more flexible. You can push the same amount of pixels through a $8 regular usb-c cable.
I recommend the "Kuject Design Fast Charging Link Cable (PD version)" from amazon, when paired with a PD wall plug you get unlimited battery life. The official $80 fibre cable only gave me 3 hour battery life.
-
9 hours ago, autracer said:
Hi Pilots
I‘ve Problems since a few days with quest link USB-C/ USB-C.
When i use open xr tools, i have a brighter gap on the bottom side from my view.
It renders with less colors.
Without aktive tools, the picture is clear.
Gesendet von iPad mit TapatalkTry lowering your Encode Resolution (Width) in either oculus tray tools or the oculus debug tool
-
 1
1
-
-
4 hours ago, corb said:
Hey thanks for the effort. I have setup my DCS with exact same settings as you, also downgraded to the Toolkit 1.0.4.
But still IHADS ghosting a lot when moving head around. Look in my video how the Airspeed "0" turns into two zeroes when moving head or the Torque percentage, barly readable when moving head. I cannot figure out how to get around this..
Did a clean install of DCS prior to switching to OpenXR.
Got it set to 100% resolution and MR Disabled.
NVidia Control panel set to default, except Vertical Sync set to Fast. Latest drivers.
Got a Asus RTX 3090, i9 11900K, 32 Gb Ram running at 3000 mhz. M2 Pcie 4.0 drive for DCS.I have similar juddering with reprojection turned off and can't get a smooth image without reprojection. I've gone as far as a clean windows install. Happens with or without the toolkit installed. If I can get above 90fps the judder stops.
I just use reprojection because it feels smooth and the ghosting is less bad, but would love to find a fix.
-
2 hours ago, 98abaile said:
Is the steam VR portal starting up or the WMR one? The steam headset status window SHOULDN'T appear either.
Steamvr isnt starting at all, its definitely using the wmr openxr runtime.
-
I'll add my experience that I'm getting the extra juddering/ghosting/double vision when moving my head while dropping below 90fps with motion reprojection disabled.
I've tried uninstalling & reinstalling steamvr, wmr, openxr, wmr4svr. I've tried what a previous posted said worked for him and set steamvr as the openxr runtime and then set it back to openxr. I've tried installing the openxr toolkit and enabled the overlay, but none has worked.Hopefully someone finds a fix for it.
-
I was having issues with stability where the joystick would randomly stop working and need to be reset, once every couple of days/sessions, so I did a couple of things that seem to have cured it.
Firstly, I replaced the chinese pro micro clone with a genuine sparkfun one, and installed their drivers for it.
Second, I changed my code to use my own odrive->arduino comms instead of using the ODriveArduino library. This avoids the use of arduino Strings to try and eliminate possible memory issues, clears the serial buffer before reading/writing on it, and overall reduces the number of characters being written on the serial port which makes things faster. I also made sure to give the arduino some "idle" time instead of trying to get as many position updates as possible.
I also realized that my settings for the motors and torque commands meant I was saturating my set current limit and was clipping the feedback. You should set the odrive's motor torque constant parameter correctly, and send the commands in units of torque instead of units of current.
Here's the updated code. Be warned that it's still pretty confusing and mostly hacked together bull<profanity>. If you've got a question I'd be happy to try and explain.
Replace the files in the Fino project with the contents here:
Fino.ino:
#include "src/Joystick.h"
#include "config.h"
#include <HardwareSerial.h>

// Printing with stream operator helper functions
template<class T> inline Print& operator <<(Print &obj,     T arg) {
  obj.print(arg);
  return obj;
}
template<>        inline Print& operator <<(Print &obj, float arg) {
  obj.print(arg, 4);
  return obj;
}
// -------------------------
// Various global variables
// -------------------------
unsigned long lastEffectsUpdate;
unsigned long nextJoystickMillis;
unsigned long nextEffectsMillis;

// --------------------------
// Joystick related variables
// --------------------------
#define minX -10000
#define maxX 10000
#define minY -10000
#define maxY 10000


//periodicGain sets the gains for everything that isnt a spring, friction, or damping force
const float periodicGain = 0.5;
const float extraDampingGain = 0.01;
int dampingEnabled = 0;

bool is_connected = false;
bool forces_requested = false;
bool pos_updated = false;
bool newData = false;

const byte numChars = 32;
char receivedChars[numChars];
char tempChars[numChars];        // temporary array for use when parsing

float rcvdPos[2];   //uses odrive notation for motors
float rcvdVel[2];   //uses odrive notation for motors

int16_t pos[2] = {0, 0};
int lastX;
int lastY;
int lastVelX;
int lastVelY;
int lastAccelX;
int lastAccelY;

float scaleFactorX;
float scaleFactorY;

//because odrive reports in motor rotations we have to do some converting
//these are the limits and center for my joystick in odrive-reported-rotations
const float maxXRot = 0.13;
const float minXRot = -0.11;
const float maxYRot = -0.23;
const float minYRot = 0.17;
const float centerXRot = 0.02;
const float centerYRot = -0.03;


EffectParams effects[2];
int32_t forces[2] = {0, 0};

Joystick_ Joystick(
    JOYSTICK_DEFAULT_REPORT_ID, JOYSTICK_TYPE_JOYSTICK,
    0, 0, // Button Count, Hat Switch Count
    true, true, false, // X, Y, Z
    false, false, false, // Rx, Ry, Rz
    false, false); // rudder, throttle

void setup() {
    //Makes uploading the new sketch easier, because serial may get flooded
    //hit the reset pin as it finishes compiling
    delay(1000);
    setupJoystick();

    // setup timing and run them as soon as possible
    lastEffectsUpdate = 0;
    nextJoystickMillis = 0;
    nextEffectsMillis = 0;
    dampingEnabled = 0;
}

void loop(){
    //i setup my odrive as motor 1 is x, 0 is y :bigbrain:
    unsigned long currentMillis;
    currentMillis = millis();

    //wait 2 seconds for encoder signal to calm down and make sure theres no velX funny business
    if(currentMillis > 2000){
      dampingEnabled = 1;
    }

    // do not run more frequently than these many milliseconds
    if (currentMillis >= nextJoystickMillis) {

        getFeedback(1);

        getFeedback(0);

        pos[0] = (int)((rcvdPos[1]-centerXRot)*scaleFactorX);
        pos[1] = (int)((rcvdPos[0]-centerYRot)*scaleFactorY);

        updateJoystickPos();
        nextJoystickMillis = currentMillis + 8;


        // we calculate condition forces every 50ms or more frequently if we get position updates
        if (currentMillis >= nextEffectsMillis || pos_updated) {
            updateEffects(true);
            nextEffectsMillis = currentMillis + 50;
            pos_updated = false;
        } else {
            // calculate forces without recalculating condition forces
            // this helps having smoother spring/damper/friction
            // if our update rate matches our input device
            updateEffects(false);
        }

        setTorque(1,(forces[0]*(0.1378*7.5/10000.0))+(effects[0].damperVelocity*-extraDampingGain*dampingEnabled));
        setTorque(0,(-forces[1]*(0.1378*10/10000.0))+(effects[1].damperVelocity*extraDampingGain*dampingEnabled*2));
    }
}
com.ino:
void setOdriveState(int axis, int requested_state) {
  Serial1 << "w axis" << axis << ".requested_state " << requested_state << '\n';
}

void setTorque(int axis, float torque) {
  Serial1 << "c " << axis << " " << torque << "\n";
}


void getFeedback(int motor_number){   //use odrive numbers for motors
  //clear the input buffer
  while(Serial1.available()>0){
    Serial1.read();
    }
  Serial1 << "f " << motor_number << "\n";
  recvFeedback(motor_number);
}

void recvFeedback(int motor_number) {
  static byte ndx = 0;
  char endMarker = '\n';
  char rc;
  static const unsigned long timeout = 10;
  unsigned long timeout_start = millis();
  bool not_timed_out = true;
  while (newData == false && not_timed_out) {
    if (Serial1.available() > 0) {
      rc = Serial1.read();

      if (rc != endMarker) {
        receivedChars[ndx] = rc;
        ndx++;
        if (ndx >= numChars) {
          ndx = numChars - 1;
        }
      }
      else {
        receivedChars[ndx] = '\0'; // terminate the string
        ndx = 0;
        newData = true;
      }
    }
    else if (millis() - timeout_start >= timeout) {
        not_timed_out = false; //taking too long, abort
      }
    }

    if(newData){    //we must have timed out, so don't copy in new data
      strcpy(tempChars, receivedChars);
      char * strtokIndx; // this is used by strtok() as an index
      strtokIndx = strtok(tempChars, " ");     // get the first part - the string
      rcvdPos[motor_number] = atof(strtokIndx);
      strtokIndx = strtok(NULL, ",");     // this continues where the previous call left off
      rcvdVel[motor_number] = atof(strtokIndx);     // convert this part to a float
      newData = false;    //reset for next read
      pos_updated = true;
  }
}
joystick.ino:
void setupJoystick() {
    scaleFactorX = (2*maxX) / (maxXRot - minXRot);
    scaleFactorY = (2*maxY) / (maxYRot - minYRot);
    Joystick.setXAxisRange(minX, maxX);
    Joystick.setYAxisRange(minY, maxY);
    Joystick.begin();
    Gains gains[FFB_AXIS_COUNT];
    gains[0].springGain = 1.0;
    gains[1].springGain = 1.0;
    gains[0].frictionGain = 0.25;
    gains[1].frictionGain = 0.25;
    gains[0].squareGain = periodicGain;
    gains[1].squareGain = periodicGain;
    gains[0].sineGain = periodicGain;
    gains[1].sineGain = periodicGain;
    gains[0].triangleGain = periodicGain;
    gains[1].triangleGain = periodicGain;
    gains[0].sawtoothupGain = periodicGain;
    gains[1].sawtoothupGain = periodicGain;
    gains[0].sawtoothdownGain = periodicGain;
    gains[1].sawtoothdownGain = periodicGain;
    gains[0].damperGain = 0; //added always-active damping elsewhere
    gains[1].damperGain = 0;

    Joystick.setGains(gains);
    Serial1.begin(500000);

    delay(100);
    //clear the input buffer
    while(Serial1.available()>0){
      Serial1.read();
    }
    setOdriveState(0, 8); //AXIS_STATE_CLOSED_LOOP_CONTROL = 8
    delay(100);
    setOdriveState(1, 8);
    delay(100);
}

void updateJoystickPos() {
    Joystick.setXAxis(pos[0]);
    Joystick.setYAxis(pos[1]);
}

void updateEffects(bool recalculate){
    for (int i =0; i < 2; i++) {
        effects[i].frictionMaxPositionChange = 15; // TODO: find proper values for these automatically
        effects[i].inertiaMaxAcceleration = 5;
        effects[i].damperMaxVelocity = 50;
    }

    effects[0].springMaxPosition = maxX;
    effects[1].springMaxPosition = maxY;
    effects[0].springPosition = pos[0];
    effects[1].springPosition = pos[1];

    unsigned long currentMillis;
    currentMillis = millis();
    int16_t diffTime = currentMillis - lastEffectsUpdate;

    if (diffTime > 0 && recalculate) {
        lastEffectsUpdate = currentMillis;
        int16_t positionChangeX = pos[0] - lastX;
        int16_t positionChangeY = pos[1] - lastY;
        int16_t velX = positionChangeX / diffTime;
        int16_t velY = positionChangeY / diffTime;
        int16_t accelX = ((velX - lastVelX) * 10) / diffTime;
        int16_t accelY = ((velY - lastVelY) * 10) / diffTime;

        effects[0].frictionPositionChange = velX;
        effects[1].frictionPositionChange = velY;
        effects[0].inertiaAcceleration = accelX;
        effects[1].inertiaAcceleration = accelY;
        effects[0].damperVelocity = velX;
        effects[1].damperVelocity = velY;

        lastX = pos[0];
        lastY = pos[1];
        lastVelX = velX;
        lastVelY = velY;
        lastAccelX = accelX;
        lastAccelY = accelY;
    } else {
        effects[0].frictionPositionChange = lastVelX;
        effects[1].frictionPositionChange = lastVelY;
        effects[0].inertiaAcceleration = lastAccelX;
        effects[1].inertiaAcceleration = lastAccelY;
        effects[0].damperVelocity = lastVelX;
        effects[1].damperVelocity = lastVelY;
    }

    Joystick.setEffectParams(effects);
    Joystick.getForce(forces);
}
Eventually I'd like to speed things up even further by just reading the position in as an int and avoid all the float math.
-
1
-
 1
1
-
-
12 hours ago, TomVR said:
I wonder if then instead running a shoulder bolt from the top and putting a nut on the bottom would work better
https://www.amazon.ca/uxcell5pcs-Stainless-Socket-Shoulder-Length/dp/B077GWSV23/ref=sr_1_47?crid=1ZYZRE2FM43G1&keywords=5mm+shoulder+bolt&qid=1644431485&sprefix=5mm+shoulder+bolt%2Caps%2C60&sr=8-47I cut the head off a m5x50 shoulder bolt, put it in the existing hole with a flange nut on the bottom and a shaft collar at the top.
-
Between adding always-active damping and dropping odrv0.axis0.motor.config.current_control_bandwidth from the default of 2000 down to 100 it seems like I solved my out of control oscillation problems at higher torques. Motors are nice and quiet too.
Now the limiting factor really is the strength of the printed gimbal joint, and all that vibration has put that "clunk" back in to the roll axis, even with re-tightening everything down

-
1
-
-
PM sent
-
10 hours ago, Chuls said:
Great job @theperson! When I created that Fino library I thought the most useful part would be the library but reusing the sketch that way is a great idea. I'll change it a bit so that it's easier to reuse but what you did is great.
Just one comment about when you wonder about the "pos_updated" variable. I just had to do that because the Brunner joystick refreshes the X and Y axes at different intervals and made recalculating inertia and friction really tricky, so I just calculate those at a lower frequency. Using the filter as you are doing is a very similar idea. I'll make some changes so it's easier to debug these.
Also, someone was kind enough to send me a Due which uses a SAM3X8E and everything but the USB communication is working. There's some issue there that I'm trying to find but it's quite tricky. I have read many messages online that the Arduino USB libraries are full of bugs but I don't know if that's still the case or I just have a lot to learn about all this. I hope to get this working during January
Thank you for making it available. You absolutely saved me a lot of headache getting it figured out.
I took a look at trying to run it on an SAME51 chip (basically an SAMD51 chip with a CAN bus - supposedly more reliable than the odrive serial uart) but the USB library stuff goes way over my head.
I think my next step is adding some switches to the arduino to turn on/off motors as well as adding some damping that isnt dependent on it being enabled in-game.
I also replaced the m5 bolt that runs up through the GIMBAL_CORE_JOINT with a proper 5mm shaft, since the bolt threads were slightly undersized for the bearing ID and caused a barely perceptible amount of slop.
-
On 12/12/2021 at 5:07 PM, TomVR said:
In the gimbal design, has anyone had a problem with a clunk on the pitch axis? Feels like the "GIMBAL_CORE_JOINT.STL" part is shifting back and forth while crossing the center on the pitch, making a popping noise and a felt clunk. Only happens when there is an external load on the axis from the gear teeth (or my cam springs)
recorded a video of it happening.
I had a similar "clunk" when going from one direction of force to the other. Noticed the frames were flexing and allowing the bearings to slide in and out on the joints. Fixed by tapping the holes on the joints and securing the bearings that way.

-
1
-
-
My previous arduino code is garbage and I am deleting it out of shame.
Here is the much much better Fino implementation.
Download the Fino library, put it in your ~/Documents/Arduino/libraries folder and replace the Fino.ino and joystick.ino files with the code below.
I'm also filtering the input encoder position with a simple MovingAverage library - available through the library manager as MovingAverager by Ian Carey
I have my DCS controls FF_Tune menu set as follows:
Trimmer Force = 75
Shake Force = 5
Swap Axis = unchecked
Invert X = unchecked
Invert Y = unchecked
Fino.ino
#define DEBUGNO
// the digits mean Mmmmrrr (M=Major,m=minor,r=revision)
#define SKETCH_VERSION 3000001

#include "src/Joystick.h"
#include "config.h"
#include "order.h"
#include <ODriveArduino.h>
#include <ODriveEnums.h>
#include <HardwareSerial.h>
#include <MovingAverage.h>

// Printing with stream operator helper functions
template<class T> inline Print& operator <<(Print &obj,     T arg) {
  obj.print(arg);
  return obj;
}
template<>        inline Print& operator <<(Print &obj, float arg) {
  obj.print(arg, 4);
  return obj;
}
// -------------------------
// Various global variables
// -------------------------
unsigned long lastEffectsUpdate;
unsigned long nextJoystickMillis;
unsigned long nextEffectsMillis;

// --------------------------
// Joystick related variables
// --------------------------
#define minX -10000
#define maxX 10000
#define minY -10000
#define maxY 10000

//forces[] has a range of +/-10000, so this sets a safe motor amperage
float motorAmps = 1;
float forceToAmps;

//sets the values of all the periodic function gains
float periodicGain = 0.05;

bool is_connected = false;
bool forces_requested = false;
bool pos_updated = false;

int16_t pos[2] = {0, 0};
int lastX;
int lastY;
int lastVelX;
int lastVelY;
int lastAccelX;
int lastAccelY;

float scaleFactorX;
float scaleFactorY;

//Input filters - the number is the # of readings its averageing, higher number more stable but slower, lower number less filtered but faster response
int readX;
MovingAverage filterX(4);
int readY;
MovingAverage filterY(4);

//because odrive reports in motor rotations we have to do some converting
//these are the limits and center for my joystick in odrive-reported-rotations
//maxX is joystick to the right, maxY is joystick pushed away from you
float maxXRot = 0.13;
float minXRot = -0.11;
float maxYRot = -0.23;
float minYRot = 0.17;
float centerXRot = 0.02;
float centerYRot = -0.03;


//Hardware serial port
HardwareSerial& odrive_serial = Serial1;

// ODrive object
ODriveArduino odrive(odrive_serial);

EffectParams effects[2];
int32_t forces[2] = {0, 0};

Joystick_ Joystick(
    JOYSTICK_DEFAULT_REPORT_ID, JOYSTICK_TYPE_JOYSTICK,
    0, 0, // Button Count, Hat Switch Count
    true, true, false, // X, Y, Z
    false, false, false, // Rx, Ry, Rz
    false, false); // rudder, throttle

void setup() {
    //Makes uploading the new sketch easier, because serial can get flooded
    //if you have trouble hit the reset pin as it finishes compiling
    delay(2000);
    setupJoystick();

    // setup communication
    Serial.begin(SERIAL_BAUD);
    // setup timing and run them as soon as possible
    lastEffectsUpdate = 0;
    nextJoystickMillis = 0;
    nextEffectsMillis = 0;
}

void loop(){
    //get_messages_from_serial();
    //i setup my odrive as motor 1 is x, 0 is y :bigbrain:
    readX = (int)((odrive.GetPosition(1)-centerXRot)*scaleFactorX);
    readY = (int)((odrive.GetPosition(0)-centerYRot)*scaleFactorY);
    //I'm sure this wont cause any issues in the future
    pos_updated = true;
    pos[0] = filterX.addSample(readX);
    pos[1] = filterY.addSample(readY);
    //Serial << "x" << pos[0] << ", y" << pos[1] << "\n";
    unsigned long currentMillis;
    currentMillis = millis();
    // do not run more frequently than these many milliseconds
    if (currentMillis >= nextJoystickMillis) {
        updateJoystickPos();
        nextJoystickMillis = currentMillis + 2;

        // we calculate condition forces every 100ms or more frequently if we get position updates
        if (currentMillis >= nextEffectsMillis || pos_updated) {
            updateEffects(true);
            nextEffectsMillis = currentMillis + 100;
            pos_updated = false;
        } else {
            // calculate forces without recalculating condition forces
            // this helps having smoother spring/damper/friction
            // if our update rate matches our input device
            updateEffects(false);
        }
        //Again, i have mine set up as X axis is motor 1, Y axis is motor 0
        odrive.SetCurrent(1,(float)forces[0]*forceToAmps);
        odrive.SetCurrent(0,(float)-forces[1]*forceToAmps);
        //Serial << "fx" << (forces[0]*forceToAmps) << ", fy" << (forces[1]*forceToAmps) << "\n";
    }
}
joystick.ino
void setupJoystick() {
    forceToAmps = motorAmps/10000;
    scaleFactorX = (2*maxX) / (maxXRot - minXRot);
    scaleFactorY = (2*maxY) / (maxYRot - minYRot);
    Joystick.setXAxisRange(minX, maxX);
    Joystick.setYAxisRange(minY, maxY);
    Joystick.begin();
    Gains gains[FFB_AXIS_COUNT];
    gains[0].springGain = 0.7;
    gains[1].springGain = 0.7;
    gains[0].frictionGain = 0.25;
    gains[1].frictionGain = 0.25;
    gains[0].squareGain = periodicGain;
    gains[1].squareGain = periodicGain;
    gains[0].sineGain = periodicGain;
    gains[1].sineGain = periodicGain;
    gains[0].triangleGain = periodicGain;
    gains[1].triangleGain = periodicGain;
    gains[0].sawtoothupGain = periodicGain;
    gains[1].sawtoothupGain = periodicGain;
    gains[0].sawtoothdownGain = periodicGain;
    gains[1].sawtoothdownGain = periodicGain;

    Joystick.setGains(gains);
    odrive_serial.begin(500000);
    //Serial.println("requesting torque control");
    //sometimes it fails to turn on axis 0, so i dunno, try it twice?
    odrive.run_state(0, AXIS_STATE_CLOSED_LOOP_CONTROL, false);
    delay(100);
    odrive.run_state(1, AXIS_STATE_CLOSED_LOOP_CONTROL, false);
    delay(50);
    odrive.run_state(0, AXIS_STATE_CLOSED_LOOP_CONTROL, false);
}

void updateJoystickPos() {
    Joystick.setXAxis(pos[0]);
    Joystick.setYAxis(pos[1]);
}

void updateEffects(bool recalculate){
    for (int i =0; i < 2; i++) {
        effects[i].frictionMaxPositionChange = 25; // TODO: find proper values for these automatically
        effects[i].inertiaMaxAcceleration = 10;
        effects[i].damperMaxVelocity = 40;
    }

    effects[0].springMaxPosition = maxX;
    effects[1].springMaxPosition = maxY;
    effects[0].springPosition = pos[0];
    effects[1].springPosition = pos[1];

    unsigned long currentMillis;
    currentMillis = millis();
    int16_t diffTime = currentMillis - lastEffectsUpdate;

    if (diffTime > 0 && recalculate) {
        lastEffectsUpdate = currentMillis;
        int16_t positionChangeX = pos[0] - lastX;
        int16_t positionChangeY = pos[1] - lastY;
        int16_t velX = positionChangeX / diffTime;
        int16_t velY = positionChangeY / diffTime;
        int16_t accelX = ((velX - lastVelX) * 10) / diffTime;
        int16_t accelY = ((velY - lastVelY) * 10) / diffTime;

        effects[0].frictionPositionChange = velX;
        effects[1].frictionPositionChange = velY;
        effects[0].inertiaAcceleration = accelX;
        effects[1].inertiaAcceleration = accelY;
        effects[0].damperVelocity = velX;
        effects[1].damperVelocity = velY;

        #ifdef DEBUG
        write_order(LOG);
        Serial.print(currentMillis);
        Serial.print("X");
        Serial.print(pos[0]);
        Serial.print("Y");
        Serial.print(pos[1]);
        Serial.print("C");
        Serial.print(positionChangeX);
        Serial.print(",");
        Serial.print(positionChangeY);
        Serial.print("V");
        Serial.print(velX);
        Serial.print(",");
        Serial.print(velY);
        Serial.print("A");
        Serial.print(accelX);
        Serial.print(",");
        Serial.print(accelY);
        #endif

        lastX = pos[0];
        lastY = pos[1];
        lastVelX = velX;
        lastVelY = velY;
        lastAccelX = accelX;
        lastAccelY = accelY;
    } else {
        effects[0].frictionPositionChange = lastVelX;
        effects[1].frictionPositionChange = lastVelY;
        effects[0].inertiaAcceleration = lastAccelX;
        effects[1].inertiaAcceleration = lastAccelY;
        effects[0].damperVelocity = lastVelX;
        effects[1].damperVelocity = lastVelY;
    }

    Joystick.setEffectParams(effects);
    Joystick.getForce(forces);

    #ifdef DEBUG
    if (diffTime > 0 && recalculate) {
        Serial.print("F");
        Serial.print(forces[0]);
        Serial.print(",");
        Serial.println(forces[1]);
    }
    #endif
}
If I turn the gains up too high it'll start oscillating something fierce, but these seem alright for my setup. Maybe direct-driving the gimbals would take out that small springiness of the belt and allow for higher gains?
-
1
-
-
3 hours ago, SquidgyB said:
@theperson Nice work!
You said that downgrading the firmware helped with SPI issues? These have plagued my setup throughout, to the point that I've ordered two separate single-axis ODrive clones to get around the issue - Axis1 seemed to have SPI_COM_FAIL errors on calibration every time while Axis0 stayed ok.
I tried with tri-state buffers but these didn't seem to help with the dropouts, though they seemed to work as the data was still being passed on when checking SHADOW_COUNT.
Sorry, but the comms issues I was having was just with the serial output to the arduino. My SPI comms seem to be solid. With the motors turned on the odrive would just stop responding to GetPosition() calls after a couple seconds. It would take longer at slower baudrates but it would eventually happen. The strange thing was the SetPosition() commands going the other way would get through just fine, even when the odrive stopped responding to position requests.
Do you have ferrite toroids on the motor leads, shielding wrap on your motor wires and encoder wires, grounding said shielding wrap to the V- input pad? Also just routing the encoder cables away from the motors and motor leads.
A word of warning on the Due - the ArduinoJoystickWithFFBLibrary and Fino are built around the usb comms of an ATmega32u4 chip. I spent a little while trying to see if I could run it on a SAMD51 chip, and couldn't figure it out.
I've determined that the jitter is the encoder data, definitely not a commanded vibration input. With friction turned on it gets pretty horrible with how it's trying to apply friction forces to the constantly changing position.
I'm going to take a look at redoing my encoder/magnet mounts to see if I can reduce some jitter that way. With how much I've turned down my motors I could probably eliminate the belts and just direct-drive the gimbal, so I'll figure out how best to mount everything for that. I figure the loss of encoder resolution will be worth it.
-
1
-
-
On 12/16/2021 at 8:41 AM, 0xDEADBEEF said:
Would you mind sharing your code? I just finished my mechanics and am about to tackle exactly this. I was actually looking at fino, but it seems it does not really matter which library to use

I'm going direct drive with hoverboard motors by the way, landed a nice deal on a used hoverboard without charger for 30€. I was lucky the seller did not check used prices on those boards, a charger would have only been 15€ on amazon ...
Be warned, it's still very much in the kludged-together state. I'm thinking of trying out the Fino library instead, since he's got nice rate control and the friction position change/velocity calculations set up already.
It's a bit jittery in DCS, and I'm not sure quite sure how much of that is forcefeedback vibration or jittery encoder vibration.
My problems with the Odrive UART not responding to the GetPosition() calls were solved by flashing the older 0.5.1 firmware. I also downgraded the odrivetool command line to keep things compatible.
BAD CODE USED TO BE HERE,
REMOVED TO SAVE THE WORLD FROM MY INEPTITUDE
LOOK AT A LATER POST BELOW FOR BETTER CODE
I included the Ewma library for input filtering, which is available to install through the arduino library manager window. For the ArduinoJoystickWithFFBLibrary and the OdriveArduino library you'll have to download them separately and move them into your ~/Documents/Arduino/libraries folder.
And these are the commands for setting up the odrive parameters with the as5048a encoders:
//Initial Setup
odrv0.axis0.motor.config.resistance_calib_max_voltage = 4
odrv0.axis0.encoder.config.abs_spi_cs_gpio_pin = 6
odrv0.axis0.encoder.config.mode = ENCODER_MODE_SPI_ABS_AMS
odrv0.axis0.encoder.config.cpr = 2**14
odrv0.axis1.motor.config.resistance_calib_max_voltage = 4
odrv0.axis1.encoder.config.abs_spi_cs_gpio_pin = 7
odrv0.axis1.encoder.config.mode = ENCODER_MODE_SPI_ABS_AMS
odrv0.axis1.encoder.config.cpr = 2**14
odrv0.config.uart_baudrate = 500000
...with the 0.5.1 firmware the brake resistor is just assumed to be connected
...for the newer firmwares you'll need to configure it
odrv0.config.enable_brake_resistor = True
...I set the current limits to 6, I dont really need more with my motors
odrv0.axis0.motor.config.current_lim = 6
odrv0.axis1.motor.config.current_lim = 6
...raise the velocity limits to 6rev/s, you can pretty easily hit the 2rev/s default
odrv0.axis0.controller.config.vel_limit = 6
odrv0.axis1.controller.config.vel_limit = 6
odrv0.save_configuration()
odrv0.reboot()

//Motor and Encoder Calibration
//do these with the motors free to spin, not hooked up to the gimbal
odrv0.axis0.requested_state = AXIS_STATE_FULL_CALIBRATION_SEQUENCE
odrv0.axis0.motor.config.pre_calibrated = True
odrv0.axis0.encoder.config.pre_calibrated = True
odrv0.axis1.requested_state = AXIS_STATE_FULL_CALIBRATION_SEQUENCE
odrv0.axis1.motor.config.pre_calibrated = True
odrv0.axis1.encoder.config.pre_calibrated = True
odrv0.save_configuration()
odrv0.reboot()

odrv0.axis0.requested_state = AXIS_STATE_CLOSED_LOOP_CONTROL
odrv0.axis1.requested_state = AXIS_STATE_CLOSED_LOOP_CONTROL
...this should turn on the motors and have them hold position where they are
...try turning the motors by hand and see if they push back
...if motors aren't on check for errors by running:
dump_errors(odrv0)
...you can follow the Tuning section to tune the gains: https://docs.odriverobotics.com/control.html
...but it might be better to do that with the belts connected

//Anticogging Calibration
//do these with the motors free to spin, not hooked up to the gimbal
odrv0.axis0.requested_state = AXIS_STATE_CLOSED_LOOP_CONTROL
odrv0.axis0.controller.start_anticogging_calibration()
odrv0.axis1.requested_state = AXIS_STATE_CLOSED_LOOP_CONTROL
odrv0.axis1.controller.start_anticogging_calibration()
...wait for anticogging to finish, it can take a while like 10 minutes
...you can increase pos_gain and vel_integrator_gain by a factor of 10 to speed it up, but remember to set them back
...you can check if anticogging calibration is finished by running:
odrv0.axis0.controller.config.anticogging.calib_anticogging
...and if it returns True, calibration is still running, it will return False when its complete
odrv0.axis0.controller.config.anticogging.anticogging_enabled = True
odrv0.axis1.controller.config.anticogging.anticogging_enabled = True
odrv0.save_configuration()
odrv0.reboot()
-
3
-
1
-
-
Downgrading the odrive firmware to 0.5.1 fixed all my serial dropout problems.
I kludged together some code using this library on an arduino pro micro
protip: spring effects in that library expect you to set your joystick range as (-min,max), not (0,max) like it shows in the example [at least to make effects in DCS work]
I've spent about 30 minutes just making sure it works right and getting gains in the right neighborhood to where they won't break the gimbal.
I'll get my setup mounted properly and clean up the code in the next couple days and post some more.

-
2
-
-
9 hours ago, robjos1 said:
@theperson Out of interest which magnets did you fix to the end of the motor to control the AS5048A?
I'm using the development boards, which each came with a small round magnet (AS5000-MD6H-2 diametric magnet). I printed the encoder mounts such that the surface of the chip would be 1.5mm away from the magnet, since the datasheet recommends a 0.5-2.5mm range.
No luck with shielding and ferrite rings fixing my odrive->arduino communication problem. Posting about it here in the odrive forums.
@propeler let me know if you need any testers for the odrive firmware
-
30 minutes ago, robjos1 said:
@theperson which encoders did you end up using? The as5048a? I have previously used the odrive board with the AMT102 and would like to keep using these if possible, would they work? When you finish the wiring for your setup would you mind posting the final arduino code you use and a quick schematic for which pins on the odrive and arduino you are using for the connection.
Keep up the great work
Correct, I'm using the as5048a's. While using incremental encoders is probably do-able, its a lot simpler to have the odrive already know where it is at startup without needing to do an index search. Remember that the joystick has limited travel and the motors can't make a full rotation. With the designed gear ratio the motors have a lock-to-lock range of ~half a rotation total (+/- 0.25 rotations each side). With a stick extension I'm only going to be using about half of that available travel on the roll axis, so the 2048ppr resolution of the amt102's might start becoming noticeable.
-
3 hours ago, slimheli said:
Wow. This looks amazing! What material and thickness did you specify for the metal bits?
I followed propeler's design specs so I wouldn't have to recalculate bend radii. Cheap and cheerful A36 mild steel @ 3mm. With the slots there's some wiggle room, but my holes are lined up basically in the middle of the slots.
Eventually I may need to add some sort of rust preventative though.
The thickness is needed for the tapped holes mounting the main gimbal frame bearings. As designed there's no space for hex nuts there. If you lengthened the shoulder on the arm frames and spaced out the sheet metal plates and mounting holes accordingly you could get away with using thinner steel that you could bend in your garage.
Arduino -> oDrive serial connection keeps dropping due to noise, and Amazon has lost two separate ferrite ring orders. Why did I have to forget those on my digikey order? I've been mourning the loss of Radioshack and Fry's recently.
-
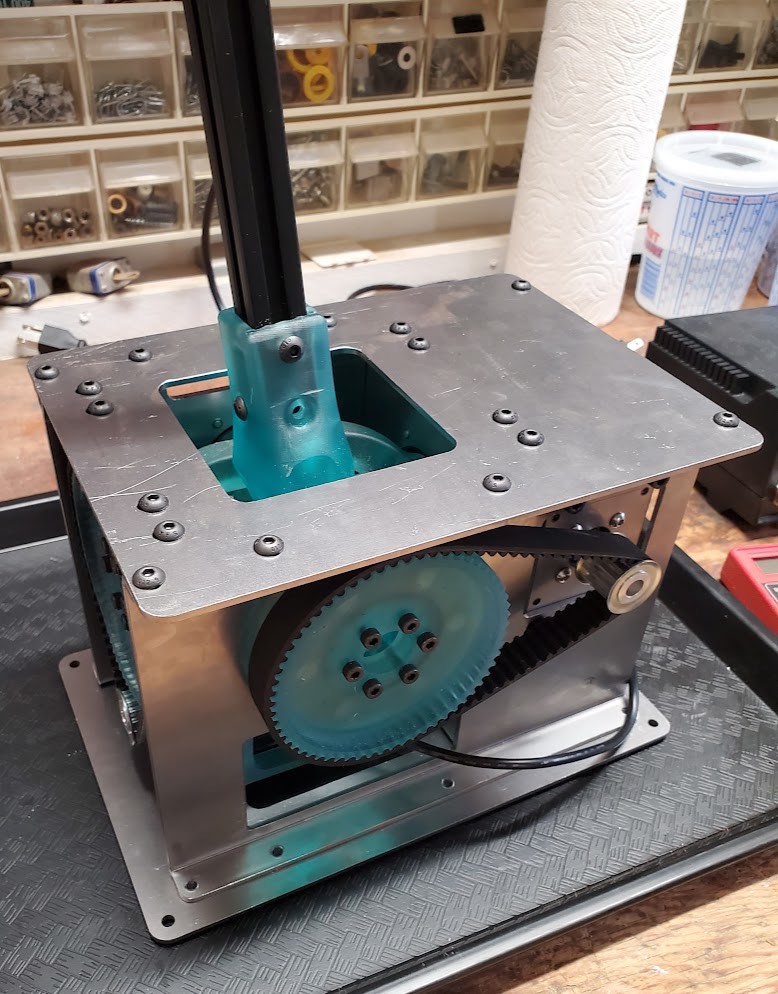
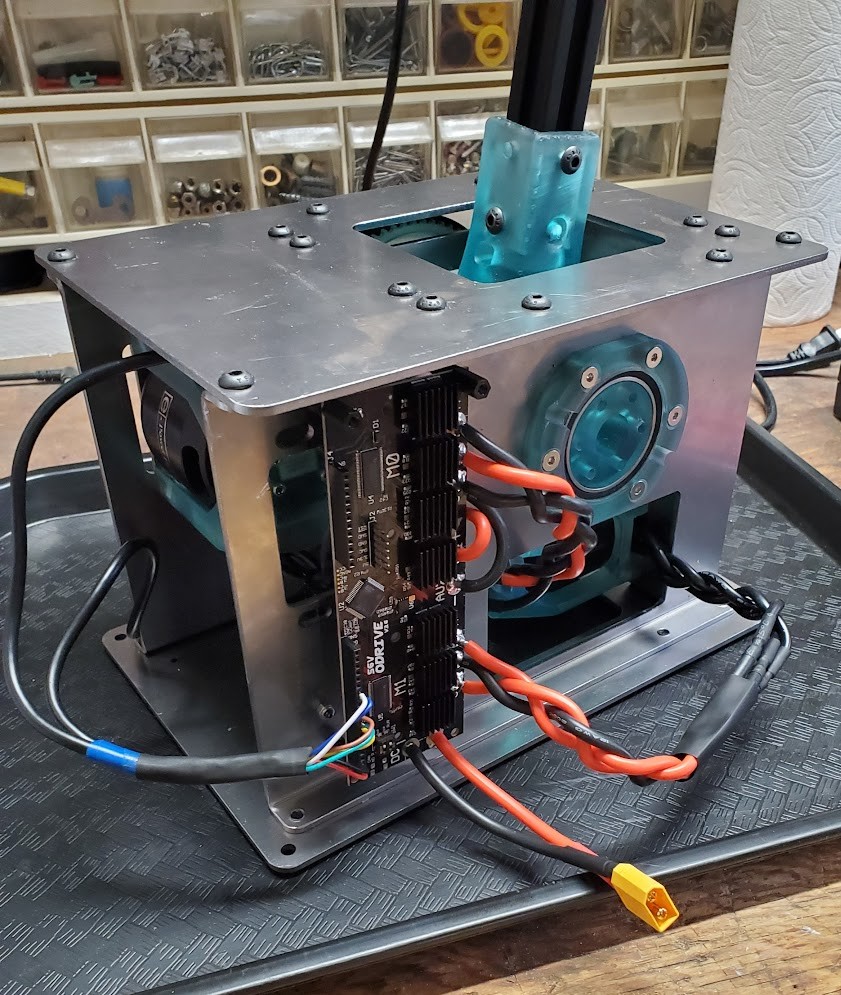
Update to my build.
Had the metal plates cut and bent by SendCutSend. I spent an afternoon deburring edges and tapping holes. The holes came slightly undersized and needed a pass with a drill before they were tapped.
I'm running the odrive off a 24v-350w power supply that currently runs my bass shakers. Motors are limited to 8A as the gimbal made some unnerving creaking sounds at 10A. Might need to get another psu since both motors at 8A will pull 380W and leave no headroom for the shakers.
Had some trouble with noise on the SPI lines disrupting the encoders, but rewired with shielded cables and they now work with the motors at "full" draw. Still waiting on ferrite rings for the motor leads which would help.
I'm very impressed with the sensitivity of the encoders. They react to the slightest pressure on the stick with no slop.
Currently my plan for the programming side is to run the odrive in torque mode and control it with
a teensy boardrunning this FFB library. (apparently the usb libraries used by the teensy are not the same as the standard arduino libraries and therefore not compatible with the ffb library without serious effort, so now I'm waiting on a arduino pro micro)Big thanks to propeler for all the work developing the design and making it freely available.
-
4
-
-
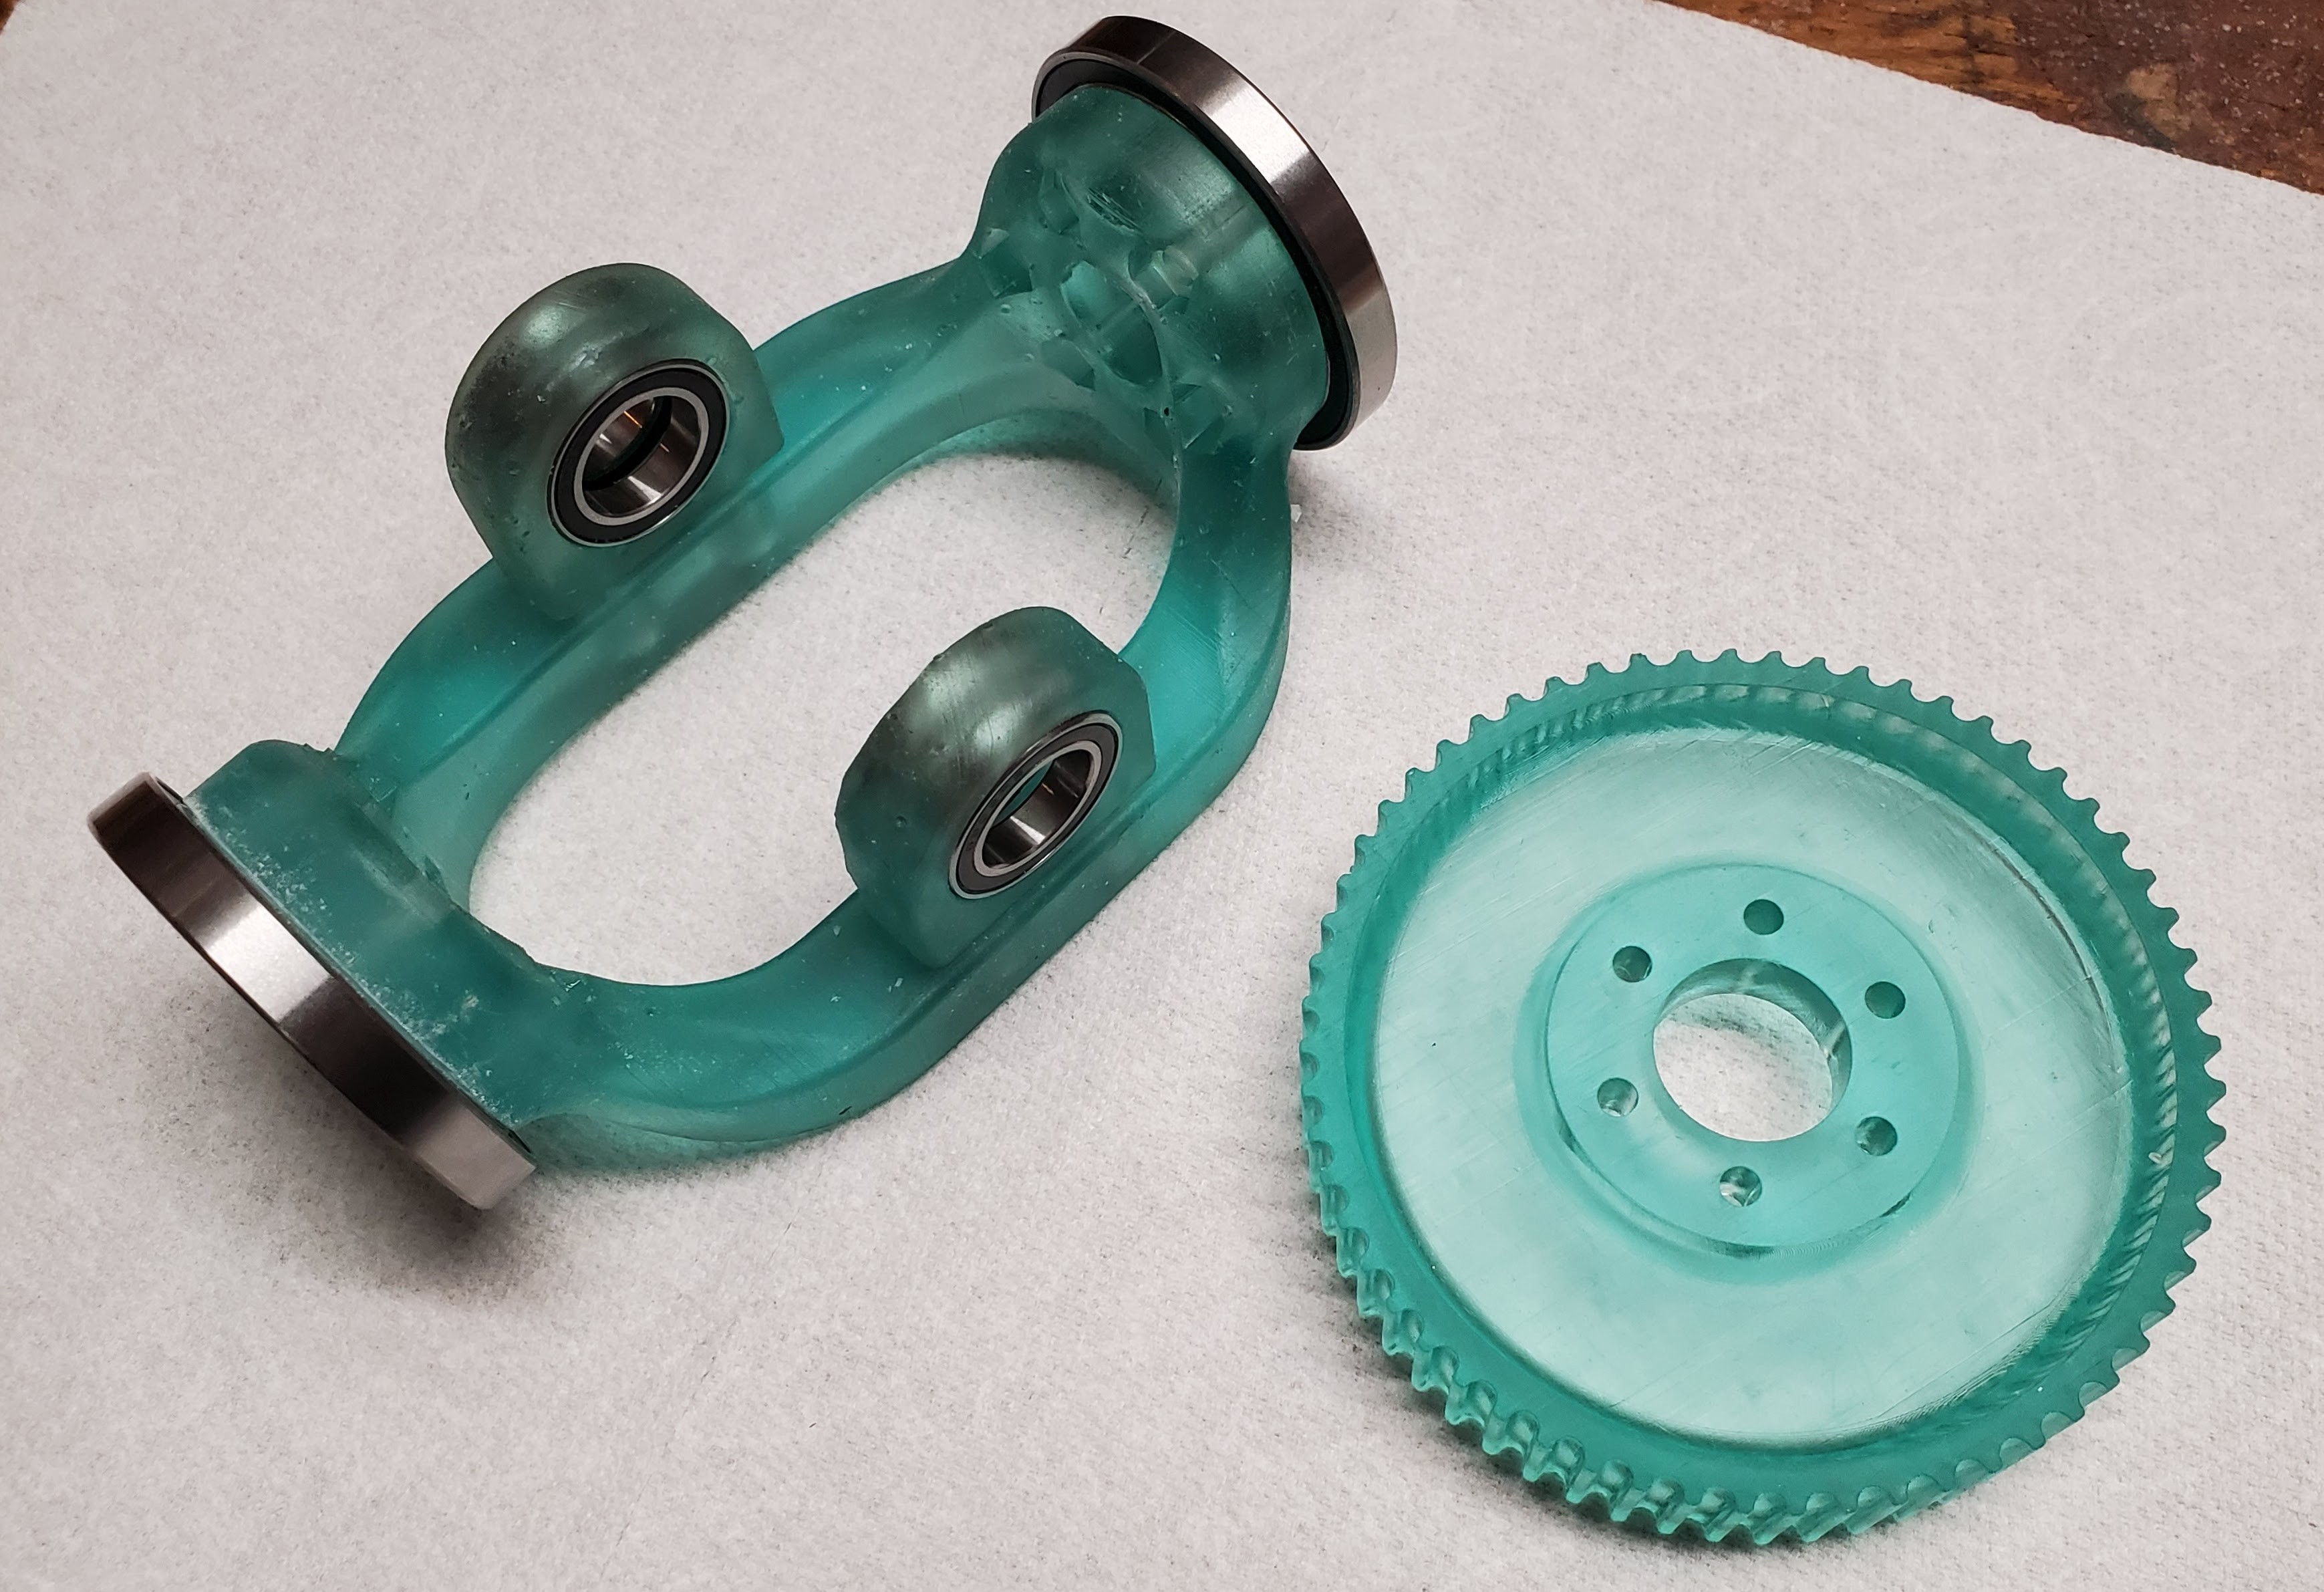
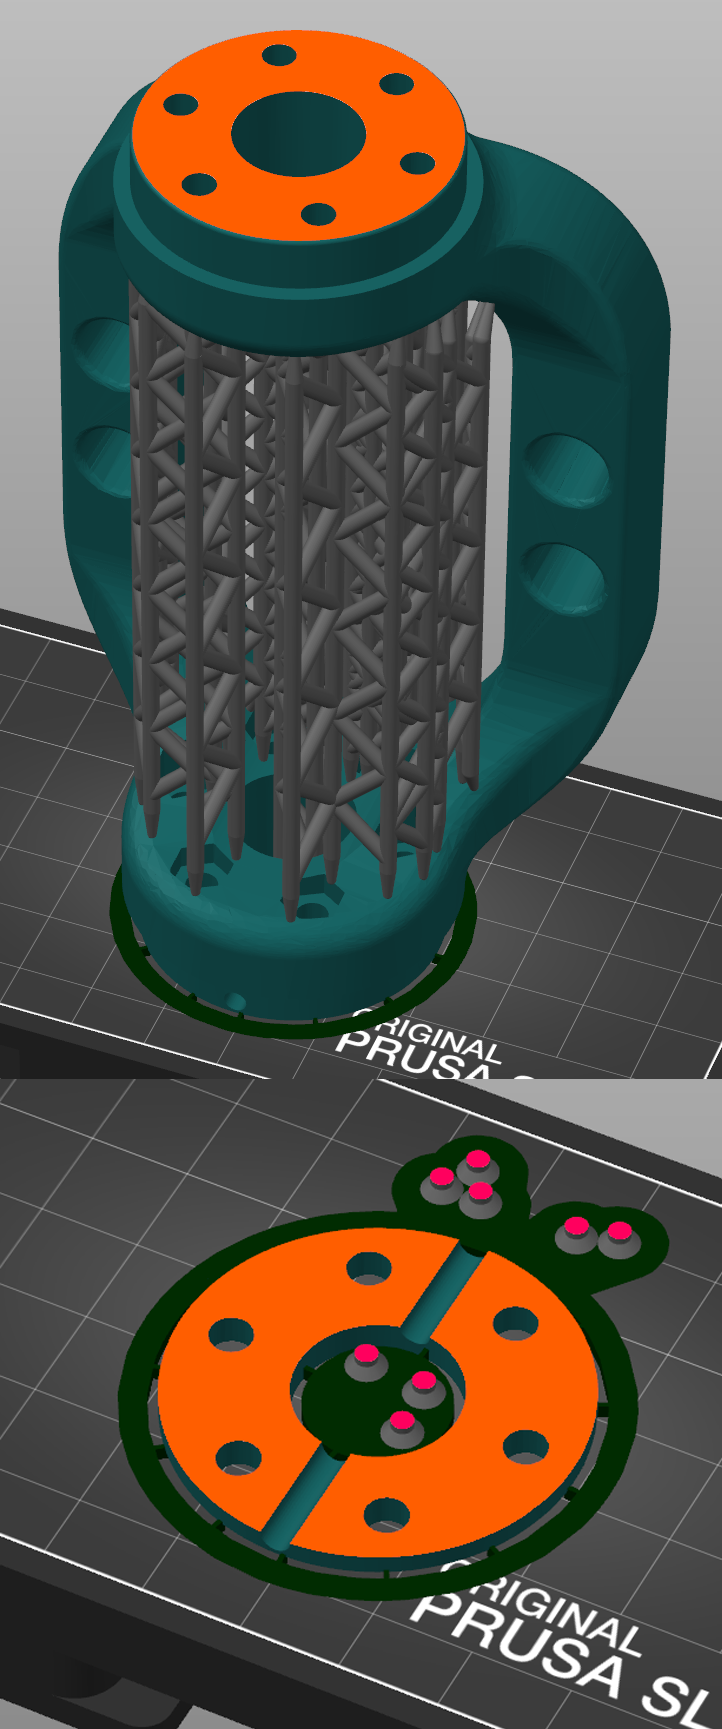
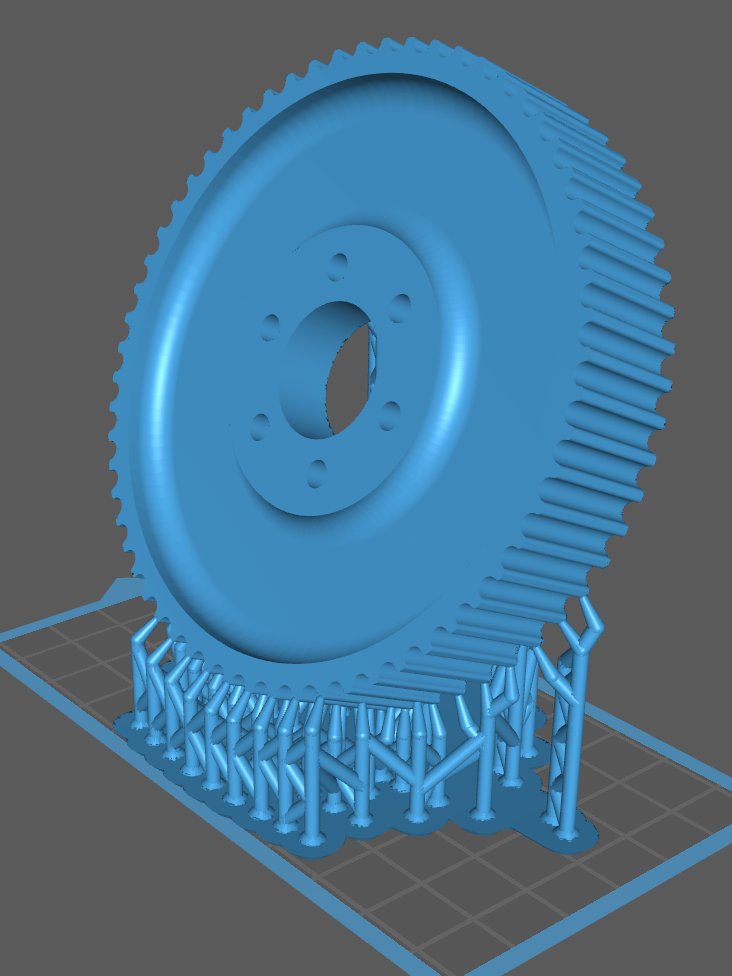
I'm starting a build of one of these using a resin printer. Using siraya blu/tenacious mix.
The frame arm needed some small modifications to get it to print. Once I have it all together and I trust the strength/dimensions of the print I'll post my modified/supported stls.
Planning on using an odrive, 6354-60kv motors with as5048a encoders.
-
2
-


G2 to Quest Pro (when is better actually better?)
in Virtual Reality
Posted · Edited by theperson
Kuject Design 18W Fast Charging Link Cable for Quest 2/Pro/Pico 4 16FT, with Separate Charging Port for Unlimited 120HZ PC/Steam VR Playtime, USB 3.0 Type A to C Cable Accessories for VR Headset https://a.co/d/dIIhYTJ
This is the one I have. It has not burned my house down.
For the record I have tried both the official expensive link cable and this other charging cable, and they both performed perfectly as far as visuals/bit rates, but the headset battery discharged in ~3hours.