tower59
-
Posts
28 -
Joined
-
Last visited
Content Type
Profiles
Forums
Events
Everything posted by tower59
-
Windshield fairing My son and I initially attempted to bend a 1 1/2" aluminum strip into the shape of the windshield fairing. We soon realized that the complex curves involved made this approach impossible. Then, we figured out that instead of working with straight strips of aluminum, we could cut curved pieces. This allowed us to make the complicated curves and angles work. After cutting out several pieces, we fitted them together with epoxy. Sanded, polished, degreased, and painted with official Blue Blasters paint (also known as Rustoleum Midnight Blue). Then, the next step was to precisely position the aluminum fairing on a wooden plywood jig to get the shape just right. We made a couple of extra arches to help lock down the position of the acrylic windshield. Next, we'll use poster board to make a template from which we'll cut the shape of the acrylic. We'll use the base template we made ourselves when we traced a real F/A-18 Blue Angel bird. We hope to use a heat gun to carefully bend a single sheet of acrylic over the canopy bow and then bond it to the interior of the aluminum fairing with E6000. Open to any suggestions!!! -Skip

-
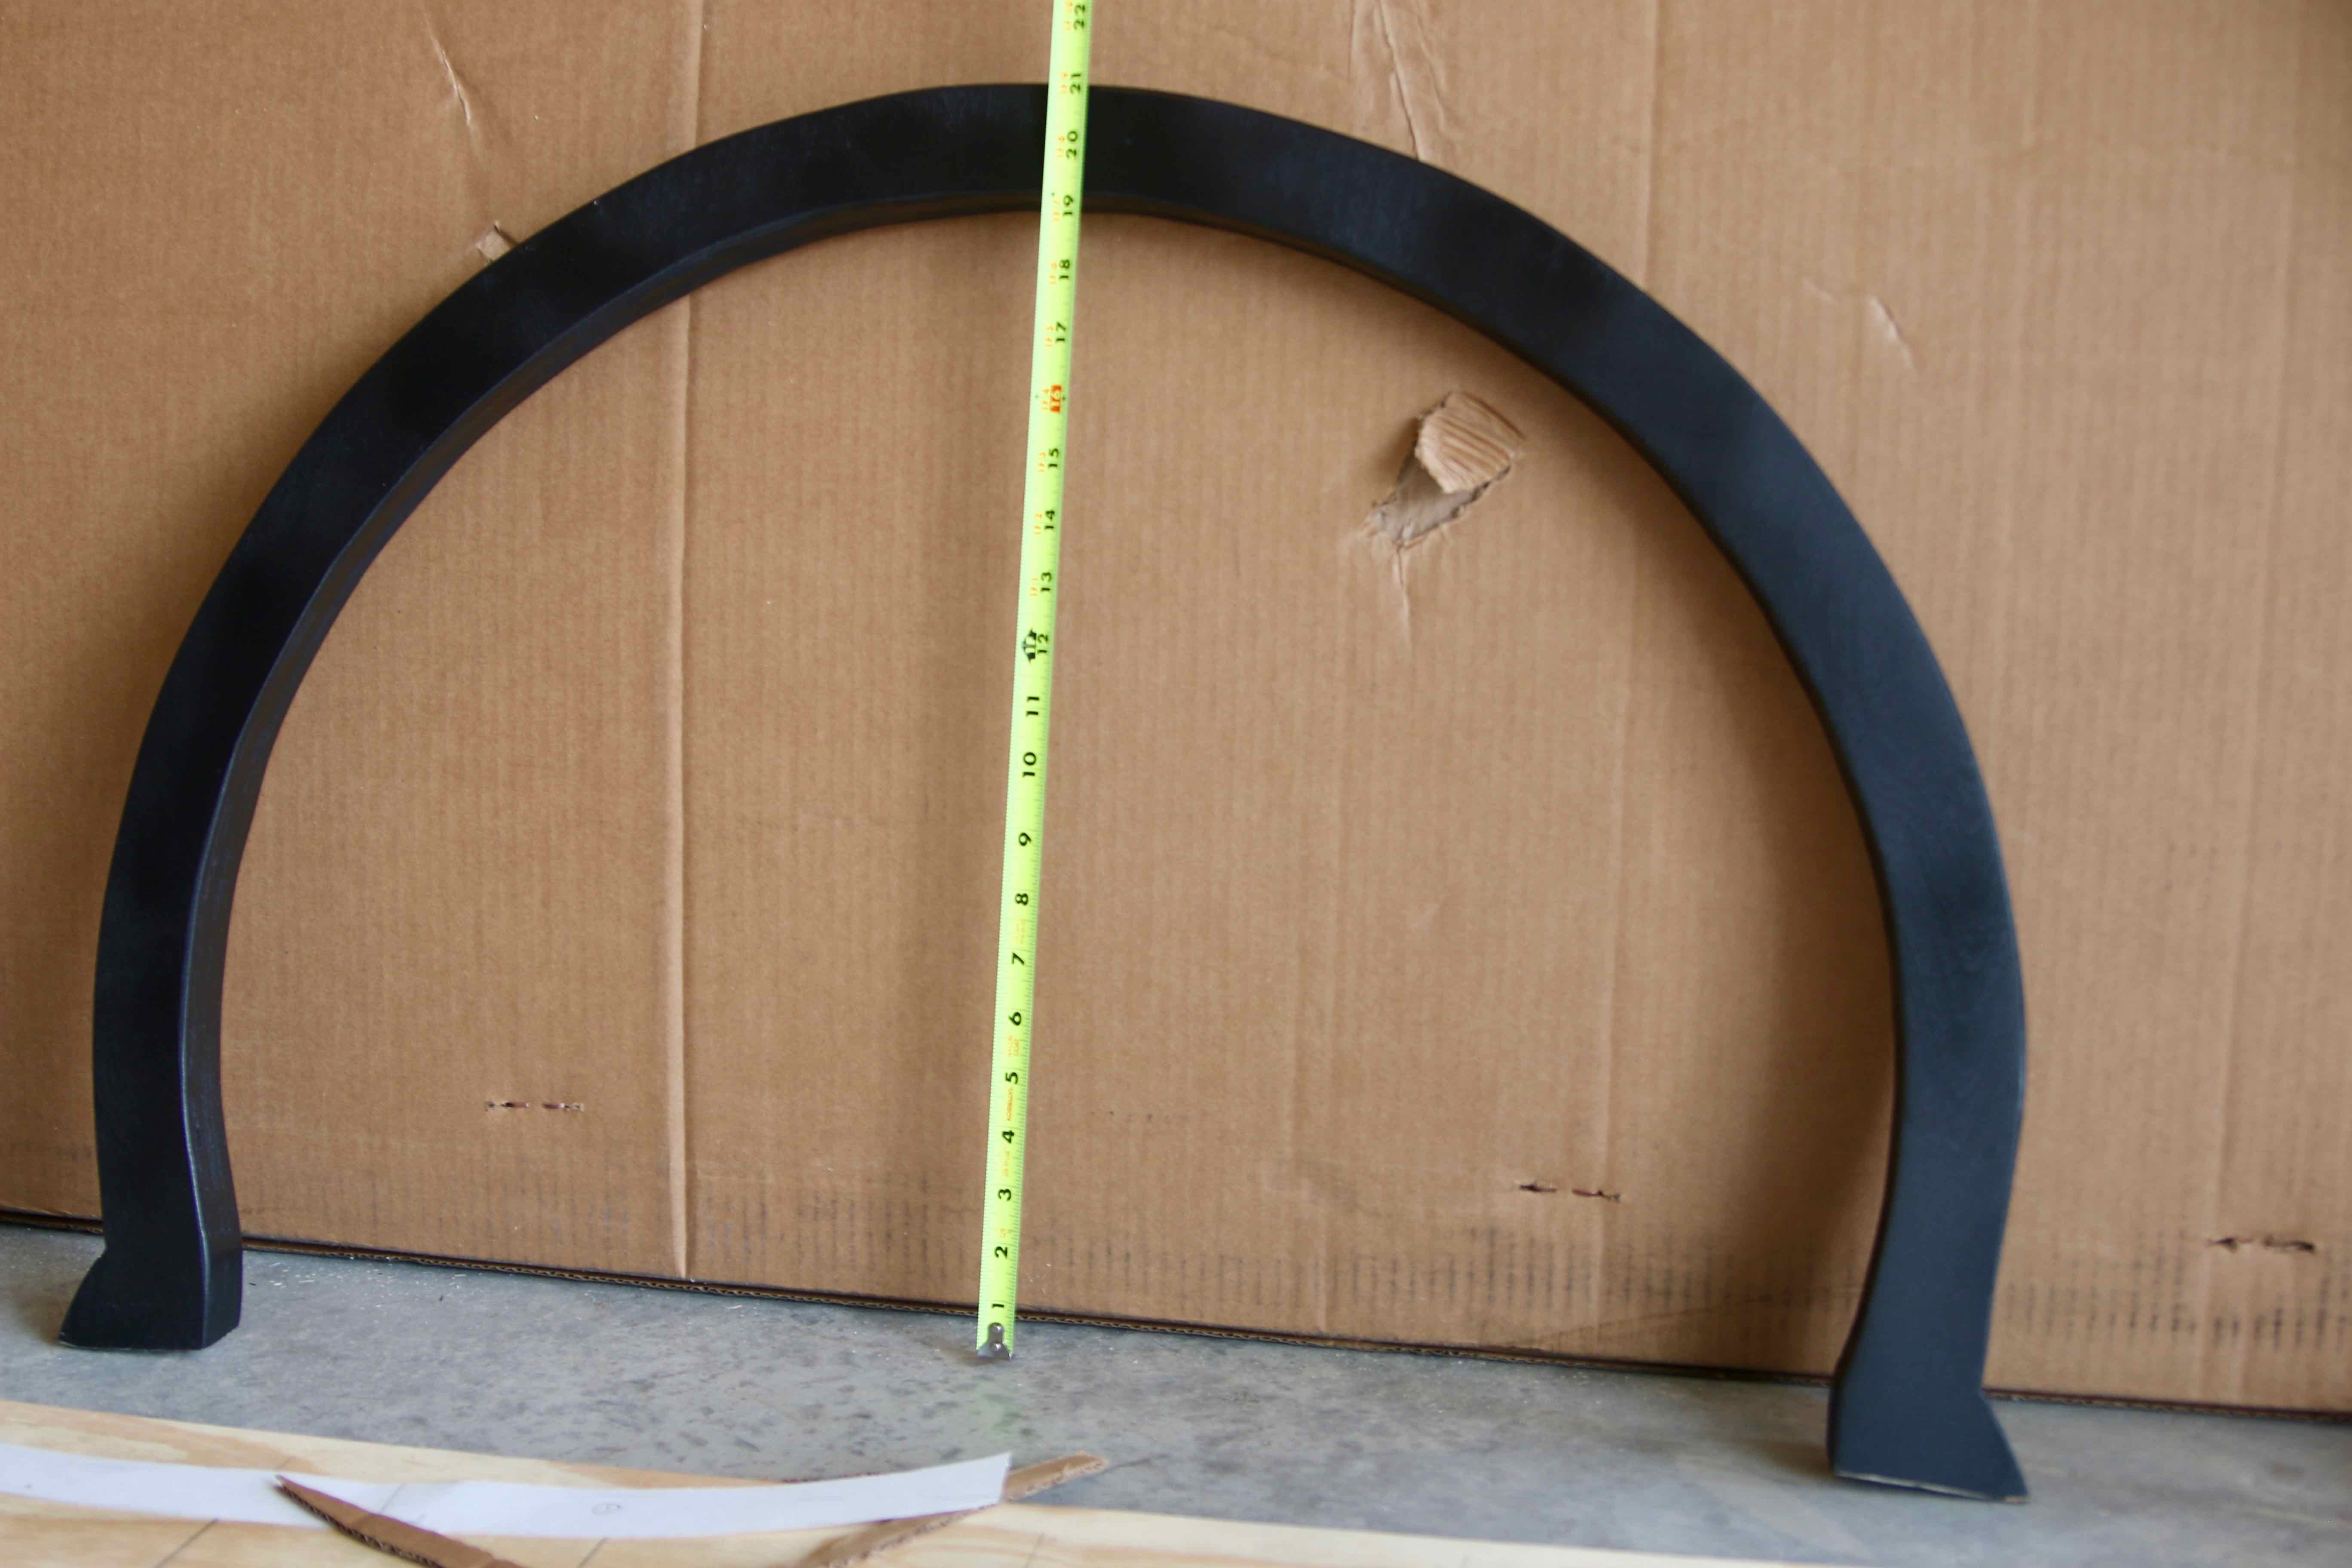
Canopy Bow My son & I have been working on the canopy bow. First, we glued together some cabinet grade 3/4" plywood and let it cure. Then, we used a trammel to draw an arc at 16" and 14", to form a portion of a circle. Note that the center point of the trammel was placed 6" above the base of the plywood, allowing for slightly more than a half circle. This is consistent with the actual shape of the canopy bow as best we could determine from photos, plans, and various measurements. The bow was rough cut with a saber saw, then shaped with a belt sander, then smoothed with a palm sander. A few coats of black paint and we're done. The trickiest part was getting the slight angle on the bow feet correct, since it is angled forward by about 12 degrees or so. Hope this might be useful to someone building their canopy bow! Next step is shaping the windshield frame from aluminum, which we'll then epoxy to the canopy bow. -Skip
-
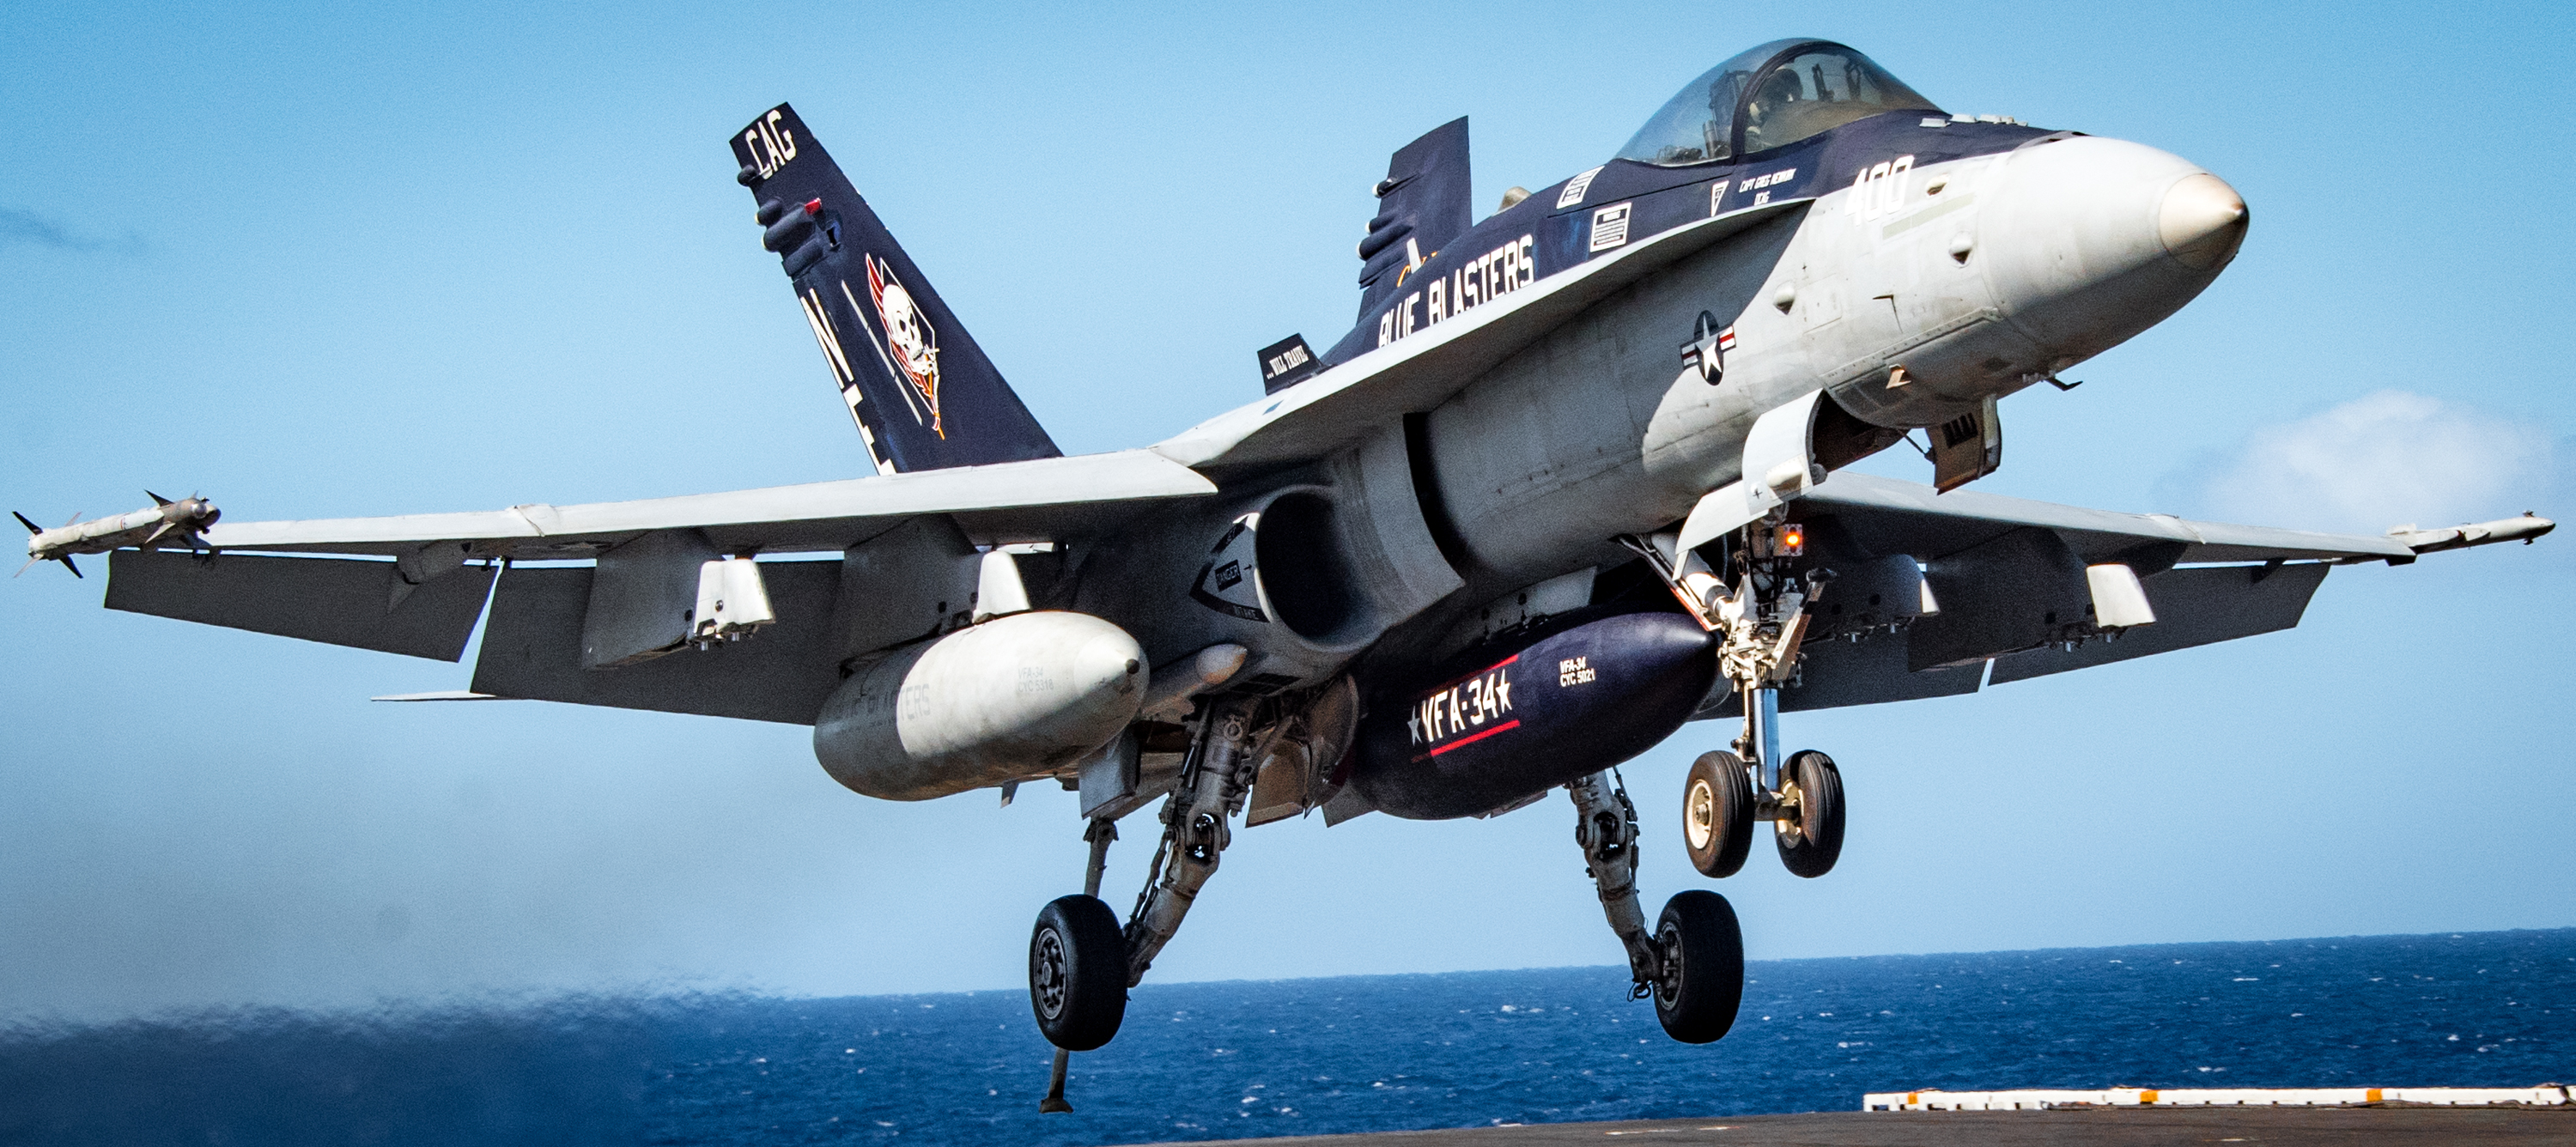
My son & I have started an attempt to build our version of the CAG bird from VFA-34. The plan is to make it realistic, but since we'll use VR we won't make cockpit switches and such operational. We're starting with a challenge- building a windshield. We've put together a working drawing that might be of use to others (attached). The measurements are harvested from open source plans, contributions from forum members (Baldrick & Garep), and most importantly, actual measurements we took ourselves. Thanks to Mr. Jim Hodgson of the Ft. Worth Aviation Museum, we actually got to measure a Blue Angels F/A-18A that they have on display! The windshield construction plan is to create a wooden jig on which we will form 1 1/2" wide aluminum strips into the windshield frame. Then, we'll (hopefully) be able to bend a large acrylic sheet over the canopy bow to form the curve of the windshield, and then epoxy the acrylic to the aluminum. Appreciate any comments and suggestions you may have as we try to fabricate our sim! -Skip F-18 Windshield SC19.pdf