
[MVP] Mugga
-
Posts
296 -
Joined
-
Last visited
Content Type
Profiles
Forums
Events
Everything posted by [MVP] Mugga
-
@Treker would love to do some Sabre flying with you! Have you checked out the MVP KOREA1952 Combat Server?
-
@BlackLibrary Thank you! IndianaShane spoke to me today and let me know that you had both had a discussion about the F86F Sabre sim pit and our difficulty with DCS BIOS last night. Appreciate your offer to help us out, very much.
-
Managed to blast through getting all of the switches and the potentiometer soldered up this evening. Next step will be to map the connection plug and then solder all of the leads into it. Apologies to all of the experienced and more professional electronics people out there. Some of my soldering was a little less than impressive, however, I got there in the end.
-
On the way home from work today, I stopped by the local electronics store and purchased all of the required items to complete the left hand control panel, which is out of an original Australian CAC CA27 Mk31 Sabre. I also purchased some interface connectors and will take some time to build electrical wiring harnesses for each control board - aiming to keep the wiring as organised and professional as possible. I have never soldered wiring to these types of connectors, so I will be needing to do some research for methods etc! Anyone with experience doing this, feel free to post a reply, it would be appreciated. Many thanks to our MVP Senior Members IndianaShane and Xpendable172 who both spent a few hours yesterday evening assisting me with getting the Arduino controllers setup and configured, along with DCS BIOS. I am pretty much a beginner with all of the programming side, however, it has been awesome to have the assistance of the MVP boys who have experience with both. We also discovered that the DCS BIOS controller set for the F86F Sabre has never been tested and will need to be updated as we go through this journey. We have already discovered several switches which do not function properly and has required script updates to the DCS BIOS F86F Sabre files to get them working. Again, I have been incredibly fortunate to have the assistance of IndianaShane and Xpendable to resolve these issues.
-
Thank you @Treker appreciate the kind words. I've thought about it, but it would just add another workload. Between my real-world work, family and this hobby... I am short of time already! Are you a F86F Sabre guy in DCS World yourself?
-
I have pulled the bomb angle adjustment flip cards apart this evening and spent some time straightening them out, as they were bent and dinged up. Next step will be to scan each of the plates so that new artwork faces can be made. The hinge top assembly needs to be paint stripped and cleaned up and painted.
-
Today I managed to get two coats of black paint onto the bomb angle adjustment box, which sits on top of the instrument panel glare-shield on the left hand side. After it receives another final coat, it will be given two coats of clear, which should give it a durable coating. Once the painting is finished, I will install the new electronics and wiring harness, which connects it to the Arduino controller. And will then refit all of the brass hinge accessories that hold the flip cards in place.
-
Managed to source an original F86 Sabre Undercarriage Retraction Selector unit! I have been searching for an original part for some time, so this is an exciting score.
-
The Ejection Seat is back from media blasting and has been given a solid epoxy primer coat in preparation for its final paintwork coatings. However, before I can do that, I need to complete the seat accessories tear down - these include the arm-rests, ejection actuator handles and associated connecting rods and bell-cranks. Once all of these have been reduced to individual components, they too will be media blasted and given epoxy primer coats. I have been asked why I am going to such an extent with media blasting and epoxy priming? Yes, I could have just painted over the existing finishes, however, there was some aluminum corrosion which was bubbling in places that needed to be removed. In addition, just about all of the steel components are cad plated, and after of 70 years of use and storage many have started rusting and have needed proper treatment to prevent them from further deterioration. The media blasting was done with aluminum oxide. Up for debate is what colour I will paint the Ejection Seat... All black or all silver? I cannot decide atm.
-
MVP KOREA1952 COMBAT SERVER - SUI-HO DAM RAID MULTIPLAYER STRIKE MISSION FRIDAY, 29th JULY @ 20:00UTC (USA) ----------------------------------- The Attack on the Sui-Ho Dam was the collective name for a series of mass air attacks during the Korean War on thirteen (13) hydroelectric generating facilities by the United Nations Command air forces. Primarily targeting the hydroelectric complex associated with the Sui-Ho Dam, the attacks were intended to apply political pressure during the stalled truce negotiations at Panmunjeom. Heavily defended by Soviet Air Force MiG15's and major anti-aircraft guns, the hydroelectric targets were subjected to 1,514 attack sorties, conducted jointly by the US Air Force, US Navy and US Marine Corps and South African Air Force. This was the first time that the separate air arms had worked together on a massive scale during the Korean War conflict. The KOREA1952 skies will come alive on Friday 29th July from 20:00UTC as we go back in time to recreate the Sui-Ho Dam Raid, targeting six (6) hydro-electric systems and six (6) thermal electric power generation plants. Each power generation facility is heavily defended by anti-aircraft gun emplacements and will be subject to strong air cover by North Korean and Soviet Air Force MiG15's, which will be dominating the skies. Naval TASK FORCE 77 will be responsible for executing the bombing attacks, launching P47 Sea Fury, SpitIX Seafires and P51 SeaStangs from the HMS Triumph aircraft carrier. Participants can choose to download the event MOD PACK, however it is not required to take part in the mission. Combined UN air forces will provide top-cover, launching F86F Sabres from Gudata and Sukhumi Air Bases in a coordinated effort to overwhelm the North Korean defenses. Combat operations will commence at 20:00UTC with the KOREA1952 Combat Server starting at 7:30am daylight, June 23rd 1952. Weather is set to replicate historical conditions, with heavy low-level broken cloud and a temperature of 25 degrees C. EVENT HIGHLIGHTS - Commencing Friday 29th July @ 20:00UTC (USA) - Maximum of 80 players - Open to pilots of all experience levels - Open to individuals and squadrons - North Korea versus Allied UN Forces - MiG15 versus F86F Sabres - P47 Thunderbolt & P51 Mustang Bombers - DCS World Caucasus Map - DCS World Open Beta - SRS Communications EVENT MOD PACK Available for download on the MVP KOREA1952 Discord. EVENT LIVERY PACK Available for download on the MVP KOREA1952 Discord. REGISTER YOUR SLOT TODAY! Pilots are asked to register their participation on the MVP KOREA1952 Discord. JOIN THE KOREA1952 DISCORD https://discord.gg/ht5uVAppvT
-
Got some time today to start on the restoration of the left hand side console control panel, which houses a range of old-school switches and rheostats which control cockpit climate control heating and air conditioning, the Lateral and Longitudinal Alternate Trim controls services and the Flight Control Hydraulic Reset and Alternate system reset switches. The panel is constructed of an aluminum back-plate and a perspex cover sandwich, which is engraved with lettering on the back of it. It does not appear that this panel has any back-lighting at all, which makes this one a little easier to refurbish. Steps for today will be to paint strip the backing plate, alumi-prep the plate and then prime and top coat in black. The perspex cover plate is a little more difficult and some consideration needs to be given as to how it can be restored. The face can easily be polished to a like new state, however, the back of the perspex layer has adhered to the old black paint in places where there has been pressure applied by the panel screws etc. I am not sure the old black paint can be removed easily without damaging the perspex. My guess is that the black paint is nitro-cellulose which was used commonly with all the old warbirds, in which case, I may be able to gently remove the paint by carefully rubbing with thinners. If you would like to build your own panel - Click to Download Panel PDF Scan PANEL DIMENSIONS: Total Length: 314mm Left Width: 120mm Right Width: 92mm The above screenshot is courtesy of Chucks Guide for the F86F Sabre.
-
Dropped the Ejection Seat off today at the media blaster, the next time I see the seat it should be looking factory new!
-
Spending some time thinking about how the forward cockpit assembly will come together. Inside the base of the seat is an air driven seat separation drive, that is used to pull a triangular webbing tight, thus forcing the pilot from the seat at a designated height (baro) or on manual activation. The anchor bolts were all frozen in the unit and it was impossible to get access through the inspection panel at the bottom of the seat. I decided to drill out the seat bottom reinforcement that conceals the unit, which gave full access for removal. At the top of the seat, I removed the galvanised steel canopy breaker assembly, which was a modification made to the NAA Ejection Seats towards the middle of their service life. This was done, to enable the seat to eject through the canopy perspex, instead of requiring canopy separation prior. The F86F Sabre used a relatively complicated method of ejecting. Unlike modern seats, where the pilot simply pulls one handle, the old-school NAA seats required the pilot to first initiate canopy separation, then the pilot had to pull himself upright into the seat with his feet on the foot rests at built onto the seat, then the pilot initiated the actual ejection of the seat, then once tumbling, the pilot had to initiate separation from the seat. There are some really interesting accounts of pilots describing the process and their experiences on the web. All of which show the system was rather complicated. Later seats automated everything. Last item I need to get off the seat is the pilot safety harness inertia reel and its associated bowden cable. Once this has been drilled out, I can then take the seat to a blasting shop and have it material blasted, which will remove all paint, primers and surface corrosion. I will then give the entire seat an acid bath, then alodine coating, then it will be repainted silver with several coats of clear coat to protect it. I will then take it to an upholstery shop to have the foam seat backs and base made up. These will be constructed using high-density foam backings, with layers of softer foam added for comfort. I am setting the goal of having the seat complete by the end of August. Start the countdown! Pushed on and got the headrest foam removed today and the pilot harness inertia reel bracket and assembly removed. The seat is now ready to be sent off for media blasting and then paintwork. Once that has been completed, all of the seat accessories need restoring and reinstalling. I pulled the left and right hand side arm-rest assemblies out of storage today and have brought them home. I will tear these down this week and restore them. All new paintwork, hardware and upholstery for the arm-rests.
-
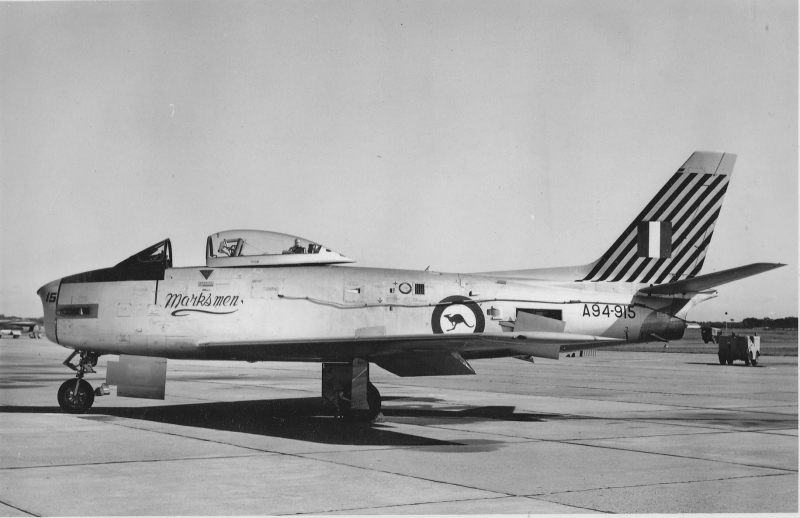
Cockpit panel assemblies including the instrument panel, left and right hand quarter panels and throttle quadrant. All of these are from an Australian Commonwealth Aircraft Corporation CA27 Sabre. There are some subtle and major differences between the US built North American F86F Sabre, especially with the Throttle Quadrant. The Australian Sabres used a Rolls Royce Avon engine and the throttle quadrant was setup with a 'RELIGHT' handle, whereas the F86F Sabres did not. Purchased a right hand console A4 Sight Test Plug Tray and a left hand console instrument back-panel. Again, there are some subtle differences between the Australian CAC CA27 Sabre and the NAA F86F Sabre. The left hand instrument panel back plate is as rare as hens teeth, so extremely lucky to have acquired one!
-
Apologies for this being out of sequence. Some photographs of the work tearing down the Ejection Seat and removing the ejection sequence accessories etc. All of this work was in preparation for removing everything so that the seat could be sent off for media blasting and painting.
-
Acquired a Control Stick locking arm. This is located at the top of the centre pedestal. When the aircraft is on ground, the locking arm can be extended from the panel and locks the control stick assembly. Also purchased was a perforated air conditioning rail guard. Unfortunately, they only had one side not both.
-
Purchased a NOS F86 A4 Gunsight Glass Element to replace the perspex unit that was installed in the forward cockpit frame that I acquired.
-
Making slow progress on then refurbishment of the Ejection Seat handles, everything gets media blasted, primed and painted. In the case of the Ejection Handles, they get painted Caution Yellow, then black stripes applied, then the assembly is given four coats of 2k clear to provide a durable protective layer.
-
Purchased an original 1951 North American Aviation ejection seat cushion. Made from some weird 1950's fire retardant material and designed to provide specific cushioning properties to assist the pilots spine during an ejection sequence. Again, its just incredible that these NOS parts have been hidden in warehouses etc.
-
After almost two years of searching, I managed to track down a slightly banged up A4 Sight Gun Bomb Rocket selector, removed from a Hellenic F86 Sabre! Original components for the A4 Sight are almost impossible to find as most have been scrapped and recycled by now. The only component I am missing is the Wind Adjustment unit, so still looking for that one! Sourced an original Weapons Control Panel from 1951, that gets installed on the centre pedestal console in front of the control stick and between the pilots lets/feet. I have spent some time researching these as there were a multitude of variations etc. This one is as close as I have been able to find to the panel used by the DCS F86F Sabre.
-
Managed to source an original F86F Sabre Main Canopy assembly for the Sim Pit build. The plan is to have the canopy able to be opened and closed using the cockpit switch. Purchased an F86F Sabre Main Canopy Actuator Motor (which is actually overhauled for flight use) which can be installed into the Main Canopy that I have for the Sim Pit build. Again, the goal will be to have the canopy able to open and close using the cockpit switch hardware.
-
After months of searching the internet and contacting a host of aircraft salvage yards, I have managed to source an original, albiet a little beat up, ADF control unit for the right hand console. Like all of the avionics in the Sim Pit, they are only really needed for their panels and knobs etc. Each unit will be pulled down and carefully modified so that each knob, dial, light, tuning handle etc are all Arduino driven and translated back to DCS Bios.
-
Long overdue update on the MVP F86F SABRE SIM PIT: I managed to track down a complete control stick assembly that was in great condition and including the original electrical harness, which will make adding an original grip so much easier! The control assembly was removed at some time from a Canadair CL13 Sabre. Canada built the F86 Sabre under license from North American, as did Australia through our Commonwealth Aircraft Corporation factory. As with all other parts of the Sim Pit build, the aim is to use all original aircraft equipment, so that the finished product looks exactly as the real aircraft does. The control assembly provides a range of options with respect to installing force feedback and movement sensors or gas-struts etc, given it has strong control connection horns etc.
-
Bump - a resolution on this would be incredibly beneficial.
-
MISSION UPDATE - Version 4c BETA MVP KOREA 1952 | PVP MULTIPLAYER COMBAT SERVER ----------------------------- Introduction of new North Korean Field Airbases, with piston fighter bombers available as hot starts. Both field airbases have fuel, ammunition and repair functionality. All aircraft are pre-configured with full bomb load outs and fuel. All slots tested and able to takeoff and land with sufficient safety margin. Field Airbase 1 - Smirnoff Group 4 x USSR Yak 9 Fighter Bomber (Spit IX CW) 4 x USSR Tu2 Bombers (Mosquito) Field Airbase 2 - Beluga Group 6 x USSR Il2 Fighter Bomber (P47) Field Airbase 2 - Stolichnaya Group 4 x USSR Tu2 Bombers (Mosquito) For more information, visit the MVP KOREA 1952 Discord Server. KOREA 1952 Discord: https://discord.gg/frKCh9PGCN COPYRIGHT NOTICE: Squadron Artworks are copyright (c) to MVP and may not be used without prior permission. All rights reserved.
![[MVP] Mugga](https://forum.dcs.world/uploads/monthly_2021_03/MVP.thumb.png.398f5fa5eaf57799a81da76f4cc64fc1.png)
