haz
-
Posts
5 -
Joined
-
Last visited
-
VKB MK IV T-Rudder New Owners and Veterans Q&A
haz replied to Weedwacker's topic in VKB-SIM Flight Gear
Damping force is ok. There is a Damping -/+ rotary on damper (setup the damping force) -
Fasu You can try using damper for heli
-
VKB MK IV T-Rudder New Owners and Veterans Q&A
haz replied to Weedwacker's topic in VKB-SIM Flight Gear
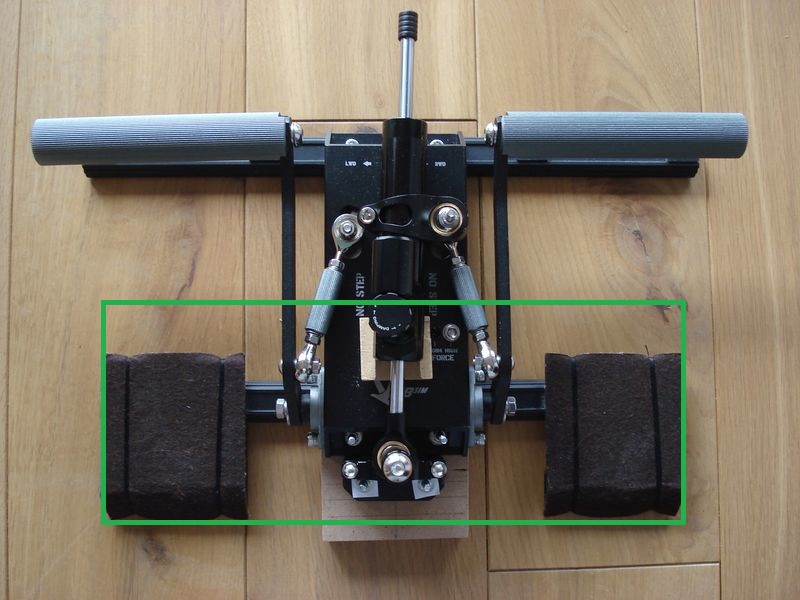
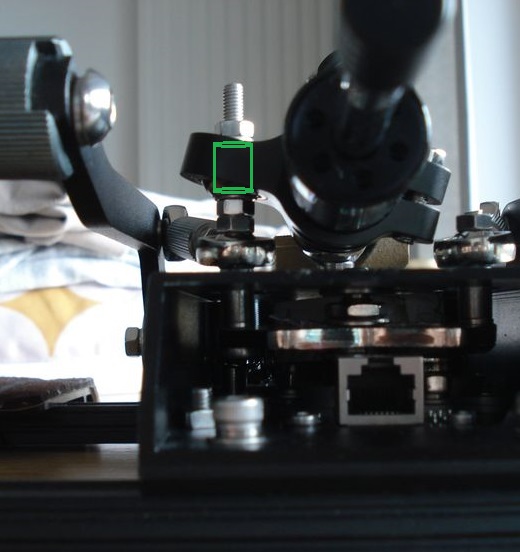
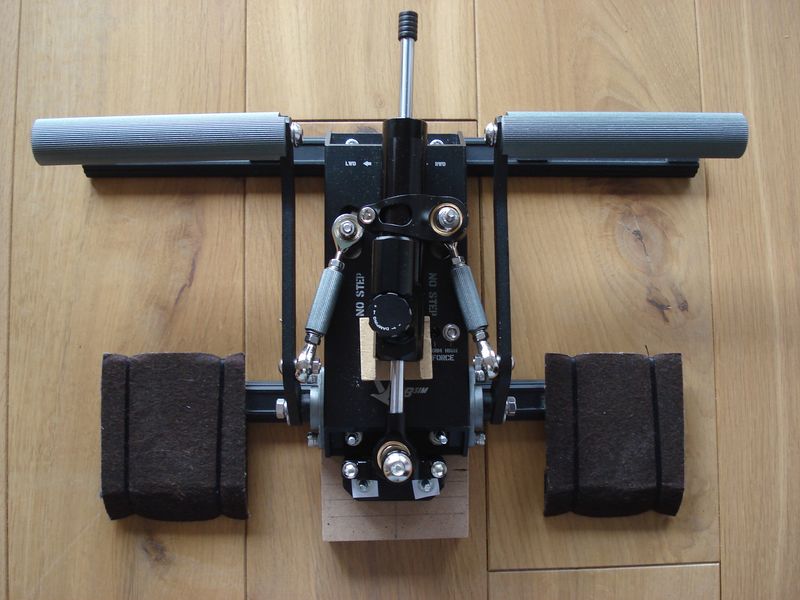
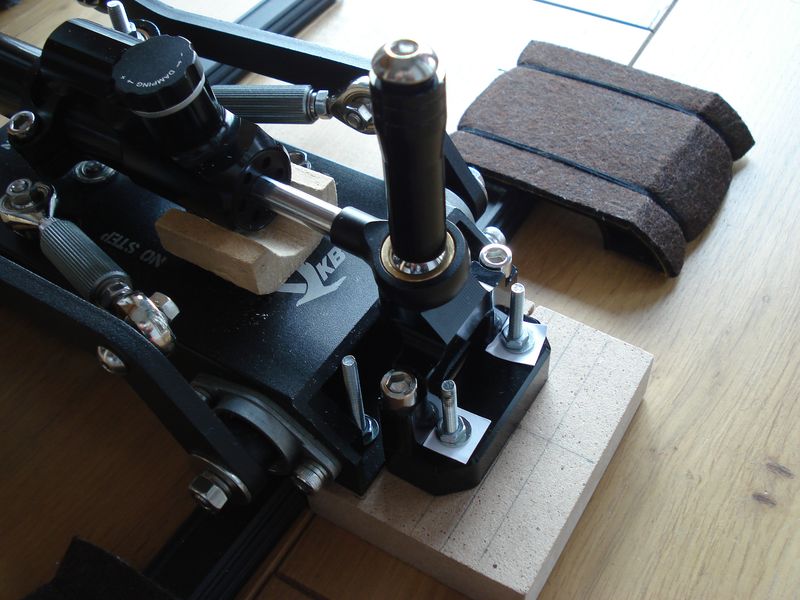
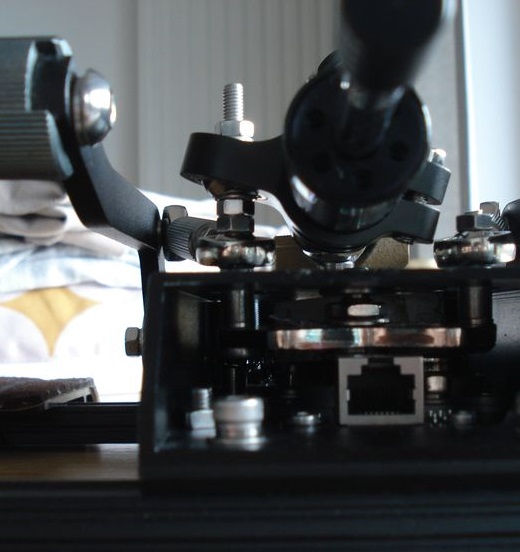
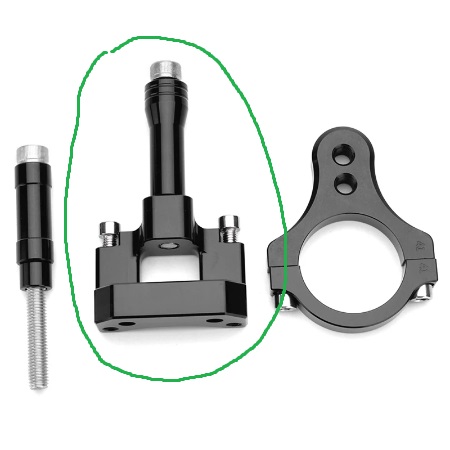
Yep. This is the same bolt that comes out of the CAM, only longer. This Upgrade is fully reversible. You have to unscrew the bolt from the CAM and go to the "bolt shop" and find a longer replacement. (With a same type of thread) You have to check if the new longer bolt fits the CAM thread. In my case, the original short bolt was also glued, but finally I managed to unscrew it. I recommend using a longer and wider wooden pad and additional bolts for mounting.("non-bending" metal pad would be best) (green lines on images 01 02) In the last version, I have it the width of the pedals exactly to fill the range of oblong holes at the bottom. But You just gonna get rid of heelpads. The structure is more stable then. You also need to attach some anti-skid skickers like the original has if the peddals will sit on the floor. The gasket that needs to be inserted between the bolt and the damper is problematic. I haven't found the right size in the store. So I wrapped the screw with the strips of paper and duct tape. (green tube on image 03) (...) how long of a bolt did you buy? -58mm without a head but it's a bit too long (...) can measure the inner diameter of the hole? -8mm diameter sizes are not 100% accurate (based on my pencil sketches)
-
VKB MK IV T-Rudder New Owners and Veterans Q&A
haz replied to Weedwacker's topic in VKB-SIM Flight Gear
Speeding PRO Motorcycle Store on AliEx -
VKB MK IV T-Rudder New Owners and Veterans Q&A
haz replied to Weedwacker's topic in VKB-SIM Flight Gear
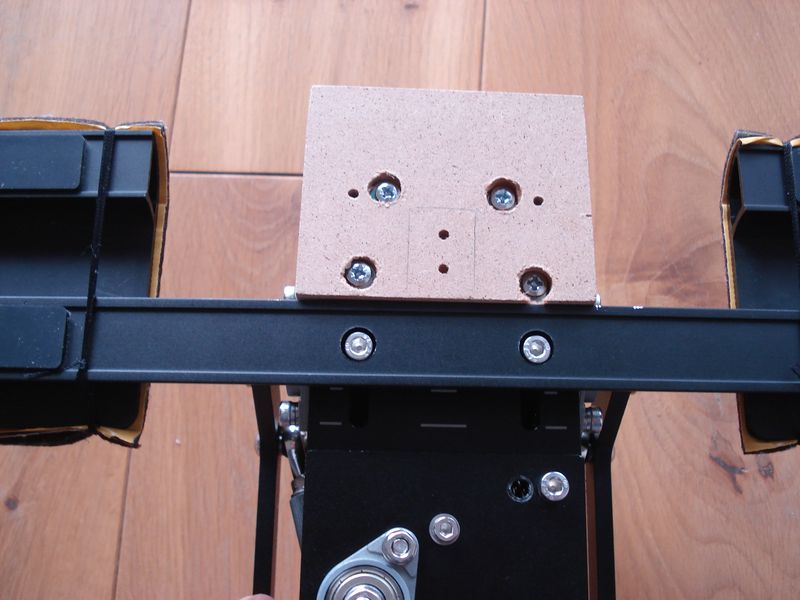
I used a wooden pad under the base. (I did not want to drill holes in the base). It needs some fine-tuning. There is no space for mounting there, bolts are too close too the edge, so the pad flex up to 0,5mm. It has to be turned into metal or replaced by longer one, the heel pads need to be replaced then...Apart from the fact that the pad flex a little it works great. A HUGE increase in precision. There is no center "floppiness" now. I use it for fixed wing. It can be turned to helo setup easy without dismonting by tighten the TENSIONER screw (tiny hole in the side of the base) and setting required damper "power". I used the same damper as with the MFG Replika Gear crosswind upgrade. (I recomend it to all MFG users) You attach the damper to the central mounting that you have to do yourself, the end of the mounting can be purchased with the motorcycle damper kit (marked in green). A some kind of gantry is also needed so that the damper does not fall on the base. You also need a longer screw that comes out of the CAM, a set of nuts and washers ... I wonder what effect will be created when the damper is mounted the opposing direction, but it is probably better to have the damper weight connected to the CAM instead of to the base. It has a more heavy/mechanical feel. it is also parallel to the base in the latter case it would have to be at an angle.