ITR1102
-
Posts
53 -
Joined
-
Last visited
Content Type
Profiles
Forums
Events
Everything posted by ITR1102
-
Thanks for the link to the RWR! I hadn't seen that before. I haven't begun looking for proper screens for the VDI or HSD yet but what I have done is use older iPads as monitors using SpaceDesk (free app), just for the VDI and HSD. I was just hoping that when I got to the point of making the instrument panel housings that the iPads I have would fit. Can you share a link to the 5x5 screen you found for the VDI? I found these a while back. I'm not using them but thought I'd share for anyone not wanting to start from scratch. https://www.printables.com/@DX6_393740/models
-
Hope this helps!

-
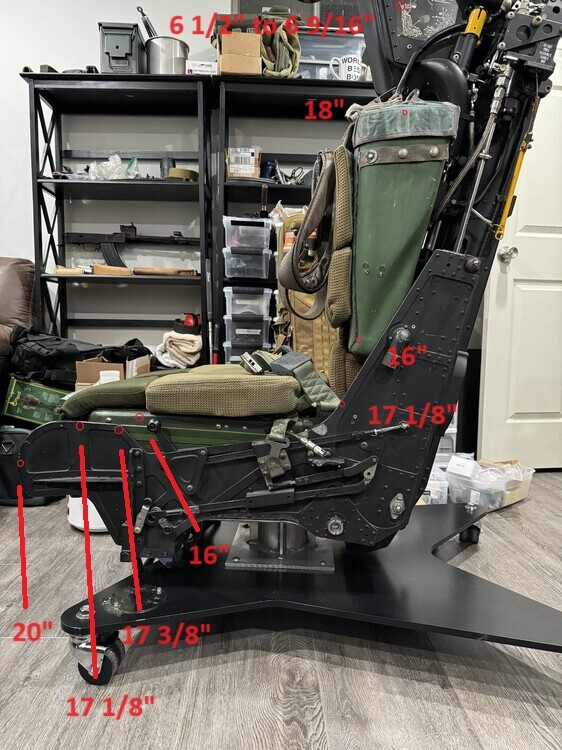
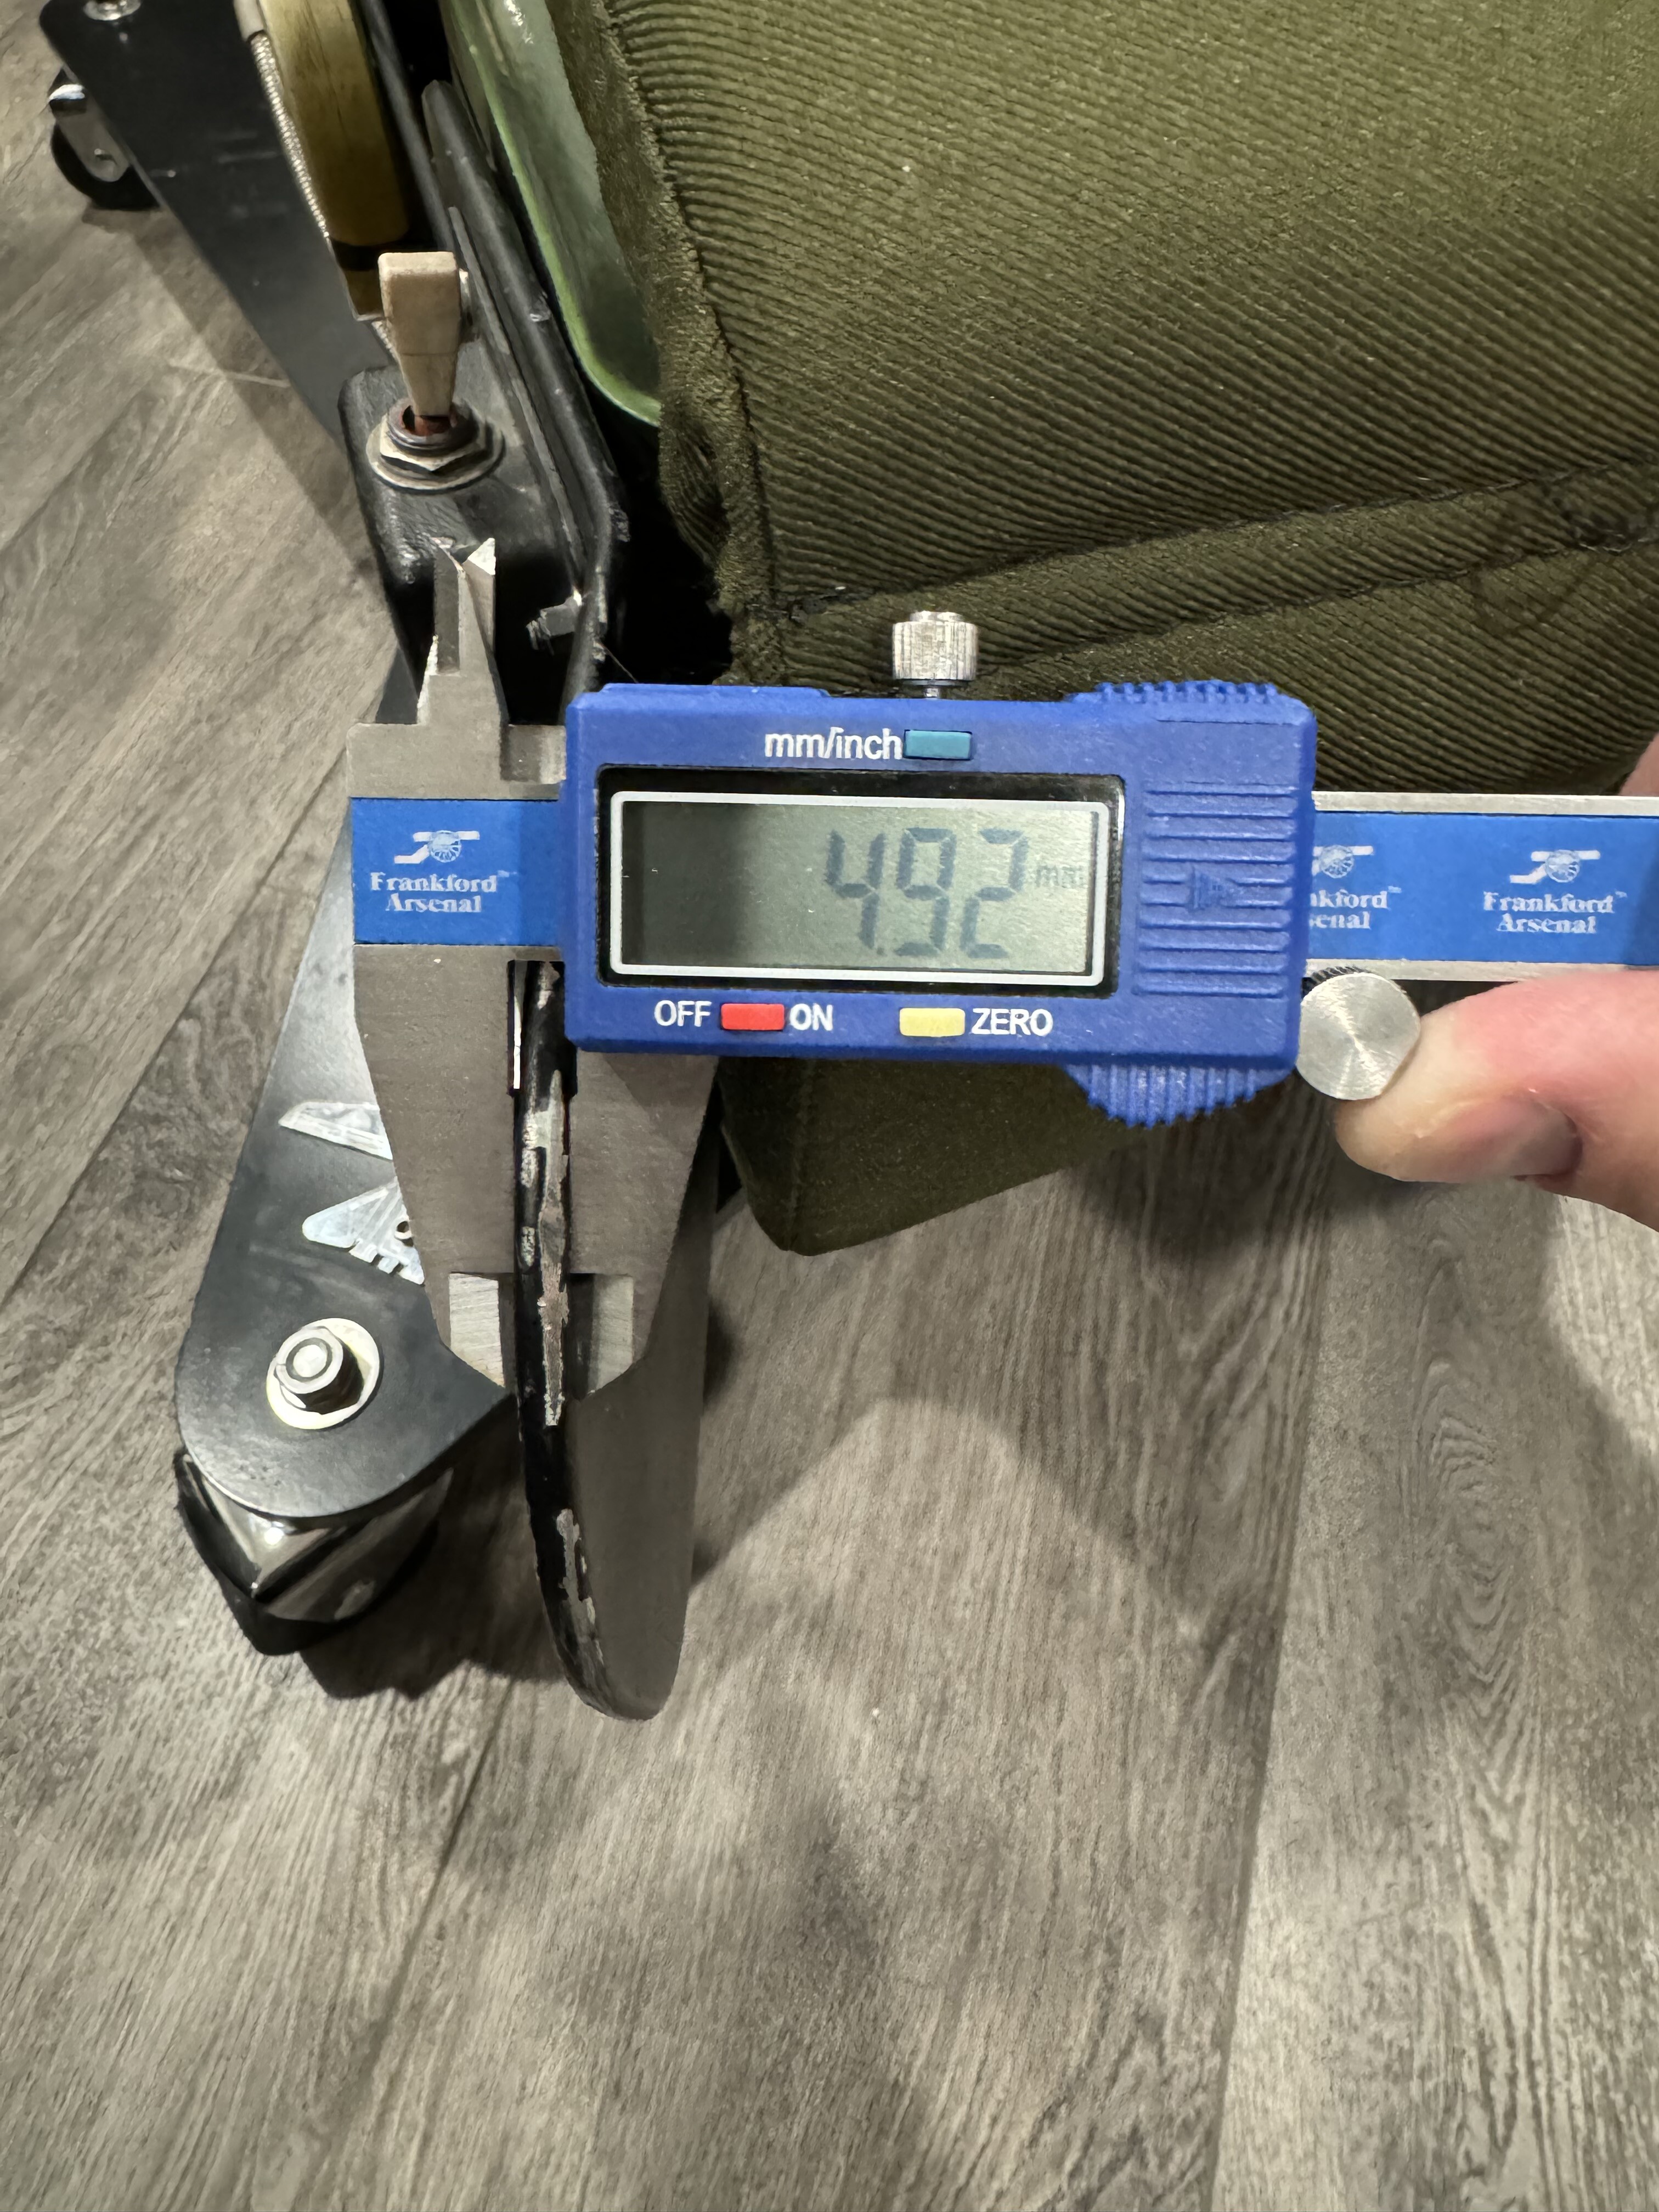
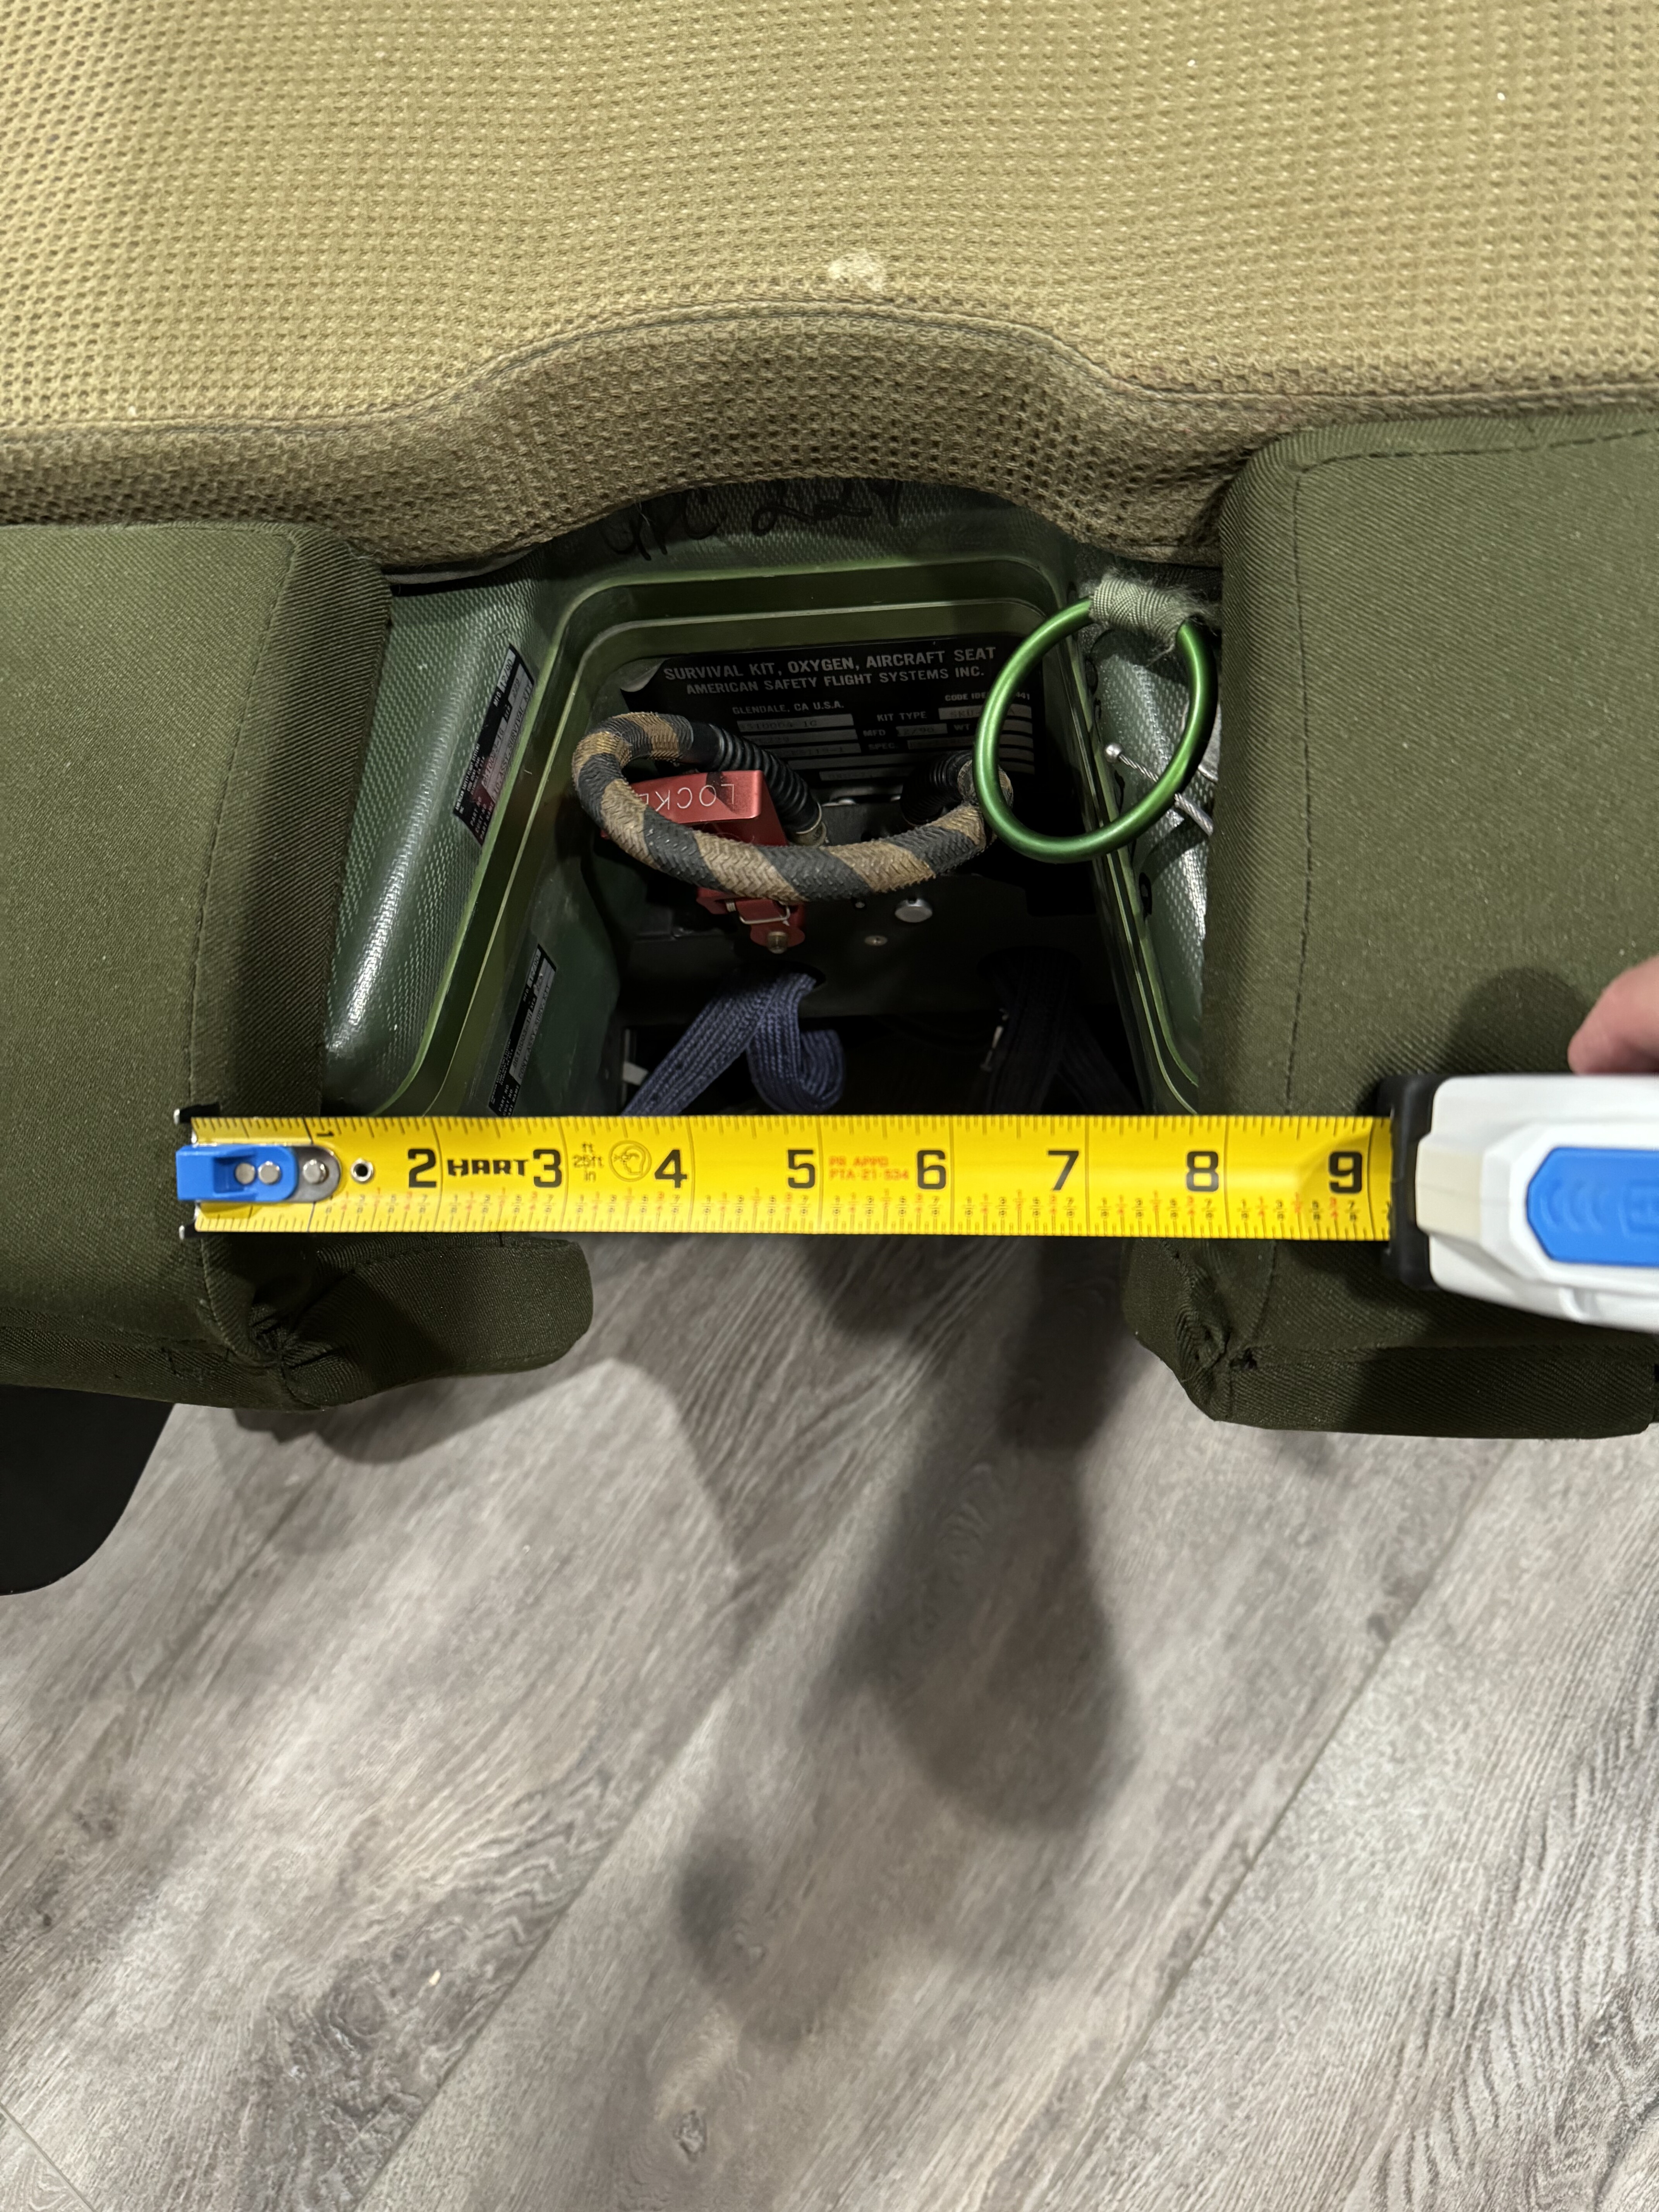
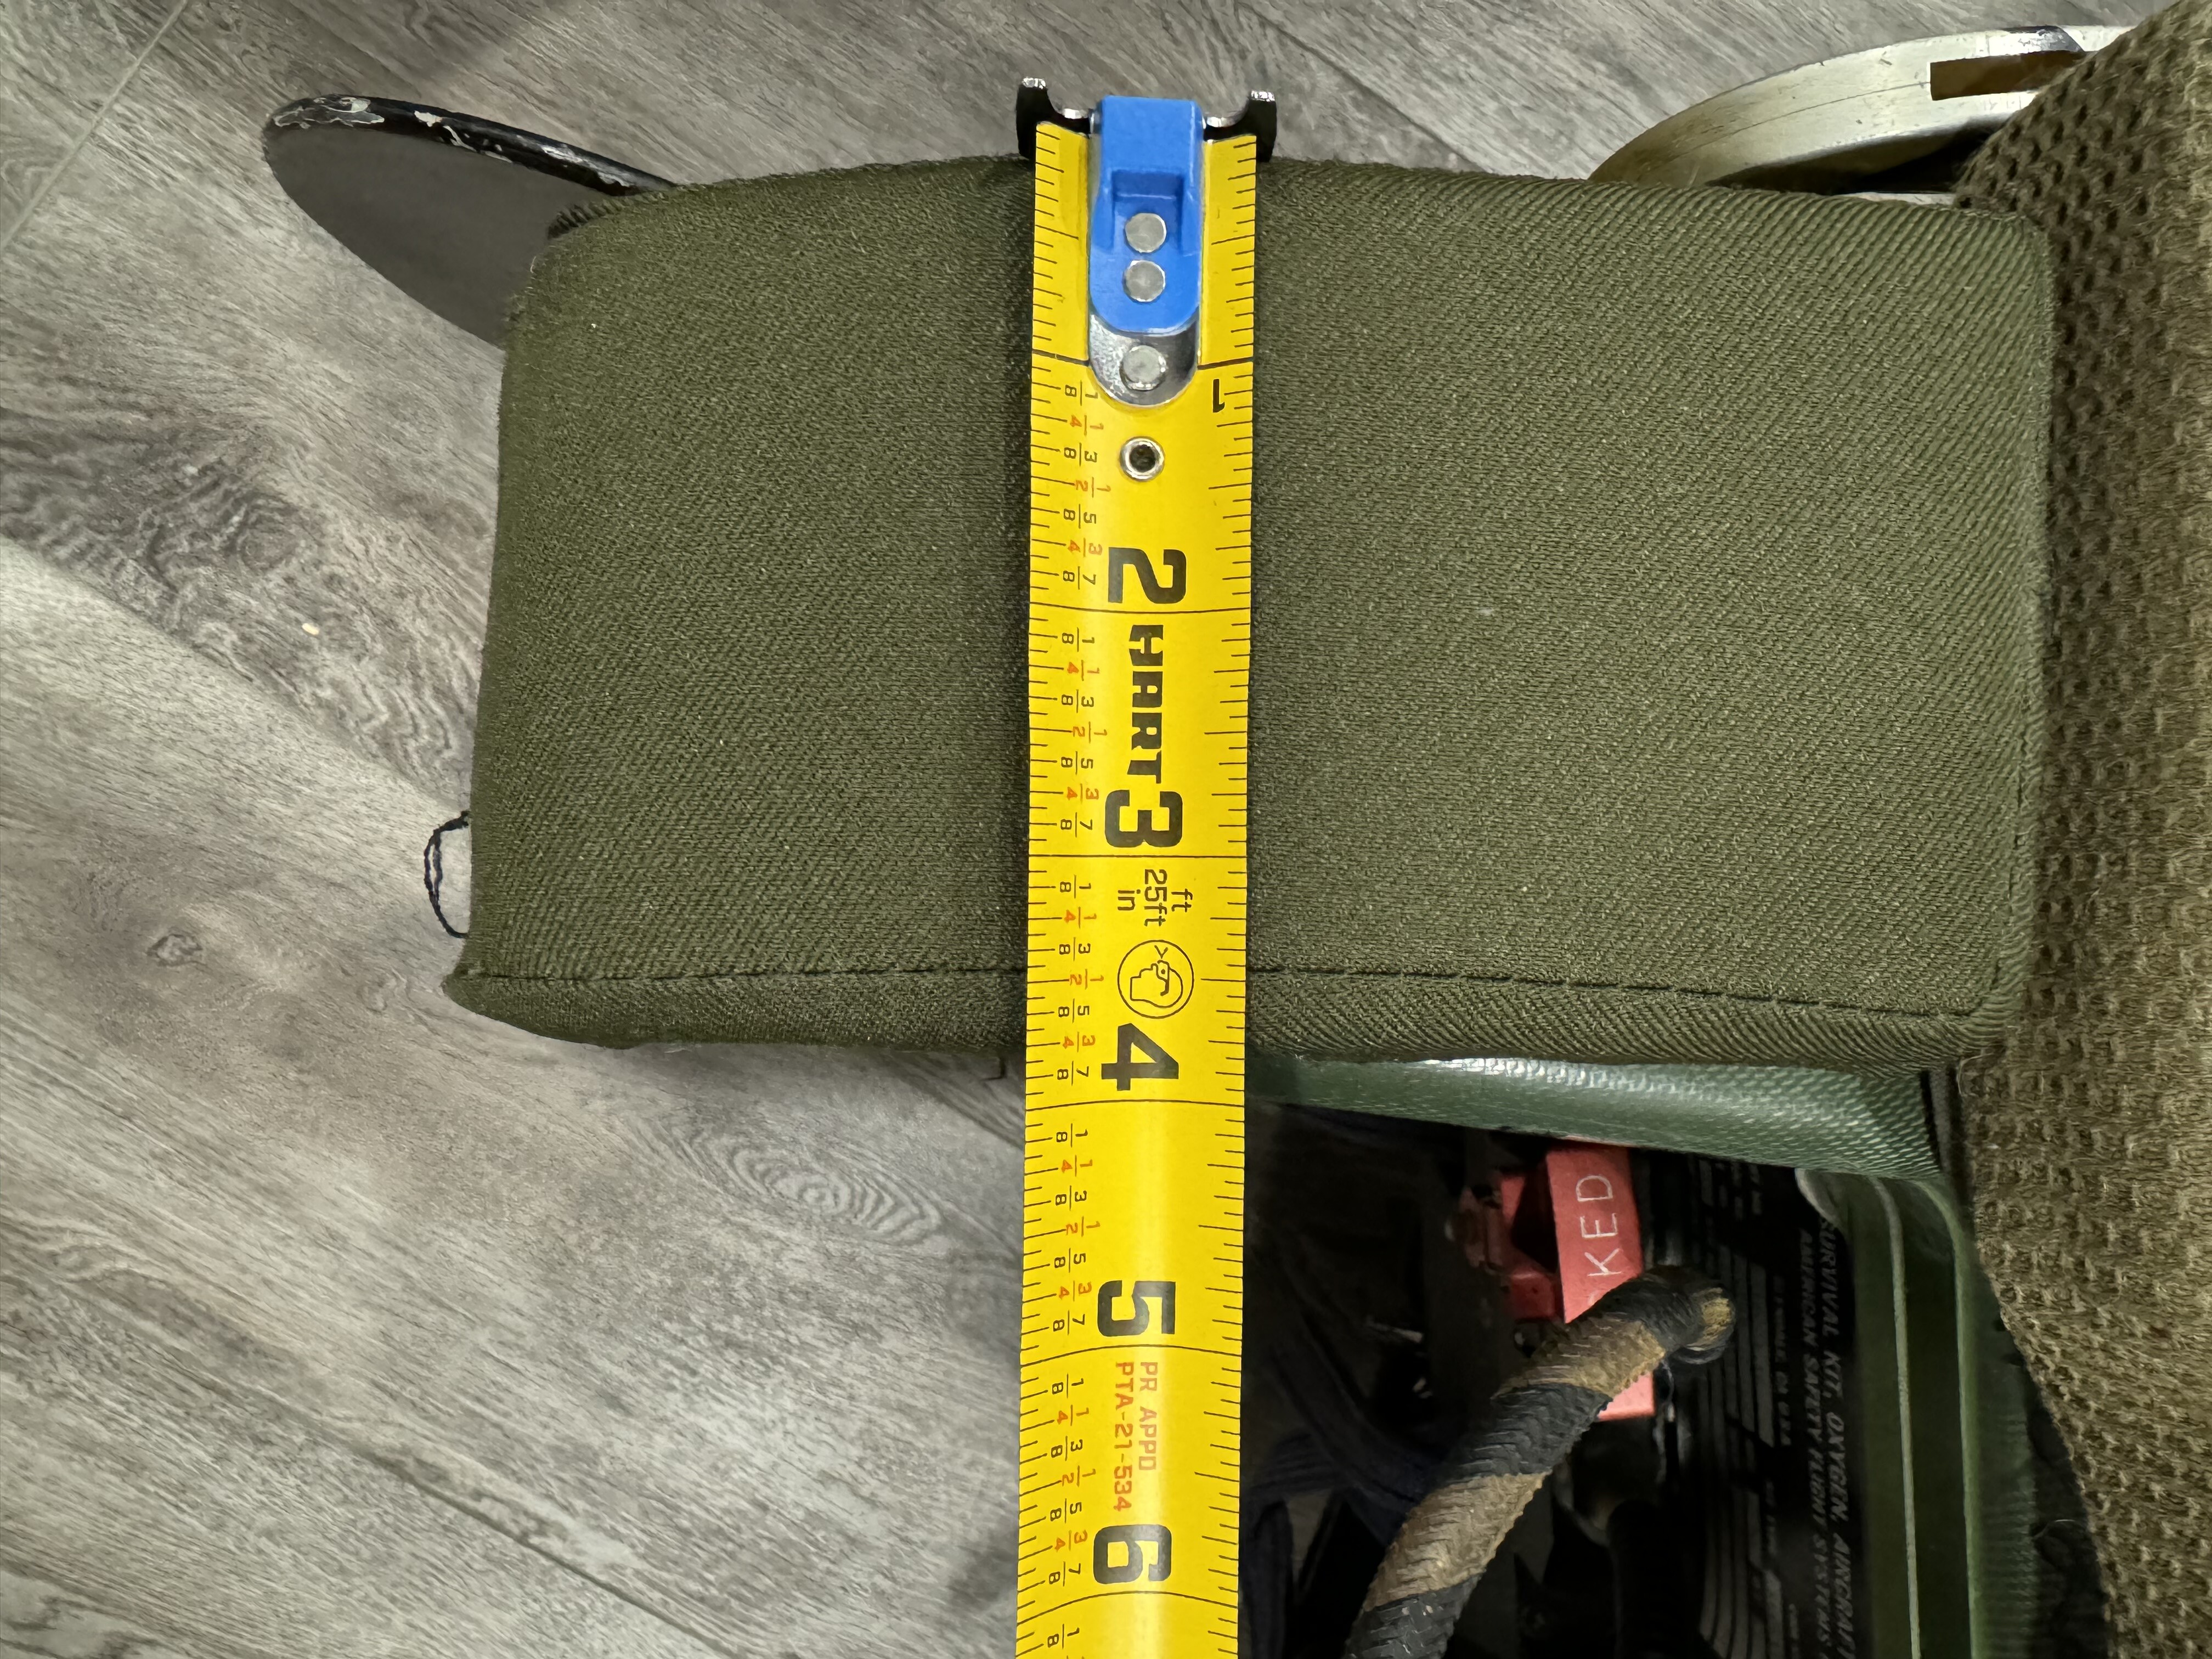
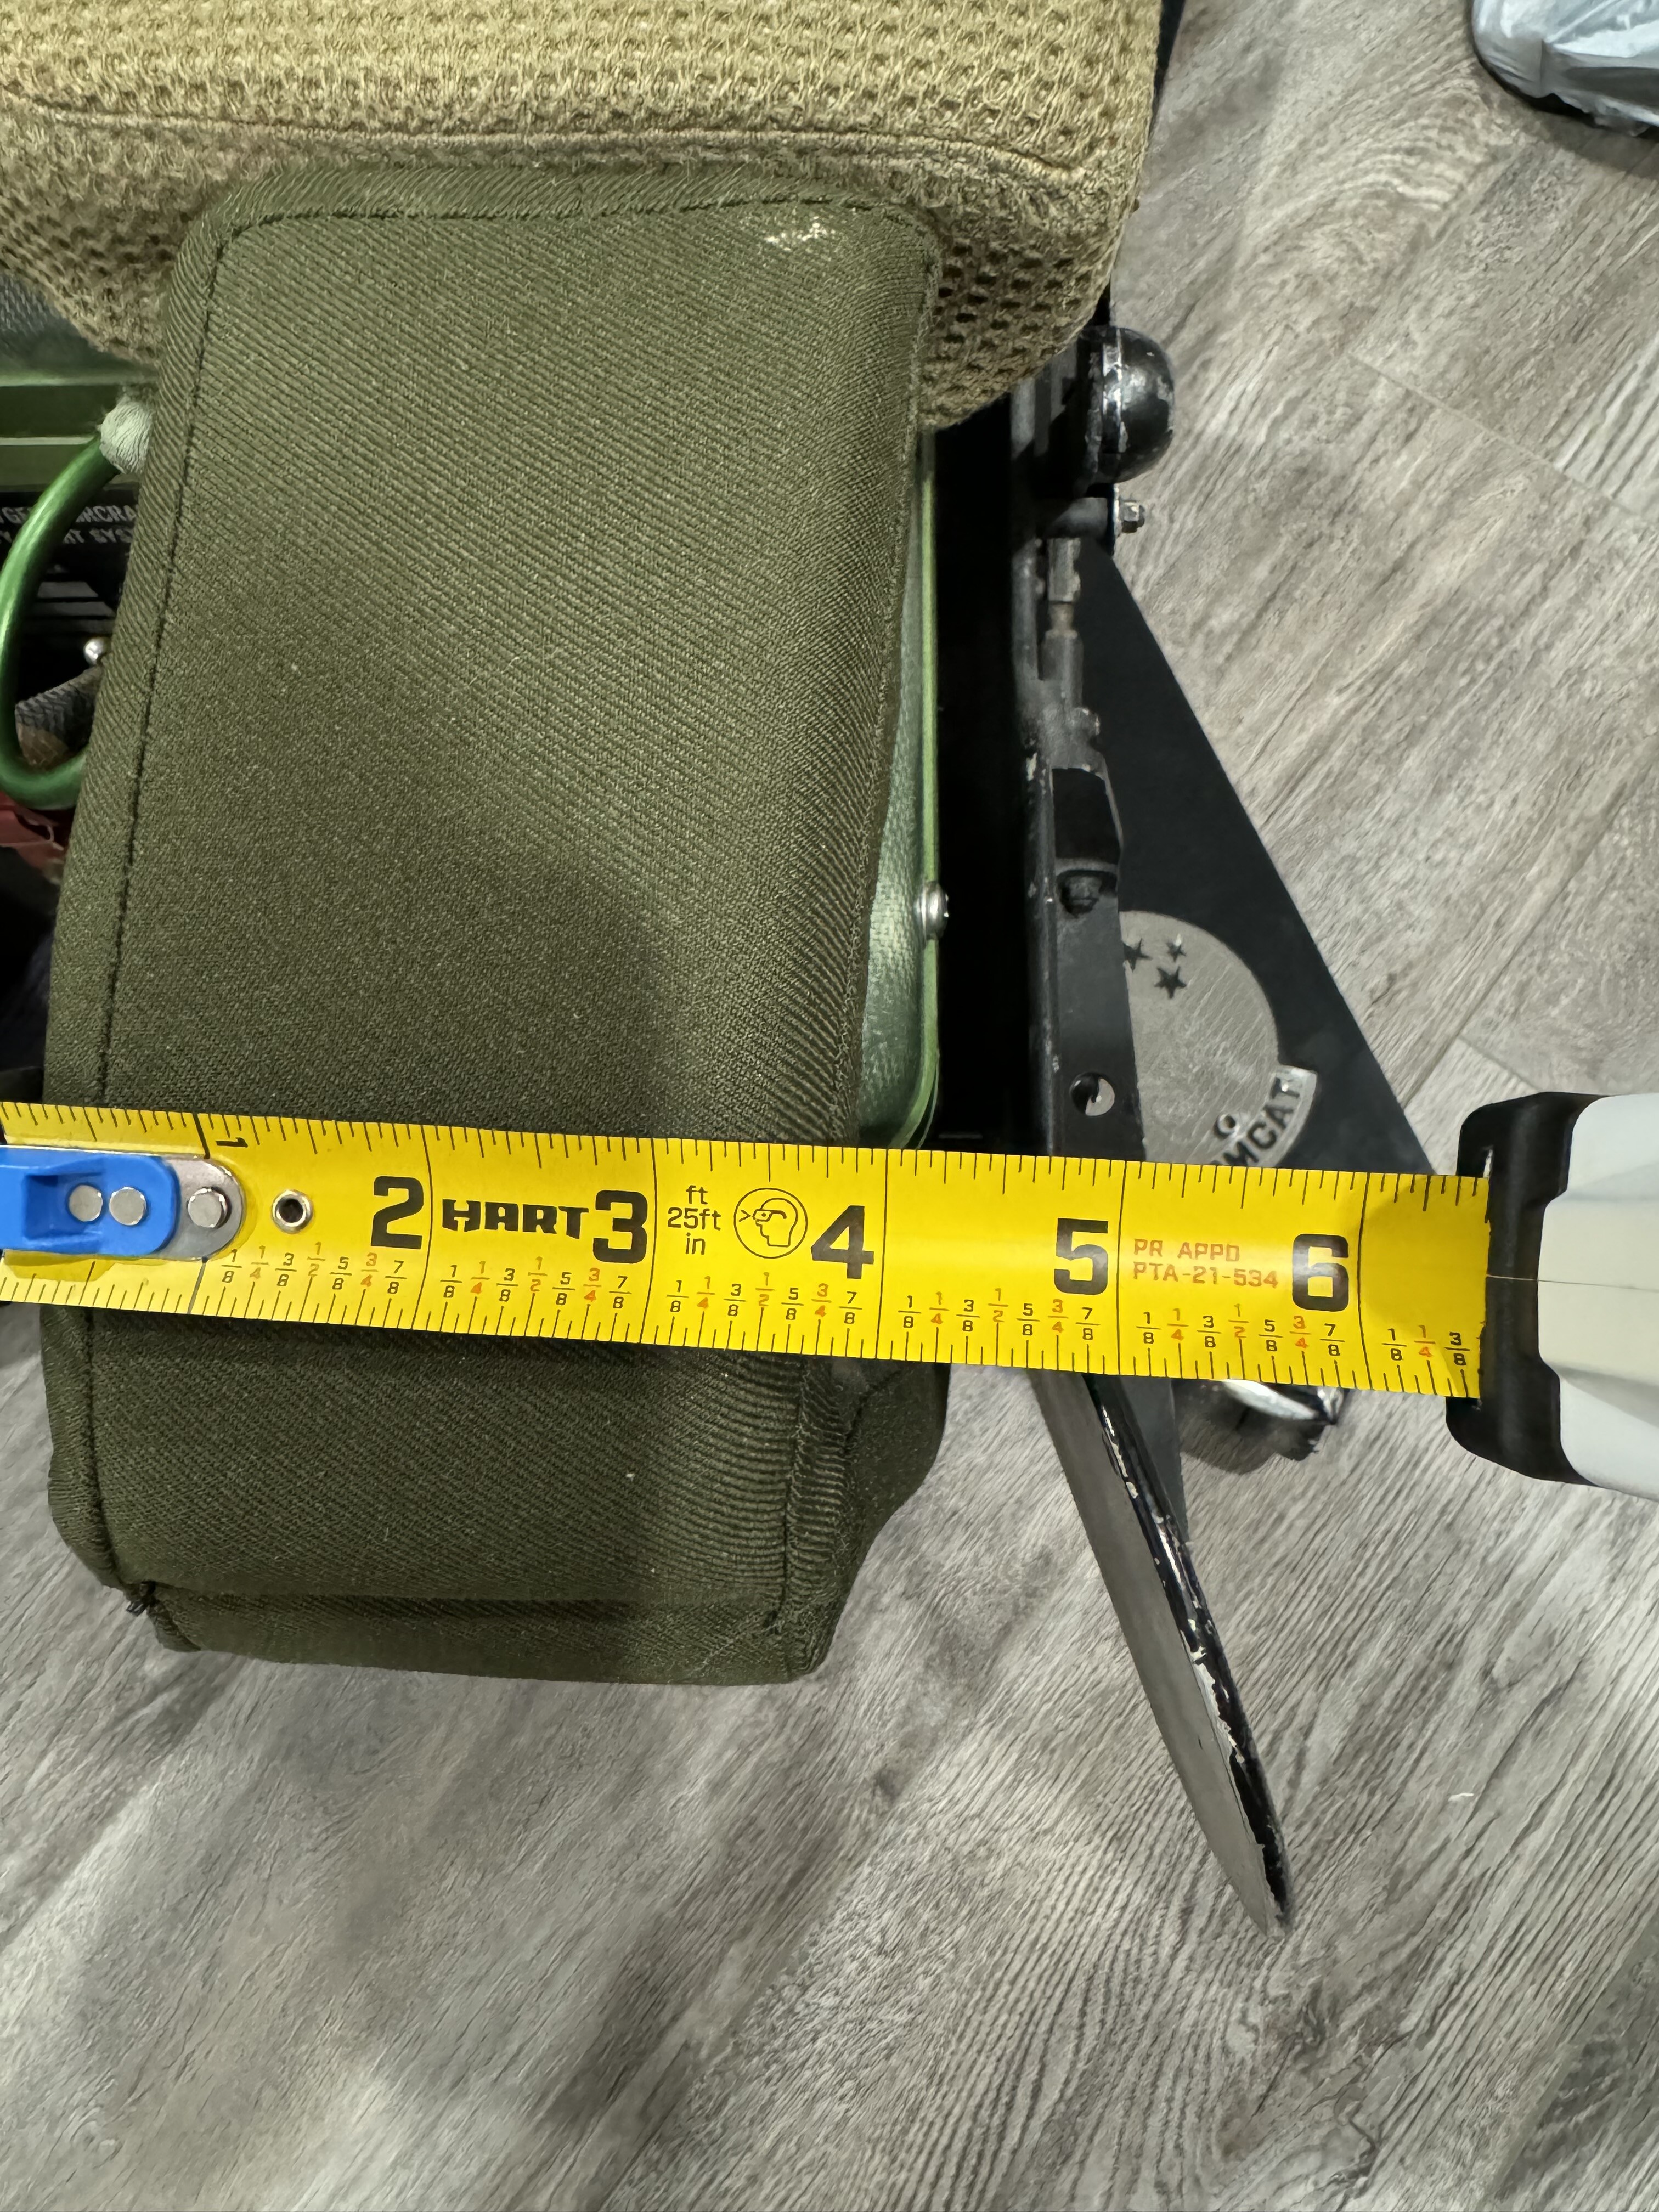
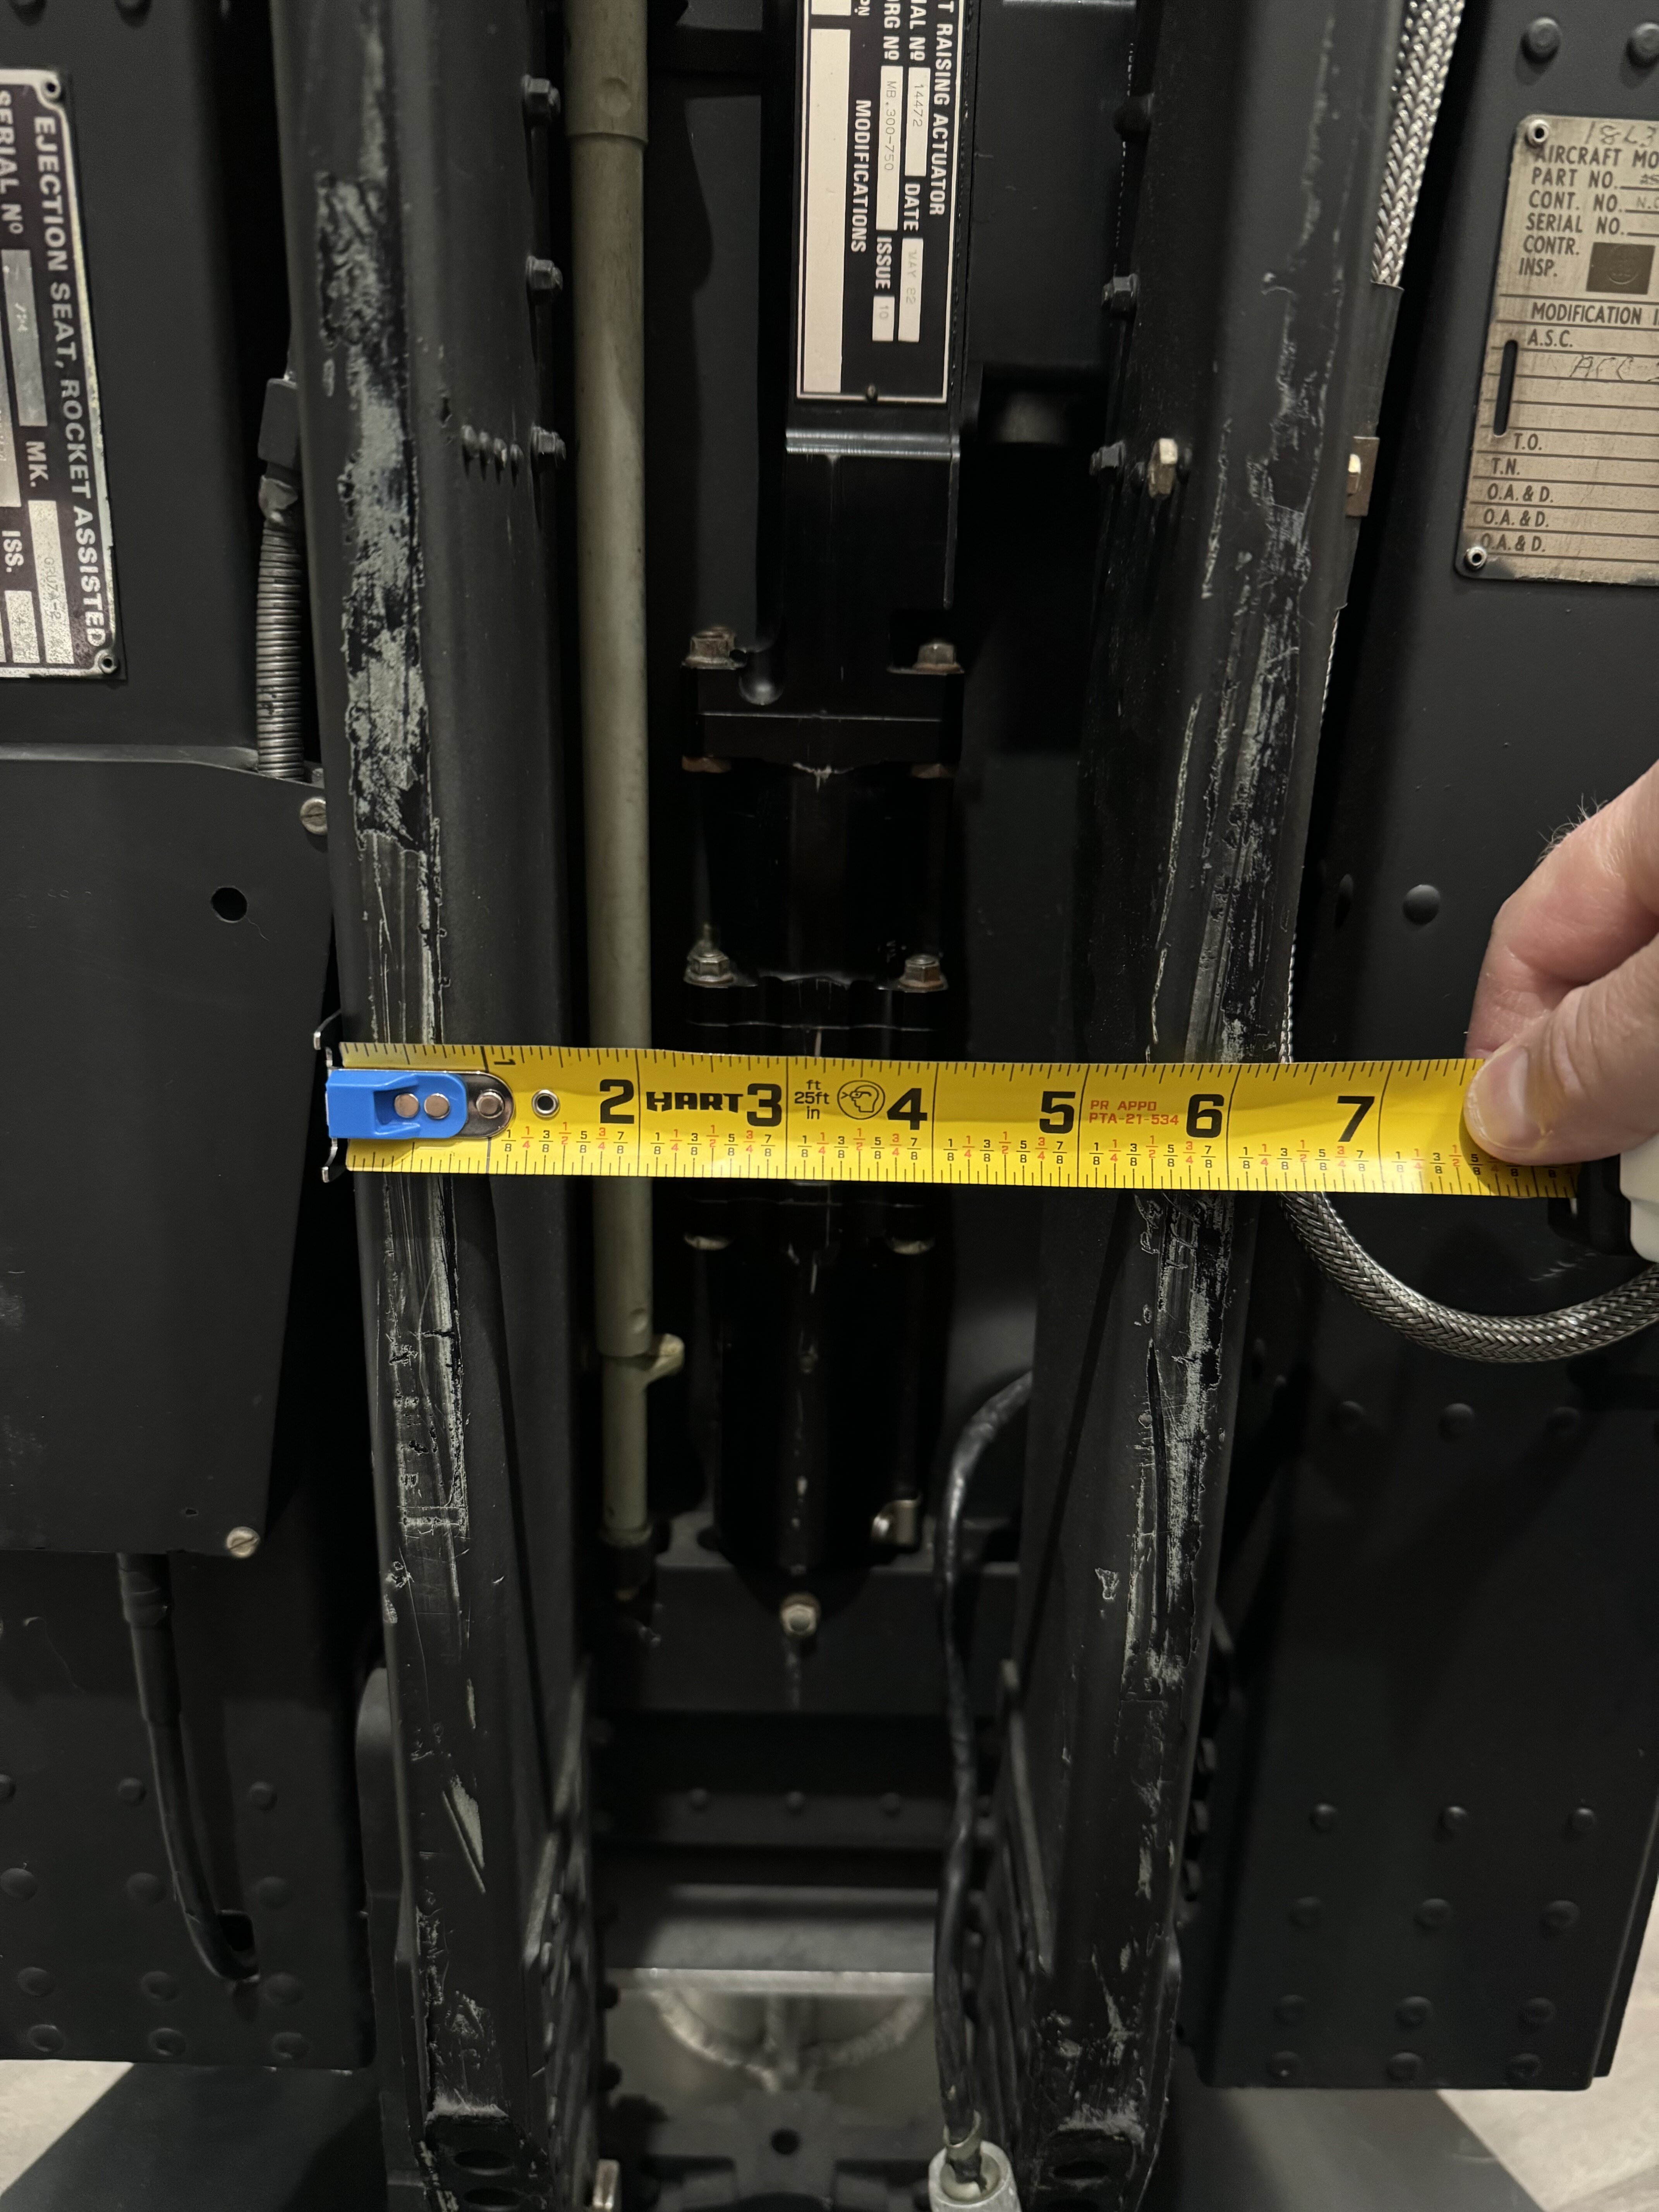
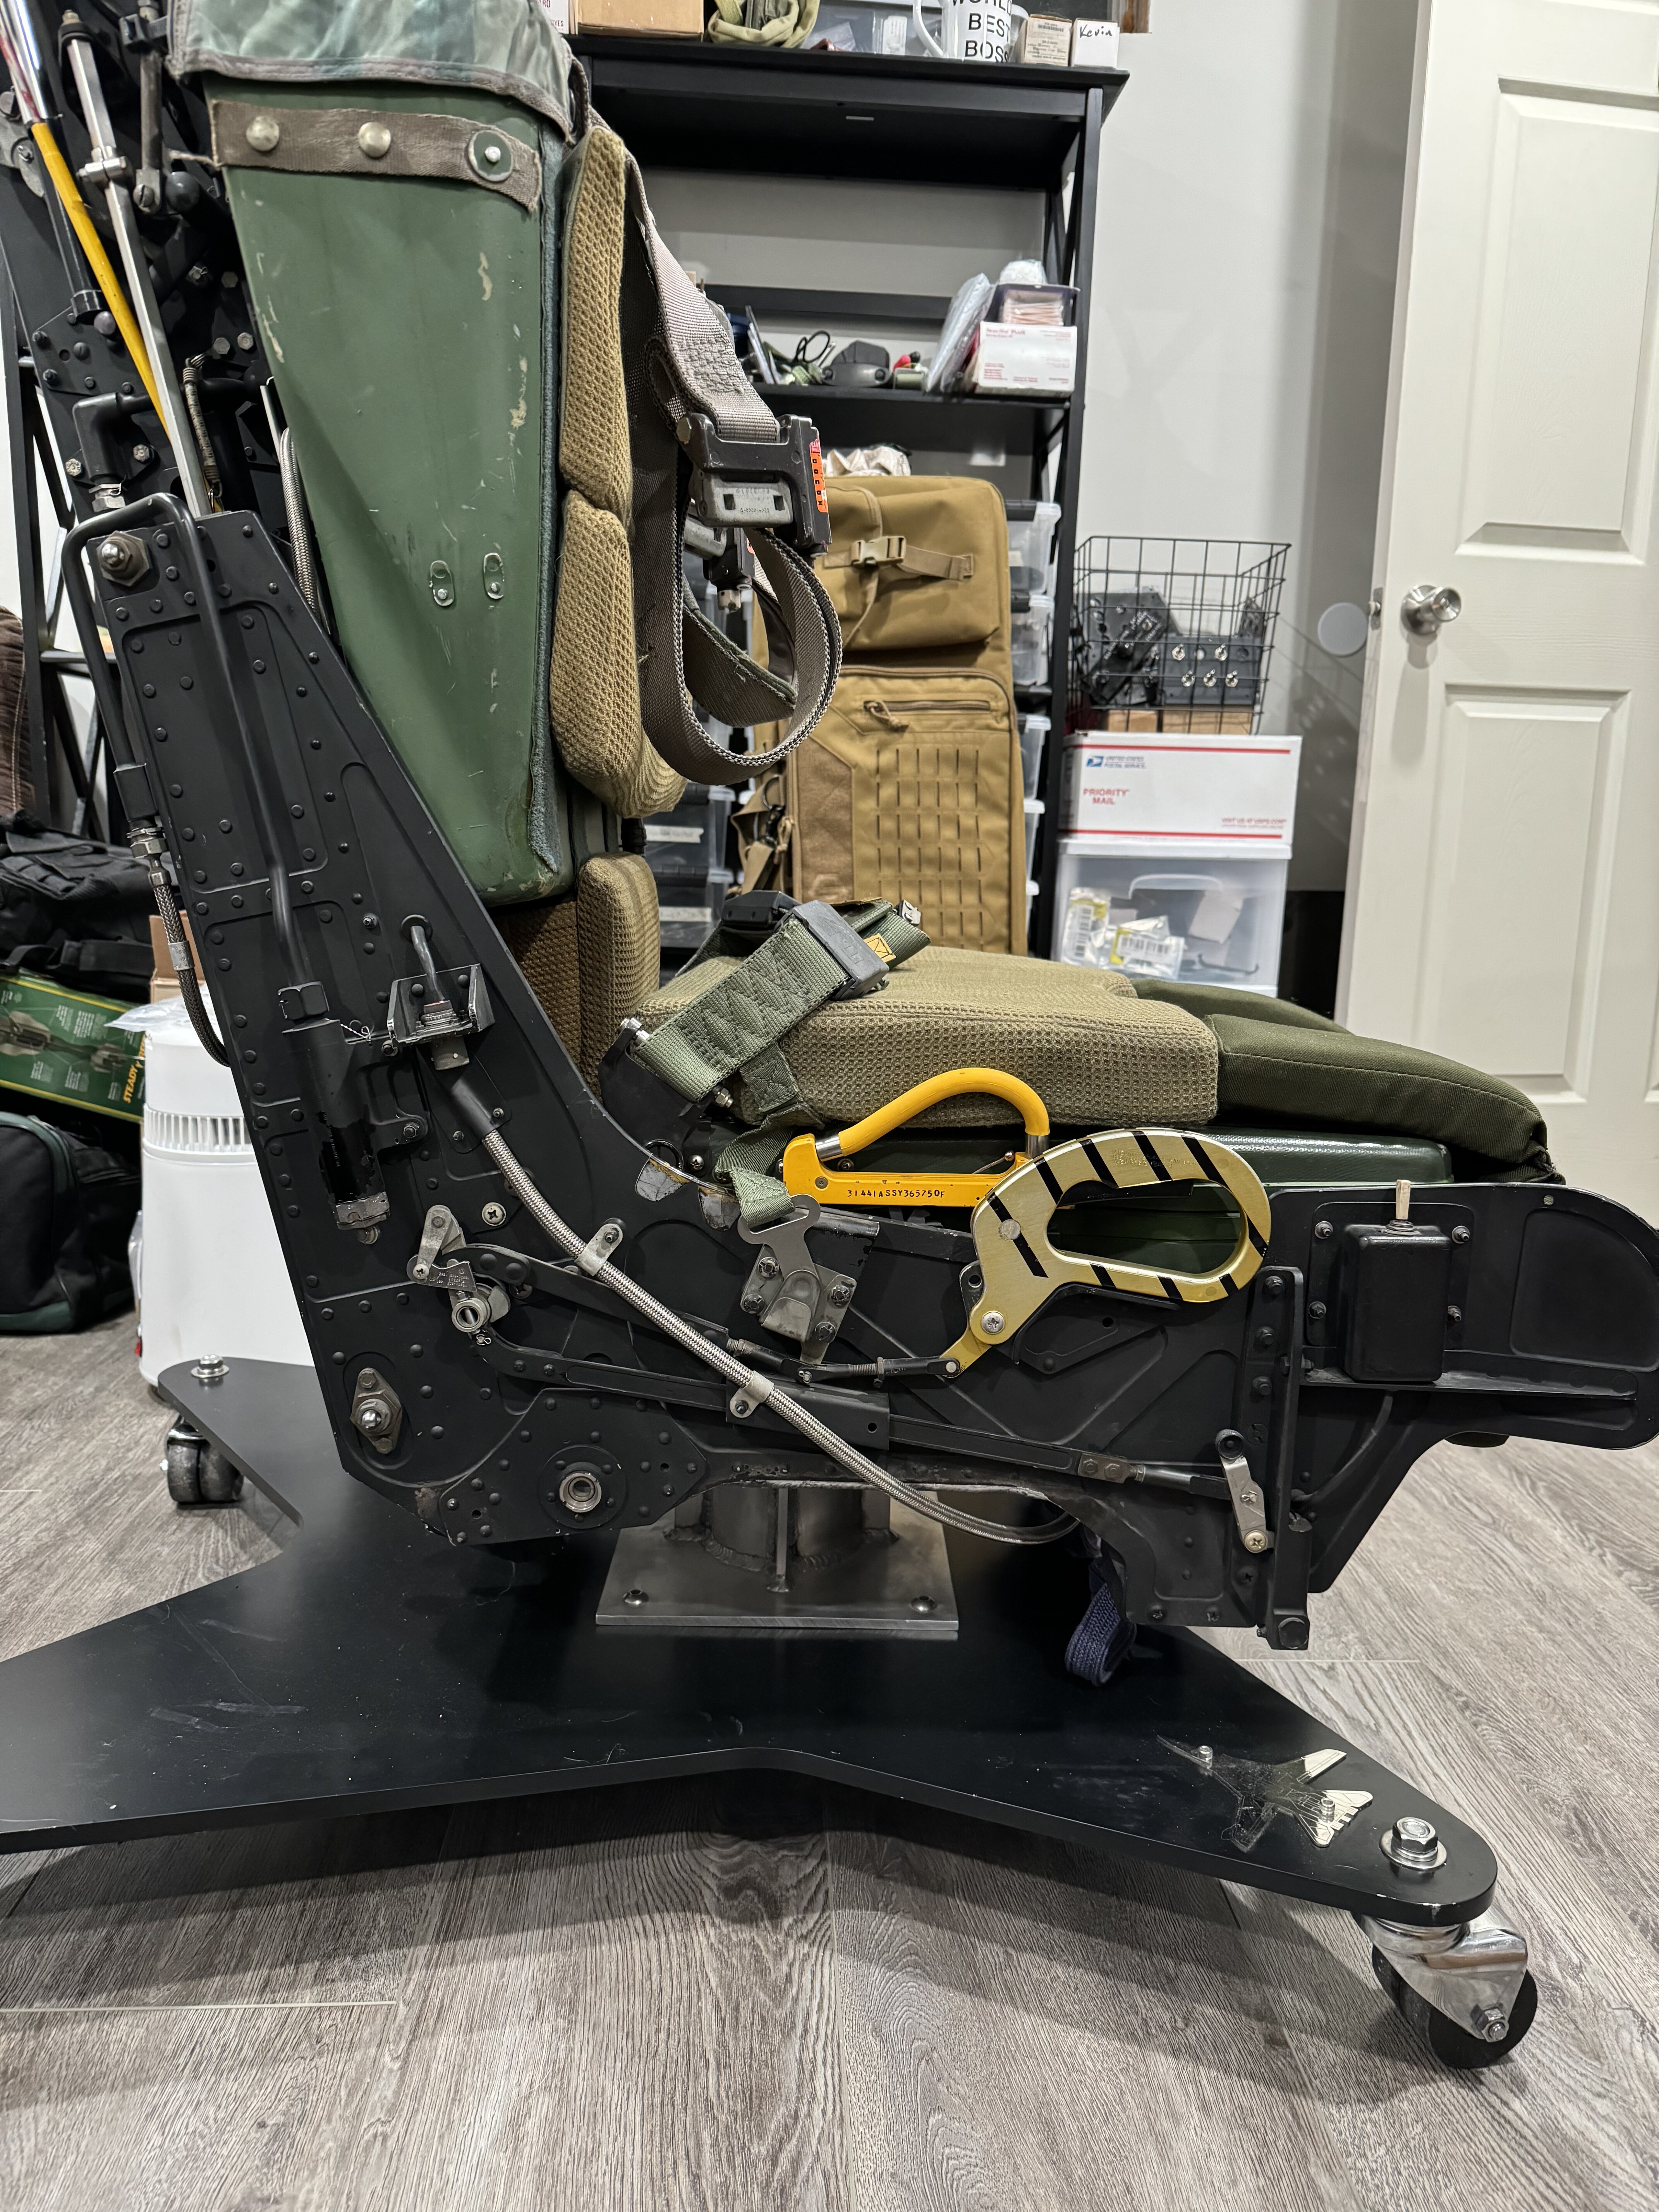
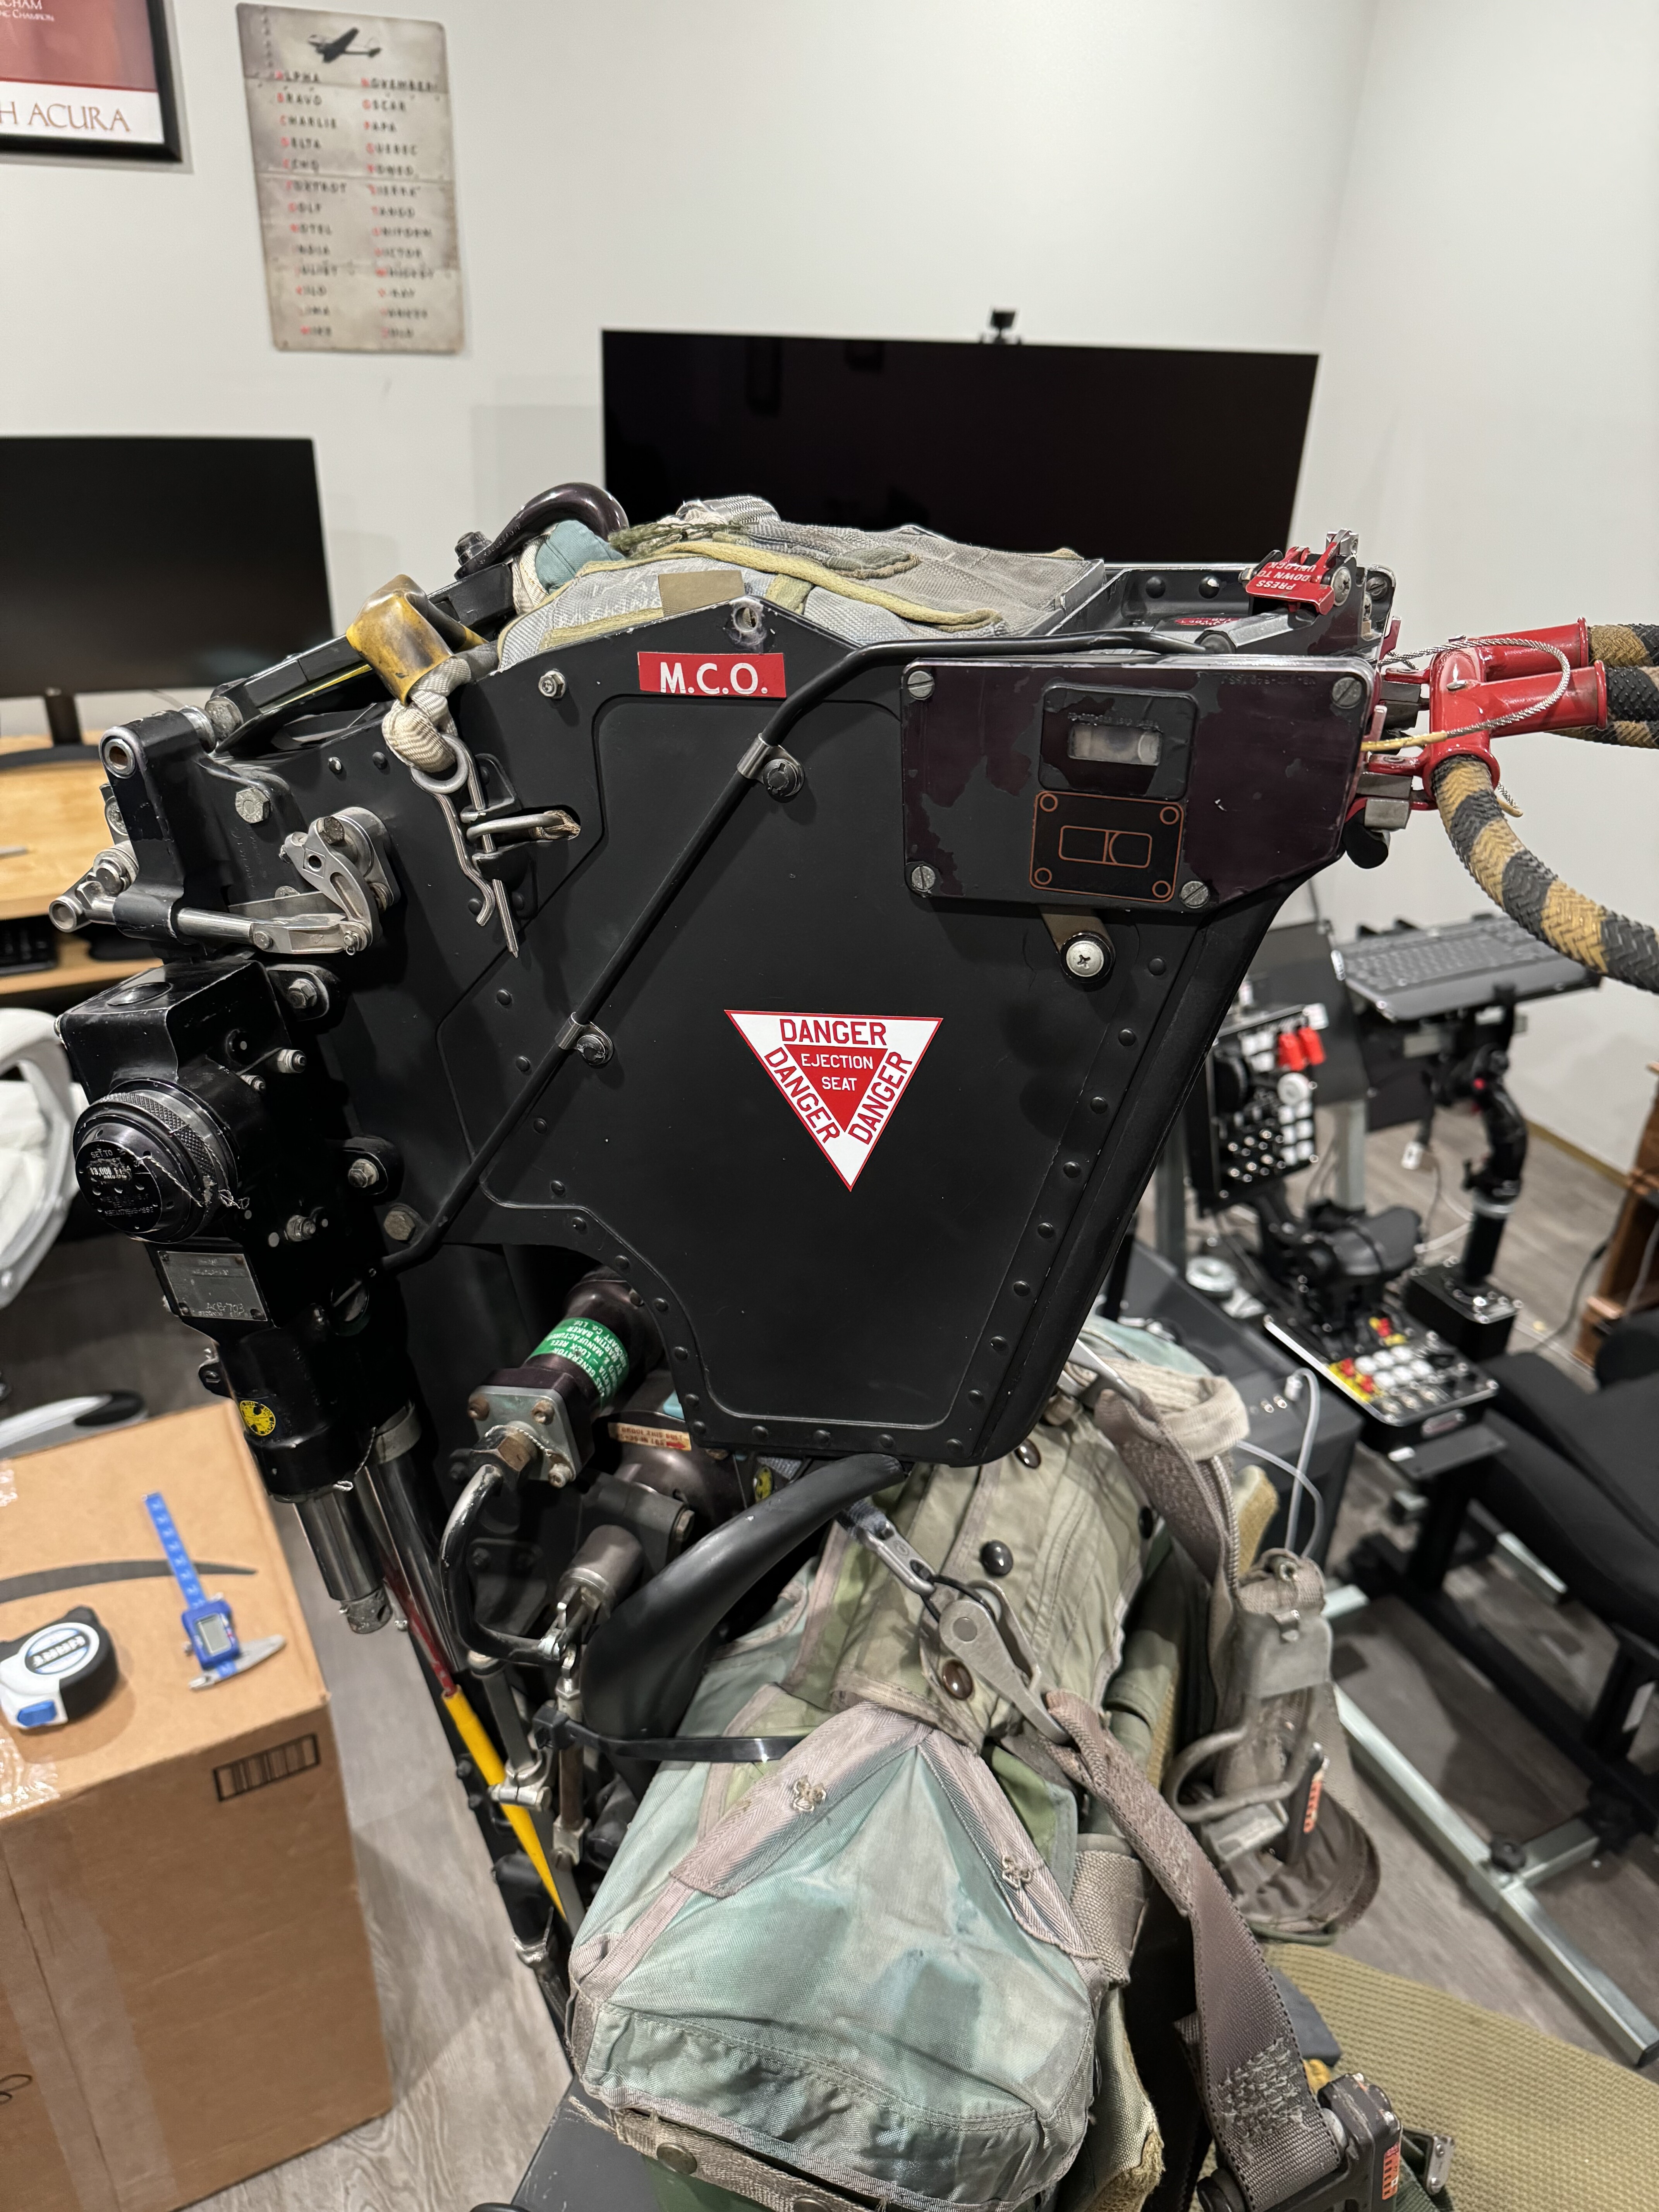
The left and right seat and padding look and feel symmetrical to me. I’ve taken a few measurements for you but I only have a US standard tape measure and a small digital caliper. I’ll add some extra photos too.
-
If you need any photos or easy measurements without disassembly, let me know. I just got a nice seat from a local auction. Sent from my iPhone using Tapatalk
-
Anyone have the dimensions for each of the analog and tape gauges? Also, has anyone incorporated working analog gauges into their cockpit builds? I wondered if I can get some LCD panels of the same size and run them via Arduino and DCS Bios. Has this been done before?
-
The throttle tested OK when looking in windows joystick. After a full DCS repair, initial testing still showed the issue. Looked at key binds and the speed brake engage then had the wrong throttle button bound to it (not sure it was even a real button based on the number assigned). Changing the bind back to the proper button got me the rest of the way so I’m back in business. Thanks all for the suggestions. I’d never used the DCS repair before but will certainly keep this in mind for future issues. Sent from my iPhone using Tapatalk
-
I haven’t done that. How would I check to see if the throttle is sending a signal for the brake? Or should I remove the bind on the throttle for the speed brake and see if it’s still happening? Sent from my iPhone using Tapatalk
-
I looked at axis binds and the only thing moving with the throttles was for the throttle itself and no other functions. I think I still have Beta installed and may test it out. I could also export the key binds from the current version and import to Beta to see what happens. Either that or a fresh install. But that’s a long download time. Sent from my iPhone using Tapatalk
-
Anything else to check? I checked the axis and nothing else is bound to the throttle. Not sure if the idle cutoff on the throttle could be a variable. Sent from my iPhone using Tapatalk
-
I’m referring to the speed brake, not the wing spoilers. I don’t recall this behavior prior to ~April but I’ll check my key binds as suggested and report back. Sent from my iPhone using Tapatalk
-
I've read that the speed brakes will automatically extend when the throttle is moved to the idle position, but should this happen in all cases? And if so, is there any setting in DCS to disable this behavior? I ask because when taxiing to the runway or cat, the speed brakes seem to be extending when the throttle is moved back to idle and they stay in the extended position unless I manually hold the switch down to retract them all the way after moving the throttle out of idle. This has been a real pain. I'm frequently finding that upon takeoff the brake is still extended. This is also happening in the air anytime the throttle goes to idle, extending the speed brake and leaving it extended until I fully retract it. Is this normal behavior? If possible, how can this be disabled to only extend if using the speed brake switch?
-
Can you share the .stl for your modified throttle gates? Thanks!
-
@Yogi8 Do you have any pictures of your wiring / pinout for the 4-way switches?
-
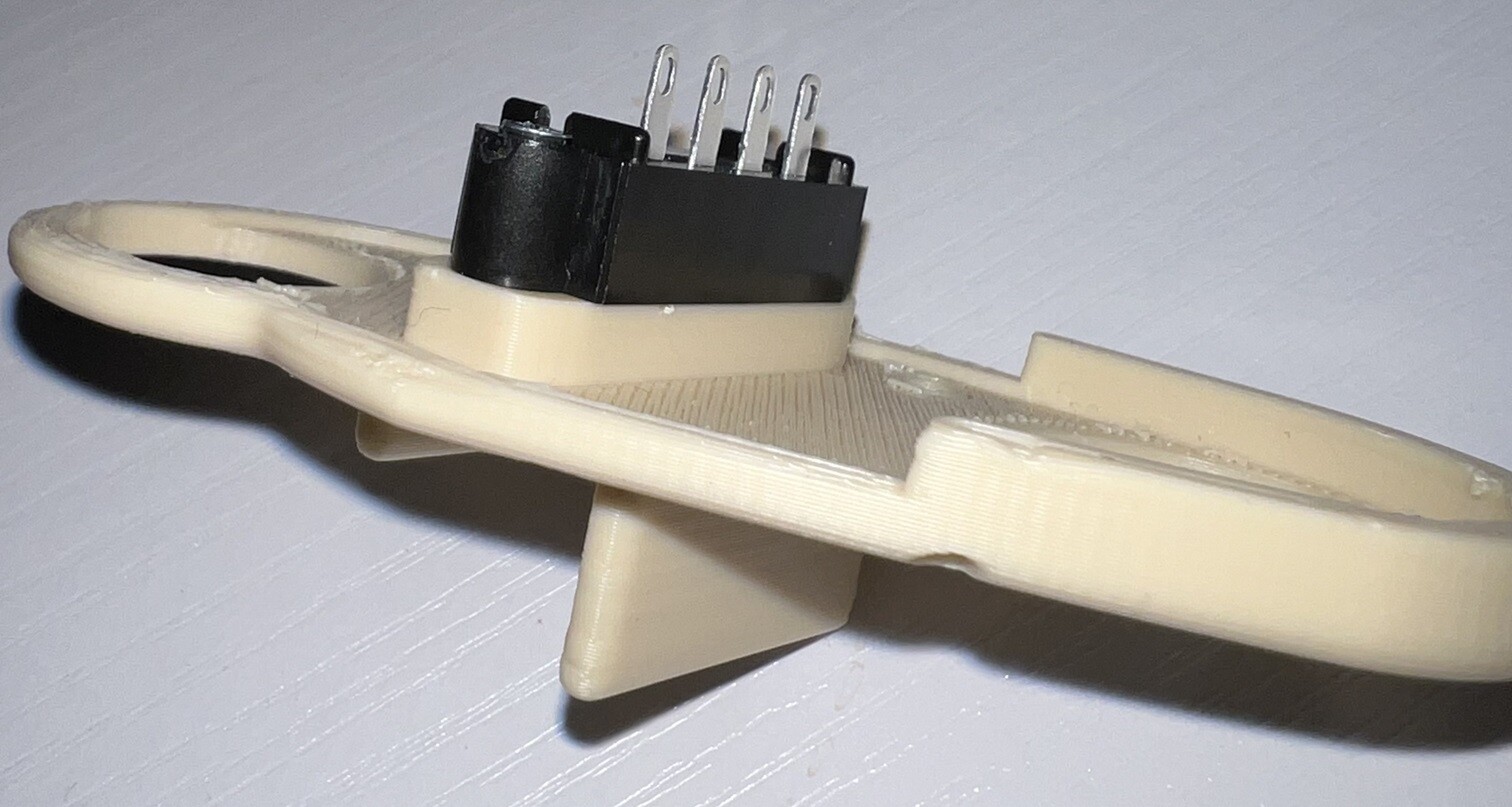
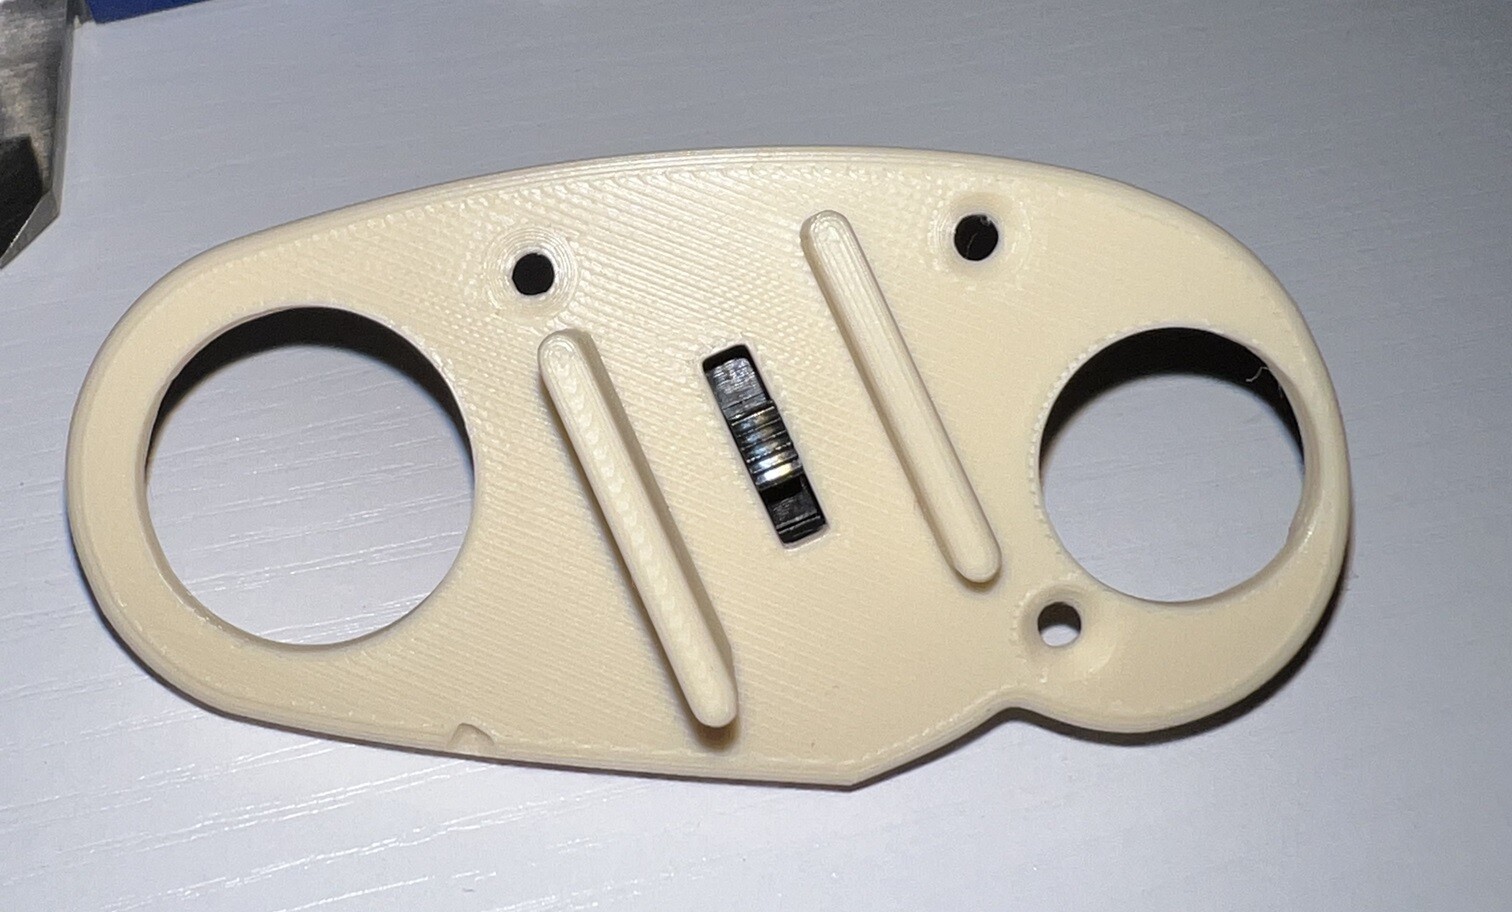
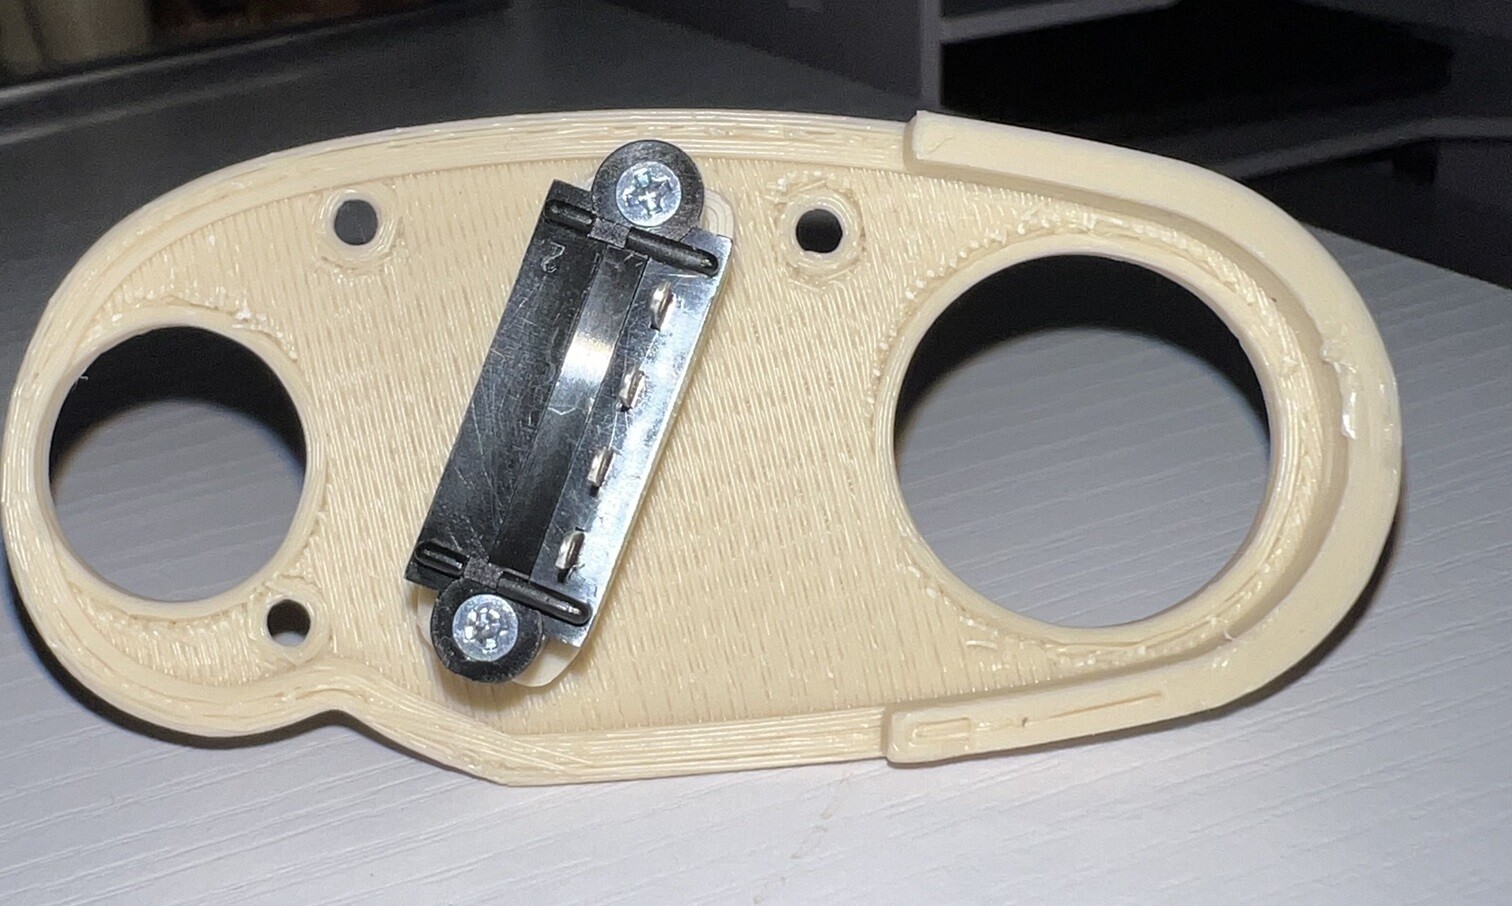
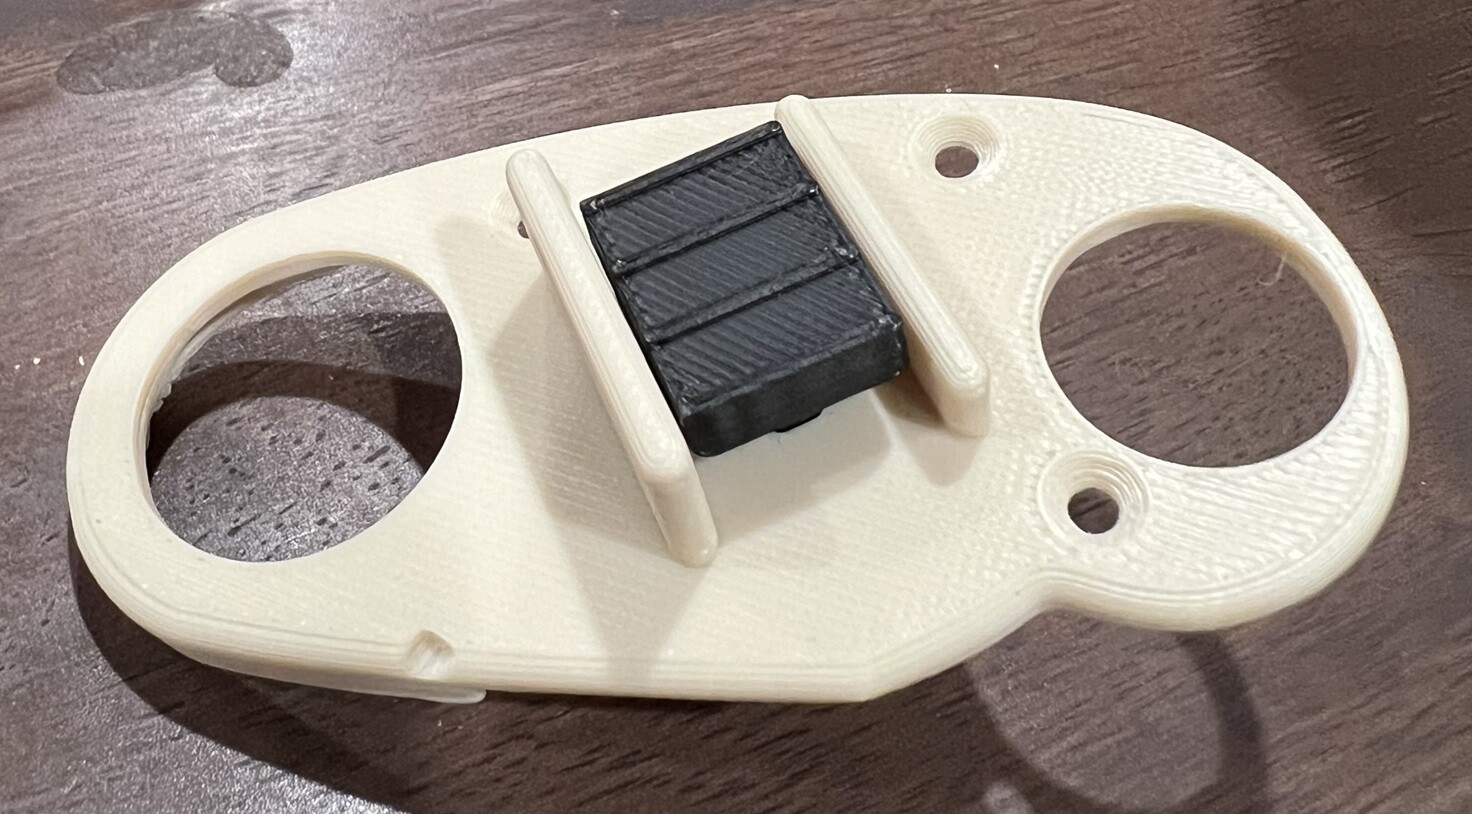
Wanted to share some info about the Volume panel I've been working on. I hit a roadblock on the TACAN CMD portion and had no idea what kind of switch I was looking for. Eventually I read enough to figure out this was a Korry type switch, but making them looked to be more work/time than I was able to spend on it. Thankfully, I was led to 737diysim.com and I found the following item. The switch travel is less than 1mm when depressed but otherwise will work out very nicely and looks like an authentic switch as far as I can tell from photos. I didn't pay enough attention when customizing the text at time of order, so the top line on mine says PILOT rather than PLT, but I'll just have to live with that mistake. It was pretty inexpensive and there's no way I would have been able to generate a Korry type replica switch any cheaper on my own. I haven't hooked mine up yet as it just arrived today, but am resuming work on the 3D design of the Volume panel now. As far as sizing, it appears to be almost a perfect match to the reference images. It ships from the UK and arrived at my home in the central US in 13 days. Given the price point, I'm impressed. https://www.737diysim.com/product-page/custom-dual-colour-korry-replica
-
I haven’t assembled mine yet unfortunately. Need to finish painting a couple of pieces but was too damn cold the last couple weeks.
-
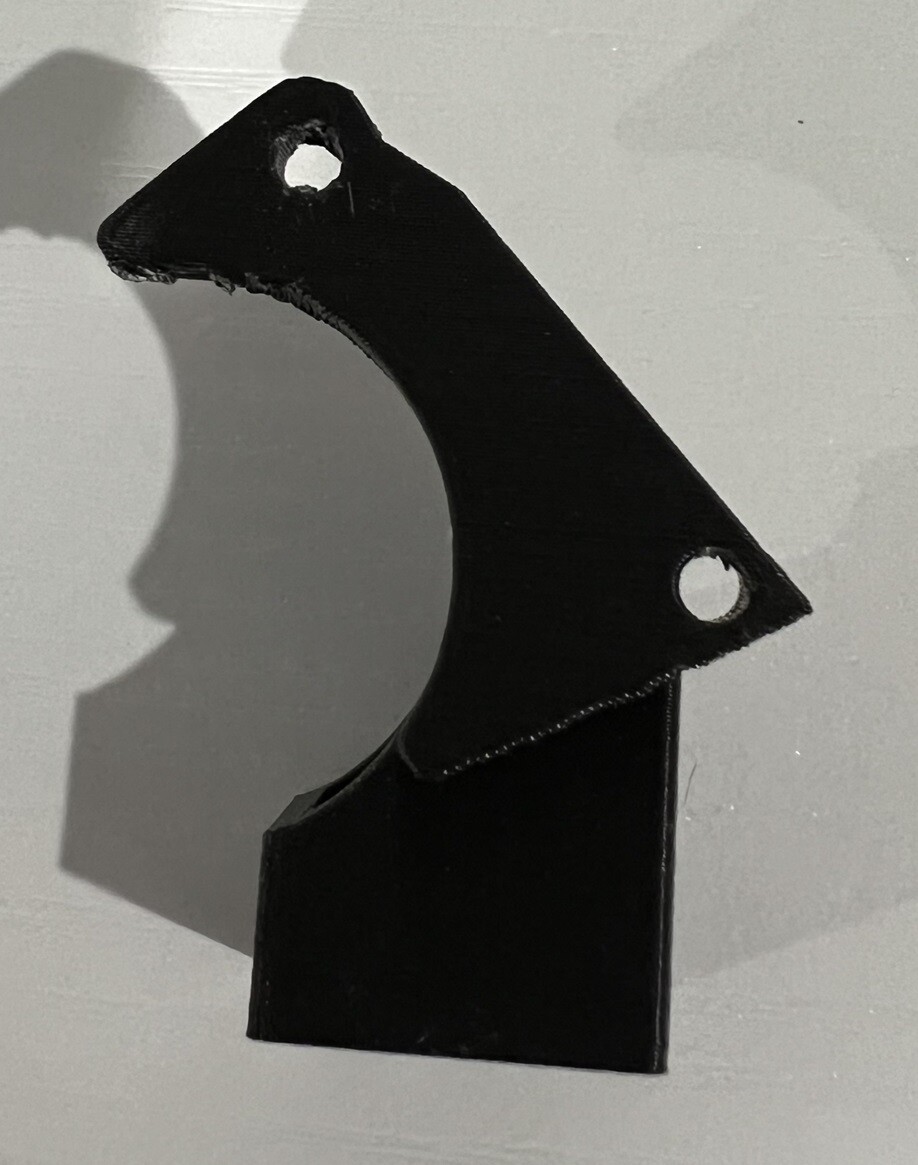
Updated the post above with a crudely modified right throttle body and blade. The blade was significantly reduced in size to work with the larger slide switch, essentially cut in half. Added an additional screw point for the blade to throttle handle body at the bottom. The top screw point for the blade has been extended - this may not have been necessary at all but my thought was to use a longer screw and it may help reinforce it as the blade has fewer attachment points now. As I mentioned, this was quick and dirty and I'm not a 3D designer so the hole will have to be drilled. How I plan to assemble it is to lay the blade on the body, drill and place the screw in the new/bottom point, then add the cover plate and remaining screws. Since the Blade doesn't extend to the front attachment points anymore, I just raised those points to the same height as the outside edge so the cover won't have a gap between the pieces for the screws. Pictures should help explain it. I test fit everything as best I could but don't have the two 4-way switches yet. @Yogi8 hopefully you aren't cringing when you see this as its not beautifully engineered like your originals, but it should work.
-
What type and size of switches are used for the wing sweep and mic buttons on the right throttle quadrant? I may have overlooked purchasing those. Was testing out fitment with the mods and realized I didn't have those.
-
Absolutely and those of us using this throttle can't say it enough. @Yogi8 we are so grateful for your tremendous efforts in making this happen. This morning I found that the blade for the right throttle is presenting a challenge using the larger switch. This will definitely take some rework of the blade and depending on the best way to go about that mod, perhaps the main body of the throttle quadrant. I'll think about it today and see what would require the least amount of work. My 3D design skills are seriously lacking though so any help on this is much appreciated.
-
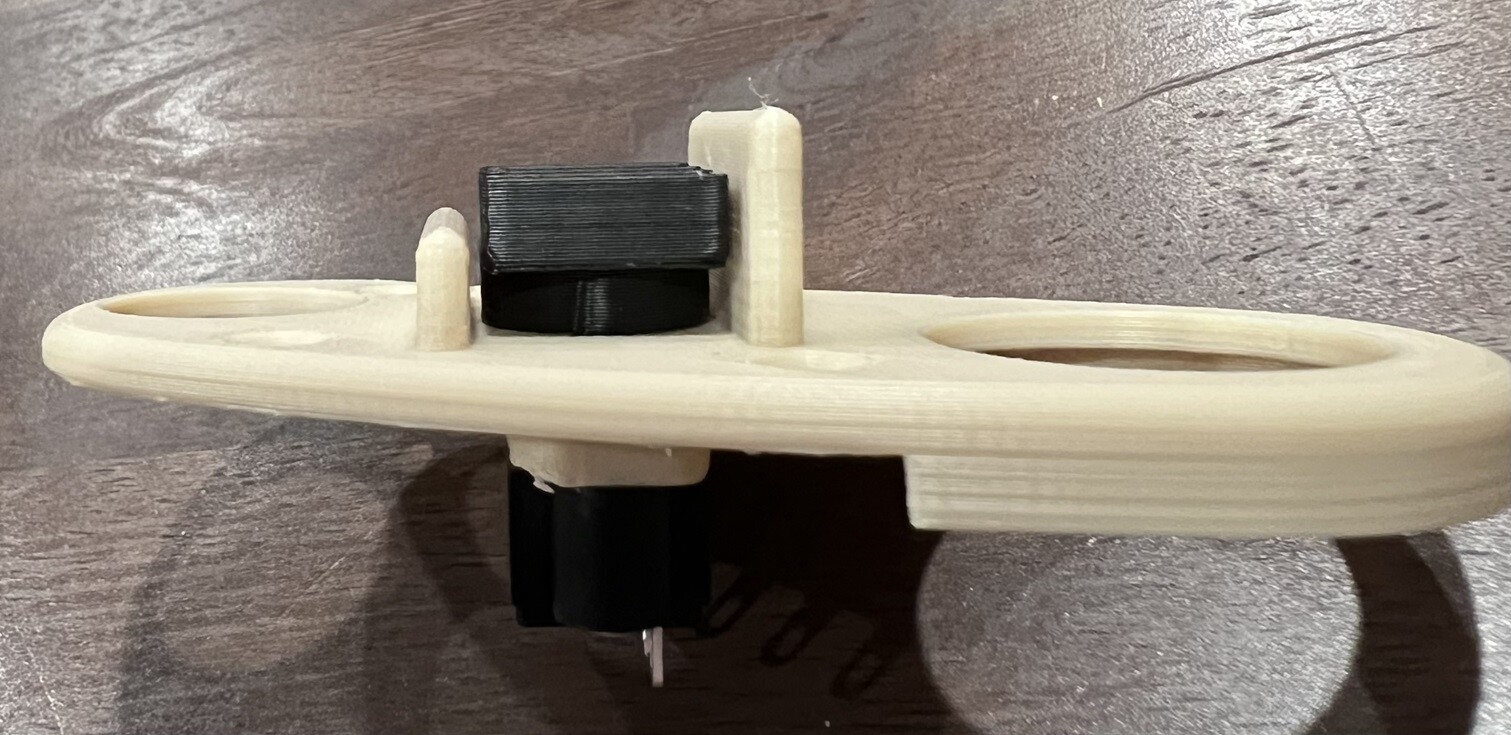
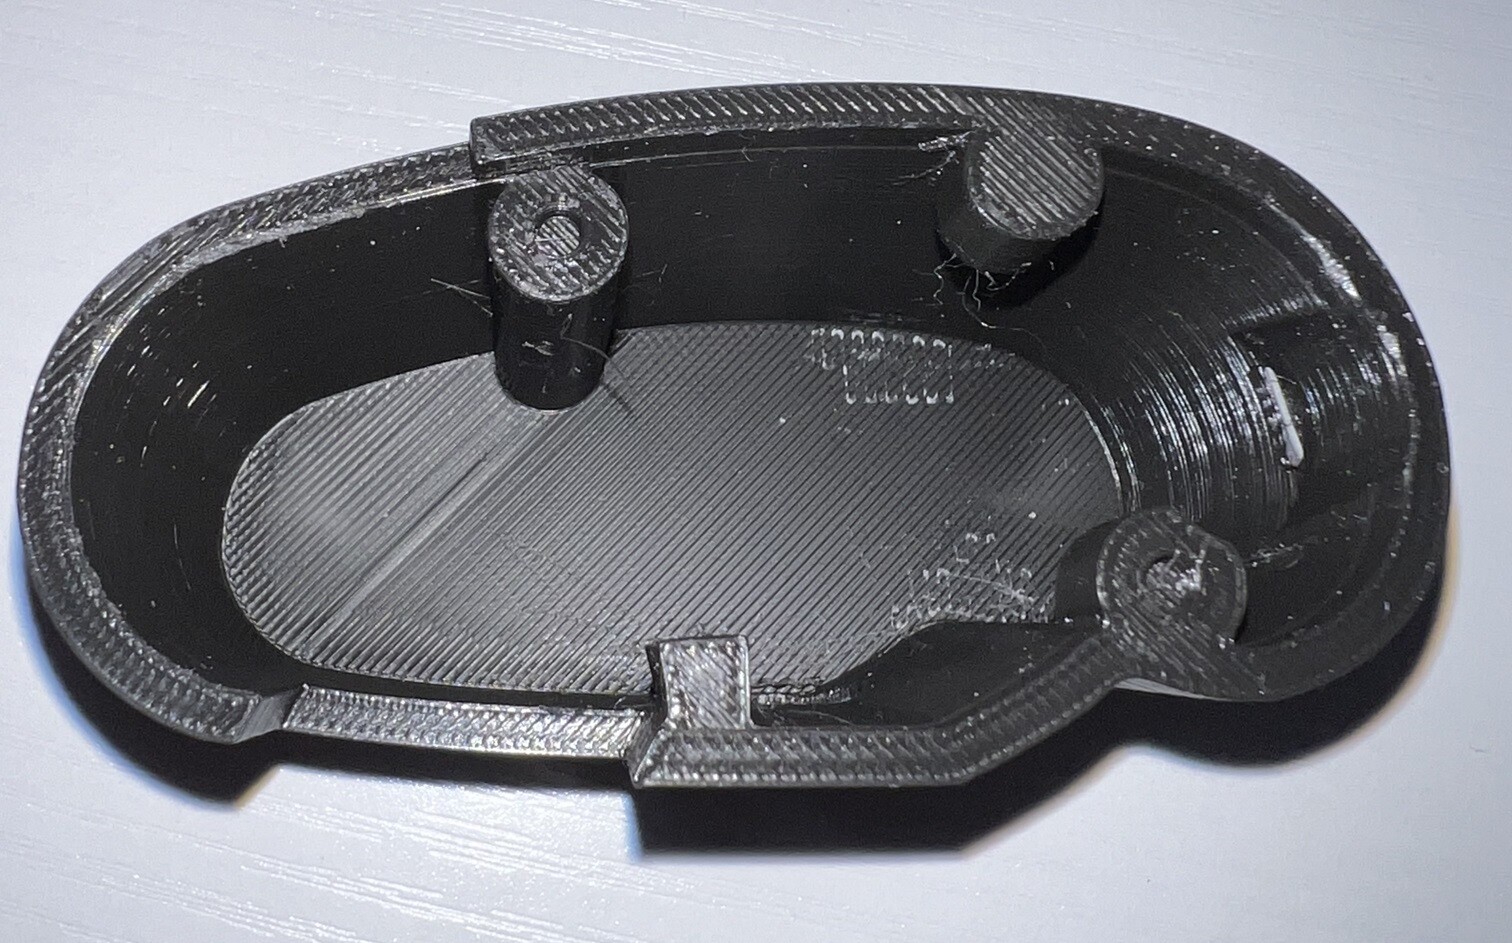
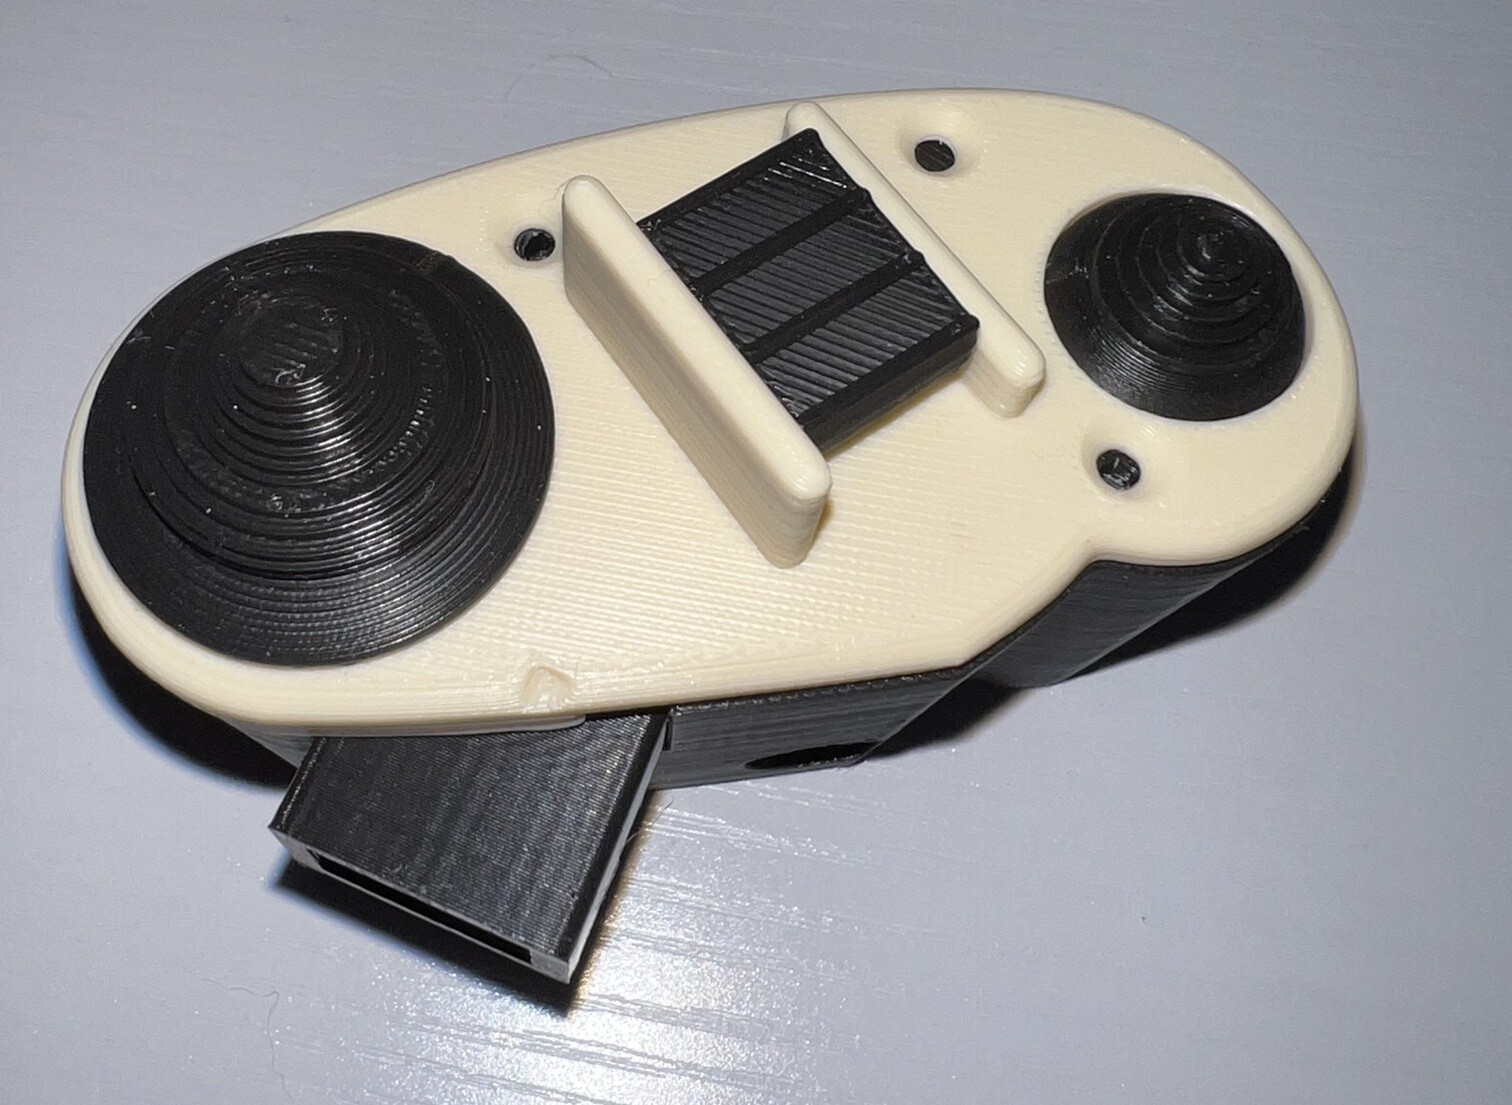
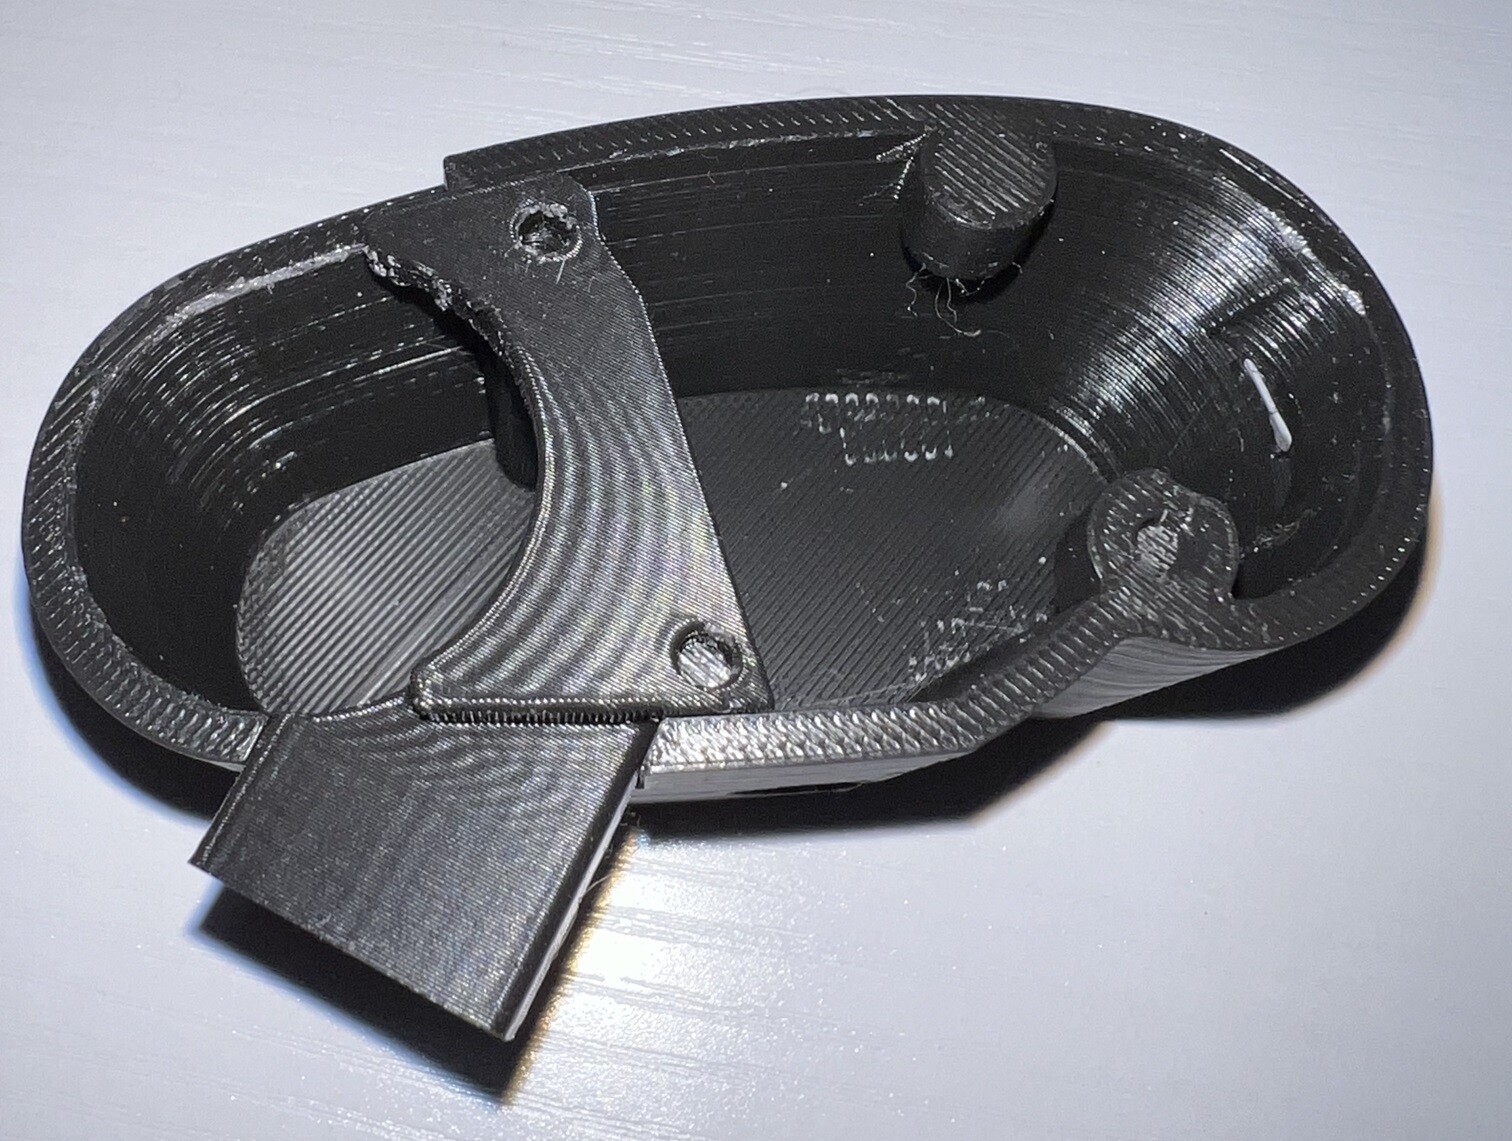
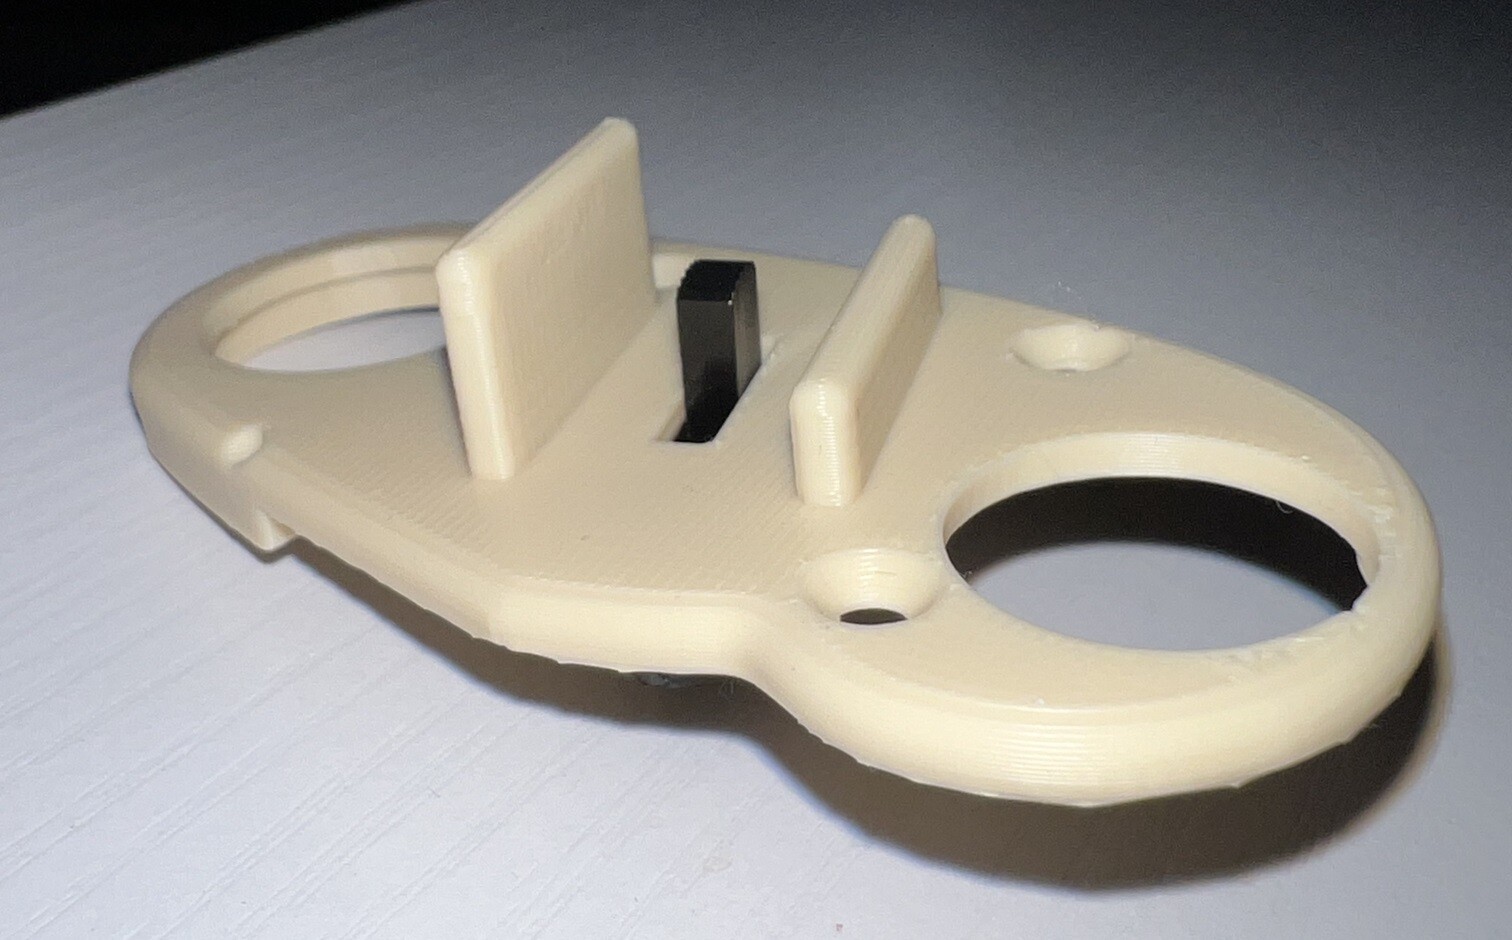
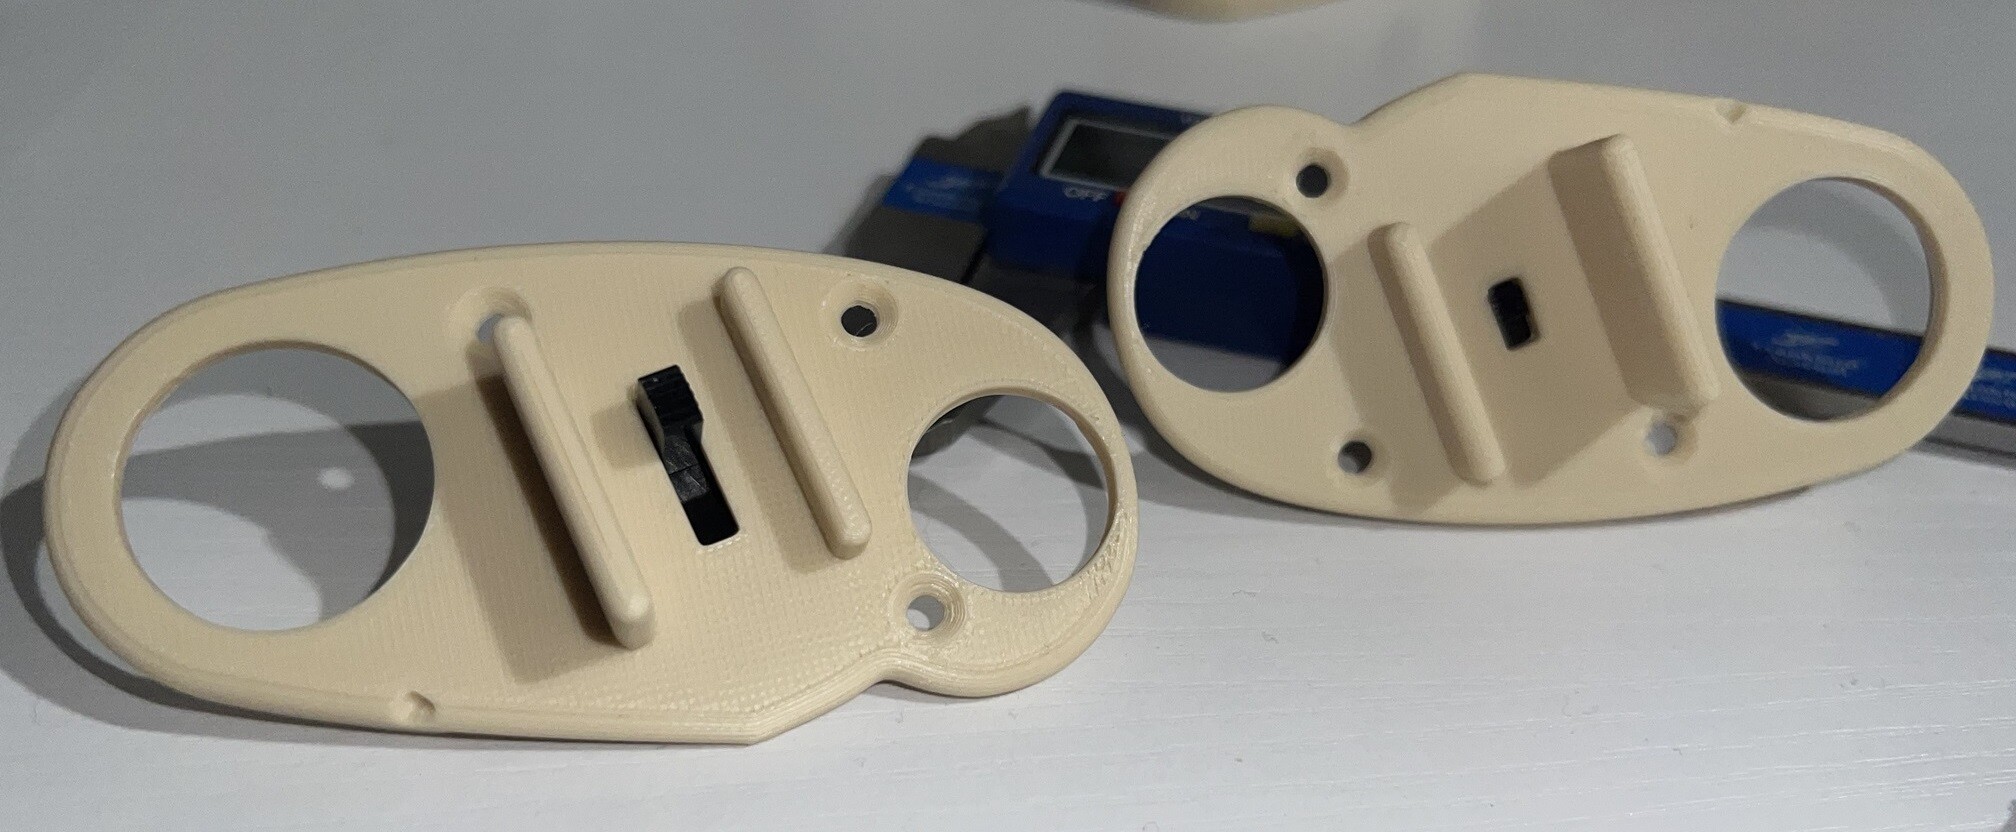
Stayed up a little too late last night making some modifications. I first made a spacer that I figured I'd just superglue to the back of the throttle cover and then I figured, why not try to just print it as a single part. I've attached the .stl file of the latest mod and have added some pictures to show what it looks like with the switch mounted. I used two 2mm x 0.4mm x 10mm screws to attach the switch to the throttle cover. The spacer does two things. First, it gives the switch something to attach to so it won't move. Second, it lowers the switch handle to the same position as the original switch that was planned to be used. *Edit - speed brake hat has been edited and .stl attached. ** Edit - throttle body and blade has been edited and .stl files attached. More info can be found in a later post. Modified Throttle Quadrant With Integral Spacer.stl Modified Speed Brake Hat.stl Trial 2 Modified Right Throttle Body.stl Trial 2 Modified Blade - Right Throttle Quadrant Handle.stl
-
The momentary speed brake switch arrived yesterday from Mouser so I played with it a bit last night. Looks like there is enough room for the switch even though it is significantly larger then the 2 position switch I had for the project. I modified the stl to make room for the switch handle and the increased range of motion required. Looks like this will work; however, not sure if gluing it in place will work or if I'll need to add material to the back side of the throttle cover with a spot to take screws. The switch hat will also need to be modified to accept the larger switch handle but I haven't looked at that yet. I can share the modified stl if anyone is interested and can't do it themselves. The switch handle appears to be to in one of the far positions in the pictures because it isn't secured to the throttle cover. It is a momentary switch, resetting the the middle, off position.
-
@Yogi8 I see there are two new files on thingiverse. I have downloaded the wing sweep hat. The other new file that I see is the left throttle quadrant and I think that file is a duplicate. From what I tied out, its the right throttle quadrant file that is missing.
-
I printed all the files with Creality Print as well without much issue. The first time I printed the flap handle, I did it like in your picture but the top portion was weak and snapped off for some reason so I did have to reprint it. The second time I printed it differently to reduce the amount of supports. Worked fine the second time. Some of the holes were printed at 45° angle to reduce or eliminate the need for supports.
-
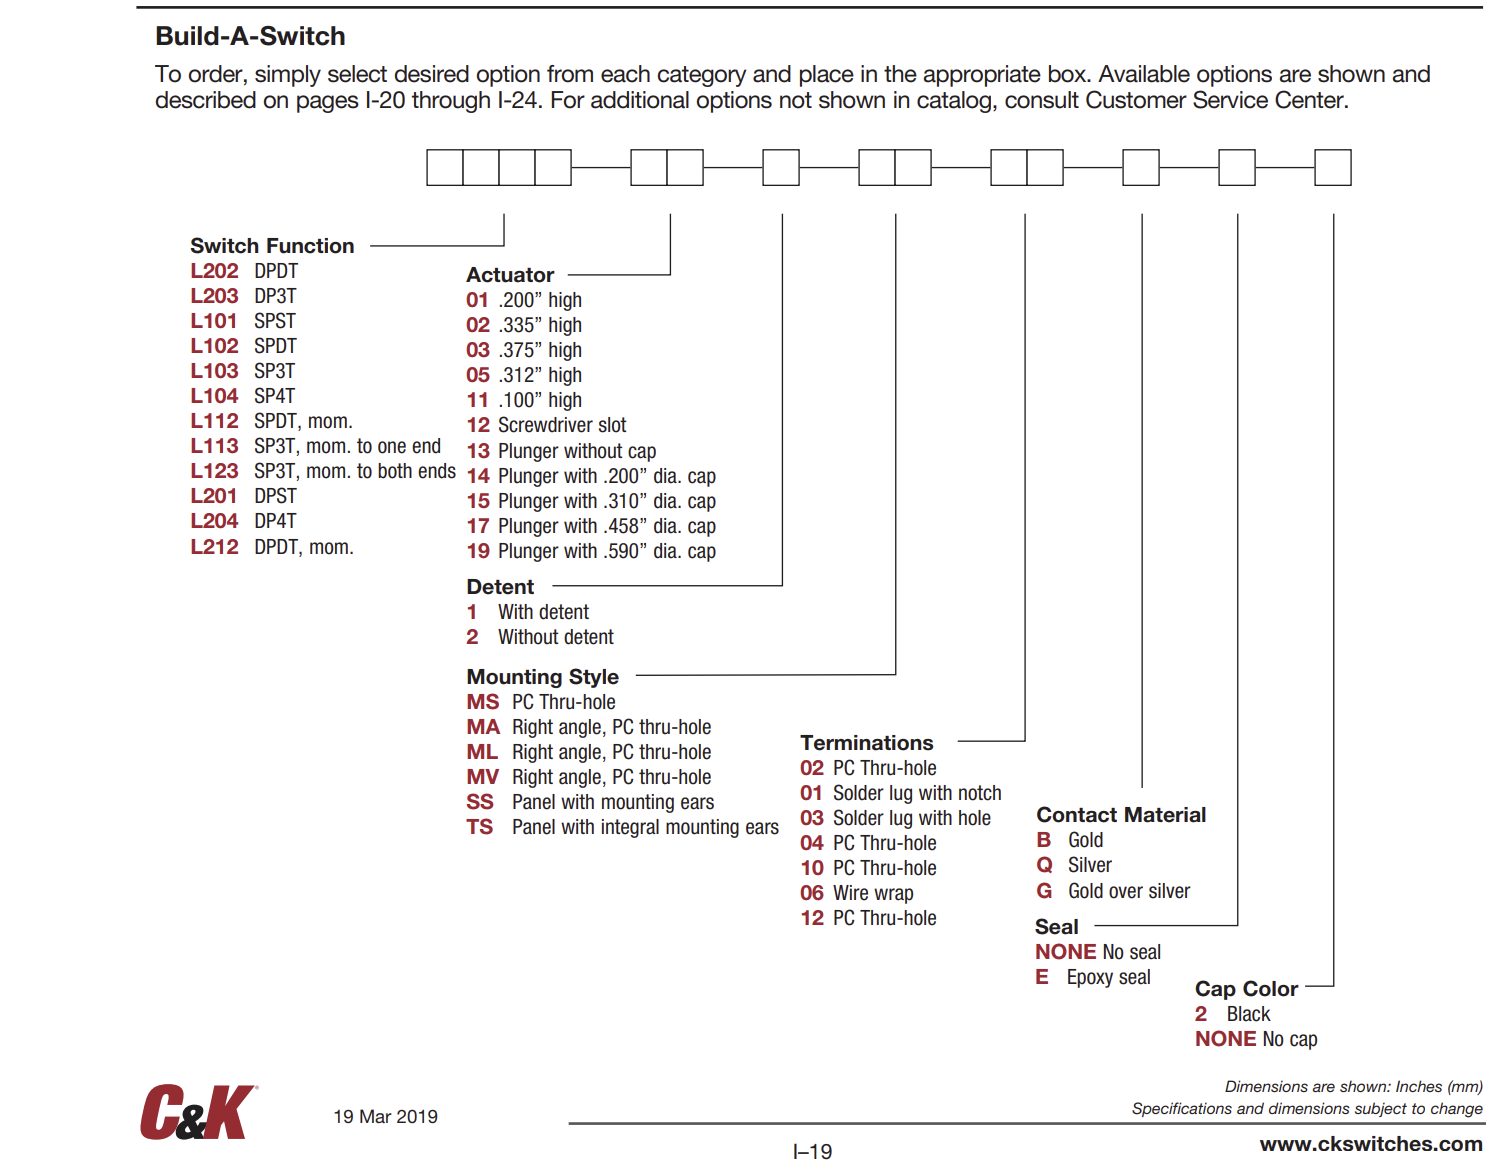
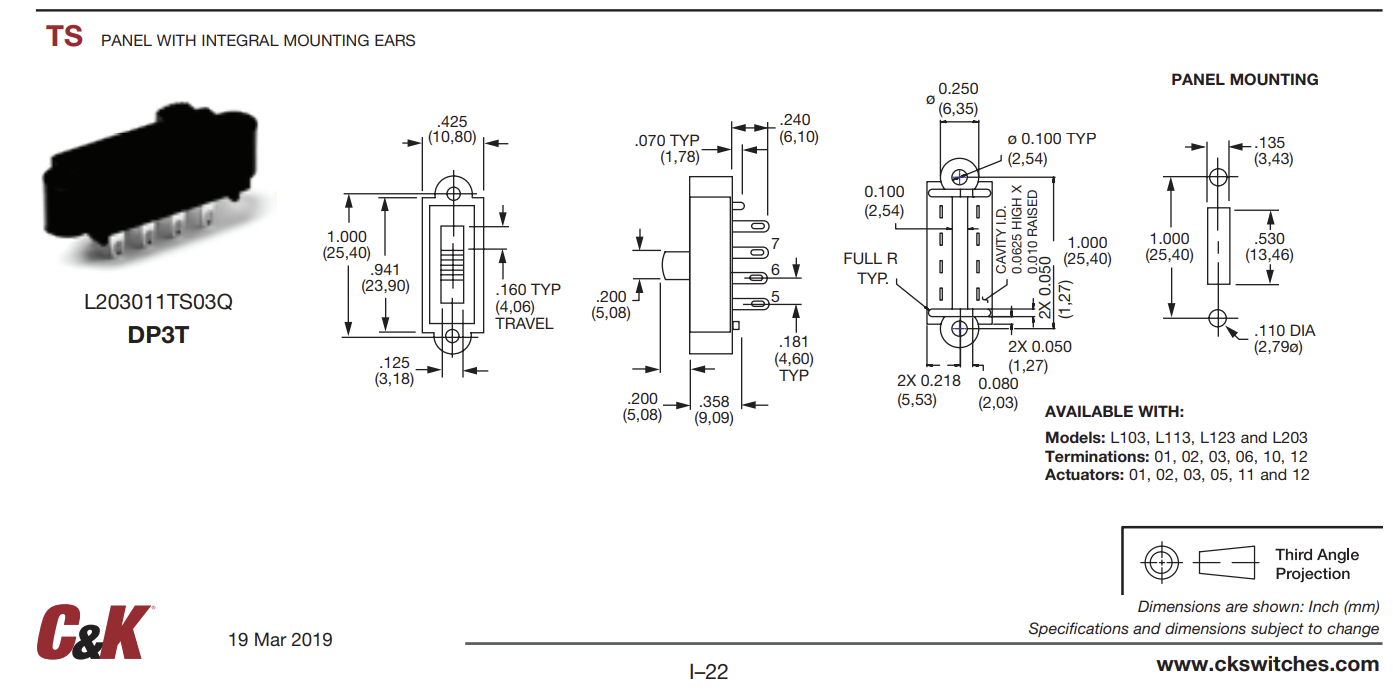
Found some C&K L123 momentary slide switches that may be worth looking into. I'm going to order one. @Yogi8 or others, if you are wanting/willing to update the model for this momentary slide switch to fit, I'd gladly ship one to you to use for yourself. :-) Unfortunately they don't make the momentary (L123) in the 'panel with mounting ears' configuration. There may be other brands and options out there but this is all my searching turned up. L123012TS03Q - $5.51 each. Shipping is $7.99 https://www.mouser.com/ProductDetail/CK/L123012TS03Q?qs=Pzq478CtQydSs5eJdMmRnQ%3D%3D https://www.mouser.com/datasheet/2/240/l-3050917.pdf
-
I have a couple of Leo Bodnar 64 button boards I am going to try using first, before I go the Arduino/Pro Micro and DCS Bios route for the throttle and additional control panels. I did use a pro Micro for a couple of the panels but I found it a little challenging to set up and haven’t even attempted to add a shift register yet. I may just use the Pro Micros and DCS Bios for LED position indicators, assuming the Bodnar board works as well as I’m expecting. If there’s anything I can help with, let me know. I’m slowly adding one panel at a time. Wish I knew FreeCad… Been using Blender but I don’t think it’s the best application for developing control panels.
-
Thanks so much for sharing your work! I've got all but a couple of the components printed but am wondering if there are a few not included in what has been posted. Here is what is potentially missing: - Right throttle blade, equivalent of the file 'Left_Throttle_Quadrant_v1.stl' - Right throttle wing sweep position hat - Right throttle wing sweep position donut All my switches and screws are ordered! Ended up buying 90% of the stuff from BoltDepot.com. There were only a couple of items I couldn't get there but was able to source the remainder on Amazon, one being the M4 x 155mm threaded rod. The only length I was able to find was 150mm so I purchased that and am hoping it will work. Going through the video a few times, I added the following parts to the hardware list: - M2 x 16mm flat head (1) - M2.5 x 3mm pan head (3) - M2.5 x 8mm flat head (3) - M2.5 x 10mm flat head (3) - M3 x 6mm flat head (5) Looking forward to the next build video and those 3 stl files