Sergey_Pe
-
Posts
82 -
Joined
-
Last visited
Content Type
Profiles
Forums
Events
Everything posted by Sergey_Pe
-
Suncom SFS and Talon restoration and mods
Sergey_Pe replied to debolestis's topic in PC Hardware and Related Software
You are welcome. If you want to use a thumb switch as 2-way+push you still need a PCB- otherwise the central switch will close every time you push the button fwd or aft. This PCB is smaller (21x14 mm); I use it in my mod- please see the file attached. The difference is that need just two signals from the switch (Up and Down), so two diodes less in the circuit. What kind of electronics are you planning to use in the grip? RKJXM_2_21x14.zip -
Suncom SFS and Talon restoration and mods
Sergey_Pe replied to debolestis's topic in PC Hardware and Related Software
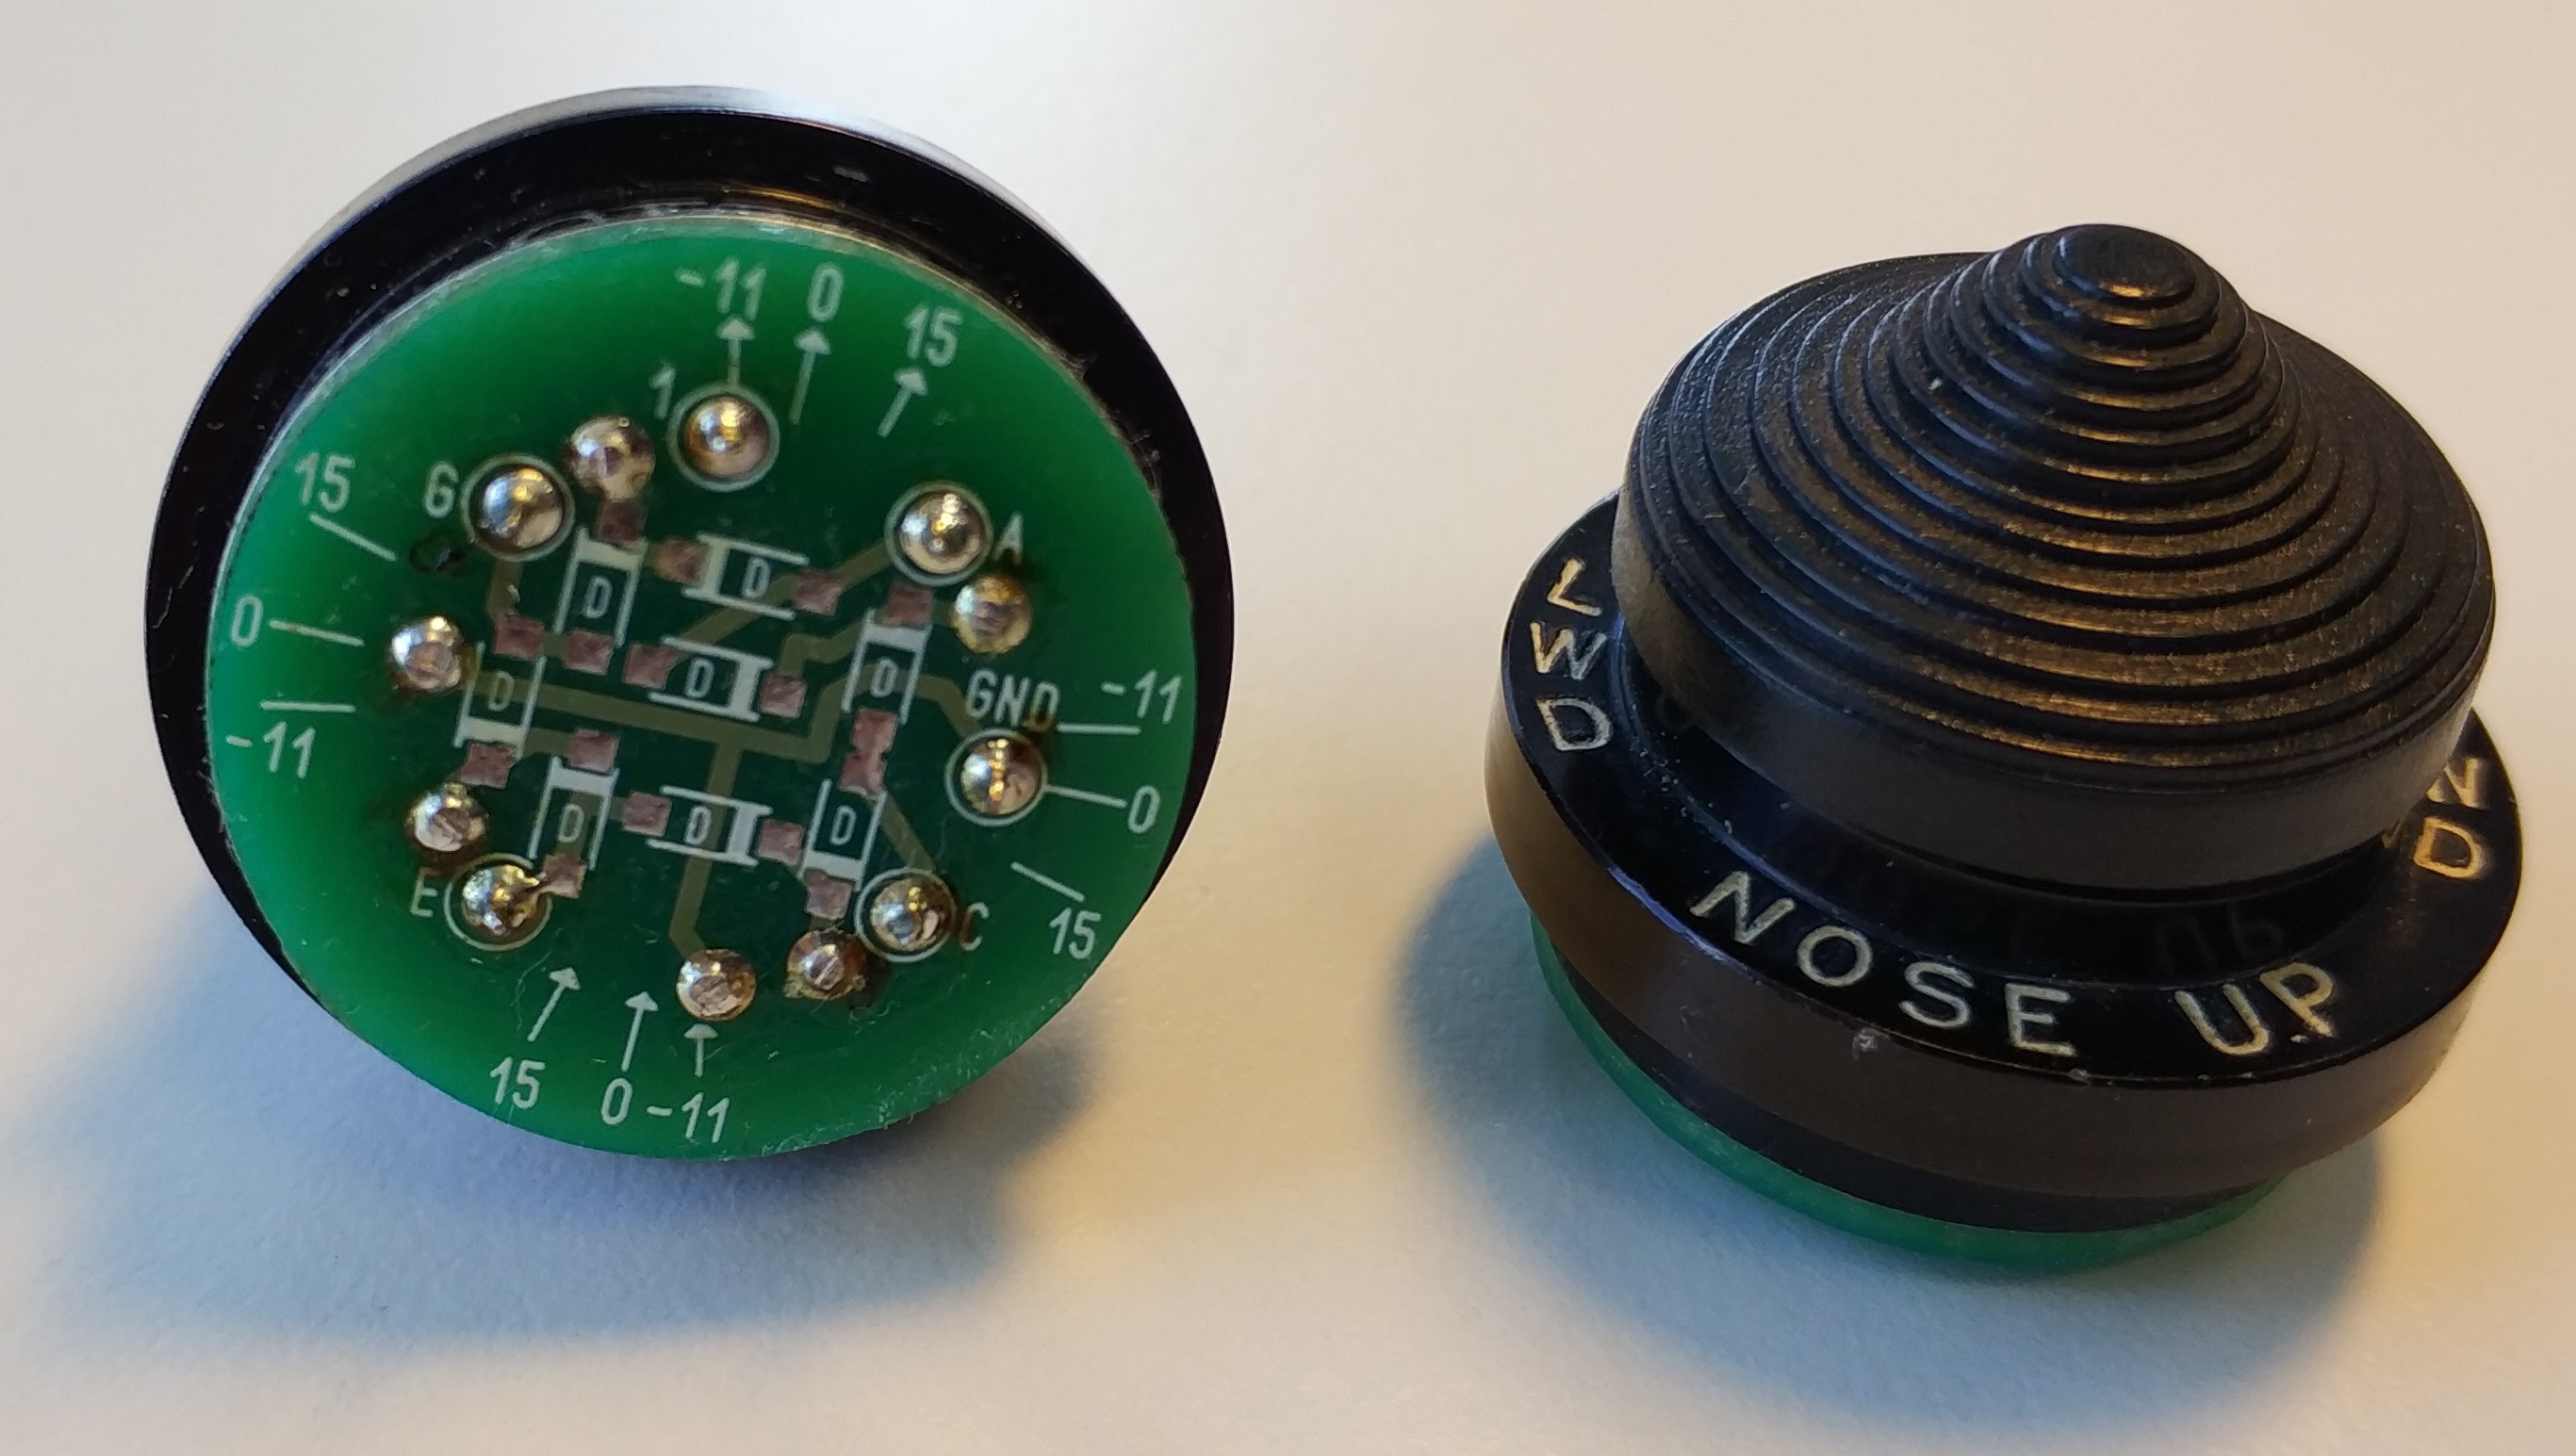
Schmirco, very good work! Just a reminder in case you want to use the "Press" function of the hats (ALPS RKJXM): the center switch operates both when the shaft is pressed and when it's moved to any direction. You'll need to add a small additional PCB (21x18 mm) to each of the hats to allow the independent operation of the center switch- please see the posts #354 and #356 of this thread. Please also see the PCB layout in Sprint format attached. Debolestis, after a long delay I'm finalizing the grip (actually, two grips) assembly :); here are the pics of the right-side hat using ALPS RKJXL switch and a modified body of a real-life OTTO hat switch (US military surplus bought on eBay). Hat cap and shaft are Suncom stock parts (the shaft was shortened and drilled to fit the switch shaft). The "15" and "-11" marks are used to set the correct orientation of the hats- in the real grip they are rotated 15 and -11 degrees. The left-side hat pics and the whole upper part assembly pics will follow soon. Center Switch PCB 21x18.zip
-
Вообще-то именно такое крепление используется на всех вариантах металлической механики от ВКБ.
-
Announcing Project VPC MongoosT-50
Sergey_Pe replied to Solway's topic in PC Hardware and Related Software
The price is for a grip only with Warthog/ Cougar adapter. -
На каких переключателях сделаны кнопки и хатки в ручке?
-
Suncom SFS and Talon restoration and mods
Sergey_Pe replied to debolestis's topic in PC Hardware and Related Software
The size is 1206- by far not the smallest. As for the non-mentioned parts: the switches are OMRON B3F; the bigger ones are 4055 model, the small one- 1055. Of course it's possible to use the buttons from the original board instead. -
Suncom SFS and Talon restoration and mods
Sergey_Pe replied to debolestis's topic in PC Hardware and Related Software
Thanks. As for SMD soldering- well, I've got used to a "traditional" process with a conical solderng bit (appr. 1 mm- diameter tip). The drawback is that you have to hold the part in place with one hand (using a smal tool- pincers or a long-blade cutter) while soldering with another hand- it requires good co-ordination and steady hands :). Also the headband magnifier is a must. For quality soldering apply plenty of neutral liquid flux (rosin + alcohol) and a MODERATE amount of solder. Some people prefer hot air soldering; it is a bit faster and easier for the beginners but requires a careful removal of paste residue afterwards as it contains some active components. Anyway, I've never tried it. -
Suncom SFS and Talon restoration and mods
Sergey_Pe replied to debolestis's topic in PC Hardware and Related Software
Here is an updated archive. I've uploaded it to OSH Park- looks like all the boards/ layers are processed properly. SuncomF15_V2_2.zip -
Suncom SFS and Talon restoration and mods
Sergey_Pe replied to debolestis's topic in PC Hardware and Related Software
OK, agreed. I've just checked OSH Design Tool Help- they require the exported files to be renamed; hopefully it's as simple as that. -
Suncom SFS and Talon restoration and mods
Sergey_Pe replied to debolestis's topic in PC Hardware and Related Software
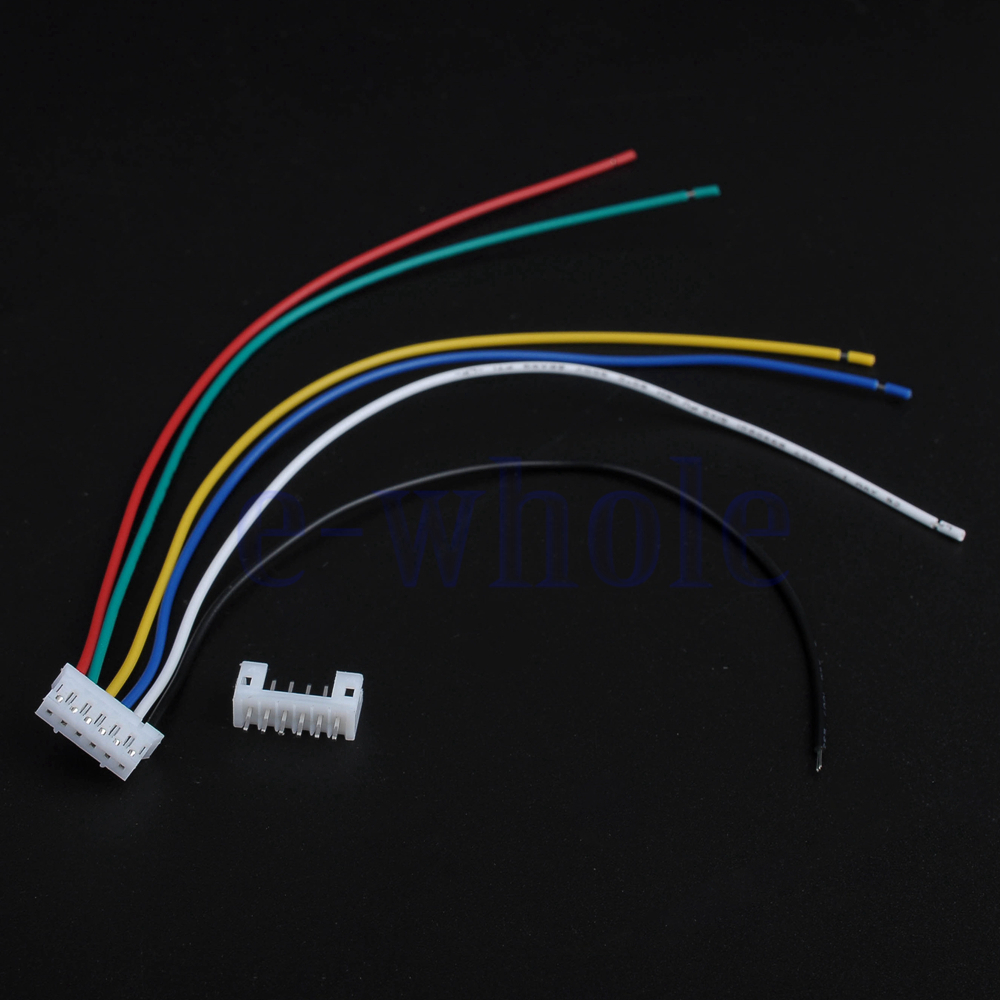
I'll upload a part list here in a couple of days; nothing special or expensive. BusterBust, the connectors are JST PH with 2 mm pitch. 1x 2-pin,1x 4-pin, 1x 5-pin and 2x angular 6-pin ones are needed. I'm ordering them on eBay, there is plenty of offers; the most handy way is to buy the sets of plug- socket pairs already wired.
-
Suncom SFS and Talon restoration and mods
Sergey_Pe replied to debolestis's topic in PC Hardware and Related Software
And here is the second set (my PCB's for ALPS switches with RLJXL/ RKJXM option). One word of warning: although I've used Gerber/ Excellon export function for PCB ordering once (and it worked fine), I cannot guarantee 100%- compatibility with a particular manufacturer's requirements. On the other hand, they are usually doing some pre-check, informing the customer about any issues/ unclear points. Conversion_1.zip -
Suncom SFS and Talon restoration and mods
Sergey_Pe replied to debolestis's topic in PC Hardware and Related Software
Here are the first two Gerber/Excellon file sets: Cougar/ Warthog PCB and CD4021 board for Suncom with original button layout. I'll upload the files for my ALPS- based boards tomorrow. Conversion.zip -
Suncom SFS and Talon restoration and mods
Sergey_Pe replied to debolestis's topic in PC Hardware and Related Software
I've made some minor adjustments to the layout, adding the base board and the "central button logic correction" PCB for RKJXM. As long as all the boards still fit the rectangle of the same size (so the price will be the same), I think it's worth converting this new version.
-
Suncom SFS and Talon restoration and mods
Sergey_Pe replied to debolestis's topic in PC Hardware and Related Software
I do agree. A small correction of these files is needed- the bottom mounting hole is displaced just a bit. Actually they are based on a template provided by MegaMozg (http://forum.il2sturmovik.ru/topic/4704-suncom-f15e-talon-sfs-throttle/?do=findComment&comment=439085); I used it as well for the test version of the board and found this mistake. I'll correct it before conversion. -
Suncom SFS and Talon restoration and mods
Sergey_Pe replied to debolestis's topic in PC Hardware and Related Software
Right; but you won't get the central button on either of the hats. And the original Suncom hat mechanism- well, let's be polite- is far from being perfect... Please give me a day or two for the file conversion. -
Suncom SFS and Talon restoration and mods
Sergey_Pe replied to debolestis's topic in PC Hardware and Related Software
AFAIK the only way to convert .lay into Gerber files is to make an export directly from Sprint Layout. What PCB's you would like to convert? I can do it for you, no problem -
Suncom SFS and Talon restoration and mods
Sergey_Pe replied to debolestis's topic in PC Hardware and Related Software
Thanks debolestis! I'm ordering from a local PCB manufacturer (Moscow, Russia); it's a former employer of my colleague who has some friends there, so I enjoy special prices (about 50% of what OSH is charging, though not too cheap still). A guy from Russian Il-2 forum is recommending this company: https://www.seeedstudio.com/fusion_pcb.html; there is also a huge number of other Chinese PCB manufacturers offering their services on eBay but I never tried them. -
Suncom SFS and Talon restoration and mods
Sergey_Pe replied to debolestis's topic in PC Hardware and Related Software
Well, five pull-up resistors with asteriks need to be present anyway (with any switch); but you are right, it's not for the faint-hearted :). Speaking seriously, I've made a layout in Sprint format to be used in Talon as a side hat (attached). As it also requires power and ground connection I've designed it as a pass-through board for the output cable from the shift register board in the grip. I've also done a similar layout to use RKJXM as a generic 5-way hat switch- I'll publish it here if anyone is interested. RKJXM.zip -
Suncom SFS and Talon restoration and mods
Sergey_Pe replied to debolestis's topic in PC Hardware and Related Software
Unfortunately RKJXM's center switch is also closing with any side stick movement. So you'll need an additional circuit to block the central switch operation when the stick is moved sideways:
-
Lynx Cockpit Utility Brick "Button box"
Sergey_Pe replied to LynxDK's topic in PC Hardware and Related Software
Well, the text is in Russian. Almost :). "ЛУСК" should be "ПУСК", "ВУЛЕЖ"-> "РУЛЕЖ", "РАКЕТНЫ"-> "РАКЕТЫ". Of course it's critical for the purists only :) -
Suncom SFS and Talon restoration and mods
Sergey_Pe replied to debolestis's topic in PC Hardware and Related Software
17 contacts in a row are for connecting the buttons (as you would expect:)): 16 buttons and a common ground. To decrease the number of wires I usually connect the common pins of all the buttons one by one and then take just one common wire to a board. -
Suncom SFS and Talon restoration and mods
Sergey_Pe replied to debolestis's topic in PC Hardware and Related Software
They will if you position the chips in a different way. I've done it specifically for Suncom grip before deciding to go for a completely new board with SMD components. The size is 53X19 mm: Shift Register 16_3_53.zip
-
Suncom SFS and Talon restoration and mods
Sergey_Pe replied to debolestis's topic in PC Hardware and Related Software
Yes, it is. AFAIK most of Chinese PCB manufacturers on eBay are accepting this format. And of course you can ask a local company (there should be plenty of them in Canada) if it's OK with them. -
Suncom SFS and Talon restoration and mods
Sergey_Pe replied to debolestis's topic in PC Hardware and Related Software
Here is the layout file made in Sprint Layout format. It includes the main board, two boards for the top hat switches and another one for the thumbstick hat switch. ALPS 8-way RKJXL switches are used for the hats with fore-aft-up-down-top press directions wired. 8 additional diodes on the circular boards are needed if you want to wire one of the top switches (or both) to work as a traditional hat (to register up-left, up-right, down-left and double-right movements). Shift registers are CD4021 in SOIC package, all the resistors are 10 kOhm, capacitors are 0.1 mF, connectors are JST PH (2 mm pitch). All passive SMD components are in 1206 packages. Thumbstick hat board needs to be trimmed a bit as well as the grip halves to fit properly; it can be done with a small file. Top hat switches will be mounted on the top cover separately from the main board as they have to be as close to the hat caps as possible to provide realistic travel. I'll provide the pictures as soon as the hats are mounted (hopefully next weekend). SuncomF15_V2.zip -
Suncom SFS and Talon restoration and mods
Sergey_Pe replied to debolestis's topic in PC Hardware and Related Software
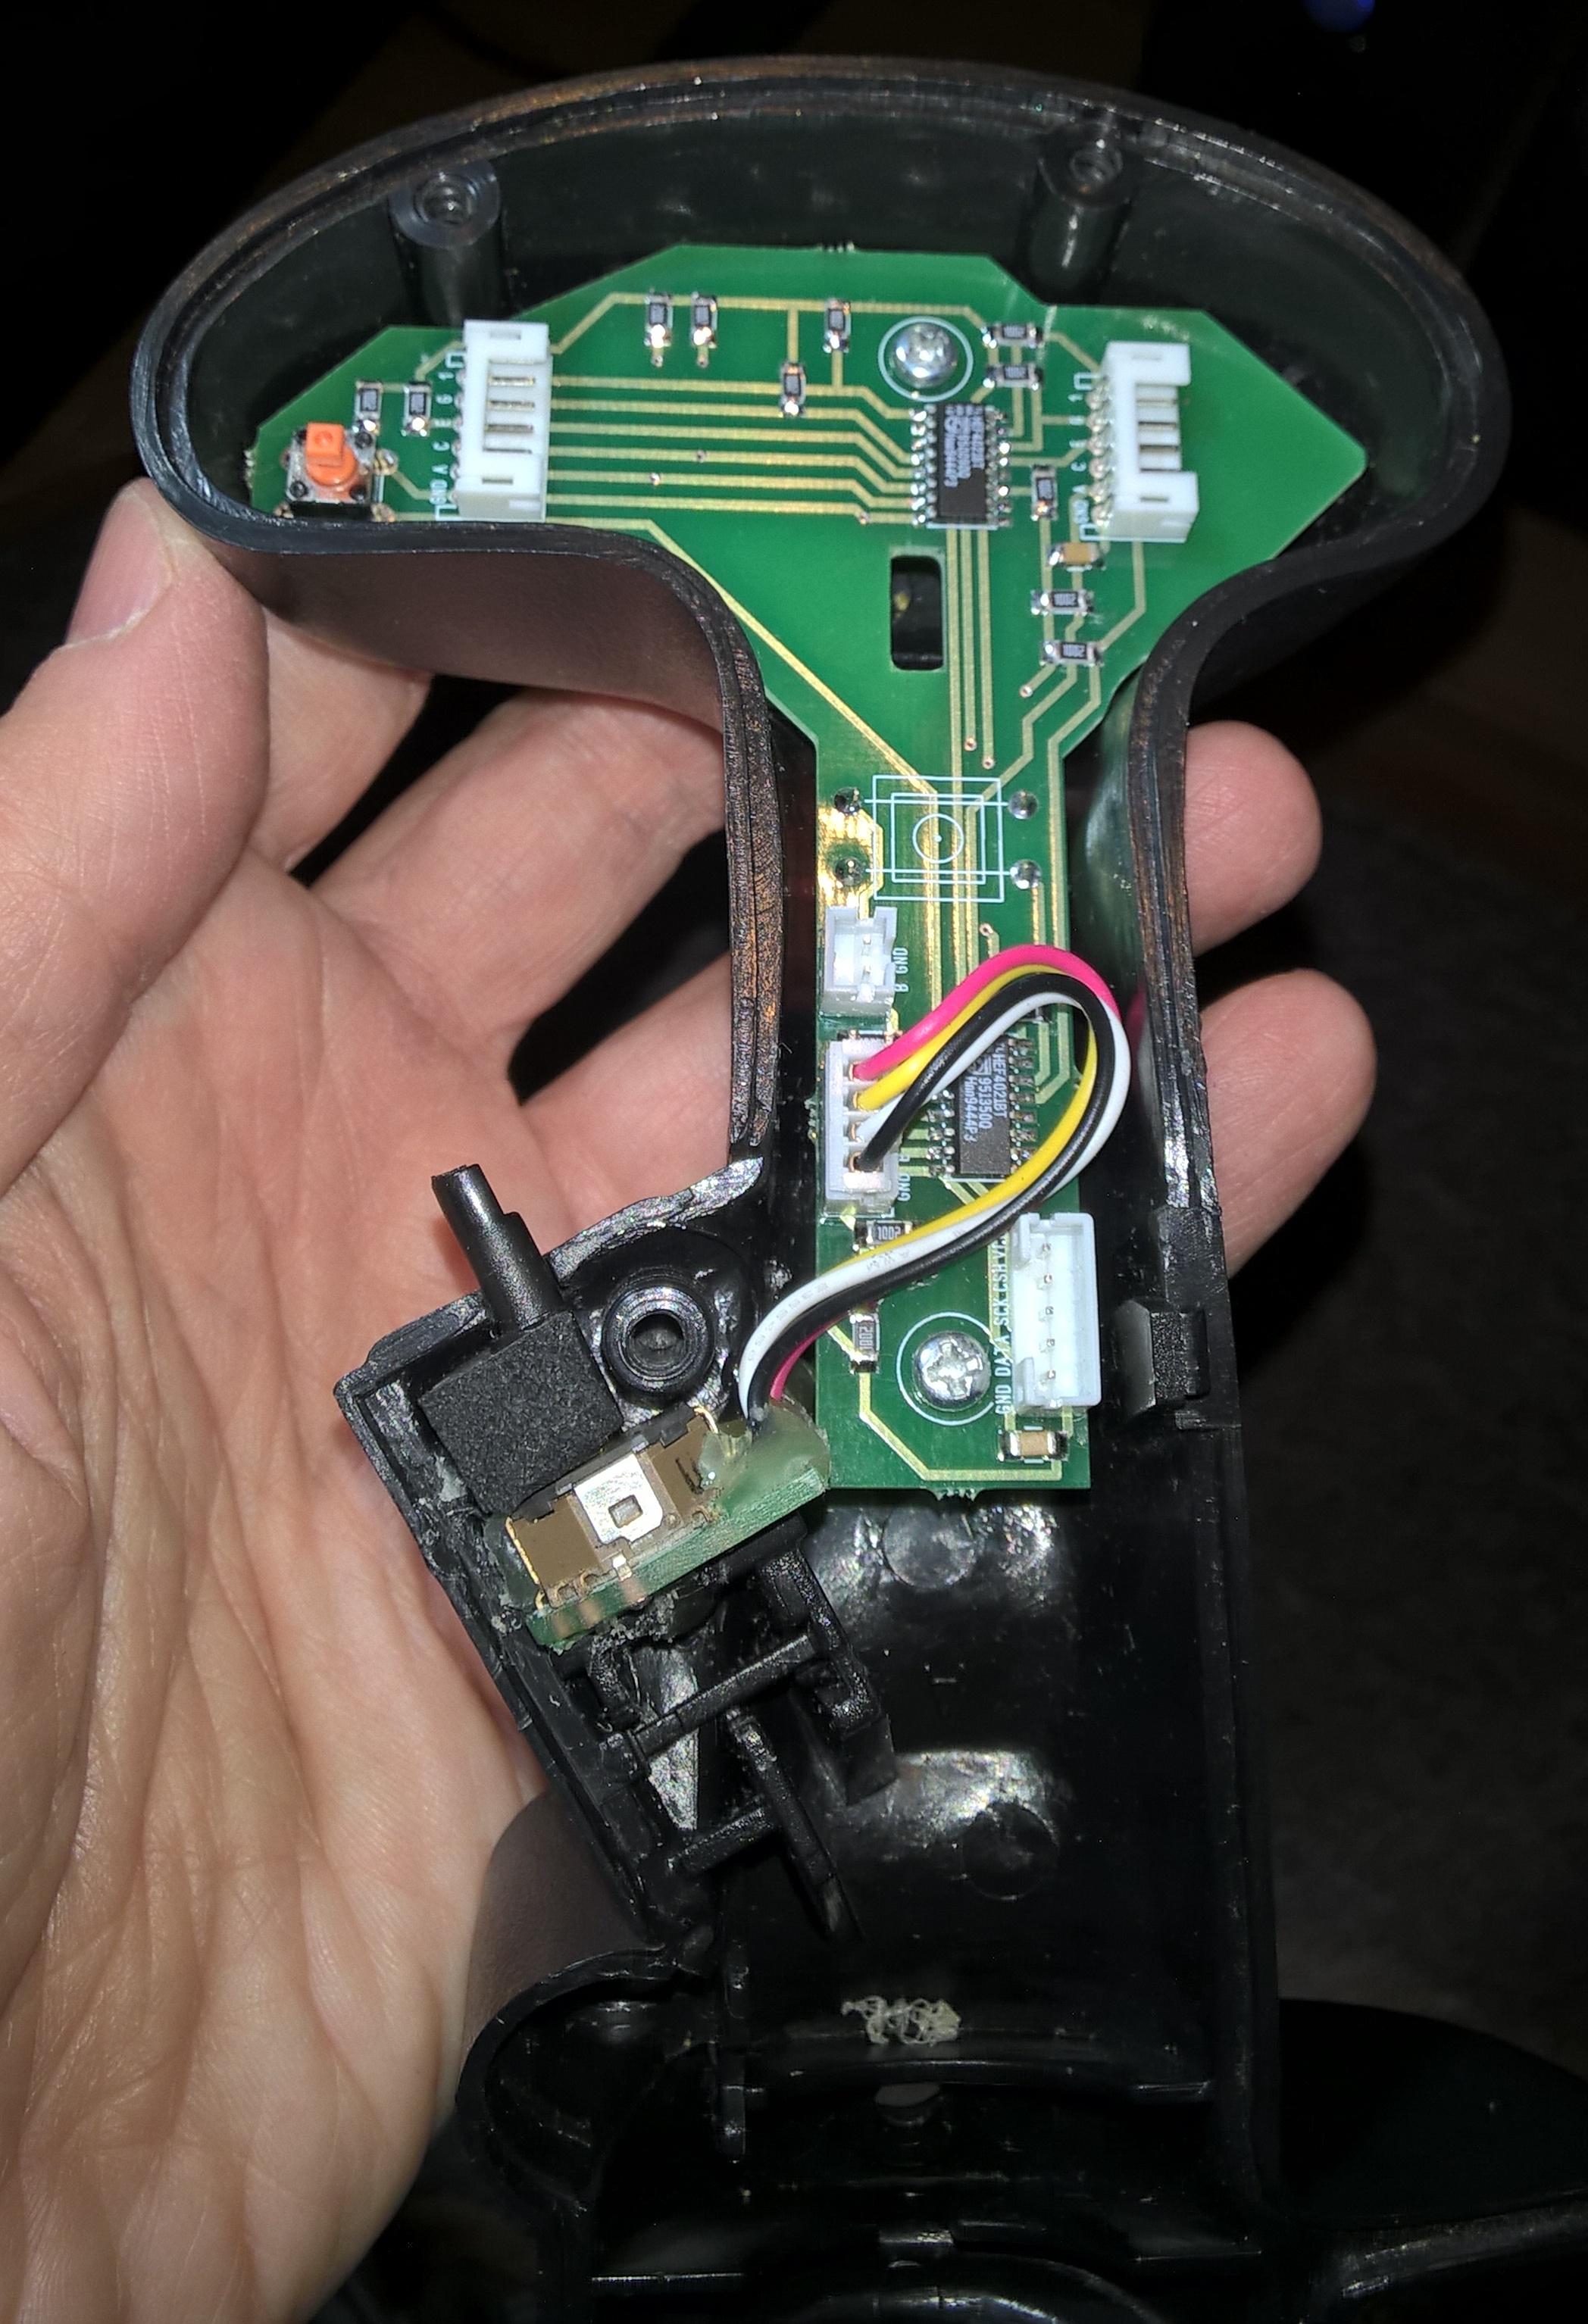
I've finally got some update on Talon grip mod. The main board (2x CD4021 shift registers) was assembled as well as the thumbsick 3-way hat board (ALPS 4-way switch wired to register fore-aft and down movements only). Then I've mounted the thumbstick using some hot-melt glue. The original Suncom thumbstick shaft is made of a very good plastic which is unlikely to crack so I've just shortened it and made a 2 mm hole to press-fit it on ALPS shaft. I've also used a small file to extend the holes in the grip body halves to restrict the thumbstick shaft movement to fore-aft directions only. As it turned out with a relatively long shaft the hat movement is a bit "light", so I've made a kind of gasket out of a piece of rubber foam and placed it around the shaft to add some resistance. Here is the result so far; the top hats will follow.