AusMumbles
-
Posts
101 -
Joined
-
Last visited
Content Type
Profiles
Forums
Events
Everything posted by AusMumbles
-
Punk, As always you are a gem. Hope you are feeling better soon. Woody, I recon it will definitely fit the VDI, I'm currently reworking the HSD to have a thick peice of Acrylic in place and the screen offset to be deeper into the housing to possibly make it work. For what its worth the TV screen is a good idea, however the MIP design is very variable in depth and pitch. If you are following the dimensions to the letter you are looking at 4 -6 screens to cover all of them. In other news I pulled the trigger on a Flux Beamo. So now I have to teach myself a new machine and design process. Cheers, Mumbles

-
Mate, If shipping to Aus is a possibility, I'd be happy to make you an offer. It will look amazing in the Turkey Pit I'm building. Cheers, Mumbles.
-
Good Morning Gentleman, the temperature is 110° Holly shit it's Cobra.... Enough crap out of me for for one post. Gunslinger, while the 3d printed stuff looks fancy, the skills required in comparison to you're amazing pit cannot be understated. If you ever do decide to change some of the parts out, all the electronics you have made can just be move over to the 3d printed parts if you ever decide to go down this route. Lt_Jaeger all the parts, drawings and whatever else you need to make my pit are/will be hosted here for anyone to use. I just like to idiot check my work before I post it to the masses. 3d printing ins't as expensive as you would think once you get your hands on a printer. PLA is about $15-20USD a roll and a decent 3D Printing with a bed large enough to do these parts is in the $550-650 USD dollar range. Something like the Ender 5 Plus isn't a bad option. Just do some research before you squeeze the trigger. https://www.creality3dofficial.com/products/creality-ender-5-plus-3d-printer I finished off the HSD this morning. If anyone is going to try and make the screen work let me know if you find a OLED/LCD that fits. 70's era CRT's are a bit hard to come by. I'm hoping by the end of next week most of the 3D designs for the front instrument panels and HUD will be complete. Punk, Doc Harley or anyone else who can help I would love to grab some measurements for the Gear, Hook and Canopy Jet Handles. Cheers, Mumbles
-
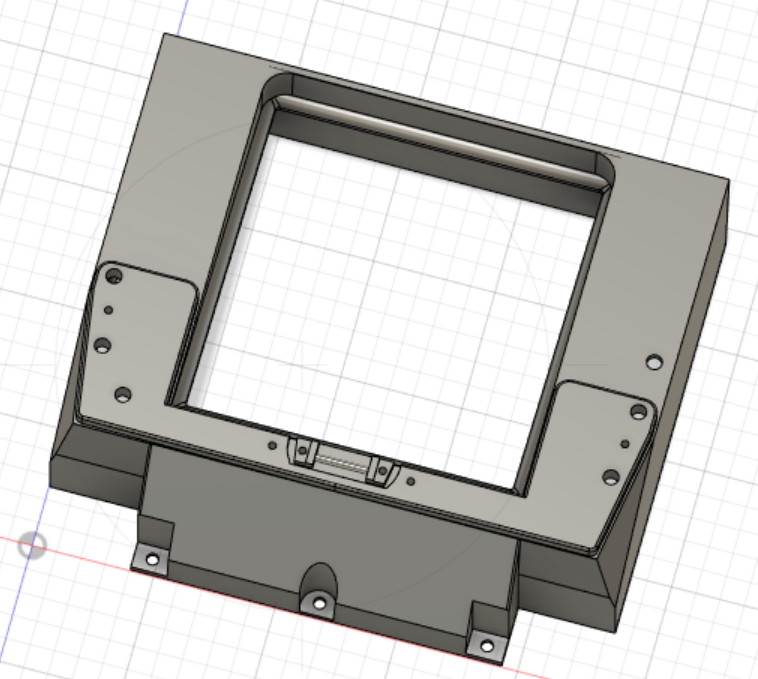
Evening, Couple of more WIP pics of 3d printed bits and bobs. I've pretty much committed to buying a laser cutter as I want to back light these the panels now. Cheers, Mumbles
-
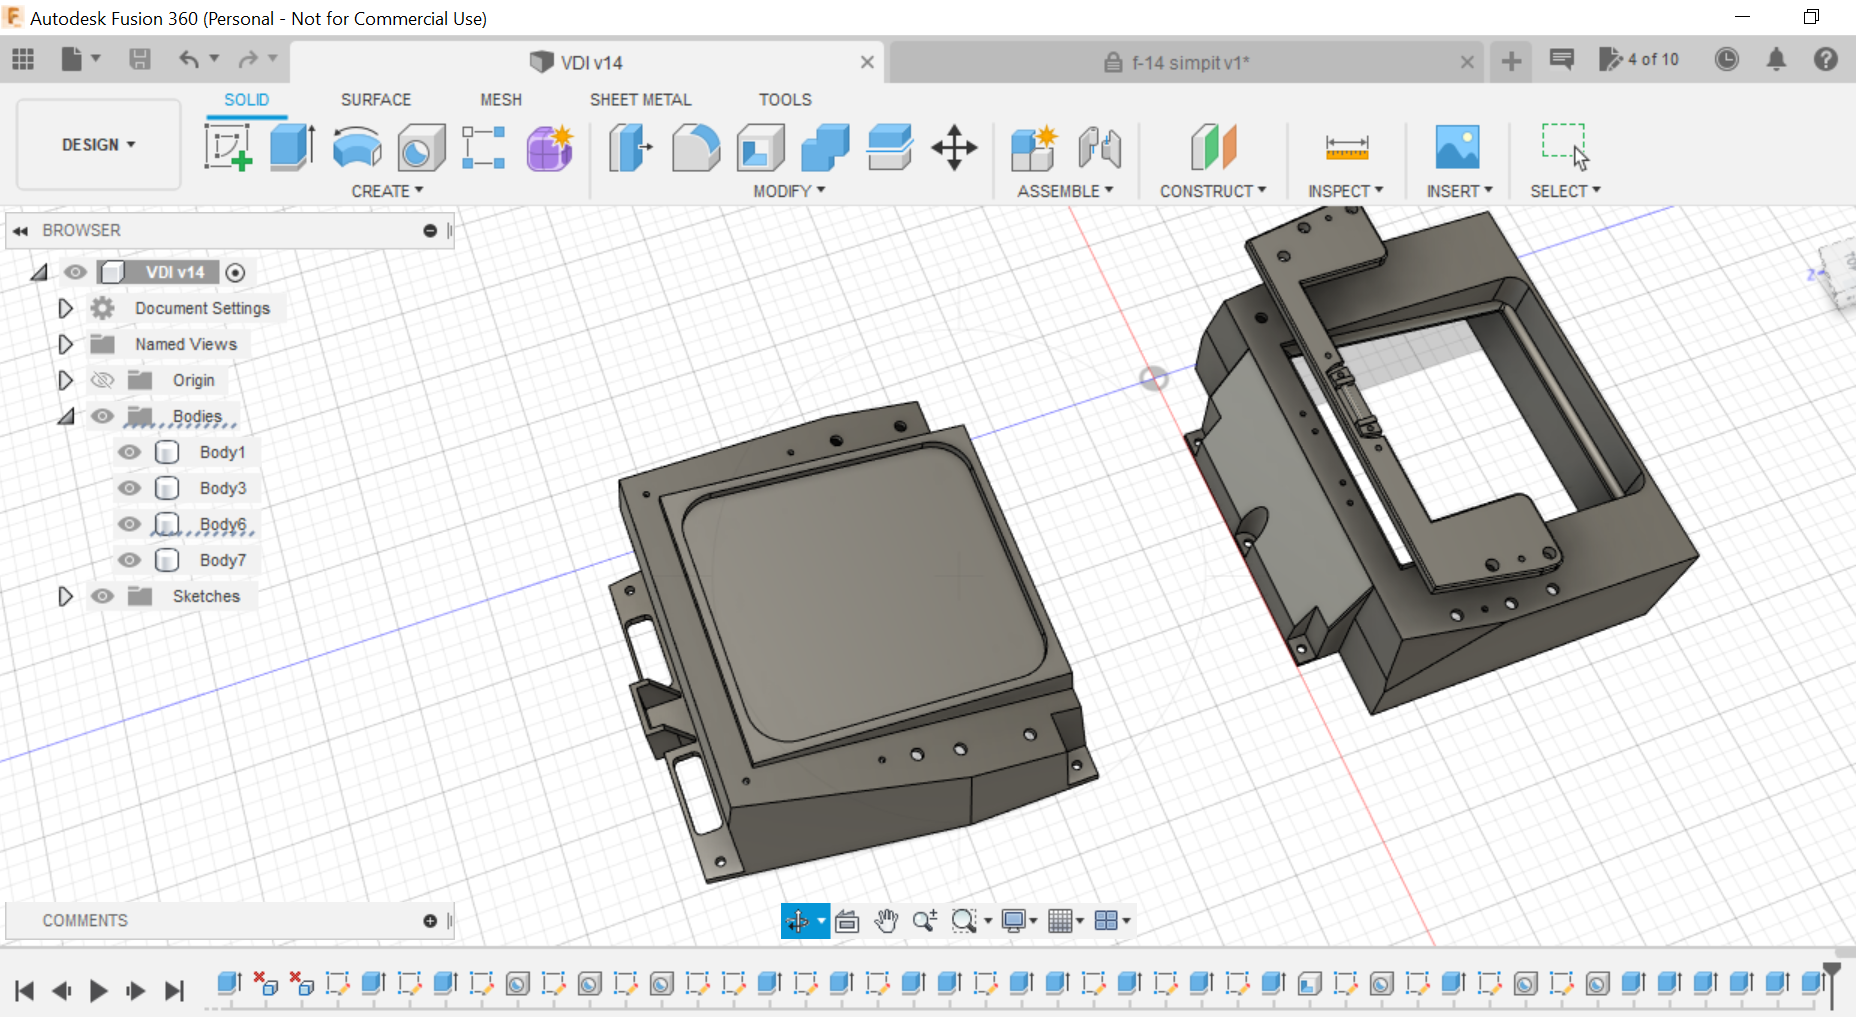
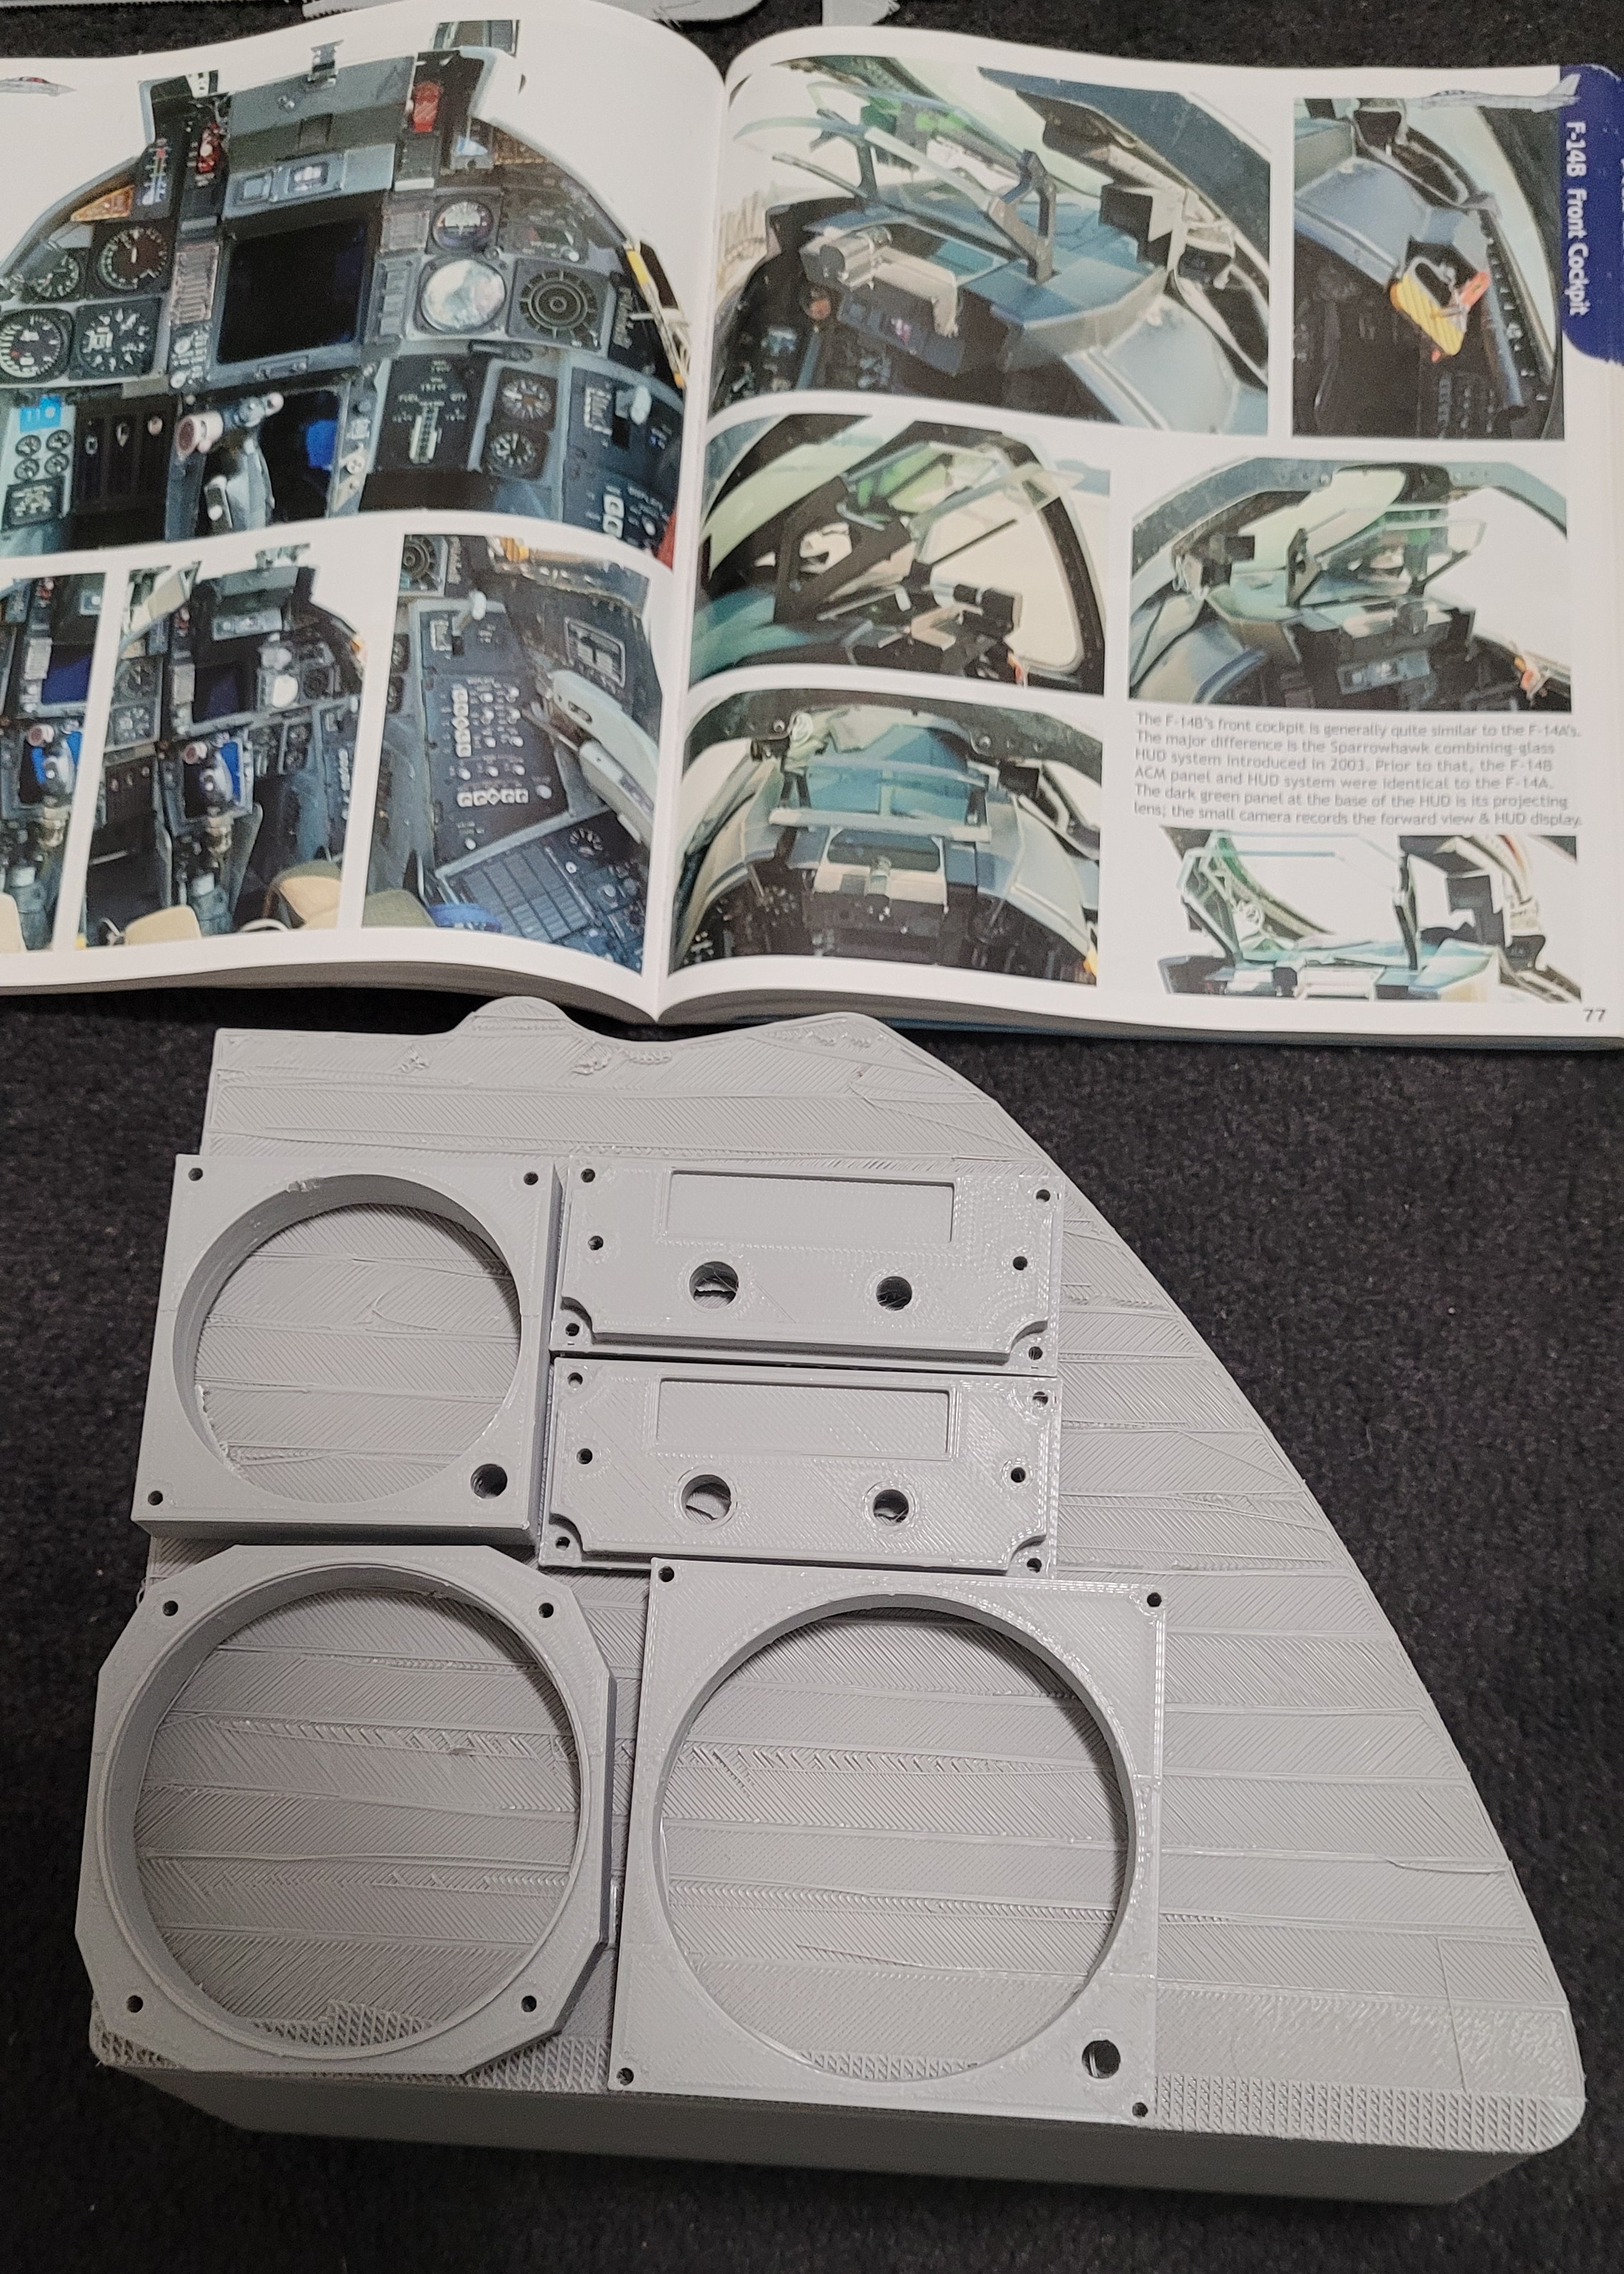
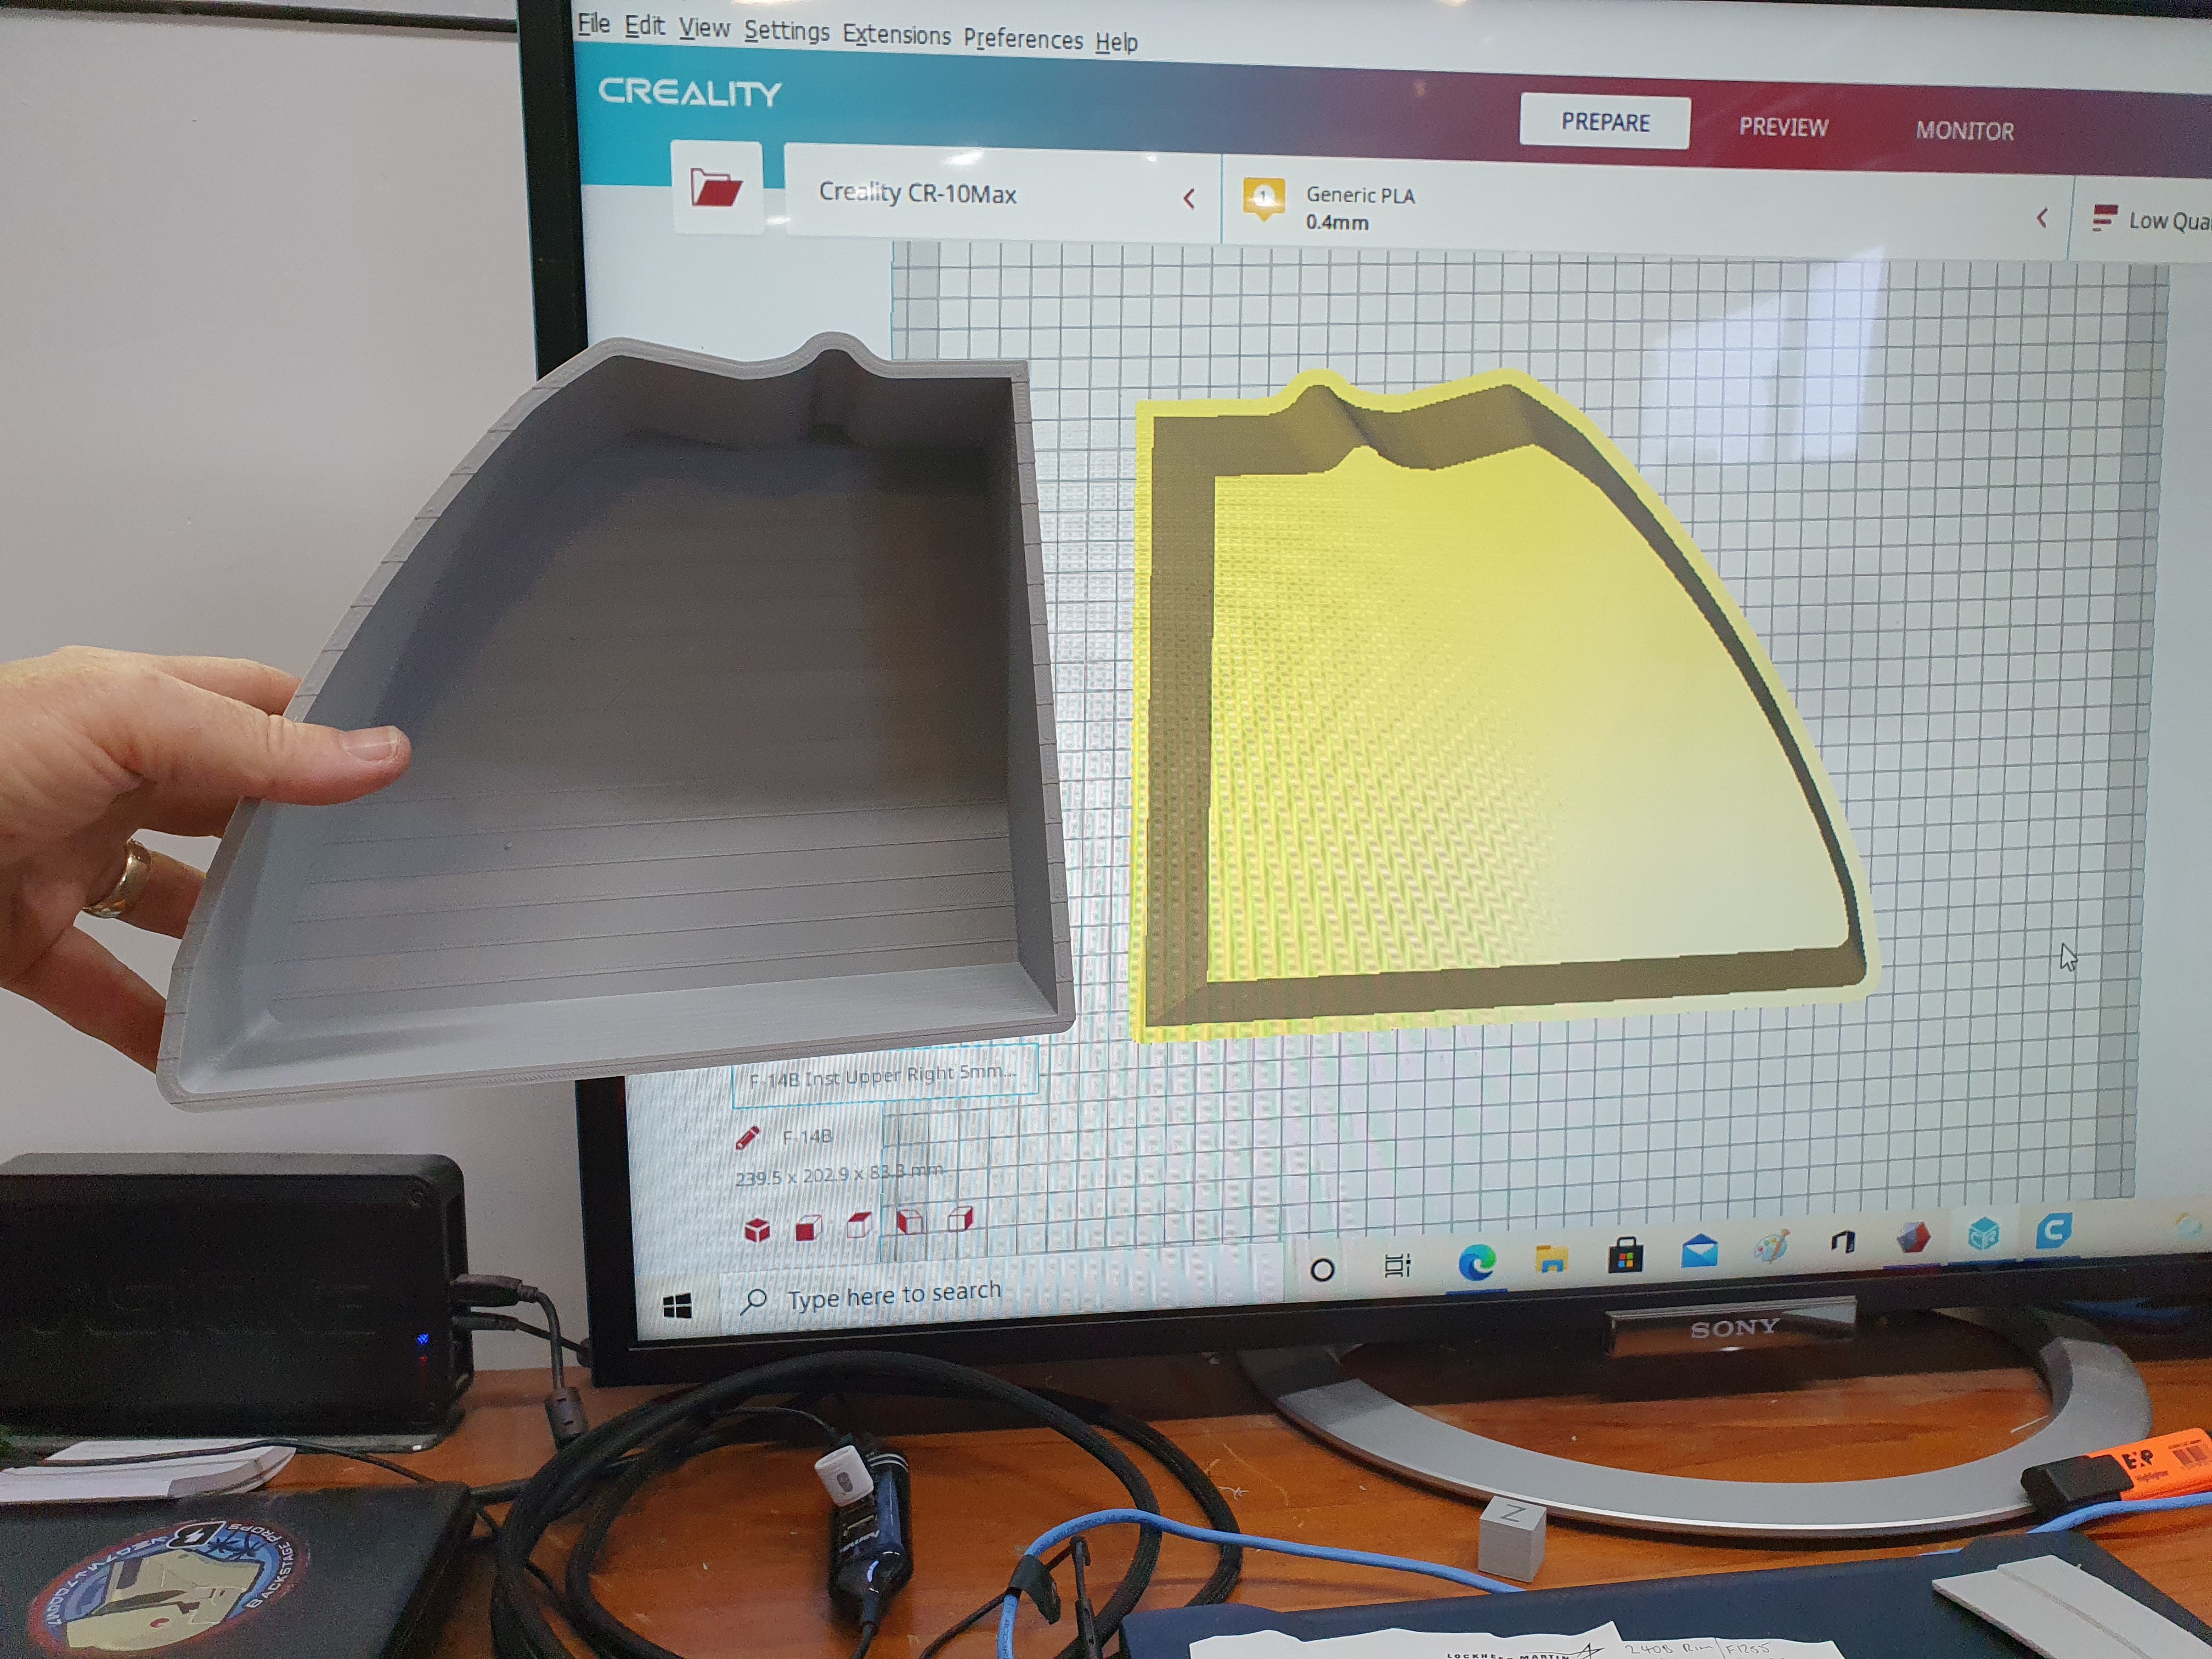
Good Evening Gents, HitmanAlpha1, love the pannels and setup so far mate. Looks amazing. I'd love to get my hands on some of your panel design files later. Figured I should chuck an update as it's been a while. My mates got a fairly large 3d printer and has been helping me out over the last few weeks testing and printing parts. The front instrument uppers have been modelled and the right printed, really happy with the part. I've been working on models for the instrument bezels, VDI and I'll probably start the HSD next weekend. At this stage the parts are going to be static only as the pit should primary run VR. However all of the of parts are being designed with ample room if someone wants to try and cram electronics in to make them work. Once I've got the parts printed and idiot checked I'll post them up here for abuse. Cheers, Mumbles.
-
Gents, Sorry this has taken so long to upload, life as always is keeping me busy. I'll probably expand this post later with some more details on how to build to CNC/Jigsaw the parts as I get further along with my own pit. It's great to see the progress everyone is making on their own pits. They are all awesome. Cheers, Mumbles F-14A-B GRU-7A Aug 21 Plans Draft.zip
-
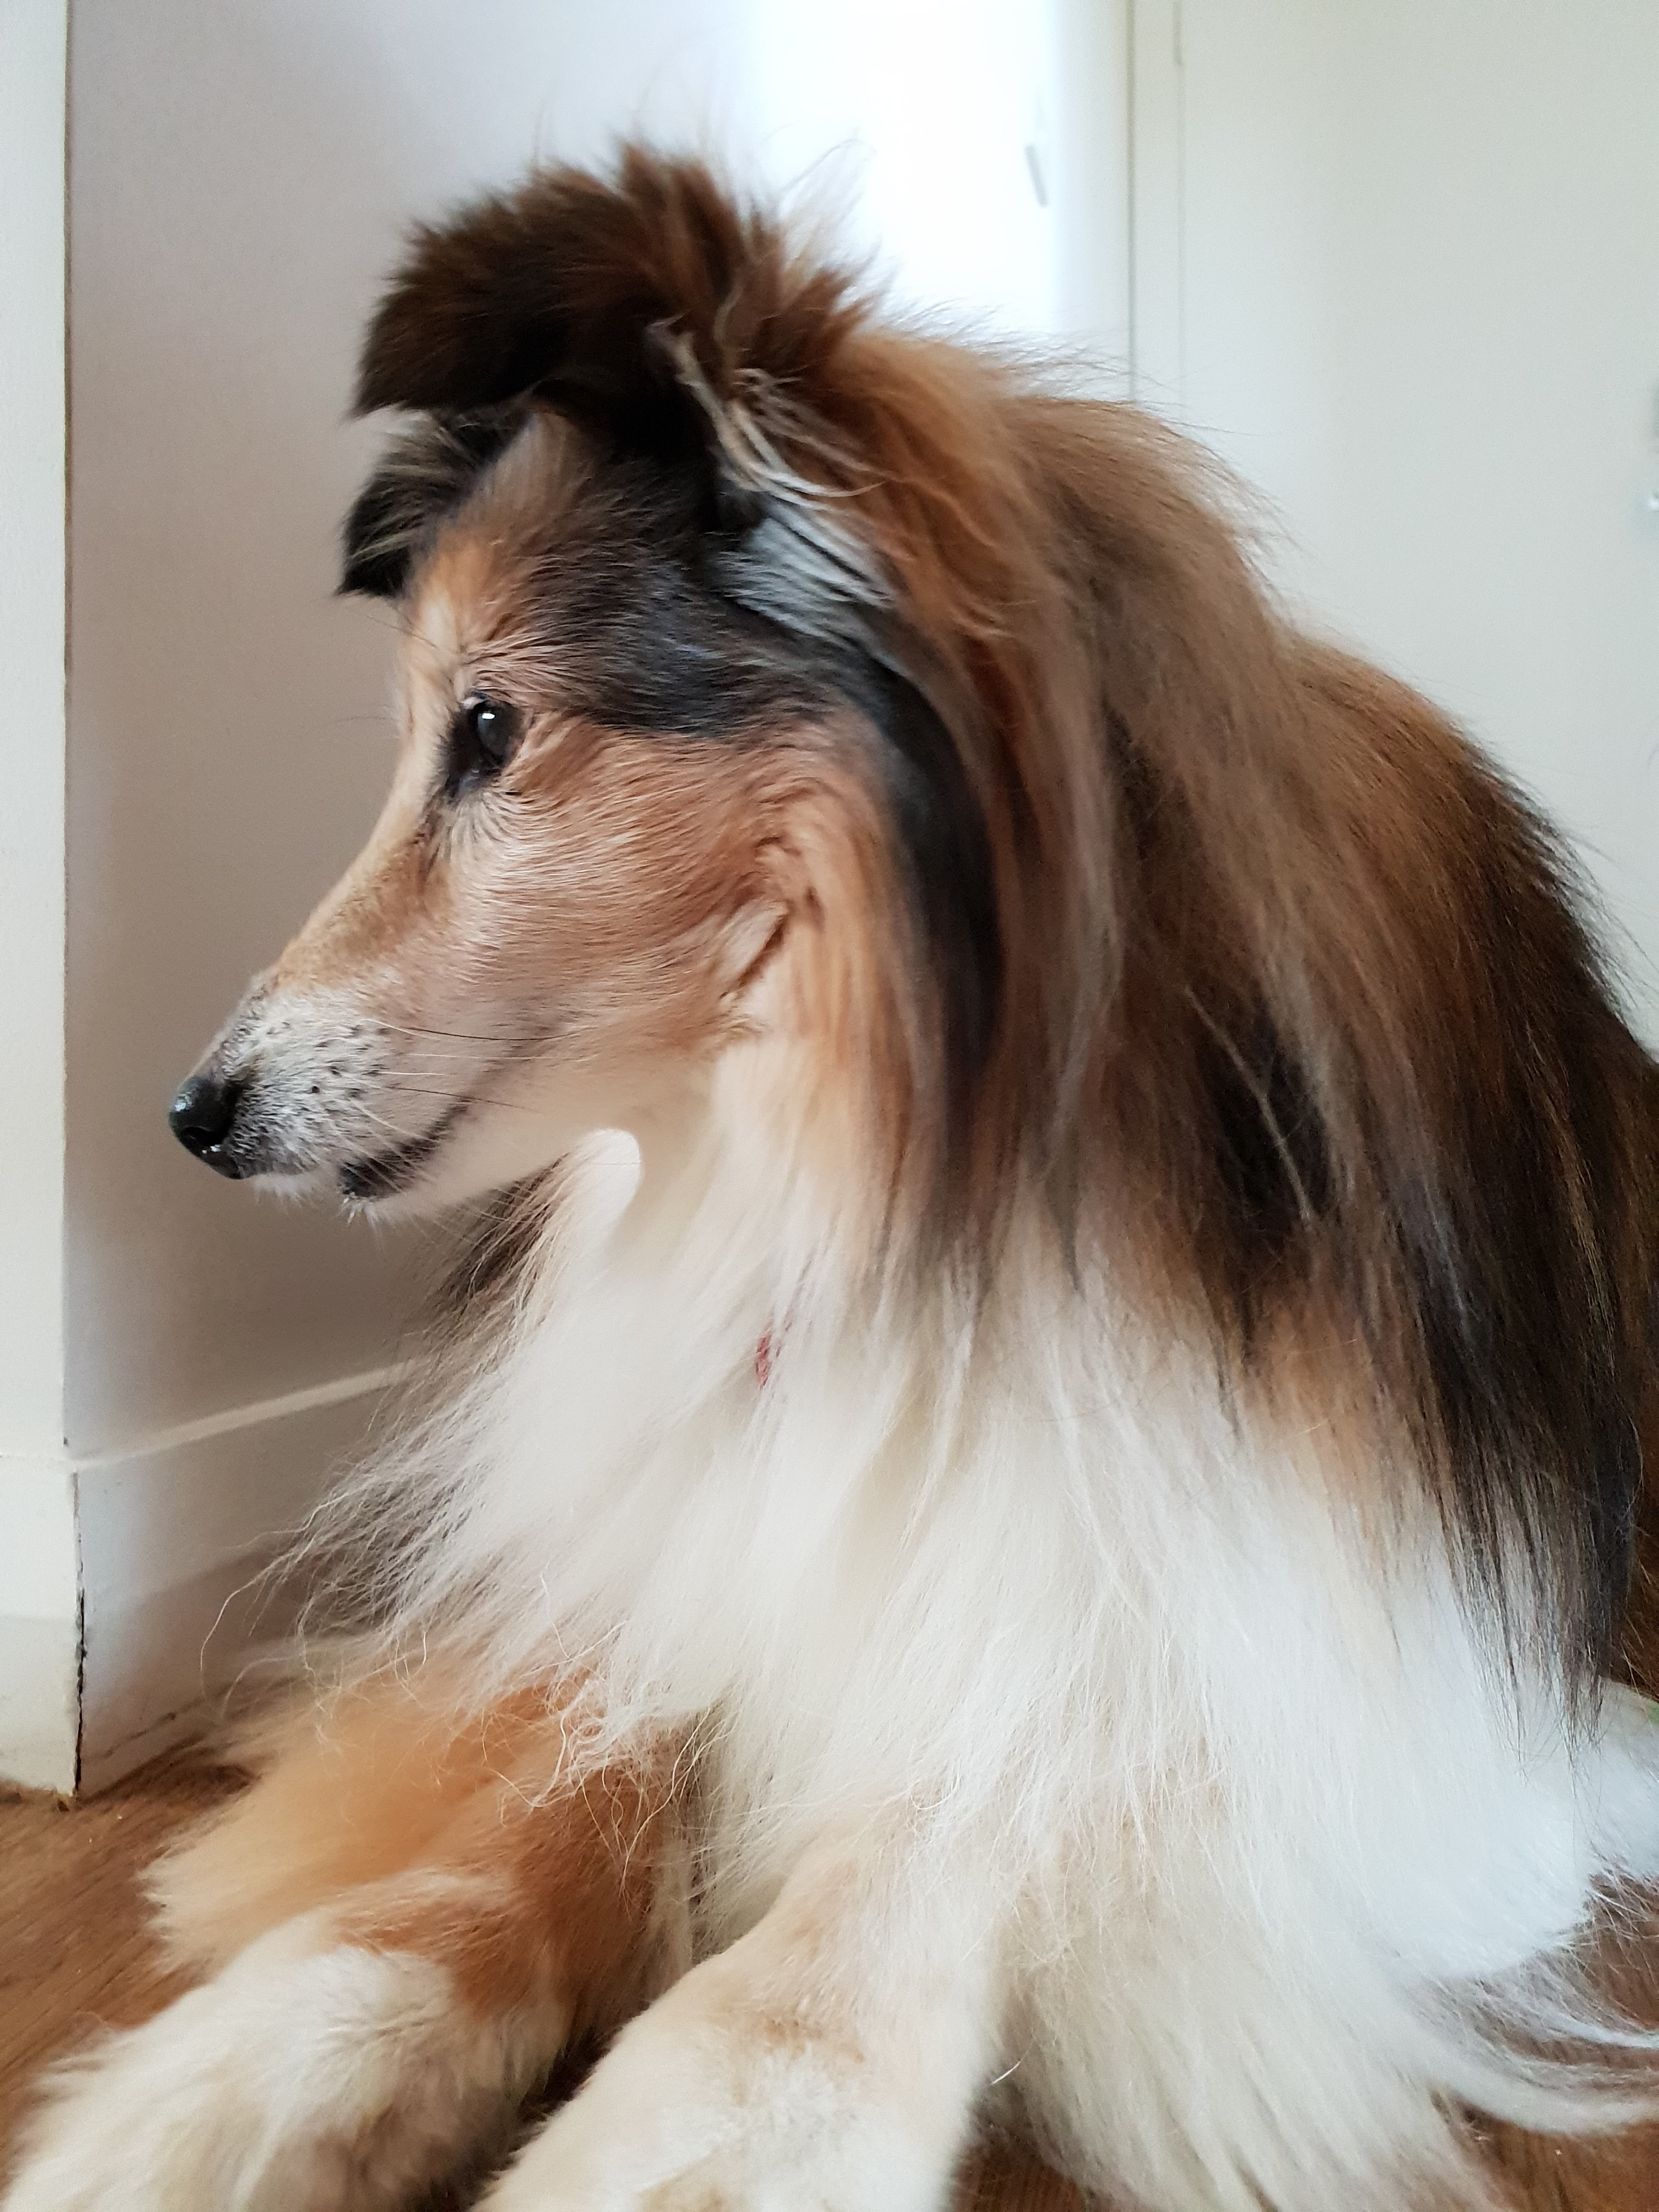
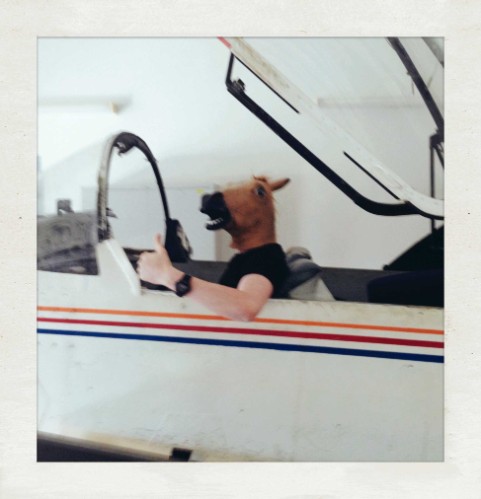
Thanks bro, That's Maggie the build supervisor. She's a Shetland Sheepdog, great dog breed. Way to smart for her own good.
-
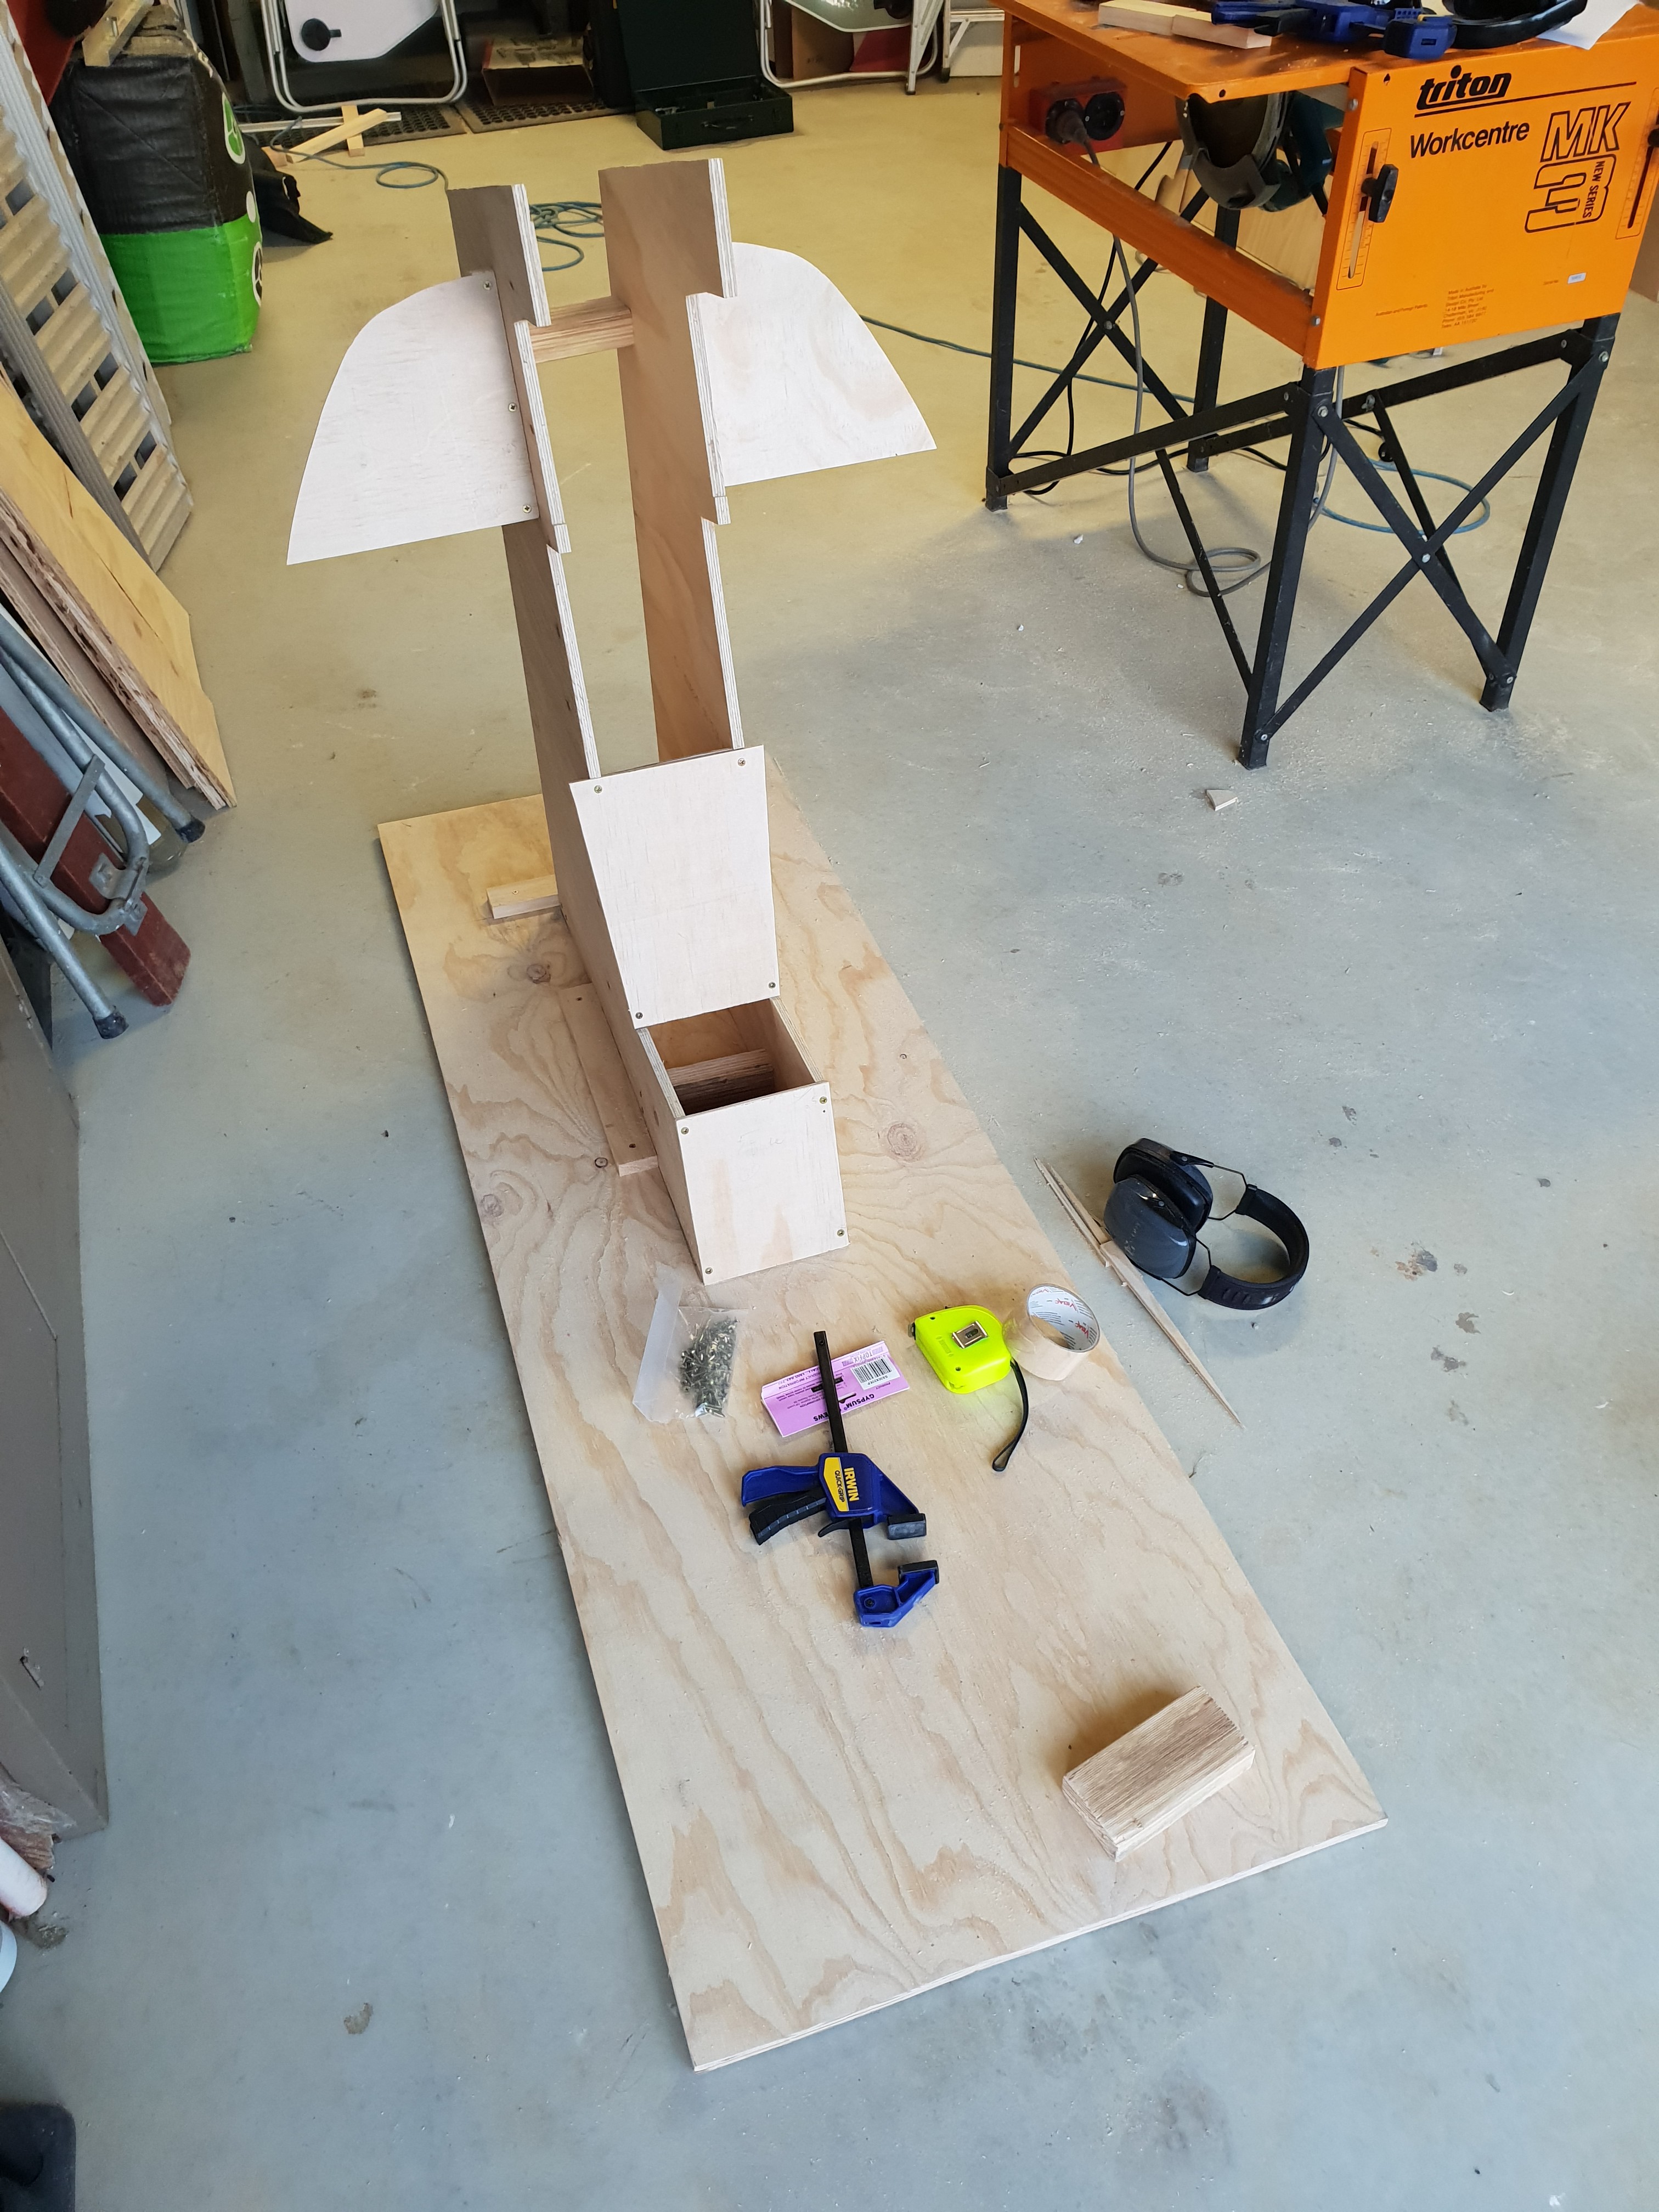
Heya Will, Sorry about the delay on this. Been flat out with work as always. I'll upload my front and backseat plans for you soon, (just want to idiot check them first). Couple of FYI's with it. I've had to make some assumptions with the backseat based on the front seat ergonomics. The TID and DDD were best guess on my part. Once I get some better data from a real Turkey or 3d scans I'll re-attack the model. (Doc Harley if you have some stuff from the back seat on the DDD, TID or left and right vertical panels it would be greatly appreciated). PSYKOnz, awesome work on your pit mate! Love the multiple base shaker idea for tactile feedback. Must be nice to be able to finally fly in it. I've got some stuff done on the front seat finally. I've knocked up the GRU-7A frame and parachute pack. The parachute pack has got some complex curves that I can't build with timber. I've put together a hot wire foam cutter and a jig to make the shell. Next step is to fibreglass it and attach it to the timber back. I've also found automotive primer filler has done wonders in removing the timber grain on the side of the seat. It's great to finally see lots of pits being finished off. Gunslinger, your pit is stunning btw. Cheers, Mumbles Parachute Pack Jig Seat Frame Dogey Dog Sanding/Test paint filler. Wire cut foam and back 3mm Skeleton frame (WIP)
-
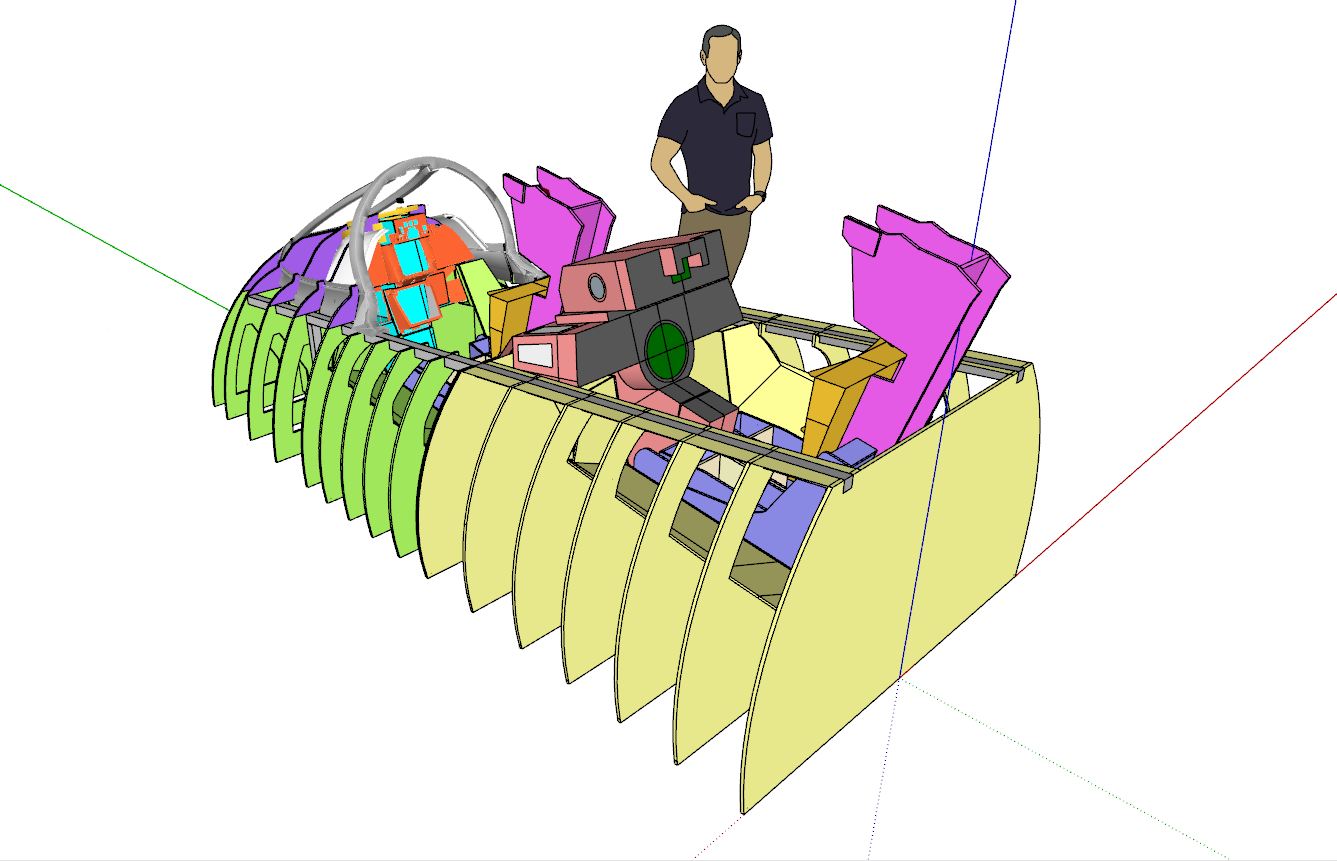
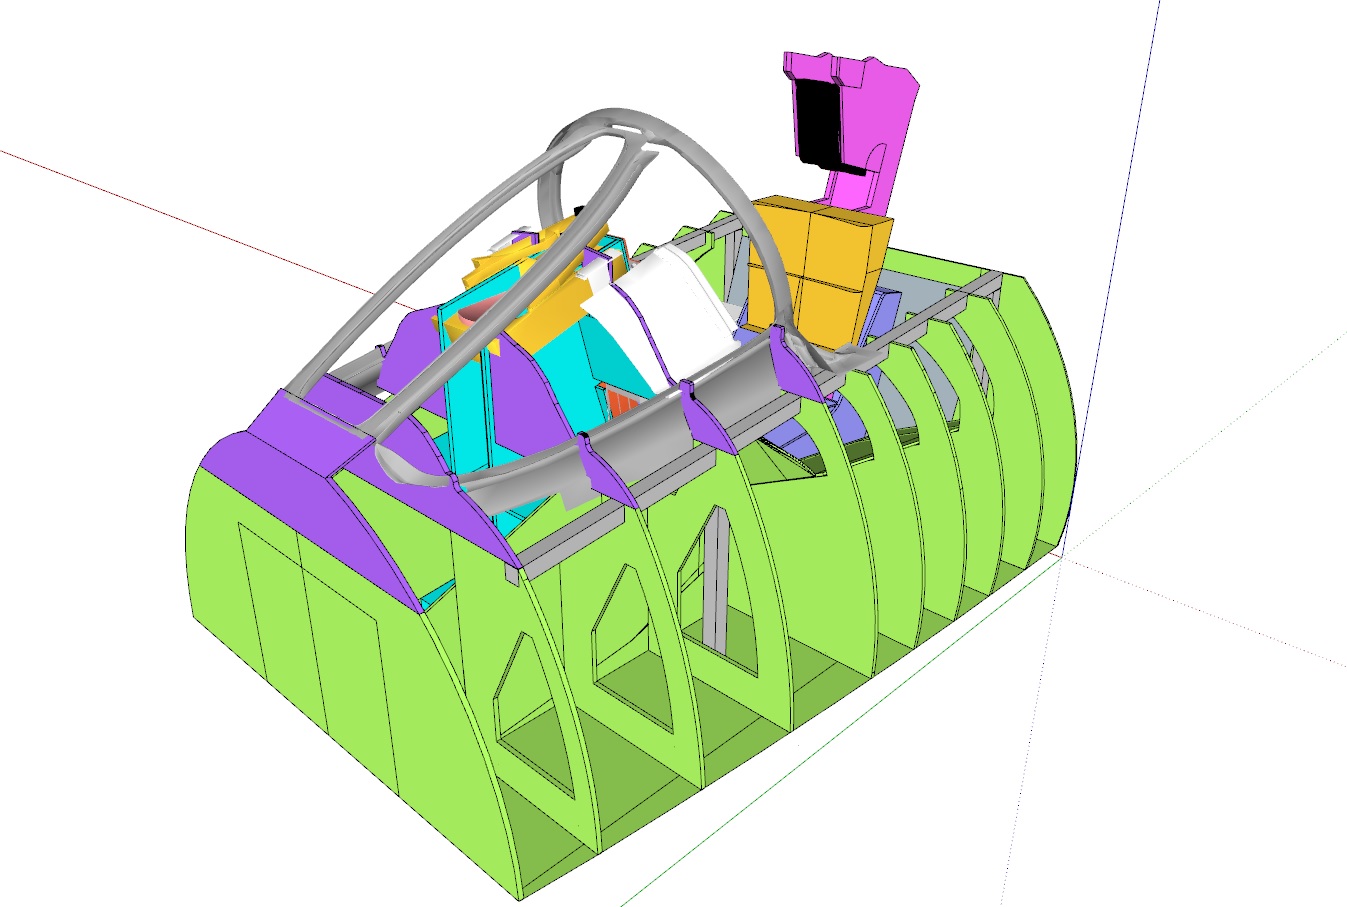
Thanks dude, I'm quite happy with the way it's turned out. It's dimensionally the closest model/plans that exist at the moment. Cobra was kind enough to let me use his laser scans of the front pit to make it. It was designed as a modular design so you can tinker and build as much or little of it as you like. I desinged the bulkheads to be 12mm with a 20mm steel rail so that you can climb over the side and into the pit without any chance of breaking stuff but it's probally overkill. A couple of things to think about would be if its going to be a VR only pit or something like RomeoKilos lovely A-10 pit. A lot of design choices can be decided from this. https://forums.eagle.ru/showthread.php?t=160233 If your looking to keep it a bit simpler and use 9mm I would suggest building up to the last bulkhead inline with the center pedestal sub frame (coloured blue in sketchup). You could just then join the purple canopy rail assembly to the green side panel frame to make it one piece. So printing it's pretty easy once you know what your doing. I wacked up a post a while back on how to do it here. https://forums.eagle.ru/showpost.php?p=3772384&postcount=175 The only change is that I've grouped all of the smaller sub assembly's together to make changes to both sides easier. The only extra step now is you will need to double click into the sub assembly's first before you can select the part you want and copy it out. If you need a hand at all tinkering with the plans or want a full up post on how to do it give me a holla. Sketchup's pretty easy once you get used to it. If your keen on a backseat as well it's mostly done. Cheers, Mumbles
-
Heya Lodkins, This post might help. https://forums.eagle.ru/showpost.php?p=3788502&postcount=180
-
Sagil, These are looking really good. What joystick gear are you planning on putting in it to make it work? I'll order this and the side stick soon. Mumbles
-
Hey Guys, Hope your all staying safe, Latest copy of the pit is attached. The model is at a point which you could build your own front seat minus the instruments and panels. I'll keep working those parts slow time. I've seen plenty of work on these forums that should cover most of it anyway. If you mod the plans, let me know what you did and chuck them up here for everyone. Cheers, Mumbles Mumbles F-14B Front Pit SKP Model 29 Mar 2020.zip
-
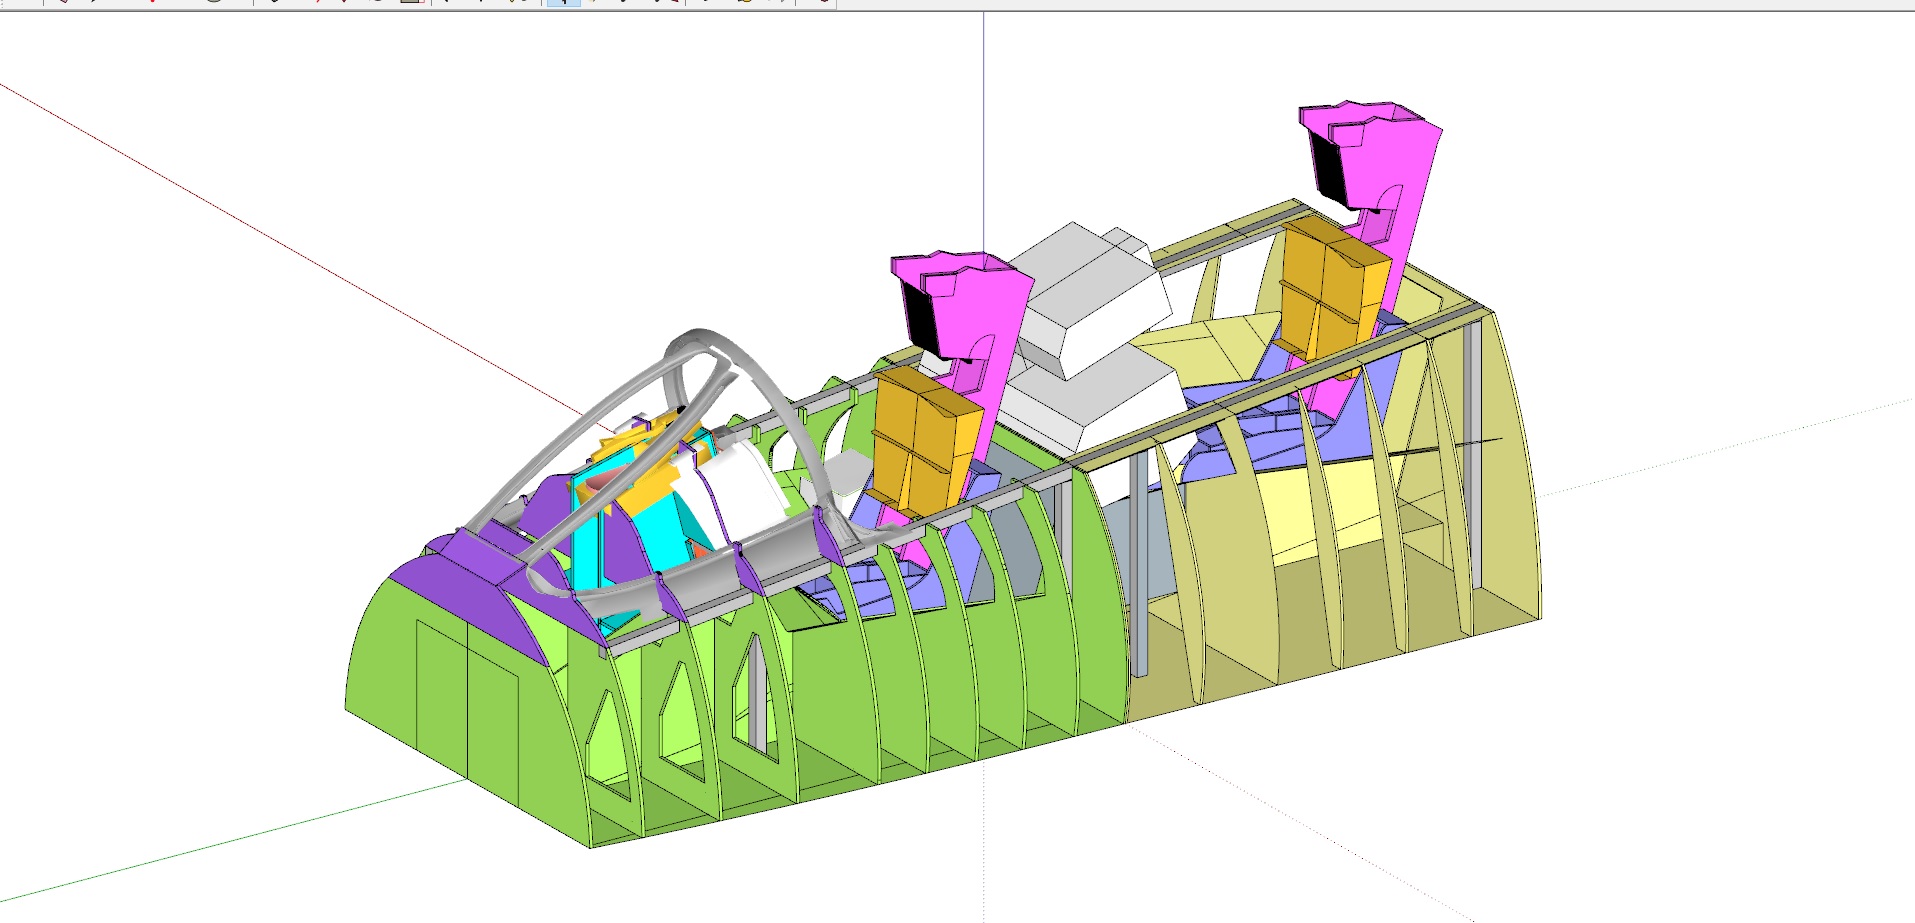
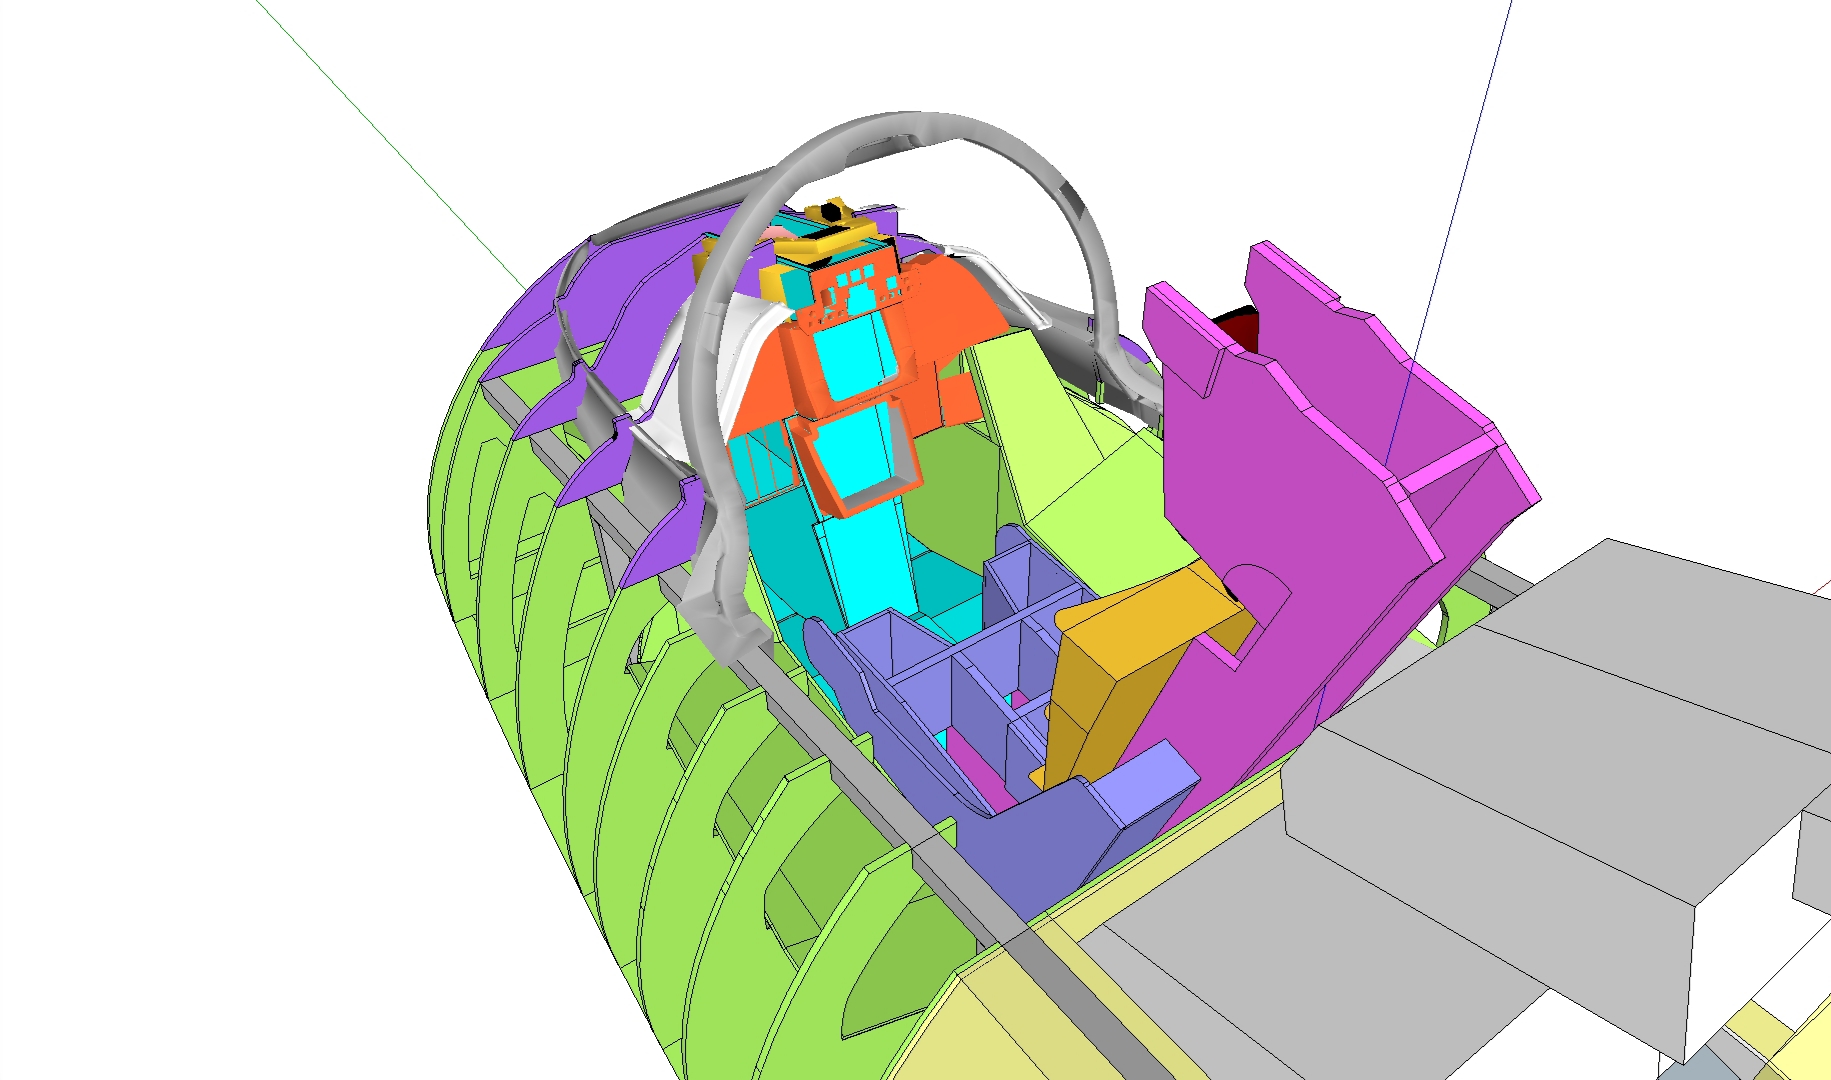
Howdy, It's been a while since I've been able to get anything done with the Pit. I have finally, more or less finalised the front pit frame. I'm still working the 3d models/files for instruments and panels etc. The only think I want to sort before I realise the front pit, is the canopy bow sub-assembly (purple structure). It's still missing some longitudinal support. It's built to be modular, the green frame is duplicated across both sides and gets bolted together. The blue section is the centre pedestal and you will be able to swap out the panels on it as you see fit for the model/year your going for. The seat also follows a similar design and will fit a NACES seat if so inclined. It has a 40mm steel sub frame designed into it to reduce the loads on the timber, especially on entry/exit. Currently the plan is to buy some of LynxDK's DZUS rails and then mount the panels to them. I'll update the 3d model soon to accommodate this. http://lynx.dk/product/dzus-rail-replica/ I'm potentially going to do some work on the seats to allow them to run as a G-Seat in future iterations of the plans The only other thing I'm tinkering with is the crew boarding steps to help get into and out of the pit. If some of the wonderful work in this thread could be posted up, specifically the panels, you should more or less be able to build the front tub without to many issues. In other News I've started the back seat as well. I'm still missing some descent data from inside the tub, but I'm pretty happy with the shell. (Cobra and the Crew, anything you could give here would be amazing). Cheers, Mumbles.
-
Afternoon, Has anyone in Aus got their shirts yet? I haven't head a peep. Cheers, Mumbles
-
Heya Mariner, So the seat cushions are made from high density foam in 20 and 10mm cuts made to measure for the seat. I was going to make up the pads to sit in a pouch so that they could be removed to be cleaned, however my current seat was a test build so I just stapled fabric over the top under tension to hold them in place. They are holding up fine. The inherent problem is that ejection seats are inherently uncomfortable for long durations due to the requirements of positioning a body for ejection. The more padding in the seat, the greater the peak instantaneous g your body will be under during the cartridge and motor firing. This is because the seat will accelerate into your lower body before the cushon fully compresses and you start accelerate up to speed with the seat. If done wrong the list of injuries are extensive. Because we hopefully don't need the seat to function we can mod it a bit for comfort. I'll need to tinker with the new one a bit when designing the SKU-12A again to make it a bit nicer for longer use. Hows ya build going anyway mate? Cheers, Mumbles
-
Punk, That's awesome dude. Was that an ebay find? Mariner I've attached a PDF of the panel for you. It's in A4 and not the most paper saving way to do it but just print it and stick them together like a puzzle. If you need a hand with it let me know. Cheers, Mumbles Left Vert Panel in A4.pdf
-
Strike thanks for putting that up. Mariner. I will pull that part out and flaten it soon for you. Once its done I'll send it to you via pm. It might take a few days to get to it. Just as a bit of an update, bought an Odyssey for a bit of a look at VR and what I can do to maybe intergrate it into the pit. Should have it late next week. I'll hopefully have new copy of the model out soon with the new parts. Do you guys want the panels as a pdf or stl files first when I get round to making thr model into better plans? Cheers, Mumbles
-
Hey Fara, Yes you do at the moment. I will eventually get round to making all the parts PDFs, but only once I have had the full pits frame completed. As I continue to build it i might tweek parts and then change to model to suit. If you want to do it I suggest that you install both SketchUp and primo pdf. The free version of sketchup wont natively print to pdf. The same basic steps as above would apply to get the prints at the right size. Hope this helps. Mumbles.
-
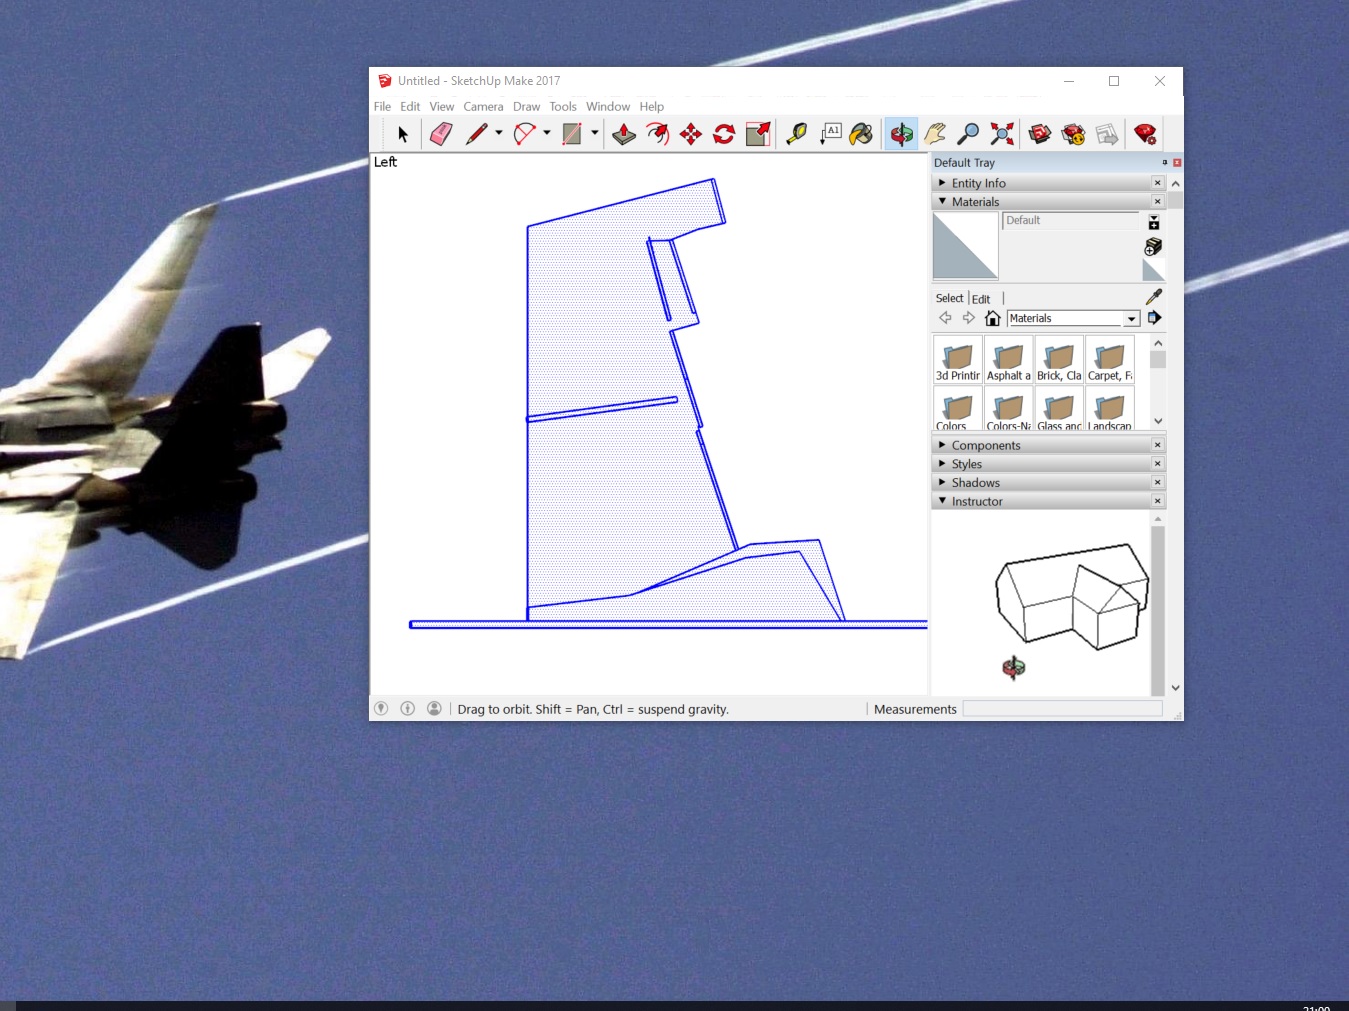
Heya, Got asked to expand on the best way to print these. To start, highlight the component that your trying to make a template for and move it into a new SketchUp file. Then under the Camera tab select "Parallel Projection" and then an appropriate "Standard View" that will show the component in a plan form view. (Pic One) Once this is completed change the size of the SketchUp app to have the least amount of dead space around the model. (This will eliminate the extra pages that it will try to print outside the component). (Pic Two) Then select File, Print. Under the print settings, you will want to un-select "Fit to page" and select "use model extents". Under the Scale settings, input 1 for both the "In the printout" and "In Sketchup" boxes. This means that for one unit of measurement in SketchUp you will get 1 units in the print. ie 1 cm in the printout = 1 cm in the SketchUp model. (Pic 3) Then hit print. All you have to do is tape the pages together and you have a template. Hope this helps. Mumbles.
-
Evening Gents, I have been asked for the plans to be posted up a couple of times so here they are. They are very much still work in progress so take them for what they are. When I finish new bits I'll re-upload the plans. I'm reworking the side panels at the moment. Hopefully I'll have these done soon. Life as usual is pretty full on so it might be a little while. I just ask if you use them, credit Heatblur and Nick for the dimensions/scans that they provided for these. If you make something from the plans put it back into the DCS F-14 community for everyone to enjoy. The easiest way to make the parts is to print the Sketchup files in full size A3/4 from a parallel projection, standard view and then tape them together as a template. If you get stuck give me a yell. Victory, That has to be one of the sexiest F-14 models I've seen. Sierra Hotel. Cheers, Mumbles. 23 Jan 19 F-14B Plans from Heatblur Data.zip
-
Howdy Victory, Thats some some really nice work you have there. You are more than welcome to any of the stuff Dino and I have made. If you send him a pm he should be able to add you to be able to access them. I haven't seen Dino for a little while. If you haven't heard from him and want a copy of my lastest design give me a yell and I'll put it up for you. Not sure what your plans are with your panels but if your happy to host them here when they are done it would be greatly appreciated. The more resources in the same place the better. Let me know if I can help out with anything. Edit: Just noticed that you're panels look like they are from the D. That's sweet. Are you hoping that HB makes one after the A/B? Cheers, Mumbles
-
Thanks Cobra, Ohh you're on. They are my childhood dogs, they're all Shetland Sheepdogs. The latest models up on Dino's dropbox. Its includes the seat, centre pedestal and the side consoles. I've only built the pedestal so far so the rest will change as its built. Next up is to work an expansion to the side consoles to include the side of the aircraft and a metal rail to run the lenght of it. My crazy idea at the moment is to mounting the metal rail to a rubber boot, in hopes to make it vibrate to provide physical feedback. The latest bunch of youtube videos look amazing and being able to feel it in the frame would be awesome. I got a Maslow CNC kit over Christmas and it's in the mail. Once I work this out as well it should make the sides way easier to make. Cheers, Mumbles
-
Evening, Just a few more pics of the latest bits and bobs. Cheers, Mumbles
-
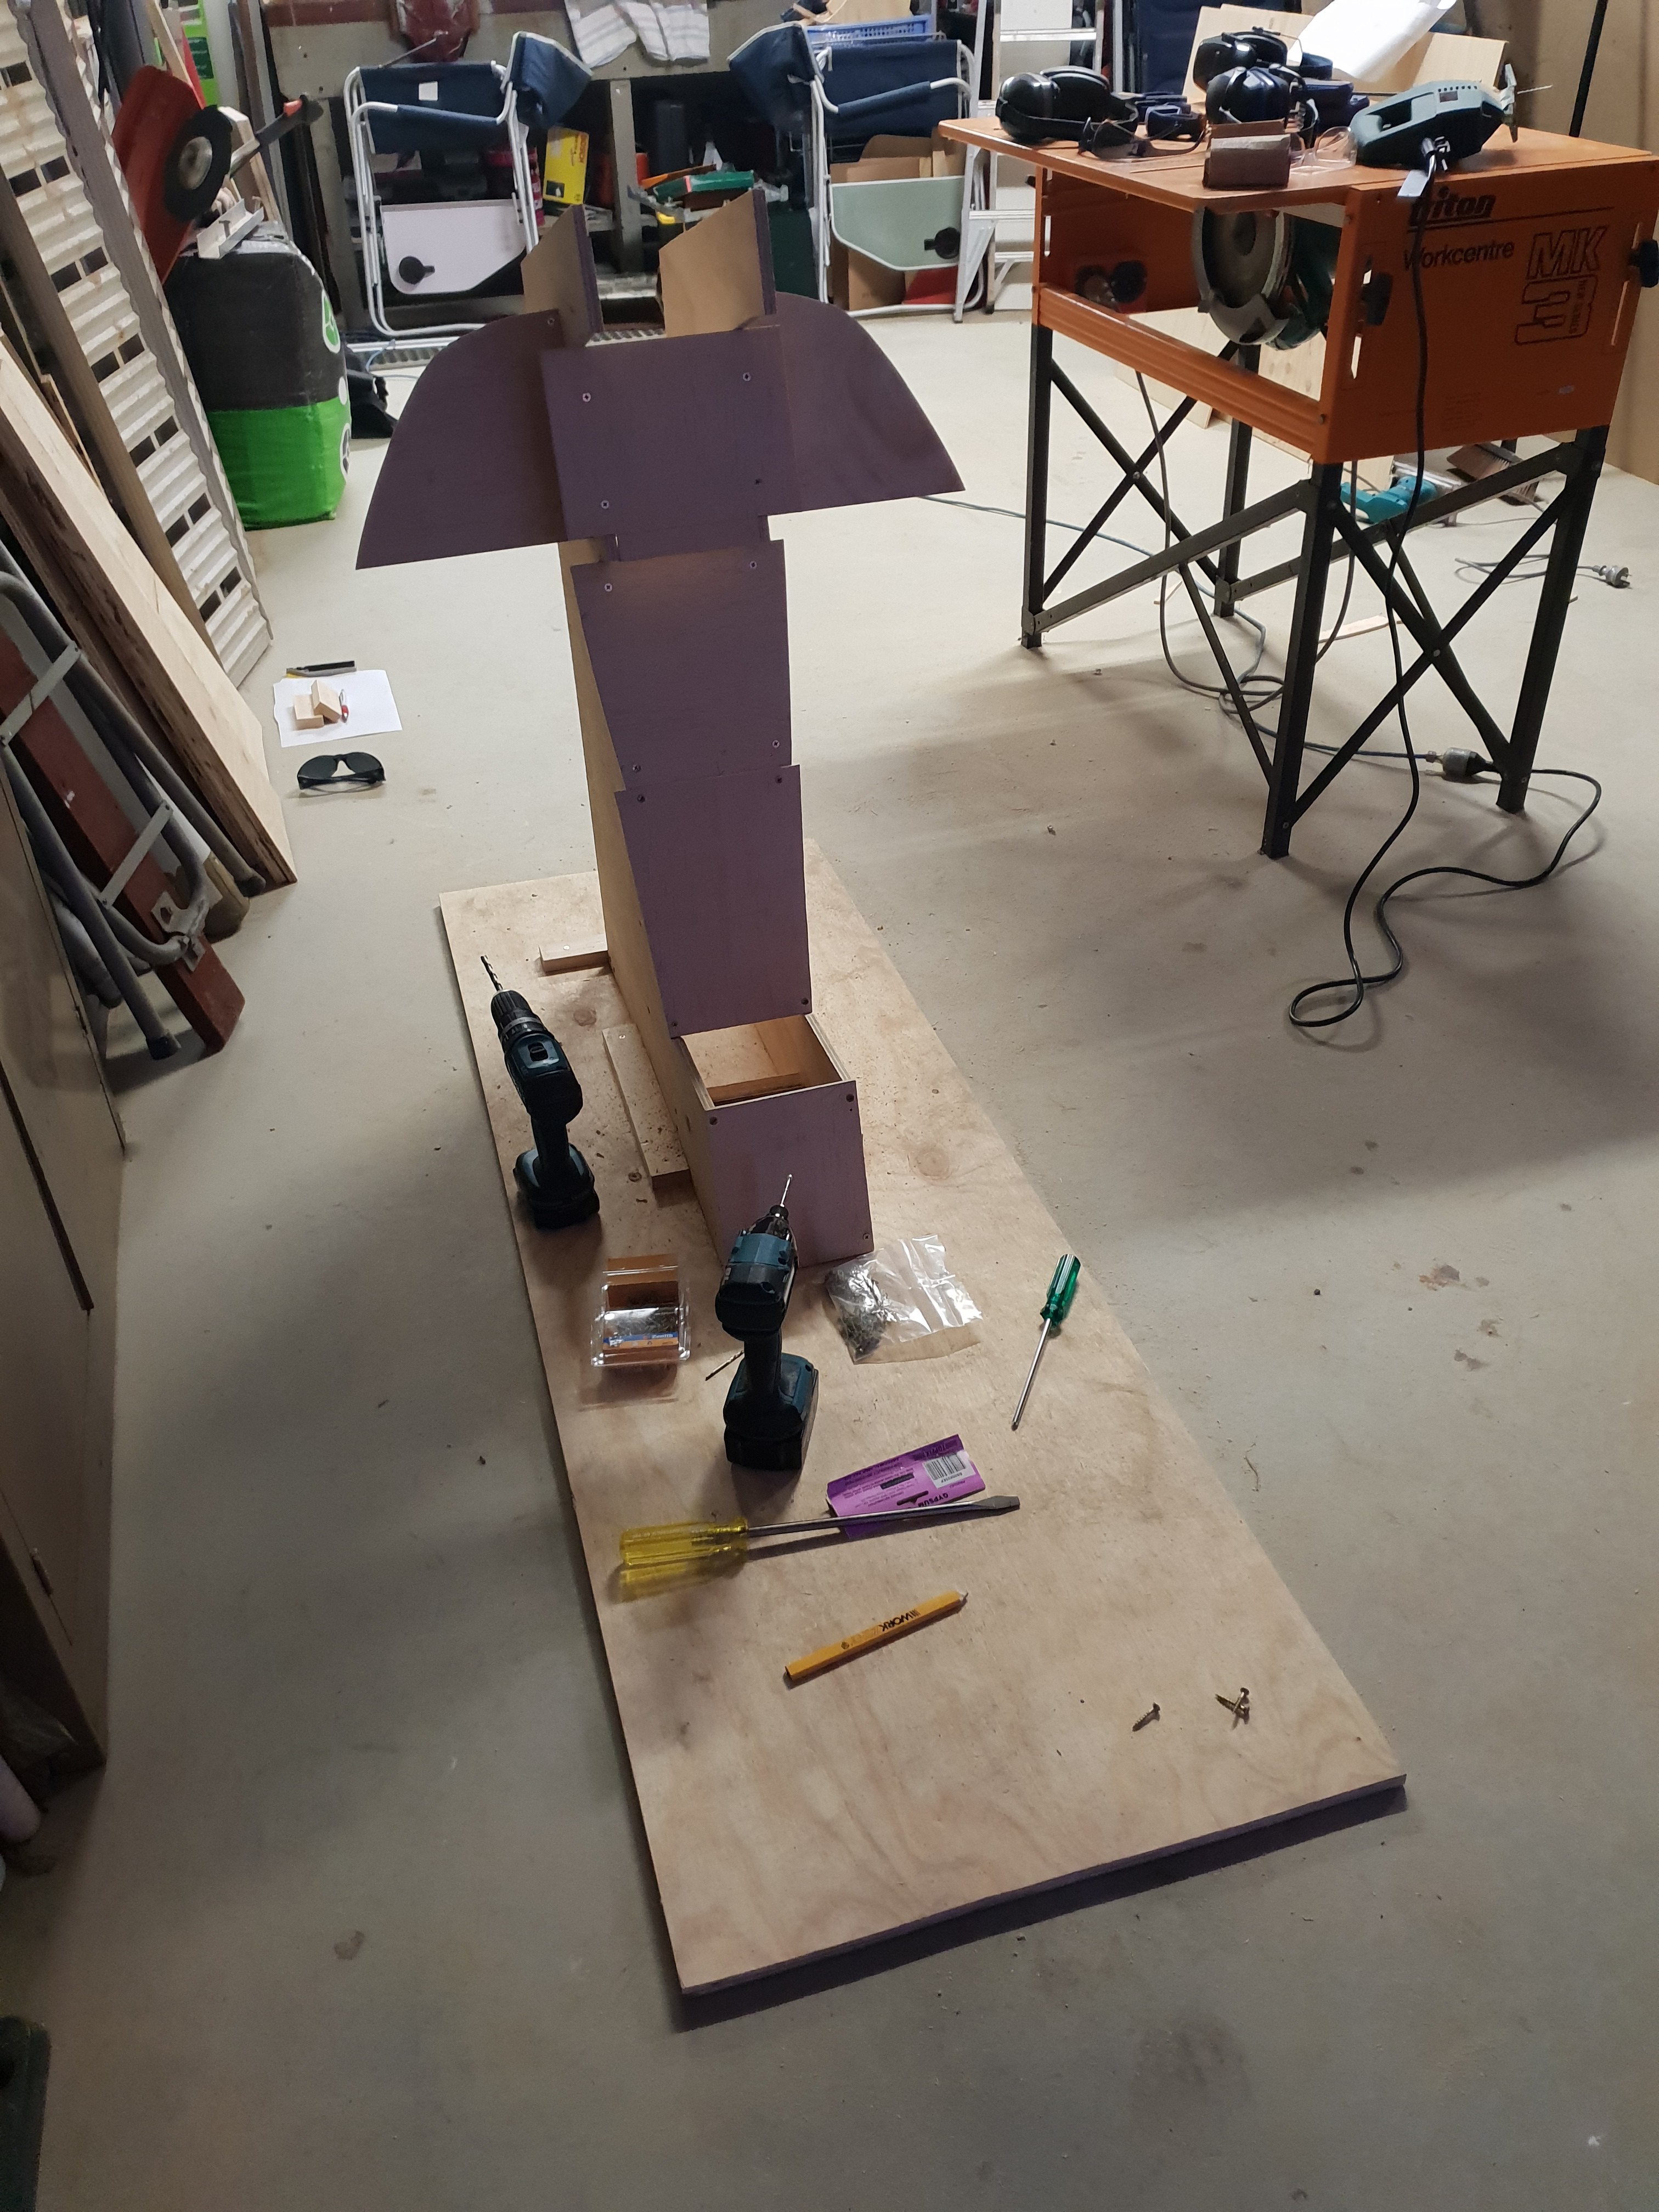
Howdy Gents, Sorry about how quite I've been with getting something out, I've been busy as usual. So I've mostly sorted the plans for the front seat and have started building the center pedestal and floor, utilising Sketchup to print out full scale parts then jigsawing them out. I've used 15,12 and 7mm BC grade ply wood for the structural construction so far. The parts that are going to be within eye sight will be skinned/made from MDF. I have also started working the 3d printer to make bits and bobs, still very new at it so they need work. All of the models will be posted up once the kinks are worked out. I'll post the plans up shortly, just working out some of the issues as we go. Punk, Thanks bud, hope you have had a great holiday. Cheers, Mumbles
-
Howdy guys, Quick question I was hoping someone in the know might be able to help me with. My general question is, did/does the USN use a different comms Standard to the USAF? I ask this because in the latest HB Turkey videos, Jester has always used Angels when calling out radar contacts regardless if they are a freind or foe. According to some of the USAF Comm Standard docs I've managed to find, Angel is always listed as the height of friendly aircraft in thousands of feet. Shouldn't Jester then be calling the non friendlys the same way the AWACS does in game like 23,000ft? I haven't been able to find a USN doc that seems to contradict this. If anyone's heard the audio from the gulf of sidra shootdown the aircrew both use Angels for friend and foe and it caused confusion. Cheers, Mumbles References: 1999 codewords doc https://www.google.com.au/url?sa=t&source=web&rct=j&url=http://www.dlielc.edu/olc/set/ANC/avdocs/index.php%3Fdir%3D72%2BOperational%2BBrevity%2BTerms%252F%26download%3DOperational%2BBrevity%2BWords%2B%2526%2BAir%2Bto%2BAir%2BCommunications.pdf&ved=2ahUKEwj016Tigu_eAhWXfysKHeEhCTwQFjADegQICBAB&usg=AOvVaw0JdeNIcYSHkae-WAXZ8FCq&cshid=1543132687889 Gulf of Sidra shootdown (4:20)