NeoEngress
-
Posts
8 -
Joined
-
Last visited
-
Days Won
1


-
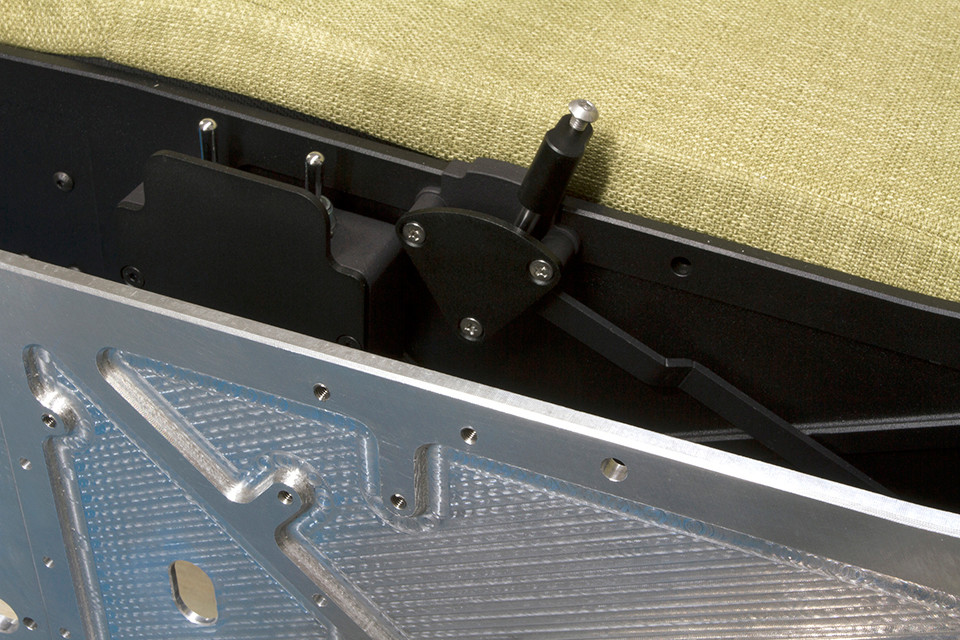
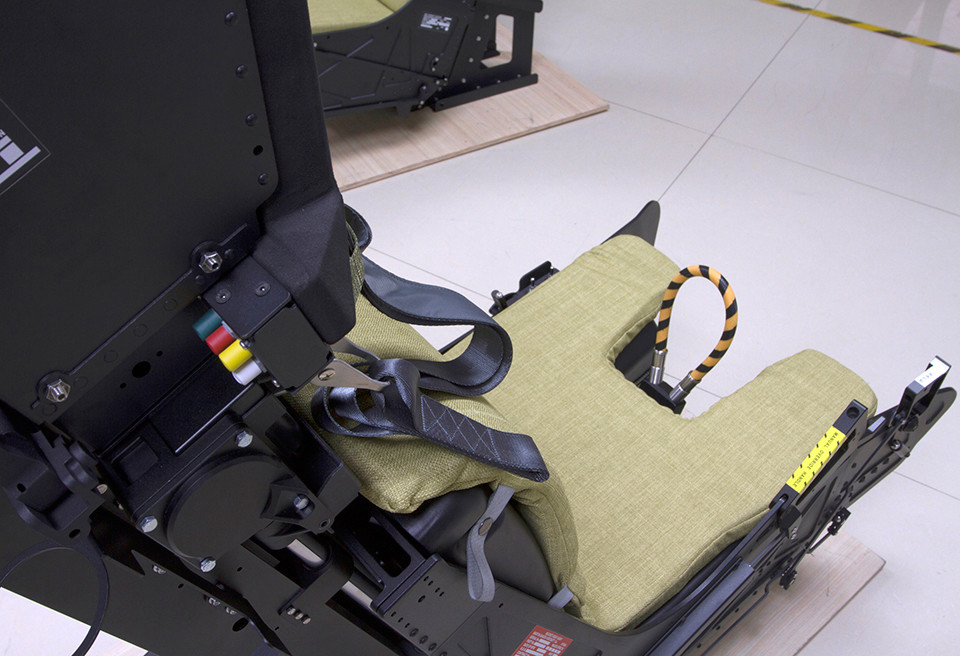
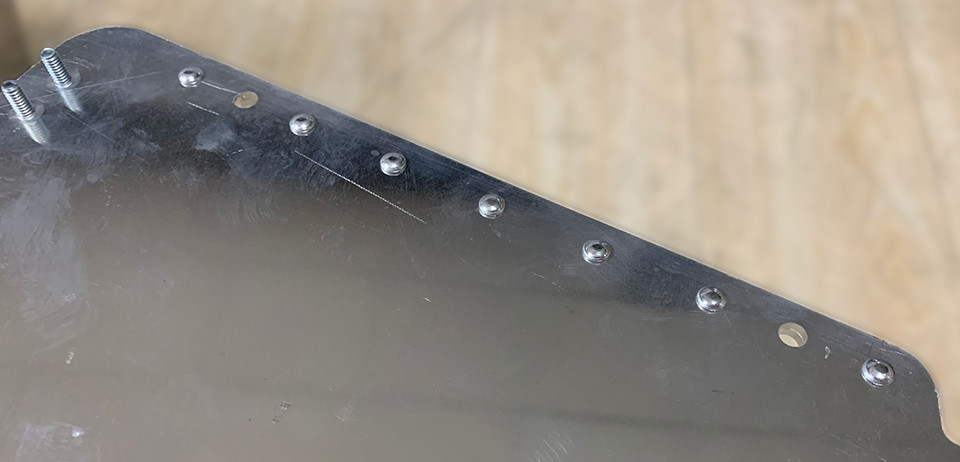
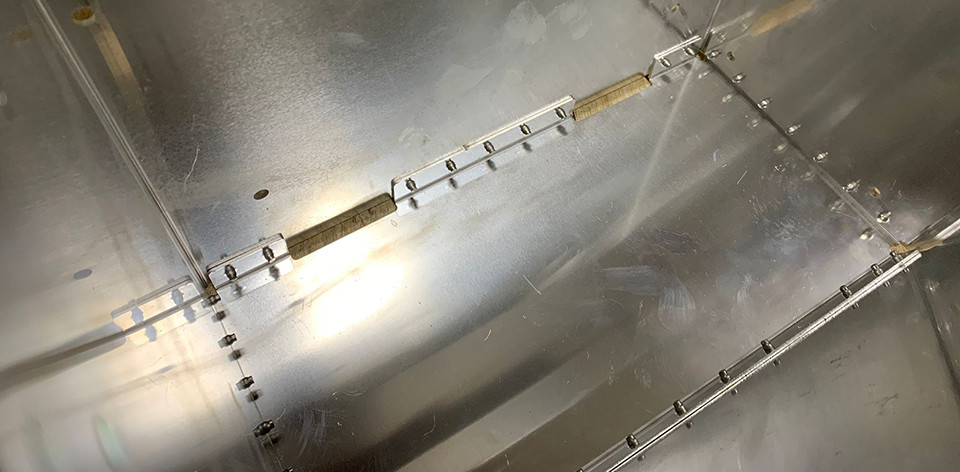
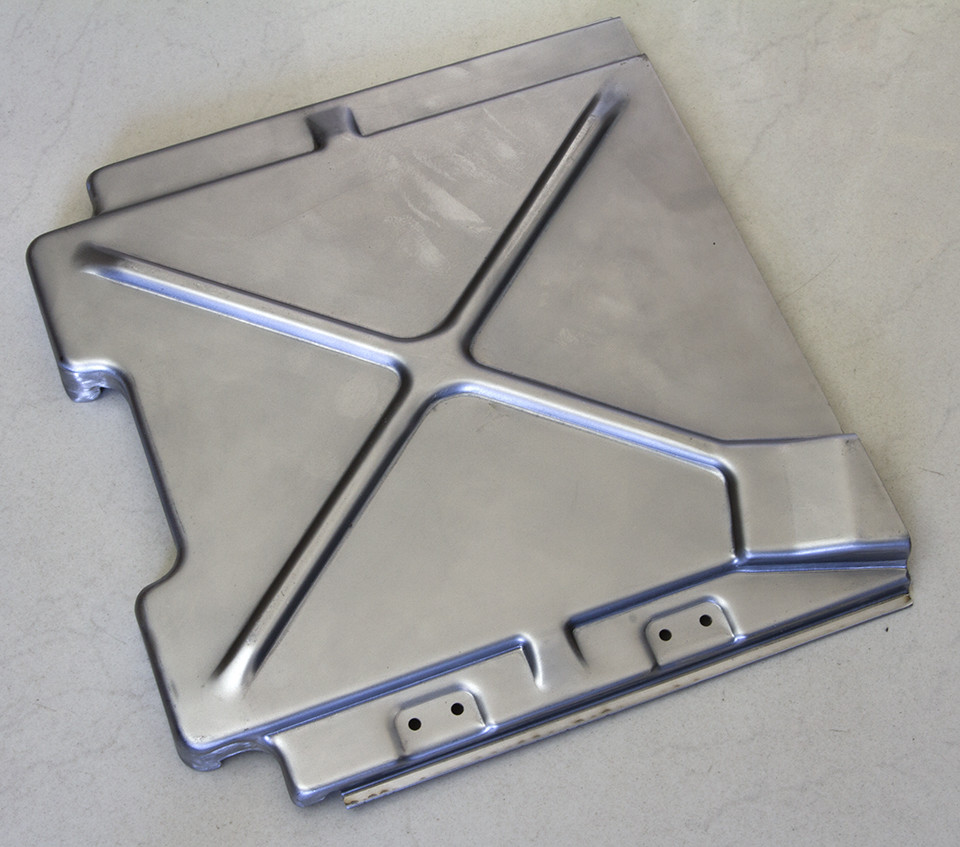
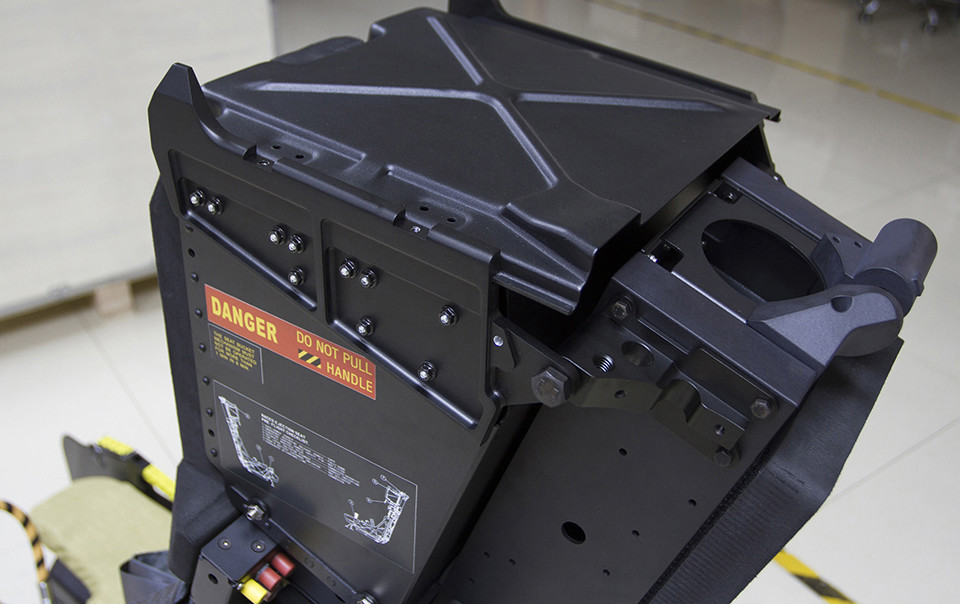
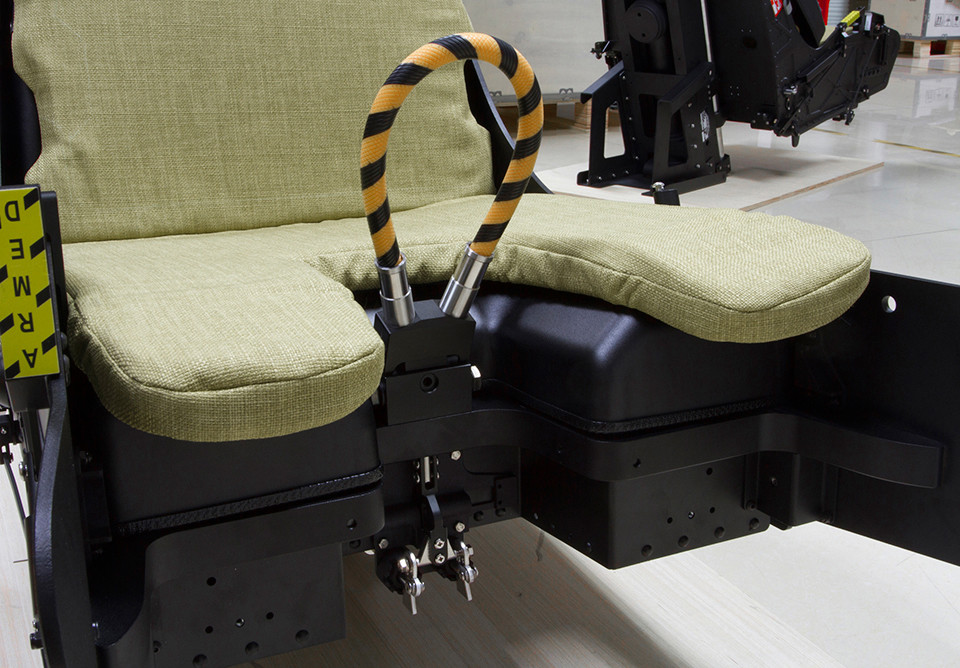
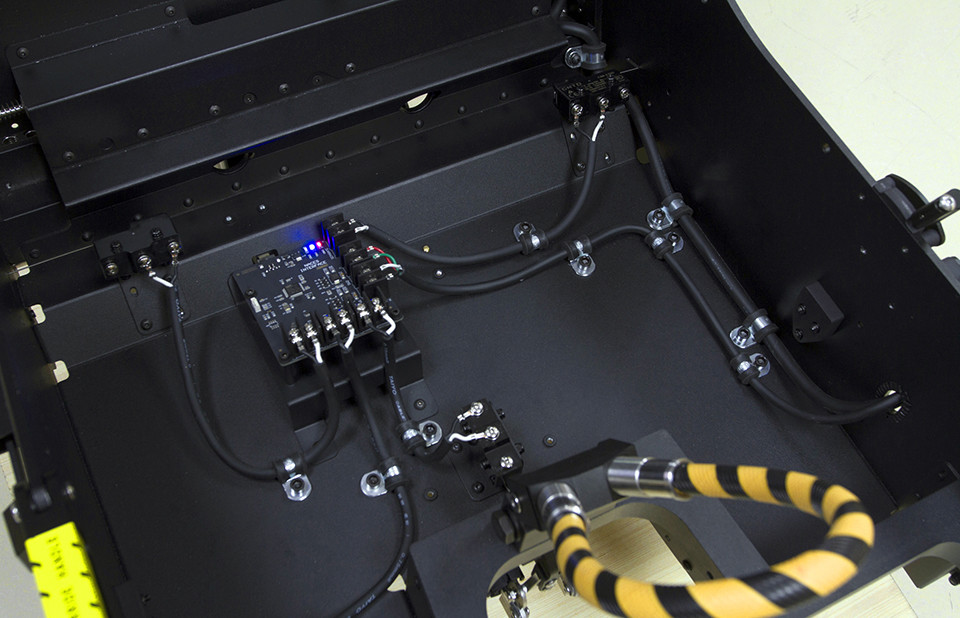
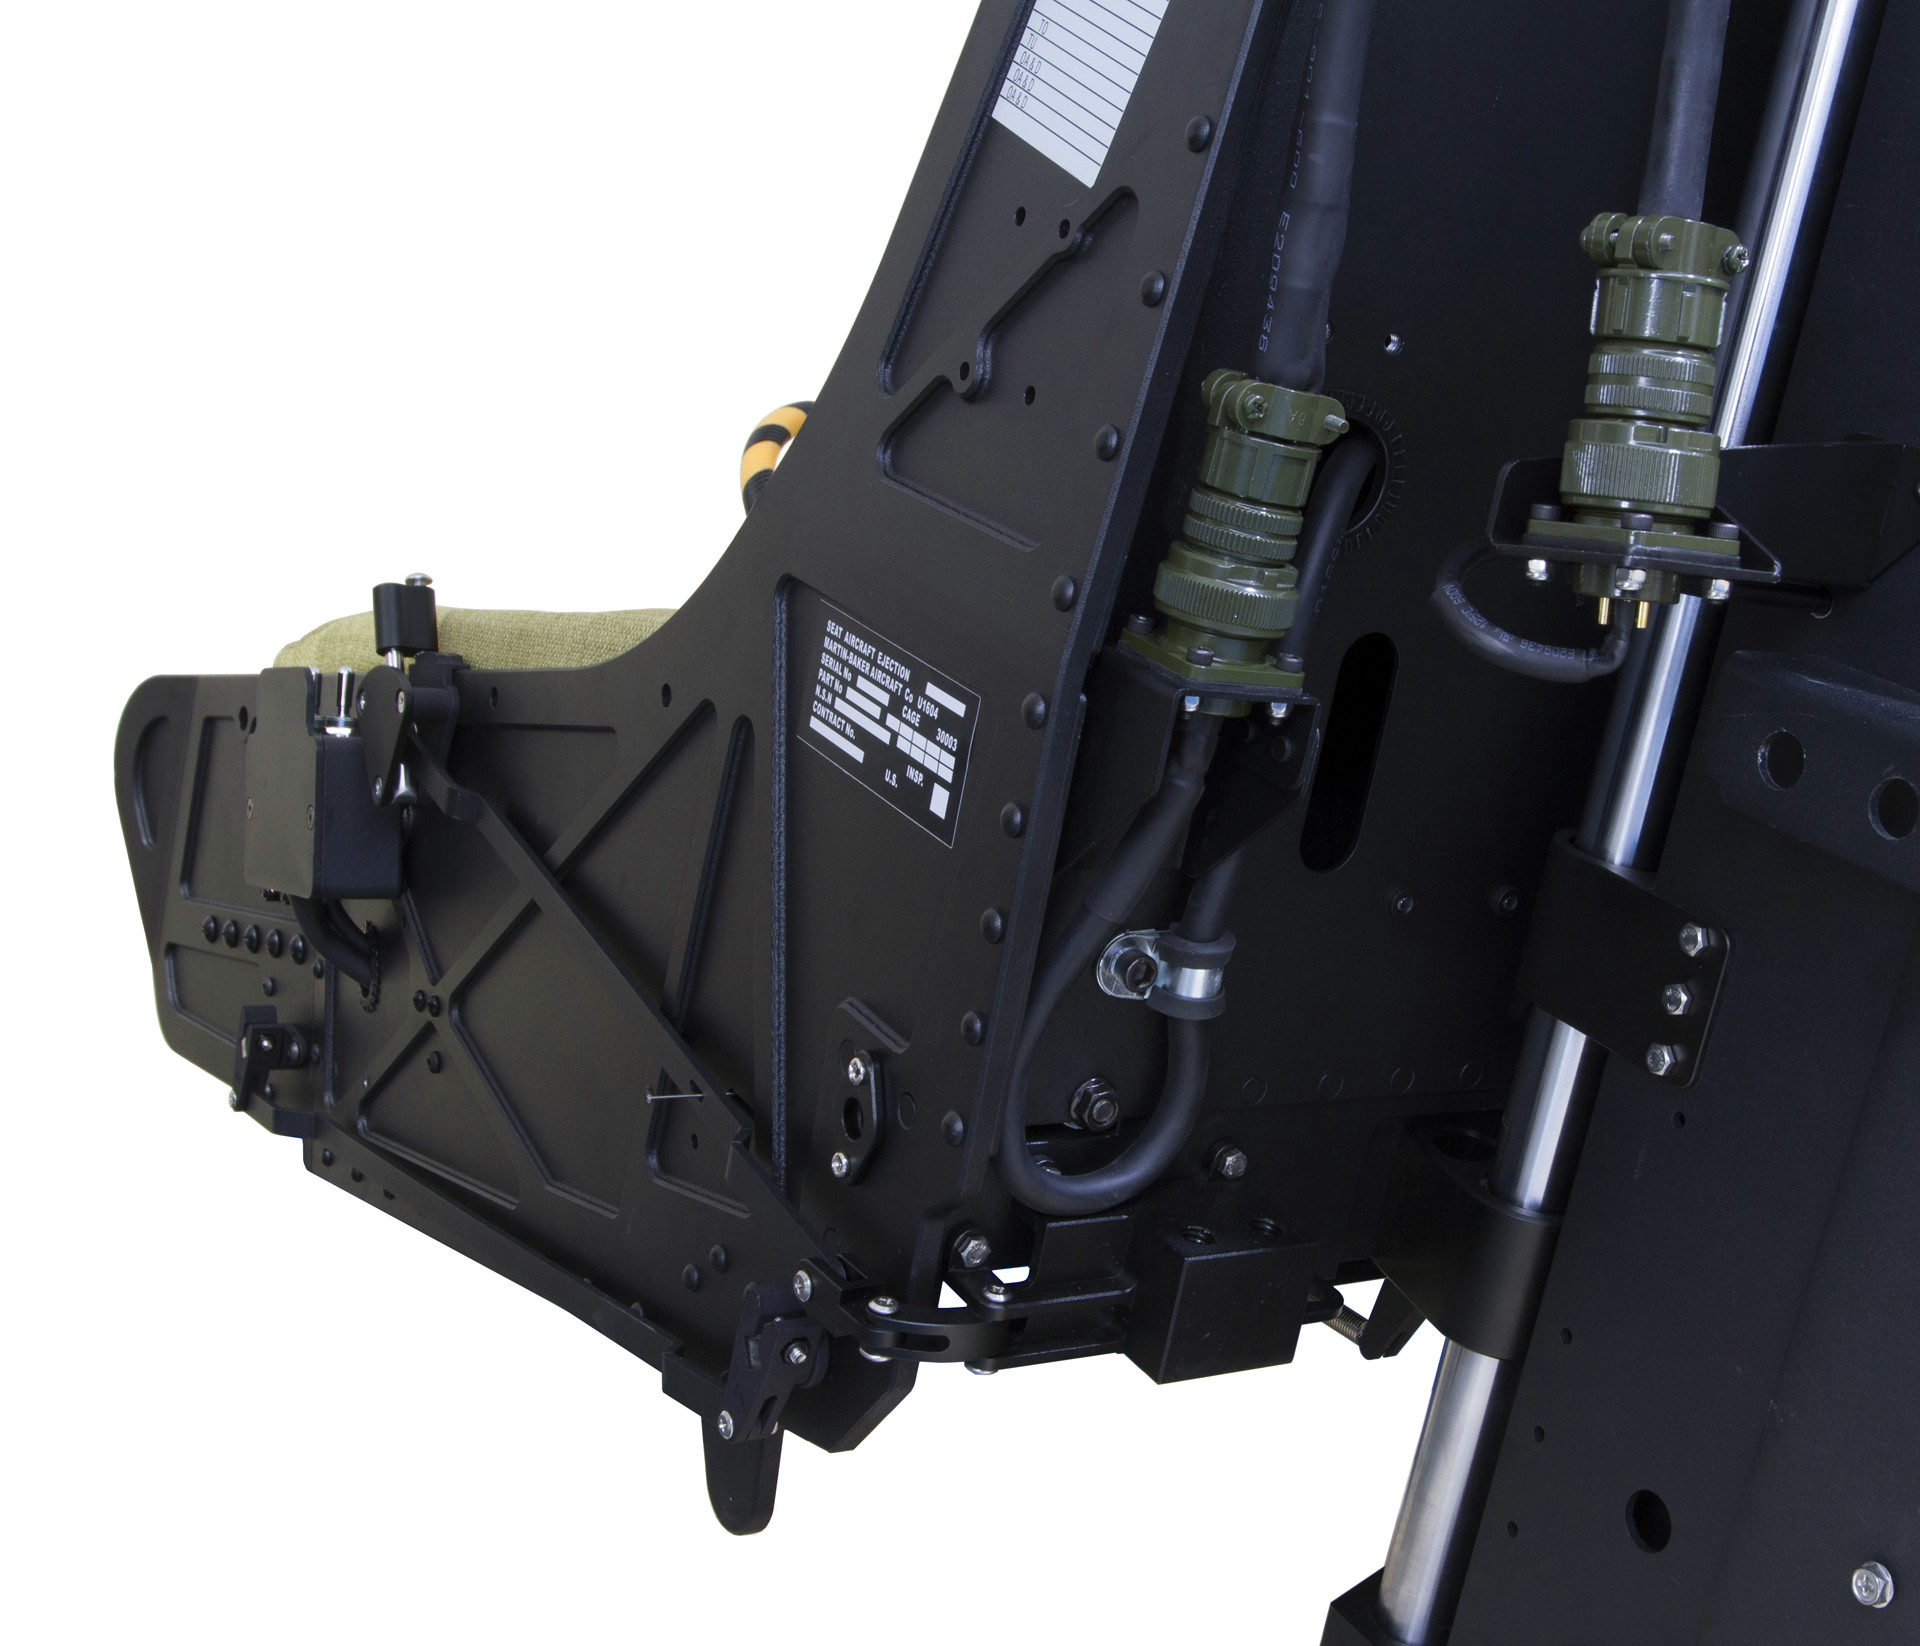
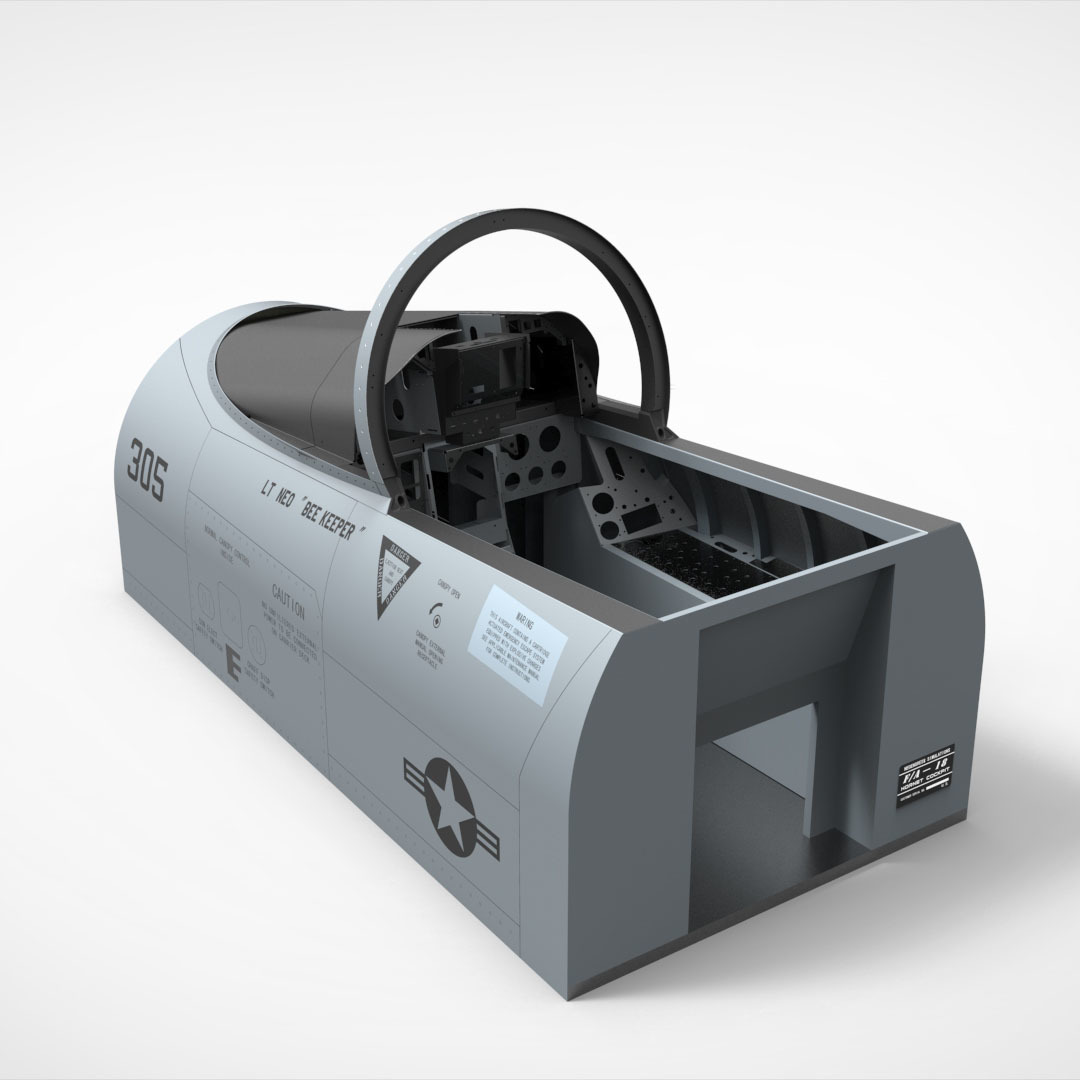
 This is for fellow simmer pilots who are seeking something more serious than regular gaming chairs and racing seats. Hopefully also for DIY enthusiasts who find the NACES too time-consuming to work out. Despite the broad selection of DIY materials and tools, the construct of this seat presents quite a challenge to work on by hand. Unlike the ACES II which is mostly sheet metal. The Martin Baker NACES is a combination of both solid chunks and thin pieces of metal, plastic and organic materials, each requiring its best suited means of fabrication. Take the seat bucket side wall above, a piece of thick aluminum plate needs to be milled down before it's bent to the right angles on a multi-ton bending machine. Screw holes are then tapped and had right lengths of steel thread inserts planted within. Cloth had to be selected with the right texture and color which closely match that of the real seat cushions. Sourcing straps of the right texture is another difficult task. Once the fabrics and filling foam are ready, it takes industrial grade cutting, forming and sewing equipment to piece them together. Snap buttons have to be riveted in place before the back cushions can be filled and closed up. Spring loaded harness retractors are customized with the designated model of straps. Velcros need to be sewn onto certain sections of straps so they can be secured or detached from the headrest, which by itself, is a dense foam that requires a special process to manufacture. Sheet metal is used throughout the seat. Large sheets of aluminum are laser cut, riveted with clinch nuts or threaded studs and bent into 3D shapes as designed. The different metal pieces are then joined together with various types of rivets, forming very robust assemblies. Another way of forming sheet metal is stamping. The back pad, seat pan and the top cover of the chute container are stamped out of steel sheets between custom made molds with tons of force from a hydraulic press. The result after thorough powder coating in matte black. Rubber has proven to be another difficult material to work with in a home DIY setting. Getting the helical color patterns to match the crisscross texture isn't good enough, the colors have to stick and endure sustained use of the ejection handle. Besides individual parts and stiff assemblies, the seat also depends on a collection of moving mechanisms to function. In a real jet, the pilot needs to adjust his sitting position in order to get the correct line of sight. This is achieved through the seat bucket actuator. A 2000N electric cylinder is incorporated in the main structure just for this purpose. The cylinder runs on 24V DC power, preferably with a 5Amp max capacity. The power supply is sourced separately, while a section of power cable is supplied with the seat. It comes with a pair of circular plugs which mate with the receptacles behind the seat. Height adjustment is commanded through the flip of a toggle switch mounted on the left of the seat bucket. The retractors for shoulder straps are spring loaded and can actually pull back on the straps. They are not actively actuated by default though. Kinematic models are used to verify the movement of each mechanism before finalizing the design of linkages and handles. The resistance of the shoulder harness control handle is adjustable through a screw cap on the top. All the handles are operable and internally linked to optional electronics. You can even actuate the sears and have the spring loaded plungers pull out. Check the following video for how they work: When it comes to the ejection handle, I feel your pain in making the repetitive Ctrl+E work with DIY electronics. Sometimes a few extra line of code is enough to hinder the progress by days for the lack of required experience. As much as we love Arduino, we prefer to build every PCB in our products on our own. That means we design all the PCB's for ourselves, and write all the firmware for ourselves. PCB assemblies are then made by professional plants to ensure proper quality. The switch box on the left side distributes 24V power directly through output cables. Some analog electronic tricks are used on the PCB to tap into that same 24V output without frying up chips, while allowing the firmware to determine whether and which way each of the toggles are flipped. Writing firmware from scratch allows us to make the seat show up on the computer as anything we want. In this case, it appears as a generic game controller with a number of buttons. The following video demonstrates how these buttons can be configured in DCS World: If you find it pointless to assign exactly the same virtual handle functions in game to the physical handles on the seat, you're welcome to get creative and find other uses for them, at the end of the day, they are only generic buttons. Bear in mind the ejection handle is the special one, it is hardwired to trigger three quick and consecutive button strokes to activate the ejection process in game. All possible scenarios such as pulling or pushing a handle from its resting state, or quickly switching it on and off are anticipated while coding the firmware. Noise from snapping mechanical contacts is also properly debounced to eliminate runaway issues in all branches of program execution. This seat is now on sale for $2,890 at our official site: https://www.neoengress.com/naces-ejection-seat . There're a bunch of other cool stuff on other pages to indulge your curiosity if it's new to you. The USB interface, switches and signal cabling requires an additional $360. If anyone is interested in this product, please feel free to write to us at info@neoengress.com for more information, because currently it's the only way to place orders.
- 2 replies
-
- 6
-

-
- f-18
- ejection seat
- (and 4 more)
-
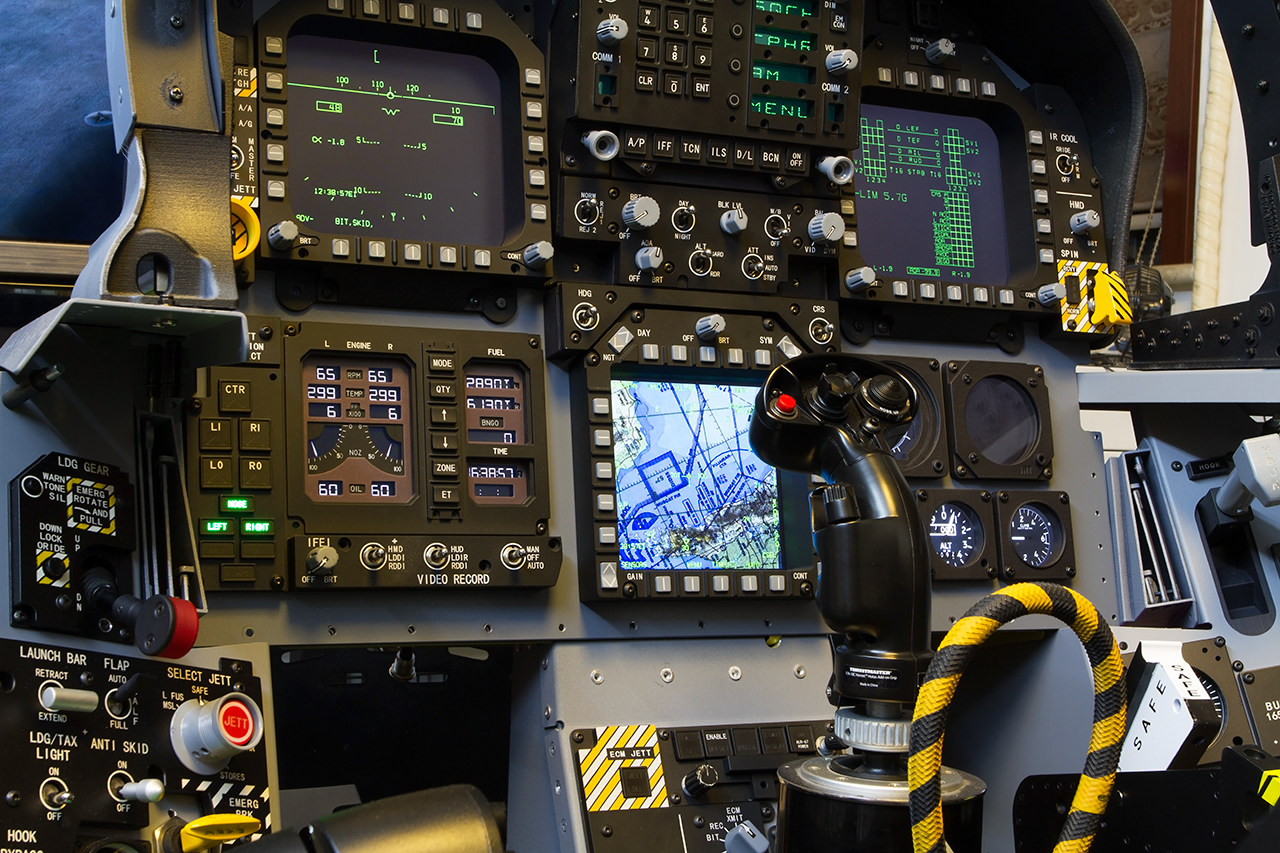
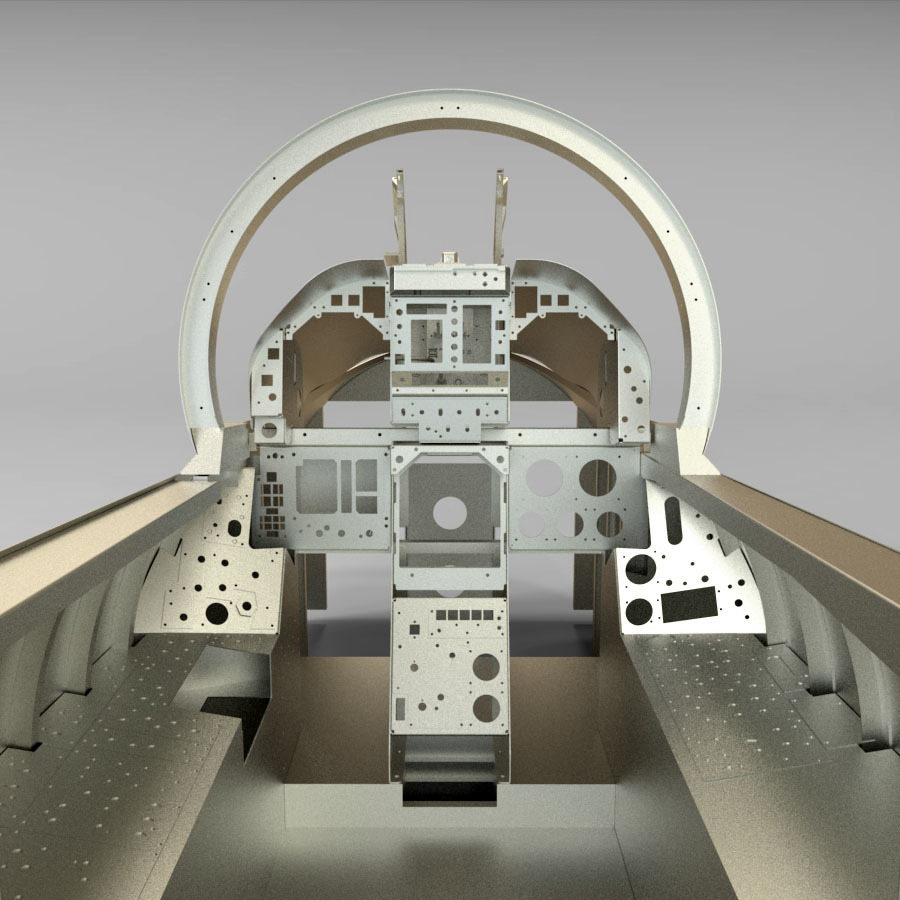
There's a massive version of this following illustration at a download page here: https://www.neoengress.com/downloads You might be new to the Hornet and are just trying to get yourself familiarized with the instruments and panels, or you figured it'd be cool to have a large printout hanging on the wall of your study. Whatever the reason, the full sized illustration is there to help. A bit of courtesy would be appreciated if the copyright text doesn't get removed. Like a lot of flight sim enthusiasts, when we started planning on our own cockpit last year we would search all kinds of keywords day and night and still couldn't find much with accurate info. And fast forward to present day, with all the geometry figured out and production-verified, we are confident enough to come up with this illustration. It's probably the only one to date which is known to be generated with a CAD model of an actual working cockpit hardware. Every feature in that image is an accurate depiction of a physical part fabricated by machine. It took us a year and a half to make the drawings, build the real thing for verification, iterate on it, and then it would take about half an hour to render and prep it. Hope it will eventually help tighten your bond with the Hornet in some way.
-
High-fidelity parts and kits for F-18 simulators
NeoEngress replied to NeoEngress's topic in PC Hardware and Related Software
We've spent a fair amount of time developing the interfacing solutions for this cockpit. Engineering background at major semiconductor manufacturers had helped us a lot with hardware development. Our work covered simple things such as sensor selection and driver coding, and more sophisticated tasks such as protocol stack design and optimization. If a component proves too hard to find, then we went ahead an built our own. More details are available on our site here, we're also on social media, come check 'em out. Homepage | Facebook | Instagram | Twitter | Youtube Shoot us a mail if you have questions.
-
High-fidelity parts and kits for F-18 simulators
NeoEngress replied to NeoEngress's topic in PC Hardware and Related Software
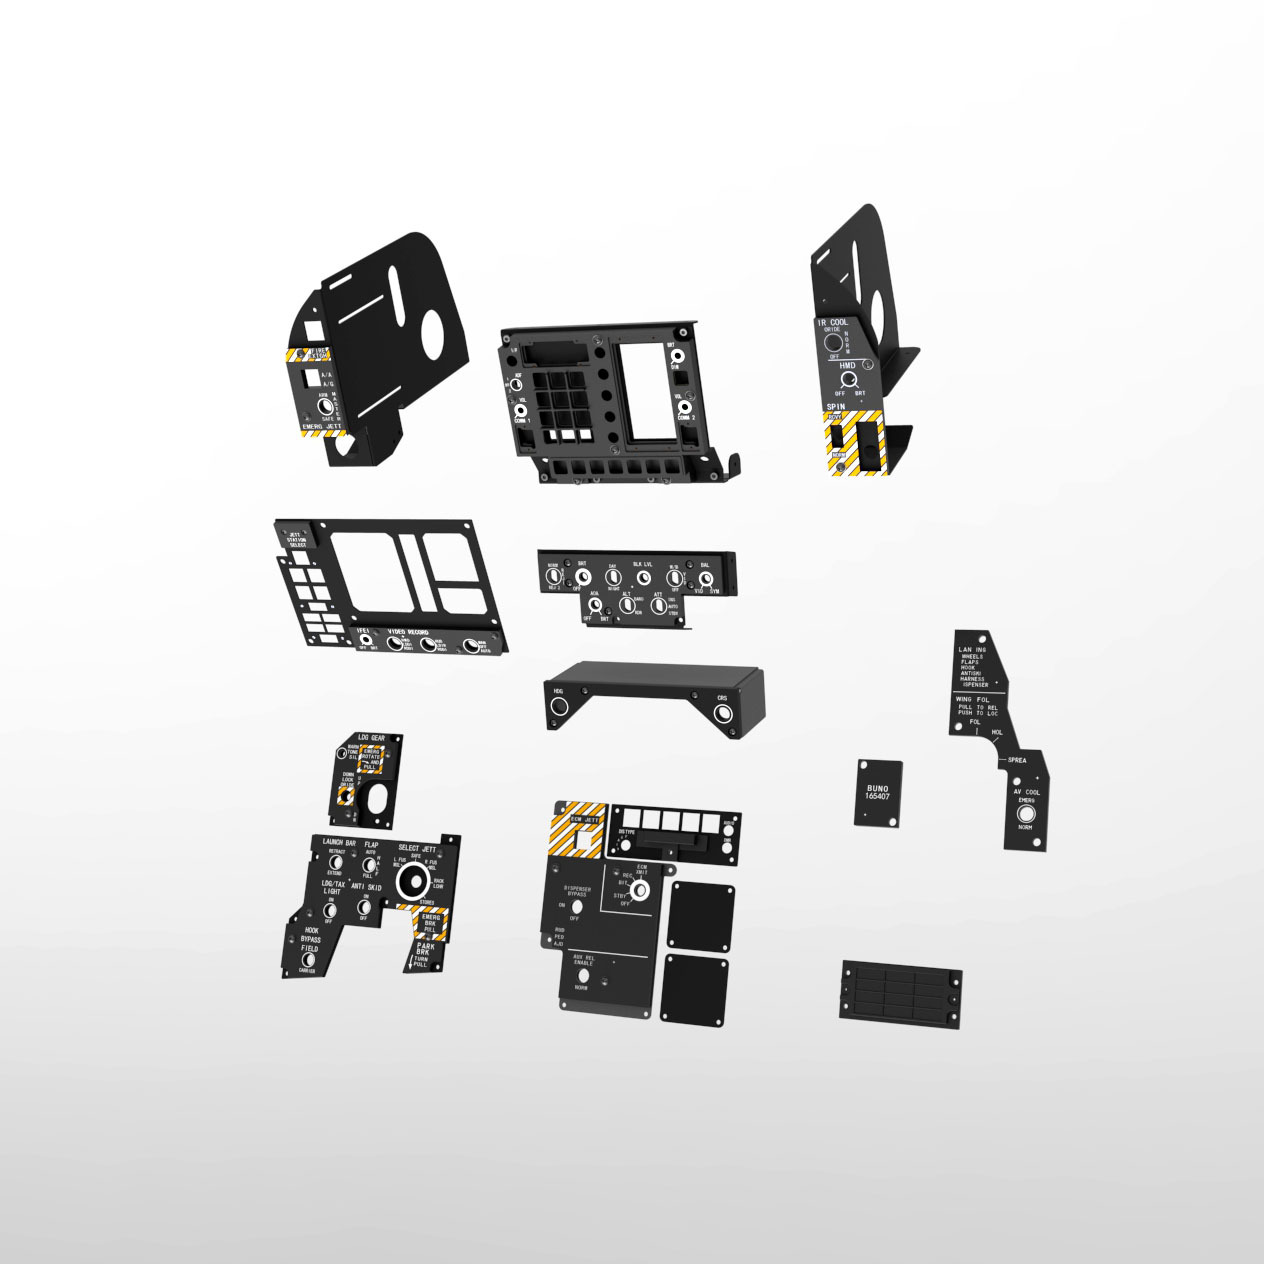
All the parts above are exactly the same ones used in our full-featured cockpit which look like this according to our latest design.
-
High-fidelity parts and kits for F-18 simulators
NeoEngress replied to NeoEngress's topic in PC Hardware and Related Software
This set of knobs and button caps are made to work best with our panels. Knobs come with set screws and you may easily fit them to your pots or selectors. And the buttons are made with translucent material and laser engraved so you may fit them inside your 3D printed bezels or panels.
-
High-fidelity parts and kits for F-18 simulators
NeoEngress replied to NeoEngress's topic in PC Hardware and Related Software
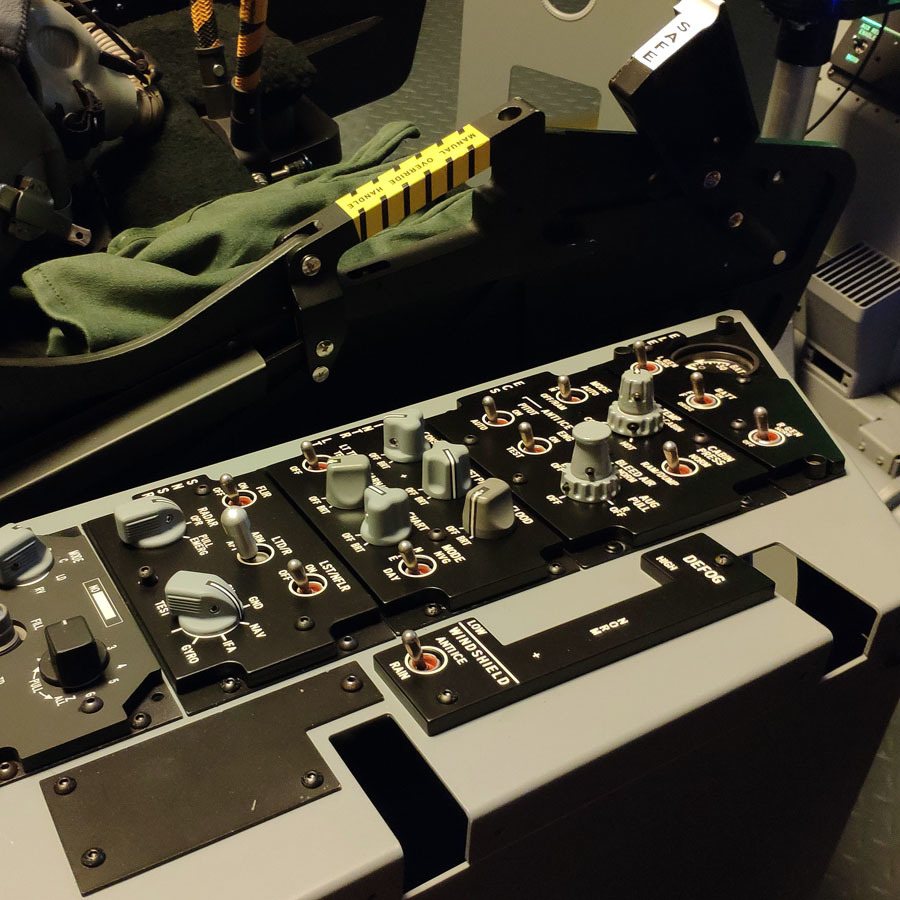
You may have sourced your switches and pots and are ready to fit them somewhere. These panels come with back plates for just that purpose. You may build your own dimming driver to feed those NVIS backlights.
-
High-fidelity parts and kits for F-18 simulators
NeoEngress replied to NeoEngress's topic in PC Hardware and Related Software
If you're building your own cockpit, this aluminum shell & frame kit may help you save a lot of tinkering with MDF and achieve some impressive results.
-
Hi guys, we've set up a business to develop and produce high-fidelity simulator hardware for DCS World applications. Here are a few items that we hope you may find useful, starting with a life-like ejection seat. There's a USB add-on which makes this seat appear as a game controller in Windows. You may assign the ejection cord to trigger the in-game ejection if you're fed up with Ctrl+EEE The height adjustment motor also comes as an add-on, watch the following video to find out how it works: