
parkerfly51505
-
Posts
31 -
Joined
-
Last visited
-
What I learned From My 6 Year Simpit Build
parkerfly51505 replied to Kenpilot's topic in Home Cockpits
Hi Bucic... I know it's been a couple of months but thought I'd mention the "simplest" method is to connect all arduinos to your computer individually via USB hubs and not worry about shift registers or anything else for that matter. I'm running 10 arduinos for my cockpit using this method and it's never let me down yet. I was/am very much a beginner when it comes to this. Is it correct, proper, or even ideal... probably not, but it works. Kenpilot... great write up on your journey. I especially like point 7 which I don't do nearly enough of. I'm four years in and still have a little bit to go. -
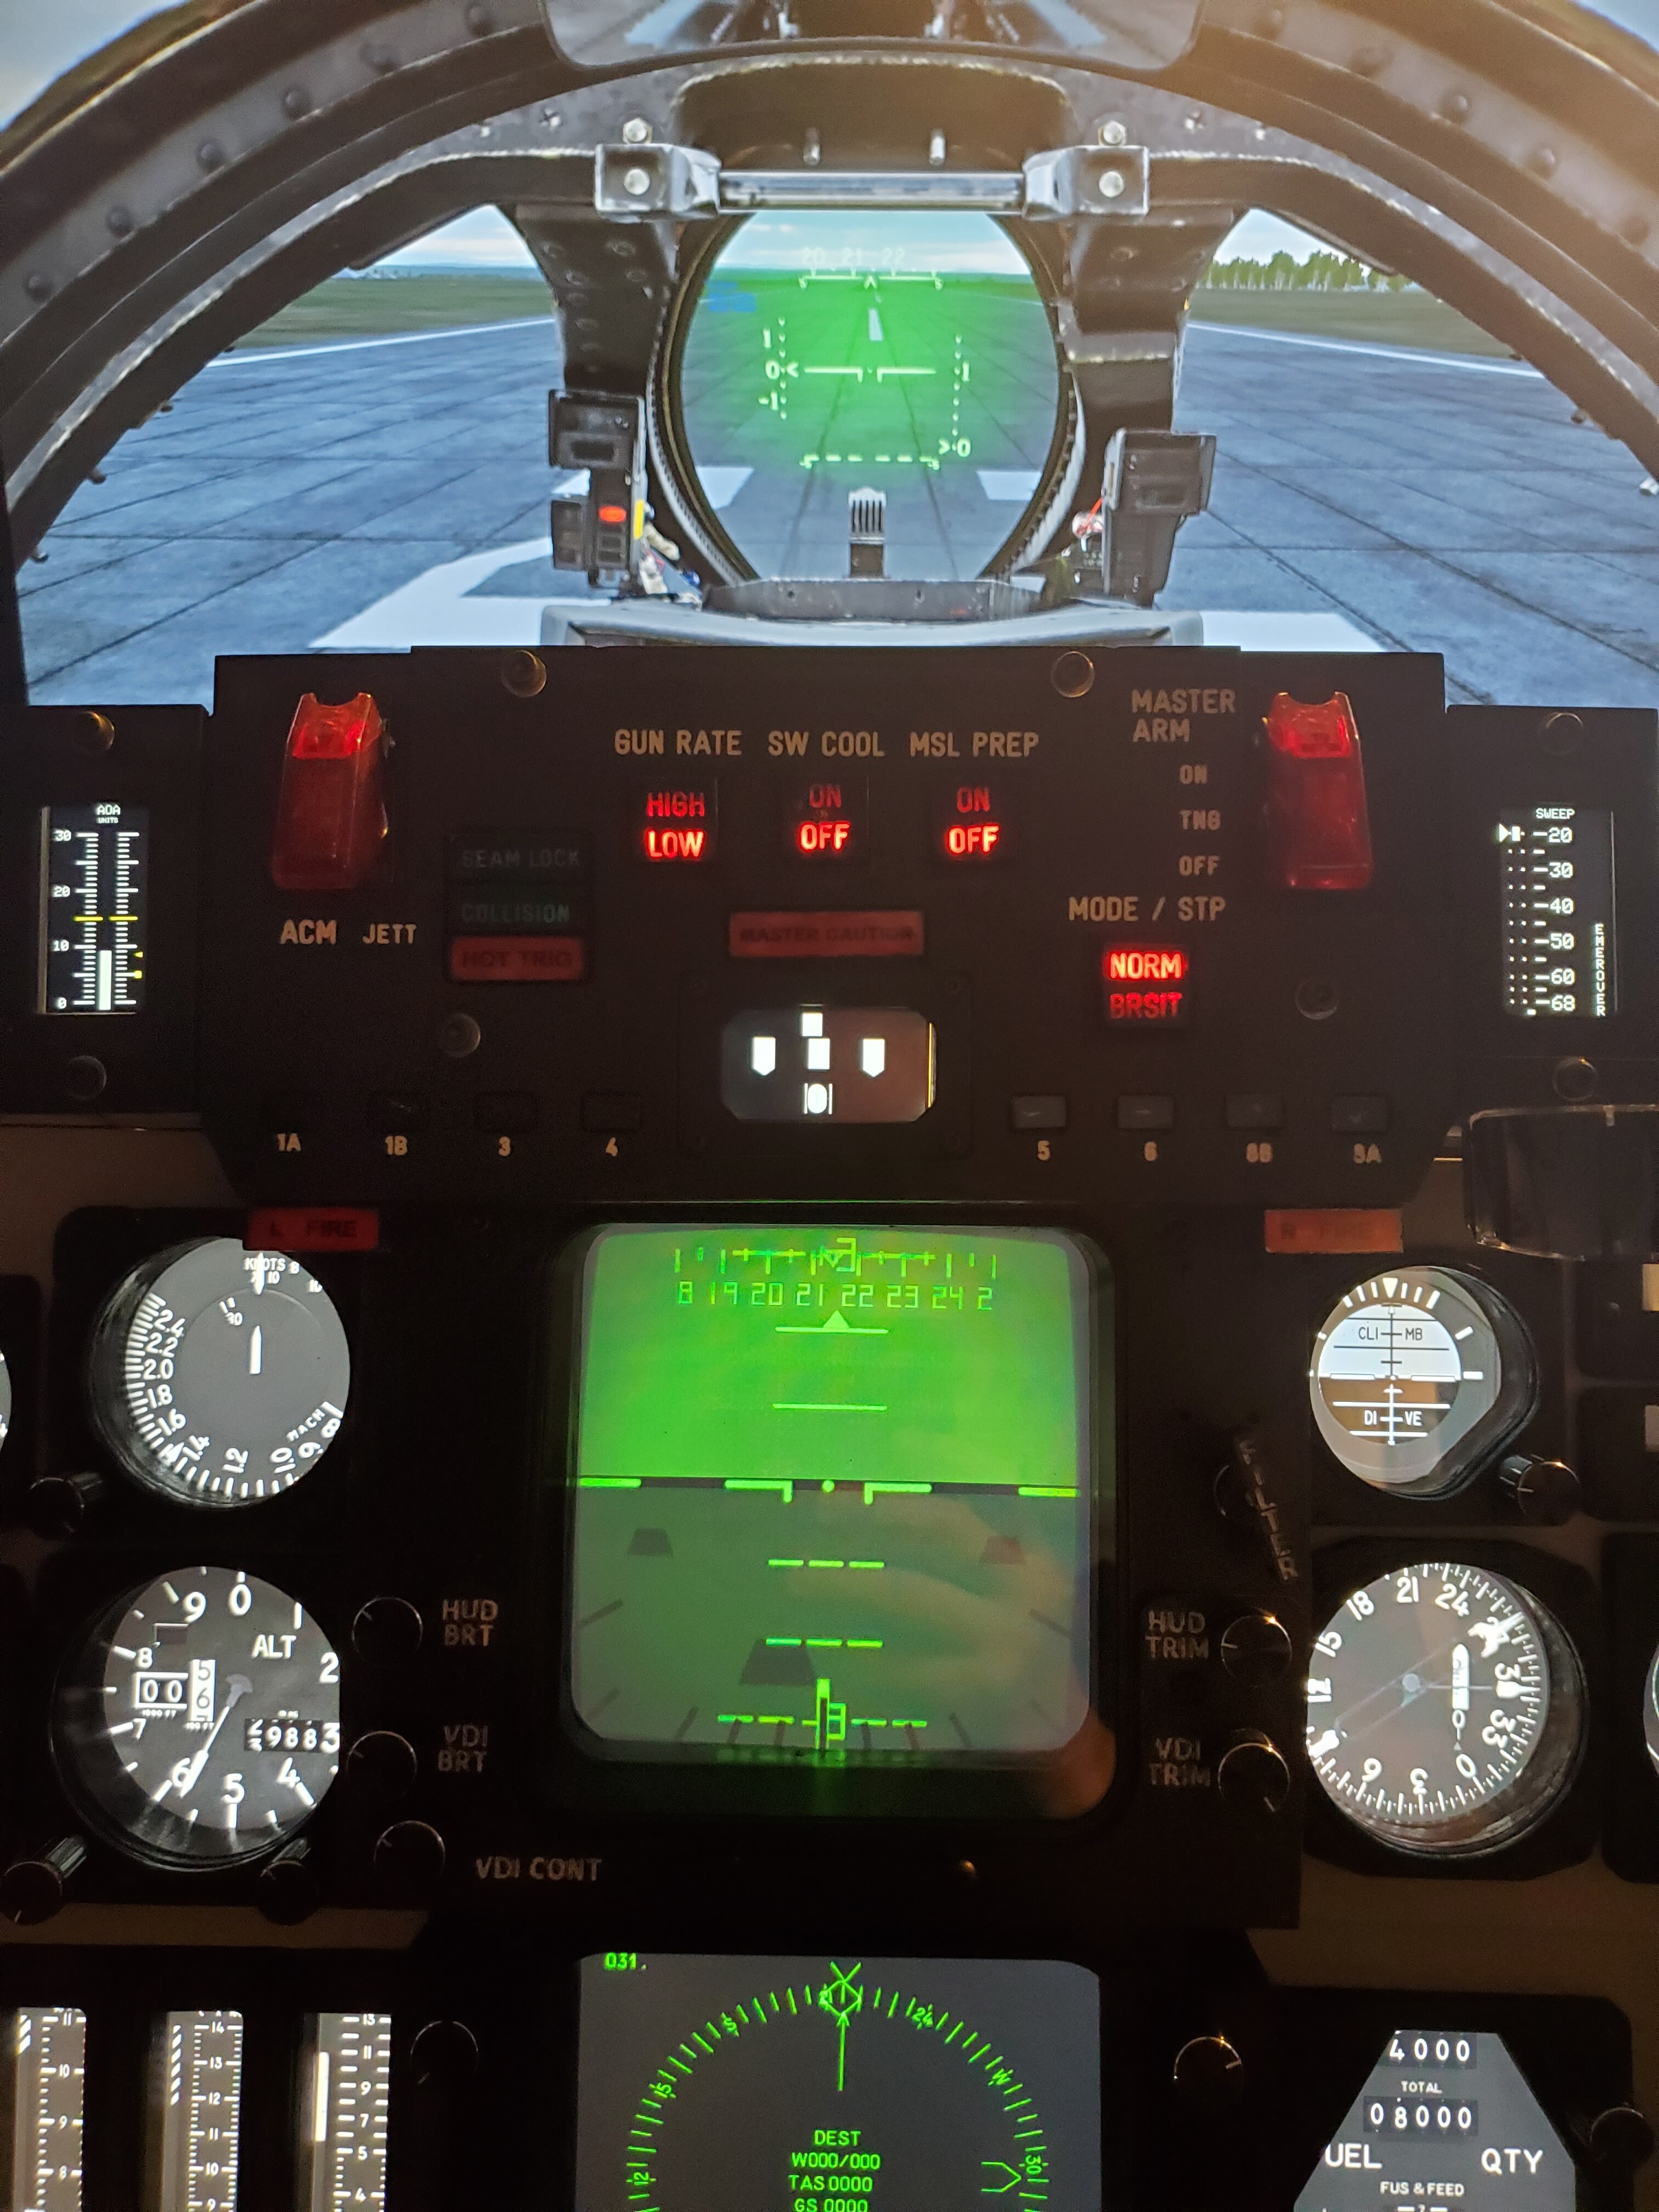
Absolutely! It's connected directly to the Arduino via 7 wires, not a full functioning display that could utilize HDMI or USB with Helios. The graphics have to be programmed to be displayed. It's definitely a bit of a rabbit hole so be prepared to put some time into it but I was surprised that it worked as well as it did. Adafruit's tutorials and example code worked well enough to get me started. I'm FAR from an expert in any of this and my code could certainly be improved, but here's the general idea. The Arduino code below is not all inclusive. There are bits and pieces like variable definitions and such that I've left out. This is just to give you an idea what's involved. I use Arduino Mega clones for everything. The setup code and the libraries used... #include <Adafruit_GFX.h> // Core graphics library #include <Adafruit_ST7789.h> // Hardware-specific library for ST7789 #include <SPI.h> #include <Wire.h> #define DCSBIOS_IRQ_SERIAL #include "DcsBios.h" // Display pin definitions #define tsTFT_CS 36 #define tsTFT_RST -1 // Or set to -1 and connect to Arduino RESET pin #define tsTFT_DC 35 // Initialize display Adafruit_ST7789 tstft = Adafruit_ST7789(tsTFT_CS, tsTFT_DC, tsTFT_RST); These are the DCS-BIOS functions that pull the numbers from DCS and call the display functions to update the graphics... // ******************************************************************************************************* // ACM Panel: PILOT ACM Slip Ball void onPltAcmSlipBallChange(unsigned int slipVal) { slipValue = ((maxTSDisplay - minTSDisplay) * (slipVal - minDCS)) / maxDCS - minDCS; slipBallRect(); } DcsBios::IntegerBuffer pltAcmSlipBallBuffer(0x139a, 0xffff, 0, onPltAcmSlipBallChange); // ******************************************************************************************************* // ACM Panel: PILOT ACM Turn Indicator void onPltAcmTurnIndChange(unsigned int turnVal) { turnValue = ((maxTSDisplay - minTSDisplay) * (turnVal - minDCS)) / maxDCS - minDCS; } DcsBios::IntegerBuffer pltAcmTurnIndBuffer(0x1398, 0xffff, 0, onPltAcmTurnIndChange); This is the display function for the graphics. The slipValue and turnValue calculations are used from the DCS-BIOS functions... void slipBallRect(void) { //The INVERSE color is used so rectangles alternate white/black tstft.fillRect(tstft.width() / 2 - 21, 45, 30, 45, ST77XX_WHITE); tstft.fillRect(tstft.width() / 2 - 106, 45, 30, 45, ST77XX_WHITE); tstft.fillRect(tstft.width() / 2 + 64, 45, 30, 45, ST77XX_WHITE); tstft.fillTriangle(tstft.width() / 2 - 91, 100, tstft.width() / 2 - 106, 90, tstft.width() / 2 - 77, 90, ST77XX_WHITE); tstft.fillTriangle(tstft.width() / 2 + 79, 100, tstft.width() / 2 + 93, 90, tstft.width() / 2 + 64, 90, ST77XX_WHITE); //Lower movement tstft.fillRect(tstft.width() / 2 - 26, 115, 2, 45, ST77XX_WHITE); tstft.fillRect(tstft.width() / 2 + 12, 115, 2, 45, ST77XX_WHITE); tstft.fillRoundRect(prevSlip - 12, 115, 32, 45, 15, ST77XX_BLACK); //tstft.drawRoundRect(prevSlip-50, 130, 30, 45, 15, ST77XX_BLACK); tstft.fillRoundRect(slipValue - 10, 115, 30, 45, 15, ST77XX_WHITE); tstft.drawRoundRect(slipValue - 10, 115, 30, 45, 15, ST77XX_BLACK); prevSlip = slipValue; //Upper movement tstft.fillRect(prevTurn - 23, 5, 32, 35, ST77XX_BLACK); //tstft.drawRect(prevTurn-10, 5, 14, 20, ST77XX_BLACK); tstft.fillRect(turnValue - 21, 5, 30, 35, ST77XX_WHITE); tstft.drawRect(turnValue - 21, 5, 30, 35, ST77XX_BLACK); prevTurn = turnValue; delay(1); } I did all this a couple of years ago so I'm a bit rusty on specifics but I'd be more than happy to provide any more info. I'd have to open up the ACM panel to verify the pinning again but certainly will if needed. Hope this helps!
-
This Adafruit display is what I used... Adafruit 1.9" 320x170 Color IPS TFT Display - ST7789. Fairly straightforward to use with their code tutorials. Same one used for the side displays. Hope this helps.

-
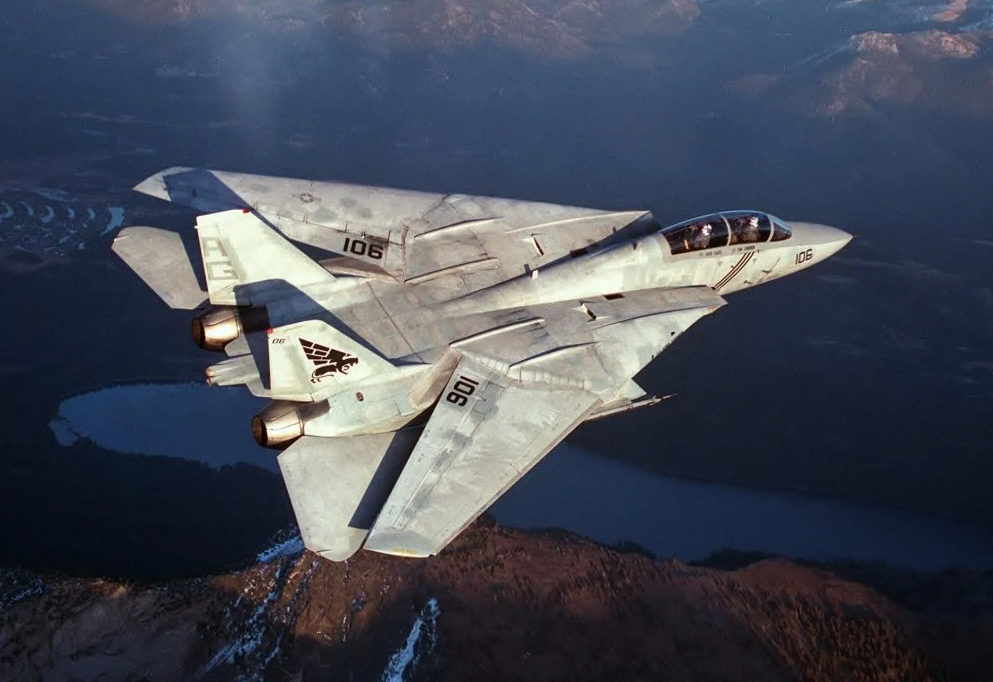
Hi Nimitz... welcome to the forum and thank you for your service! My 2 cents. I started with the home cockpit route. I'm about 3/4 of the way complete with panels for a Tomcat. Had three 2k monitors + a 1080p size monitor for gauges and TrackIR for head tracking. Had the itch for more so I went motion with an aluminum frame/four actuators + belt actuator. Amazing. I stopped building panels when I switched to VR (Quest 3) though. Everyone's correct. Once you use VR, you can't go back. I greatly missed the physical switch engagement though. Mixed reality is really getting very close to making both work. I use the Virtual Desktop app which allows passthrough of both hands so I can see the switches wherever my hands go. Quite amazing. Still the full fidelity realism of VR yet the interaction of switches. I'll be continuing the panels builds to completion probably this winter. I pared back to one monitor now. When in VR, it shows what's happening on screen but has that "VR look" so it's not very easy on the eyes for others to watch. Other's, I'm sure, could answer you better on that one. Hope this helps...
-
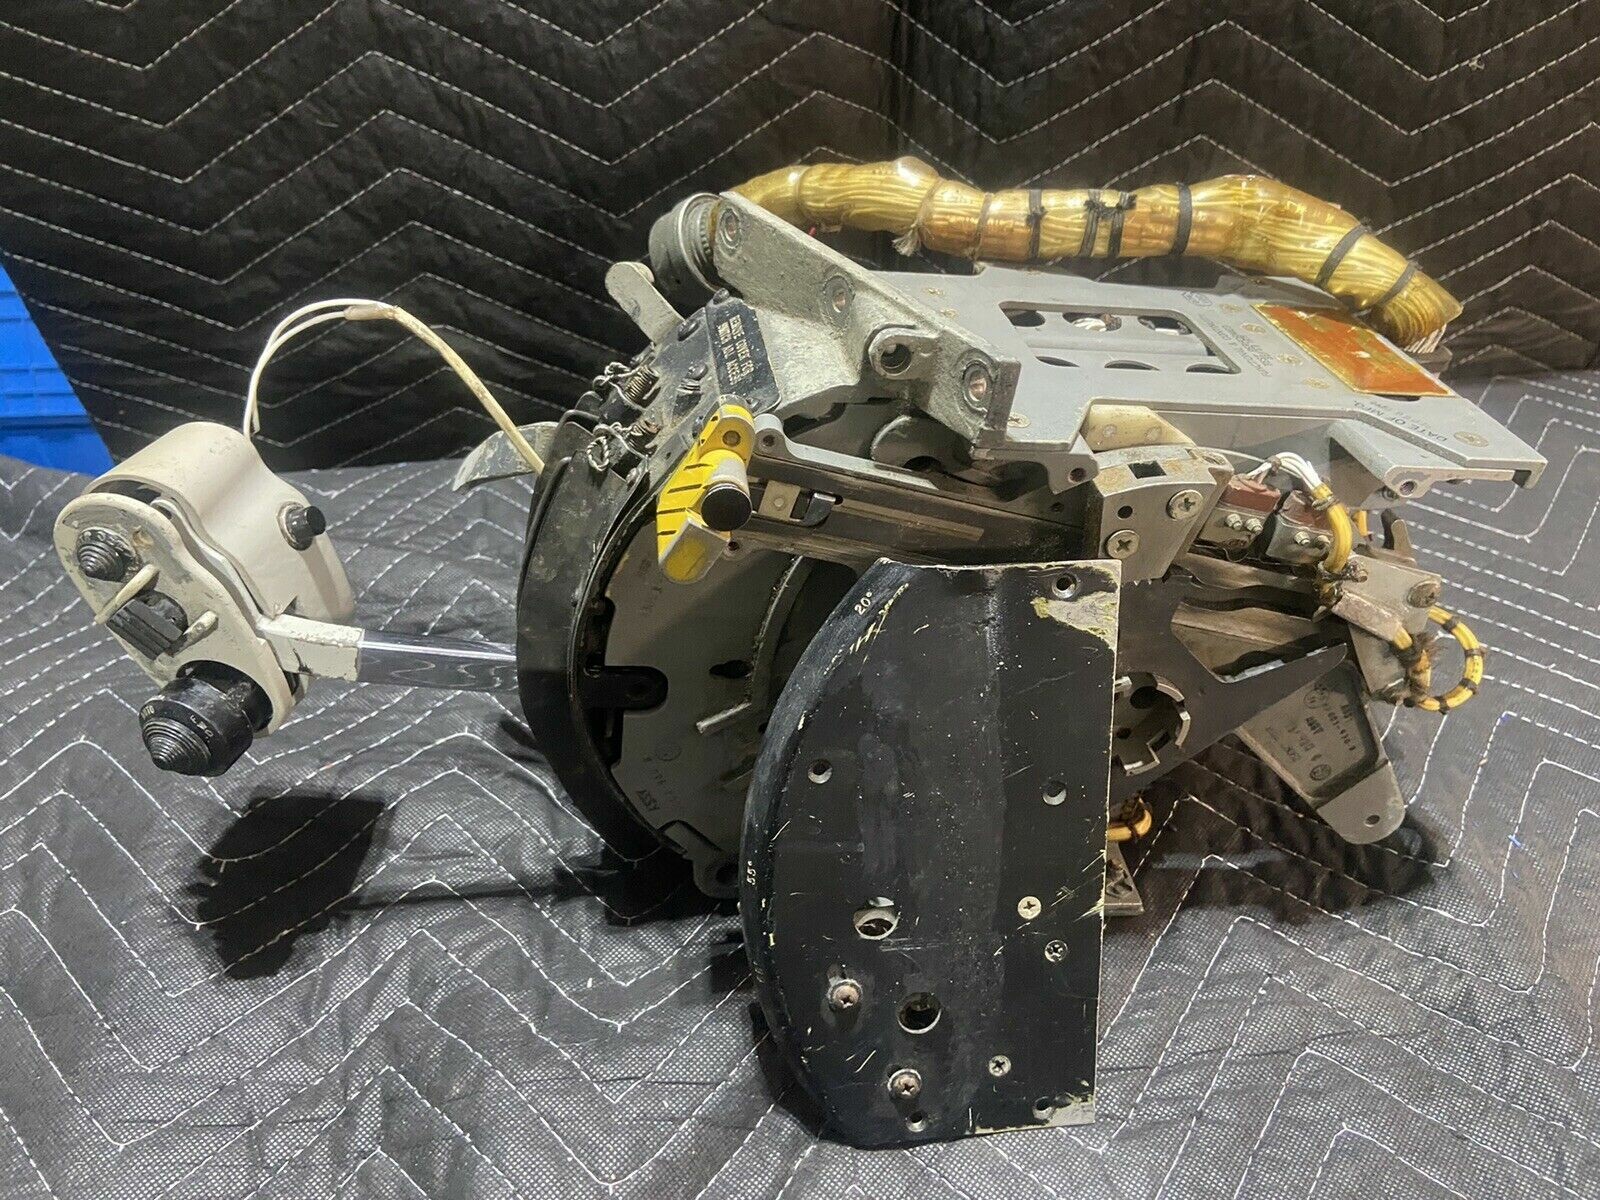
Found another photo of a pretty ragged quadrant that has a detached side panel letting us see a bit more. That pin I referenced in the other photo is seen "stowed" due to the missing side plate on the lower part of the wing sweep lever.
-
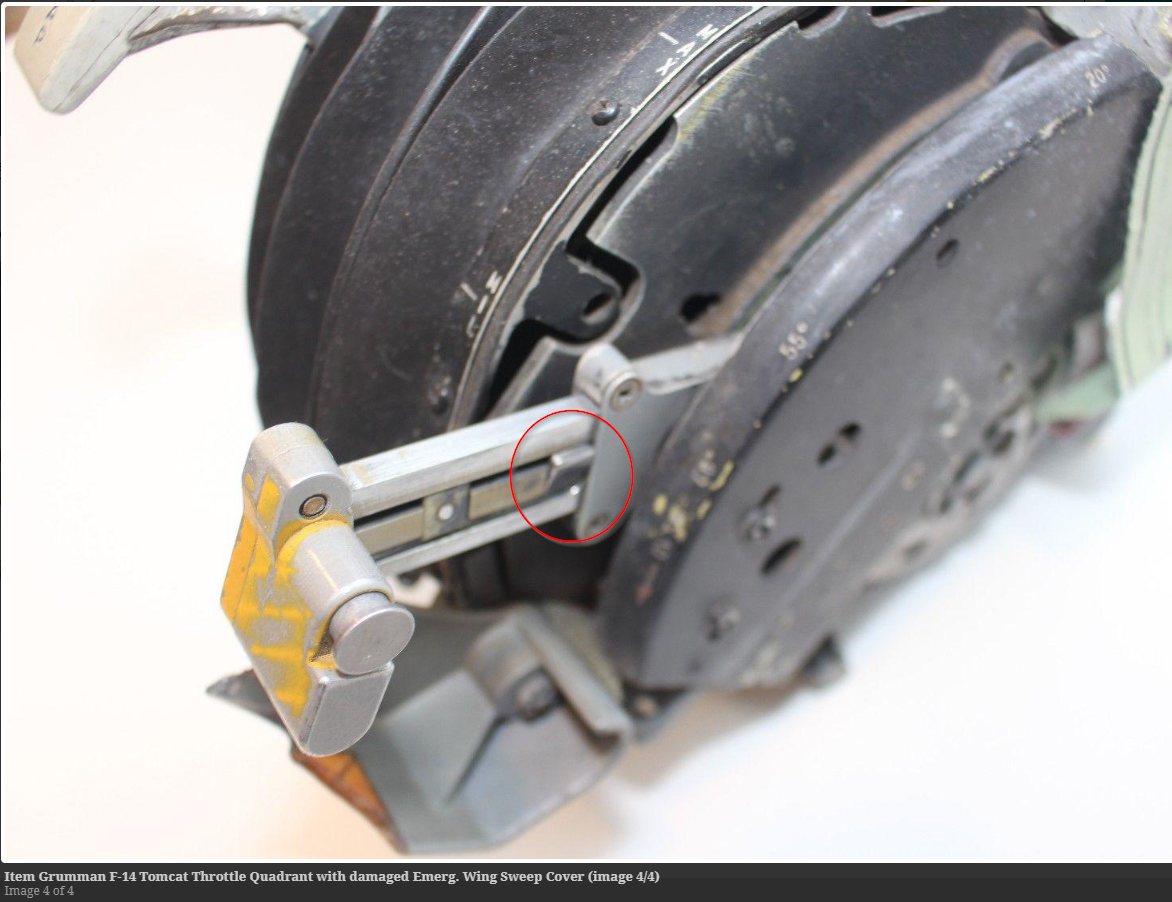
You may have already seen this photo but it's a decent closeup of the button mechanism. Looks like that tab is probably spring loaded and the button somehow pushes it in enough to allow the lever down.
-
I was just watching a YouTube video yesterday on the "art of bending acrylic"! Never tried it before. That seems to be the easiest method as long as a decent form can be made. I have some 3mm clear acrylic on hand but that's possibly too thin to try. When I get a chance, I'll try it with a heat gun and see how it holds up. I have no idea how that switch on the yellow handle works either. So wish we could tear into a real one to see how it works.
-
Definitely interested and thanks! I've been trying to figure out how I want to implement the wing sweep myself. I have a Virpil CM-3 and just map some of the buttons to the cover and handle for now but that's no fun. I'm finishing up panels on the full cockpit now but will be anxiously watching your progress. Those CAD files look great so far.
-
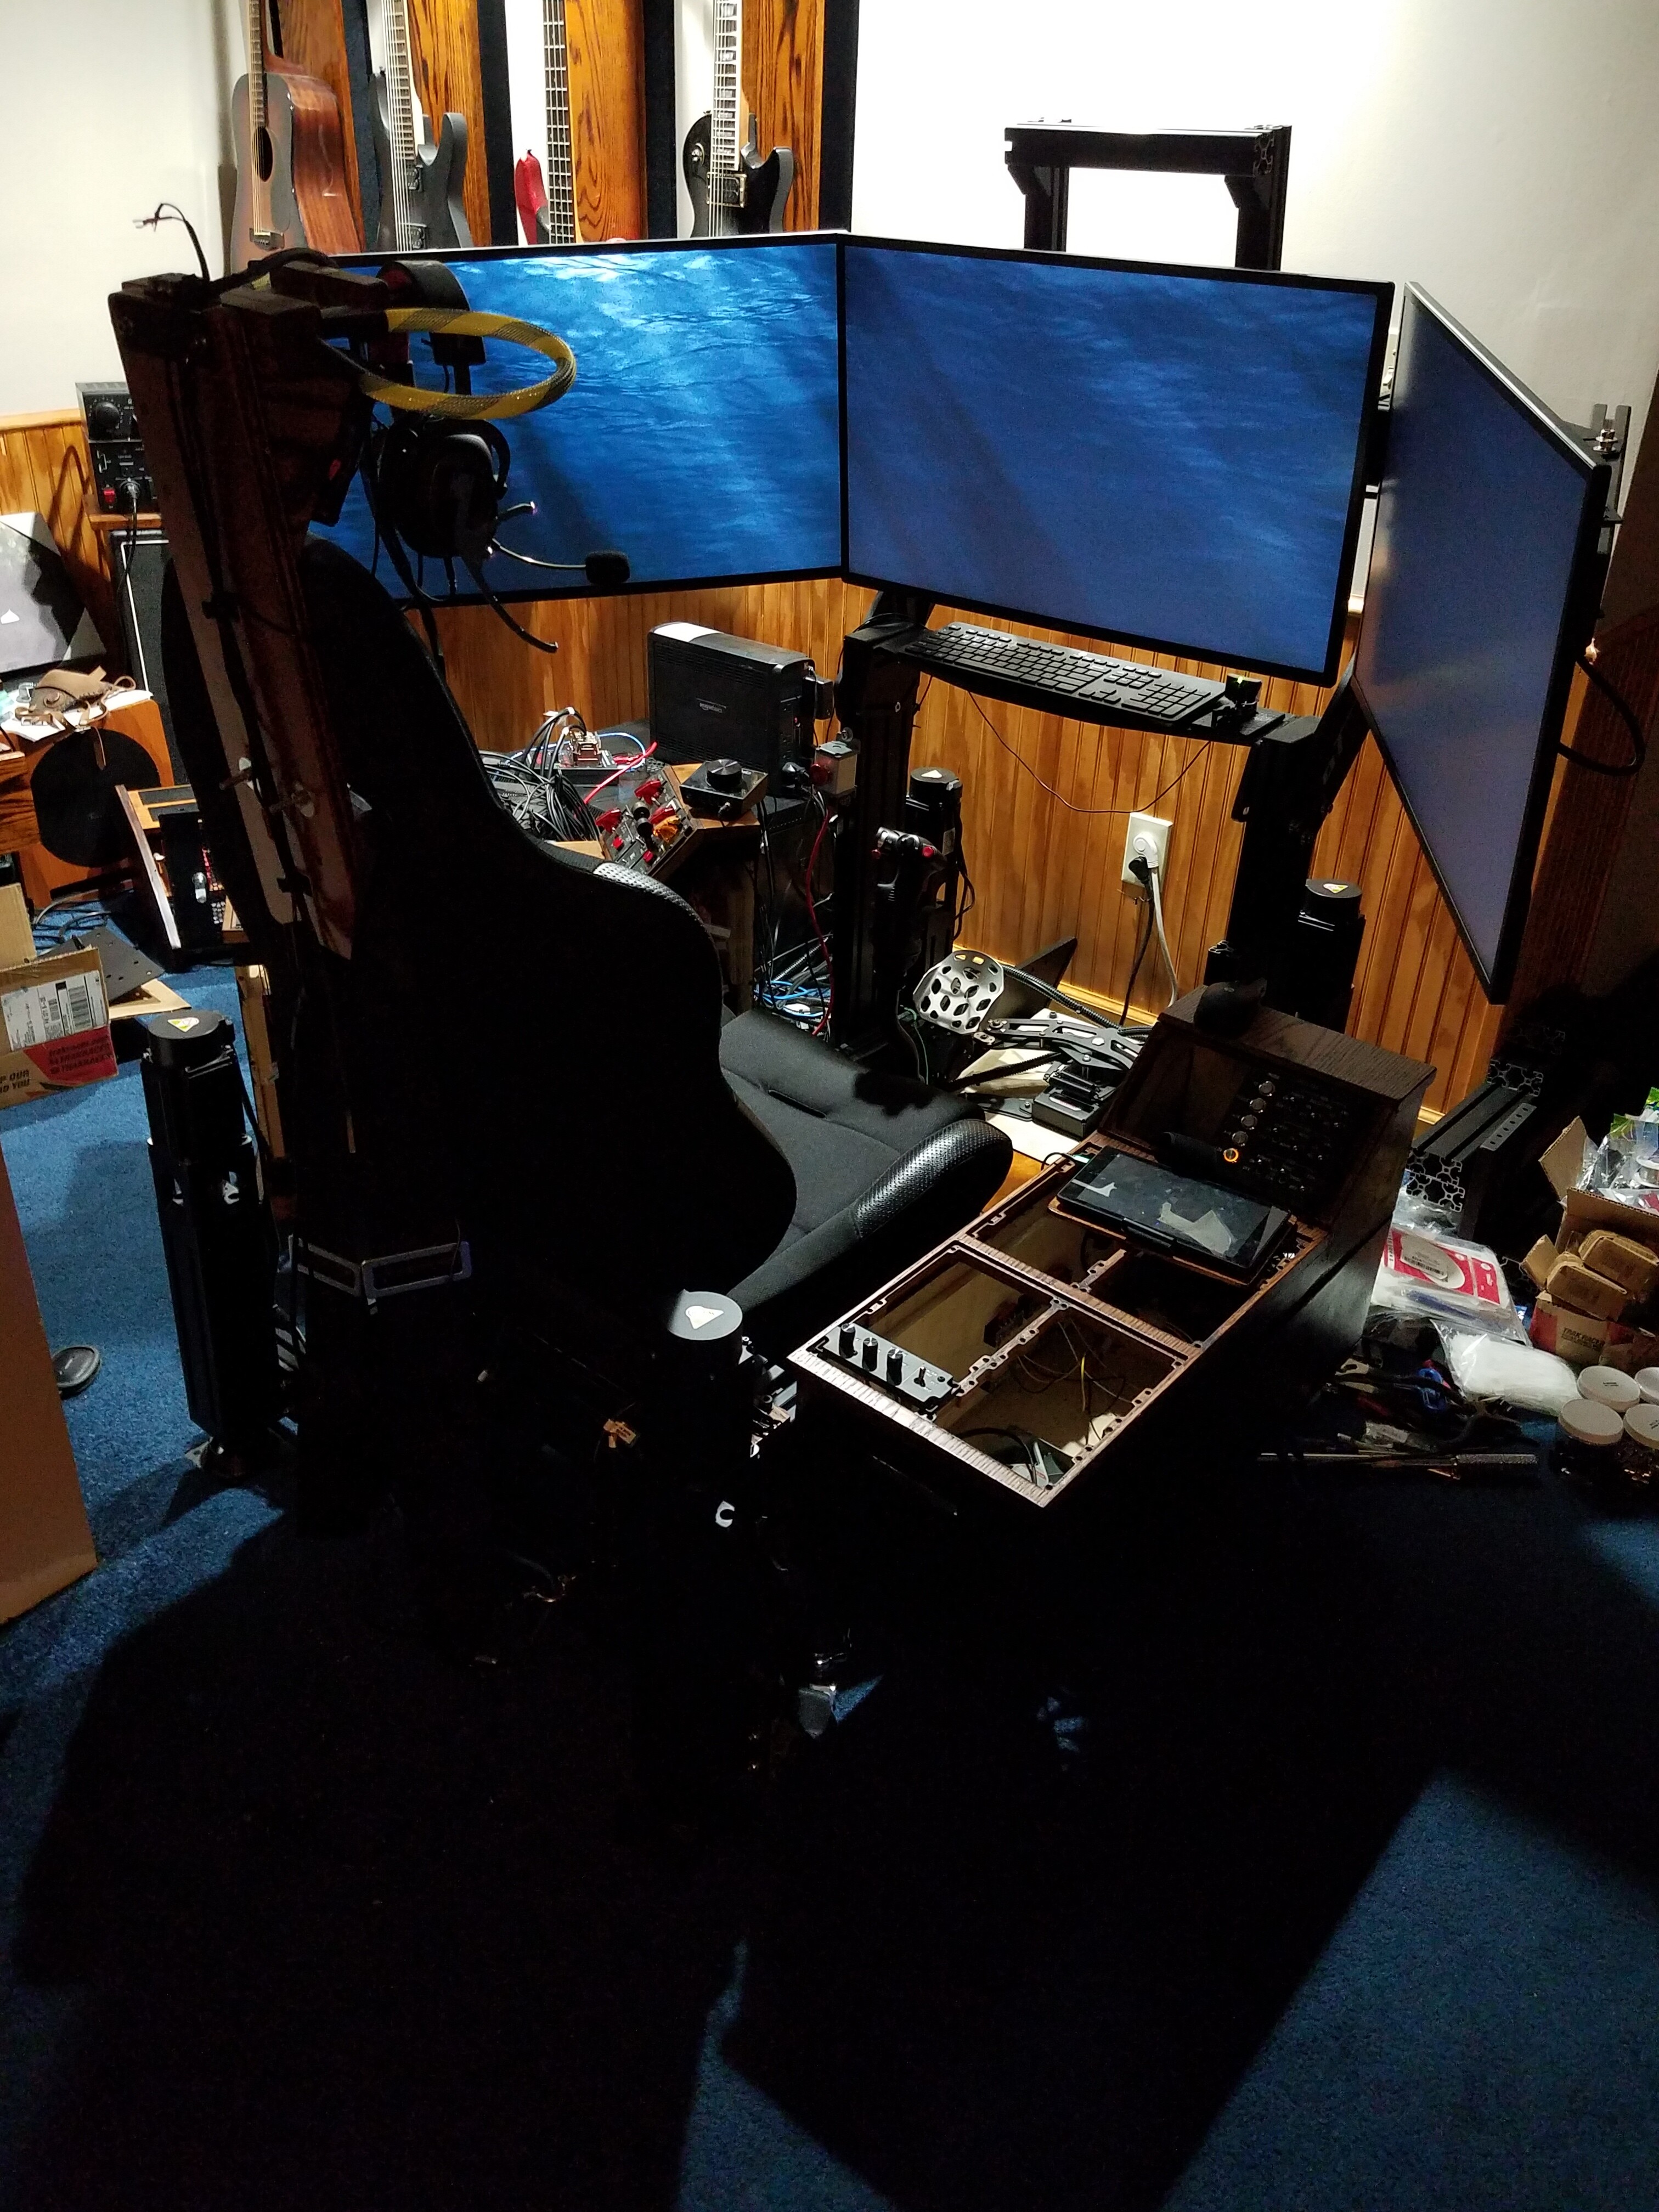
If you want to go down a never-ending rabbit hole and spend countless hours of your life... then yes, motion is for you. I have a 3DOF based on the eRacingLab 150mm actuators and GT Omega Prime cockpit. I built it to eventually go back and forth between different DCS flight modules and possibly racing. I'm building side panel consoles for the F14 module now. Using SimRacingStudio software is very quick and easy but left me with a very arcade like experience and I always had trouble with heave motion working effectively. FlyPTMover was what changed the experience for the better but man that has been a journey. It's a very high learning curve, at least for me, for how it's implemented but it can do just about whatever you want it to. This is where the time comes in. Again, I would never go back but definitely try the Butt Kicker first. I did. I haven't hooked it back up since adding motion but I plan to soon. Both together should be great. Here's an early on photo of my rig. Plenty of details have changed but the basics have not.
-
Now that is way cool!!! I never thought you could retrofit like that. I have a million questions but hate to completely hijack this thread. Mind if I PM you about it?
-
Now that's thinking outside the box. Speaking of boxes, I'd have to build a complete enclosure to keep the chips from flying even further!
-
That's a good question. I couldn't find anything referencing cast or extruded on Perspex's web site. Might have to ask Perspex directly or at least order the smallest pack you can and test. It's fairly obvious once you start cutting. Either your bit starts collecting melted plastic or there are chips flying everywhere! *UPDATE* I was looking at perspexsheet.uk not the actual company perspex.co.uk. Perspex makes both and shows them on their main page. You'll just have to make sure that the reseller knows which type they're selling. **
-
I only have a CNC. It's great for cutting acrylic... cast acrylic only. The extruded acrylic (Rock Hard Plastics) is what heats up fast and melts. Cast acrylic (SimbaLux) chips away and is MUCH easier to use. Engraving is a whole different story and wish I had a laser for that part. I can engrave well enough but its just not very consistent. Granted, my CNC is not super precise. It's built for woodworking. This is one of my better panels but is still not the most consistent from top to bottom.
-
parkerfly51505 changed their profile photo
-
I took a quick look at those control columns. That's a great idea, especially in a cramped cockpit. Even in my setup I have to move my legs a bit and end up banging my kneeboard. I found a lot of vintage gear in the UK eBay site but not a lot in the US. Probably just not finding the right search yet.
-
It never even crossed my mind that something like that would be available to buy. Sure enough, there's an overhead set for sale right now for $235 on eBay. Tempting but I have to stop spending $$$ on this damn hobby.......... or at least prioritize. haha