tietze
-
Posts
321 -
Joined
-
Last visited
Content Type
Profiles
Forums
Events
Everything posted by tietze
-
I have a similar problem. The engine starts all the time without any interaction. I've disconnected all controllers (except mouse and keyboard). Deleted the DCS folder inside Saved Games, but still the engine does starts up and shuts down all the time, as described in the debriefing:
-
Nice idea!
-
@BadWeather: did you make it work? I can see there is some Flight Sim Fanatics flying tonight 2030GMT.
-
I don't know about modman, but you can also install the patch manually - remember to backup the original files first! Copy all the *.dds-files to the following path inside your black shark directory: Bazar/Liveries/Cockpit_Ka-50/english
-
Great man - this patch is fantastic ;-)
-
I have just found it necessary to reapply some grease as I felt the stick was moving unevenly. Now it is smooth again :-) (I hope it is not necessary to reapply grease that often) Have you tried to do that? In my experience it helps to apply the grease mentioned above, but I am open to suggestions that has yielded results for others :-)
-
Seeing the same when having the KA-50 repaired (where HUD amongst other things are damaged). Is this a bug or is there some systems that needs to be reset?
-
Haha - and sorry I forgot to reply to you! While not any exams lately I do write some academic texts. I guess the primary reason for all the links and notes here is that I just like to refer and point to other bits of interest. There are so many resources available in the posts here at the forum. While one should not underestimate the function of writing the same again, I just try to make visible what is already available here - and making it available again by linking and referencing to the sometimes rather lengthy threads! :-)
-
Hej Har kigget efter danske "onlineflyvere" et stykke tid, men ikke fundet nogen. Er der noget jeg har overset? I mellemtiden er jeg begyndt at flyve med nogen gutter på flight-sim-fanatics.com. Hvis der er andre der savner nogen at flyve med kan jeg anbefale at kigge forbi. Intro til flight-sim-fanatics.com-tråd her på forummet... :pilotfly:
-
I got the impression SofTH was a way of getting extra FPS, so I tried it out and changed to fullscreen instead of windowed mode. After tweaking and trying out almost all options I could only see a small decrease in framerate, when using it. I'm only using one extra monitor to show the MFCDs of the A-10C and ABRIS and Shkval in BS2. Is there any special options I should pay attention to, to get higher framerate? (GPU: Radeon 5870, win7x64)
-
Another satisfied couch pilot and Warthog user here! If you find that it begins to move uneven and you are up for the task, you could apply new grease, as noted here: http://forums.eagle.ru/showthread.php?p=1315804
-

The New Flight Manual--Coax Propaganda, Maybe?
tietze replied to Smokin Hole's topic in DCS: Ka-50 Black Shark
Design is a very practical thing that also depends on experience. So this argument is only poor if you disregard that a reliable design needs "experience", by being confronted with a lot of different empirical situations, be it through testing, experiments or having used it in a lot of different conditions... But since that has never been the case (the bicycle is a rather new invention, compared to a four wheeler - not limiting a car to an automobile). It further obscures the argument by making it an universal question, rendering particular circumstances under which a car or bicycle have value irrelevant. Being better or best is a (normative) question that (at least) depends on what your aim, means and circumstances are. You always have to specify being better with regard to, under what circumstances and so on... While not having read the manual (:poster_oops: flying what shark? - here comes a universal presupposition about how is often argued for new designs), I suspect that things that could make it look like propaganda is to be a bit too bold with the universal potential of this particular design. A modern sports car might get you easier than legs from A-B when roads are present it might not have been so easy without roads, gas stations, oil rigs and so on... Circumstances change and that particular design might become more viable than others. Paving the road, so to speak, for the coaxial rotor is probably going to get it going in some direction, for some time, for some people in some places... If it is done right ;) If you already have a conventional helicopter and the whole sociotechnical infrastructure for this particular design, you might be hesitant about putting another rotor disc on top of that ;) -
How to unchain the rudder from trim
tietze replied to PeterP's topic in PC Hardware and Related Software
Nice to use the autohotkey-script for only recentering the rudder! :thumbup: I do not have much insight on the difference between sendevent and sendinput. But as they state that sendinput is faster and more reliable (??!), so I'm sticking with that for the moment :renske: When using sendinput instead of sendevent the set SetKeyDelay has effect and you need to sleep for 1ms between key-down and key-up: #NoEnv ; Recommended for performance and compatibility with future AutoHotkey releases. #Warn ; Recommended for catching common errors SendMode Input ; Recommended for new scripts due to its superior speed and reliability. SetWorkingDir %A_ScriptDir% ; Ensures a consistent starting dir. 1Joy3:: ; Use joystick test from autohotkey help to locate your trim button used in Black Shark KeyWait 1Joy3 ; Wait for the user to release the joystick button send {z Down}{x Down} ; unchain rudder from trim (set) sleep 1 ; needed delay send {z Up}{x Up} ; unchain rudder from trim (release) swap "Z" to "Y" if you use a QWERTZ keyboard! return:joystick: :pilotfly: -
How to unchain the rudder from trim
tietze replied to PeterP's topic in PC Hardware and Related Software
Yeah I guess the above isn't "stutter-safe"! And then it makes perfectly sense! ;) -
How to unchain the rudder from trim
tietze replied to PeterP's topic in PC Hardware and Related Software
Nice idea! I've made a couple of modifications, removing the loop, reduced the delays, and I guess you don't want to press down the y-key but the z-key instead? The key delays plays some role, I've come to the following values through trial/error. Delay between presses is set to 1 millisecond and press duration to none. Have not had any issues with it yet. 1Joy3:: ; Use joystick test from autohotkey help to locate your button. SetKeyDelay, 1, -1 send {t down} ; Press down t KeyWait 1Joy3 ; Wait for the user to release the joystick button. send {t up} ; Release t Sendevent {z Down}{x Down}{z Up}{x Up} ; unchain rudder from trim return -
Missing texture: Building at Sakhumi-Babushara airport at night
tietze replied to tietze's topic in Bugs and Problems
Thanks! - and sorry did not find that in my search! -
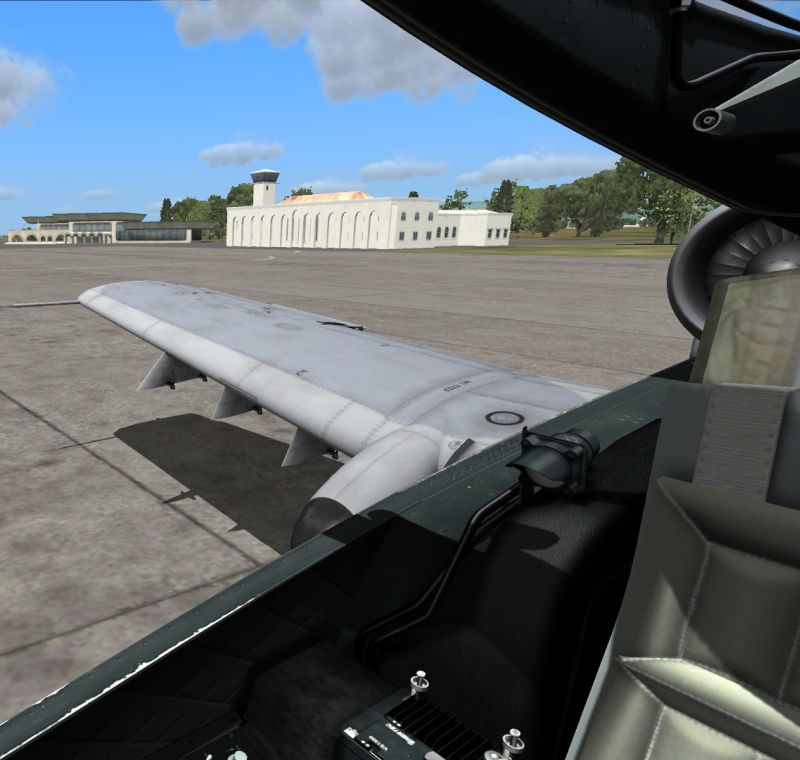
I was just noticing that the latest 1.1.1.0 full install misses a texture of one of the buildings at Sakhumi-Babushara airport at night time. This also applies to Black Shark 2.

-
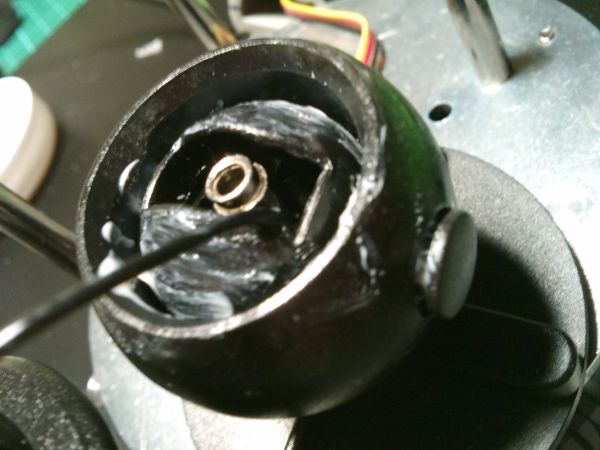
I understand that - maybe a lot of kitchen/ toilet paper, moist cloth and rubbing would be a more appropriate description of the procedure. First removing most of the grease with paper. Then using soap on cloth. Finally using one moist cloth and paper to remove the soap. I would have preferred to put it under water and wash it, but I did not disconnect all the wires, as it required to desolder one of the wires on the small circuit board. I removed the grease from everything except the spring as it seems quite separated from the joints, so I did not re-grease the spring. I did only grease up the inside and outside of the ball-joint and the two small gizmos that are part of the ball-joint. I tried not to grease anything else, not because I think it would break anything, but to avoid making a mess with the grease. One thing that might pose a problem is to grease the rubber-ring. I don't know how it will react over time.
-
DCS: BS2 graphics -- with the times, or ahead of the times?
tietze replied to Stretch's topic in DCS: Ka-50 Black Shark
Yup the 6970 provides not a tiger leap, but better performance overall (review, =on&prod[4824]=on"]toms charts). It is much better with tessellation and the fact that it has 2gb vram as default makes it a good choice for the memory hungry DCS engine. -
DCS: BS2 graphics -- with the times, or ahead of the times?
tietze replied to Stretch's topic in DCS: Ka-50 Black Shark
Sorry a bit OT, but isn't the HD 6990 a dual GPU board? AFAIK DCS does not really take advantage of that yet or am I wrong? In that case there wouldn't be much difference between a HD 6990 and a HD 6970. -
I would say that 1oz is more than enough. After applying the grease I have come to be less aware of the centerplay (which I am cancelling out with a deadzone of 5 for both axes in DCS axis adjustment). It is definitely not gone but maybe less noticeable with the smoother movement.
-
It takes some effort to get the old grease off, but the new grease has contributed to making it smooth. I really hope this will be a lasting solution. :joystick:
-
Inside view of TM HOTAS Warthog
tietze replied to Frazer's topic in PC Hardware and Related Software
Based on the Molykote-soltion I made a follow-up to this thread: Greasing up the Warthog. -
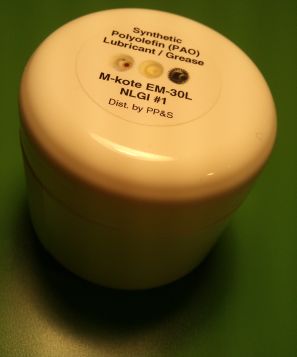
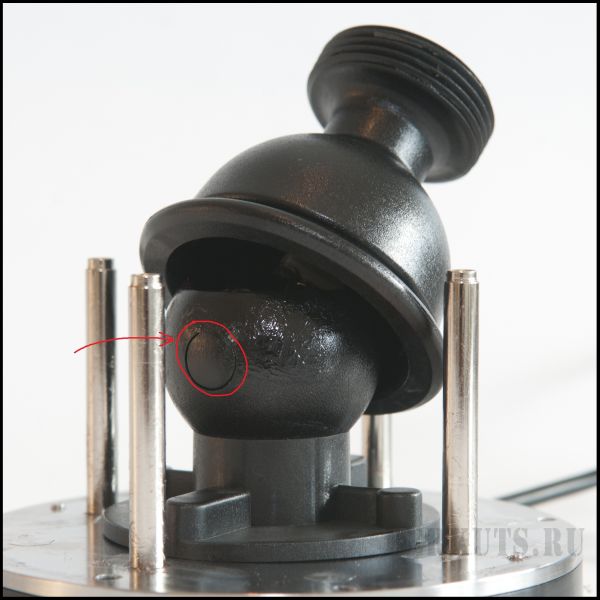
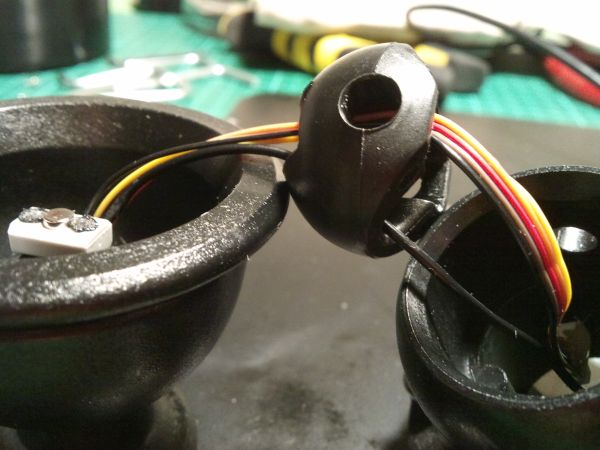
I few weeks ago I stumbled on the "Inside view of TM HOTAS Warthog"-thread and read with interest about hairiness of balls and the stick's sticktion-stucktion-stickiness and different proposed solutions. Overall I've been quite happy with the stick, but being one of those claiming that the movement could be smoother I was not completely happy. In relation to that I readily admit that I might be quite picky about the smoothness. The stick provides good tactile feedback around the center, so I would rather avoid the proposed solution of removing the big spring and space-wise there is unfortunately no room for the garden hose neck extension. Instead I opted for the re-greasing solution proposed by Callsign.Vega. Below is a description of how I got the stick smooth using the Molykote EM-30L grease: Encouraged by Callsign.Vega's post and 59th_Bird's positive experiences. I moved on to contact Thrustmaster support to find out whether it would void warranty to open up and re-grease the stick. To my surprise this was not the case as long as the grease was intended for metal & plastic and I didn't break anything in the process: While it can become hairy to argue about the directness of consequences of action, I overall saw this as an encouragement. It's probably connected with the craving for disassembling and fiddling with all kinds of gizmos. I ordered the Molykote EM-30L on ebay. After receiving the grease I opened up the stick. While the initial parts opening the stick is well-documented by previous pictures and video, I have not found any guides detailing how the last part with the ball-joint is disassembled. Joe Keefe on simHQ mentions that he "... was unable to separate the two parts of the ball joint". Being careful and taking note of earlier mistakes involving the soldering iron [also see post 12 below], it took me some time to figure out how to disassemble the last axis. The procedure is to remove the two round parts that are visible on the plastic ball-joint: I used a 3mm Allen key to push them out from inside. It requires quite some force, so if attempting this please be careful. Here is a picture of the inner part of the ball joint with the two round parts pushed out from inside the joint (the metal visible is just part of the base, for fixating the ball when disassembling): And this is the inner part of the ball-joint (cleaned): Both of the two small plastic gizmo's have a small square on the upper side one should be aware of when assembling the joint again: After disassembly I cleaned all the grease of the plastic-parts with mild soap and water [also see post 9 below] - it took quite a while! Re-greasing them with the Molykote grease didn't take quite as long. When minding the wires as described in the thread about assembly everything slid into place! To my big surprise the new grease really has made a difference - smoother movement when starting and stopping motion are now much easier. The interesting part is how long this will last and whether the stick needs to be re-greased on a regular basis (hopefully this will not be the case). Happy flying!
-
Hej, jeg er interesseret og bor i Århus :-)