
Brewnix
-
Posts
519 -
Joined
-
Last visited
Content Type
Profiles
Forums
Events
Posts posted by Brewnix
-
-
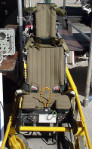
This is my current setup with 6 encoders in a matrix

This is how I hooked the ky-040 encoder up and got it to function in windows joy.cpl joystick panel.
And I didn't have to adjust MMjoy. Heres a pic of the pinout ^. Its consider a button press. 1 button to the left and 2nd button to right.
I also used different pinouts but for the assignment of the Button Rows, they are all the same here's a pic of my setup for encoder in mmjoy. I used B3 and B2 but you can use D3 and D2. I placed a orange path from switch to the next pin in matrix you have to remember not to assign it as a encoder but button. Mines not setup that way cause I have shift register for the buttons. So you have to experiment with that. Technically 1 thru 12 are programmed for encoders and everything 13 and above is only a button. I have done multiple edits just FYI. hope this helps.
-
Well Im not sure if that amazon link is working now so here is the info on them.
Also in the underlined description below, Im not sure if that button switch is only for the reset to zero it says or if can do something else altogether. Be nice if I can make the button do something else.
Does an encoder count as 2 different button presses for the -/+ or would it show as 1 button when using it keybinds. Like I said Im new to encoders.
KY-040 Rotary Encoder Module Brick Sensor Development for Arduino with Knob cap (5 PCS)
-Working voltage: 5V; Pulse number per revolution: 20
-Rotary encoder count number of output pulse output through the process of positive and
negative direction rotation
-360 degree rotation, this rotation counts are not limited.
-Cooperate with the buttons on the rotary encoder, can be reset to the initial state, that starts
counting from zero
-Knob Cap: Made of aluminium alloy, diameter: 15mm/ 0.59"; height: 16.5mm/ 0.65"
And after posting this image I noticed they dont have mounting threads,I can still make em work.
So I go it to work I need to draw pic give me a bit!
-
Ok so I have these encoders you bought. But I have not messed with these ones yet. After your last post I looked closer at the ones you bought and realized they are wired a little different then the original encoders I used. These ones have resistors on the board. I am assuming these are pull up resistors. SO I am gonna have to research and get back too you. Unless someone helps first. I apologize I didn't realize they were built a little different. But at any rate I need to learn it cause I plan to use them too!
-
Anyone have an easy to follow wiring diagram for rotary encoders using a Pro Micro?
The ones I have are 5 pin encoders.
These:
https://www.amazon.com/gp/product/B07CTJH7MS/ref=oh_aui_detailpage_o00_s00?ie=UTF8&psc=1
So how are you planning on to interface it with the Promicro? shift register or matrix? there is a githhub for MMjoy with explanation in short. I have a pic earlier in thread that is crude but I can show you a matrix setup.
-
I found this in a forum post to be able to see all fonts in Fusion360. Its third post down. Basically you place the command "Sketch.TextWritingSystem /any" In the text command box down below bottom left hit enter. And after restart you have to reinsert the command.
https://forums.autodesk.com/t5/fusion-360-design-validate/can-t-add-ttf-font/td-p/6917516
-
I have had this same interesting question about this. I never thought to google it but till I saw your question so I found this which makes it sounds pretty darn close. I am no electronic guru I usually copy other peoples design but I found this on here and poster down below asked the question! with a lower post for the answer. Maybe Braeden has a better answer.
http://www.learningaboutelectronics.com/Articles/Shift-register-circuit.php
"These pins only move data when they transition from LOW (0) to HIGH (1). If these pin are already in a HIGH state and they are sent a HIGH clock signal then nothing happens, the pin 11 and/or 12 in a HIGH state will require two actions and must first transition to a LOW state, then transition to a HIGH state to put data into the register or storage register. "
-
PCB looks great. What company made the PCB? Curious about price?
-
Just returned my Samsung O+ after one week usage.
The reason is simply O+ is not comfortable compared with CV1. No doubt the anti-SDE is great but still there is no a big "WOW". O+'s tracking is basically OK, but still cannot reach the level of CV1.
The QC is not good, there is a black bad pixel in the center of right lens.
Next try maybe Pimax 5K+....
D3Magic, Curious about the dead pixel. I understand you sent it back for other reasons. Did you happen to email and Samsung and ask what there policy is on dead pixels? Reason why I ask, some screen manufacturer's that I have read and researched have expectable amount of dead pixels they will let go that is consider a good product.
This experience is mostly thru LCD tv and computer monitors. Sucks that it was in the center.
-
Beautiful work!
-
Hi! I just installed your analog joystick in my WH throttle. This is a quality piece of equipment. I ordered it while ago but just got around putting it in. Only a couple of hours using it and it works great. This is a excellent upgrade to the Throttle. The instructions were extremely thought out and thorough. And the calibration was quick and to the point. Thanks!
-
Sending my SO+ back today and going back to the rift.
SO+ gave me stutters, shimmering, just overall much worse compared to rift. Performance was also much worse. Picture overall was not as much of an improvement, if any. Hoping the true next generation will show better results.
So can you share your computer specs? Sorry if you already posted. Thanks.
-
Nice Glad it helped!
-
Just put it on one of these. You can have momentary g's.
-
Just to make sure. Did I understand correctly that, when purchasing a module from steam, I will also be able to use that in the standalone version, whereas purchasing modules from ED website is for standalone only?
If so, why would anyone be purchasing from the ED website while prices in steam all seem to be ~€10 cheaper (at least at this moment) and you'll be limited to the standalone version?
Considering you won't need steam running in the background, will the standalone offer noticable better performance?
I used to buy thru steam only but switched to stand alone for 2 reasons, Steam doesn't allow beta or early releases it has to be a full finish product. And ED gives you extra points for buying modules to use for next purchases. SO since most of the modules come out in beta releases I felt I was missing out!
-
Maybe a wire is loose, have you checked connection between the stick and base the plugs inside the base connected to the PCB. I think when I was building my EXT for my warthog I missed a crimp on the Dupont connector I used or a wire broke I got the all buttons flashing.
-
What do the holes on the base of the stick look like? those look like the screw in center and the smooth bore outer supposed to be mounted in to the base.
-
Learning to code would open a lot of doors to a lot of areas to this hobby, personally I have not learned. There are other pre made boards that do encoders.. You probably know which ones! I have just bought this board off Ebay for encoders. I figured 35 bucks can't beat that. If it fails I am not to deep in the whole. Ill report back when I get it set up! Unless there is some one with experience with!
-
The Amazon link you posted are rotary encoders and they do act as a 2 different button presses in twisting the knob. The board you posted I don't think support the Rotary encoders. You are correct looks like the board you posted only supports rotary switches not rotary encoders. I found this board in there products page! if I wanted rotary encoders I would buy this board. Just glanced at the board but maybe a quick email to the company to confirm.
EDIT-so just was reading the description of this board and I guess it emulates a keyboard?
https://www.desktopaviator.com/Products/Model_KBD01/index.htm
-
You should be fine. I use only 2 sensors and have no problems and I don't use any controllers.
-
No its build size is 210mm x 210mm.
-
That's a tough question actually!
What do you want in a 3d Printer and the company who built it?
The 2 3d Printers I was looking at low cost and good Youtube reviews was the
Creality CR10 and Anycubic I3 Mega.
I ended buying a Anycubic I3 Mega ultra base. Price to me at the time was $325 shipped from China. I bought it off of Gearbest webpage that had both USA and China stock but I picked China to ship from. I read and heard in different instances that buying from China were the company builds the product compared to a warehouse in the USA building the product had better quality control when building products then the warehouses in US so that was my thought process there and I waited the 3weeks for it to get here. Why I picked Anycubic looking for the 3d printer that was the close to the best and cheapest. I also had the frame of mind that if it would have a epic fail somewhere in its design I fully expected to rebuild with new electronics and redesign if needed. Basic assumption for $300 I had empty chassis and frame with stepper motors and heated bed I could plug in to any aftermarket 3d print board. But it has not failed actually its been working pretty good. I bought it for buttons and knobs for the cockpit I have been dreaming of building. Its does have limitation of only printing PLA and ABS only with modifications to the hot end you can go hotter for printing materials like nylon and polycarbonate temps above 245c. I bought this printer fully expecting the worse and wanted to learn how to fix it. I fully understood if I broke it, might be pretty hard get replacement parts from the company or support and I might be rebuilding it in to something else. So I bought Anycubic cause the reviews it did the same printing quality as the CR10 just a little smaller footprint and build time to printing was shorter and some features that I thought was cool. I believe its a good entry level printer for learning.
-
Nice! That looks awesome. I was curious how long are your HDMI cords? I saw they go in the ceiling wondering did you have to look out for special cords to support that length. I am also thinking your computer is on the ground near the screen?
-
Nice work!
-
I bought one of these. Construction is pretty solid. I bought to build a cockpit and thought it was a good price to try. the clear plastic comes covered with a paper like covering and grub screws for the glass in the uprights I have not put it together to try it out yet. But I was impressed with it. edited-I think the uprights feel semi rigid not rock solid

My new button box design
in Home Cockpits
Posted · Edited by Brewnix
Nice work!! Can you use sockets for promicro and shift reg? Just so I can remove them and not worry about having to desolder.