
[MVP] Mugga
-
Posts
296 -
Joined
-
Last visited
Content Type
Profiles
Forums
Events
Everything posted by [MVP] Mugga
-
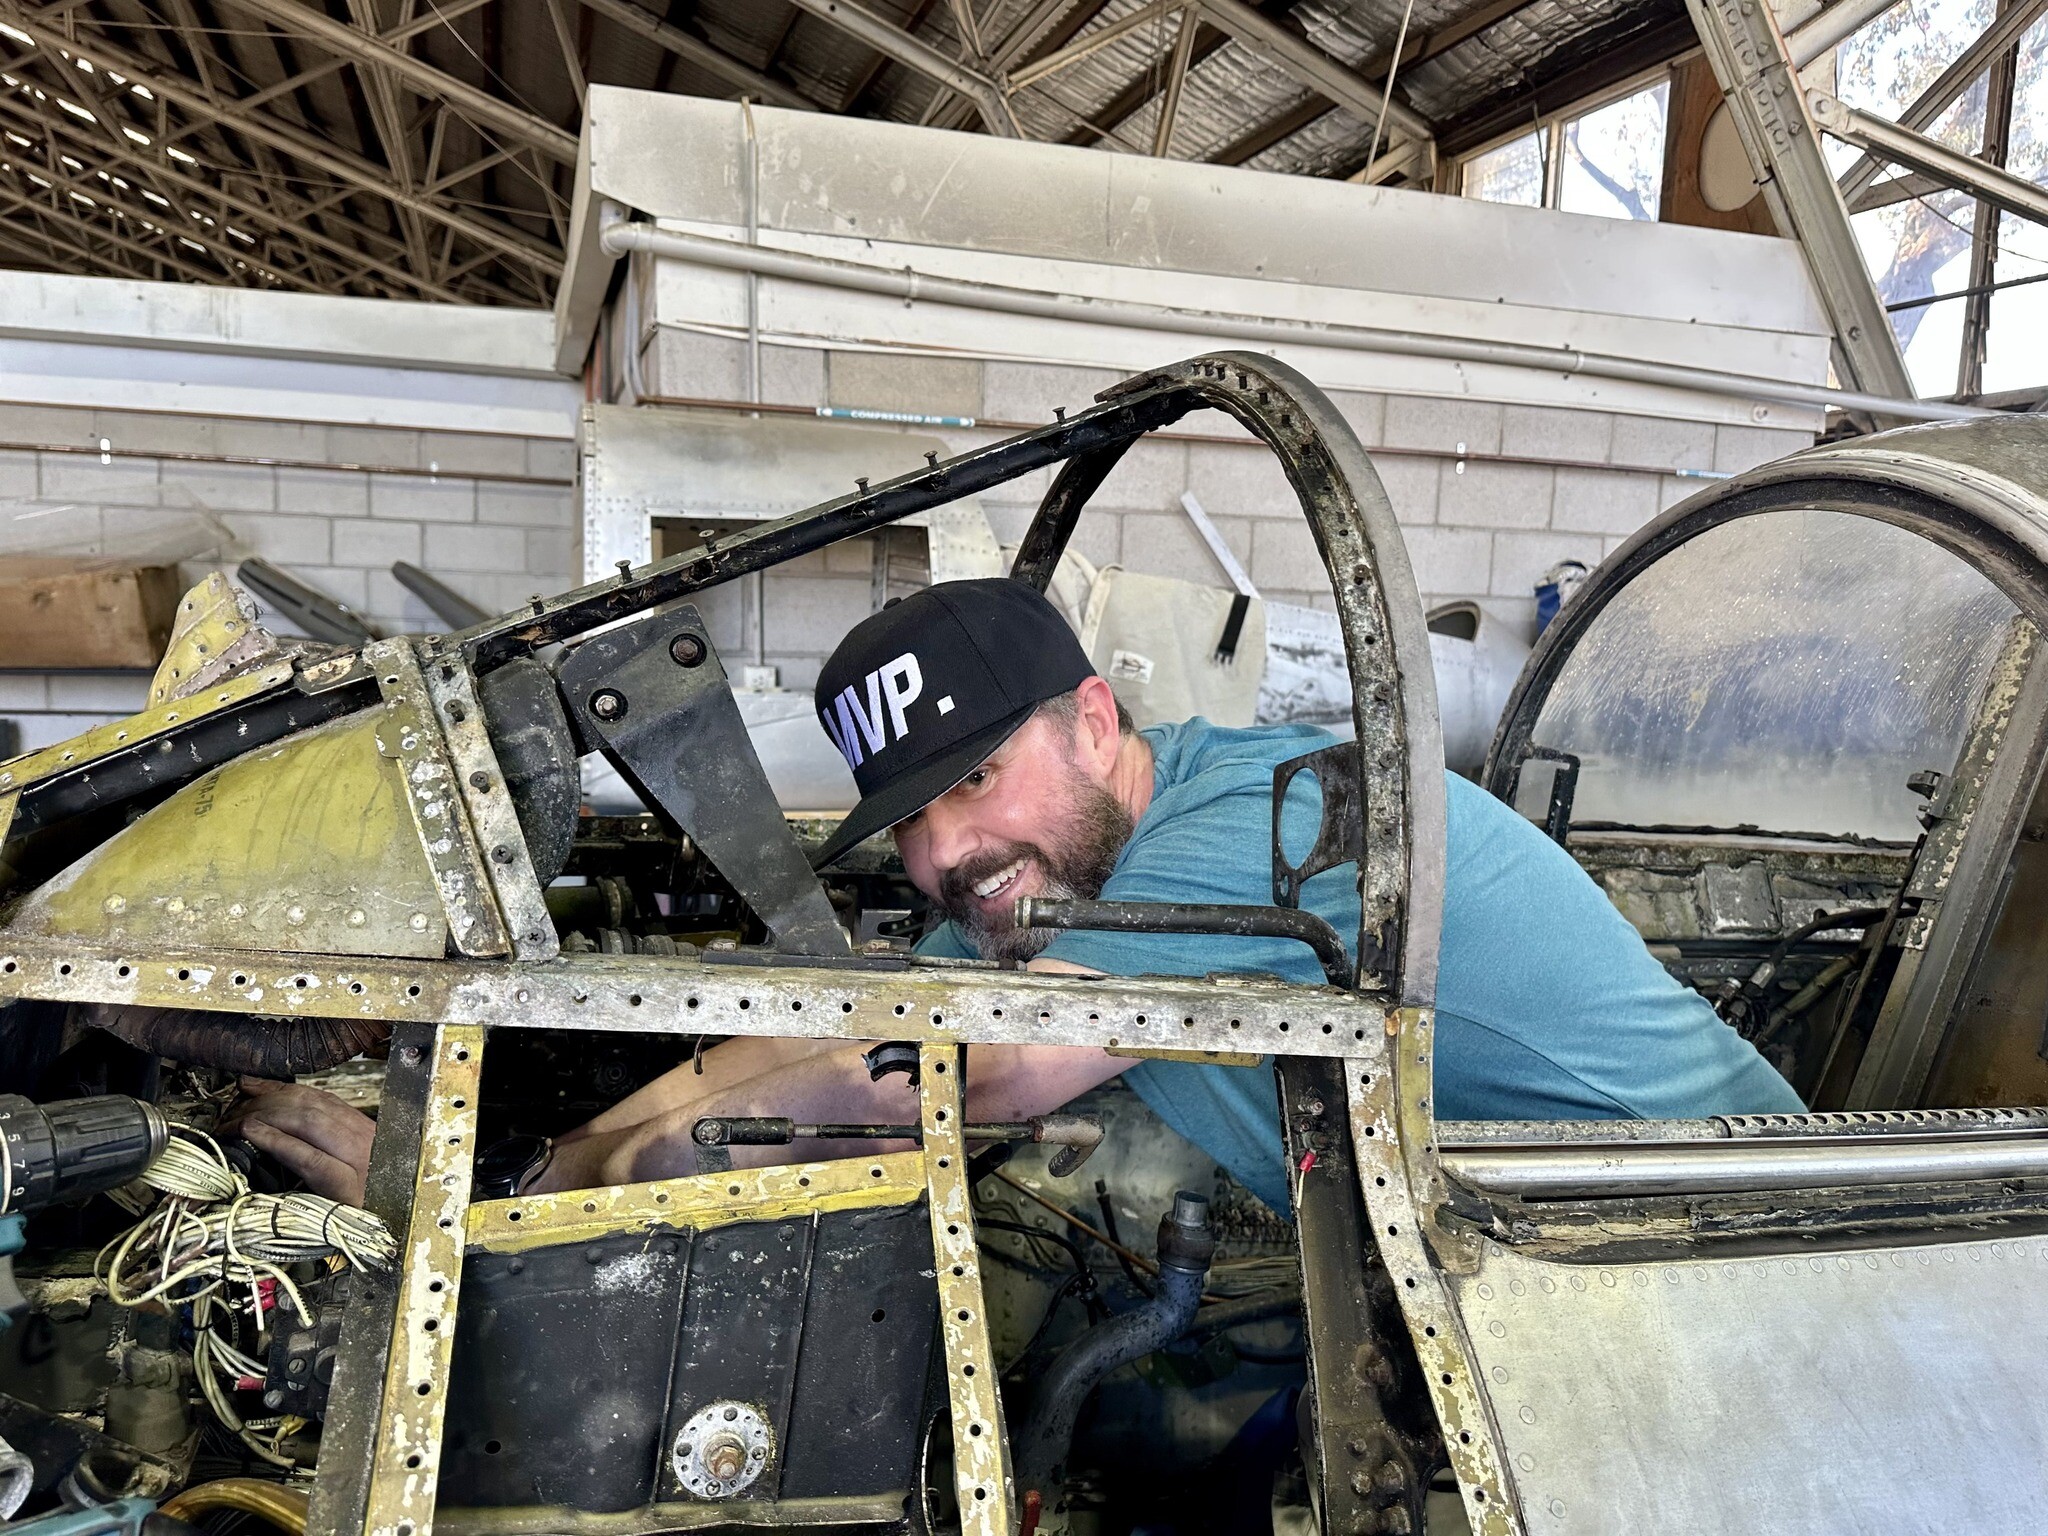
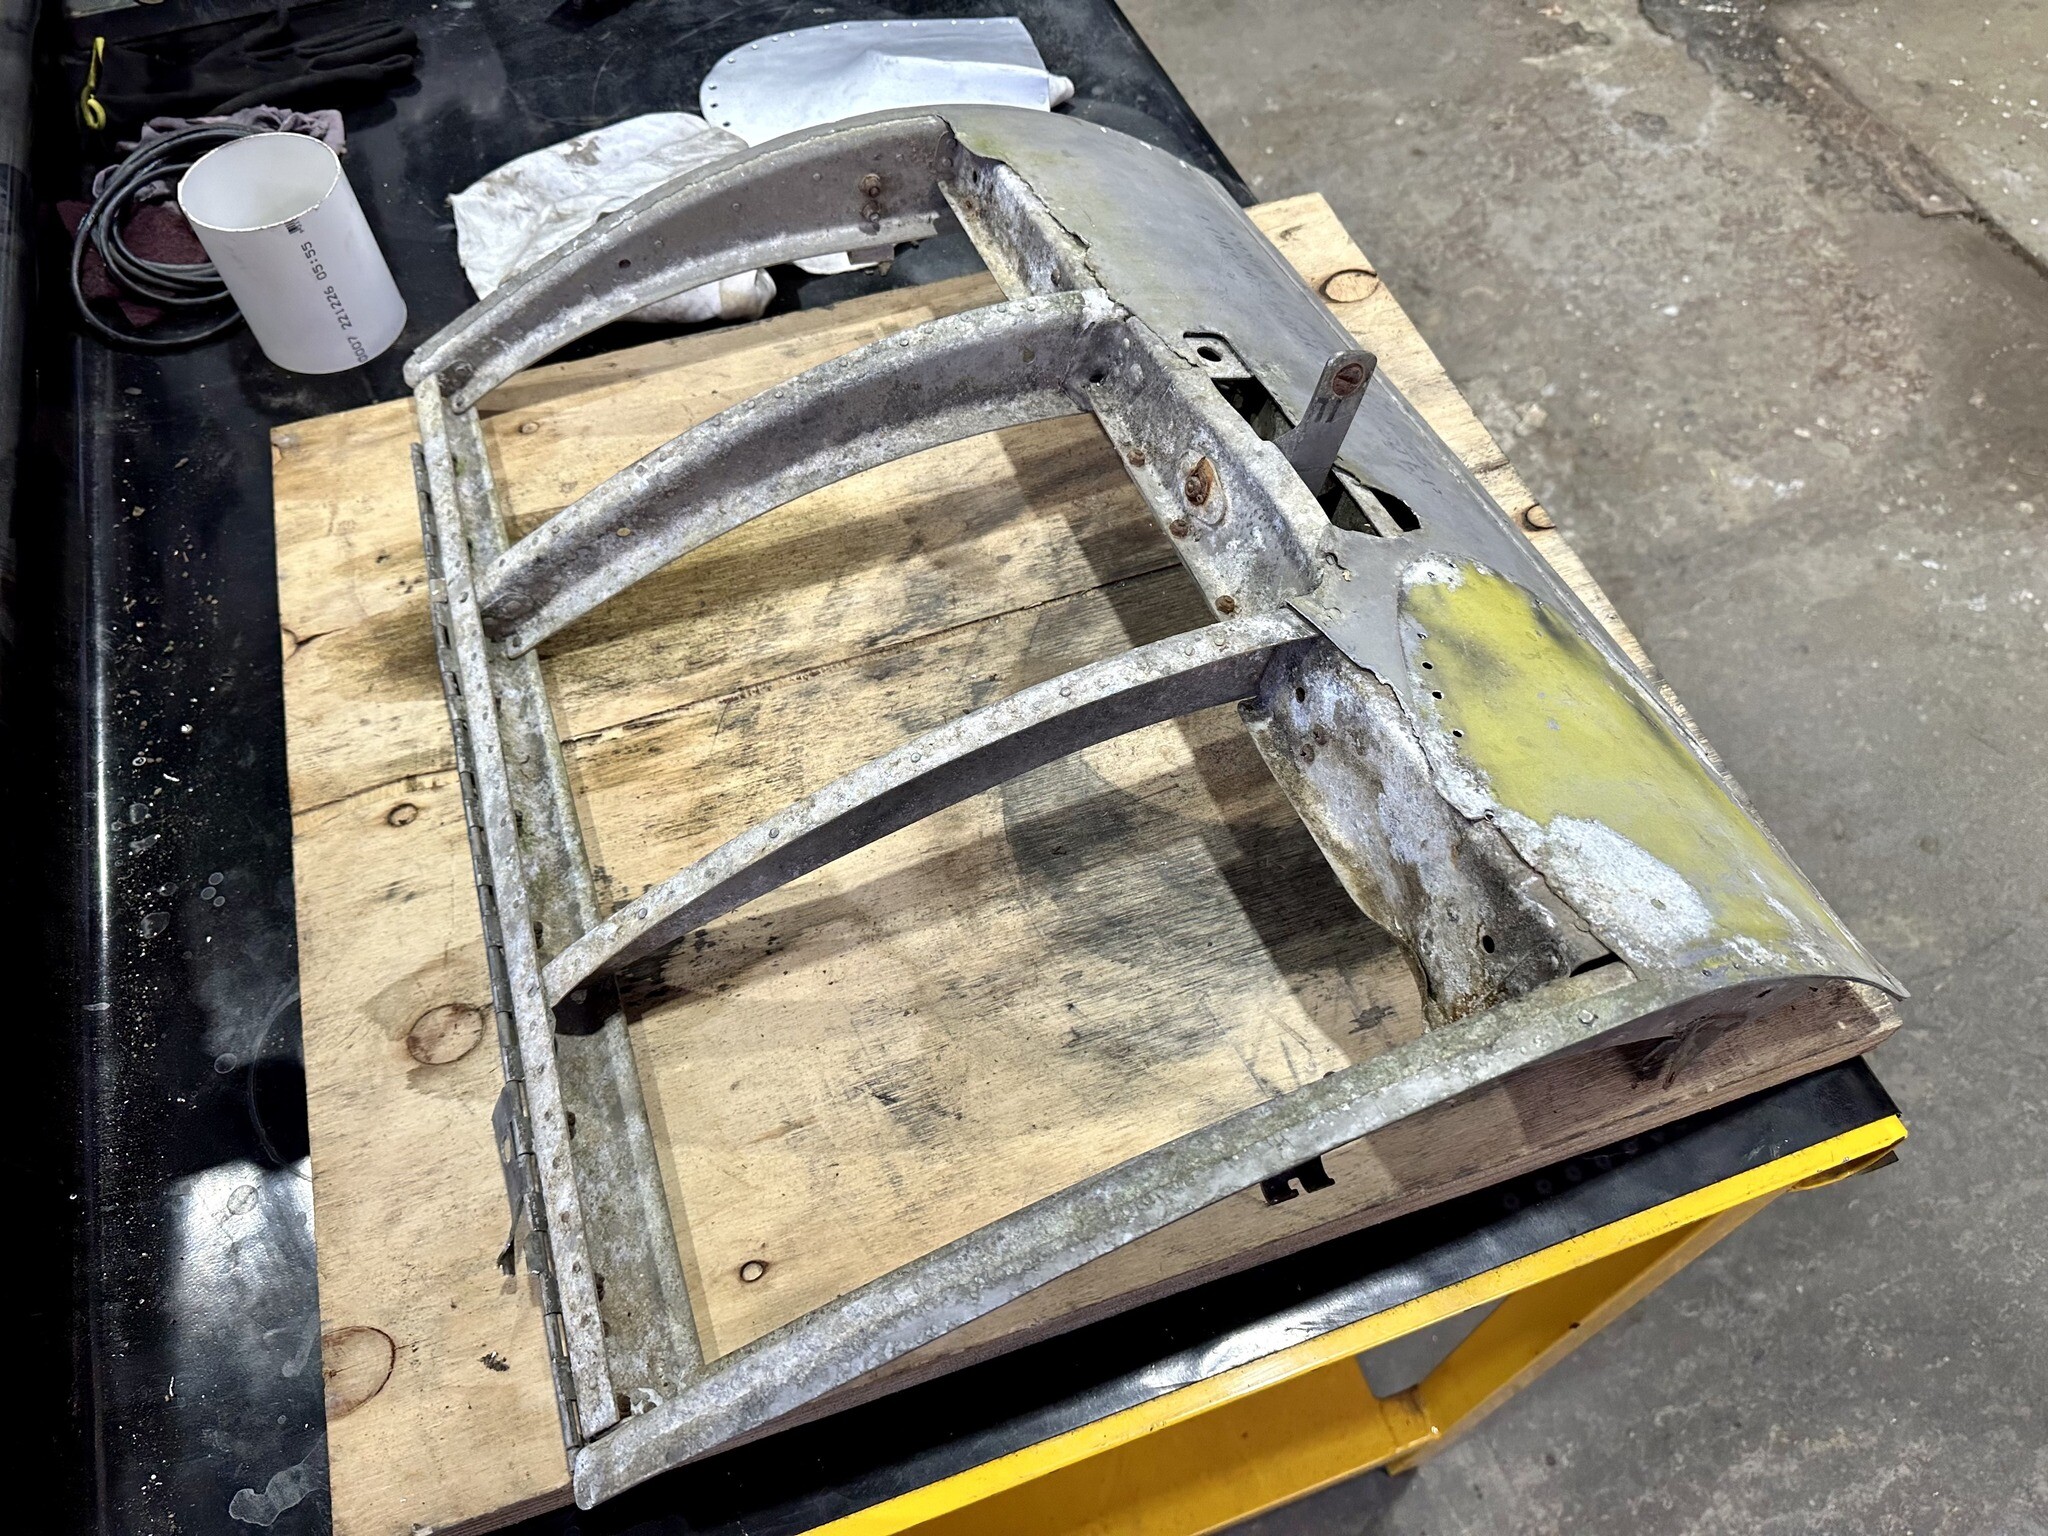
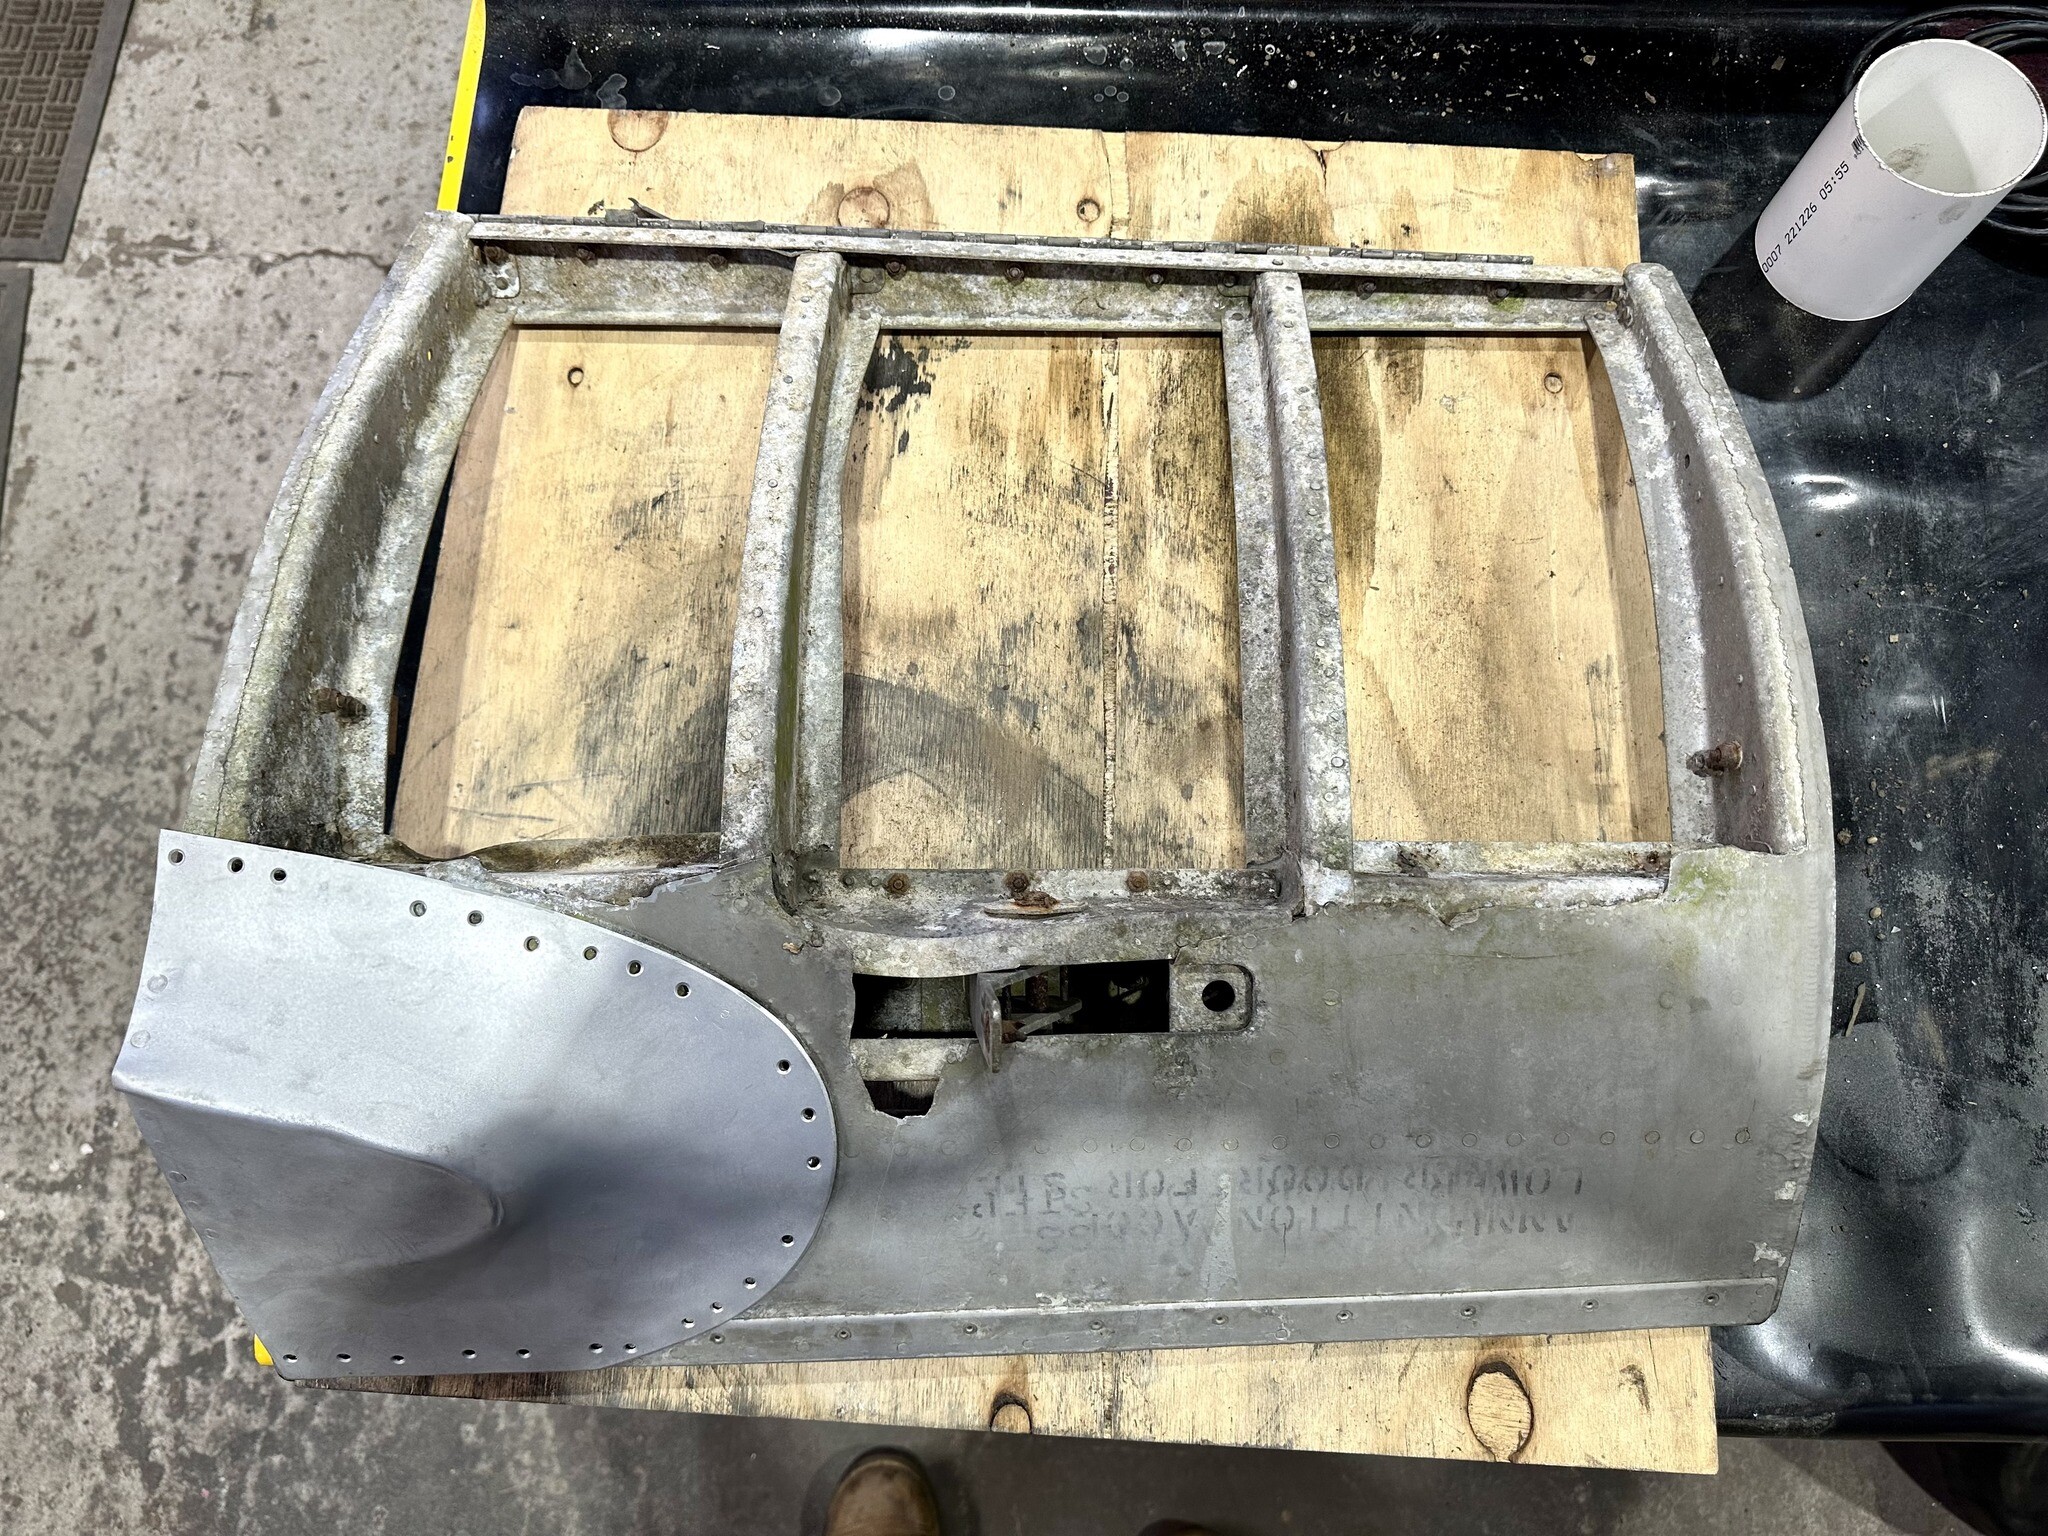
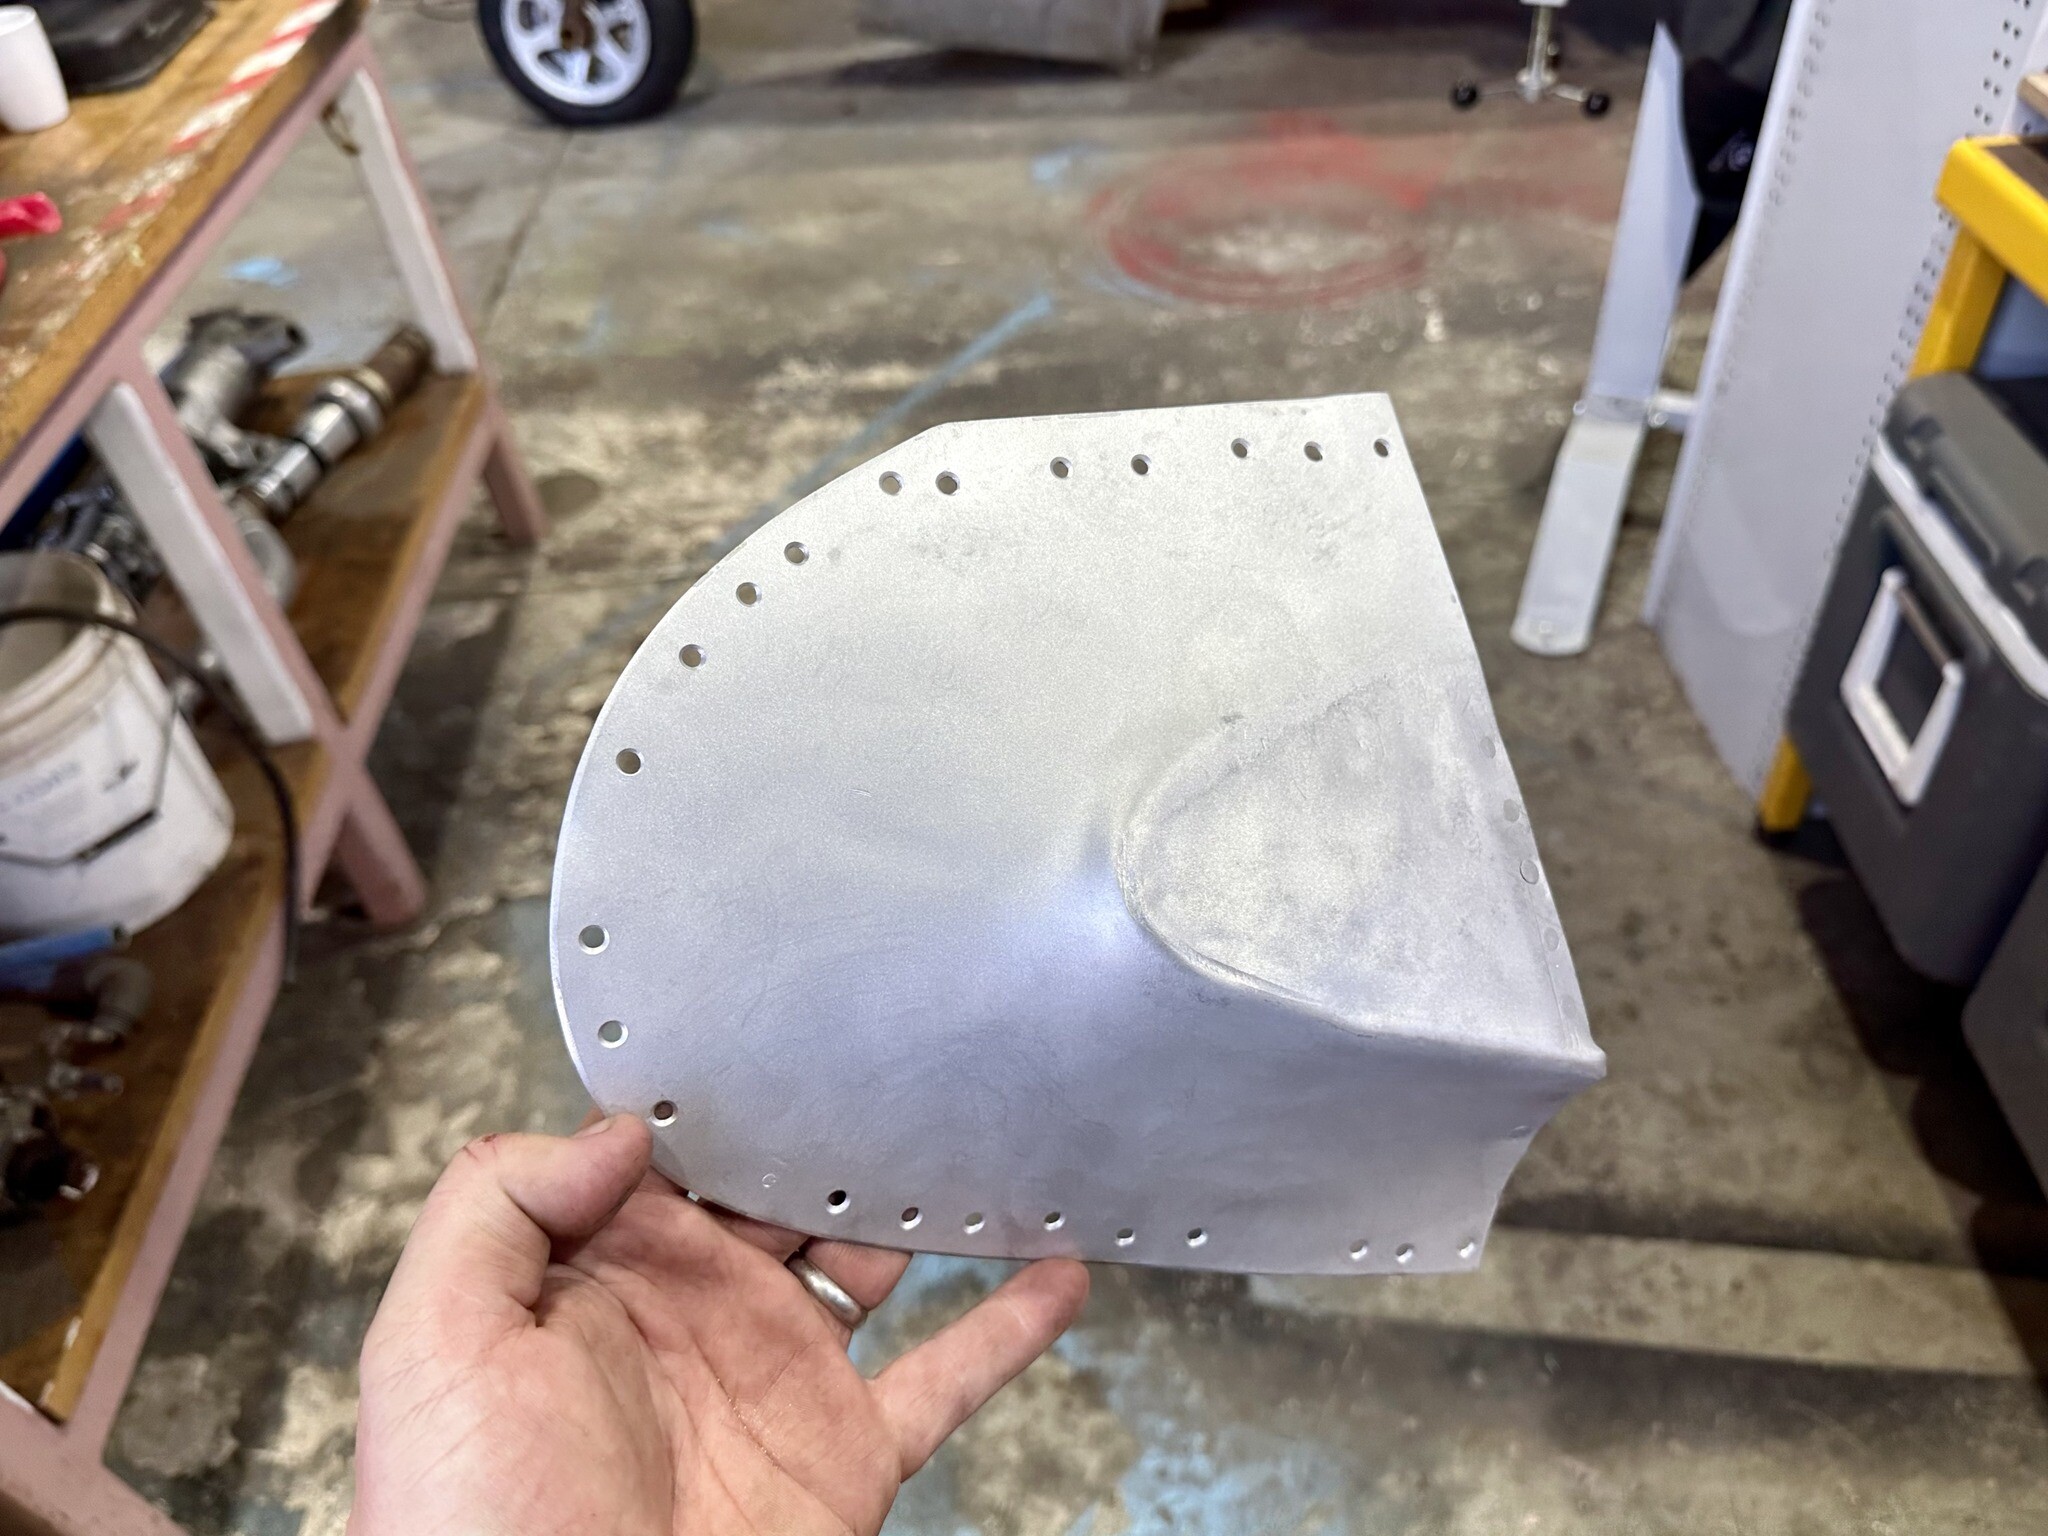
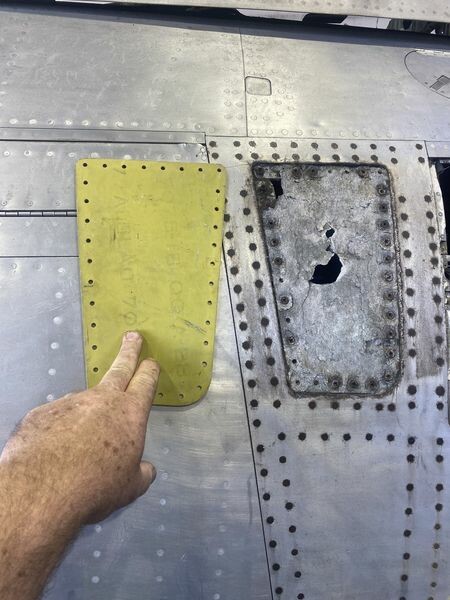
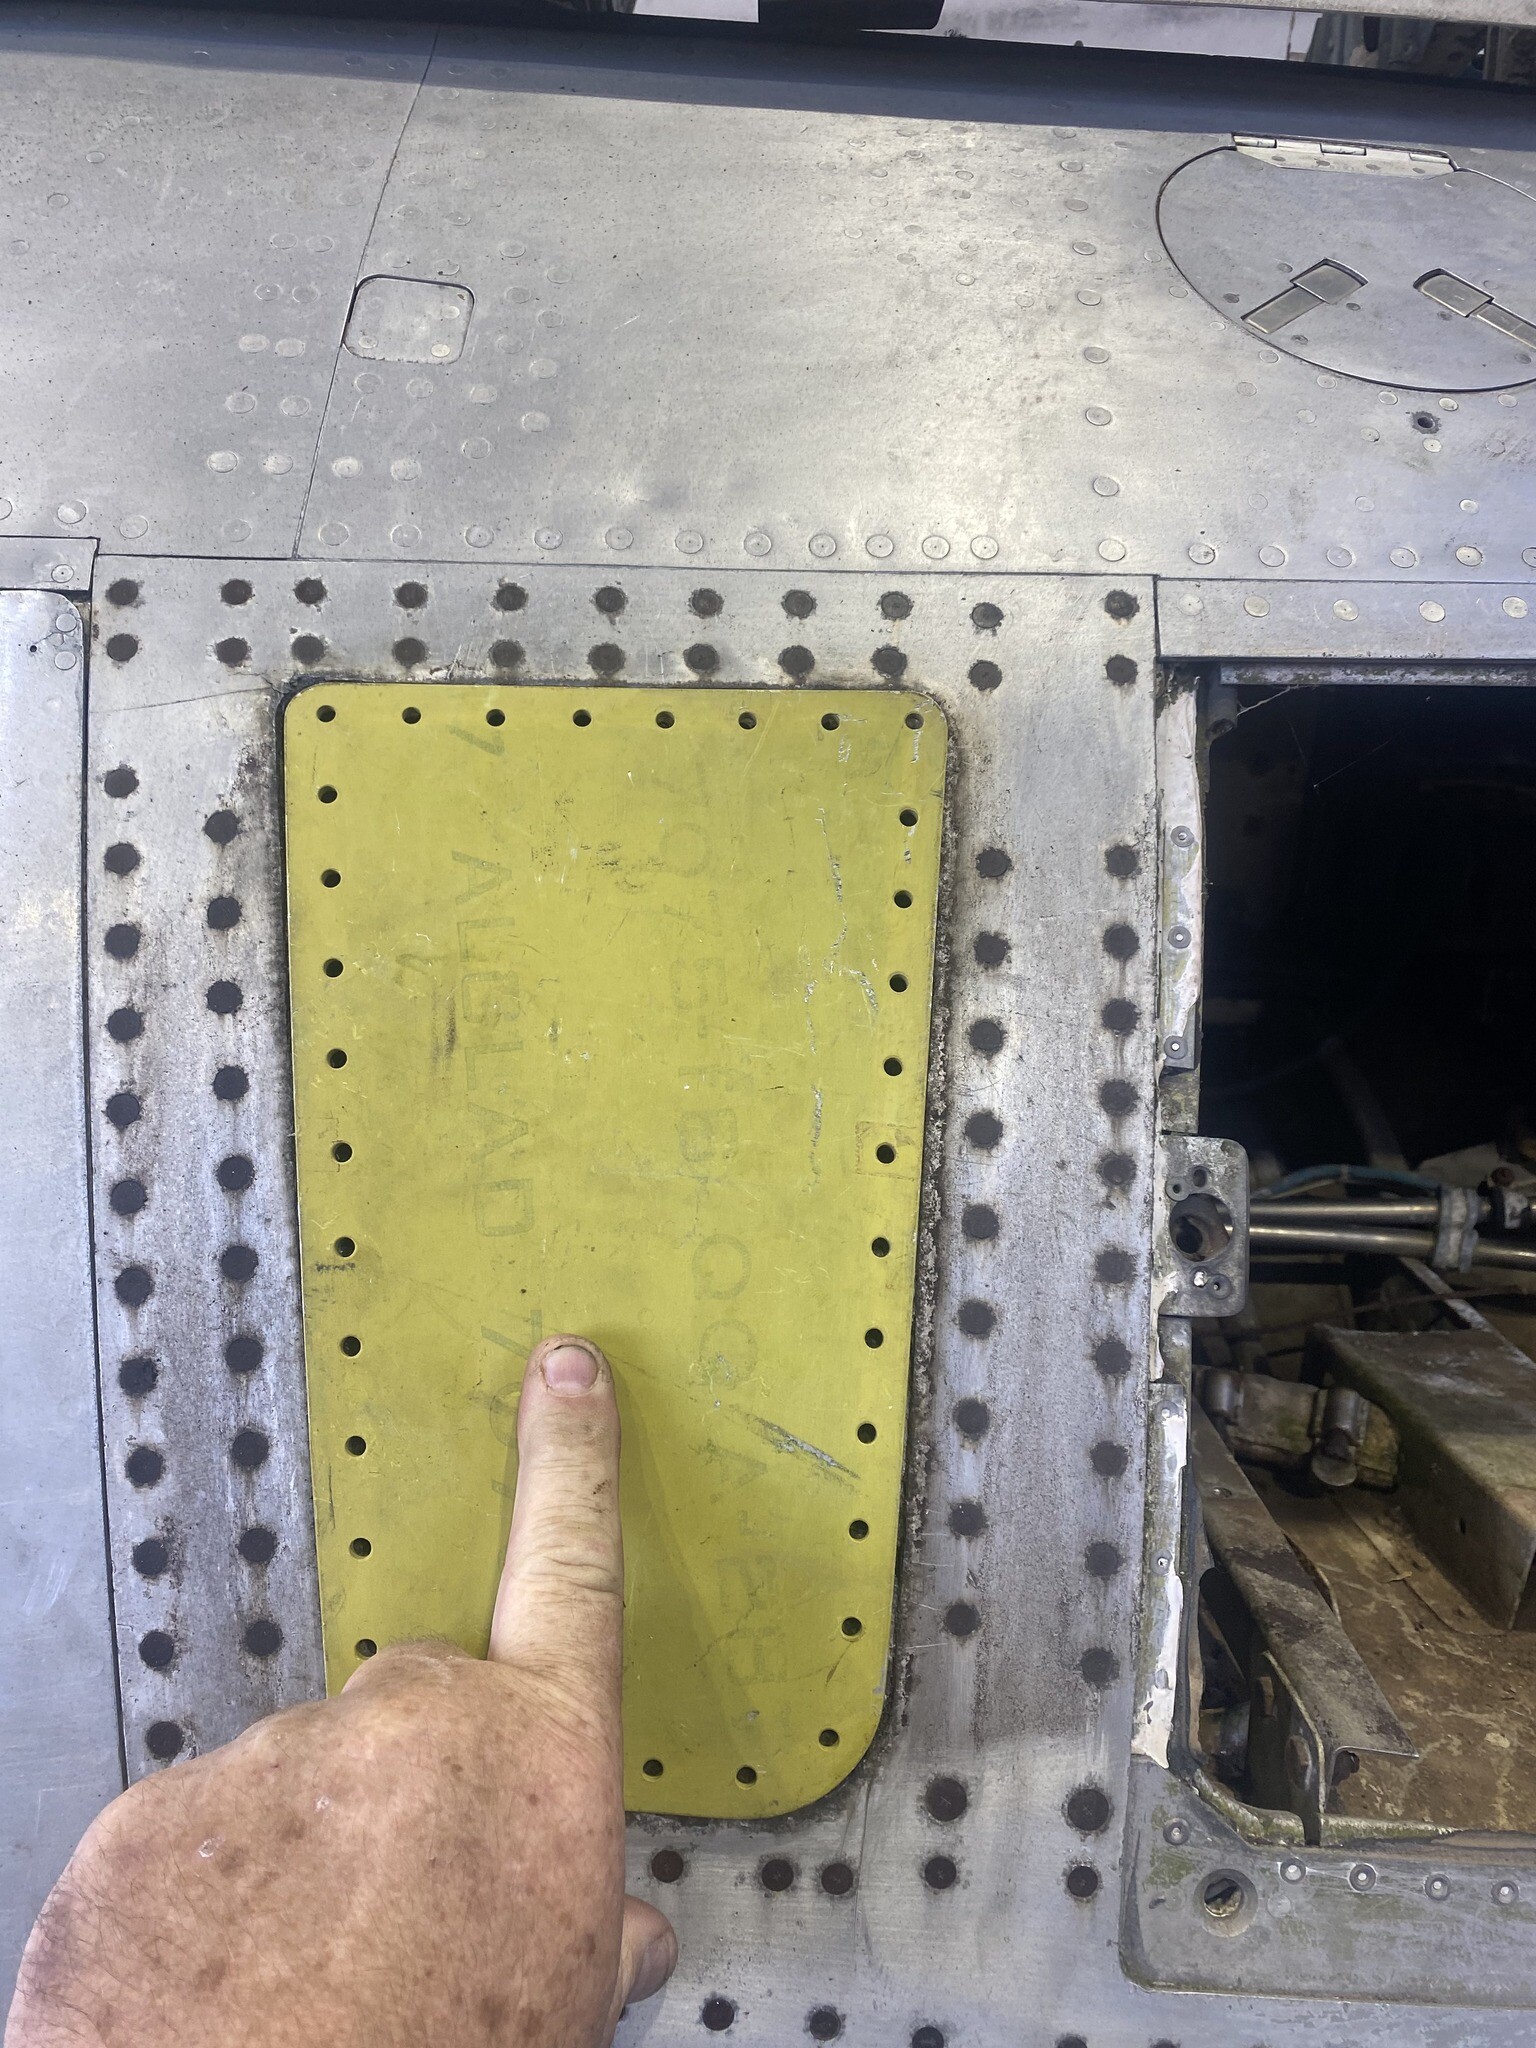
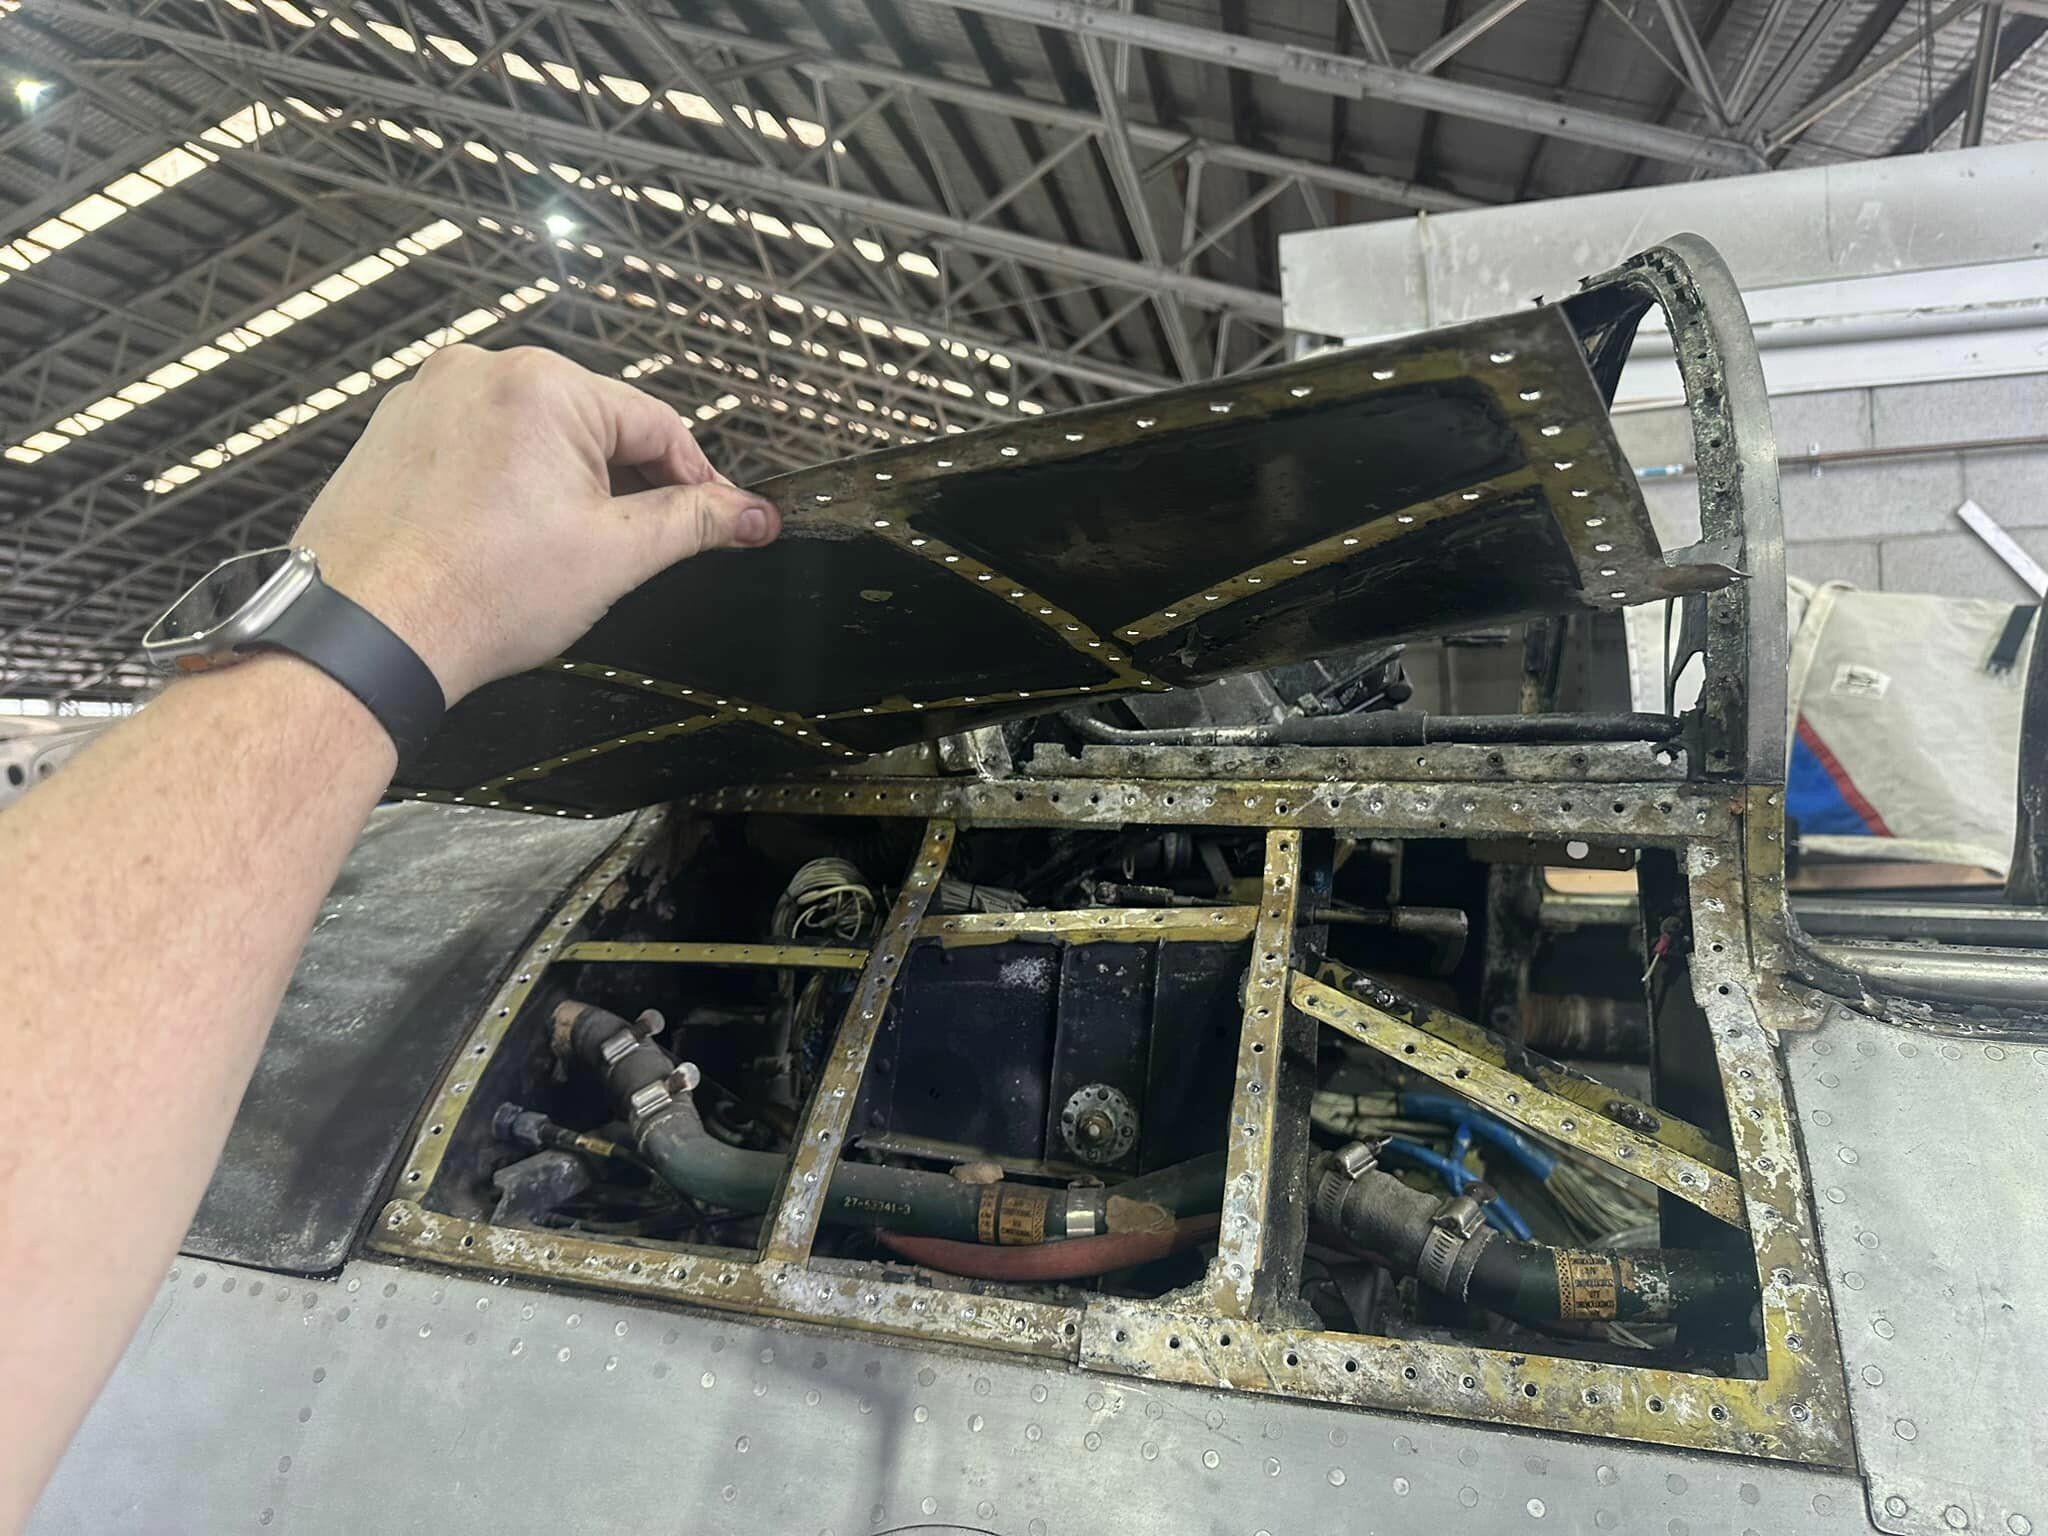
A big welcome to Nathan, our newest Sabre simulator restoration team member! We wasted no time in giving Nathan a baptism of fire today, getting him straight onto the tools and into the cockpit! Nathan, AKA "[MVP] MeSSedUp" is also one of our MVP Admin's on Discord and can be often found flying the MVP Server skies! The team removed the left hand side ammunition tray door today to begin the clean up and refurbishment. The door will require an entirely new skin and a new attachment hinge to complete. Many thanks to [MVP] MeSSedUp who hit the tools to start this work, was great to finally have him in the workshop with the team. Hopefully we see him in the shop much more regularly as we progress things.

-
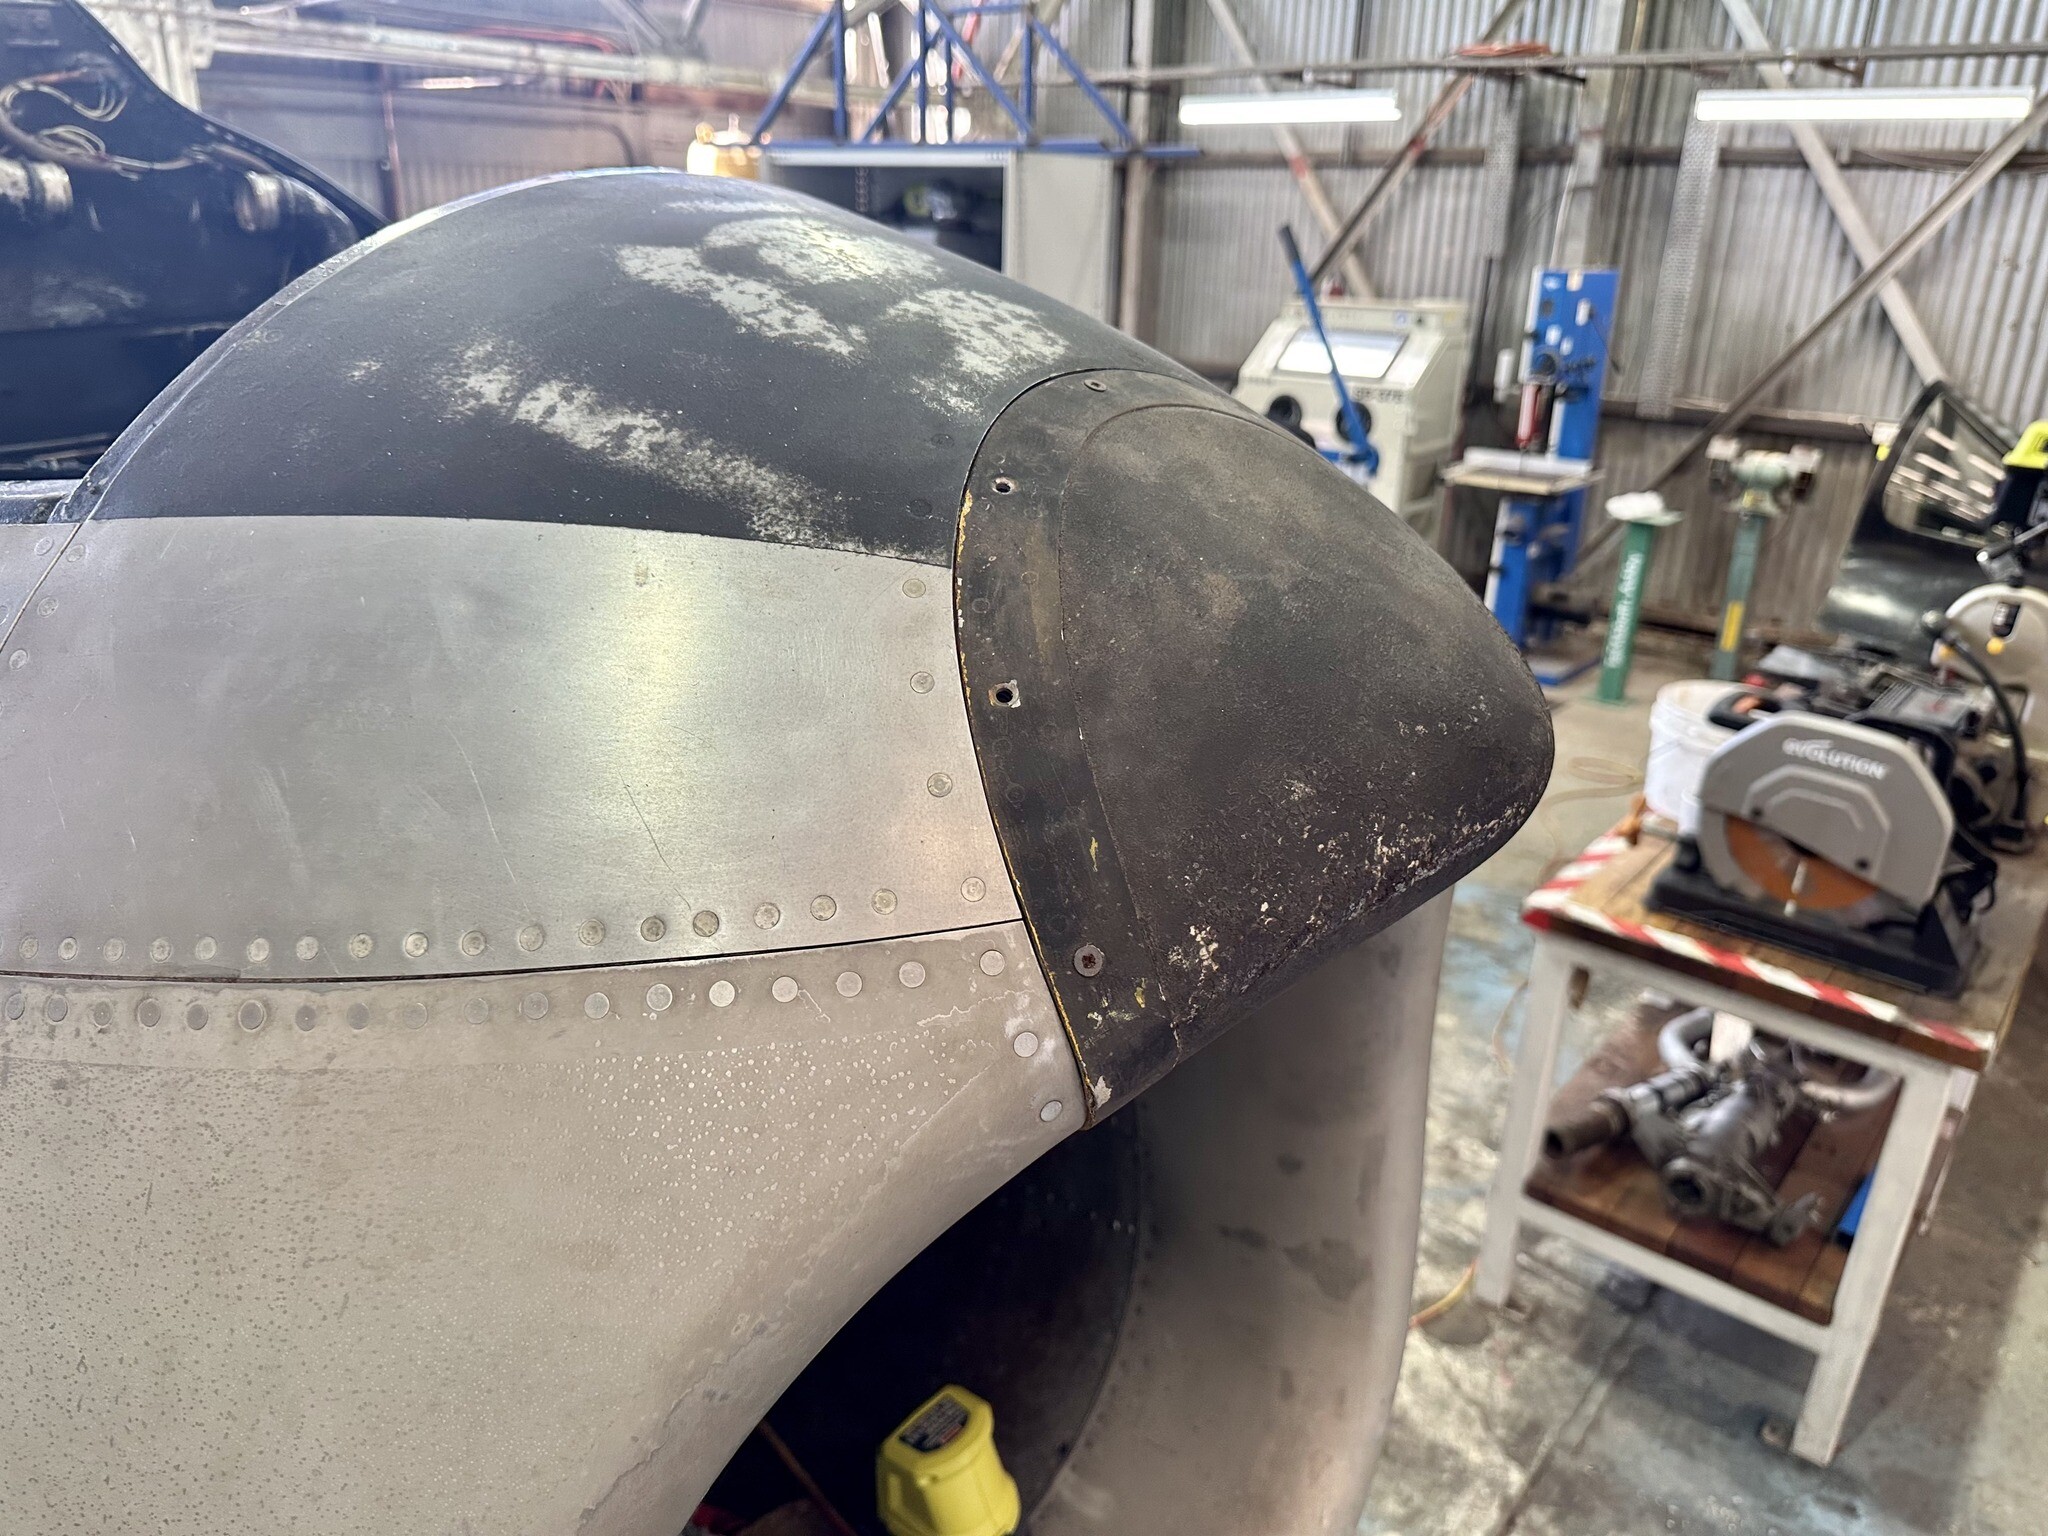
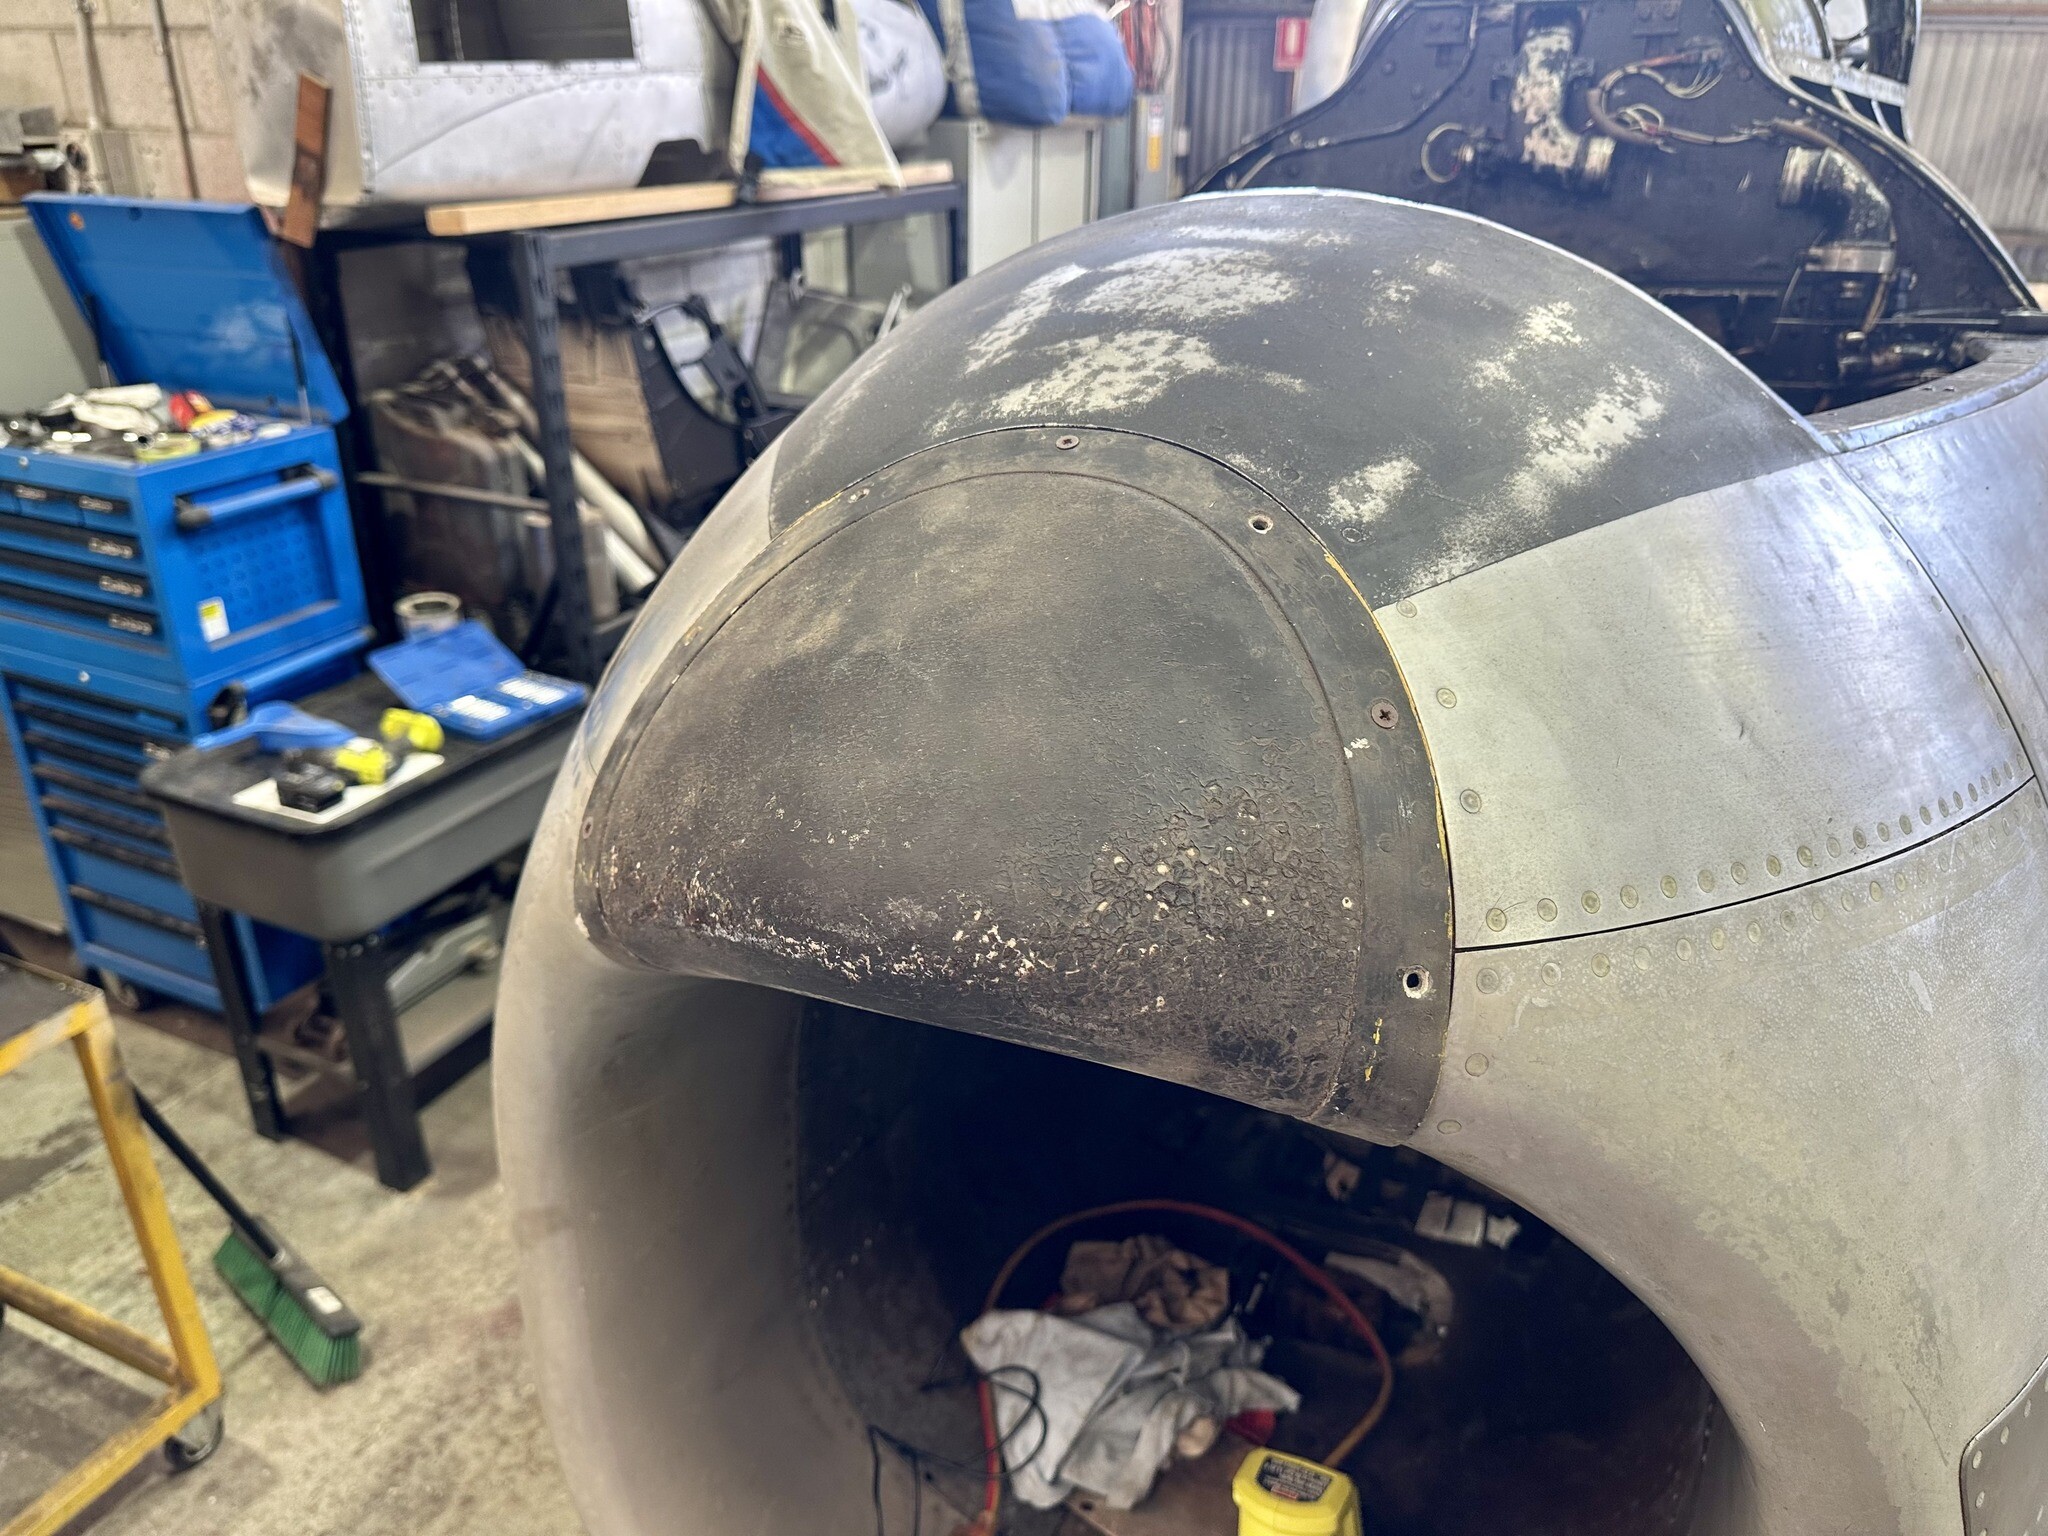
Saturday proved to be a lucky day with the project acquiring an original nose-cone! Super appreciative to our donor for this great addition.
-
It's a little like that in areas! I am hoping we can have that forward windscreen assembly out of the airframe by Saturday afternoon!
-
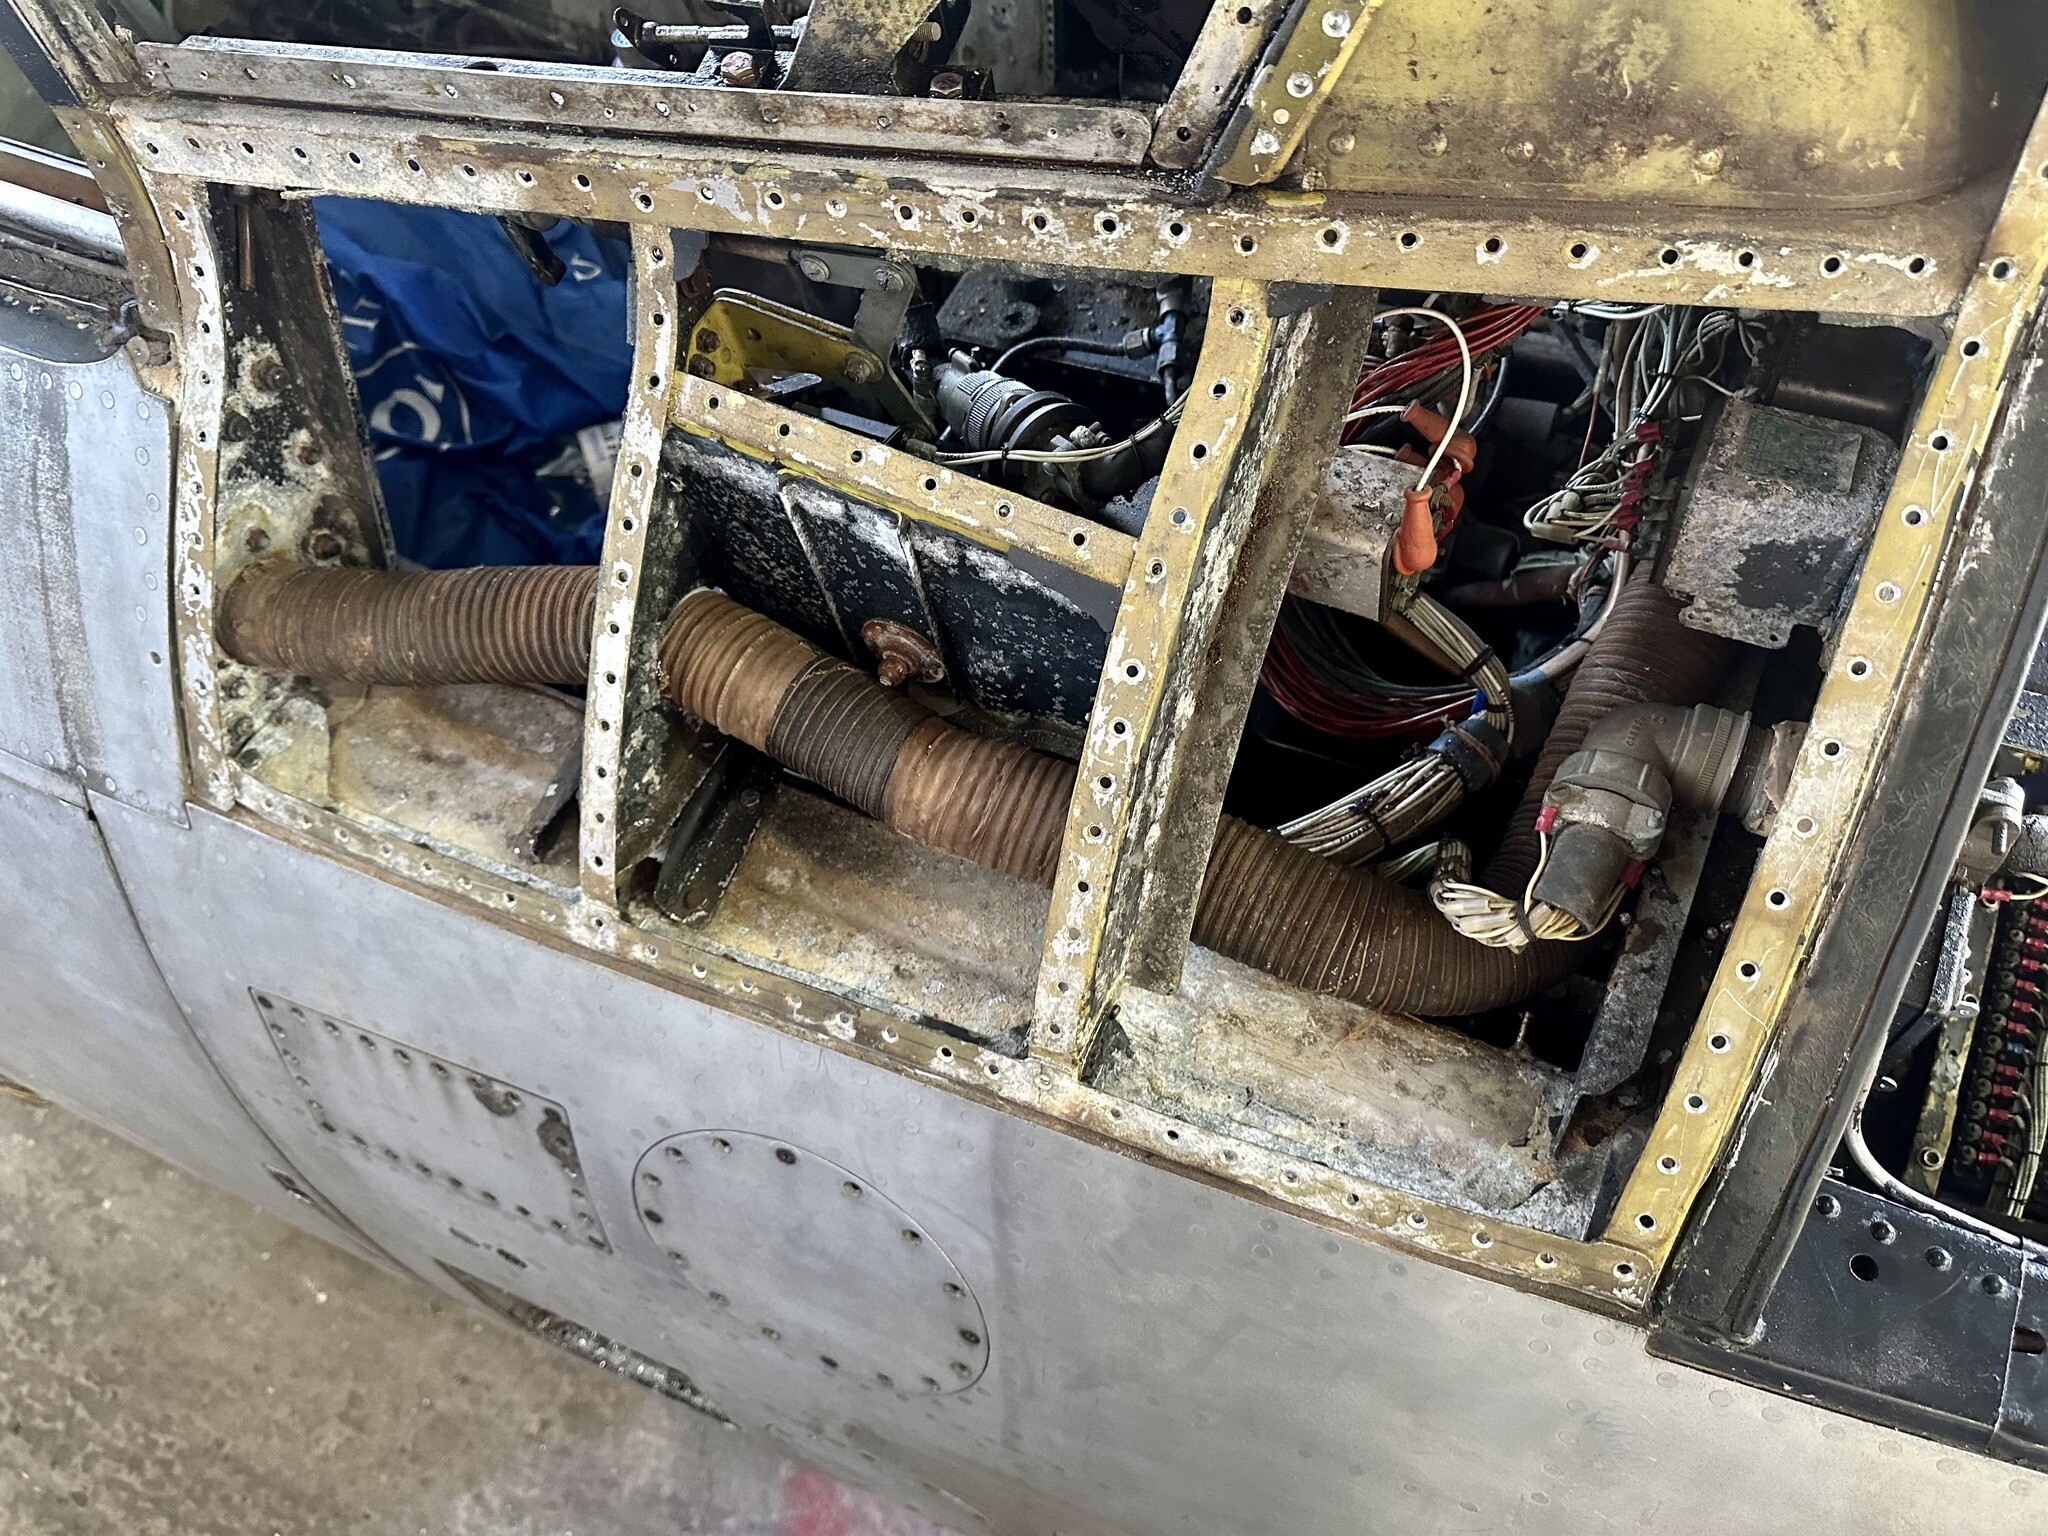
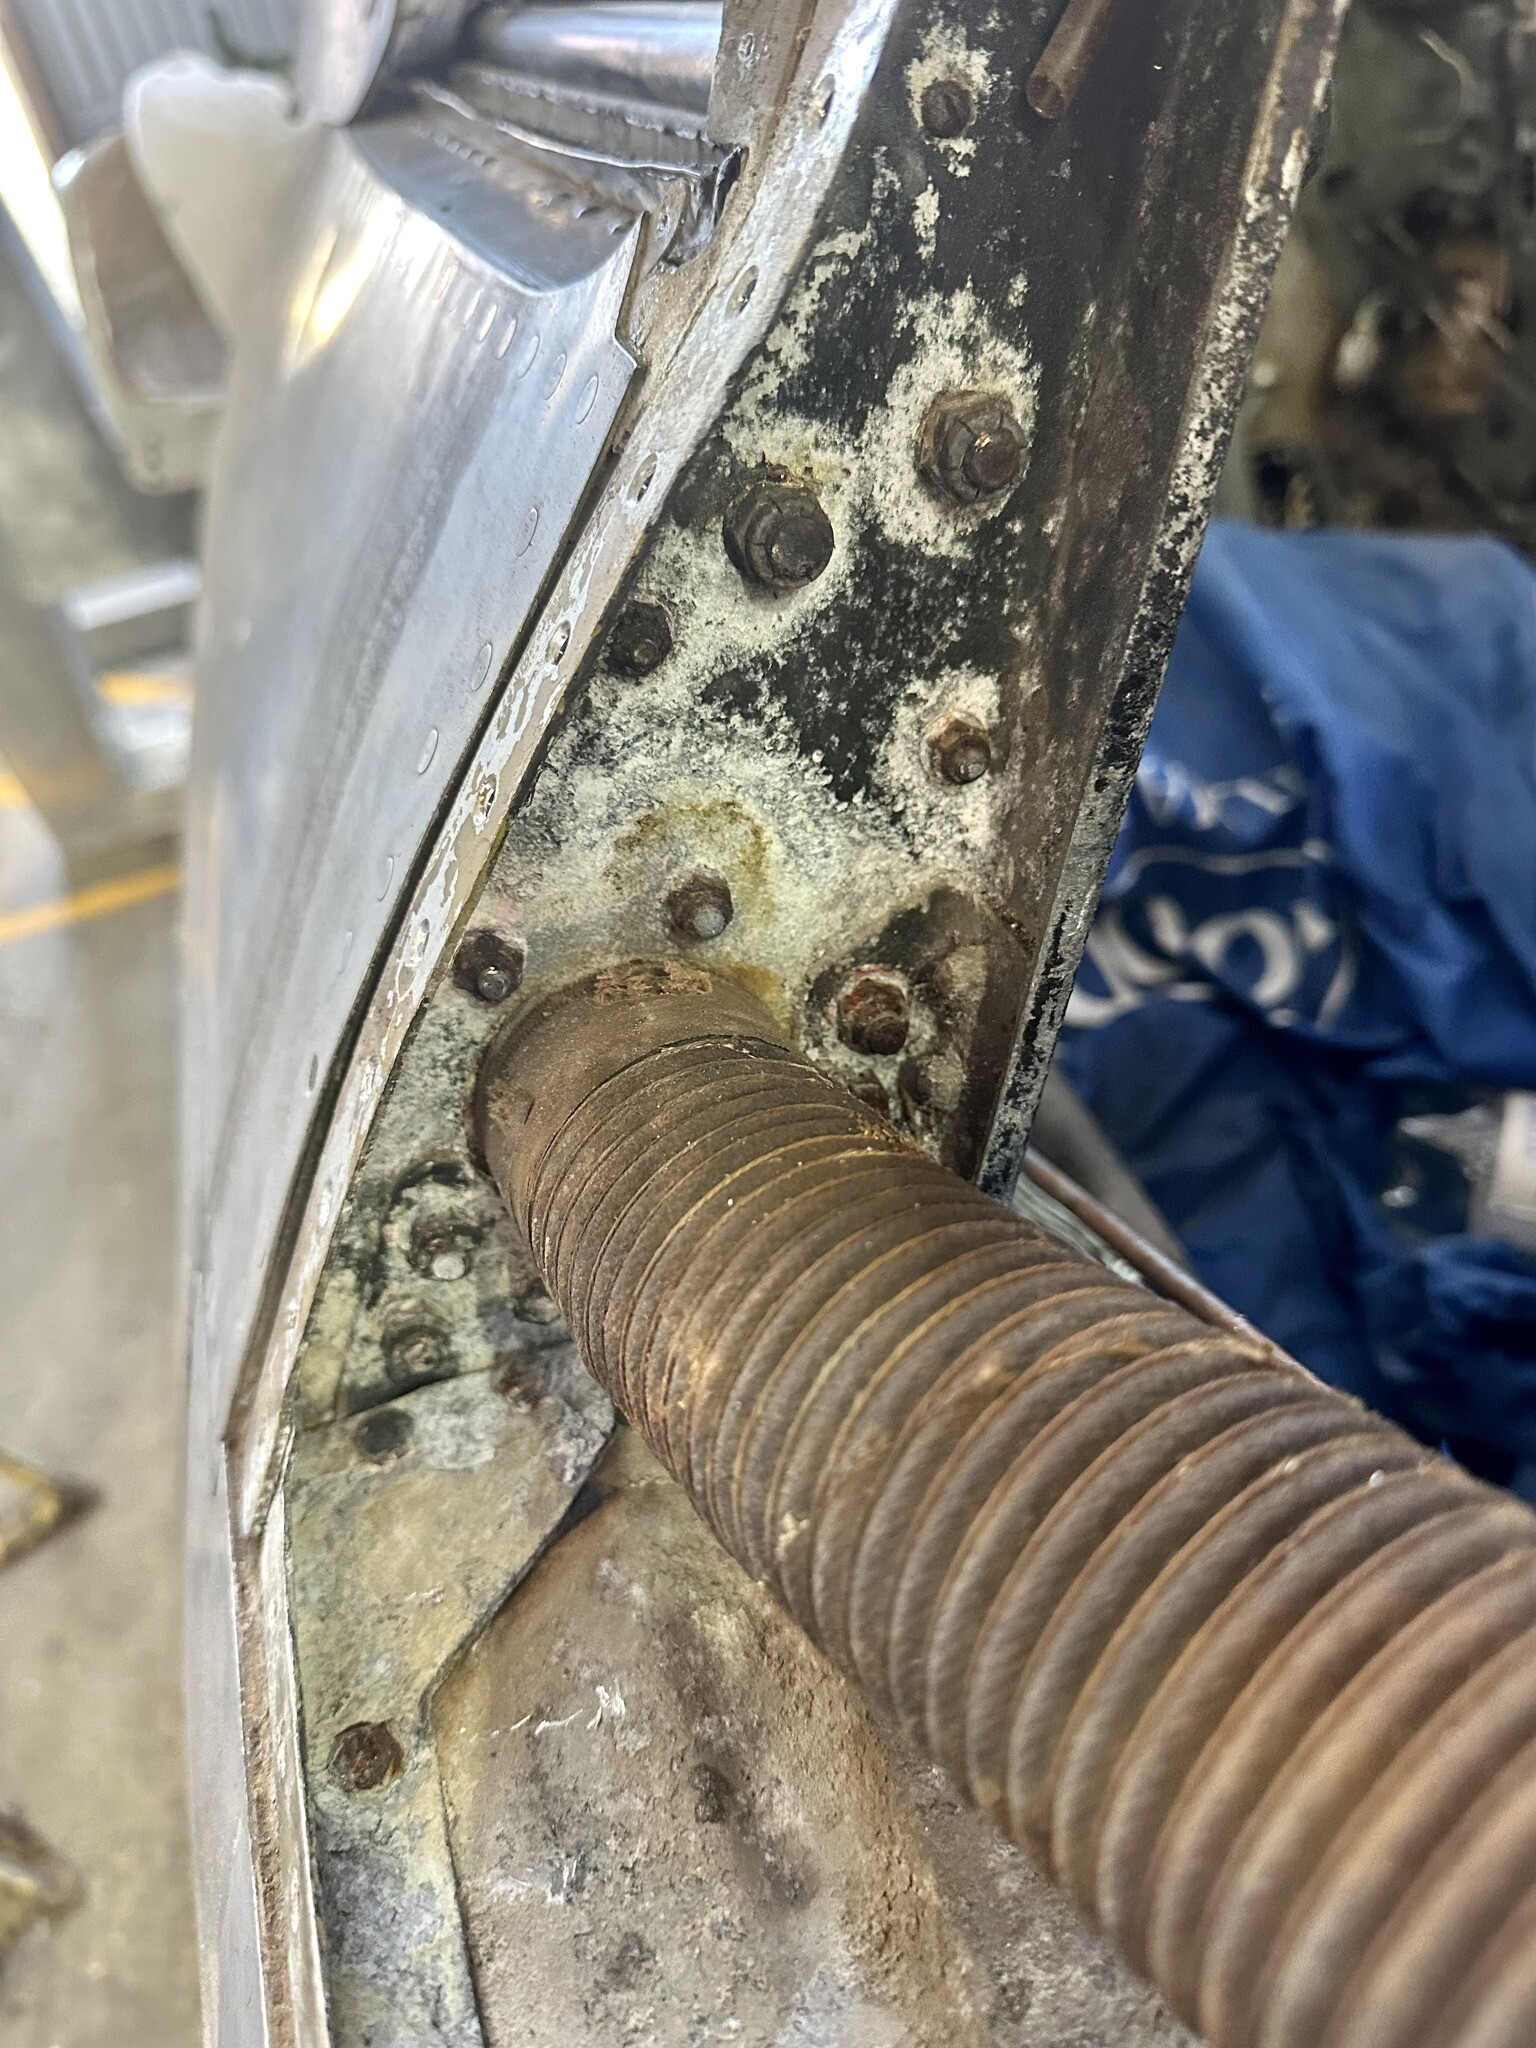
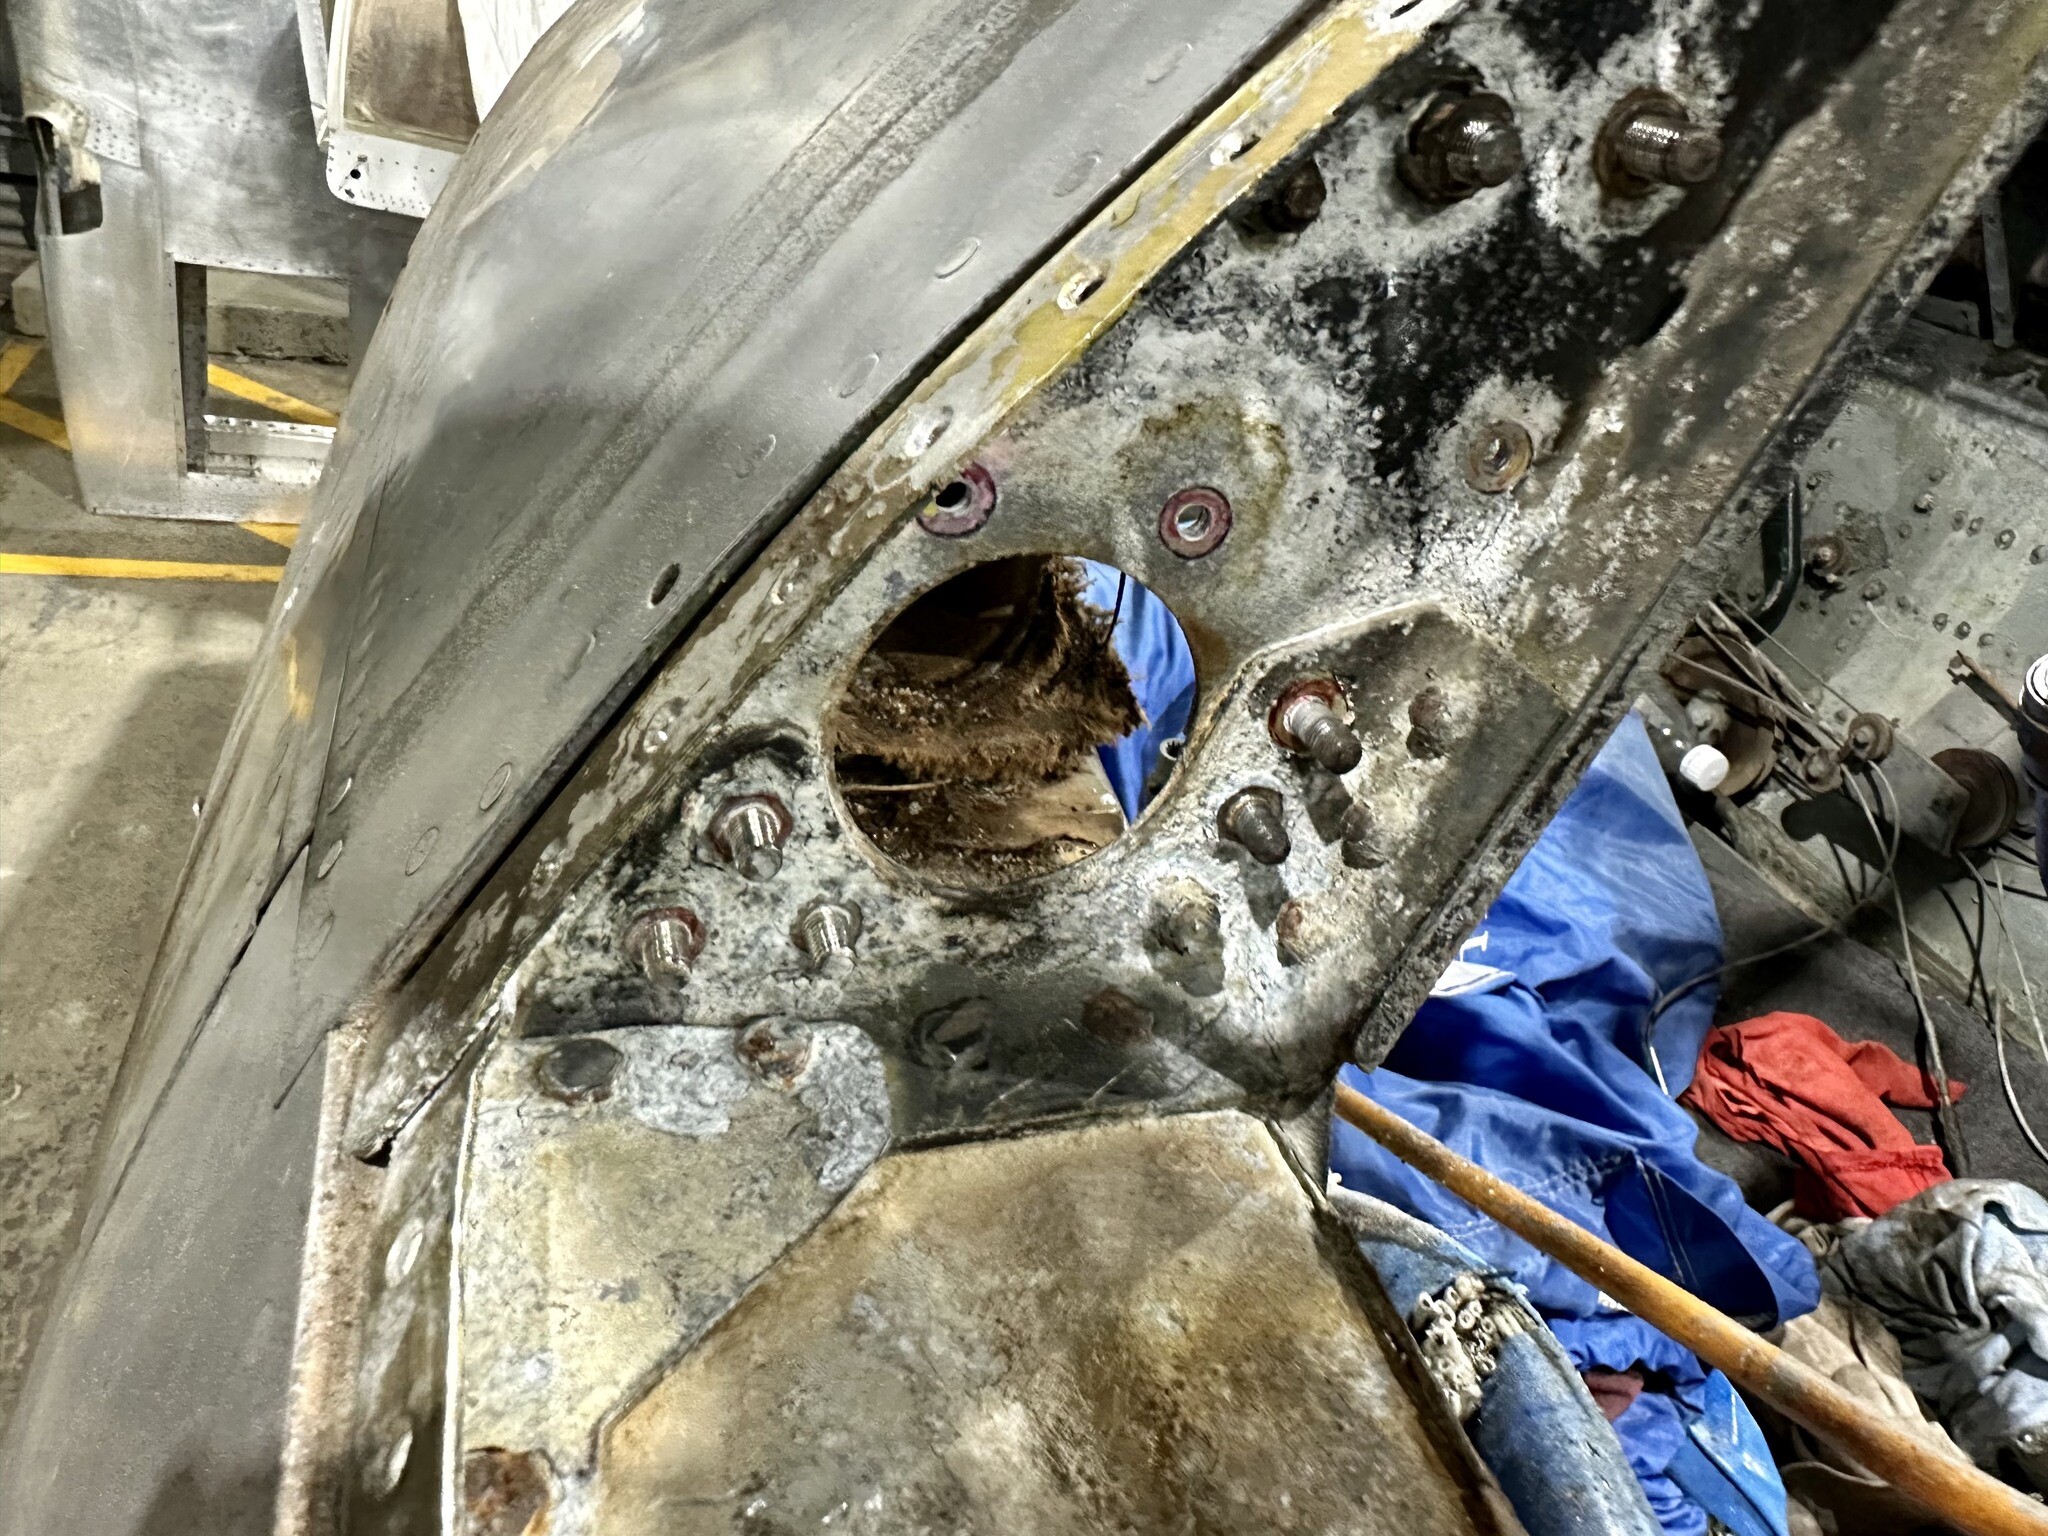
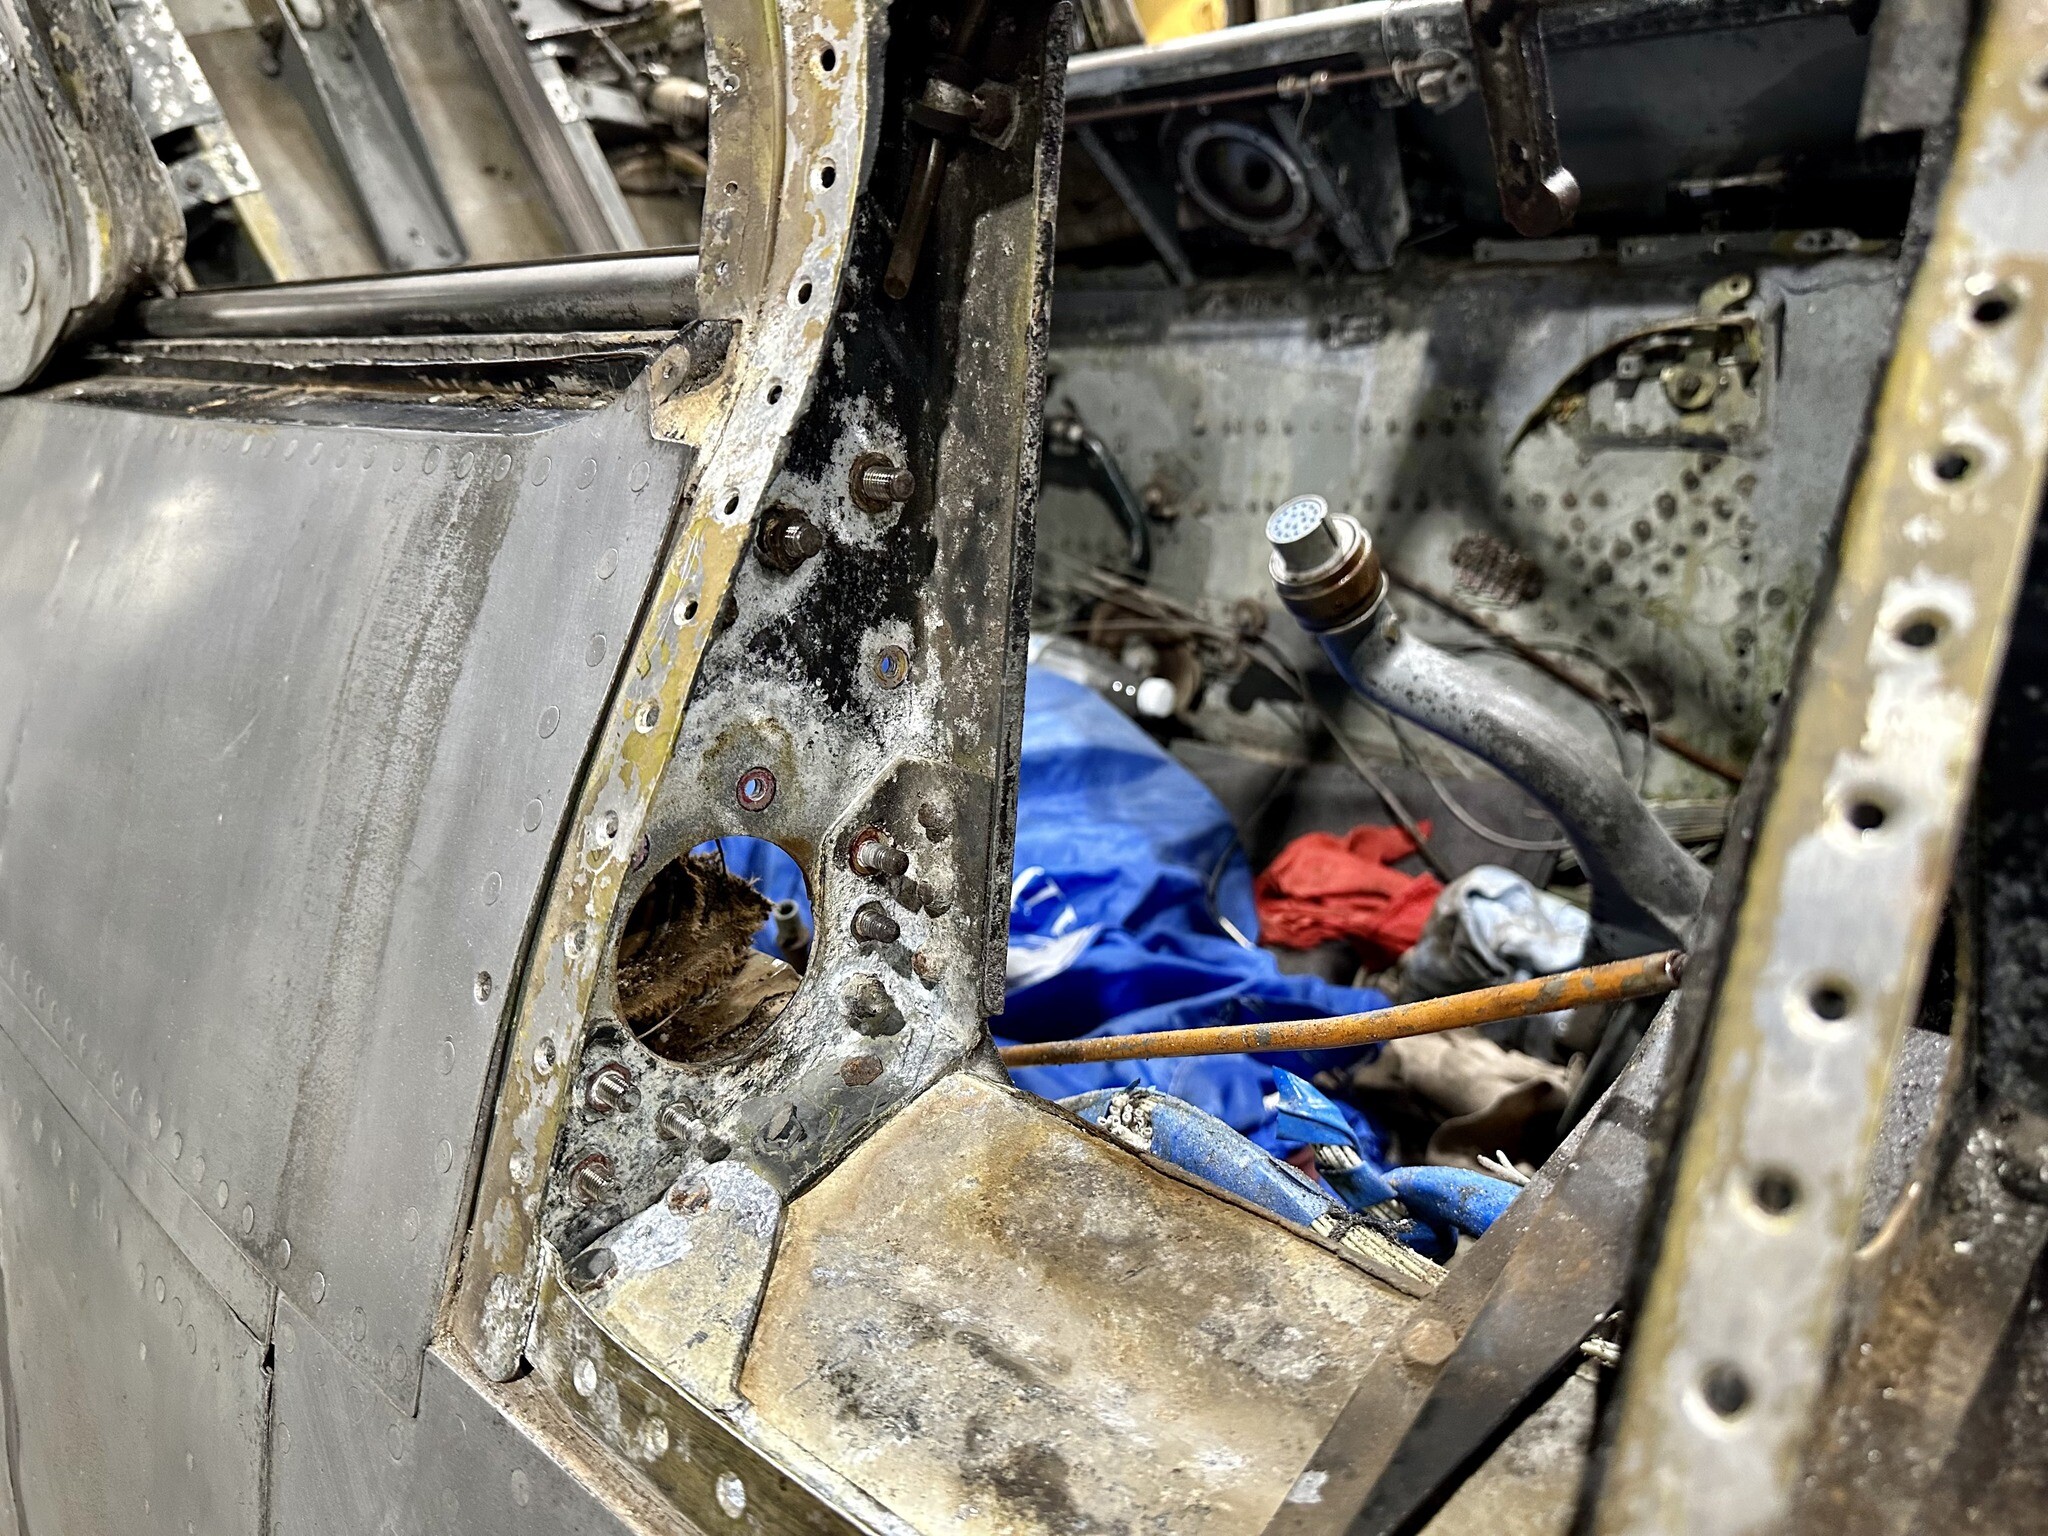
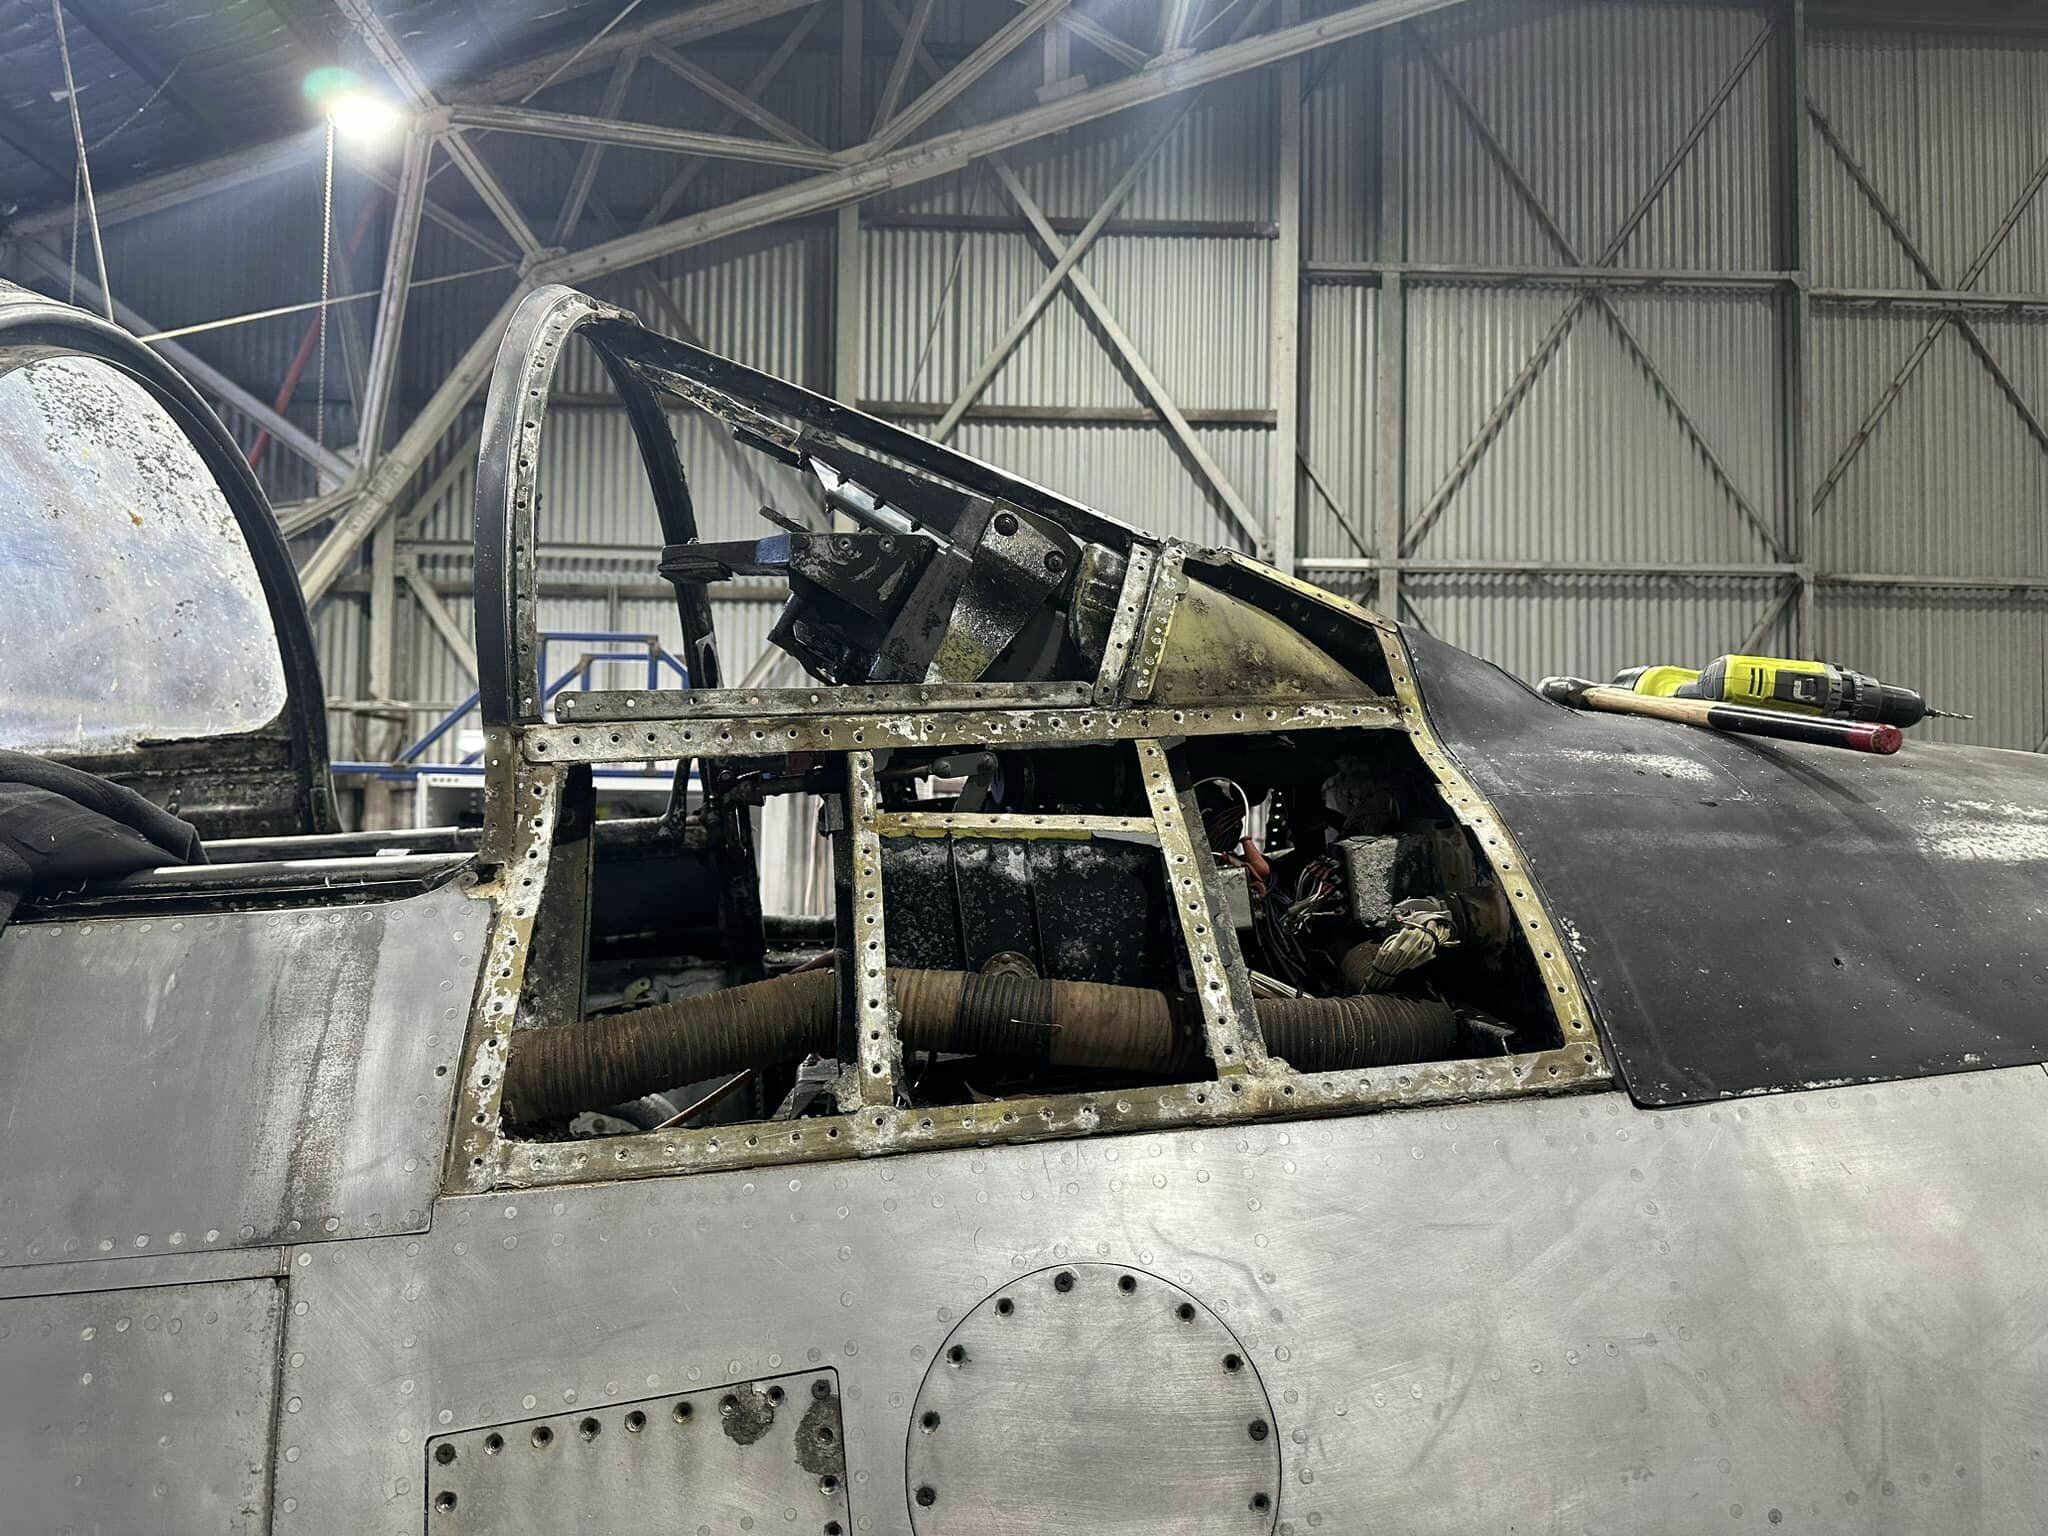
A slow progress night tonight, with work continuing on the removal of the forward windscreen structure. Unfortunately, all of the attachment hardware is considerably corroded and proving to be extremely difficult to remove, which has slowed down progress enormously. We have managed to get half of the right hand side unbolted and hope to have the entire forward windscreen structure removed by Saturday afternoon. Have included some photos of the structure showing how corroded things are.
-
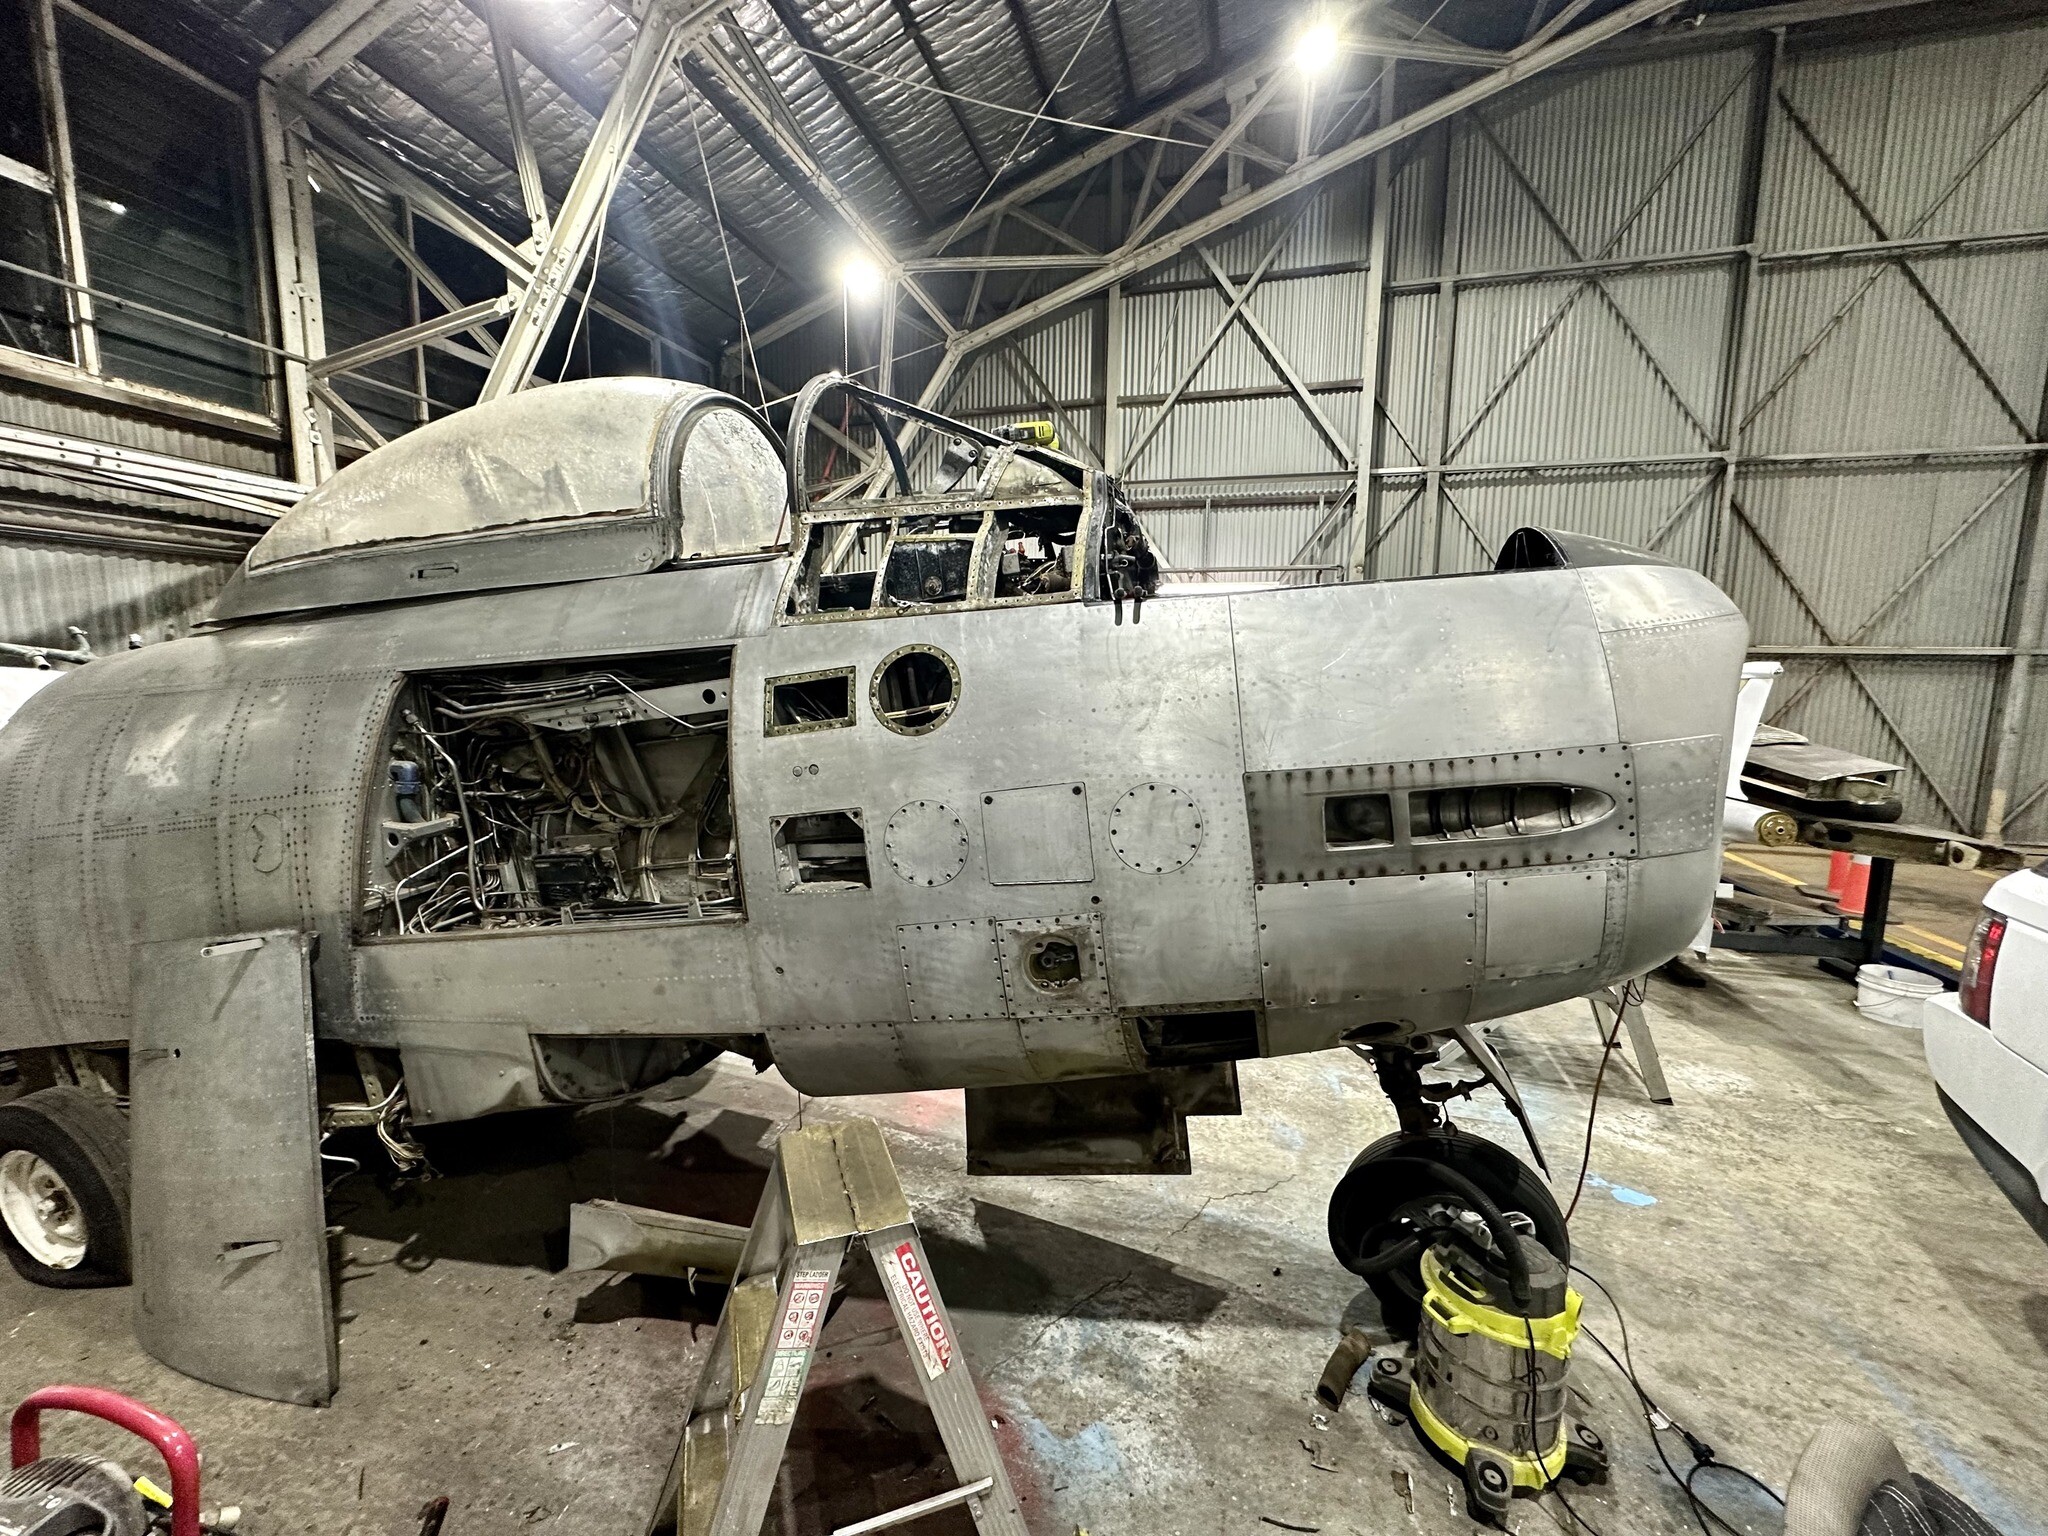
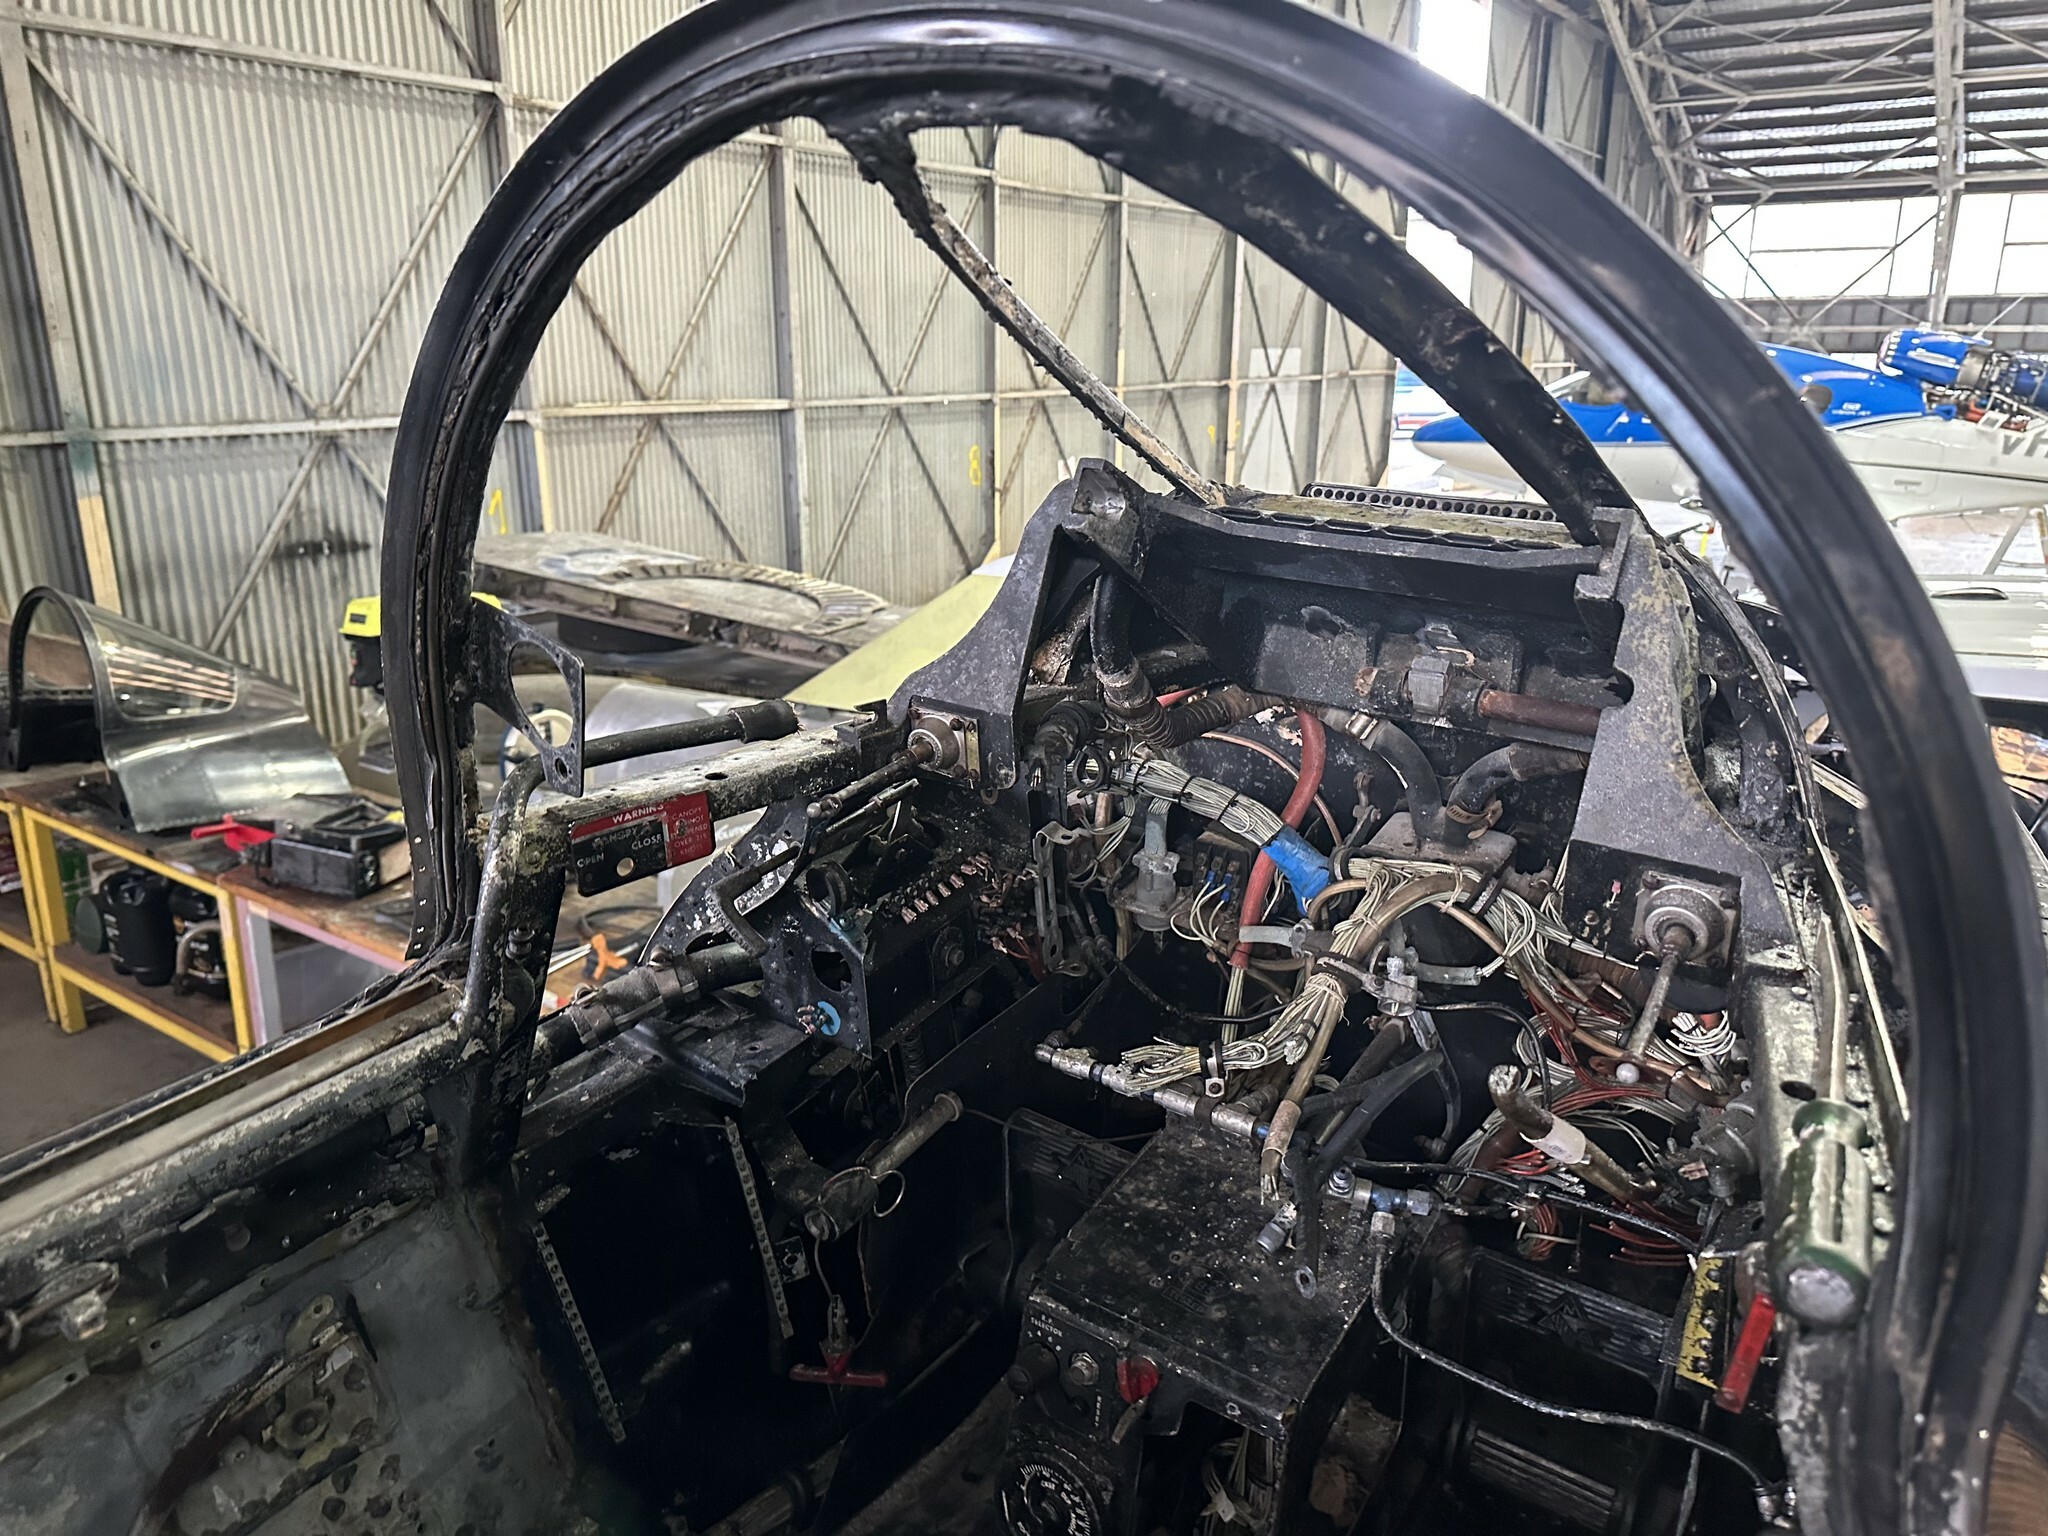
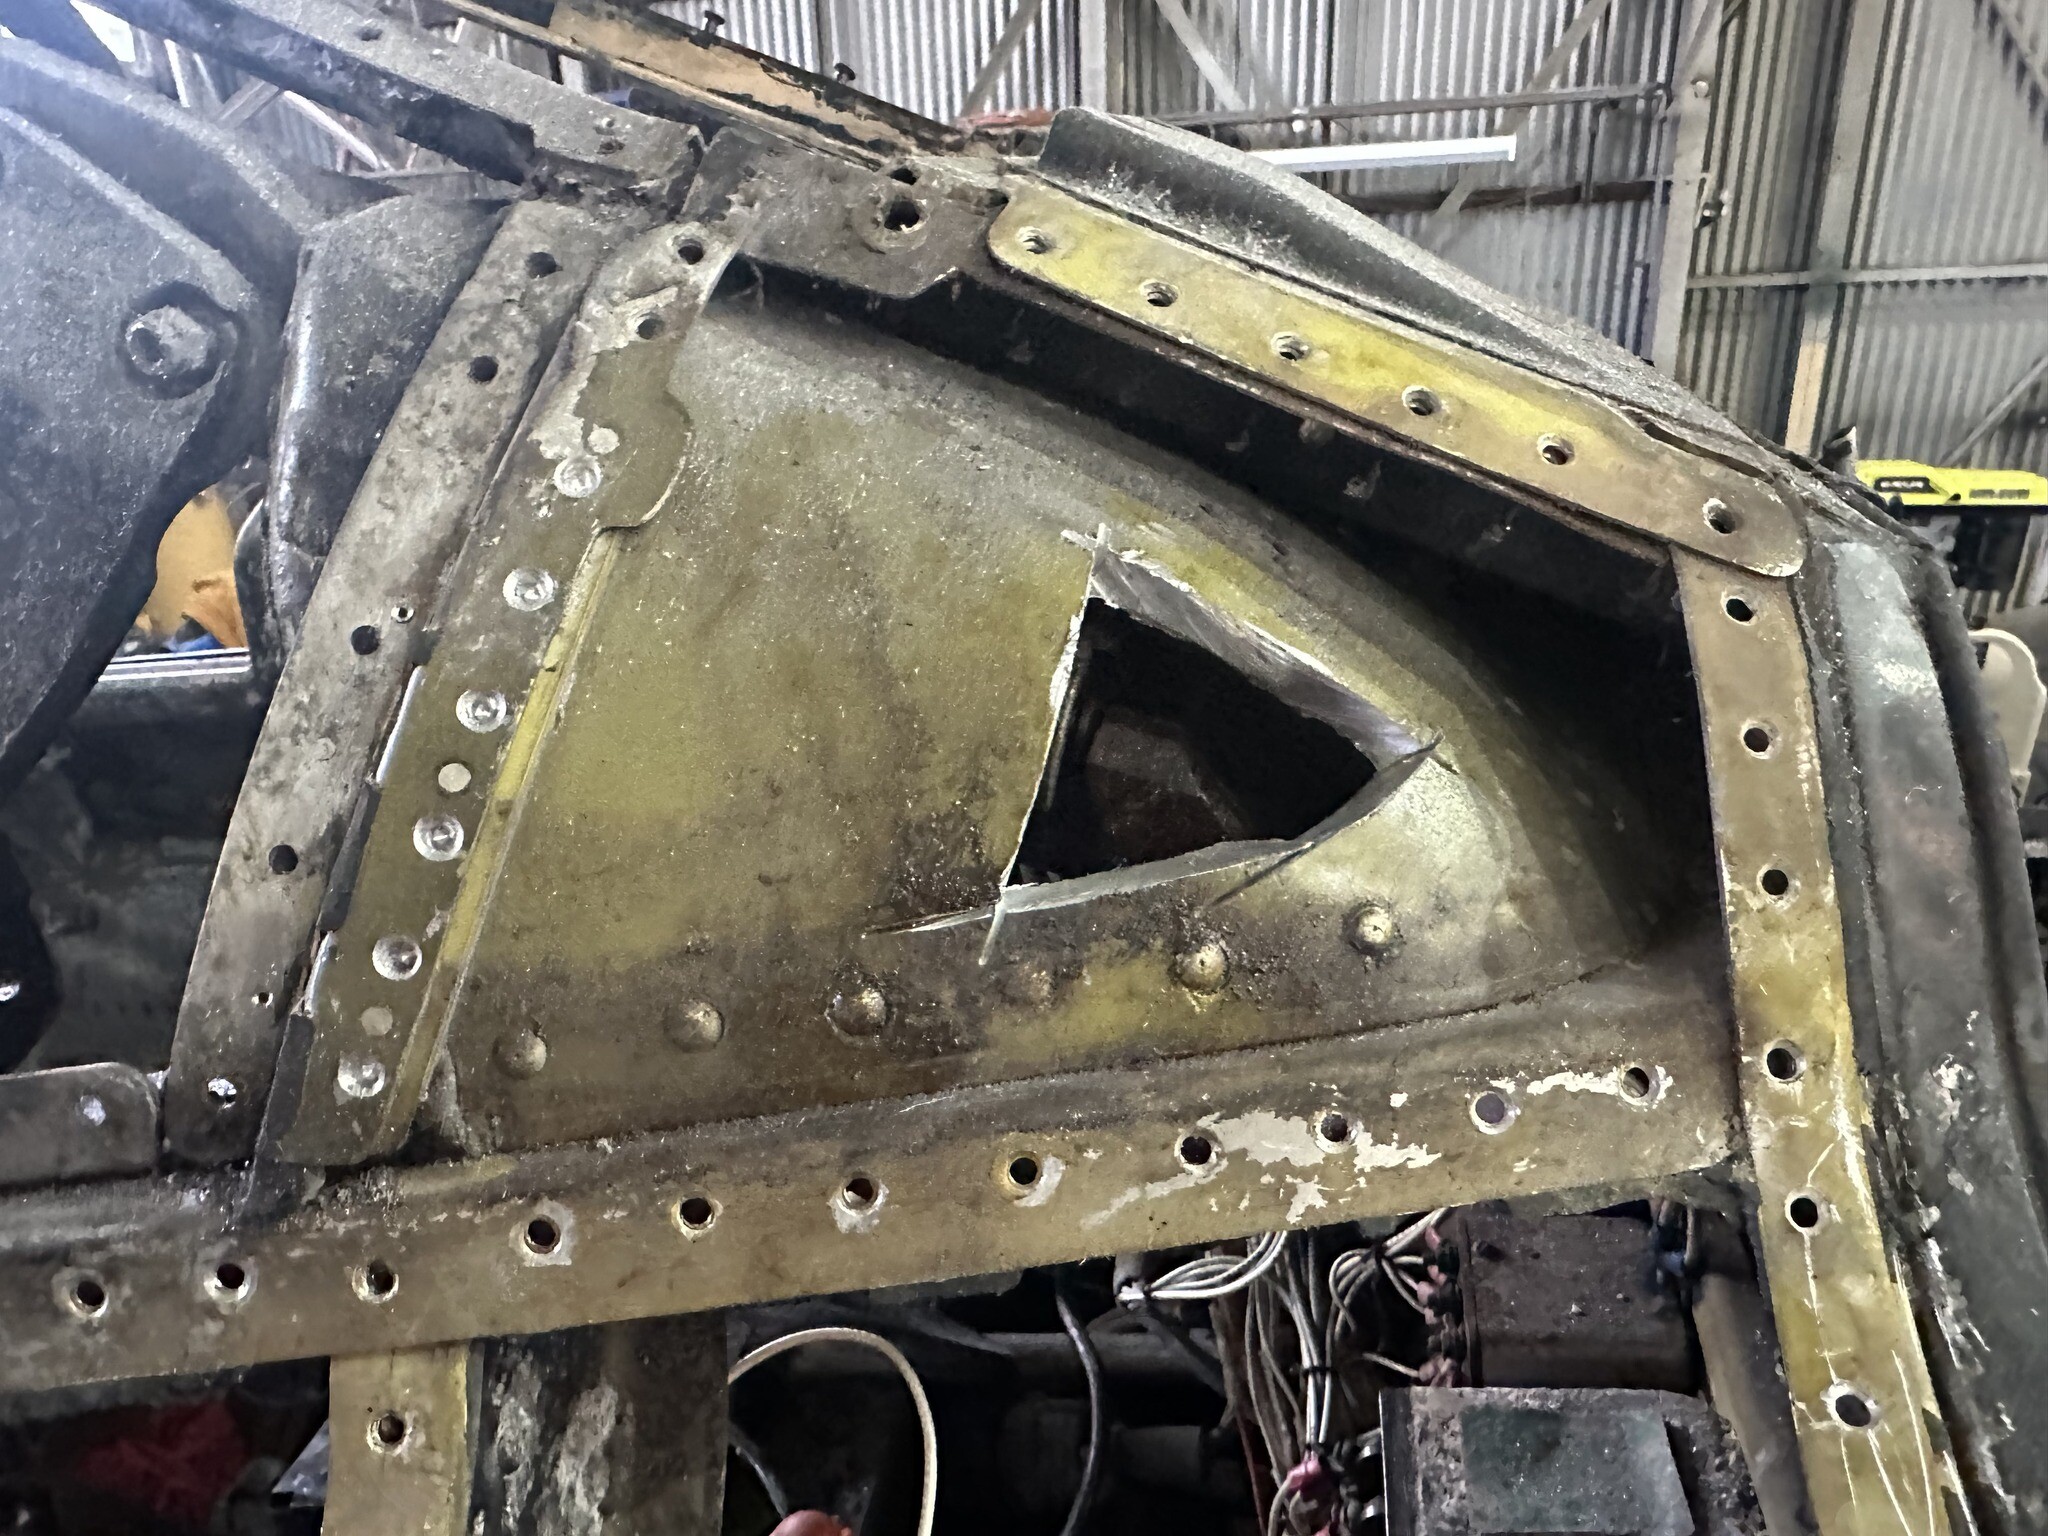
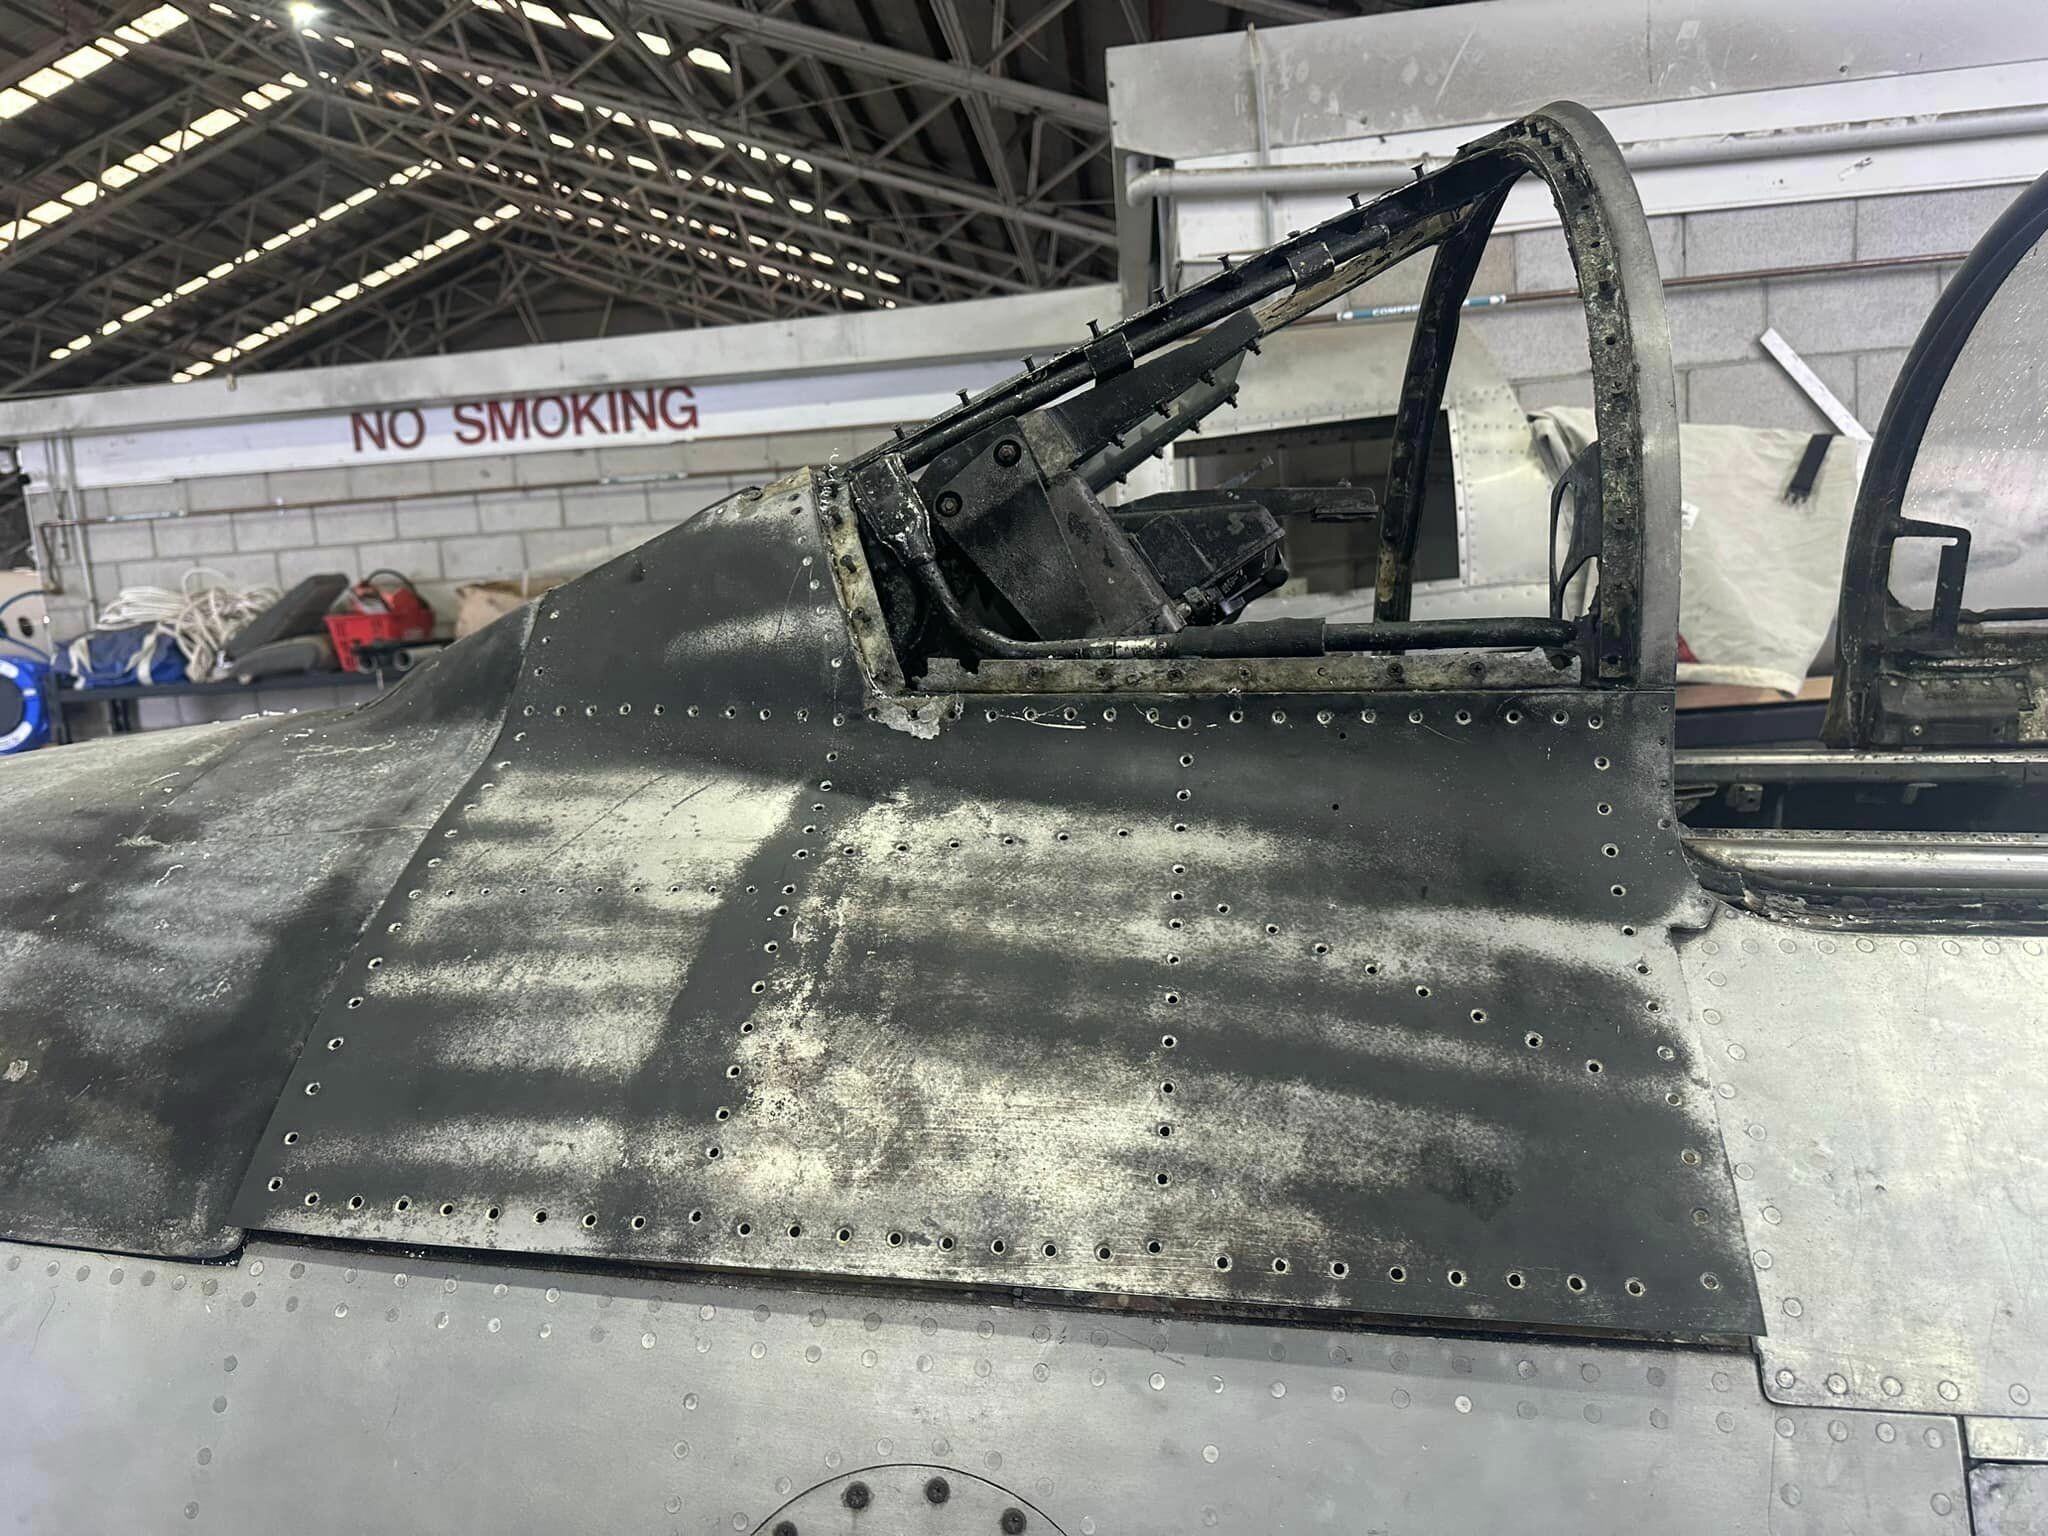
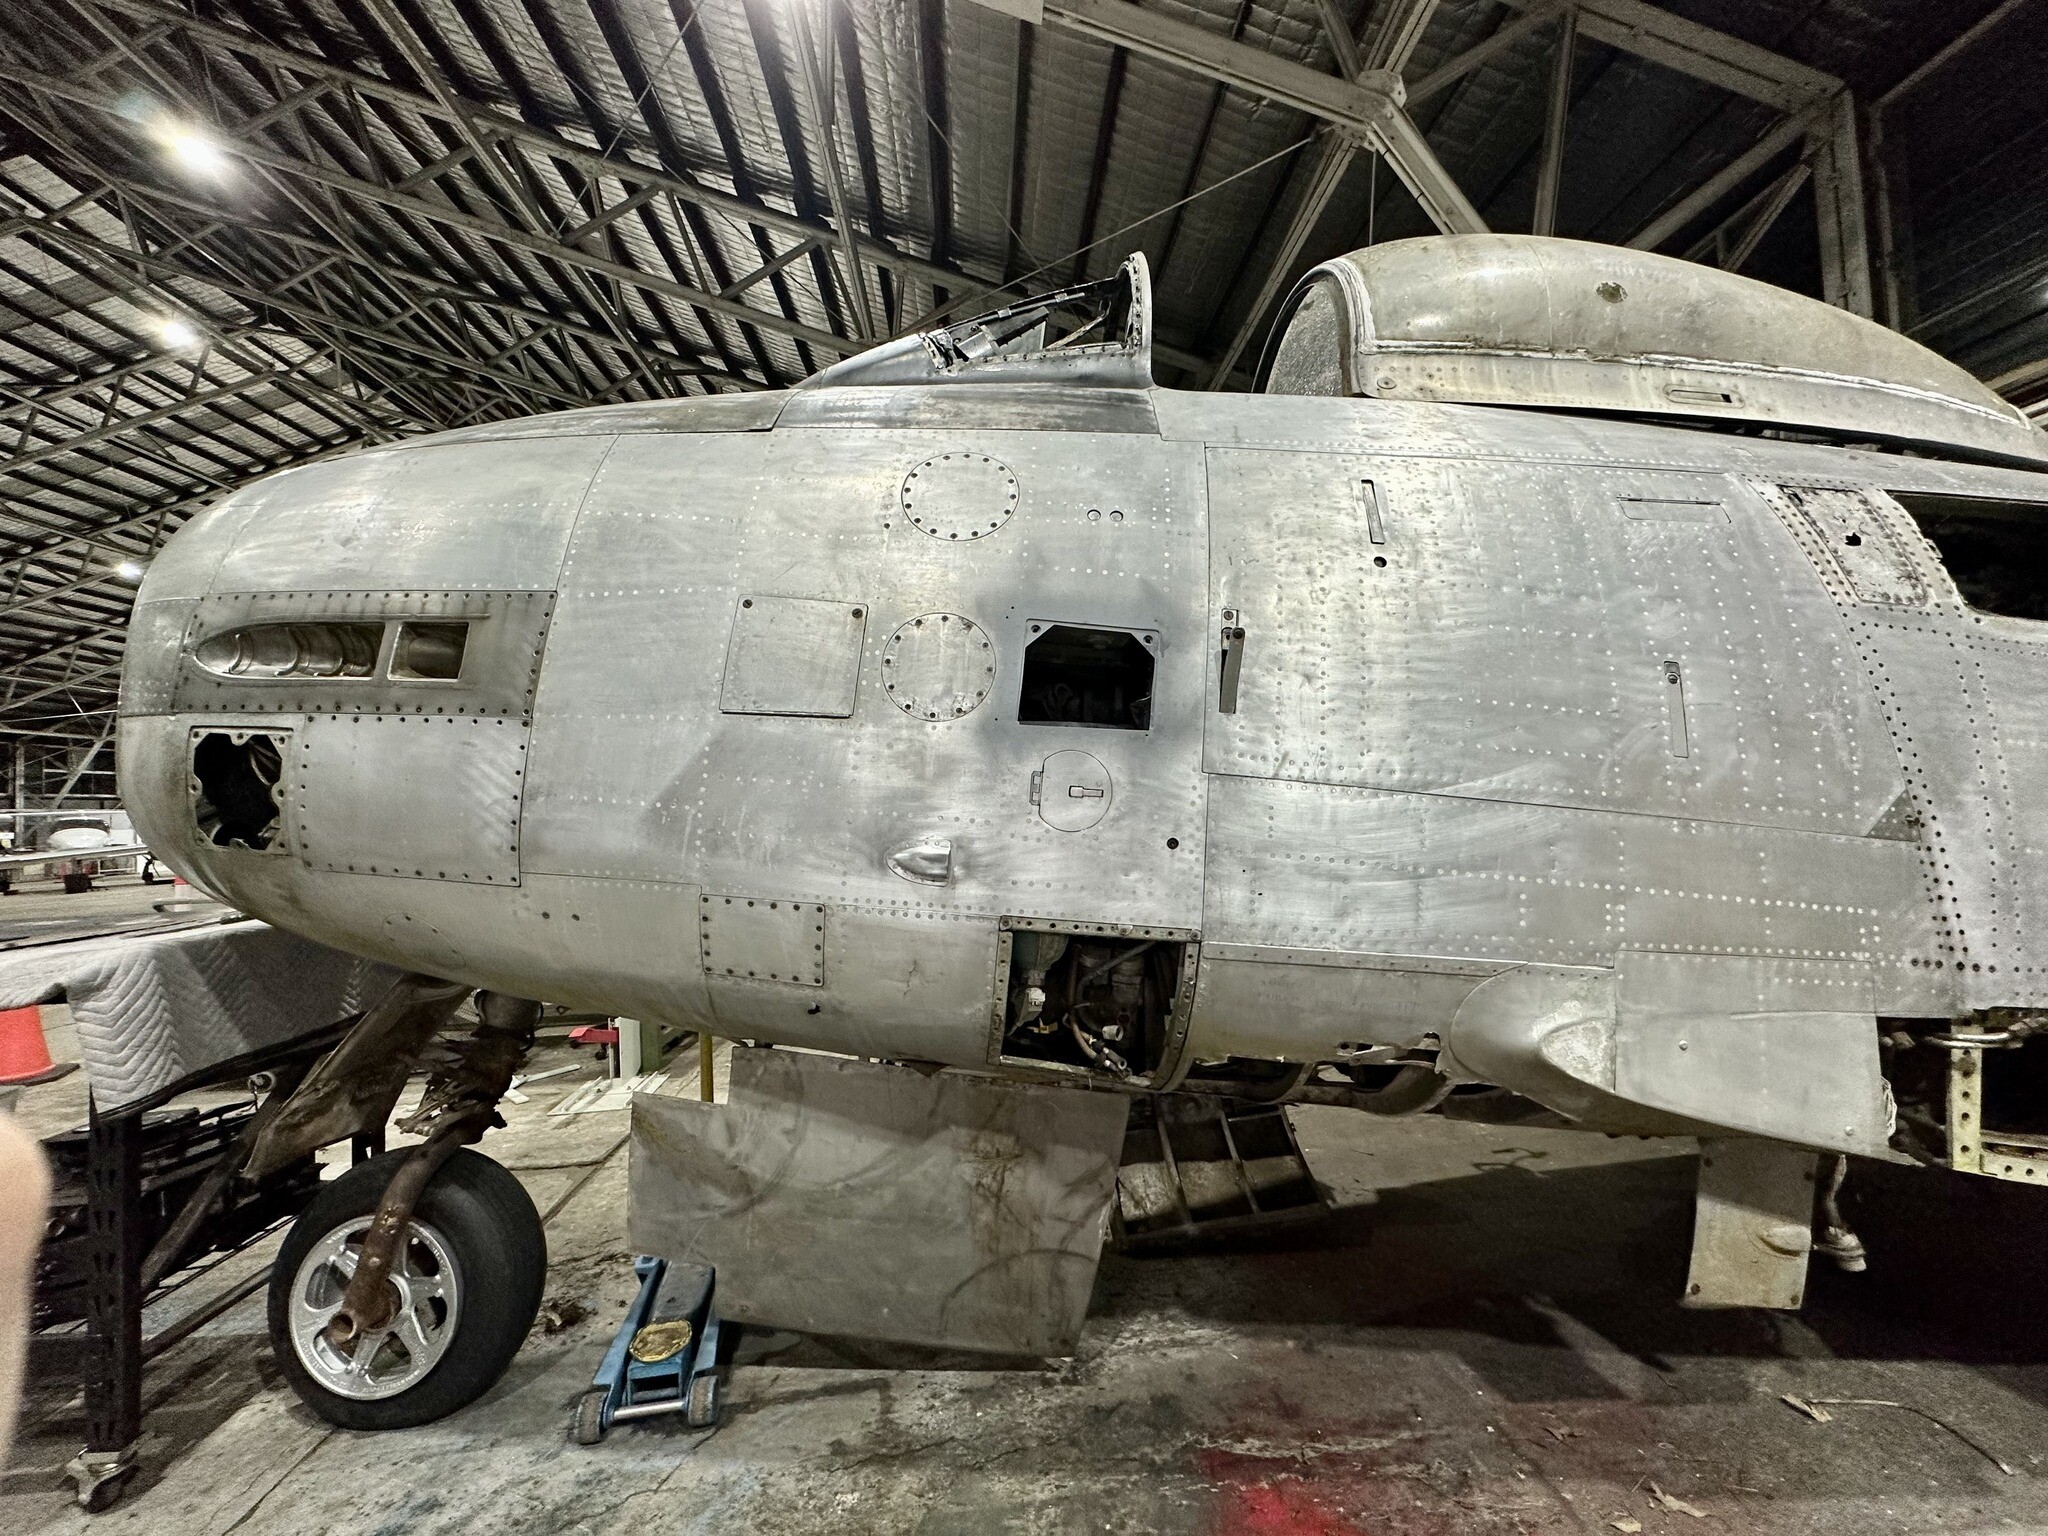
Another important milestone was achieved today. After several months of pumping penetrating oil into the gun-sight unit locking mechanism and praying it would free up, the team were left with no option but to cut an access hole into the forward windscreen armor shielding. The 100mm cut off wheel on the grinder made short work of the alloy armor plating, and in short order the stubborn gun-sight was pulled out of its mountings, possibly for the first time in 45+ years! The next step now is to complete the removal of the forward windscreen structure and all the cockpit electrical accessories and wiring, the hydraulic plumbing, and all other items. Once the cockpit is cleaned out and back to just a bare structure, we will give everything a rub back and prime then paint.
-
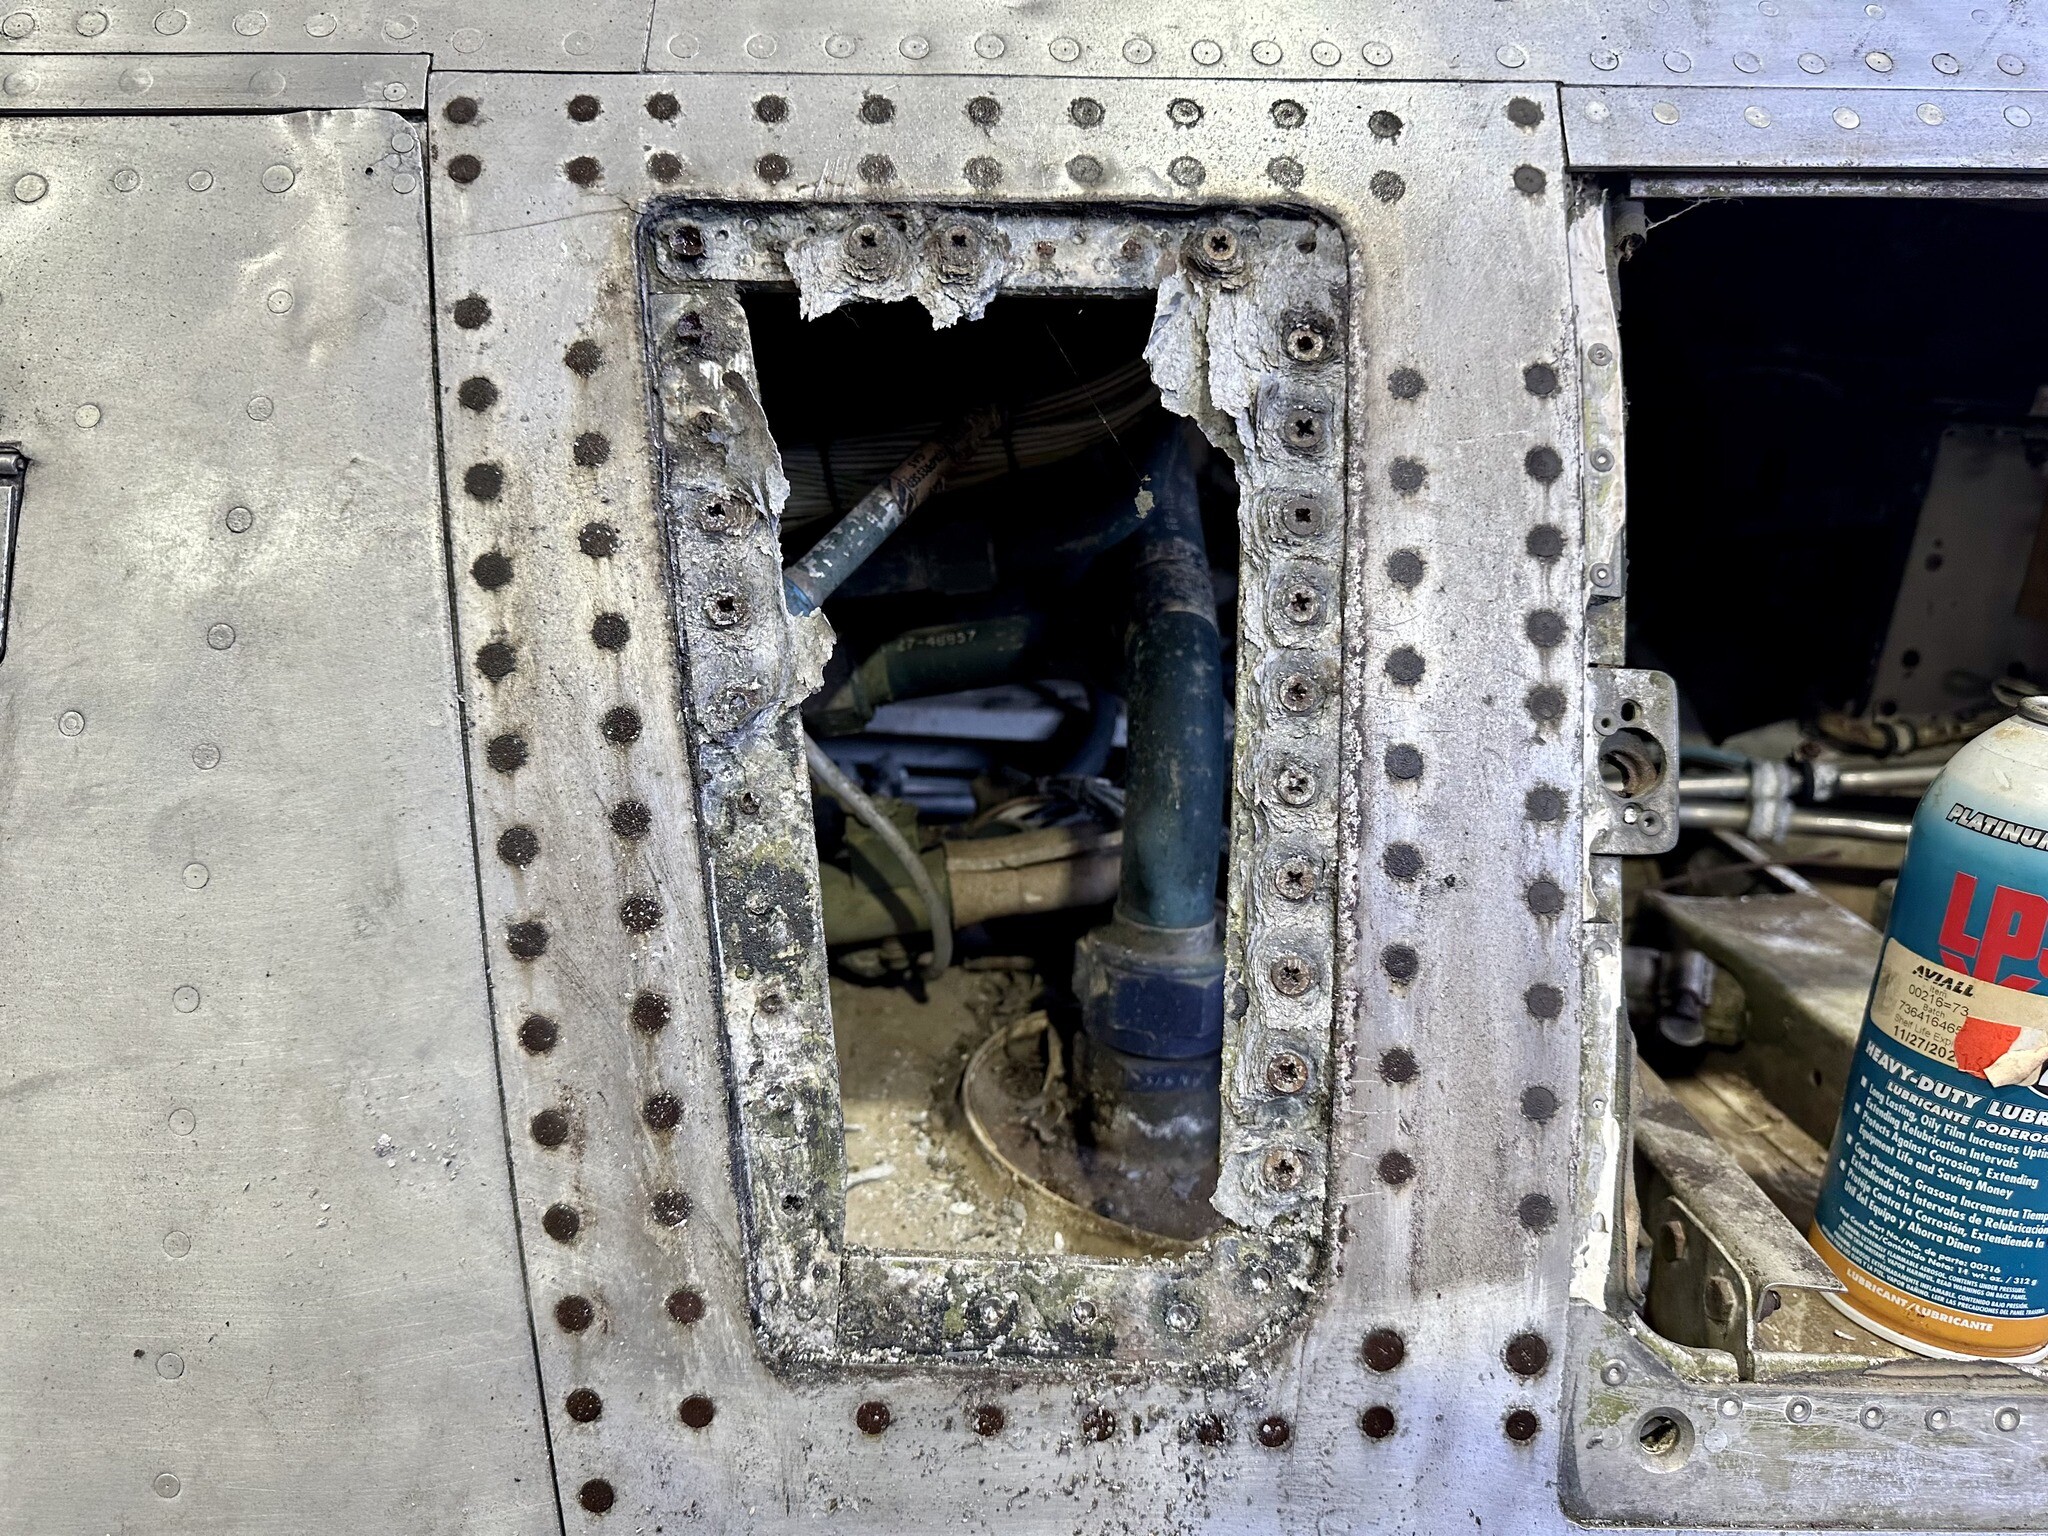
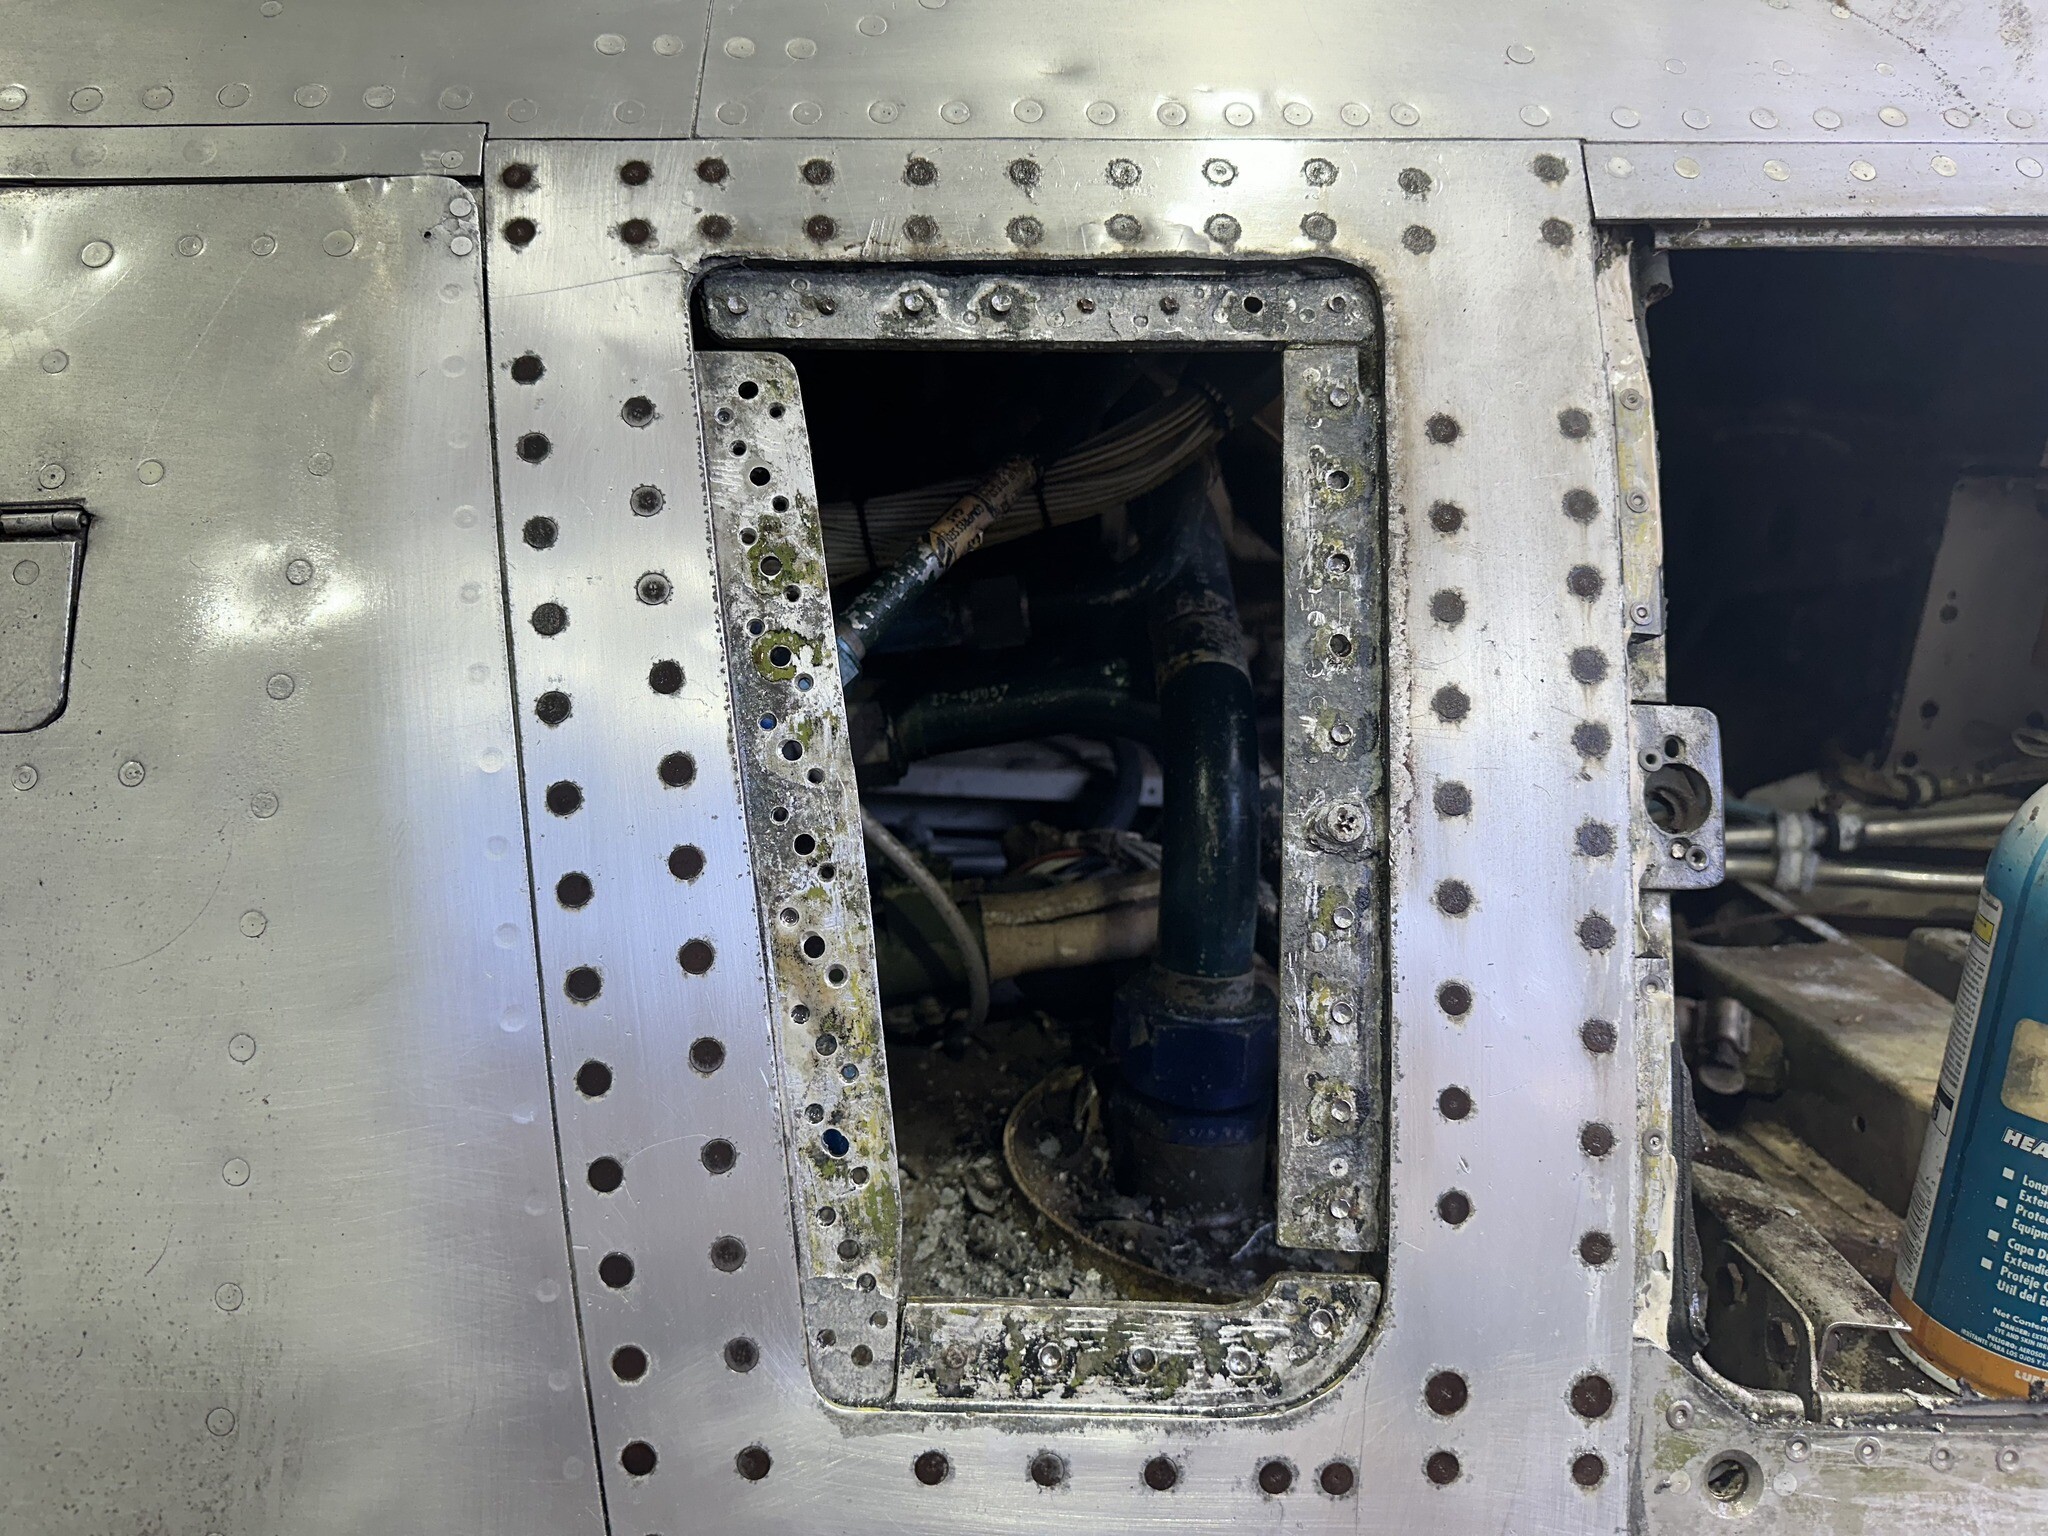
Many thanks to the team for tackling the drill-out of all 34 screws from the heavily corroded inspection panel on the left hand side of the cockpit fuselage. Slow and steady won the race today! With all of the rusted screws drilled out, all of the anchor nuts were drilled out, leaving the structure ready for corrosion clean up. Instead of installing all new anchor nuts and hardware, we will instead install the panel with countersunk rivets, as we will never have a need to open the panel again.
-
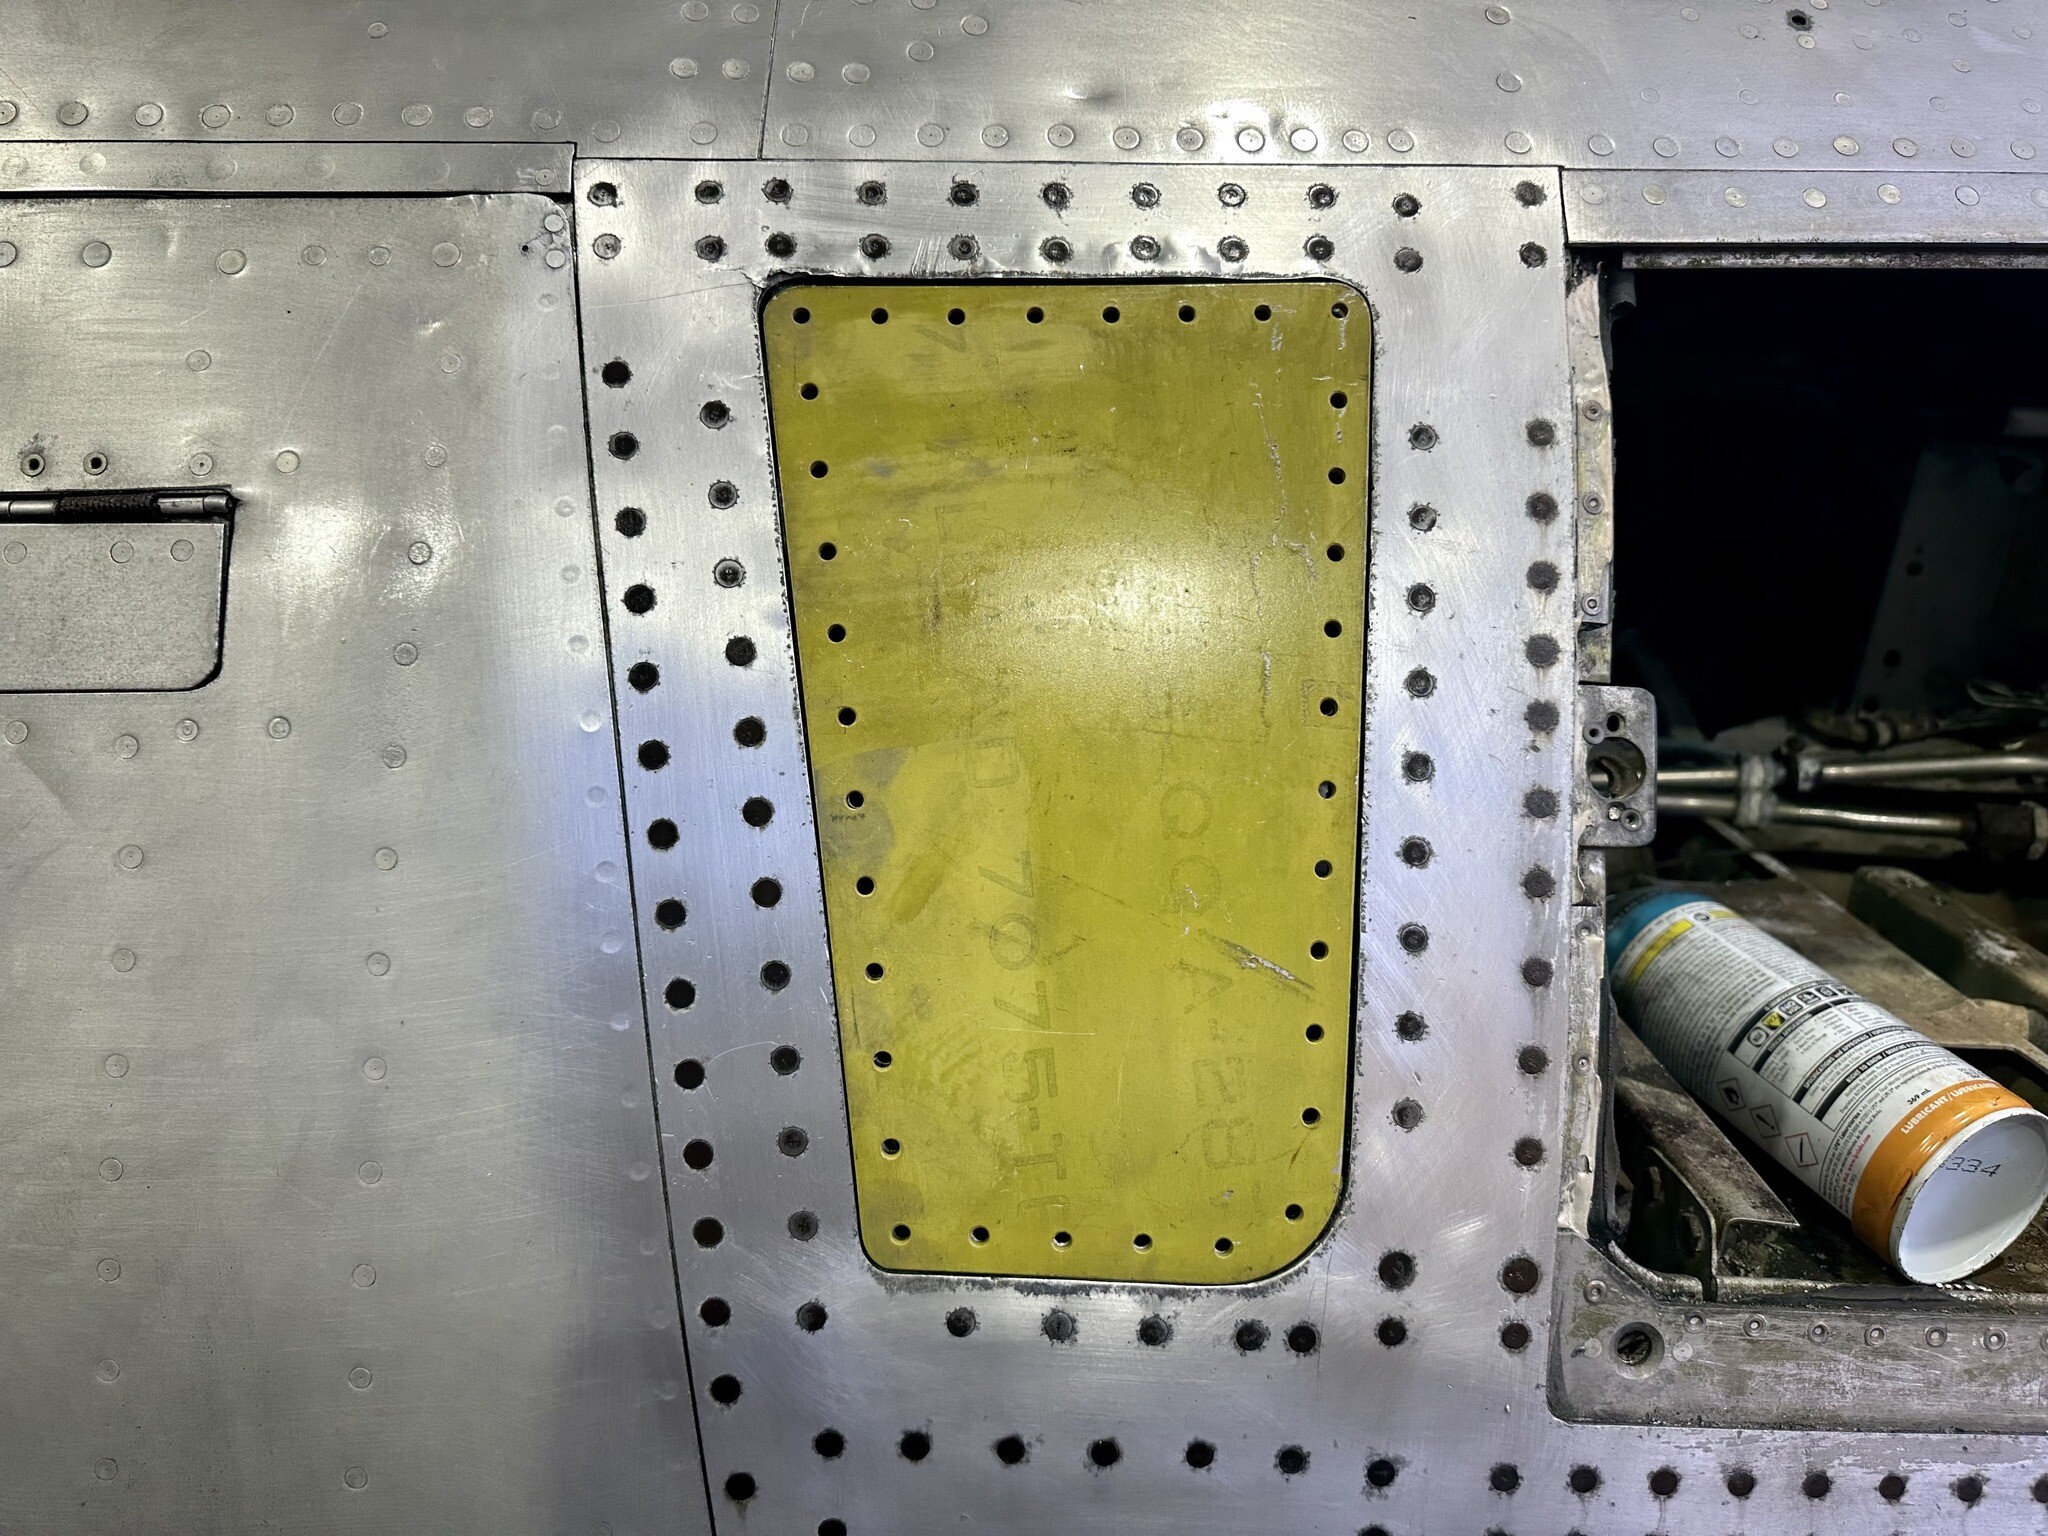
Many thanks to Nathan from the MVP team who managed to source original new stock panels to help complete the external cockpit fuselage structure! Nathan was also able to source us a nose-wheel cap, which gets installed over the top of the nose-wheel axle nut. And.... incredibly! Nathan was able to locate three original undercarriage retraction status indicators, which are not easy to come by!
-
The instrument panel centre console will be removed this week in preparation for a complete refurbishment.
-
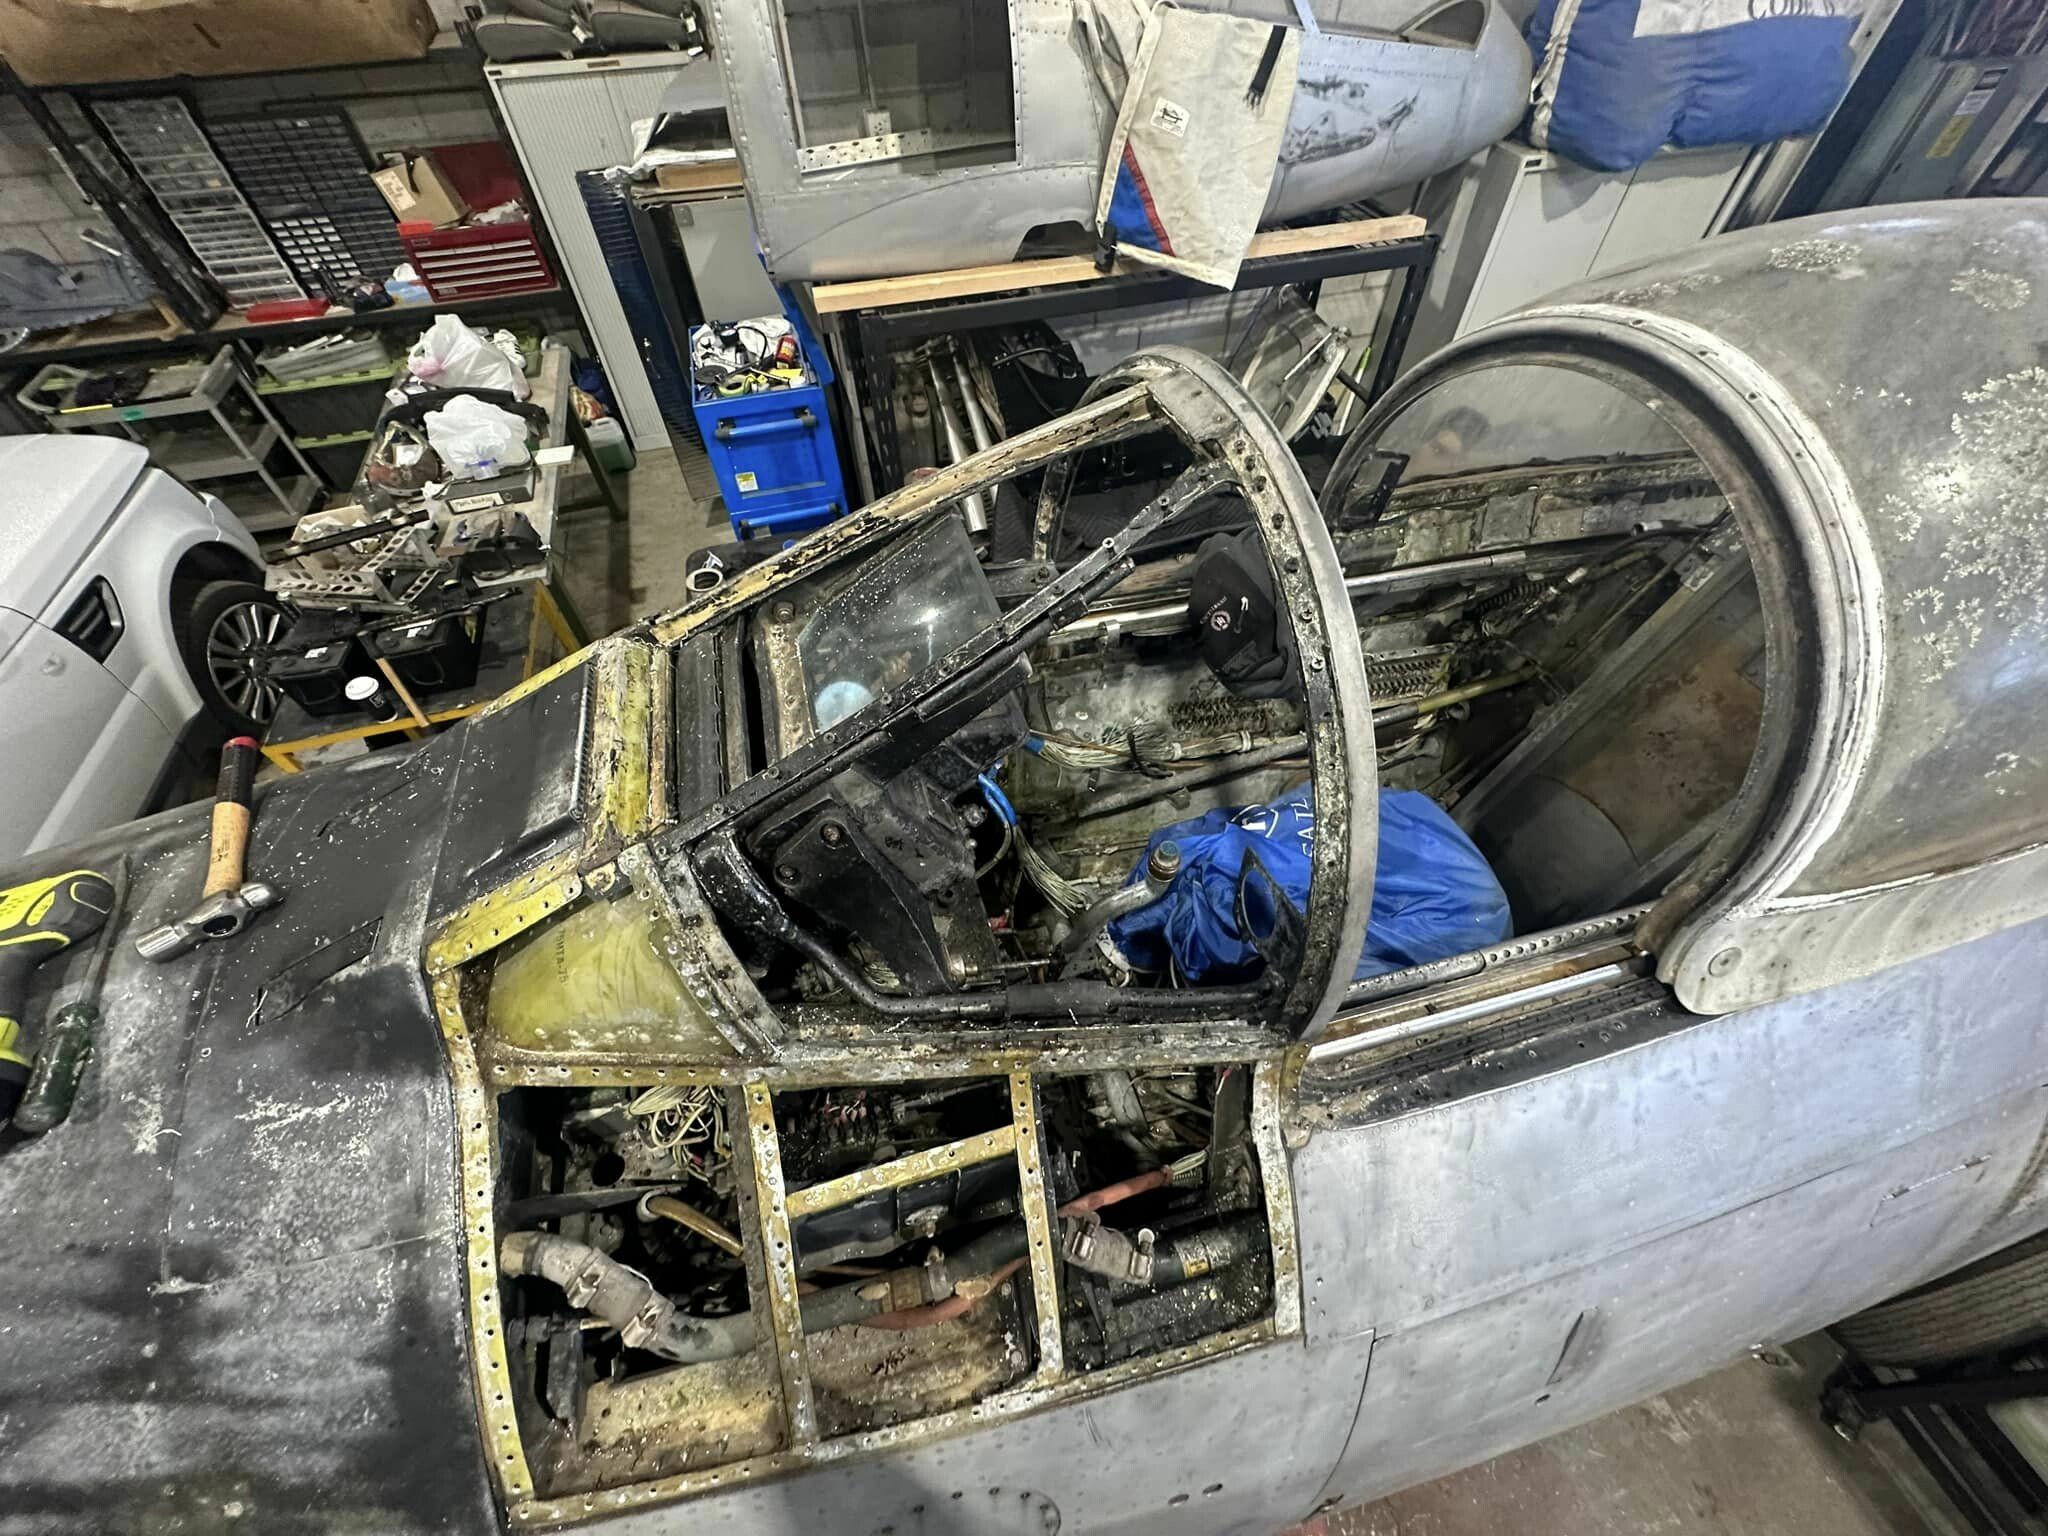
Focus of work at the moment is the clean-up of the cockpit forward windscreen structure, which is a rather tedious job of slowly disconnecting, unscrewing and removing everything, so that the components could be used again if necessary. One of the hardest things to clean up is the 1950's pressurisation sealant, which is everywhere! Every rivet, nut and bolt that penetrates the structure is coating in a thick layering of the stuff. 67 years since it was done, it has gone rock-hard and takes a great deal of effort to remove. T
-
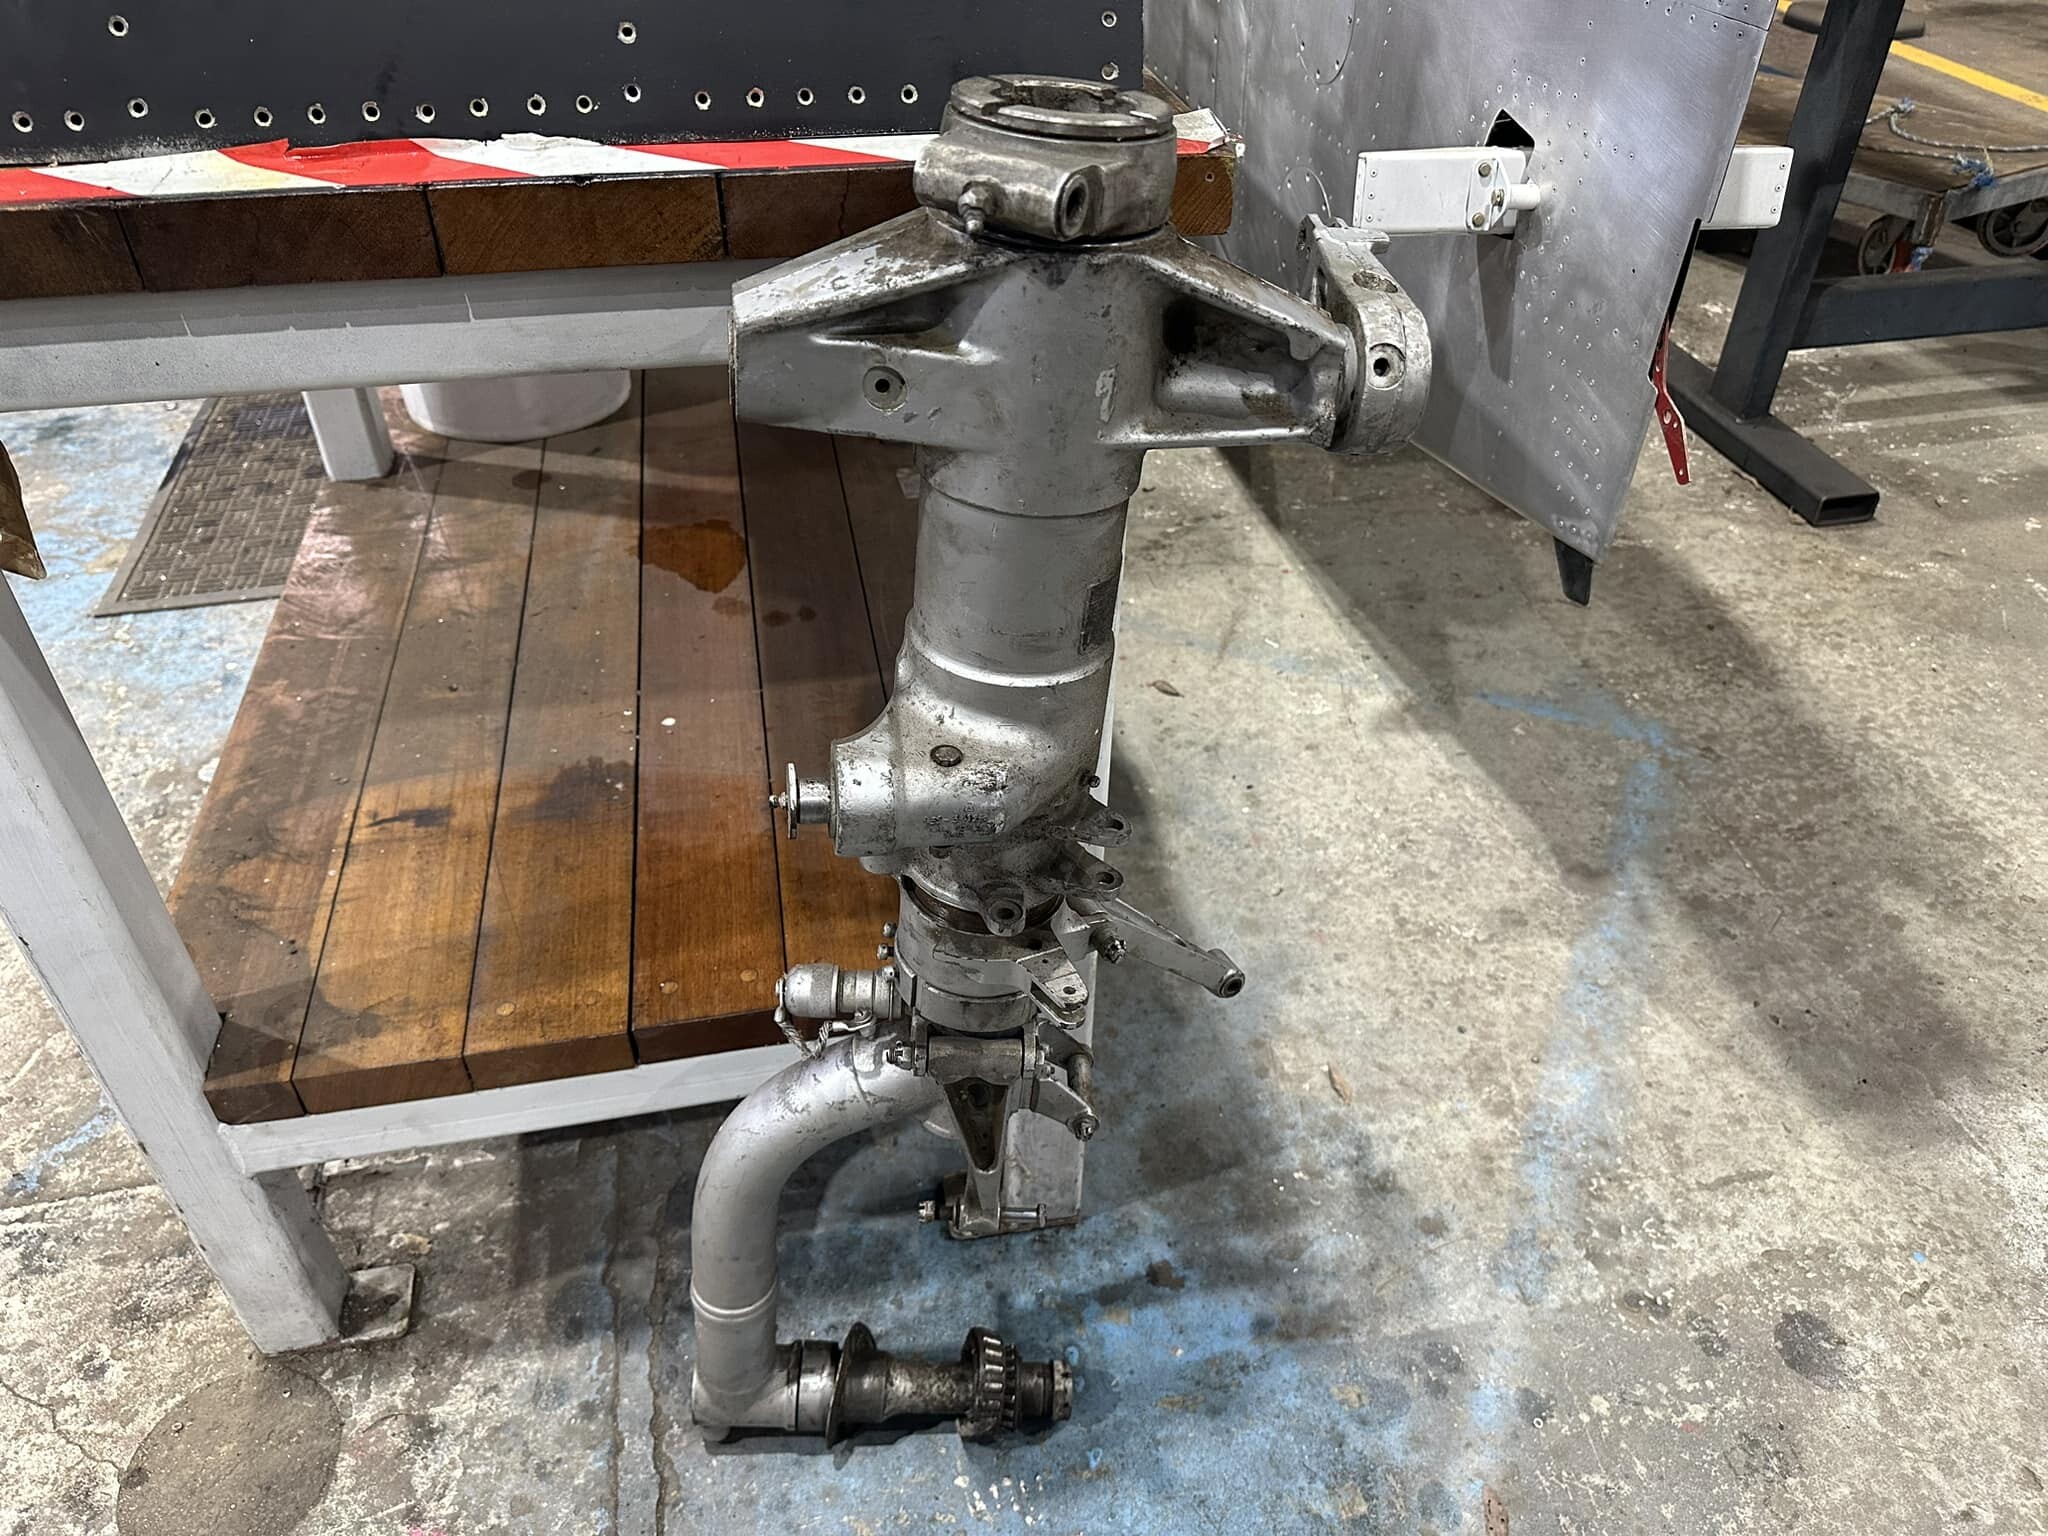
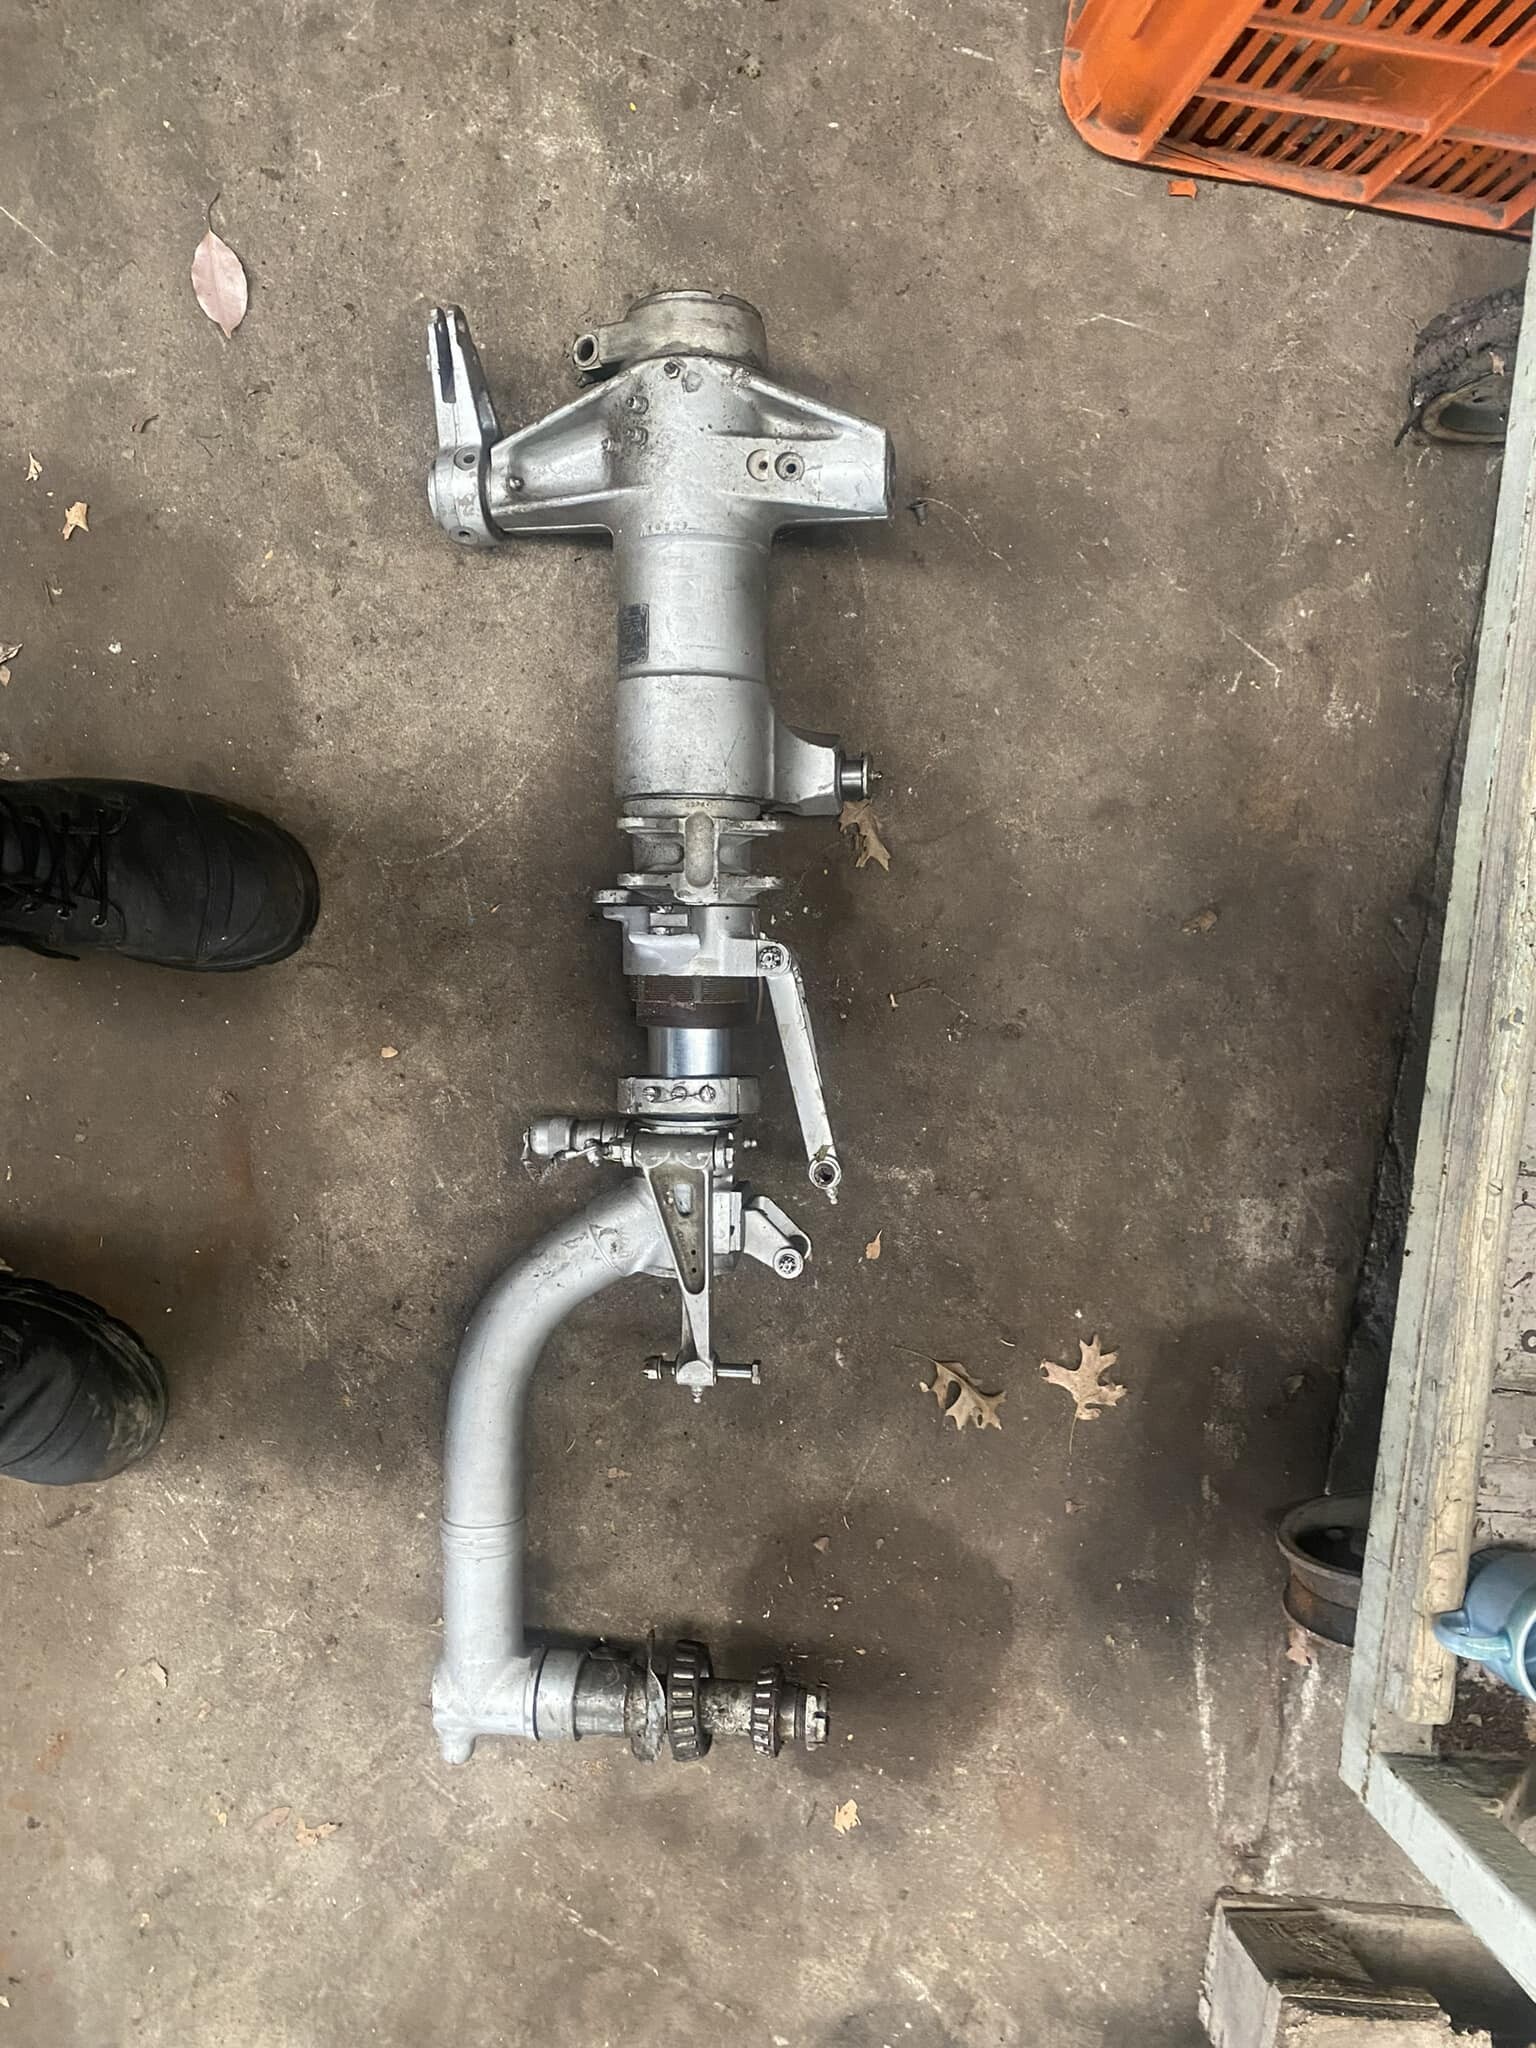
Many thanks to Nathan from the MVP team who donated a complete nose-leg assembly for the simpit. The leg was never part of the original simpit project scope, however, we decided to stand the cockpit up on it, and the original unit in the aircraft is heavily corroded and missing many of the accessories and components. We are very happy with this unit and will be looking forward to cleaning it up, giving it a fresh coat of paint and installing it.
-
The team had time this weekend to get stuck into the forward windscreen assembly, de-riveting the structure ahead of removing it from the cockpit. A relatively simple exercise, bar the exception that the skins have been bonded to the frames with pressurization sealant and required the use of metal spatulas etc to separate. The team have been super careful to not damage anything, ensuring that it can all be re-assembled should it be required for another project. Lots of cleaning is now ahead, before further disassembly etc.
-
![[MVP] Mugga](https://forum.dcs.world/uploads/monthly_2021_03/MVP.thumb.png.398f5fa5eaf57799a81da76f4cc64fc1.png)
requested DCS F-86-F35 missing ordinance AN-M65A1 W/T142
[MVP] Mugga replied to =RS= Hart's topic in Bugs and Problems
This would be a great addition if it could be added!- 3 replies
-
- 1
-

-
- f-86f sabre
- weapons
- (and 2 more)
-
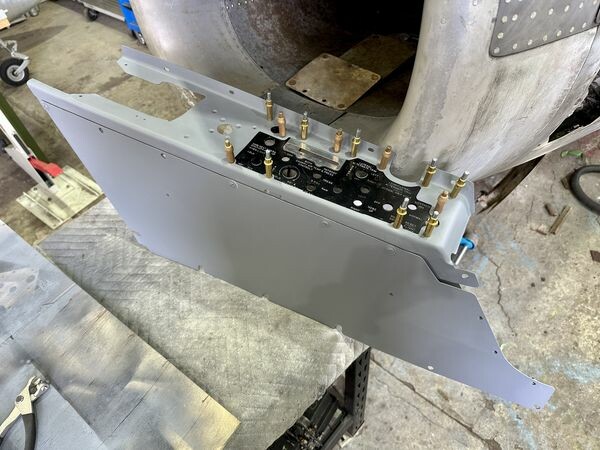
Work on the left hand side console has progressed, with the major panels being media blasted and given primer coats. The panels have all required varying amounts of panel beating to get them all back into good condition, but have come up looking great! Once everything was dry, some trial fitting was done as each of the components are from different aircraft. Next step is to source some paint in the original CAC light blue/grey that was used on the consoles. The left hand switch panel and the newly fabricated inset panel were pinned into position on the left hand console with Clecos, with only some minor adjustments of the console frame required to get everything into position. Was pretty exciting to see the partially assembled console coming together, giving everyone a sense of how the simpit will look once it is completed!
-
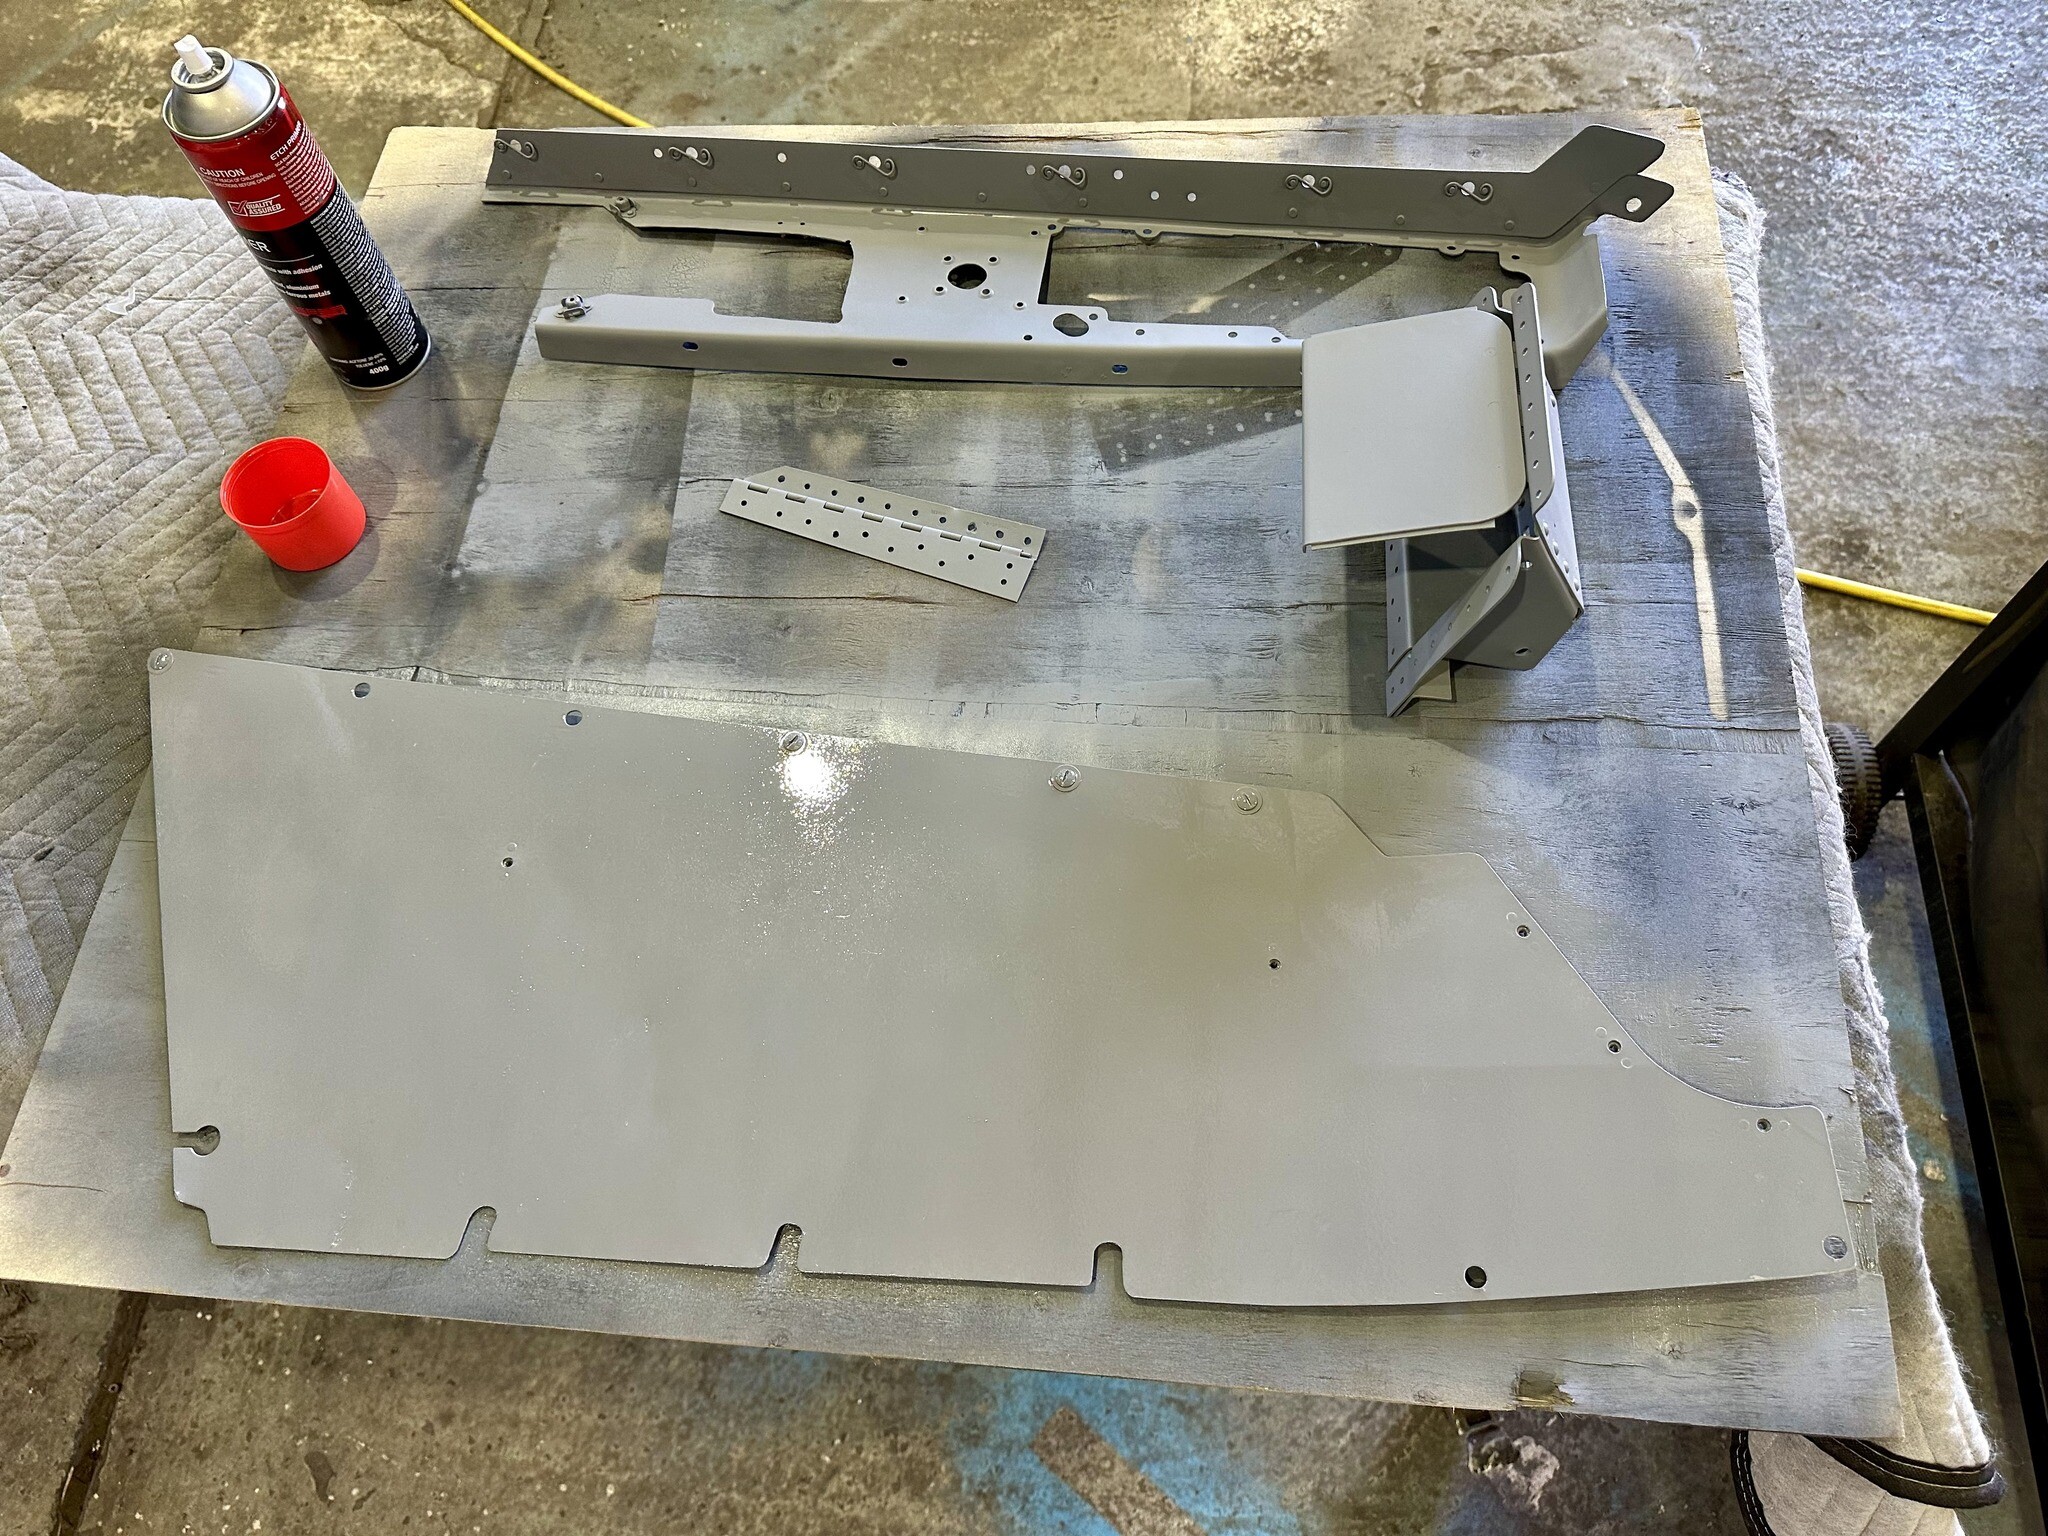
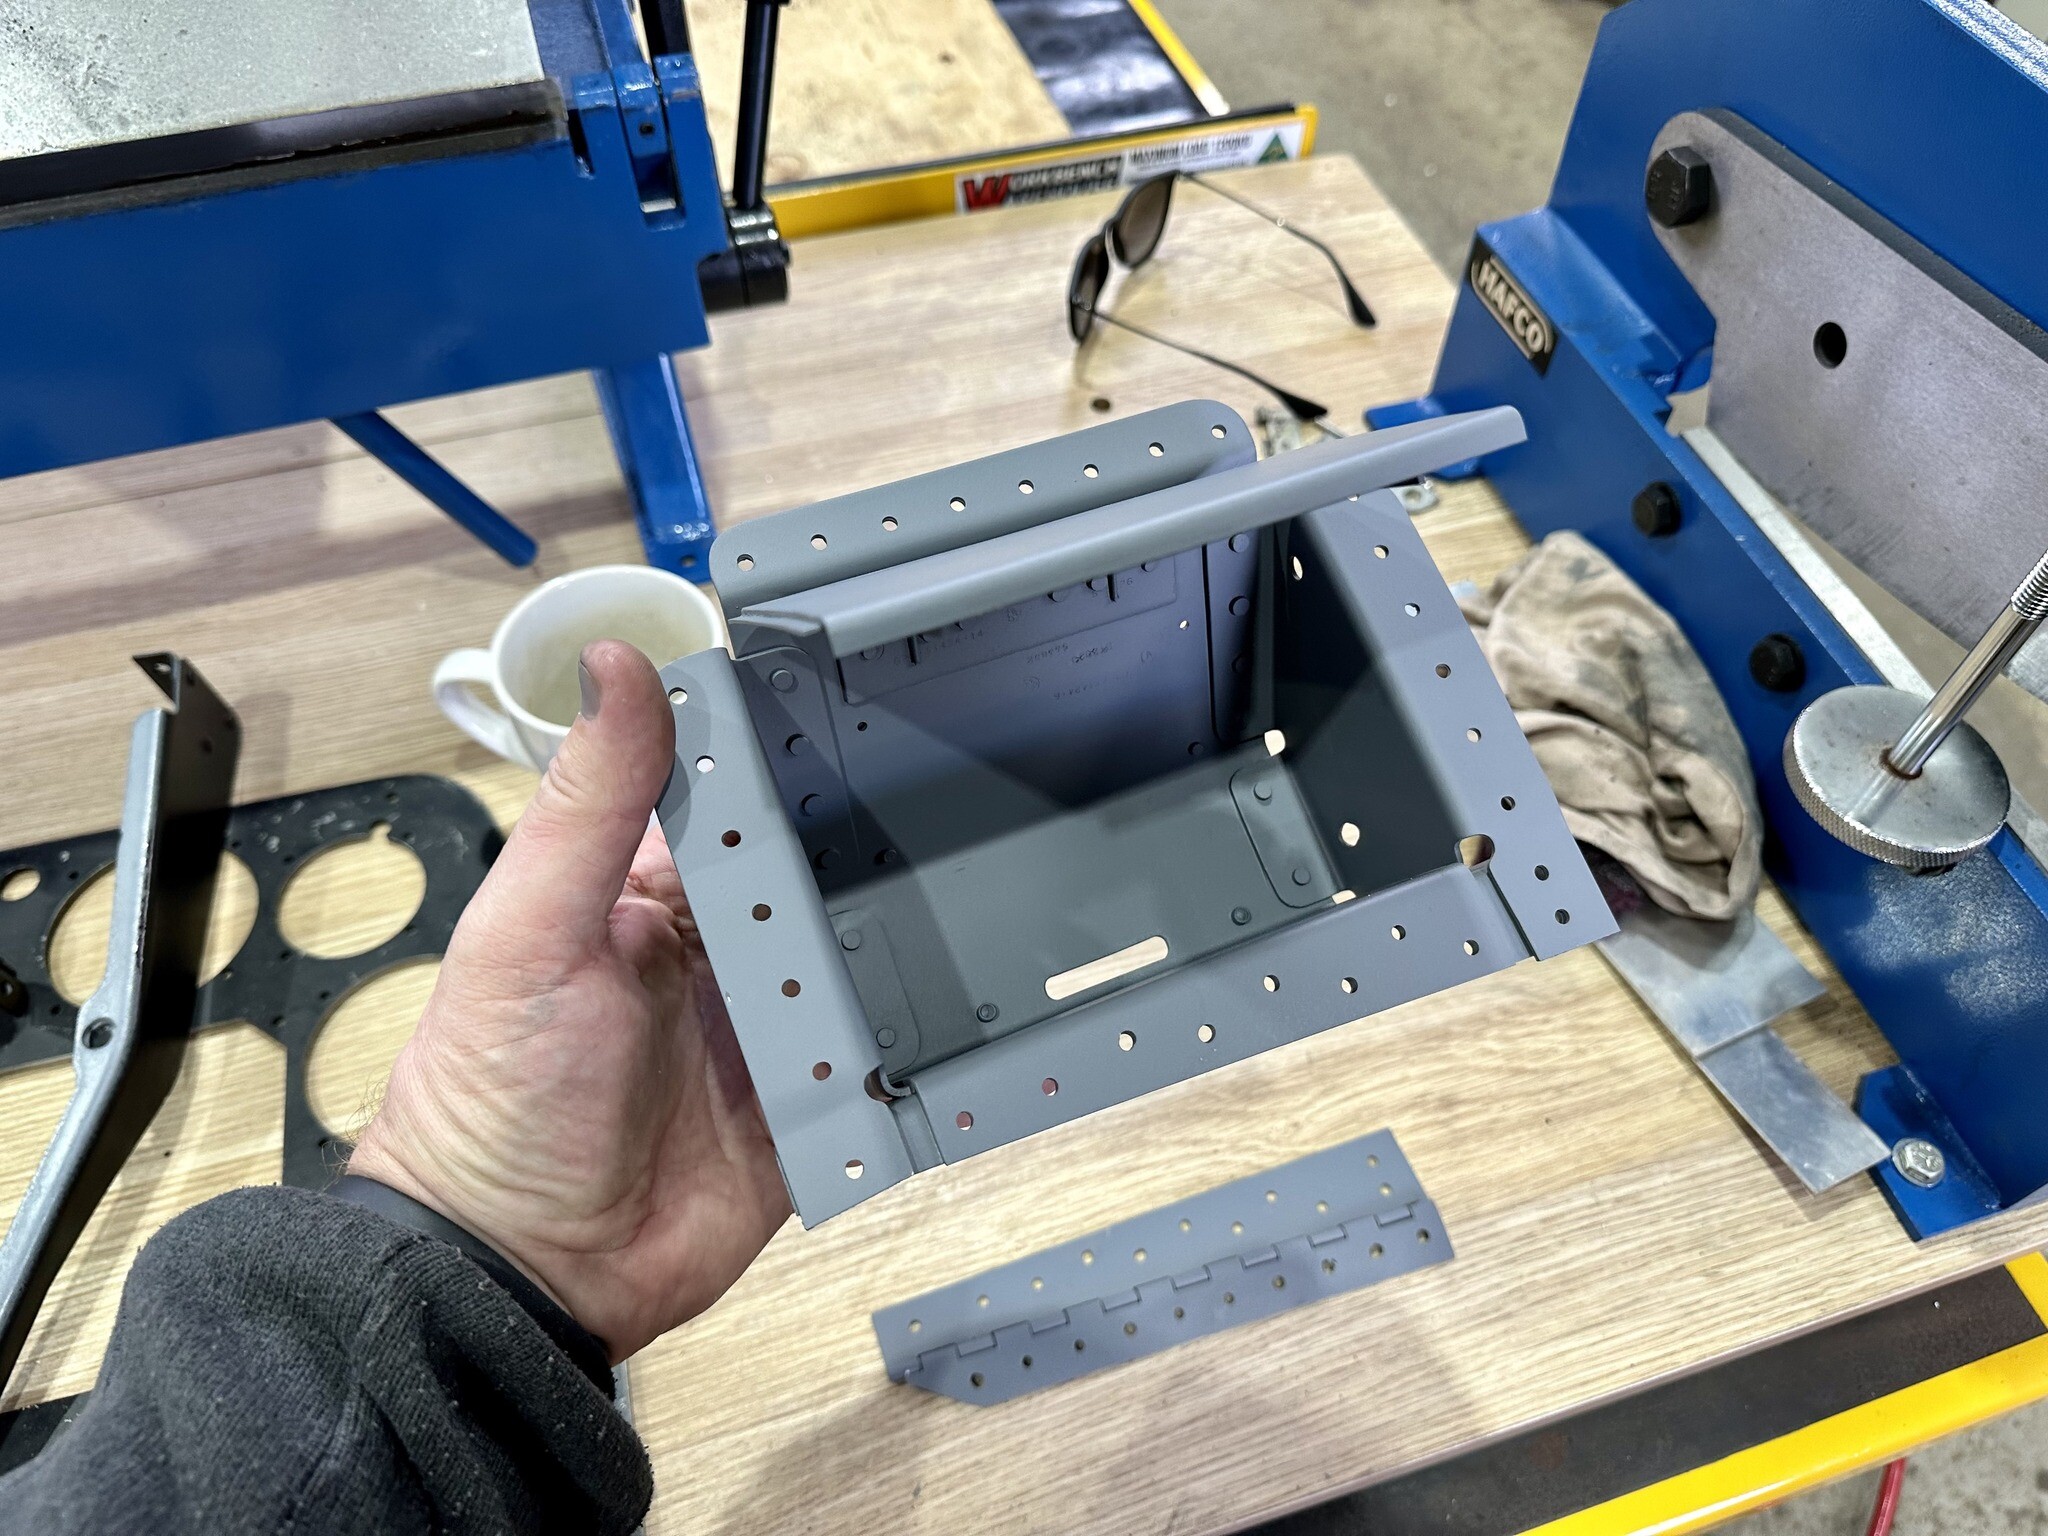
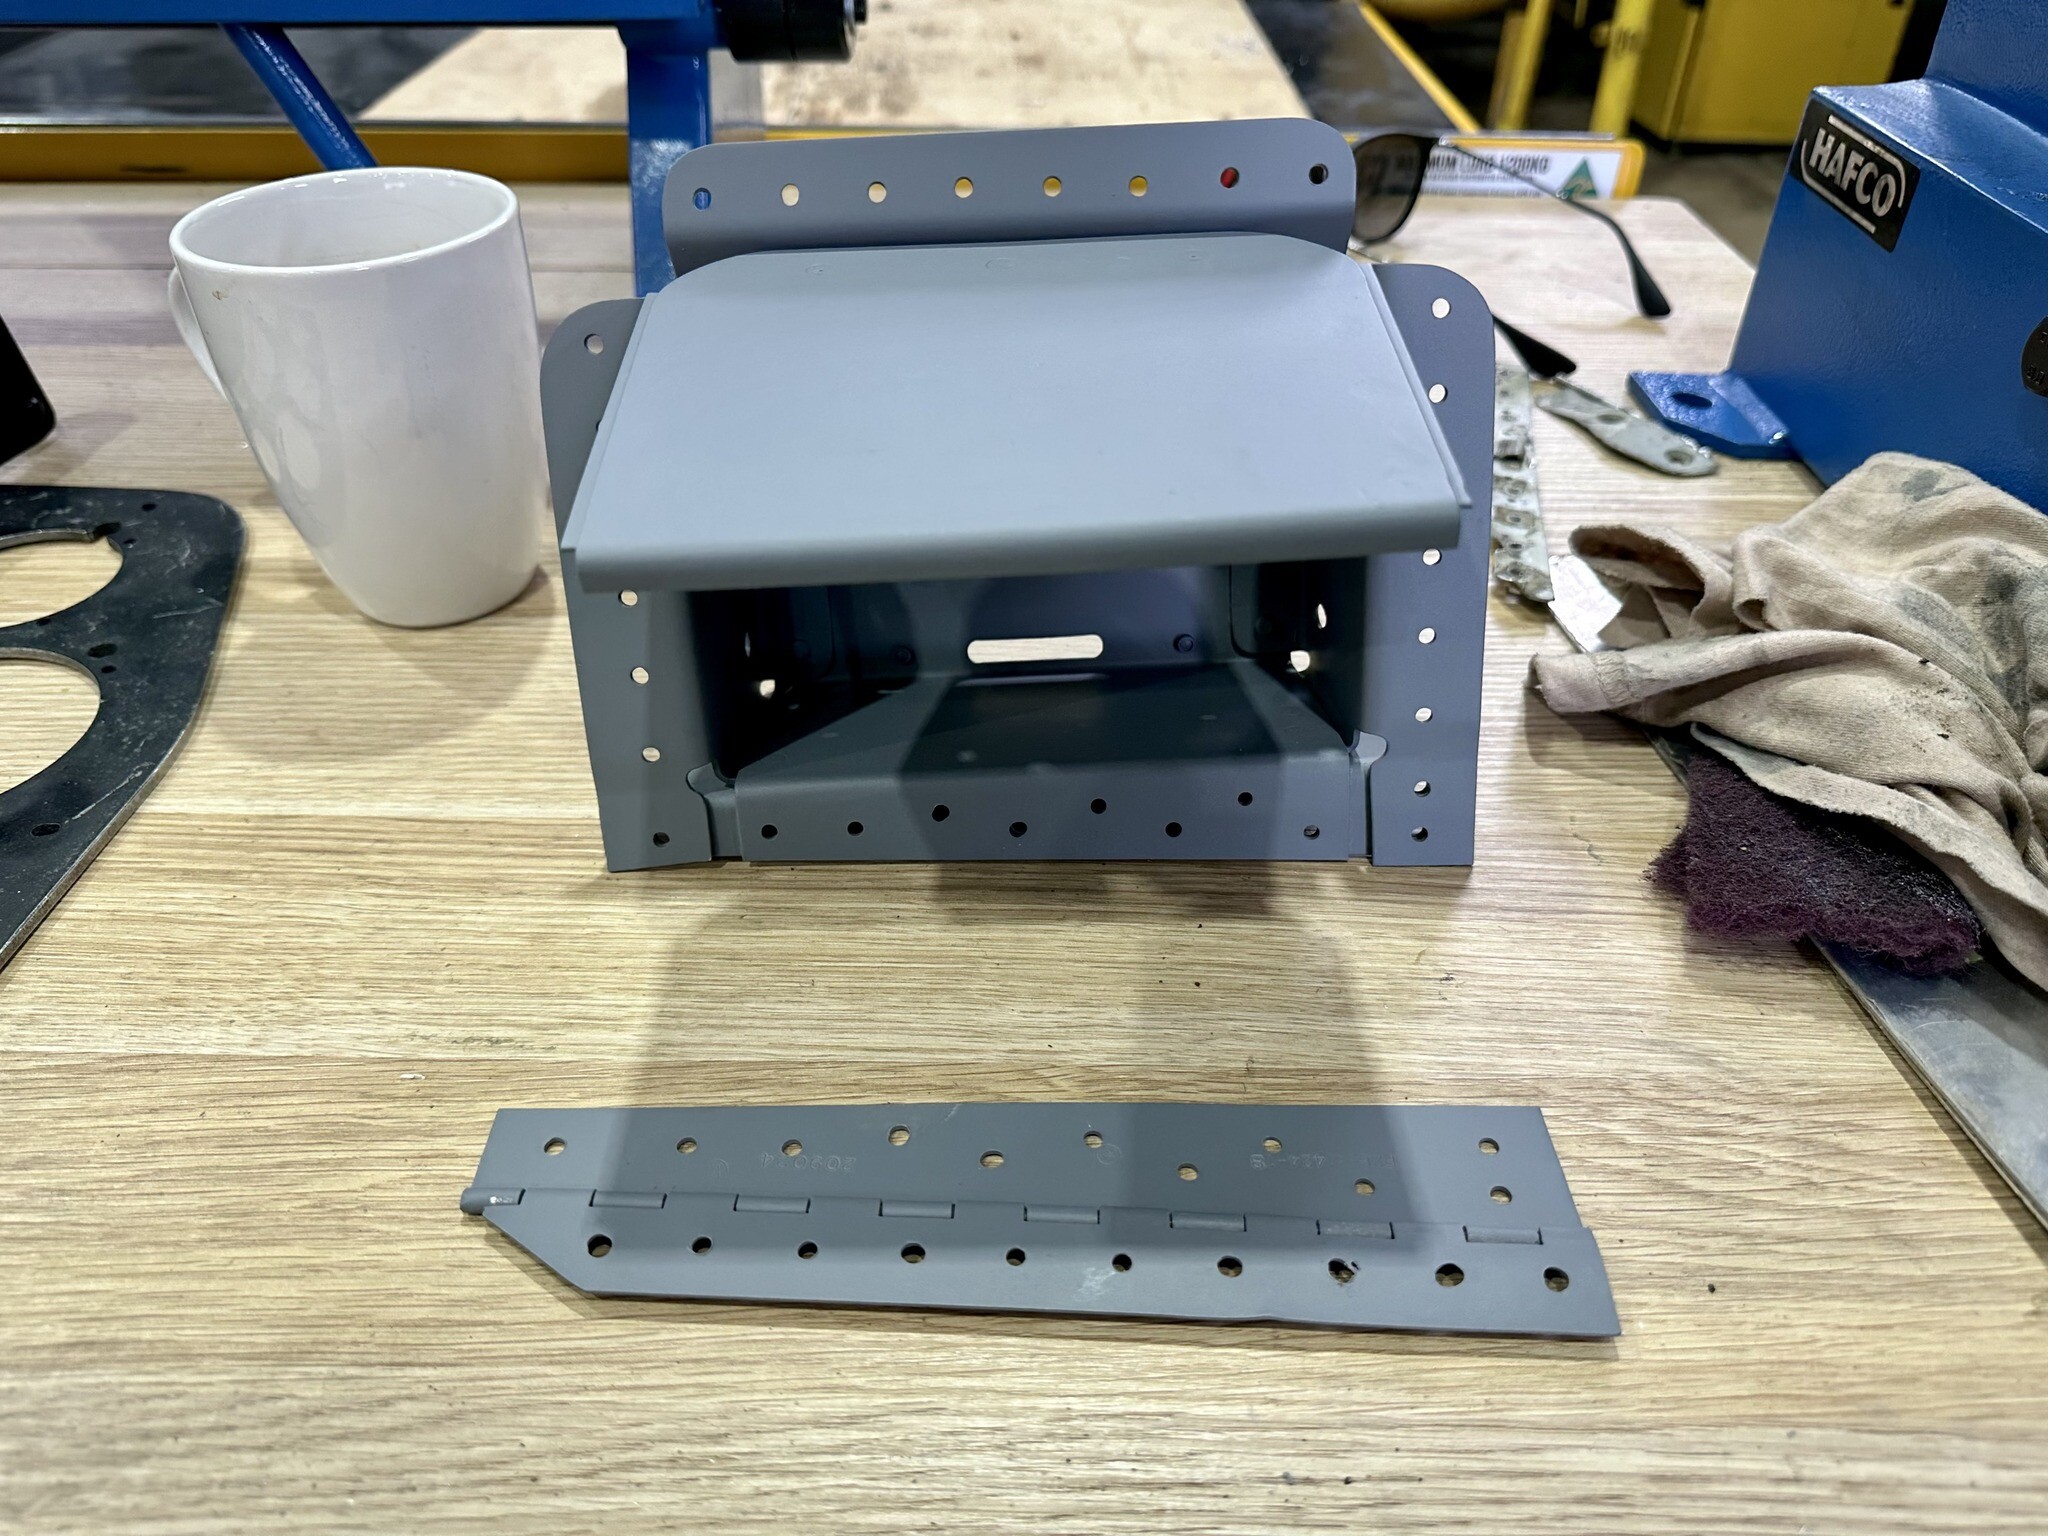
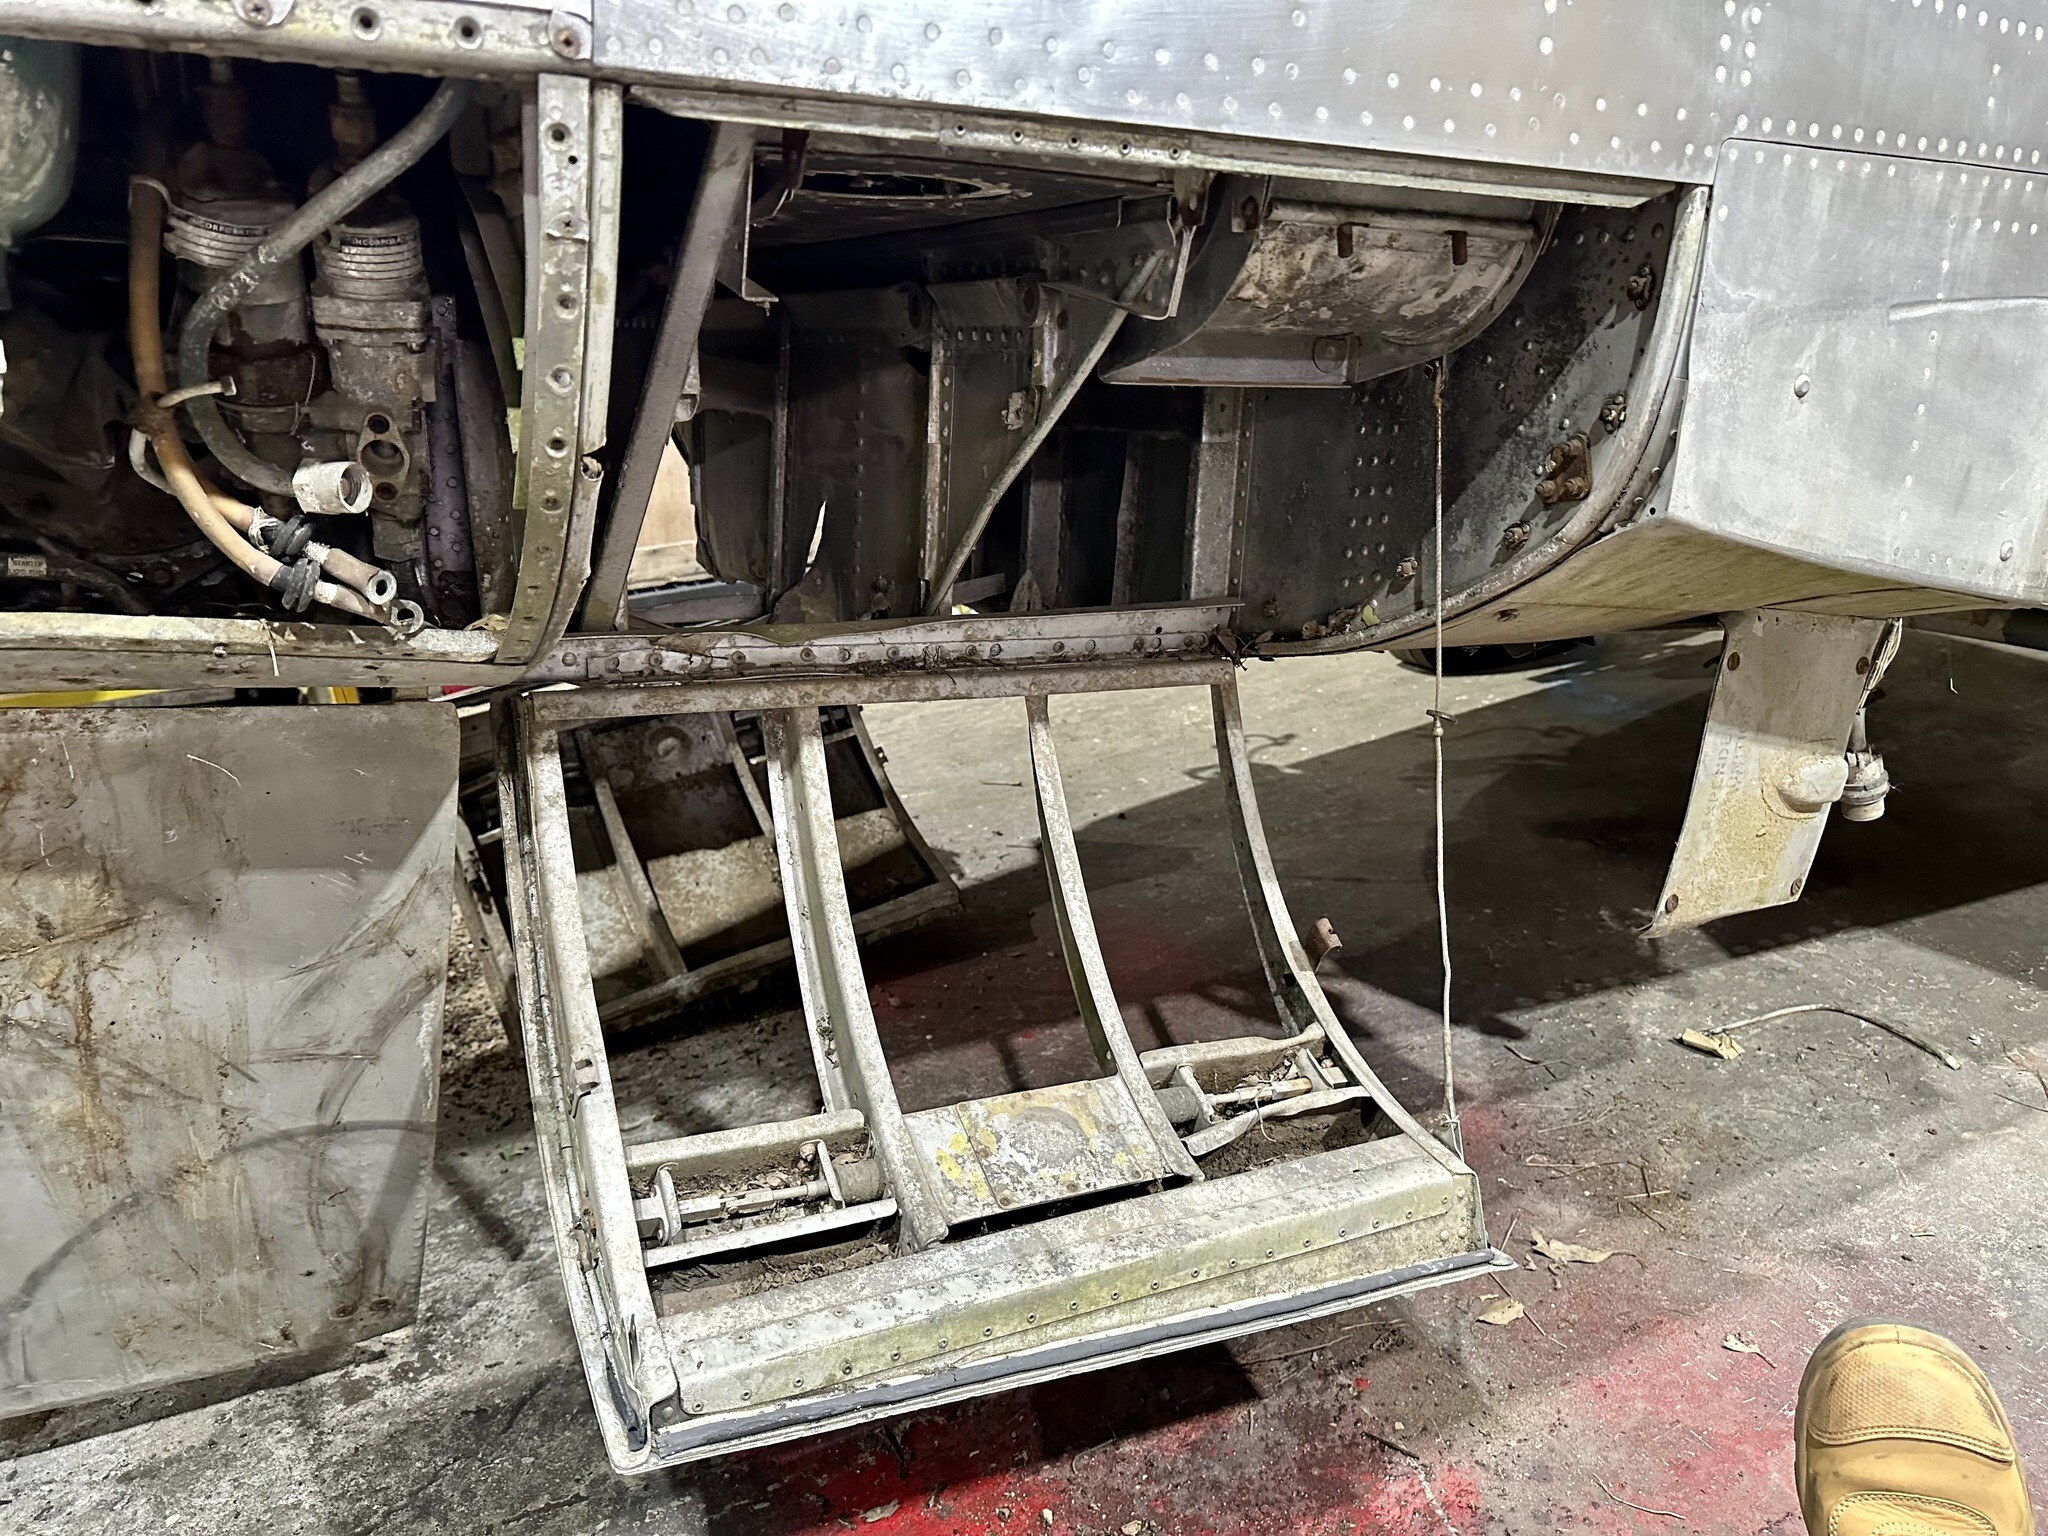
The team managed to get a little more work done today on the cockpit access steps. Using the badly corroded right hand unit as a template, we have now cut two new step skins and have trimmed them to fit the fuselage perfectly! The right hand step box was given a liberal rub down with purple scotch pads, then primed. This coming week, we will use the right hand step box as a template and fabricate one for the left hand side. Whilst paint is drying, we continued on with cleaning out fuselage compartments and their access doors, then with the surface corrosion removed, giving everything a coat of grey primer. The compartments will be given a coat of CAC silver paint at a future date.
-
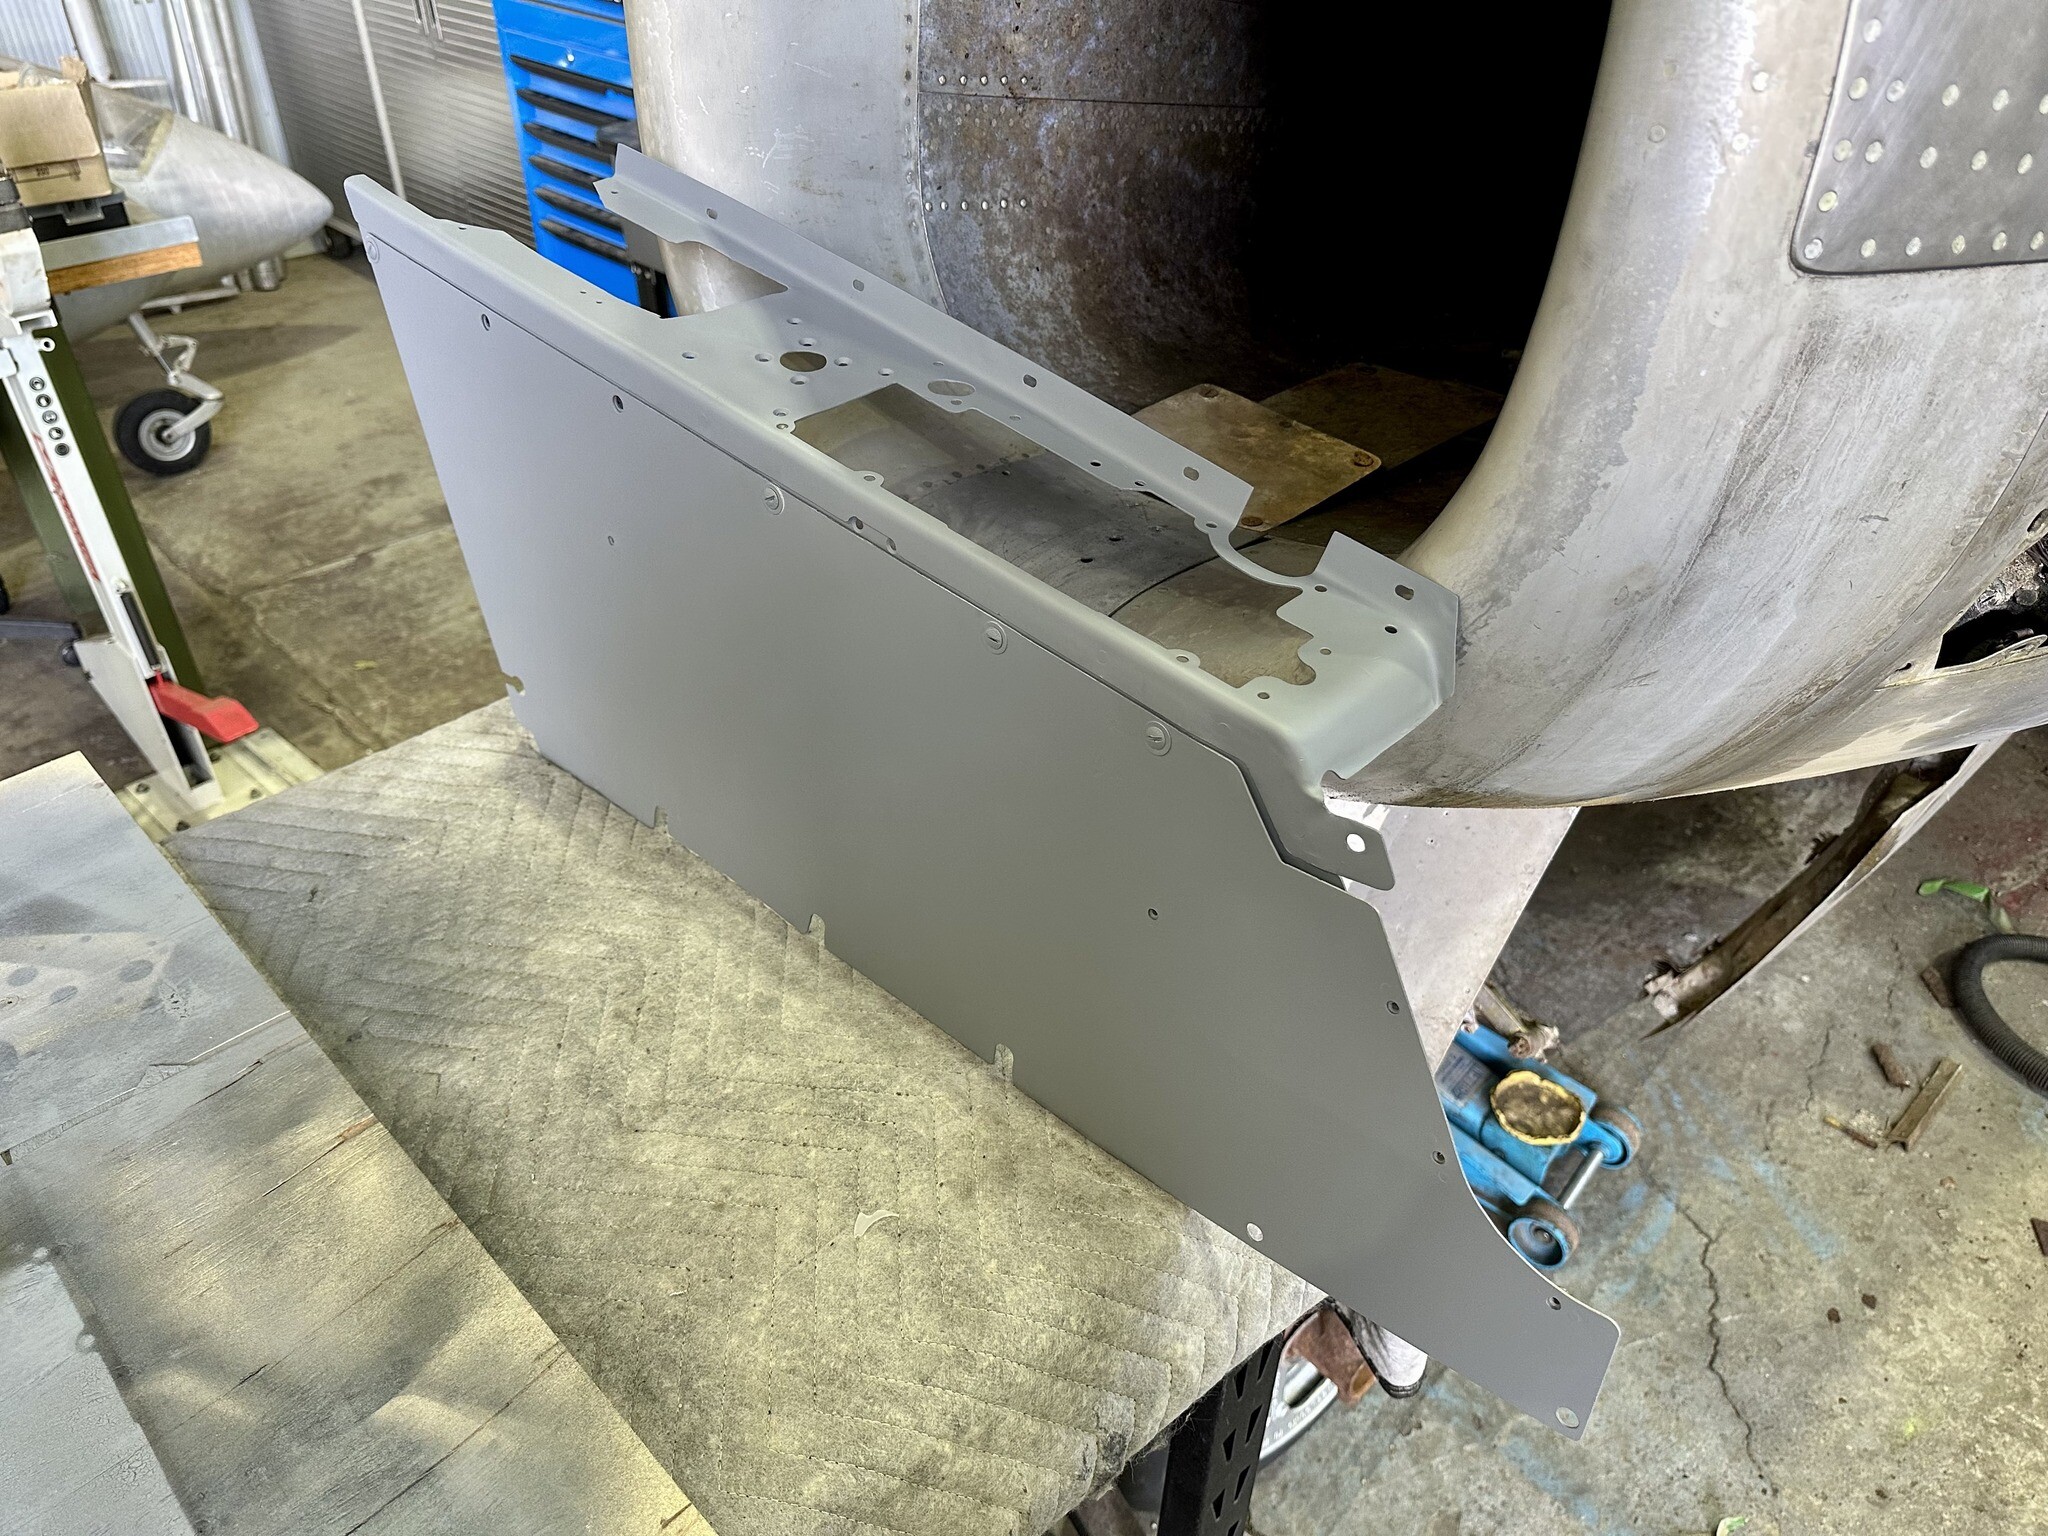
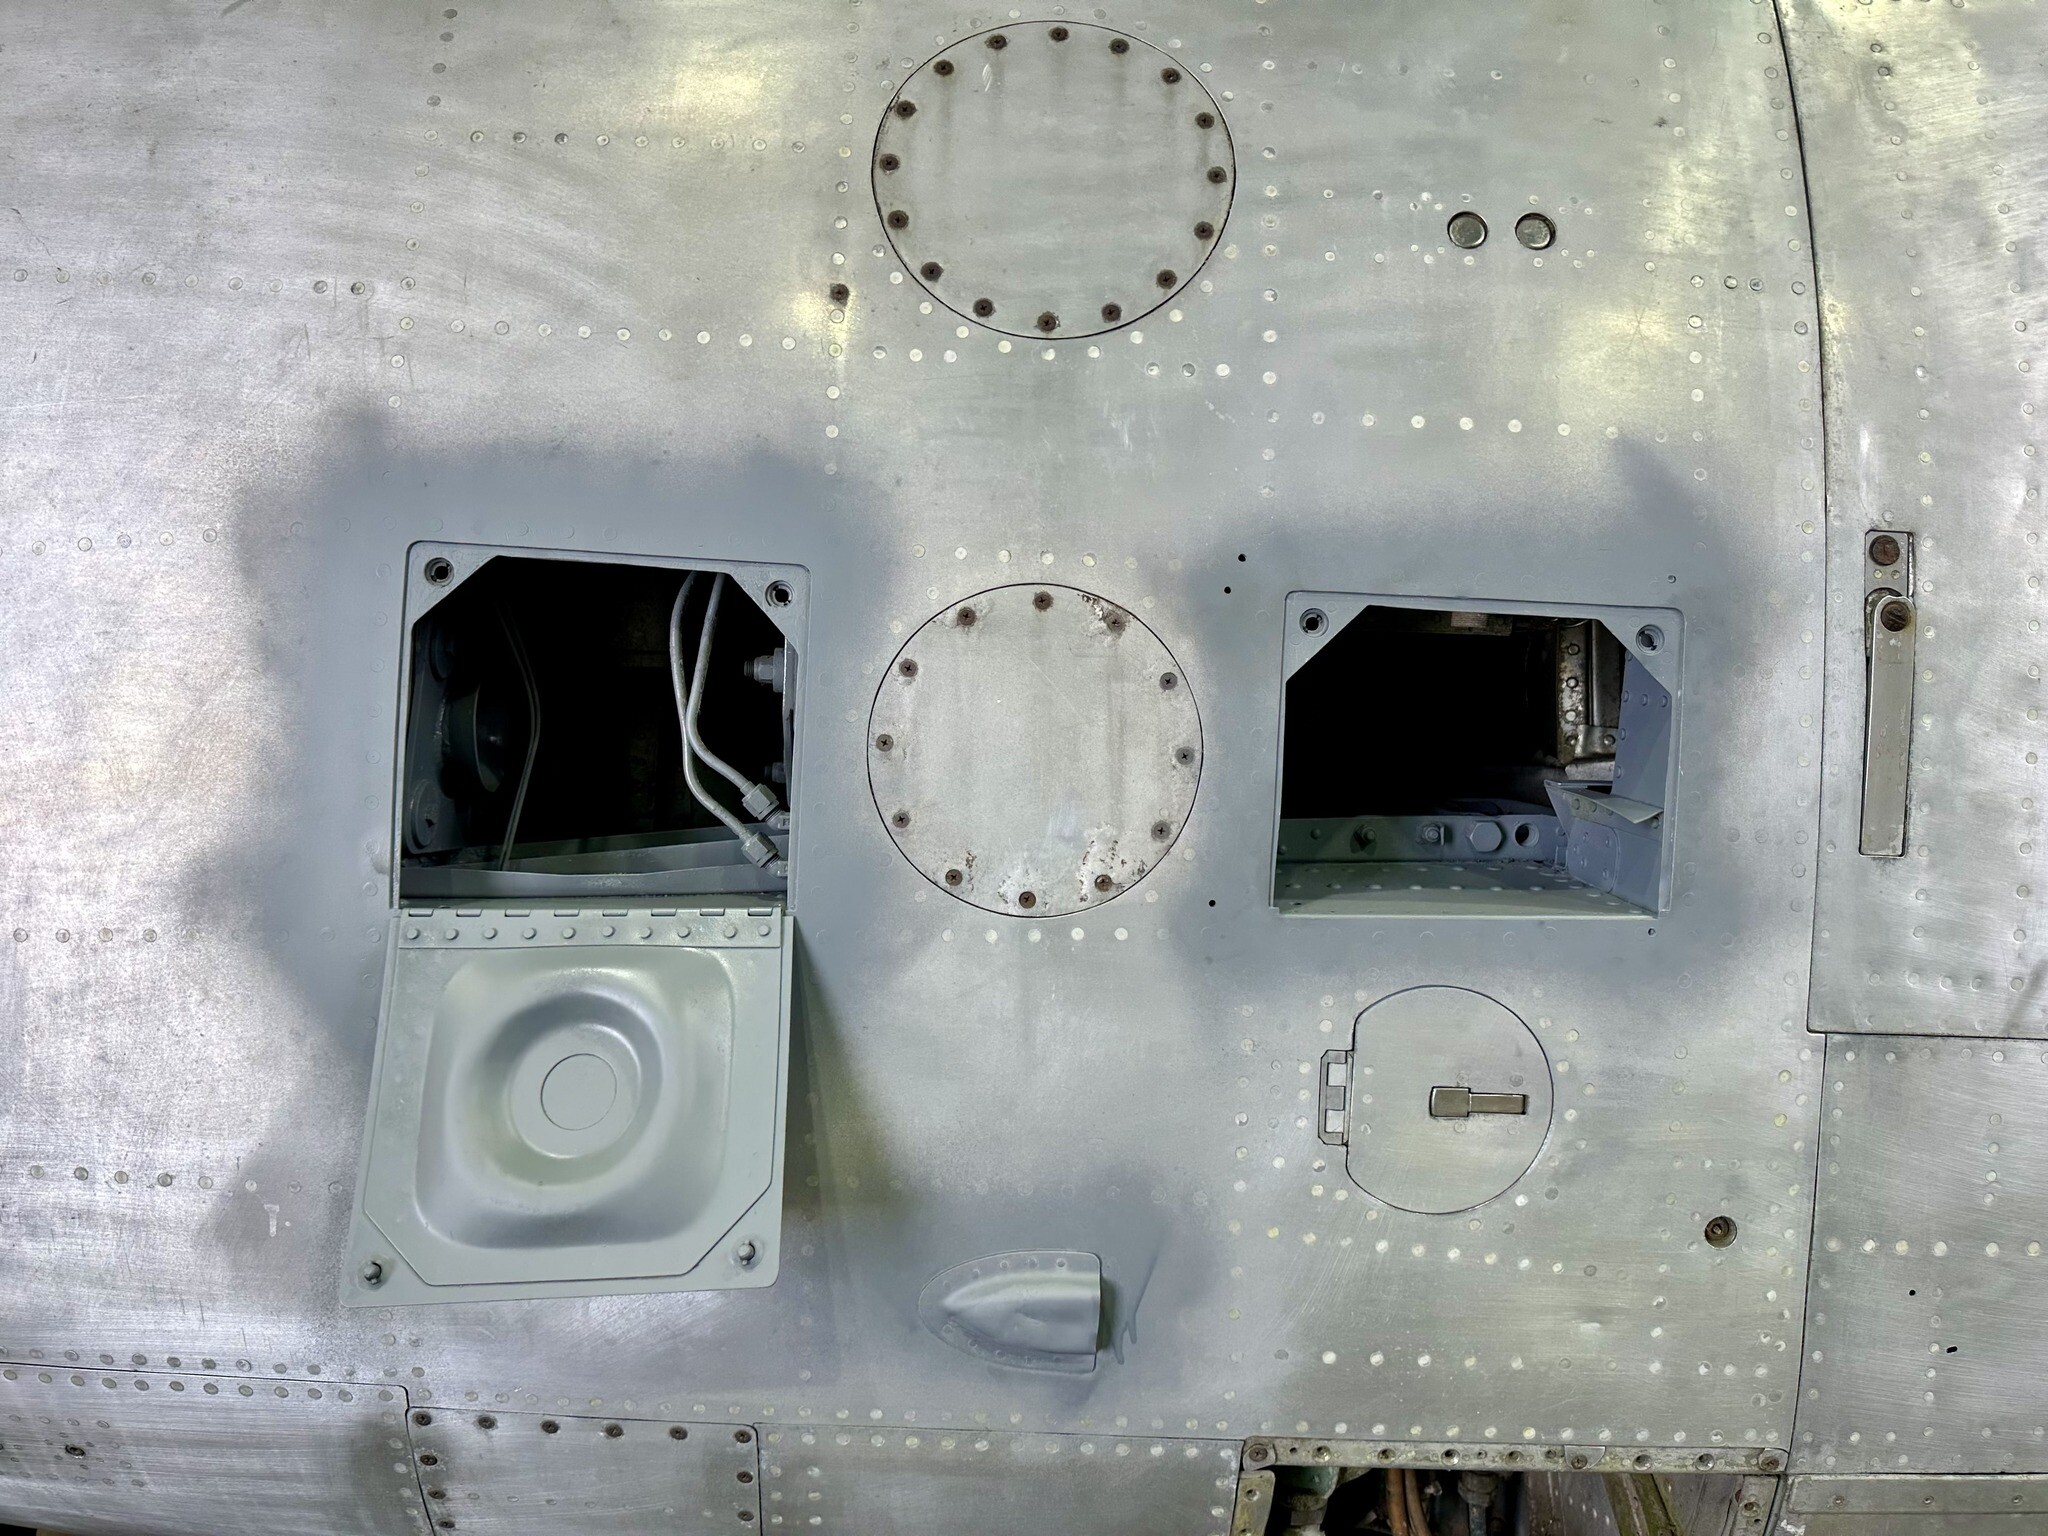
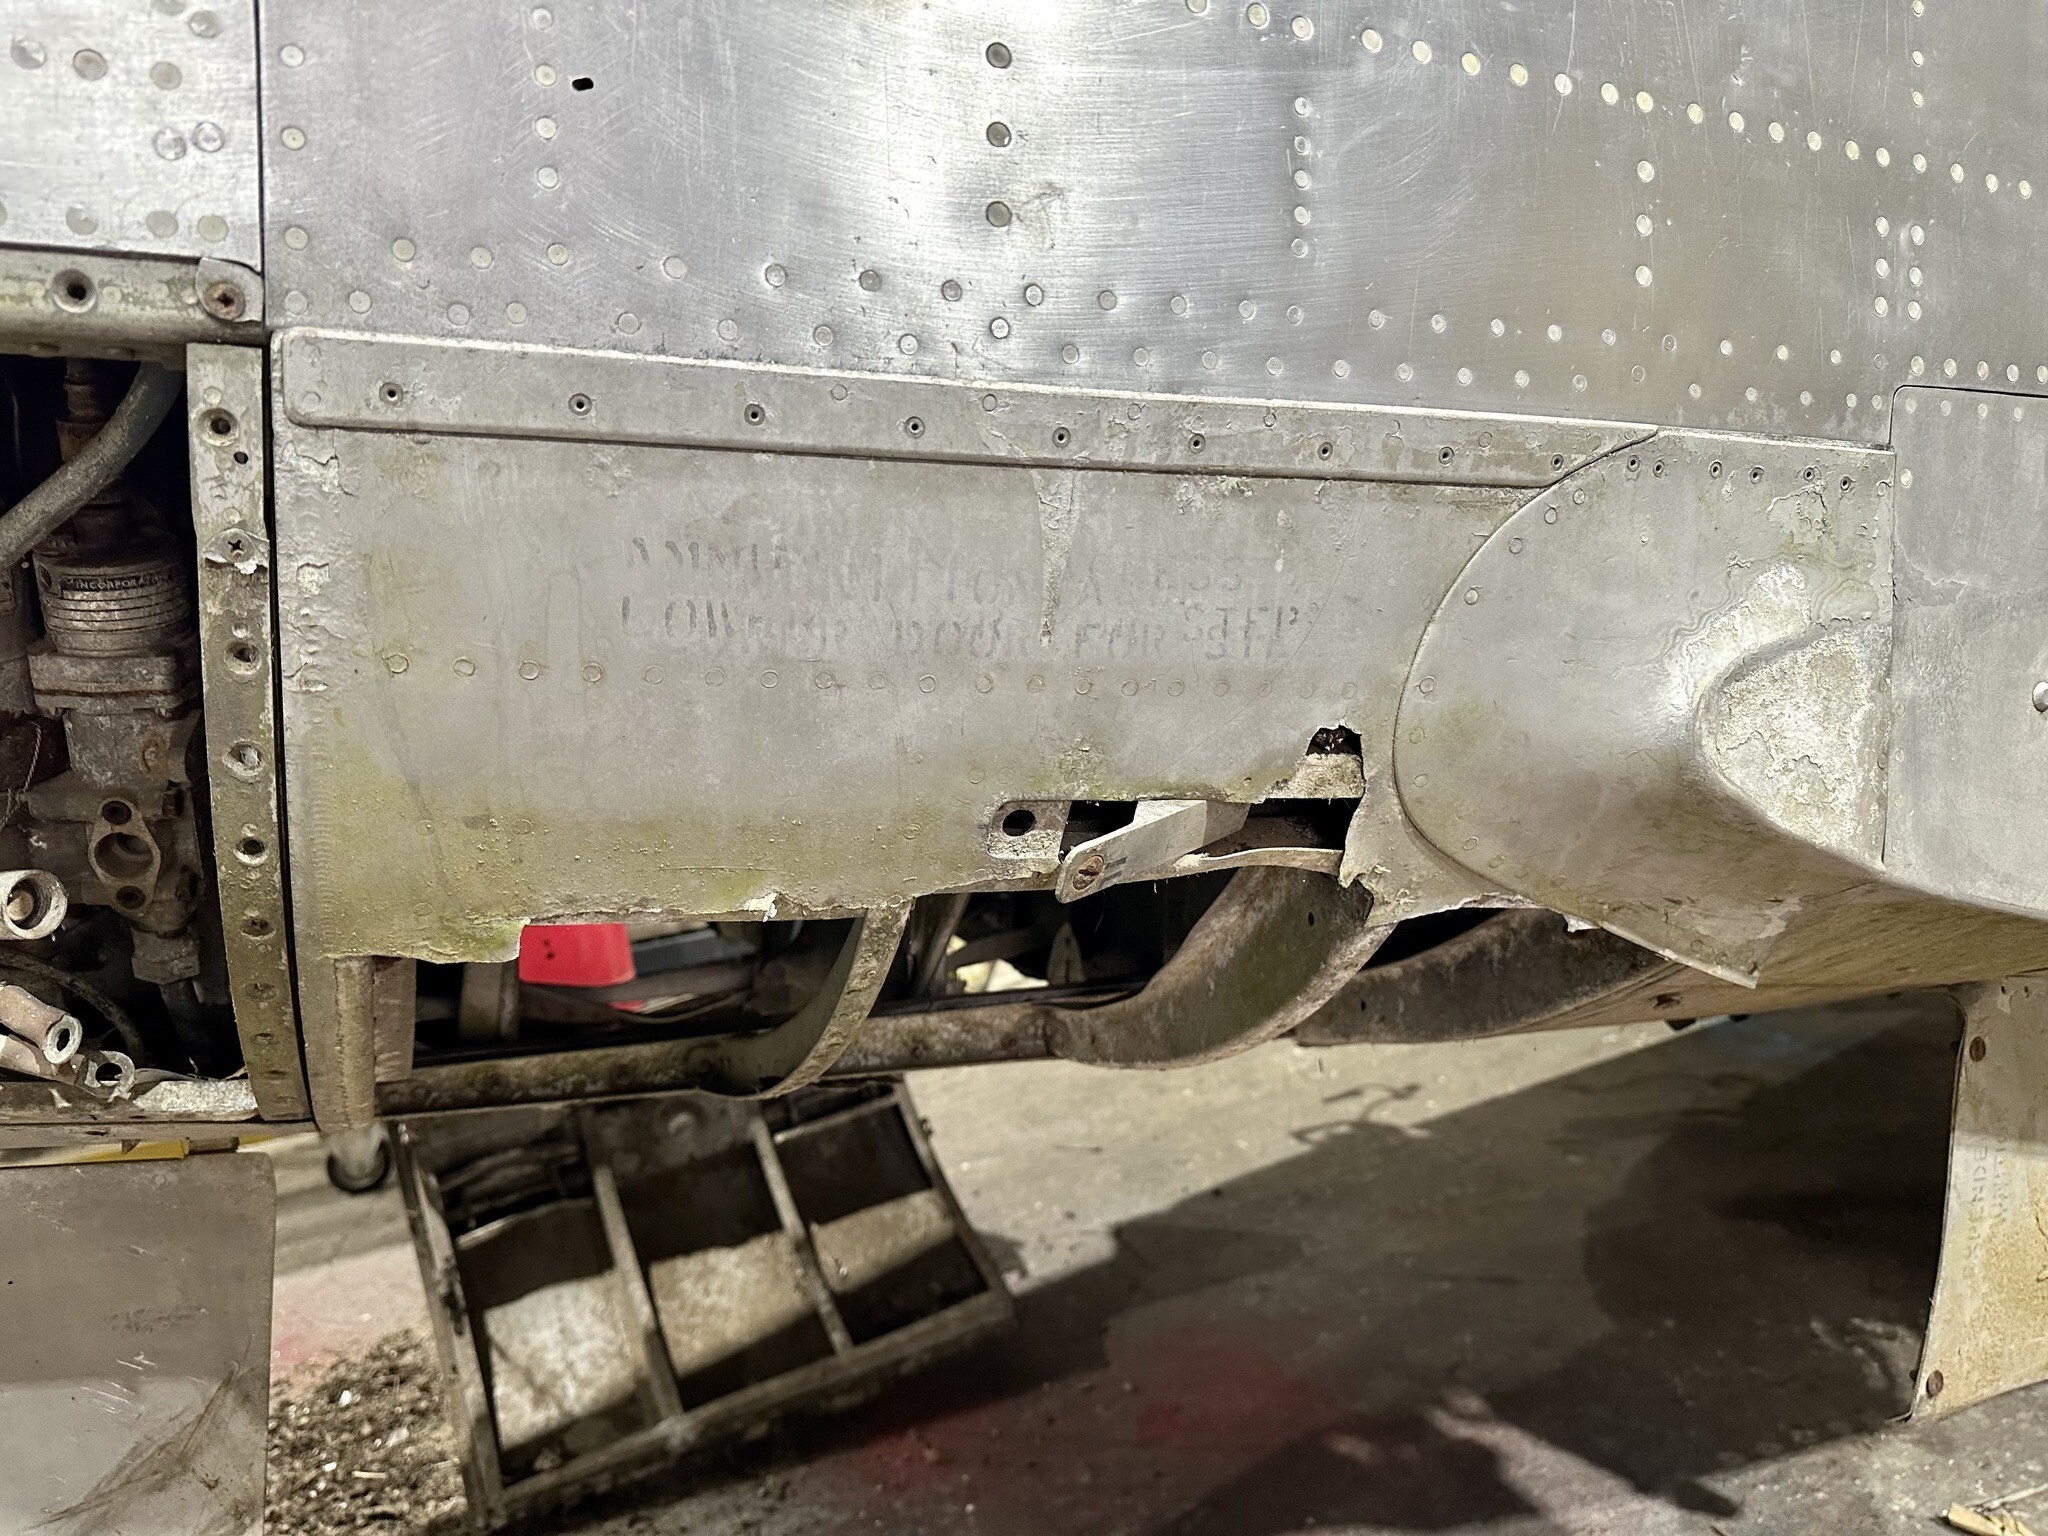
And... another big job that we have started is the re-skinning of the bottom of the cockpit section and the repair of the nose-wheel retract compartment. These areas will require general disassembly to open things up, so that we can clean out the airframe components and perform the re-skinning. The previous owner, who recovered the aircraft from the RAAF base in Sydney's west, informed us that the airframe finished it's service life as an ordinance airframe and had it's ammunition bays blown open with small charges. In fact, there are a range of areas on the airframe that have been blown apart!
-
We have started cleaning up the left hand cockpit console, with the frame receiving an evening of panel beating to get it back into shape! Unfortunately, it was not the best example going, however a couple of hours beating has got it looking good again! Next step is to media blast the console, following which it will be primed, painted and given several good coats of protective clear coat.
-
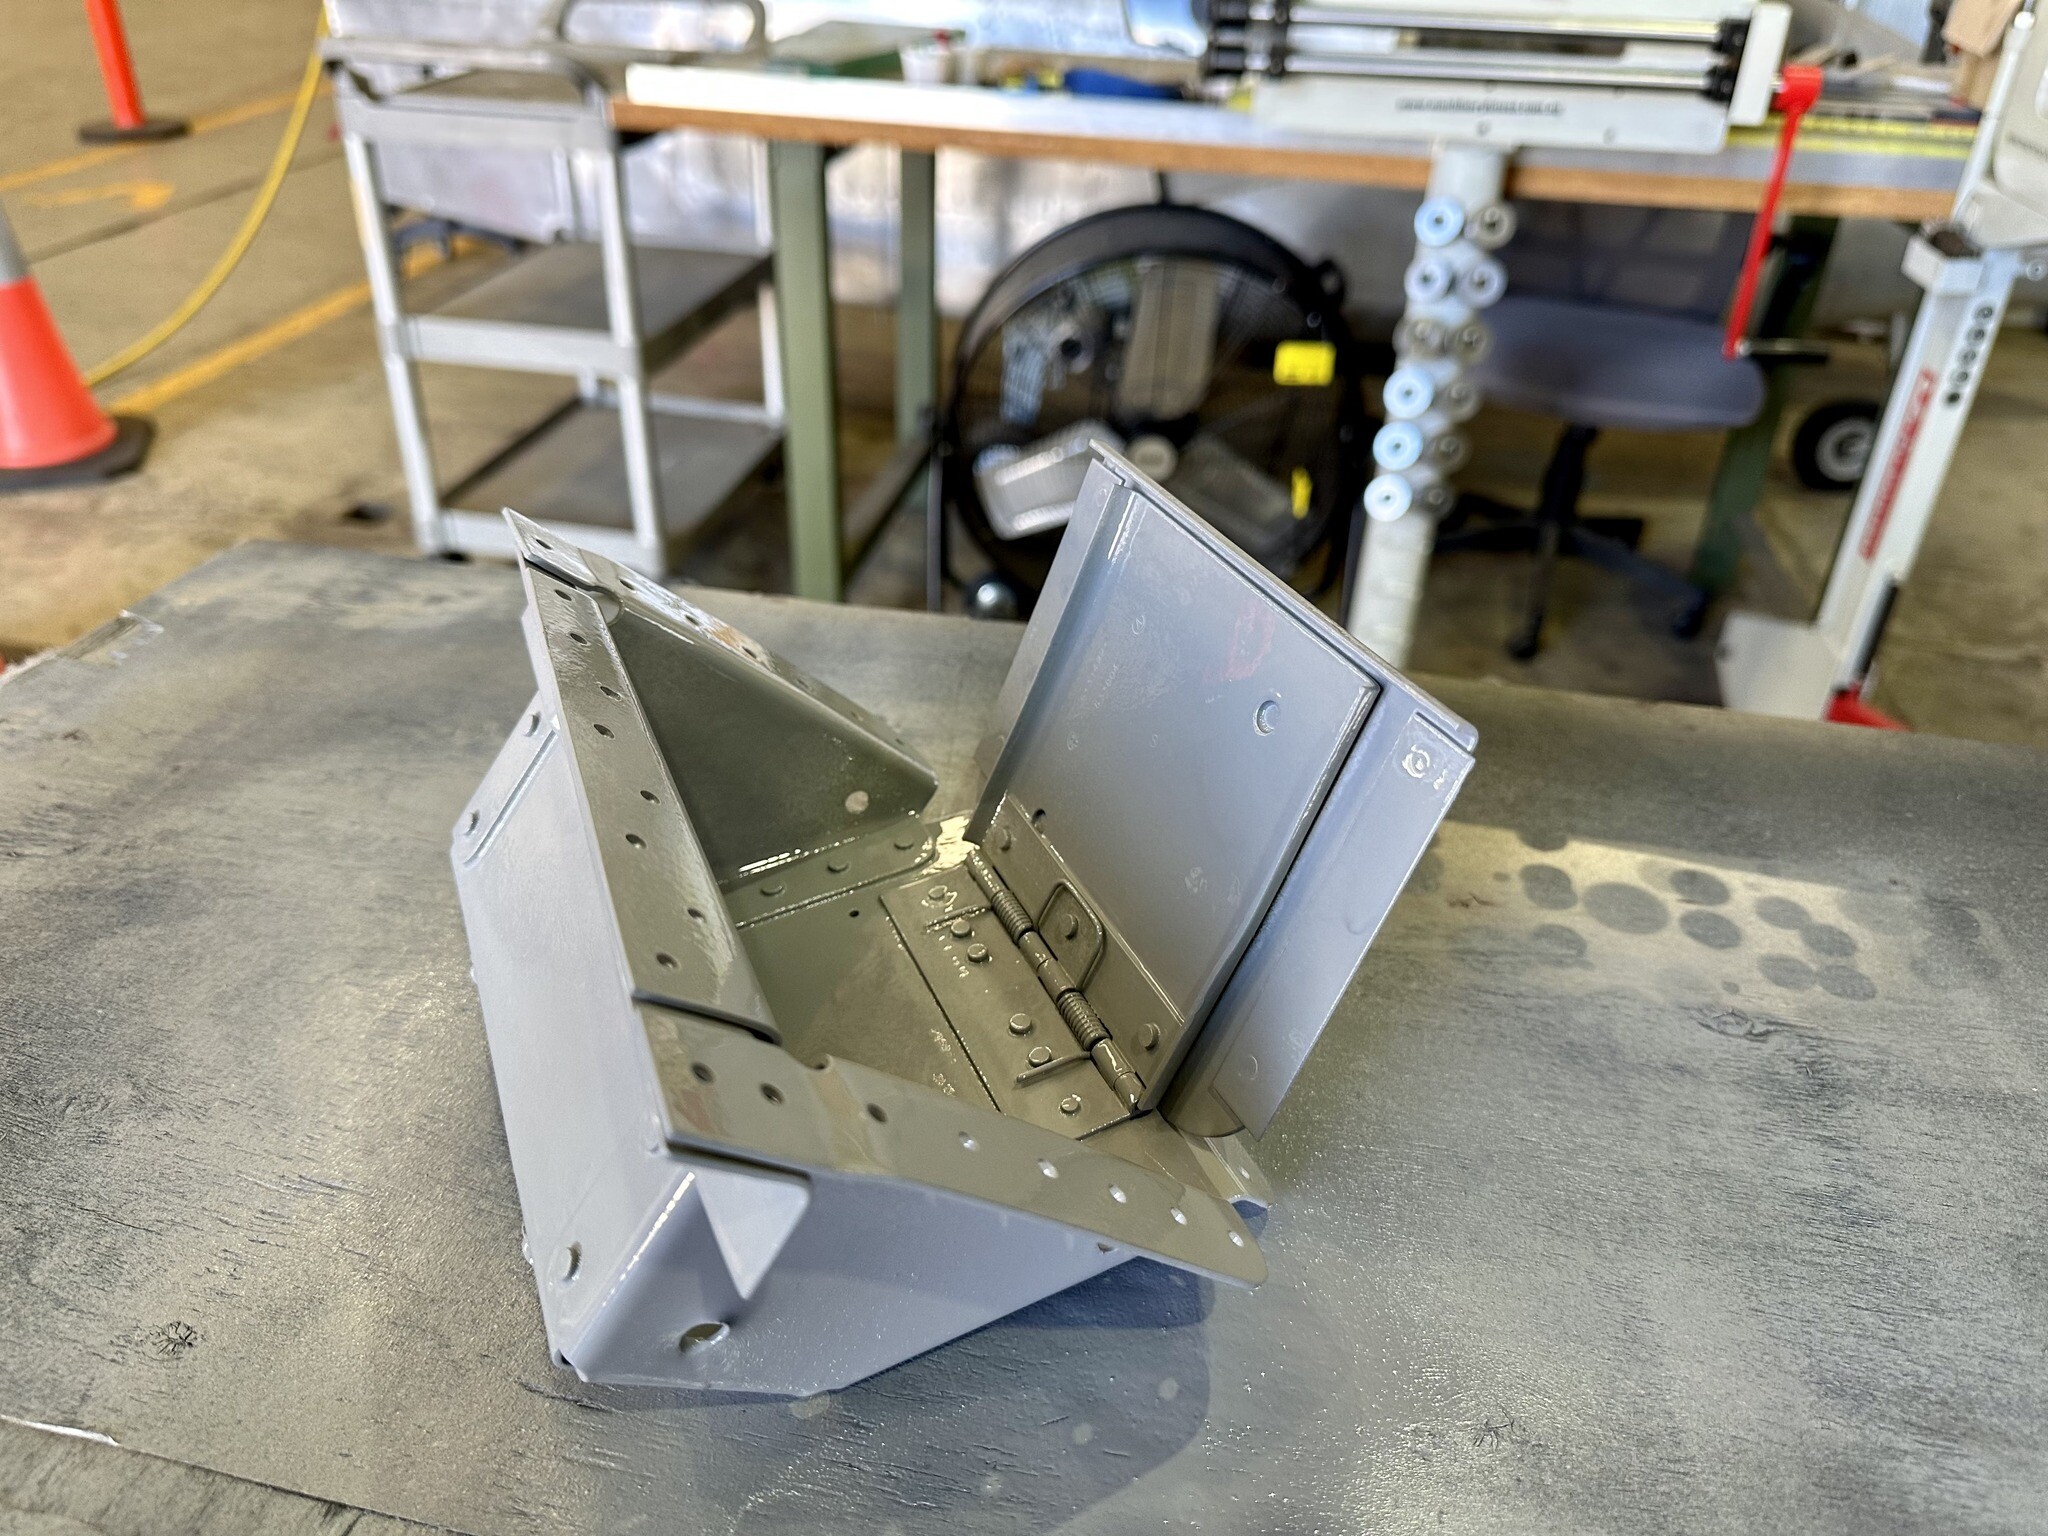
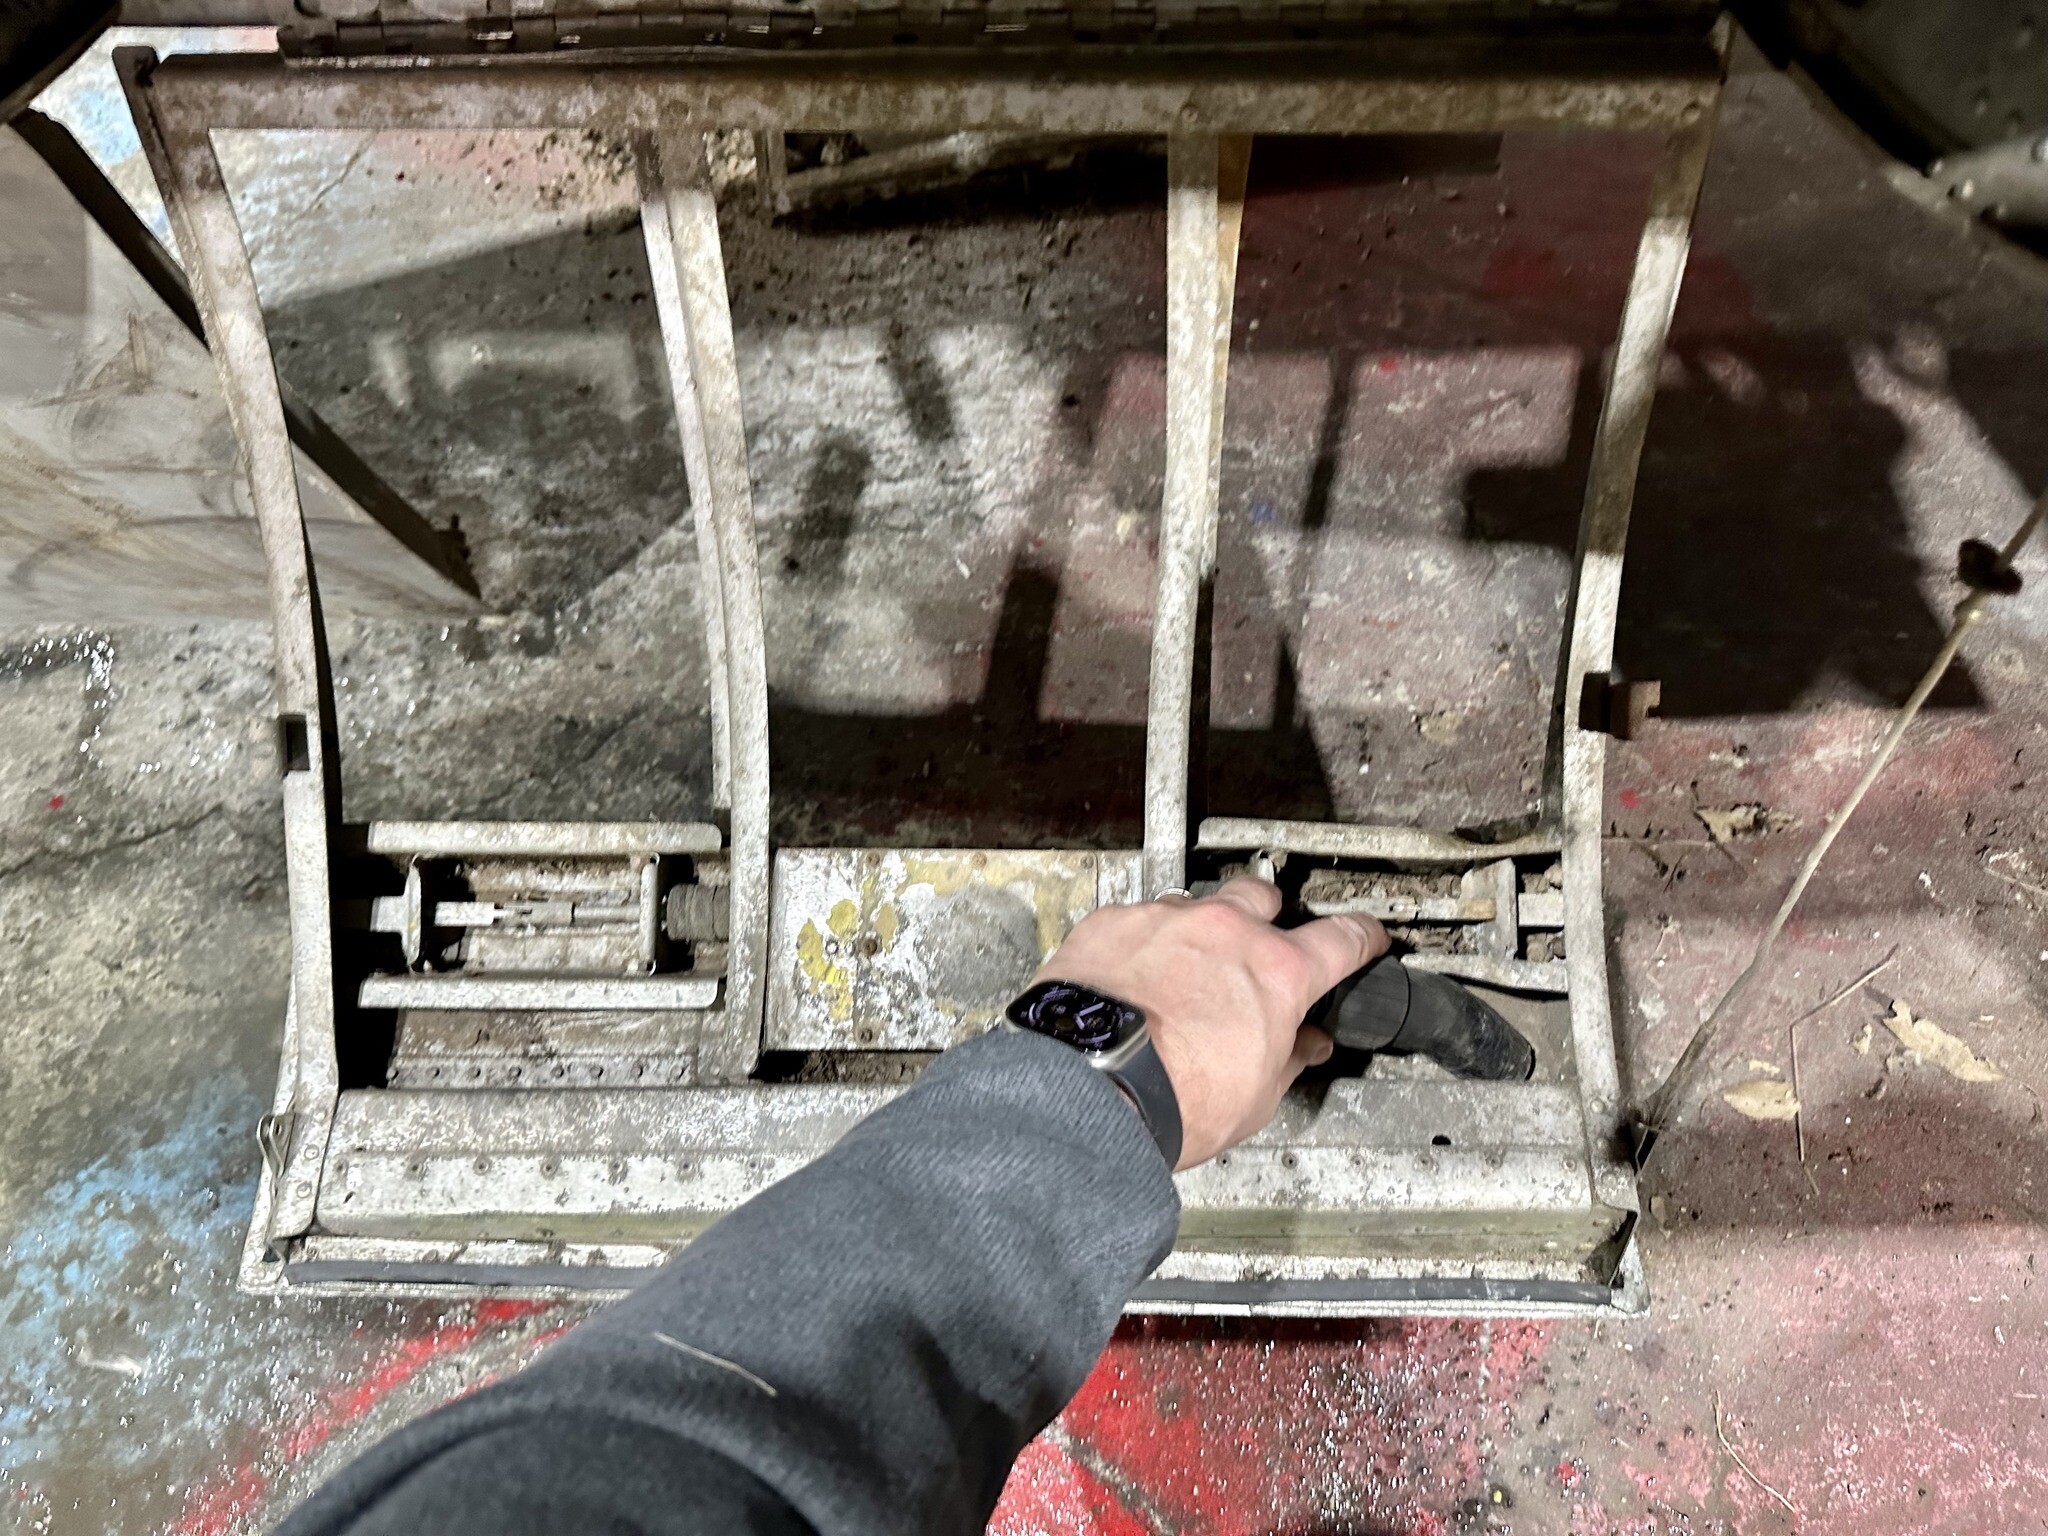
This evening we decided to tackle the left hand side cockpit access foot-well, because we need them working on both sides of the cockpit for ingress and egress. Whilst the right hand foot-well was complete and installed, the left hand side was removed at some point over the last 50 years and was missing when we acquired the aircraft. The right hand side foot-well is badly corroded and in need of repair, so it was removed tonight. And, because the left and right hand sides are mirror copies, we will use the one we have as a template to build another. The above photo shows the right hand side foot-well fascia reversed and sitting in the left hand side mounting. Both the left and right hand sides will receive new fascia skins. The above photo showing the inter-granular corrosion that has been eating away at the foot-well fascia skin. The above photo showing the left hand foot-well cleaned out and given a quick flash of primer paint. This compartment will receive a quick coat of CAC Sabre silver at a later stage.
-
A couple of quick 3D scans and videos of the production spare front windscreen assembly that we acquired two years ago.
-
A short update today... managed to get into the workshop this evening to fabricate an inset-panel for the left hand console switch panel. I have not been able to locate an original over the past two years, leaving no choice but fabricate a replica from 32 thou. Because my milling machine has not yet arrived, I had to cut the slot in the panel using the drill press and some old-fashioned metal filing. Probably not as neat as simply machining the slot, but I got it done! Next step is to get the edges all smooth, give it a primer coat and finish with black and clear. I can then go ahead and paint the switch mounting base and clean up the perspex label overlay, which will finish this panel off.
-
These next four (4) photos are not entirely related to the Sim Pit build, but may be of interest to those following..... many thanks to Nathan from the MVP team who finished cutting up the Sabre wing panels this evening! The 240mm cut-off wheel on the grinder made short work of the wing structure, slicing through the alloy like it was butter. Both the left and right hand side outer wing panels have been salvaged to be repurposed as tables. The two outer panels will be stripped of plumbing and other unnecessary items, following they will be sent for media blasting and epoxy priming. Once we have them back, they will be wet sanded and given a high-gloss metallic silver paint, with RAAF roundels and structure stenciling. Once the paintwork is completed, they will be mounted to table legs and will both receive glass top panels. I'm betting they will be hot property when they're finished! I will post more on these as work is completed.
-
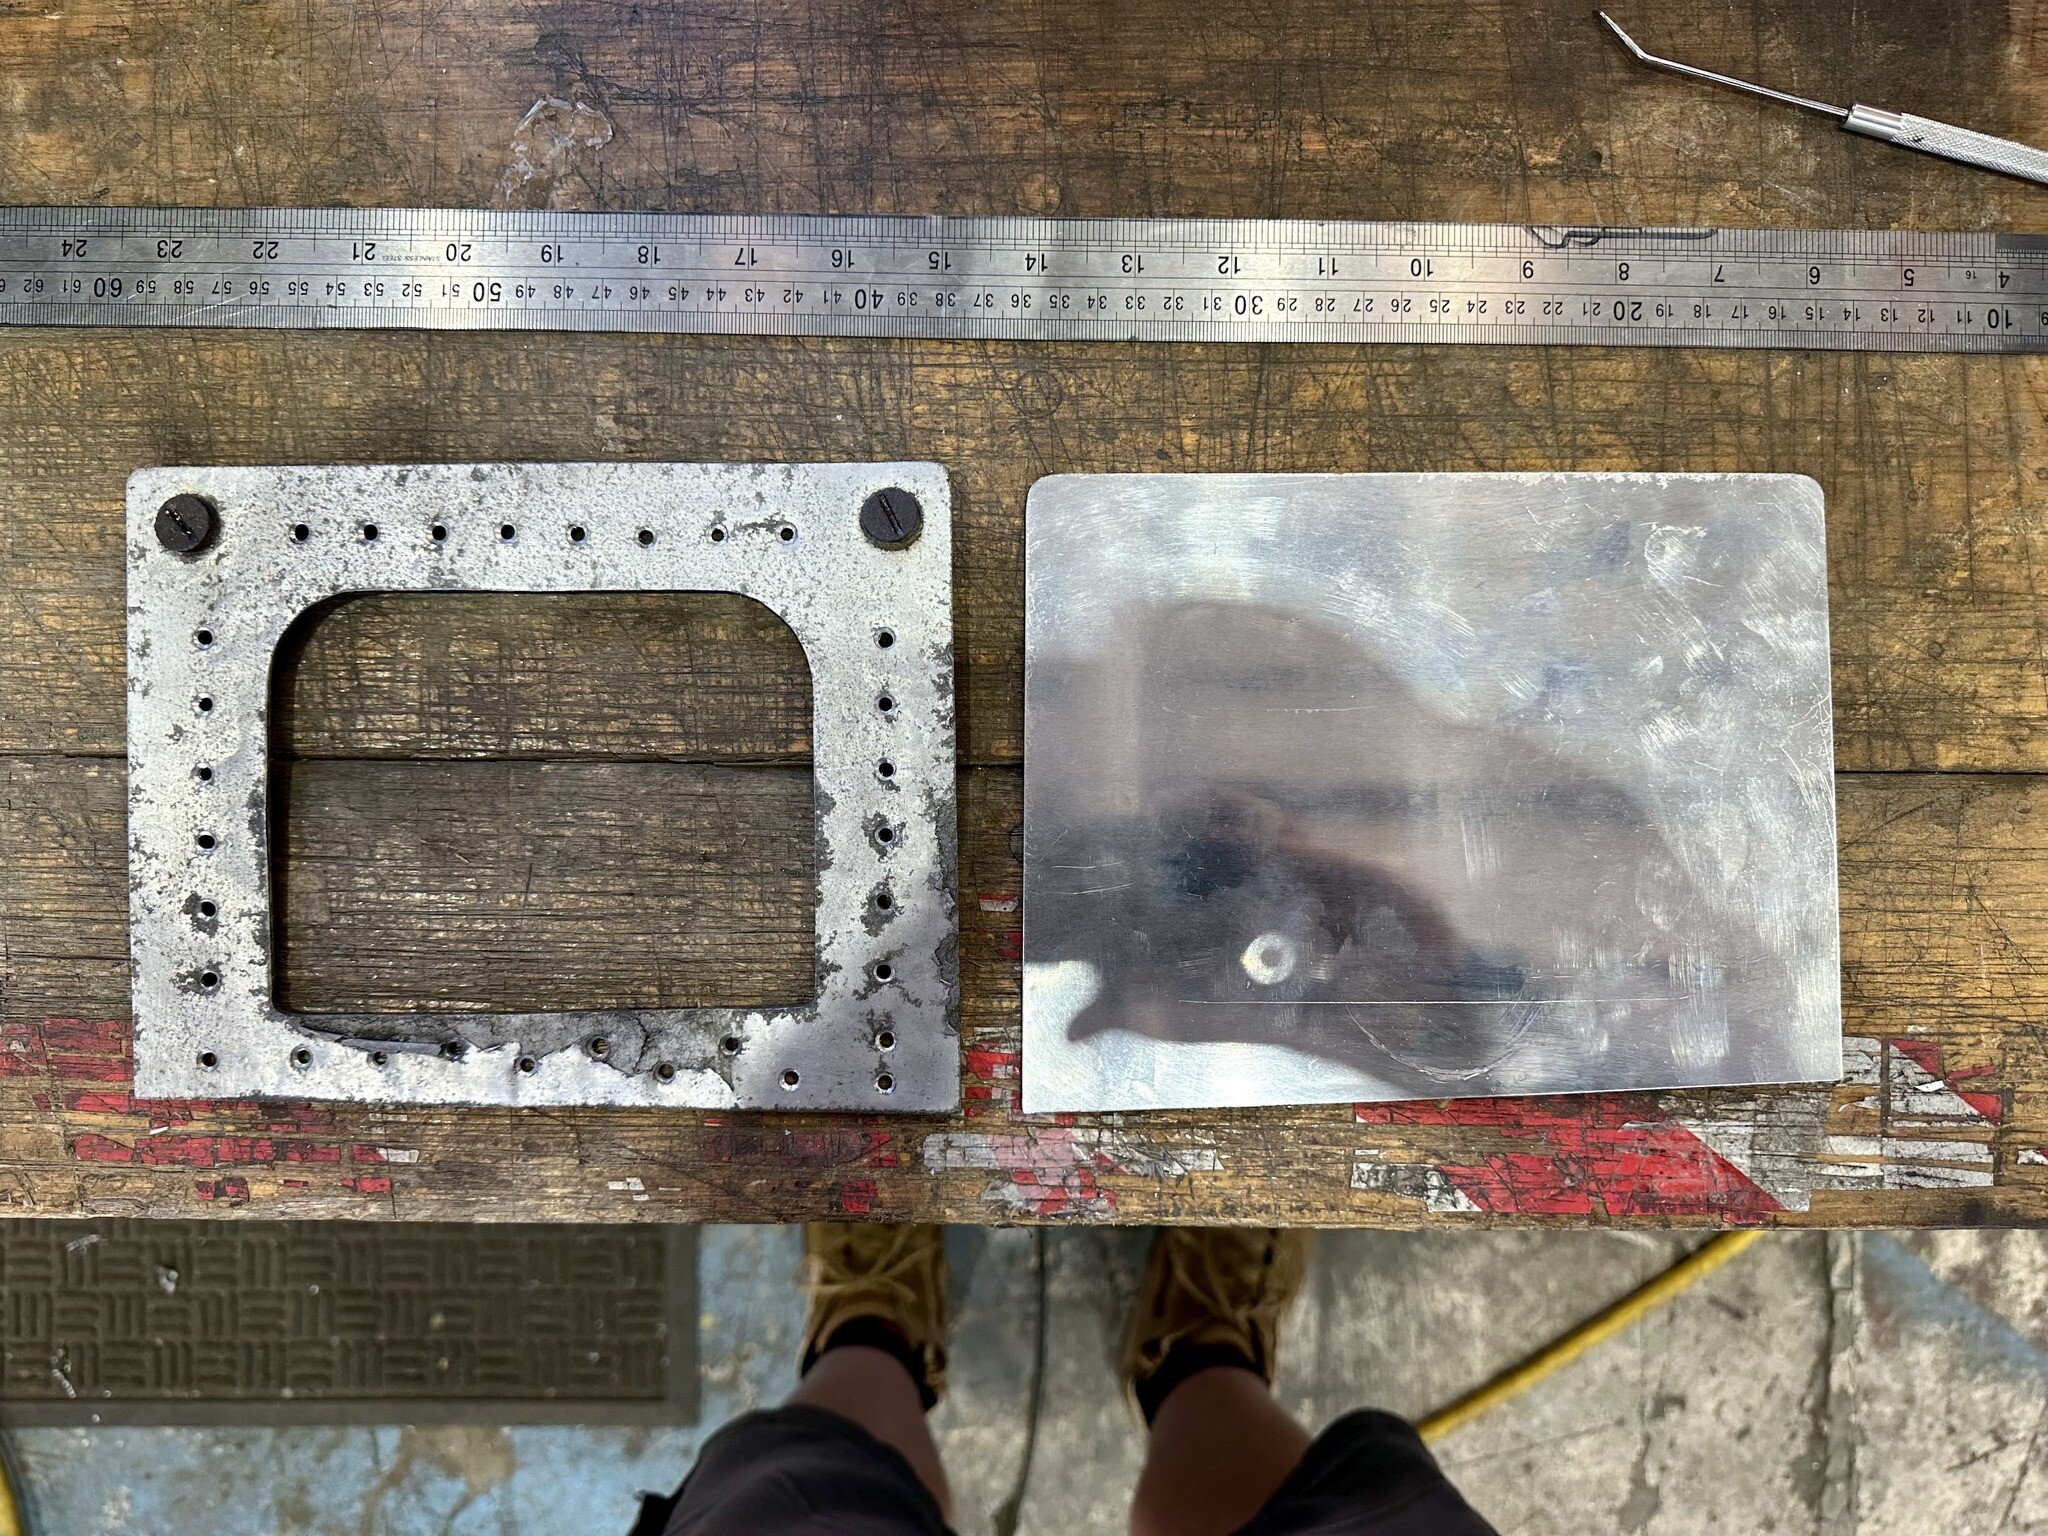
Managed to get a little more done to the left and right hand side forward cockpit panels. The outer surrounds have all been painted with the black base coat and are now awaiting their two finish clear coats. Whilst I am waiting to get that done, I have disassembled the switch panels, which comprises of a sandwich of materials. At the bottom is the aluminum mounting face to which everything attaches, then on top of that is a clear label layer which is made of clear perspex with white lettering, then on top of that is a thin plastic layer that blacks out everything bar the labels, then on top of all this is the final trim layer. Unfortunately, the upper plastic blackout layer is unusable and will need to be re-manufactured, if I am to keep the original panel lighting system. Another option may be to simply reproduce these switch panels using black painted white perspex that has the labels laser etched. This method would eliminate the multiple layers and would also incorporate LED lighting, instead of the historical incandescent system.
-
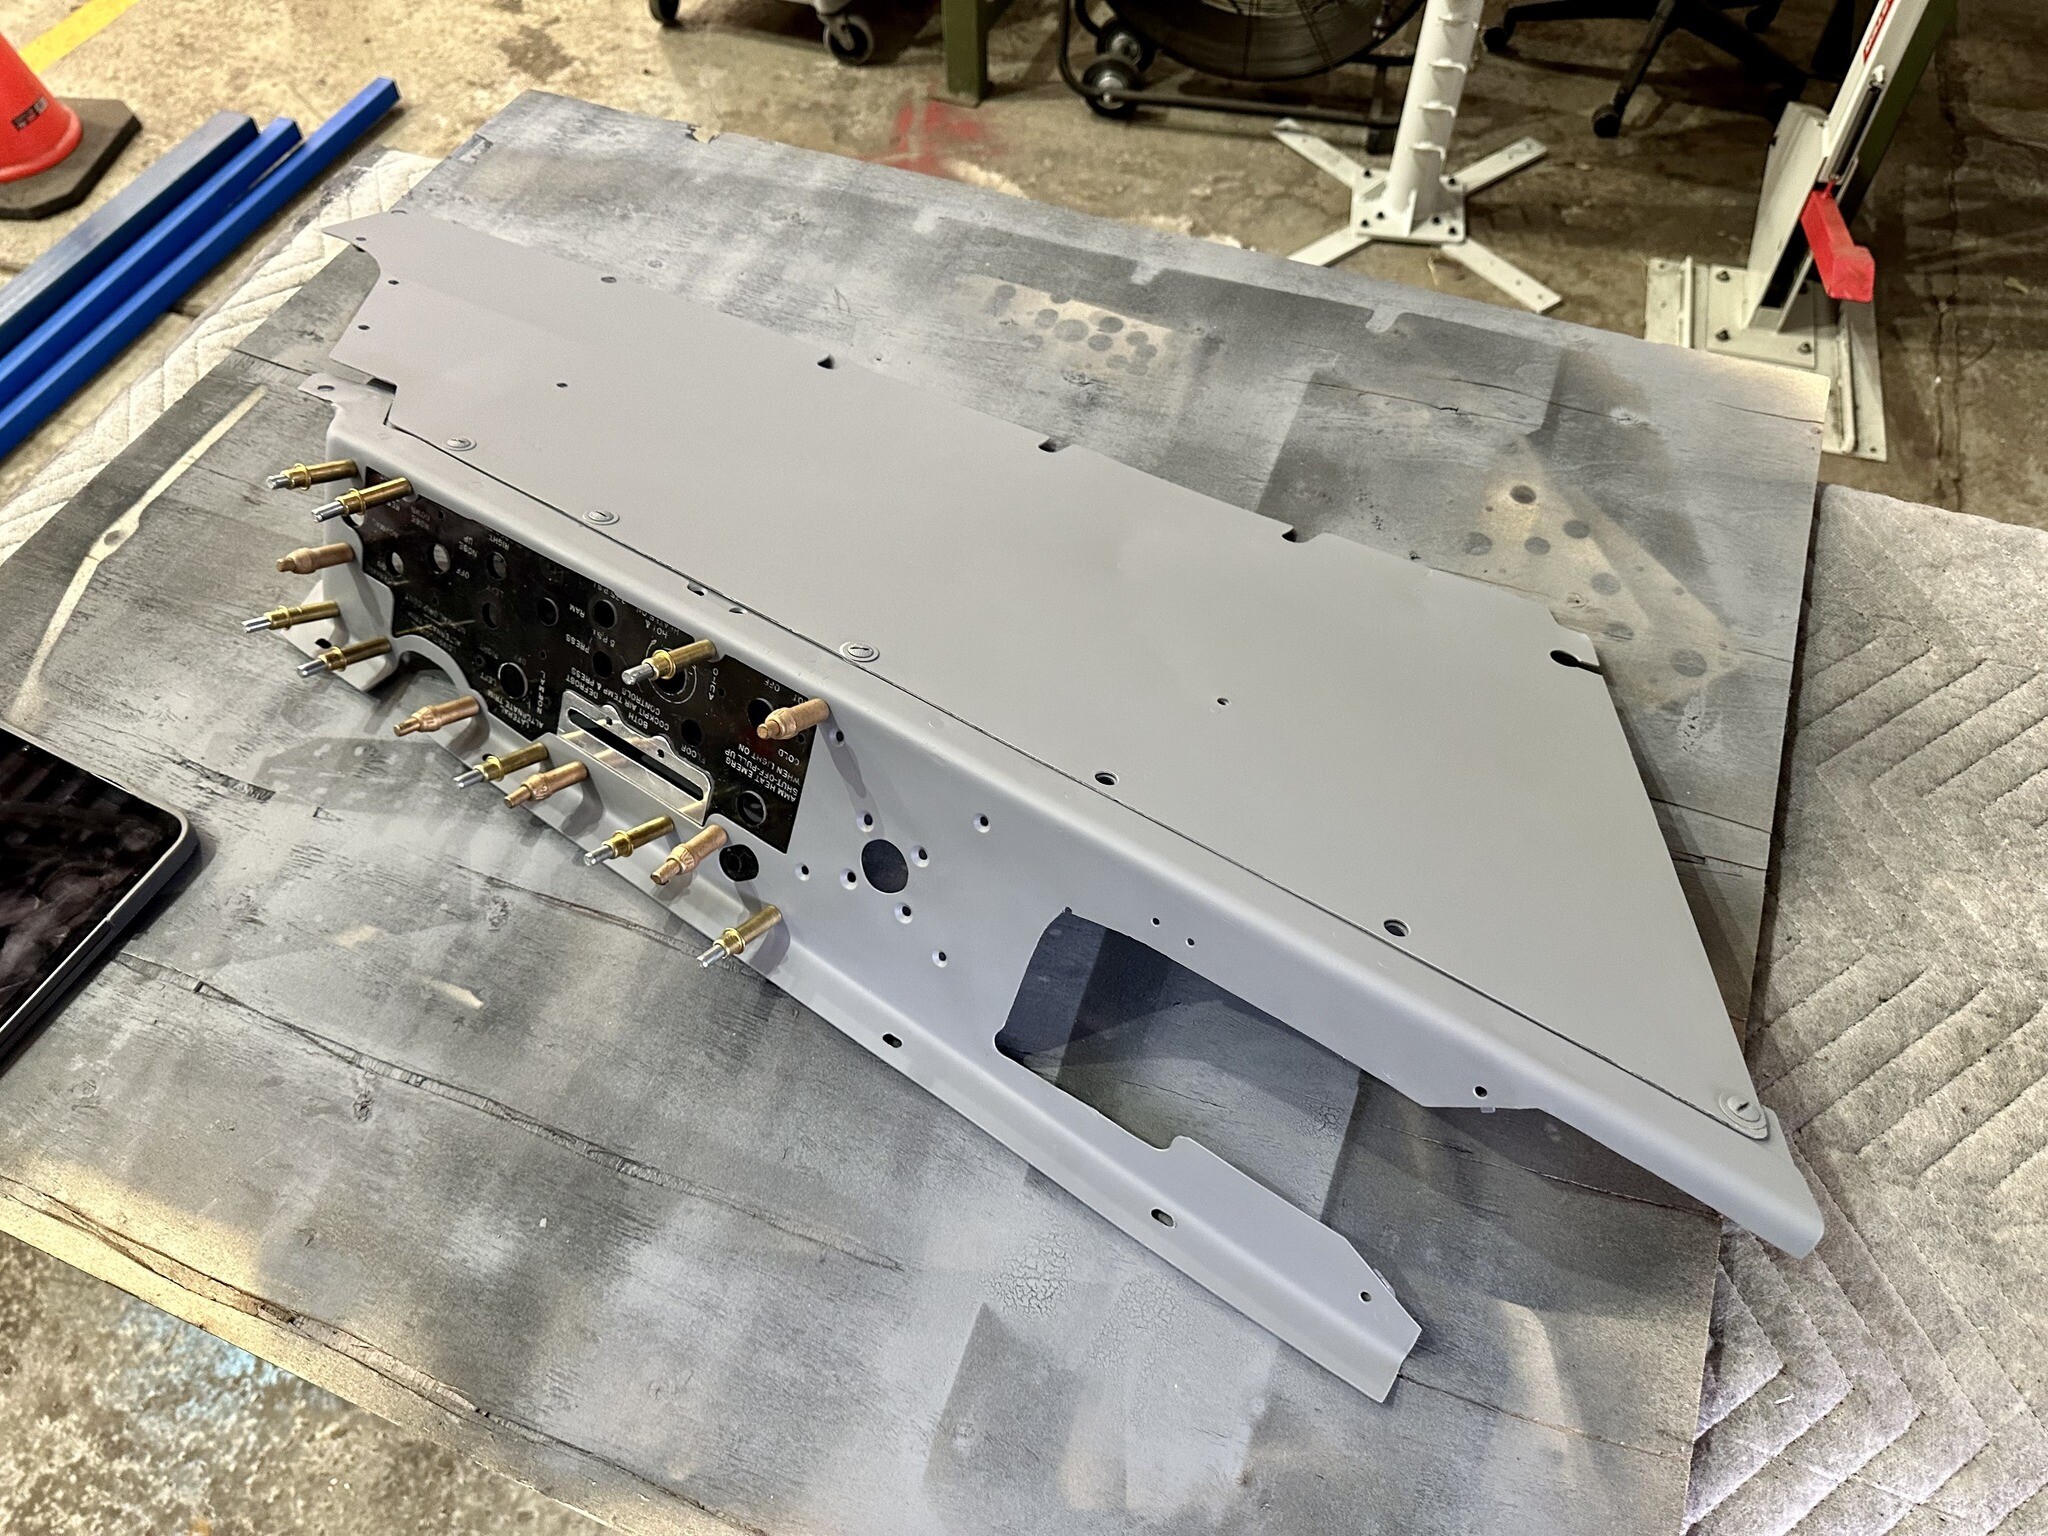
The MVP team managed to get some painting done this evening with the glare-shield and forward console panels for both left and right hand side painted matte black. The green paint you see is the aircraft zinc chromate primer. These panels will receive one further coat of matte black, and will then receive two coats of satin clear, which will protect them and make cleaning much easier than with the outright matte finish. Once the panels have been fully painted, the team will spend some time making up new panel inlays which have all of the switch and control labeling etc. The inlays are then covered with a 4mm clear perspex that is masked and painted black and given clear coats. The sandwich layering creates the lighting effects for the labels. I will get some detailed photographs of these sandwich layers and give a more detailed description in a future post.
-
Whilst work is continuing on the physical cockpit restoration, work is also progressing in parallel on the digital version as we are replicating the cockpit in 3D so that it can be used in DCS. The project aim is to create a perfect 1 to 1 between the physical and digital product, with everything exactly where it should be!
-
A quick scan of the left hand side forward cockpit quad-panel.
-
The forward fuselage section will be mounted to a frame under the centre section that will support the weight of the entire cockpit. We are in two minds about the overall height. Ultimately, I would love to have things setup where the pilot can retract the undercarriage and the nosewheel goes up and down. We are building our new home next year sometime and I will be constructing a special home office/gaming room that will accommodate the Sabre sim, and yes it will need extra high ceilings!