Ragtop
-
Posts
604 -
Joined
-
Last visited
-
Days Won
2
Content Type
Profiles
Forums
Events
Everything posted by Ragtop
-
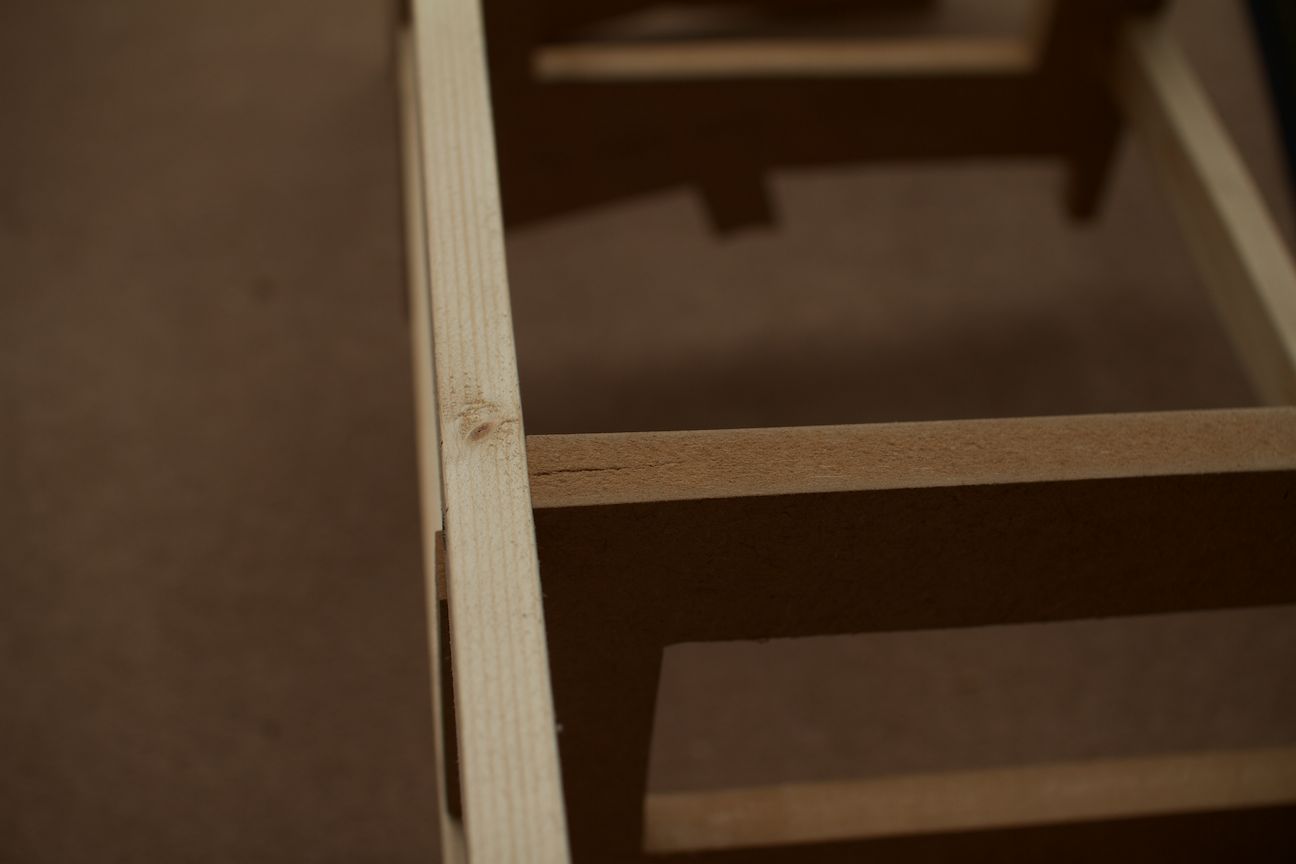
What about taking screws to fasten the panels down? Would I need to use nut and bolts instead? I was planning on using a hardwood rail as it seemed perhaps easier to fix panels to, as I can't imagine how I'd fix to aluminium, but I trust you guys judgement more than my own, so I'd like to see how you've actually gone about fixing panels down!
-
Mike, that information looks to be exactly what I need! But, the website isn't loading! I'll keep checking back. Thanks very much for your help.
-
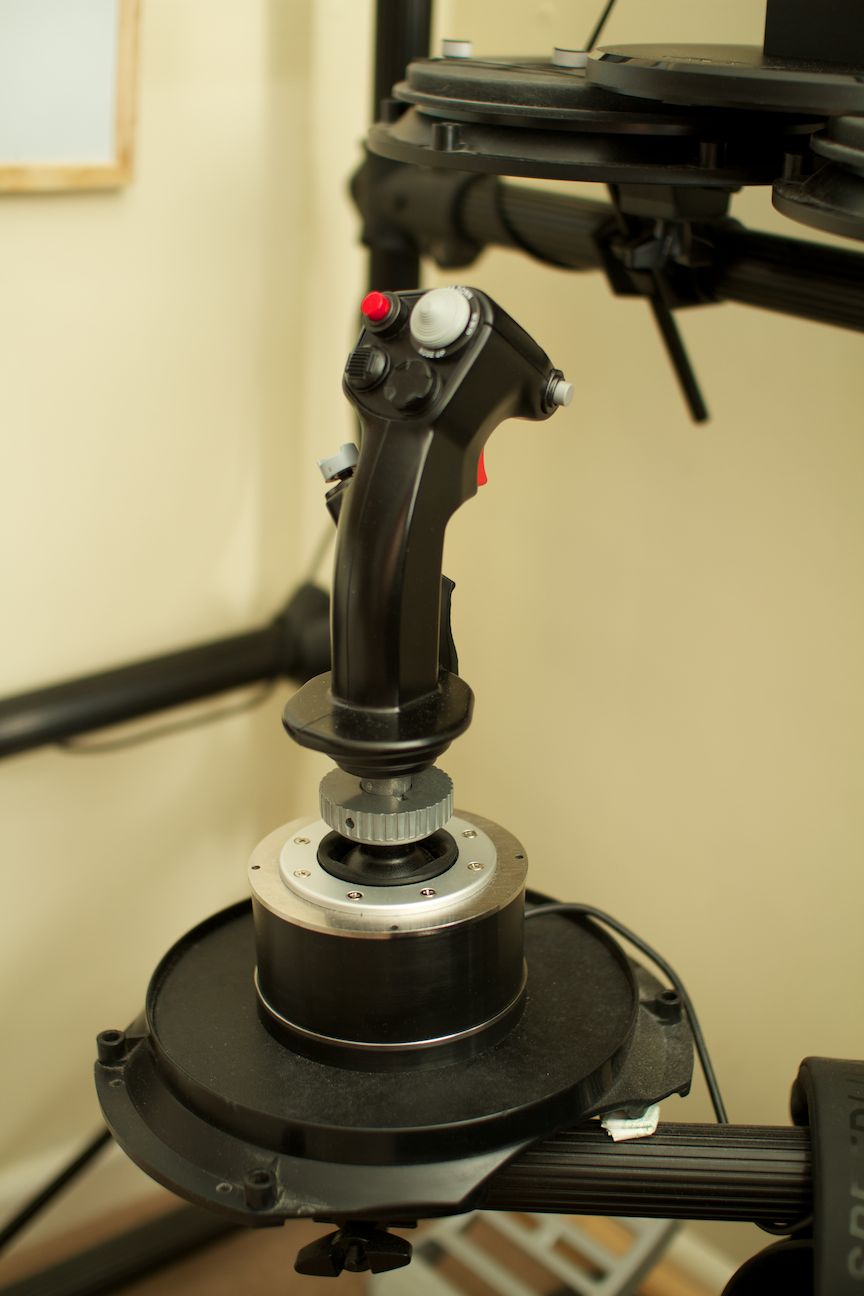
Got a couple of the side covers cut and ready today, but I'm helping move my girlfriend into her new place at the moment, life always getting in the way of pit building! :P As a side note, two questions. 1) Does anybody know if it's possible to pick up the toggle switches used in the TM:WH throttle anywhere? I'd like to continue using the same switches for consistency and also because of the nice firm feel they have. 2) Does anybody have any photos of how the Hogs panels are constructed, from base to switch plate? It looks like there are a few layers to deal with. Materials, thicknesses etc would all be great to know. I don't plan on building anything as intricate as the real thing - (Klafaille/Y2Kiah I'm looking at you guys! Wowed by some of you guys skills!) But I'd like to see how people do it so I can get a gauge on what will work best for me.
-
Have you checked the 'configure axis' settings in the DCS options? You may have it set as a slider instead of an axis. Go to the Options menu, click controls, and set the drop down to show AXIS only (should be in blue), then choose the roll axis, and click 'configure axis'. Report back with what it says.
-
 You pretty much answered your own question. Yes, a large amount of the cockpit will be designed in such a way that the pilot has his most crucial instruments located as close as possible to his line of sight, and if they are out of his LOS, they will be designed so that you can operate them based on feel. I don't know what else you're really asking...
 -
The X-45 should work perfectly in DCS without any hardware modification at all.
-
Strix that was greatly helpful, thanks a lot. I notice you, like me, have used MDF, and no rails. How did fitting the panel wood go for you? Looking at how thin the little stubs that hold the panels are, I'm worried they'd fall apart if I drilled into them for screws.
-
Dime, do you have any other photos of the build stages from anyone? I'm about to cut and fit the side panels tomorrow, and then start work on the top rails. I think I'll be using wood to make the rails from, as I think metal could introduce problems with fitting panels etc.
-
Mechanically, of course they are totally different, when I said they were similar I was referring only to the actual footplate design and the way the pilot operates them. Pixelpilots' pedals are going to be (unfortunately) confined to life under a screen, so the way they interface with the plane wasn't implied when I mentioned that they were similar. Nonetheless a very interesting bit of information!
-
Takes a lot of gun rounds to kill a T-90
Ragtop replied to Mohamengina's topic in DCS: A-10C Warthog
How are you attacking? There are a lot of variables to think about. How close are you when you engage, and are you taking the time to line up? I see a lot of people rolling in at 2.0 miles and firing at 1.8. This isn't enough time to line up adequately. I'd trim the dive so the plane is flying itself into the target, ensure that I'm on a consistent course, enable PAC and then fire when I'm in range. You also need to consider what part of the tank you're attacking. The top and rear are far less armoured than the front and sides of the tank, so make sure you use this to your advantage. Similarly, consider your attack angle. If you're flying low and only nosing down 15/20°, then you leave a lot of room for your rounds to spread. If you climb a bit and dive closer to 45° or so, then your grouping will be considerably tighter. Hopefully these tips will help you out a bit, happy flying! -
Different pedals in different planes. The A-10C uses toe style pedals, fairly similar to the Saitek Combat pedals. Most military aircraft use this layout. Look at pictures of the Simped F-16 pedals, they are a pretty accurate depiction of most US fast movers.
-
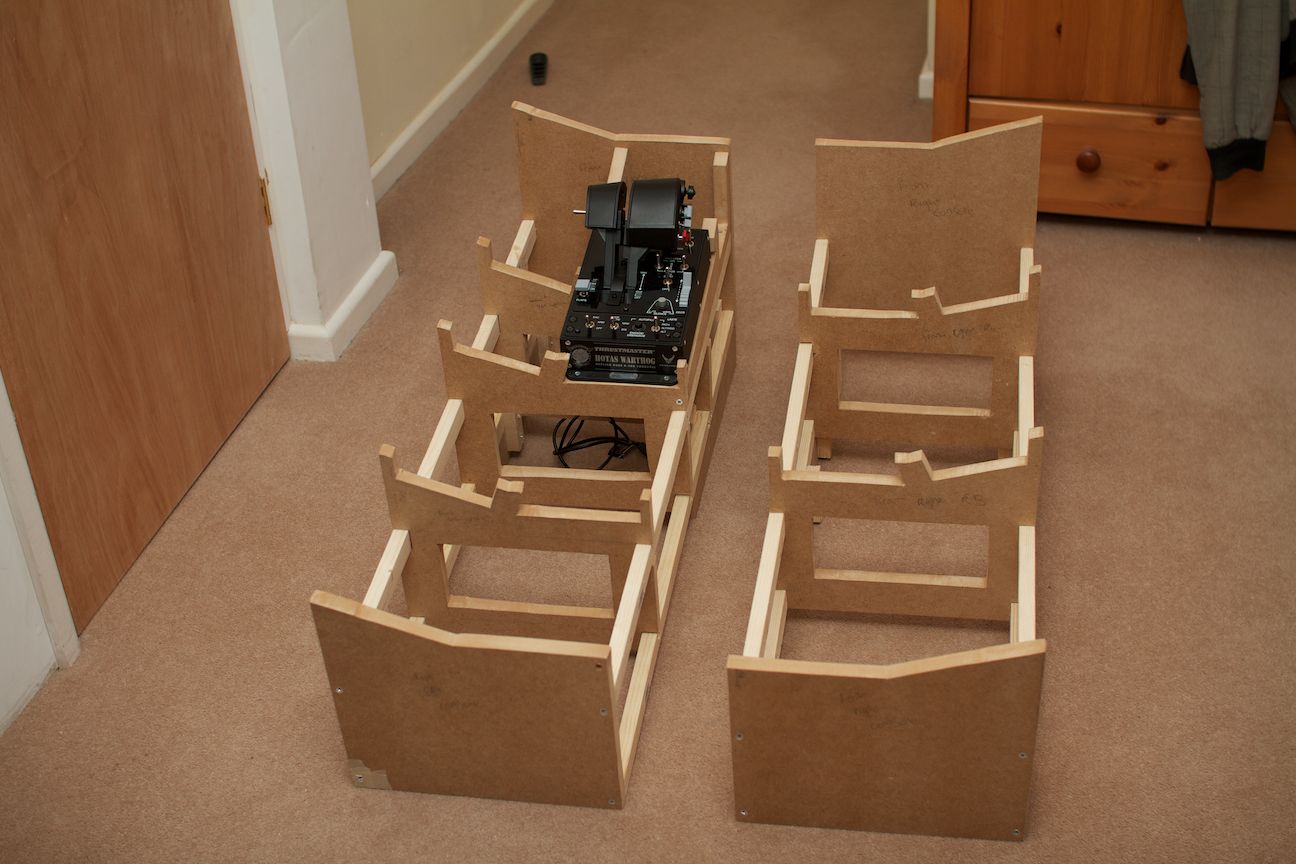
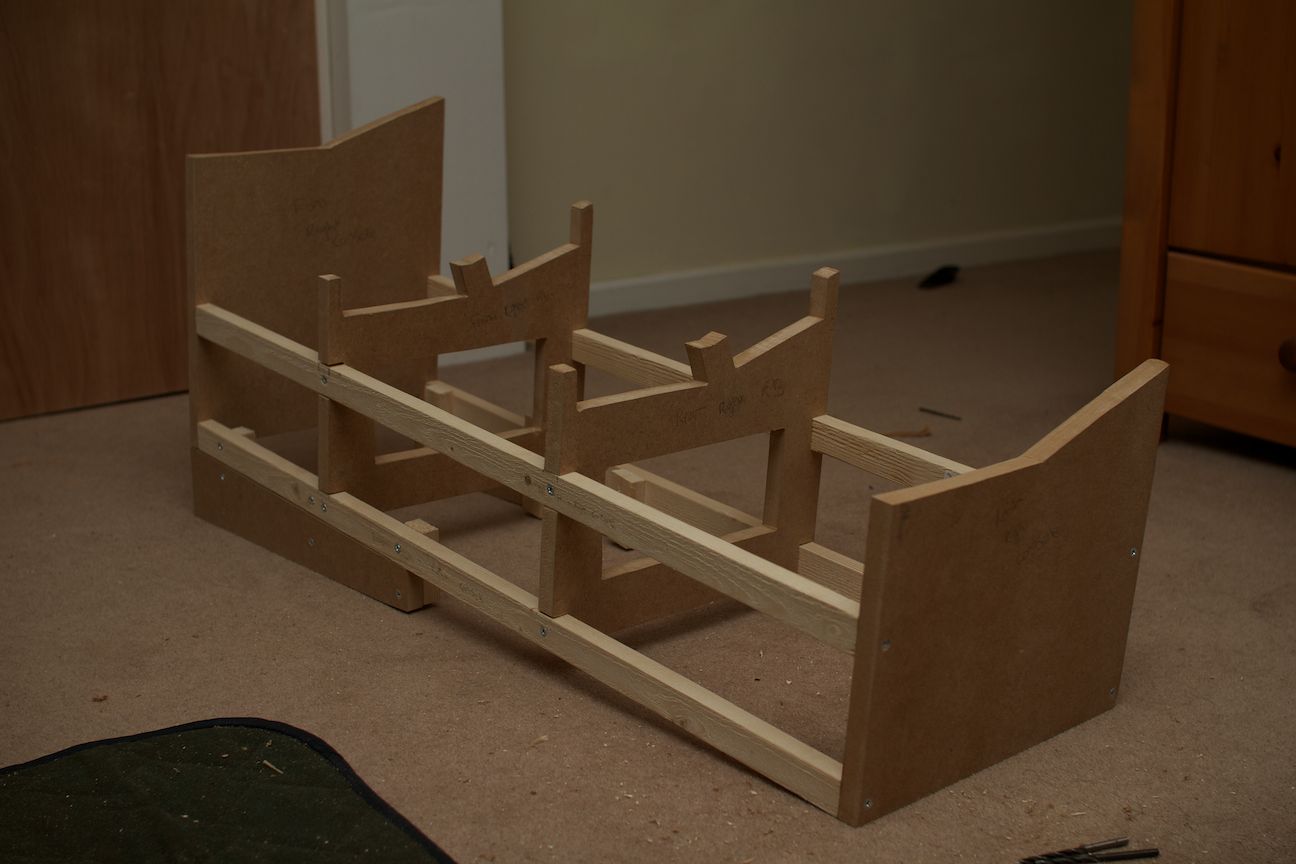
Quick update Had a longer night out than I'd expected, wound up getting home at 0330 with my friends house keys in my pocket somehow... My girlfriend was less than impressed :P Anyway! I got the left console built and fitted the throttle (which fits wonderfully, something I was more than a little worried about! I'm late leaving for work so I better get off the computer! Tonight I'll hopefully get onto the covering for the frames, but I'm still in need of help/suggestions with how I should mount the panel rails, any help would be very useful indeed. EDIT - Ignore the tape on the bottom left corner, I was clamping it in place and didn't want to damage the wood surface, forgot to take it off :P

-
Go to the SCSimulations website and check the user downloads section...
-
Haha! Rockin' pilot :P I've finished the left console and fitted the throttle now, so its just skinning the frames and then getting to work on the panels! How would you guys go about fitting to the top of this frame? Dimebug, in your plans it shows to use steel, how exactly would you fit this, there aren't really enough places to fit screws securely, and MDF splits apart when you put too much into it. I'm a bit stuck at this point guys! Pictures will come later on, for now, I'm off to the pub Over and out!
-
You might be interested in doing something similar to what I was using before this build! I actually used an old electric drum kit, you could probably find one the same in a charity shop/ebay for under $50. First thing I did was stripped out all the wiring, took out the soft padding and made a wooden plate for the WH stick to sit on, screwed the plate into the drum pad and drilled some holes in the bottom so I can remove the stick without having to take out the plate. Next I cut down the sides so I didn't keep hitting my knees on the pads, and smoothed them down with fine sandpaper. As you can see it's foldable so you can put it almost anywhere, has a fairly small footprint and is almost infinitely adaptable (especially if you got two kits, you could make a ton of attachments!
-
Stunning man! That whole build looks super professional.
-
Good to know, nice job :)
-
No, the U2 has had it for a long time, it's also quite common in helicopters too.
-
F-16 throttle onboard too! What a huge update, I always saw the SU-25 as a caveman!
-
Mower, I don't think you'd have ANY problem using the WH in BMS. Think about it, the X-65f is really the first FS stick that is commercially available, (Of course there was the FSSB mod for the Cougar, but then you're looking at >Consumer prices really) If the X-65f never came to be, its HIGHLY unlikely you'd worry about having an FSS to fly BMS with. What I'm asking is, do you only feel like you need the X-65 because it's an FSS, or for other reasons? If it's the former, one could just as easily argue that the WH would be better for BMS because of the actual stick design/button layout, it's the same as the Viper.
-
I'd suggest trying the FN + F13/14/15 keys (assuming you're using the keyboard with the numeric keypad.) If not, I'm not sure!
-
Thanks Johan, if I can get even close to as good as your pit looks I'll be a happy man! Nothing implied about Dime's plans here of course, just my building skills! :crash:
-
Right Console! I had work today, so I was unable to get as much as I'd like done, but nonetheless progress was solid and I'm happy so far. I Got the right console framework completed and ready to take a shell. I must say at this point, starting completely green has been an amazing experience, I already feel like I've learned a world of things about carpentry, and I can only get better at this point. My first centre piece was a little poorly cut, but I really saw some improvements in the second piece, which was quite a confidence booster. One problem I did encounter was that the MDF I'm using did split in a couple of places. Luckily this is not going to be an issue as it's screwed in so many places, that it is still tight. From now on I will also be gluing my joints so I don't need to screw in so tight. I also found that pre drilling with a slightly larger bit solved the problem. I'm glad I started on the right console - Something I'd advise everybody who builds these plans does. The reason is that you need to tailor the left side very perfectly to fit the TM:WH throttle, where the right side is just a panel board, allowing for the imperfections that follow the learning curve. I'm going to be leaving the right console blank at first, acting simply as a place to put my mouse, flight documents and beers. After all the carpentry is complete I will start to tackle the electronics, something also completely alien to me at the moment! My deepest explorations with electronics have stretched no further than building an IR LED track hat to try with my webcam before I got a TrackIR (A world better, but we all knew that!). I'm sure I'll have a whole other world of problems awaiting me when I get to that point! When that day arrives however, I'll be starting with the battery and electronics panel I think, as my aim is to get as much of the startup procedure as possible, without using the mouse. It also looks like a fairly simple panel to build, no awkward shapes, and only toggle switches on it. But for now, woodwork is taking up my life for the foreseeable future, that's for sure! Anyway, enjoy.
-
Coming from the man himself, that gives me some confidence! Great idea about a builders list, I like the idea of discussing any problems we've faced etc. I'm actually picking up a protractor right now, posting from my lunchbreak :P Itching to get home!
-
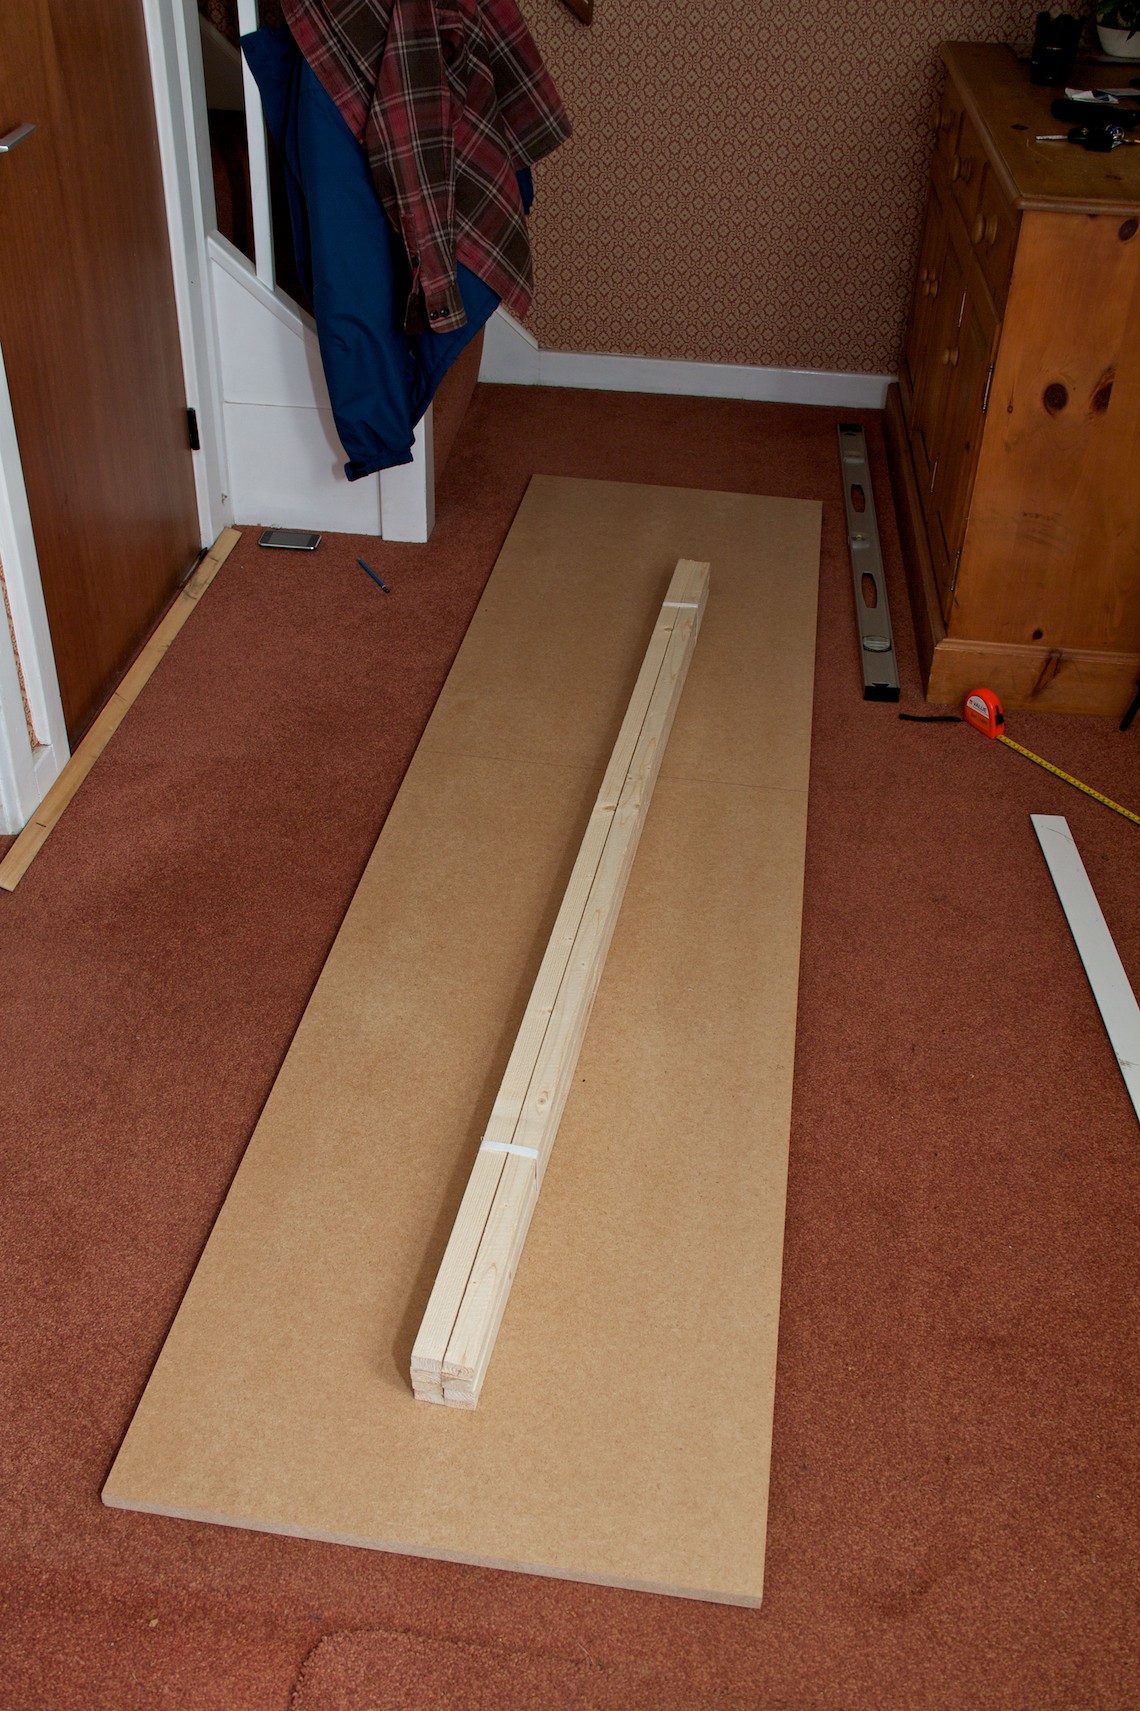
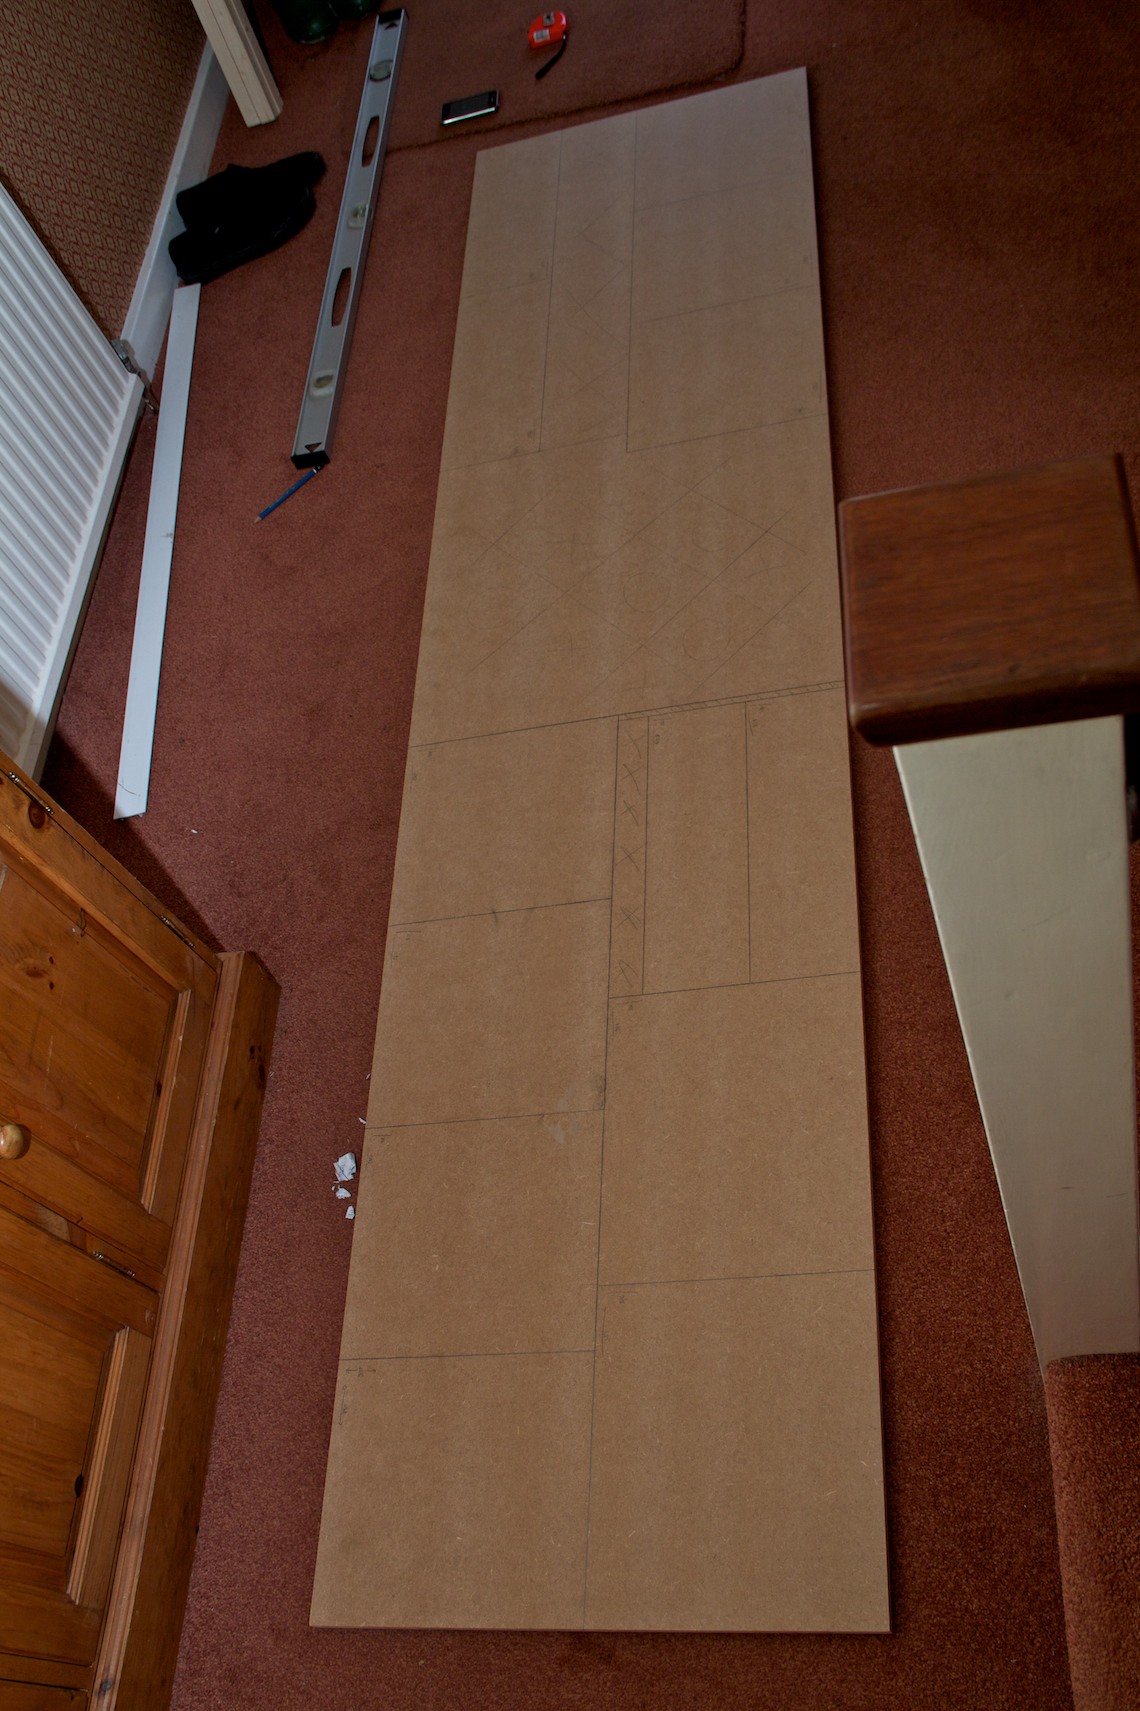
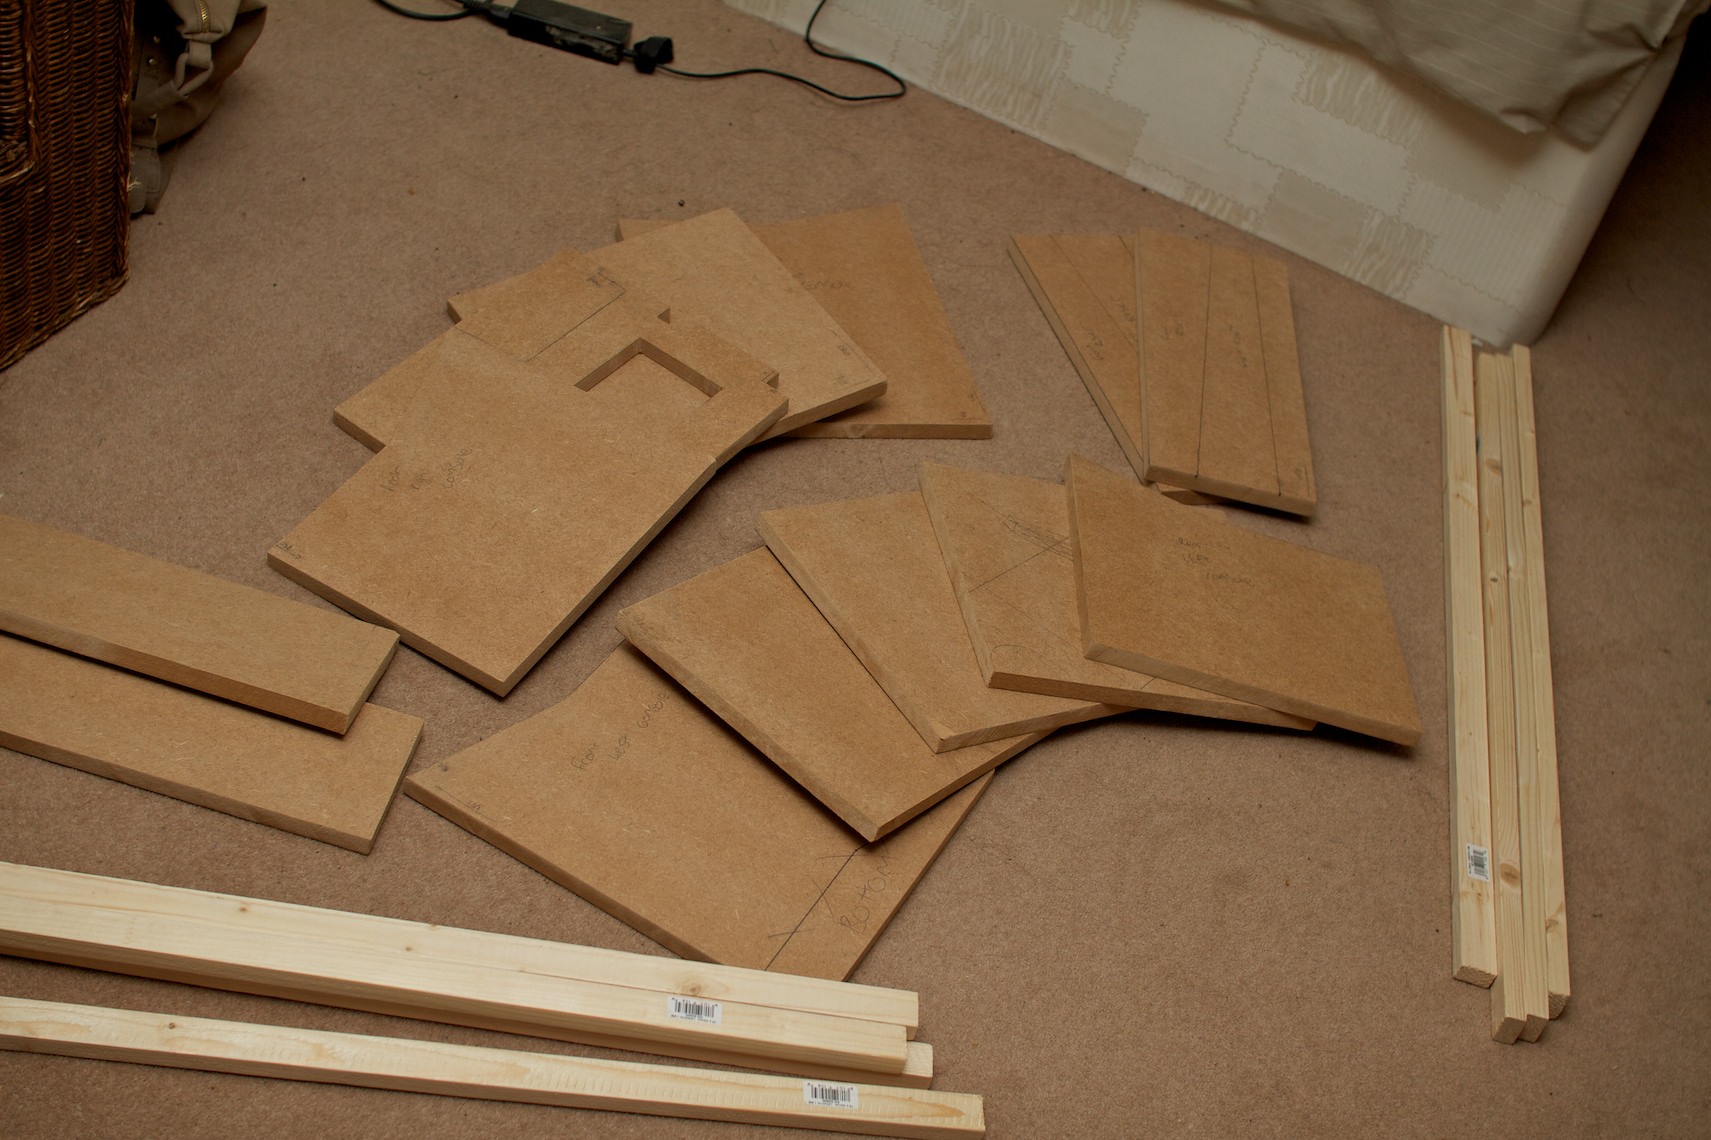
Getting Started So, today marks the first pit build I have ever done. Infact, today marks pretty much the first serious carpentry I have ever done, that being said, don't expect perfection, but expect a lot of pencil marks, a lot of offcuts, and a lot of swearing! First I went and picked up my supplies. I worked out that I could fit everything onto a single sheet of 2440x607mm MDF (Standard size here in the UK), which was perfect. I set off drawing everything onto the sheet and began cutting away! You can see my saw guide, a piece of hardwood clamped to the surface, worked perfectly for guiding the circular saw. After I had all my pieces cut out as blanks, it was time to start drawing up the detail cuts and getting to work. As you can see by the last photo, I've only done one of the detail parts, and thats only half done so far! I need a protractor before I can continue! So I'll be picking one up after work tomorrow and making a template with the first piece, to trace onto the rest. I can already tell this is going to be a very long process, but I'm very excited to be where I am so far. Once again, I should mention that all credit for this design (Not that I've got much of it to show just yet!) should go to Dimebug, he's the genius behind it!