Ragtop
-
Posts
604 -
Joined
-
Last visited
-
Days Won
2
Content Type
Profiles
Forums
Events
Everything posted by Ragtop
-
Looking great so far man! Need to order myself some MFD's on pay day, got a couple of weeks yet! How are you finding the strength of the return spring on the throttle? Do you have to help it back or is it ok? I'm considering maybe a couple of inches extension so I have some more stick precision.
-

How To: Build a A-10 flight panel controller
Ragtop replied to TigersharkBAS's topic in Home Cockpits
The video I posted explains setting 3 way switches. -
This is what I'm saying! Incredible value.
-
You'd actually be surprised how cheaply you can get car seats. Mine was actually already in the loft, my dad is a private car salesman so we have a good selection of random bits! Of course this is unlikely to be everyones scenario! But, take a trip down to your local breakers/scrapyard. If you're not familiar with the concept, it's a place where cars that are no longer fit for the road go, and are parted out at VERY low cost. You could pick up a usable seat for $30-40 I reckon.
-
Do you mean the front outer panels with the angle in? If so, read on. Here are the dimensions for the Electrical panel, it shows the measurements needed to fit that awkward angle! It also just worked for me that the same size again was a perfect fit to the top, just flipped over, so all I had to do was cut 2 identical panels, and put one up the other way! The image is not mine, but I forget who it is was that made them first. They did a very useful zip of all the console panels. I apologise to the creator of it and hope you don't mind me posting it here. Electrical power backplate.pdf
-
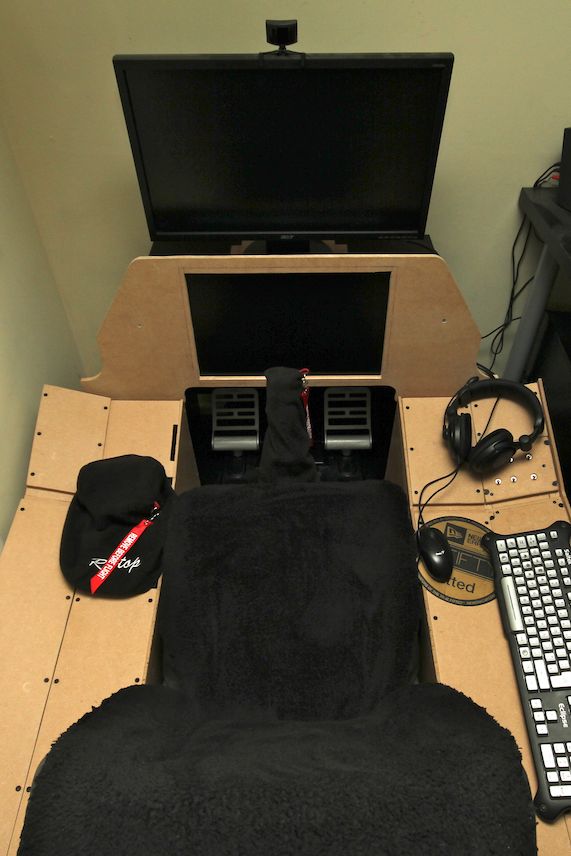
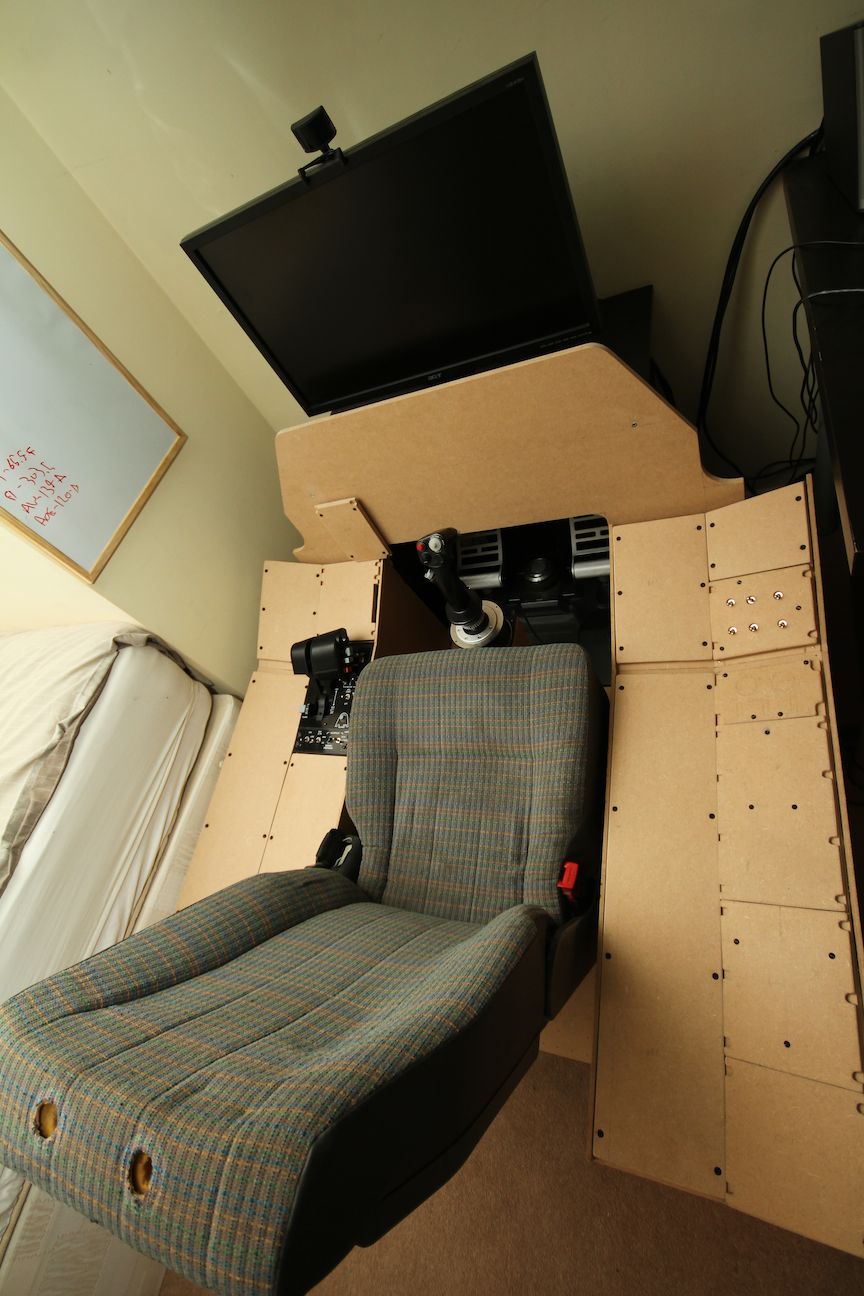
Some upholstery and vision! I'm still going! I've not updated in a couple of days, but I've been working as hard as ever! Some nice updates this weekend. My girlfriend brought the fabric I mentioned home, so we got to work stitching that onto the seat, which gives it an infinitely better finish, and it's also SUPER soft! Very comfortable for those long hauls. I've also got my console display in! The size is perfect, I've got just enough space for where I'll be fitting the TM MFD's when I get them next month. Running Helios on it and it looks awesome, I'll think about doing a cover for the screen when I've settled on a layout, much like Pcalverts design. My Meccano spacers also turned up, so my "Dzus" screws are finished! I did look for flat head screws, but for the effort involved in getting them, I'll settle :P Take a peek :)

-
You'll need to mandrel bend the tube if you don't want it to collapse on itself. Find a ball or something similar that you can fit in the tube at the position you're bending, heat the tube and bend it with the ball in place. Wait for it to cool and hold, then remove the ball. You may want to put your ball on a string so you can remove it easily after.
-
You're doing a fantastic job Ice, very impressed by your centre console so far.
-
Haha, wish I could send you some, I have it coming out of my ears, I'm sure Ice does too!
-
The AHCP is 6.5x4 inches, and the engine instruments are the same height. I've been measuring the screen, and taking the measurements I do know to make ratios for more general dimensions. You'll have to search a bit, I know some of the dimensions are on here.
-
My apologies, I was misleading there, I meant how much on the UFC? What parts did you have to build and supply yourself? Thankyou for the other info however, still very useful!
-
That looks unreal, incredible work. So impressed by your UFC aswell, how did you build it/do you mind me asking how much you spent on it, and if you had to use a CNC for any of it?
-
Haha, if you can keep that kind of thing quiet, I'm impressed! I always end up with the jigsaw or something making a racket. Are you building the centre console as it is in Dimebugs plans, or doing it custom?
-
It may well be, I found that using solid core wire (good for the Leo Bodnar) it's a little bit brittle, pushing them that far up could cause breakages if you moved them about a lot.
-
Sandwich the bit you're cutting with two other bits of wood, perfect holes every time :)
-
Excellent progress Ice! It's great to see you're coming along so nicely. The reason you'll want the holes in the ribs is so you can feed panel wiring through, so don't worry about how straight it is, cause you'll never see it, however unfortunately the drill bit is the only way. It's really easy once you've done it once or twice though.
-
I used 6mm for both the top and bottom, to be honest 3mm would be an excellent choice for the top cover, as my switches don't protrude very far! I countersunk the back of my top panel for the switch nuts, but you'd be better off sinking them into the top of the back plate, because 3mm doesn't give you a lot of room to play with.
-
Me too! Haha, if someone showed me the latest photos and said I'd have done this in 3 weeks I'd have laughed them out the door! I remember when I first started it a cut a bit of MDF wonky with the circular saw and couldn't EVER see myself even getting a cut right, to be here is truly gratifying. I look forward to seeing your progress too, I was going to do an ACES II but this seat is just too comfy to pass up on!
-
The dimensions for the consoles are exactly as in Dimebugs plans. The front panel is very similar. 939mm in length, however 355mm in height, because I didn't want mine as tall.
-
Sounds great dude, look forward to seeing your updates. I'll be tackling the light panel next I think, there's a few I want to do on the Right console, but none of them are particularly important, I need to do the fuel panel really, but it's on the other console and I think that's going to need another Bodnar board, which will have to wait until next month! Check photos of the real thing, that gap is there too :)
-
How To - Assigning toggle switches to DCS using Helios.
Ragtop replied to Ragtop's topic in Home Cockpits
Here's the link I was talking about. Page 4 towards the bottom, Fael097's post. I haven't personally explored yet, I'll post my findings when I do. -
How To - Assigning toggle switches to DCS using Helios.
Ragtop replied to Ragtop's topic in Home Cockpits
Pots and rotaries work in different ways, but they do work. Fael097 figured it out, I linked to the thread in an earlier post in my thread I think, I'm on my phone so I can't dig out the link just yet! When I've got some to test I'll let you guys know. Unfortunately it is very quiet, that was the first time I used my headset mic, didn't check the level! -
Thanks Hitch. I've got a friend who's giving me a display but I don't know the size yet, so I imagine I'll be doing everything custom, but if I run into trouble I'll be in touch!
-
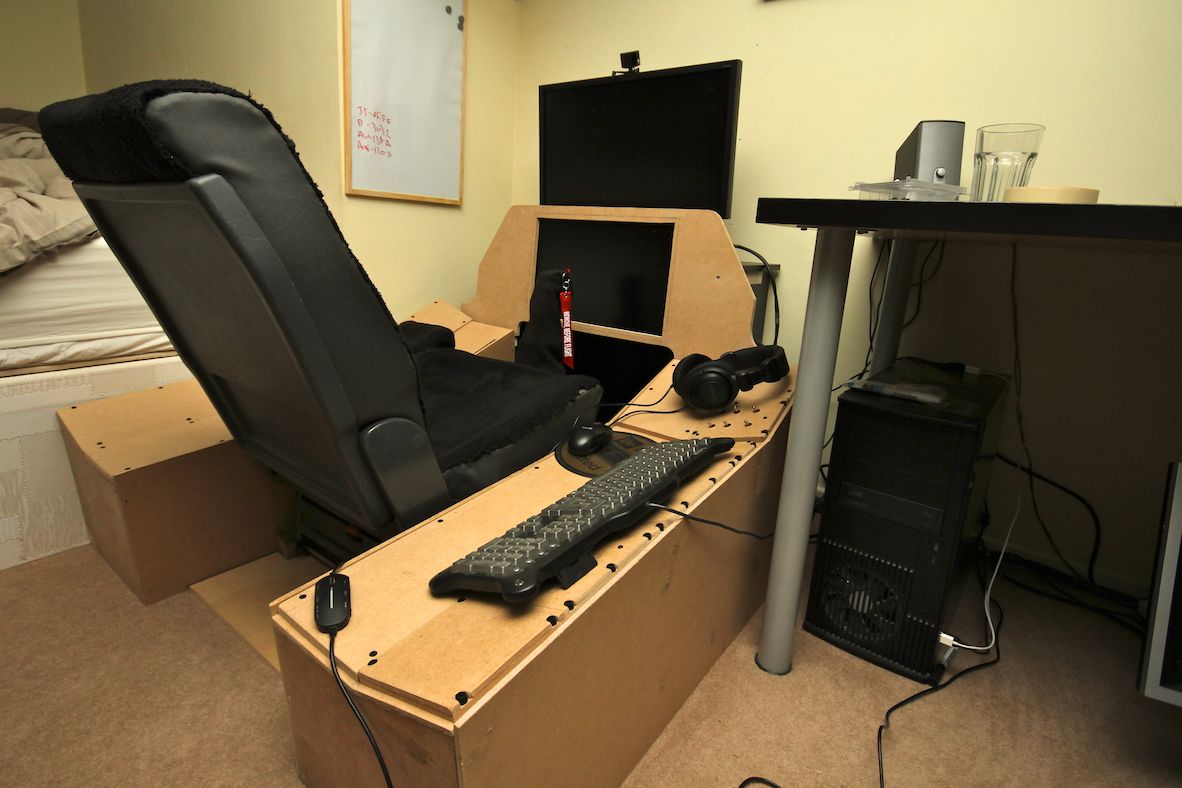
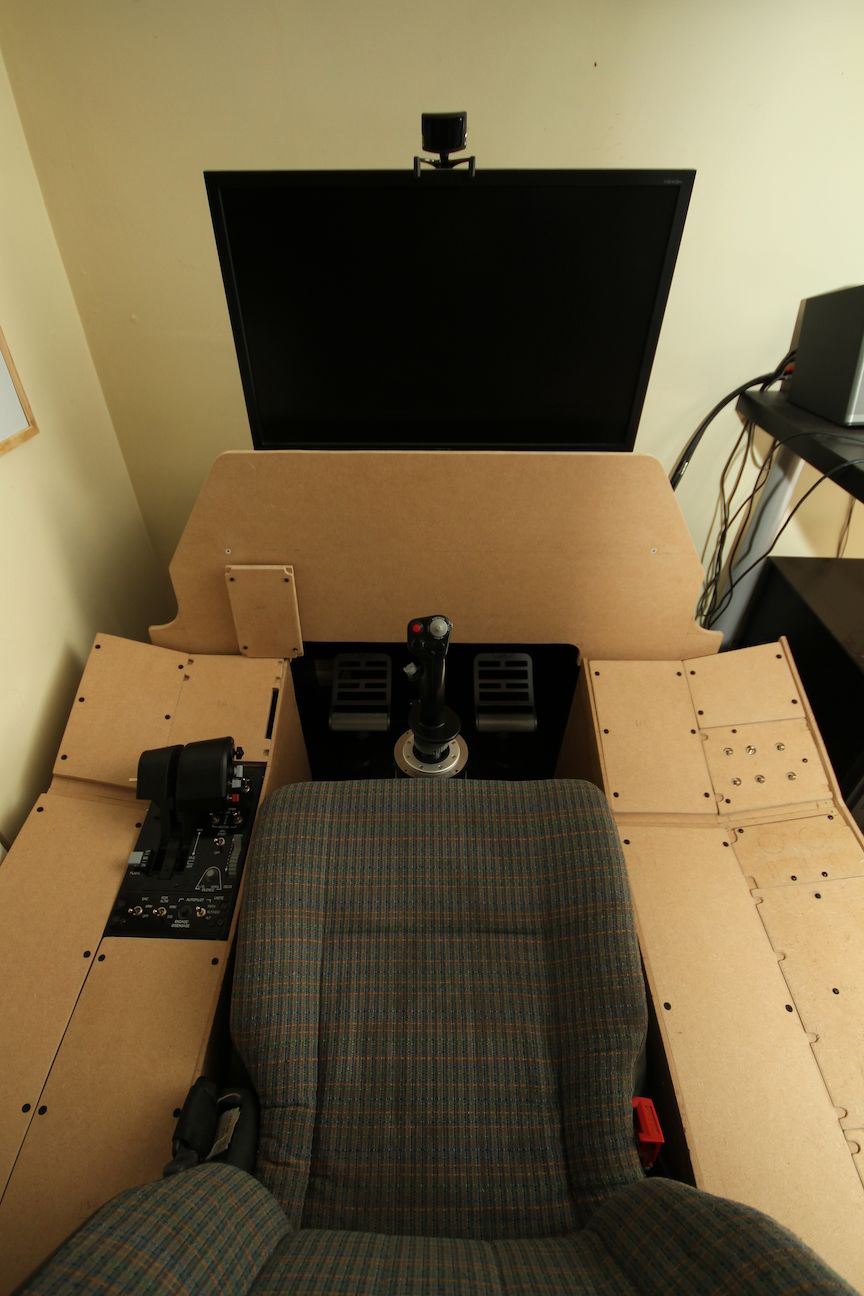
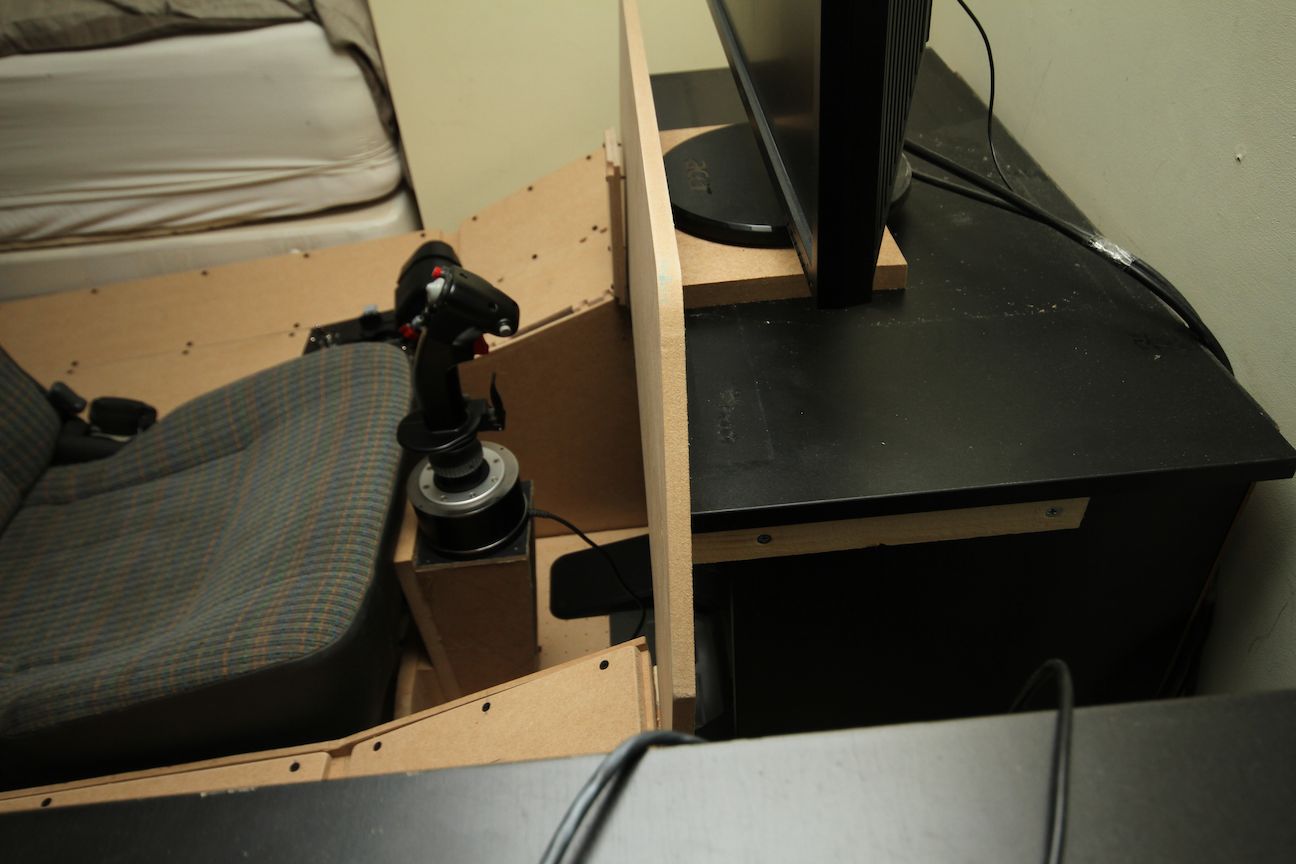
Well, things haven't slowed down around here, that's for sure! Got to work on the front panel today, aswell as fixing the top plates onto the switch plates of the console panels. I also built the main shape for the AHCP. First up, the panels. Went and picked up some black screws from the DIY store and fixed the top plates on. When I have the hardware to actually fit into them I'll do the cuts, I don't want to do it until then incase I get the sizes wrong. I made the AHCP plates, again, not drilled until later. In the photos it stick out from the front panel because I've not made the cut in it for the panel to sit in, which leads me onto todays big development! The front panel. You'll notice that this is a lot shorter than the real thing, for a number of reasons. Primarily it'd make the display higher than I'd have liked. As it is at the moment the display is at perfect eye level, which is very comfortable for me. Secondly I don't plan on a complete replica, therefore I don't need to make room for all the instruments. There will be a display (Size undecided) which serves two Cougar MFD's and some select Helios instruments. I will also be fitting the AHCP and the Gear panel, perhaps a couple of bits like HARS Fast Erect and some others, we'll see. When I come to fit the display I'll be making a cut in the cabinet for it to sit in, It'll all come out of its casing so I don't need to make too much room for it. I'll likely look into wall mounting the main display, or just move it back, we'll see. Without further ado, the customary eye candy!
-
Warthog Hotas throttle resistance & durability
Ragtop replied to GRoss's topic in PC Hardware and Related Software
Agreed, the throttle is a real lump, it's not going anywhere! As far as the switches go, I have absolutely zero concern that they are going to fail on me. I've seen a few people complain things like "The flaps switch twists around, how can that happen on a $500 HOTAS?!" Look at the real thing, the Flaps switch twists. This thing is TOUGH. They're definitely not going to fail on you.