Cydrych
-
Posts
94 -
Joined
-
Last visited
Content Type
Profiles
Forums
Events
Everything posted by Cydrych
-
F-16 Helmet HMD skin doesnt show in Game but does in Modelviewer2
Cydrych replied to Firebird1955's topic in F-16C
You will need both these in the description.Lua. The first is for the pilot in the plane and the other is for the pilot out of the plane. They use the same texture and texture file name but one is "details" and the other "getails". I'm not sure if ED made a typo or if it was intentional. Also is that my desert flight suit? {"pilot_F16_hmd_details", DIFFUSE , "pilot_f16_helmet_details", false}; {"pilot_F16_hmd_details", NORMAL_MAP , "pilot_f16_helmet_details_normal", false}; {"pilot_F16_hmd_details", SPECULAR , "pilot_f16_helmet_details_roughmet", false}; {"pilot_F16_hmd_getails", DIFFUSE , "pilot_f16_helmet_details", false}; {"pilot_F16_hmd_getails", NORMAL_MAP , "pilot_f16_helmet_details_normal", false}; {"pilot_F16_hmd_getails", SPECULAR , "pilot_f16_helmet_details_roughmet", false}; -
F-16 Helmet HMD skin doesnt show in Game but does in Modelviewer2
Cydrych replied to Firebird1955's topic in F-16C
Check that the line for the HMD texture in the description.lua is set to false. If it is true it will pull the default texture. -
Download link added to first post.
-
Could bee. Maybee. Might bee on user files soon. Anyway here is a Thursday teaser.

-
They went all out on the tigermeet liveries this year. Pure works of art. Recreating them in DCS is 100s of hours of work unless someone has access to the raw art files. It won't be me but there are some really complex liveries on user files so someone might be crazy enough to take them on.
-
DCS World 2025 Screenshots and Video Thread
Cydrych replied to ST0RM's topic in Screenshots and Videos
Skin is now on user files.
-
buzz buzz
-
If you have camo texture there are 2 possibilities. 1. The 370 gal tank textures are not in the plane's livery folder but the description.lua code is correct. 2. The lines for the 370 gal tank textures in the description.lua are incorrect and the tank textures are in the plane's livery folder. #2 is more likely because a few years ago ED changed the 370 gal tank texture file names. These are the default lines in the description.lua for the 370 gal tanks. If you want to use ED's default textures change "false" to "true" and if the livery has custom tank textures leave it false. -- F16_bl50_Fuel_Tank_370Gal {"F_16_Tank_370", 0, "Fuel_Tank_370Gal_diff", false}; {"F_16_Tank_370", 1, "Fuel_Tank_370Gal_NM", false}; {"F_16_Tank_370", ROUGHNESS_METALLIC, "Fuel_Tank_370Gal_diff_RoughMet", false};
-
-
Thanks for the compliment.
-
Speaking from my own point of view model viewer is already kind of janky and if we are forced to use anything less capable than what model viewer is now I probably will be done making liveries. Skinning is time consuming and tedious so making it more difficult just to make it harder to pirate textures and models, yeah, I just can't be bothered with it. I also don't want to have to load the whole game either. I'm already pushing the RAM limit with GIMP and MV open because I'm usually working in multiple files at the same time to match textures up on different parts of the plane. So if it has to be hooked into the DCS files for account verification and decryption then release "model viewer 2.0" as a free module you download into the DCS root directory and have it launch from the DCS launcher as a standalone app after you sign in.
-
I doubt it. There are still numerous model errors and the rear cockpit is untextured. We've been asking for years to get it updated and nothing has come of it. Just a few weeks ago the F-16 was deemed feature complete and left early access so I doubt ED will go back and fix it now. Upgrading the model and textures for a released module that most people already have won't make them money. The shiny new modules like Mig-29, F-15C, and F-35 will. Hell, look at the hornet. It has model and texture issues noted since early access almost 8 years later. Most of the textures are low resolution too. It needs updated more than the F-16 but neither will likely be fixed until ED sells a paid remaster for the F-16 and F-18 v2.0
-
The pilot suit is just a cosmetic mod. You can enable the pilot in first person while flying to see the different color flight suit. You can see it in external view while flying. Or you can eject and walk around.
-
Added user files link.
- 1 reply
-
- 2
-

-

-
Half the time I wonder why I'm spending time on patches when most people won't be zoomed in enough to see the details and outside of taking screenshots for the mod page I'm never looking at them too. They don't look like they were drawn with crayons so you did a nice job either way, just voicing my opinion. You can scale the texture up. I noticed on one of Lee1hy's recent skins he had them at 1024x1024. The patch texture looked way better but again it is a small detail most people won't notice so why waste the VRAM on it?
-
Nice skins. The texture is something I need to experiment with more. I haven't got it to look right yet. I also like the handprints on the tank. That's unique. I noticed a couple of small texture errors if you ever update them. They aren't noticeable unless you're really zoomed in. 0264 & 409 main 2 - roughness channel is missing the texture noise and the decals look like they are more rough (white) than the rest of the jet. Round decals near 264/409 on nose, left side has incorrect texture in metallic layer and right side is missing in metallic layer. Sealant line is also missing on the right side in metallic channel. 0264 main 1 serial on top is missing in roughness and metallic channels. And just my personal thoughts I think the normals on the pilot patches are too strong and degrade the patch texture by causing too much shadow. The right side patch needs moved up a little bit too. Other than that nice job! Release more please!
-
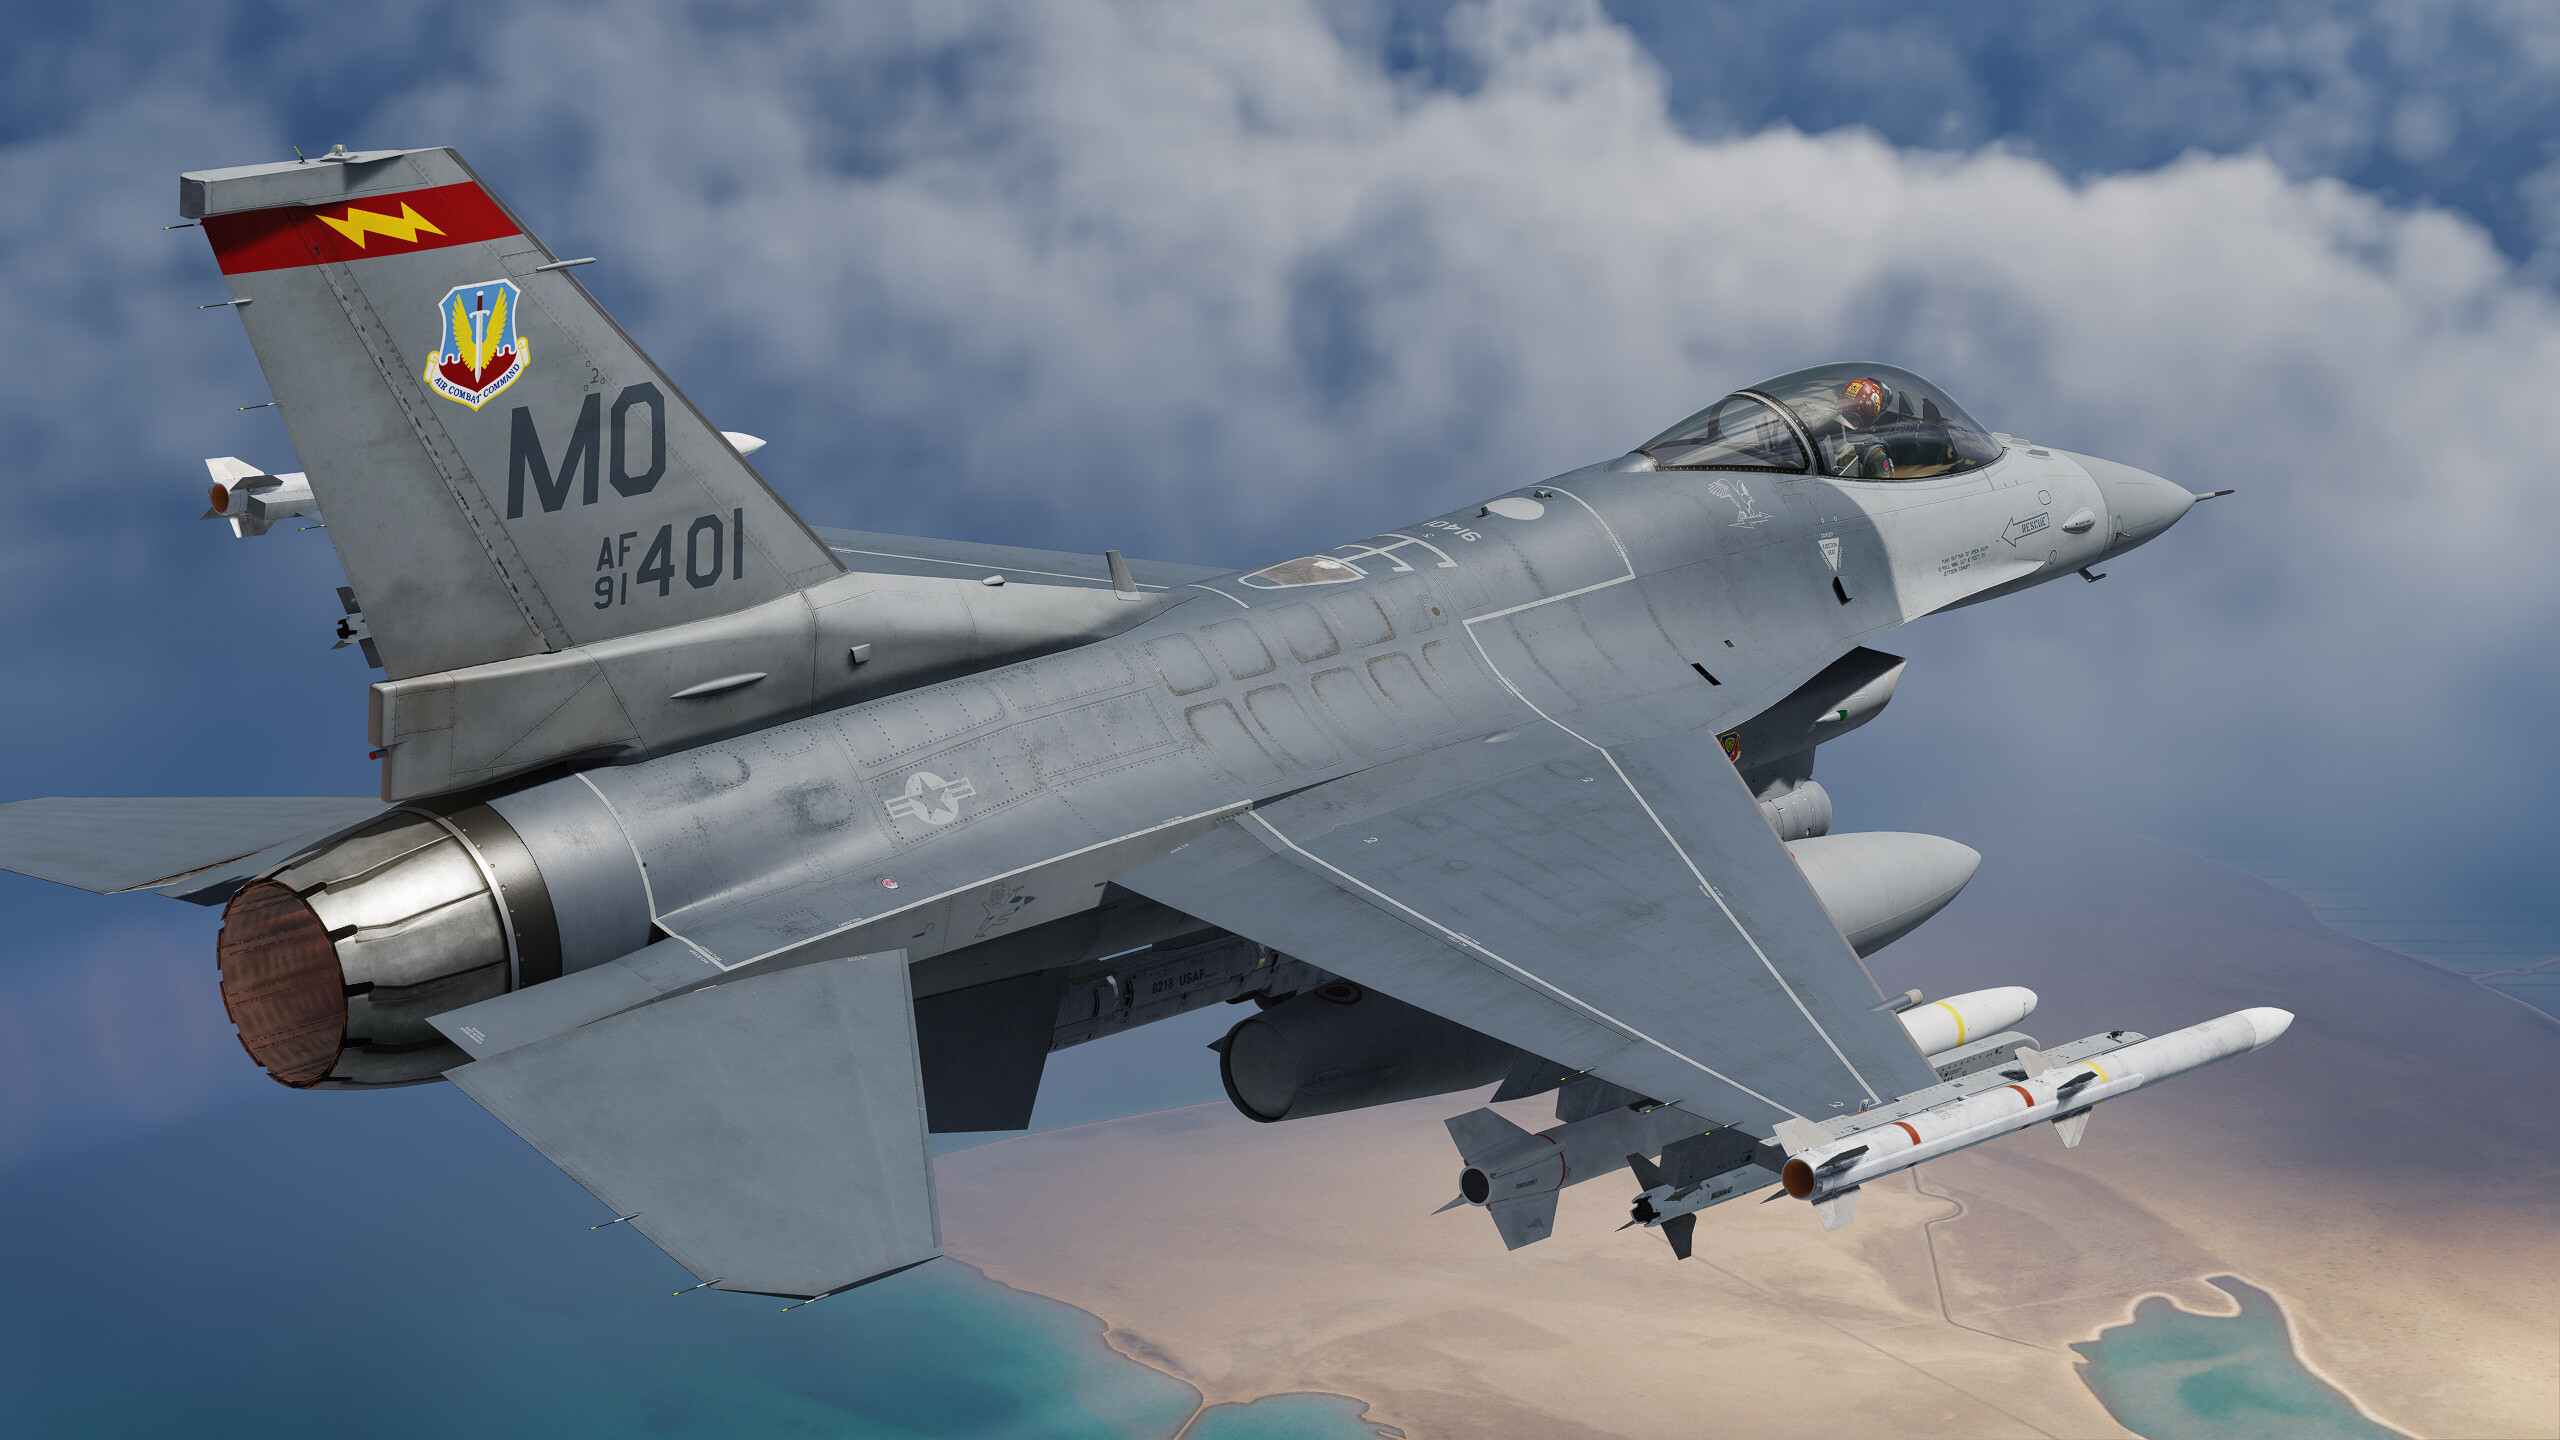
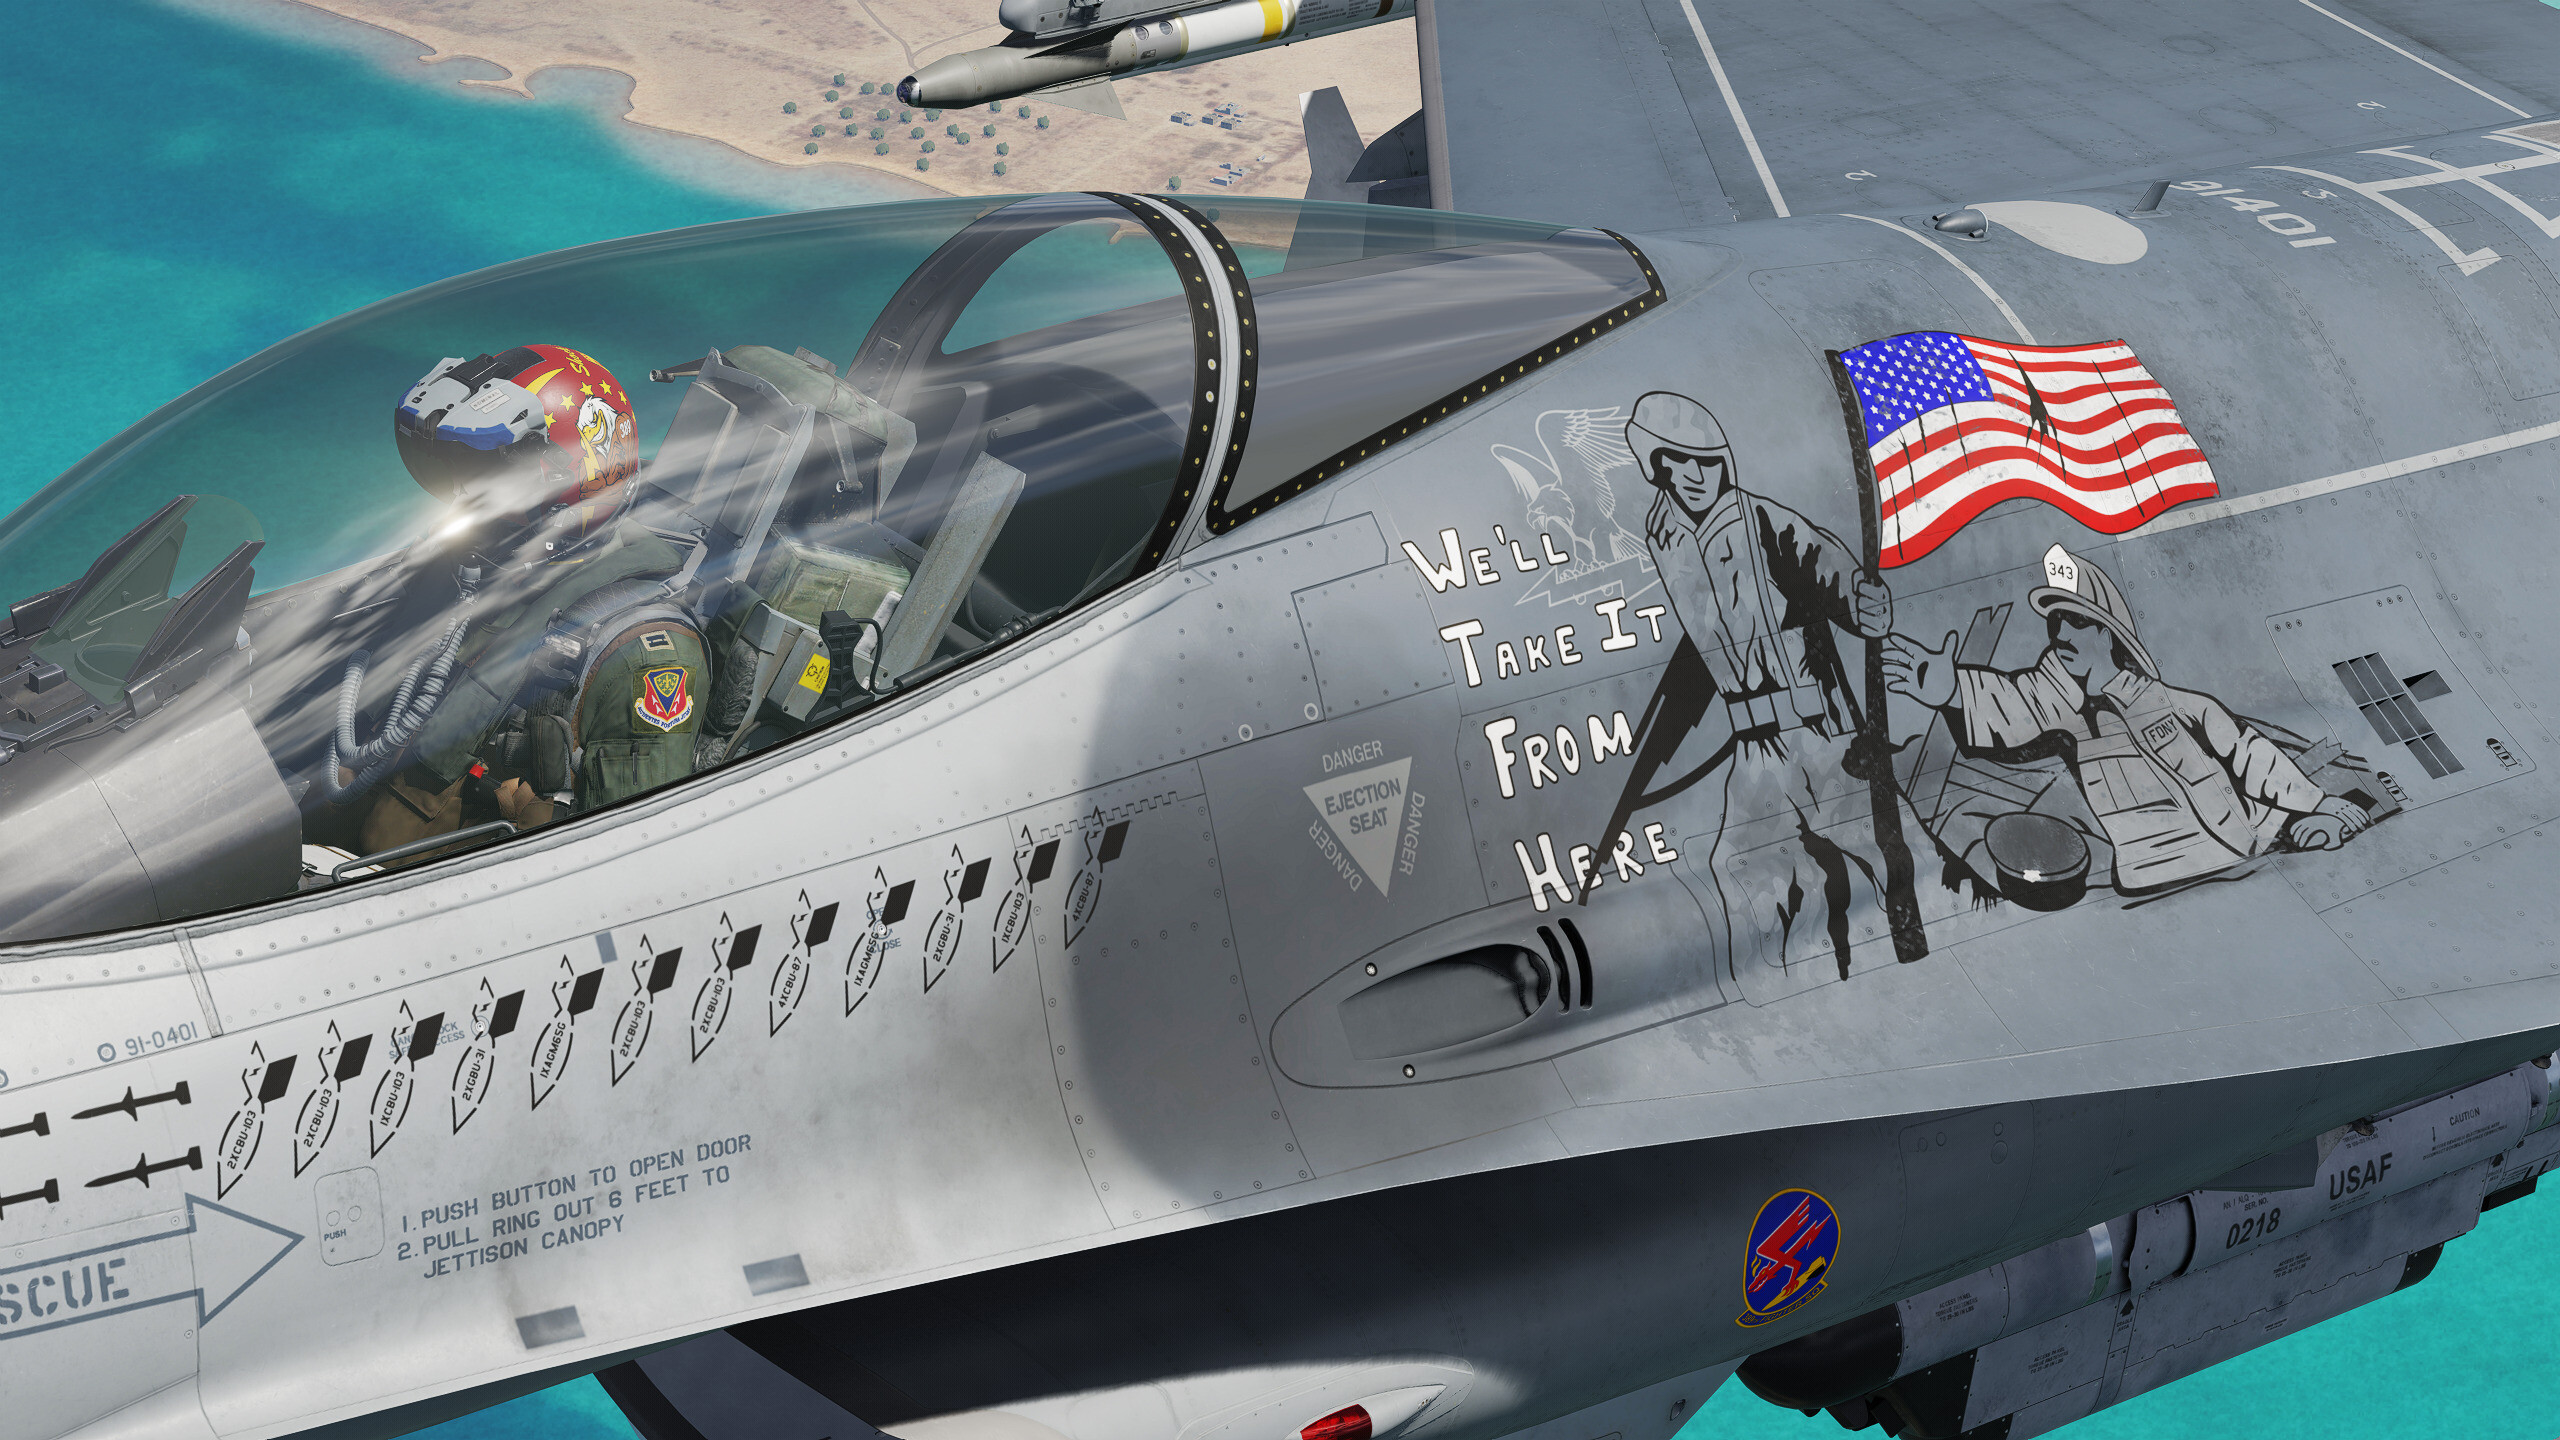
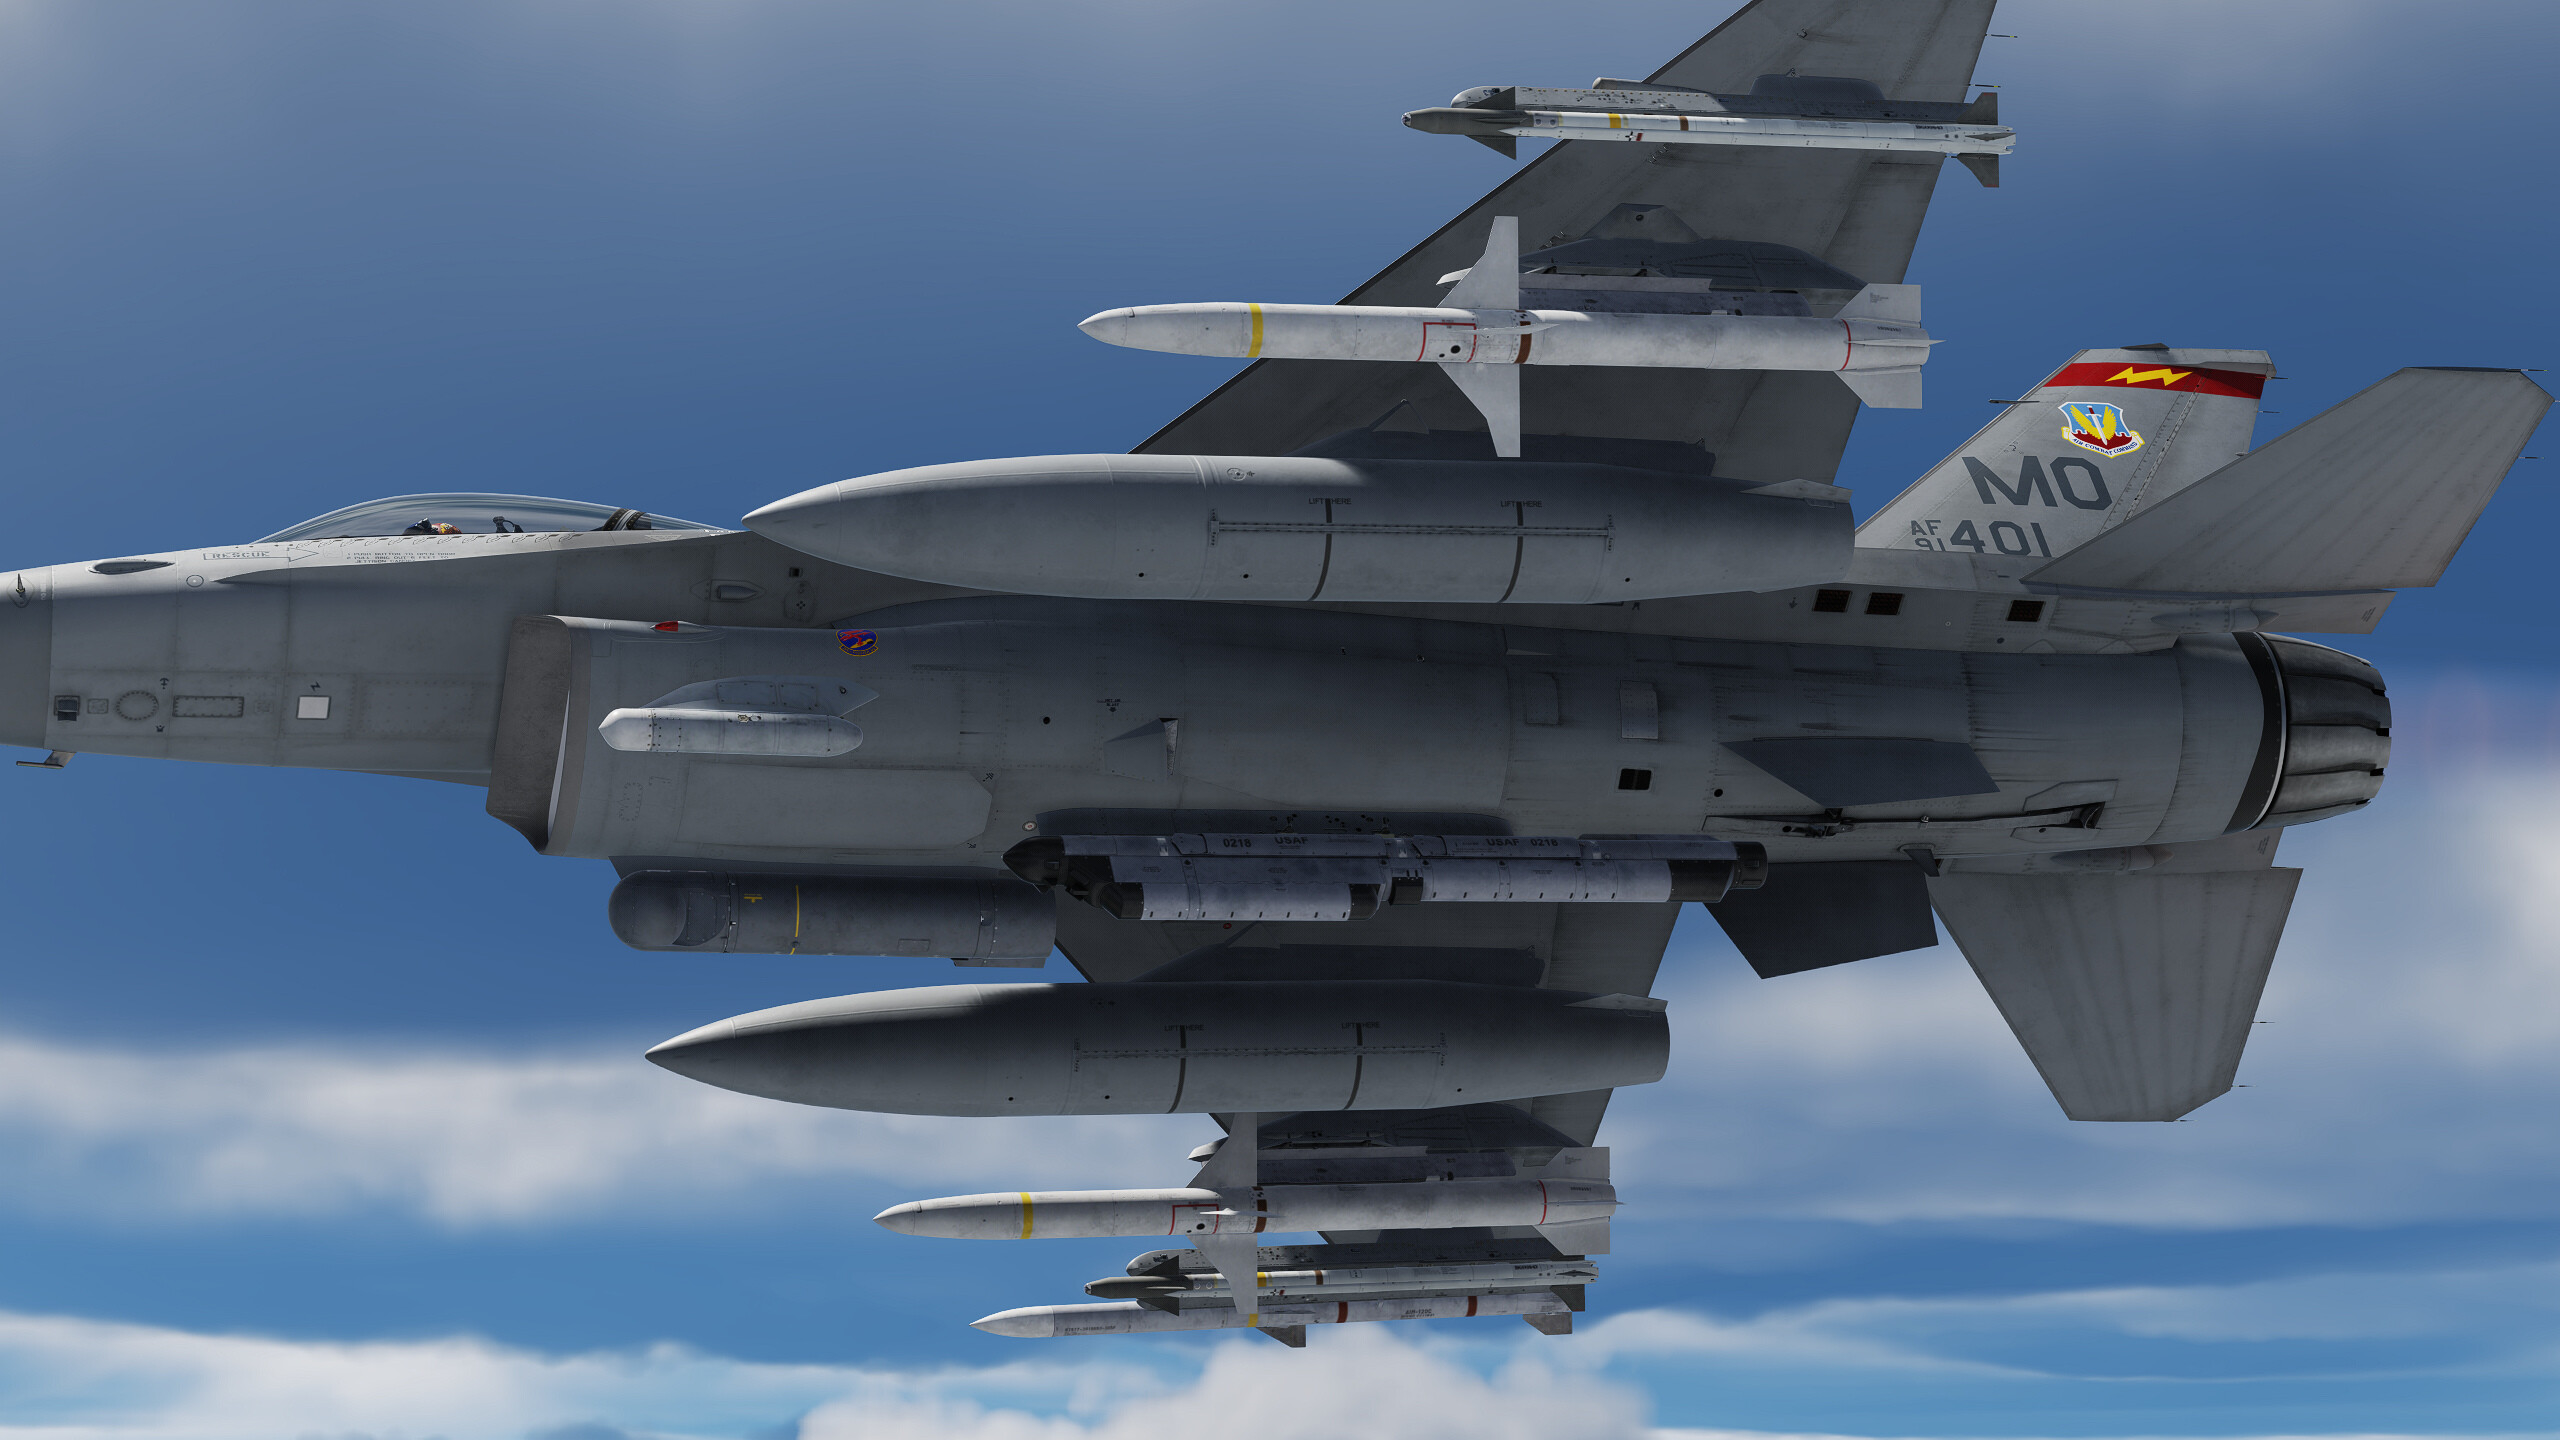
The F-16C #91-401 from the 389th Fighter Squadron carried special nose-art and mission markings while deployed to Al Udeid Airbase in Qatar from November 2001 to January 2002, flying missions over Afghanistan in support of Operation Enduring Freedom. The courage and sacrifice of New York City firefighters is honored on this fighting falcon that flew many combat missions during the way. https://www.digitalcombatsimulator.com/en/files/3343862/
- 1 reply
-
- 4
-
-
DCS: F-16C Viper Screenshots and Videos (NO DISCUSSION)
Cydrych replied to wilbur81's topic in DCS: F-16C Viper
That's a nice one! -
Added download links
-
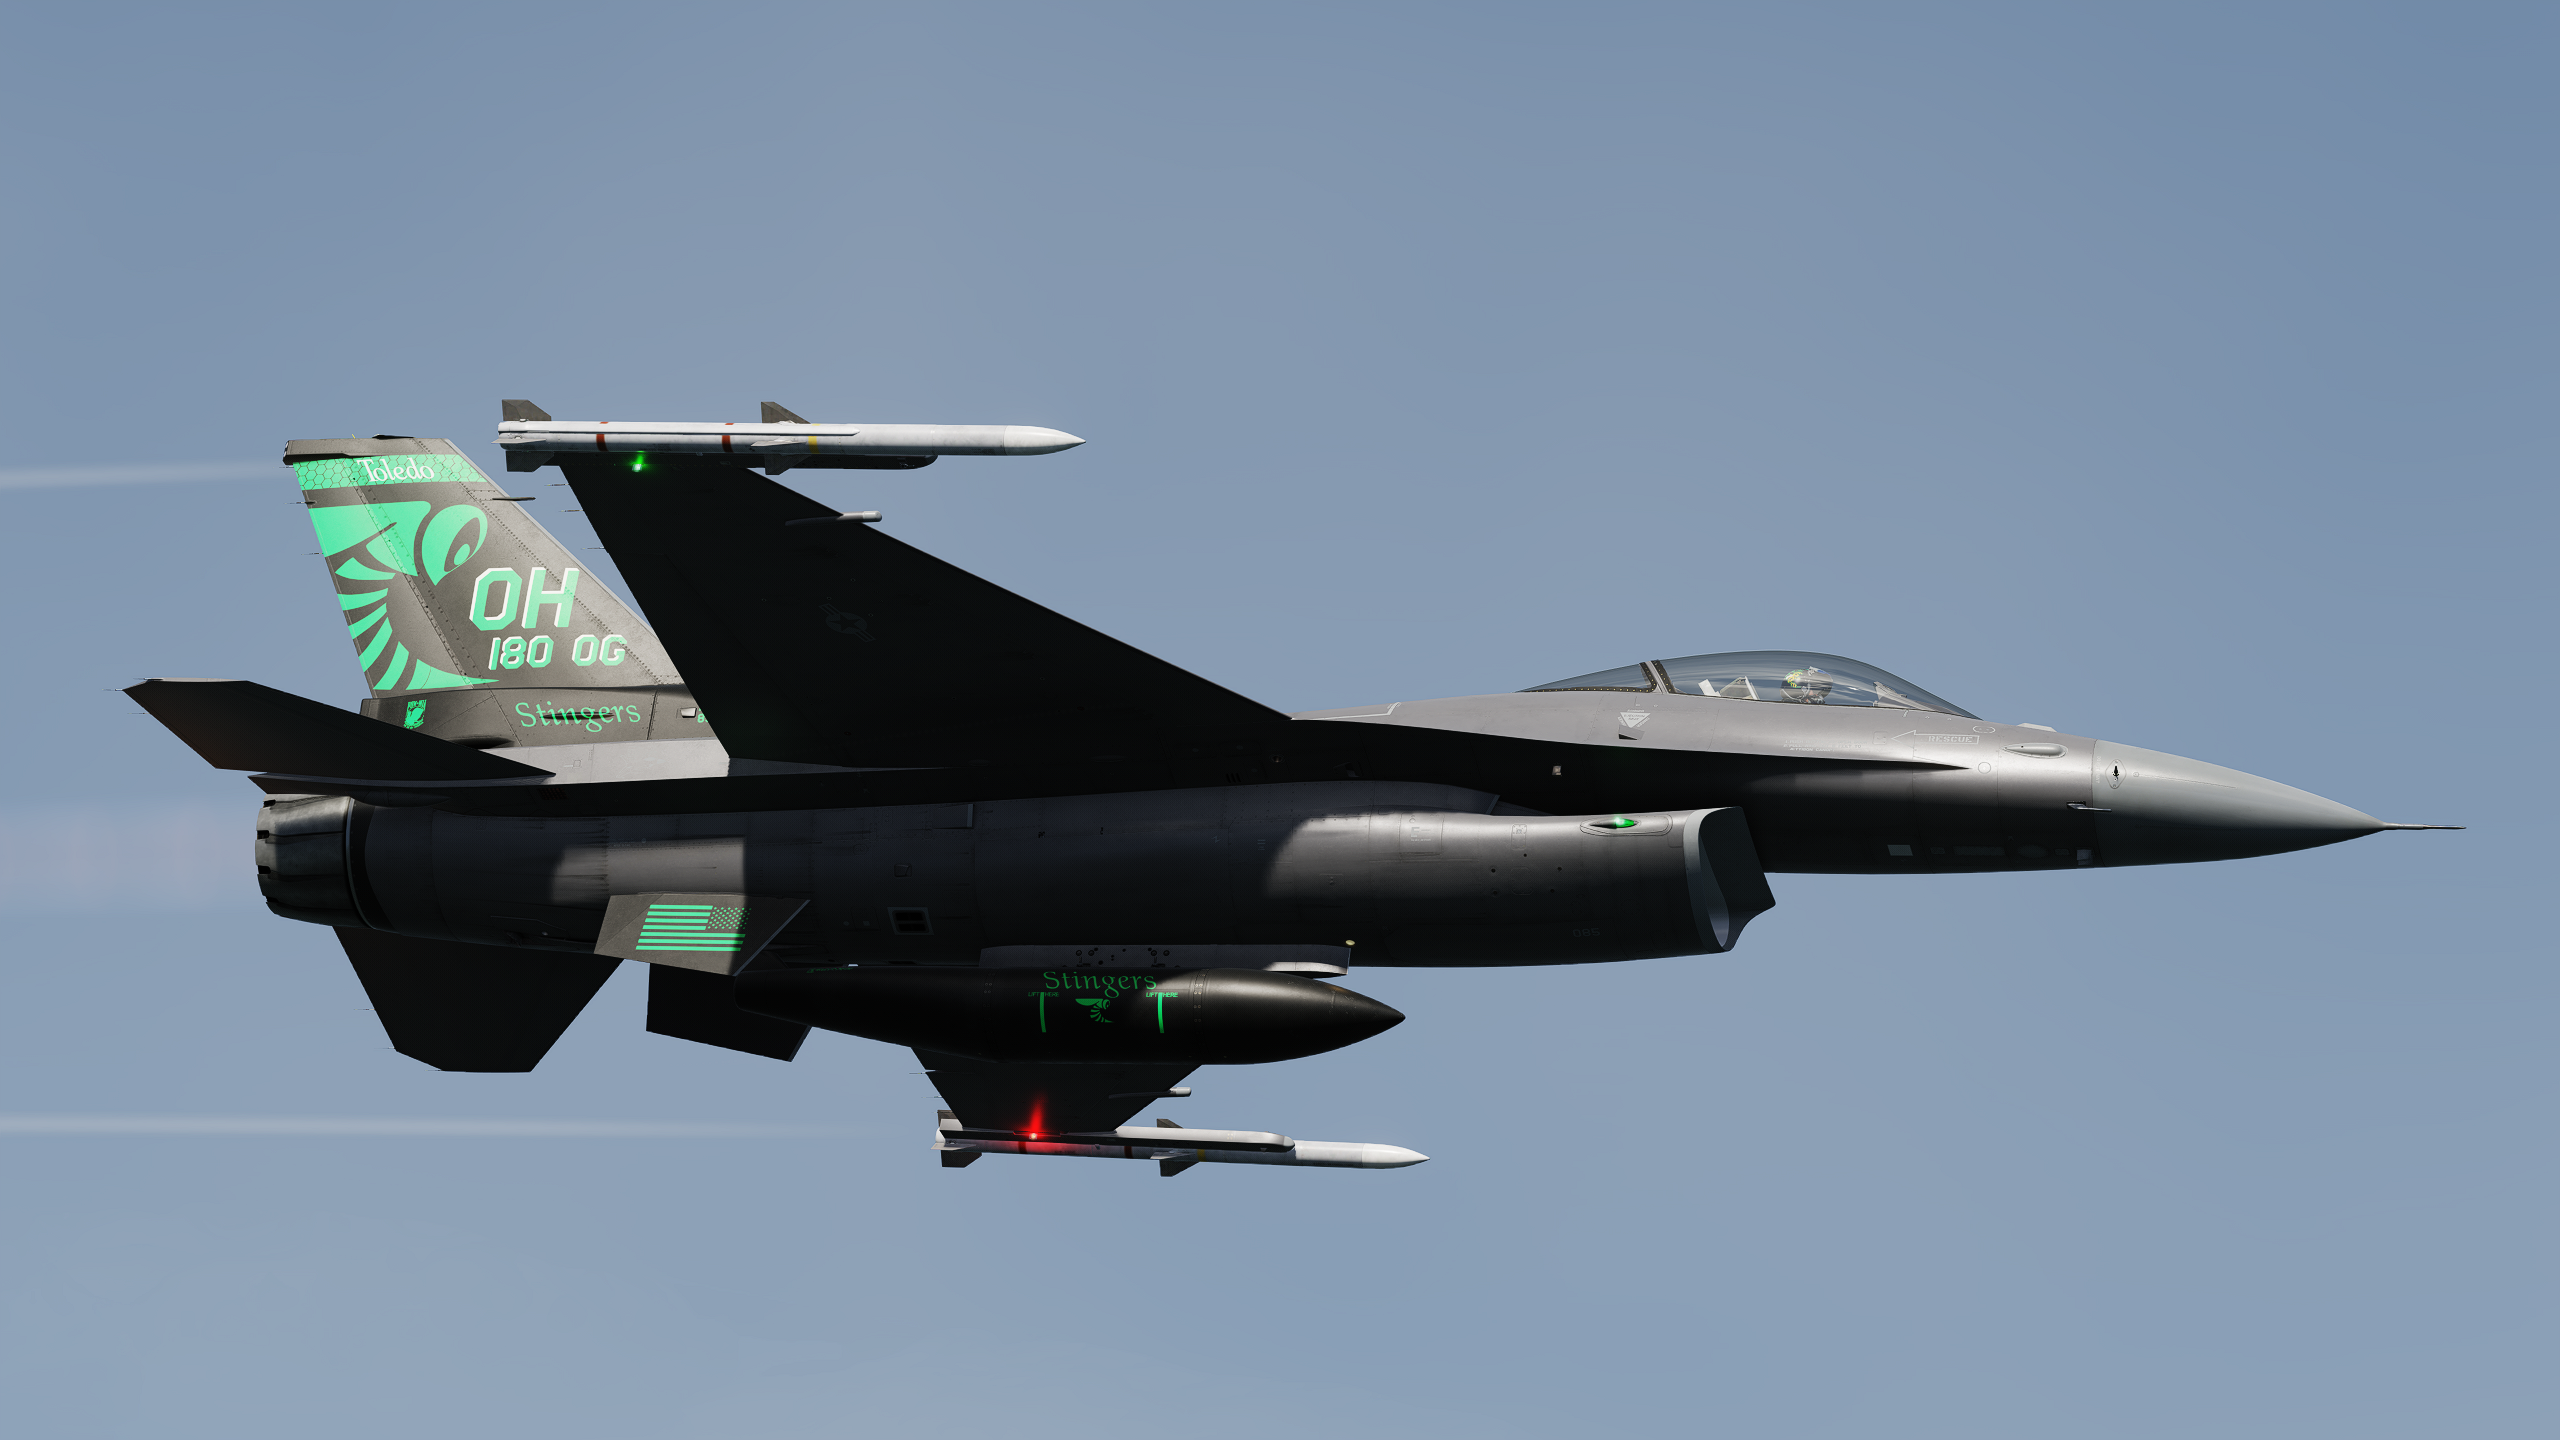
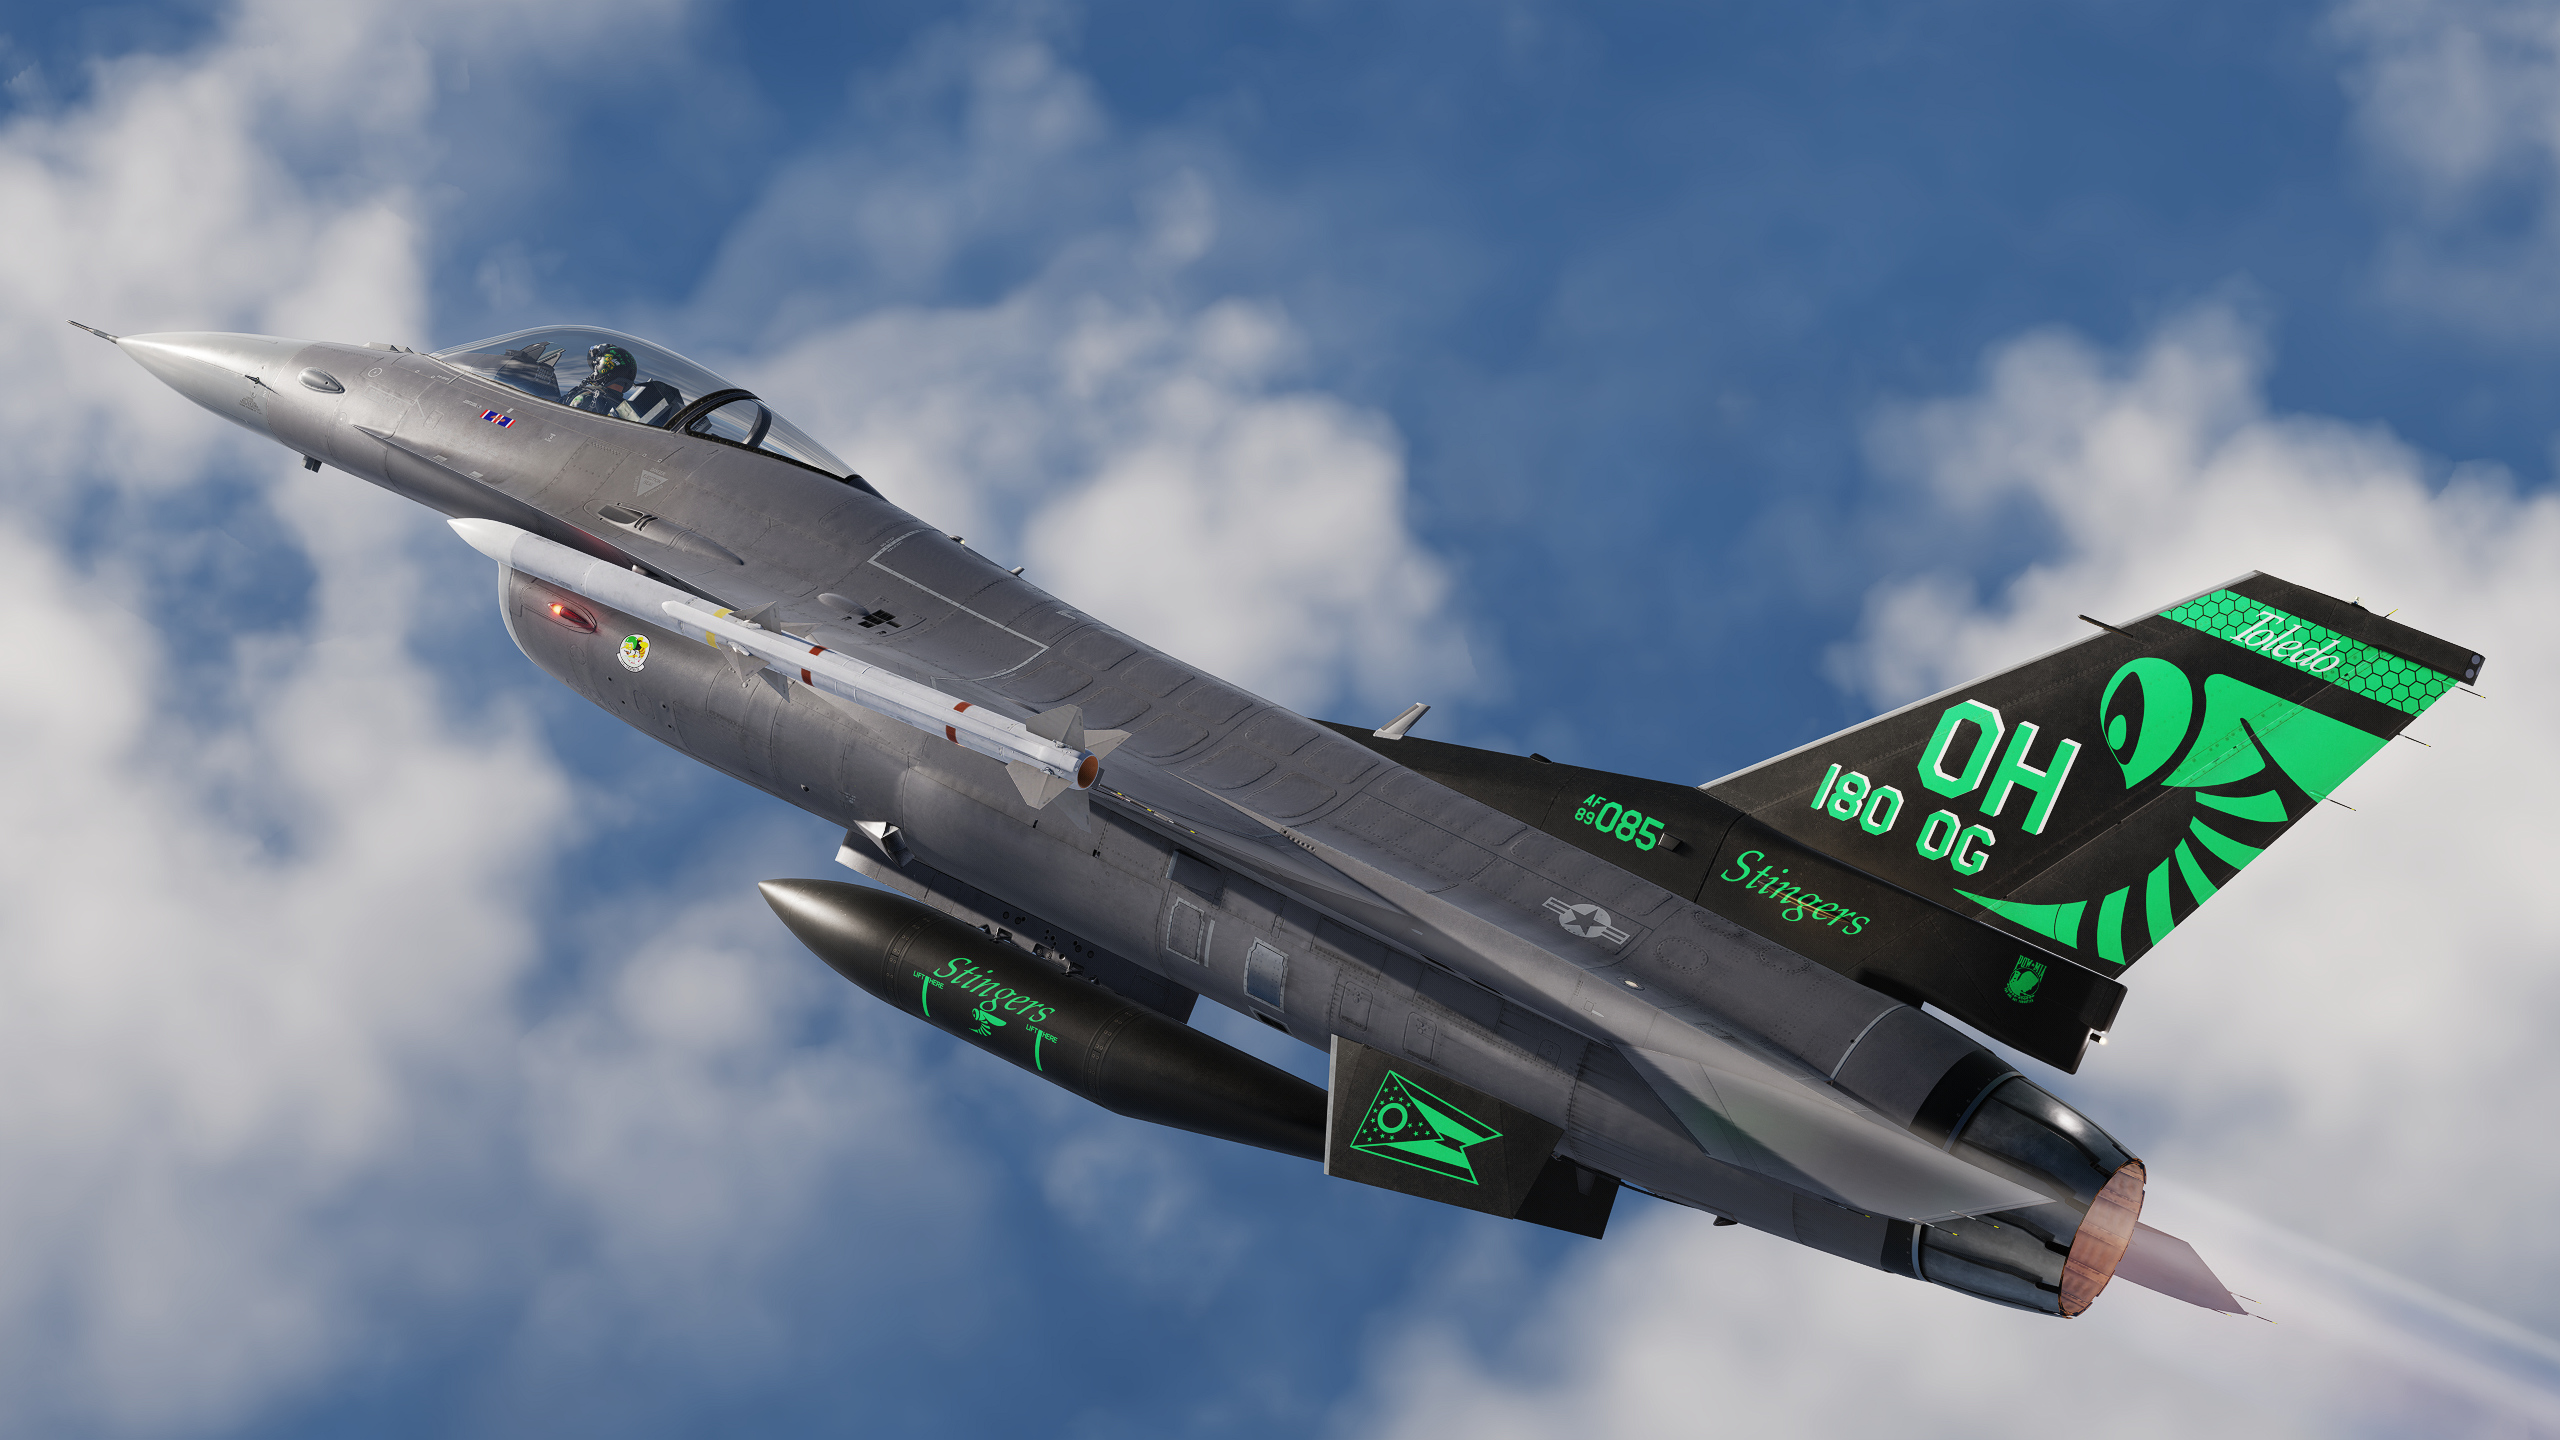
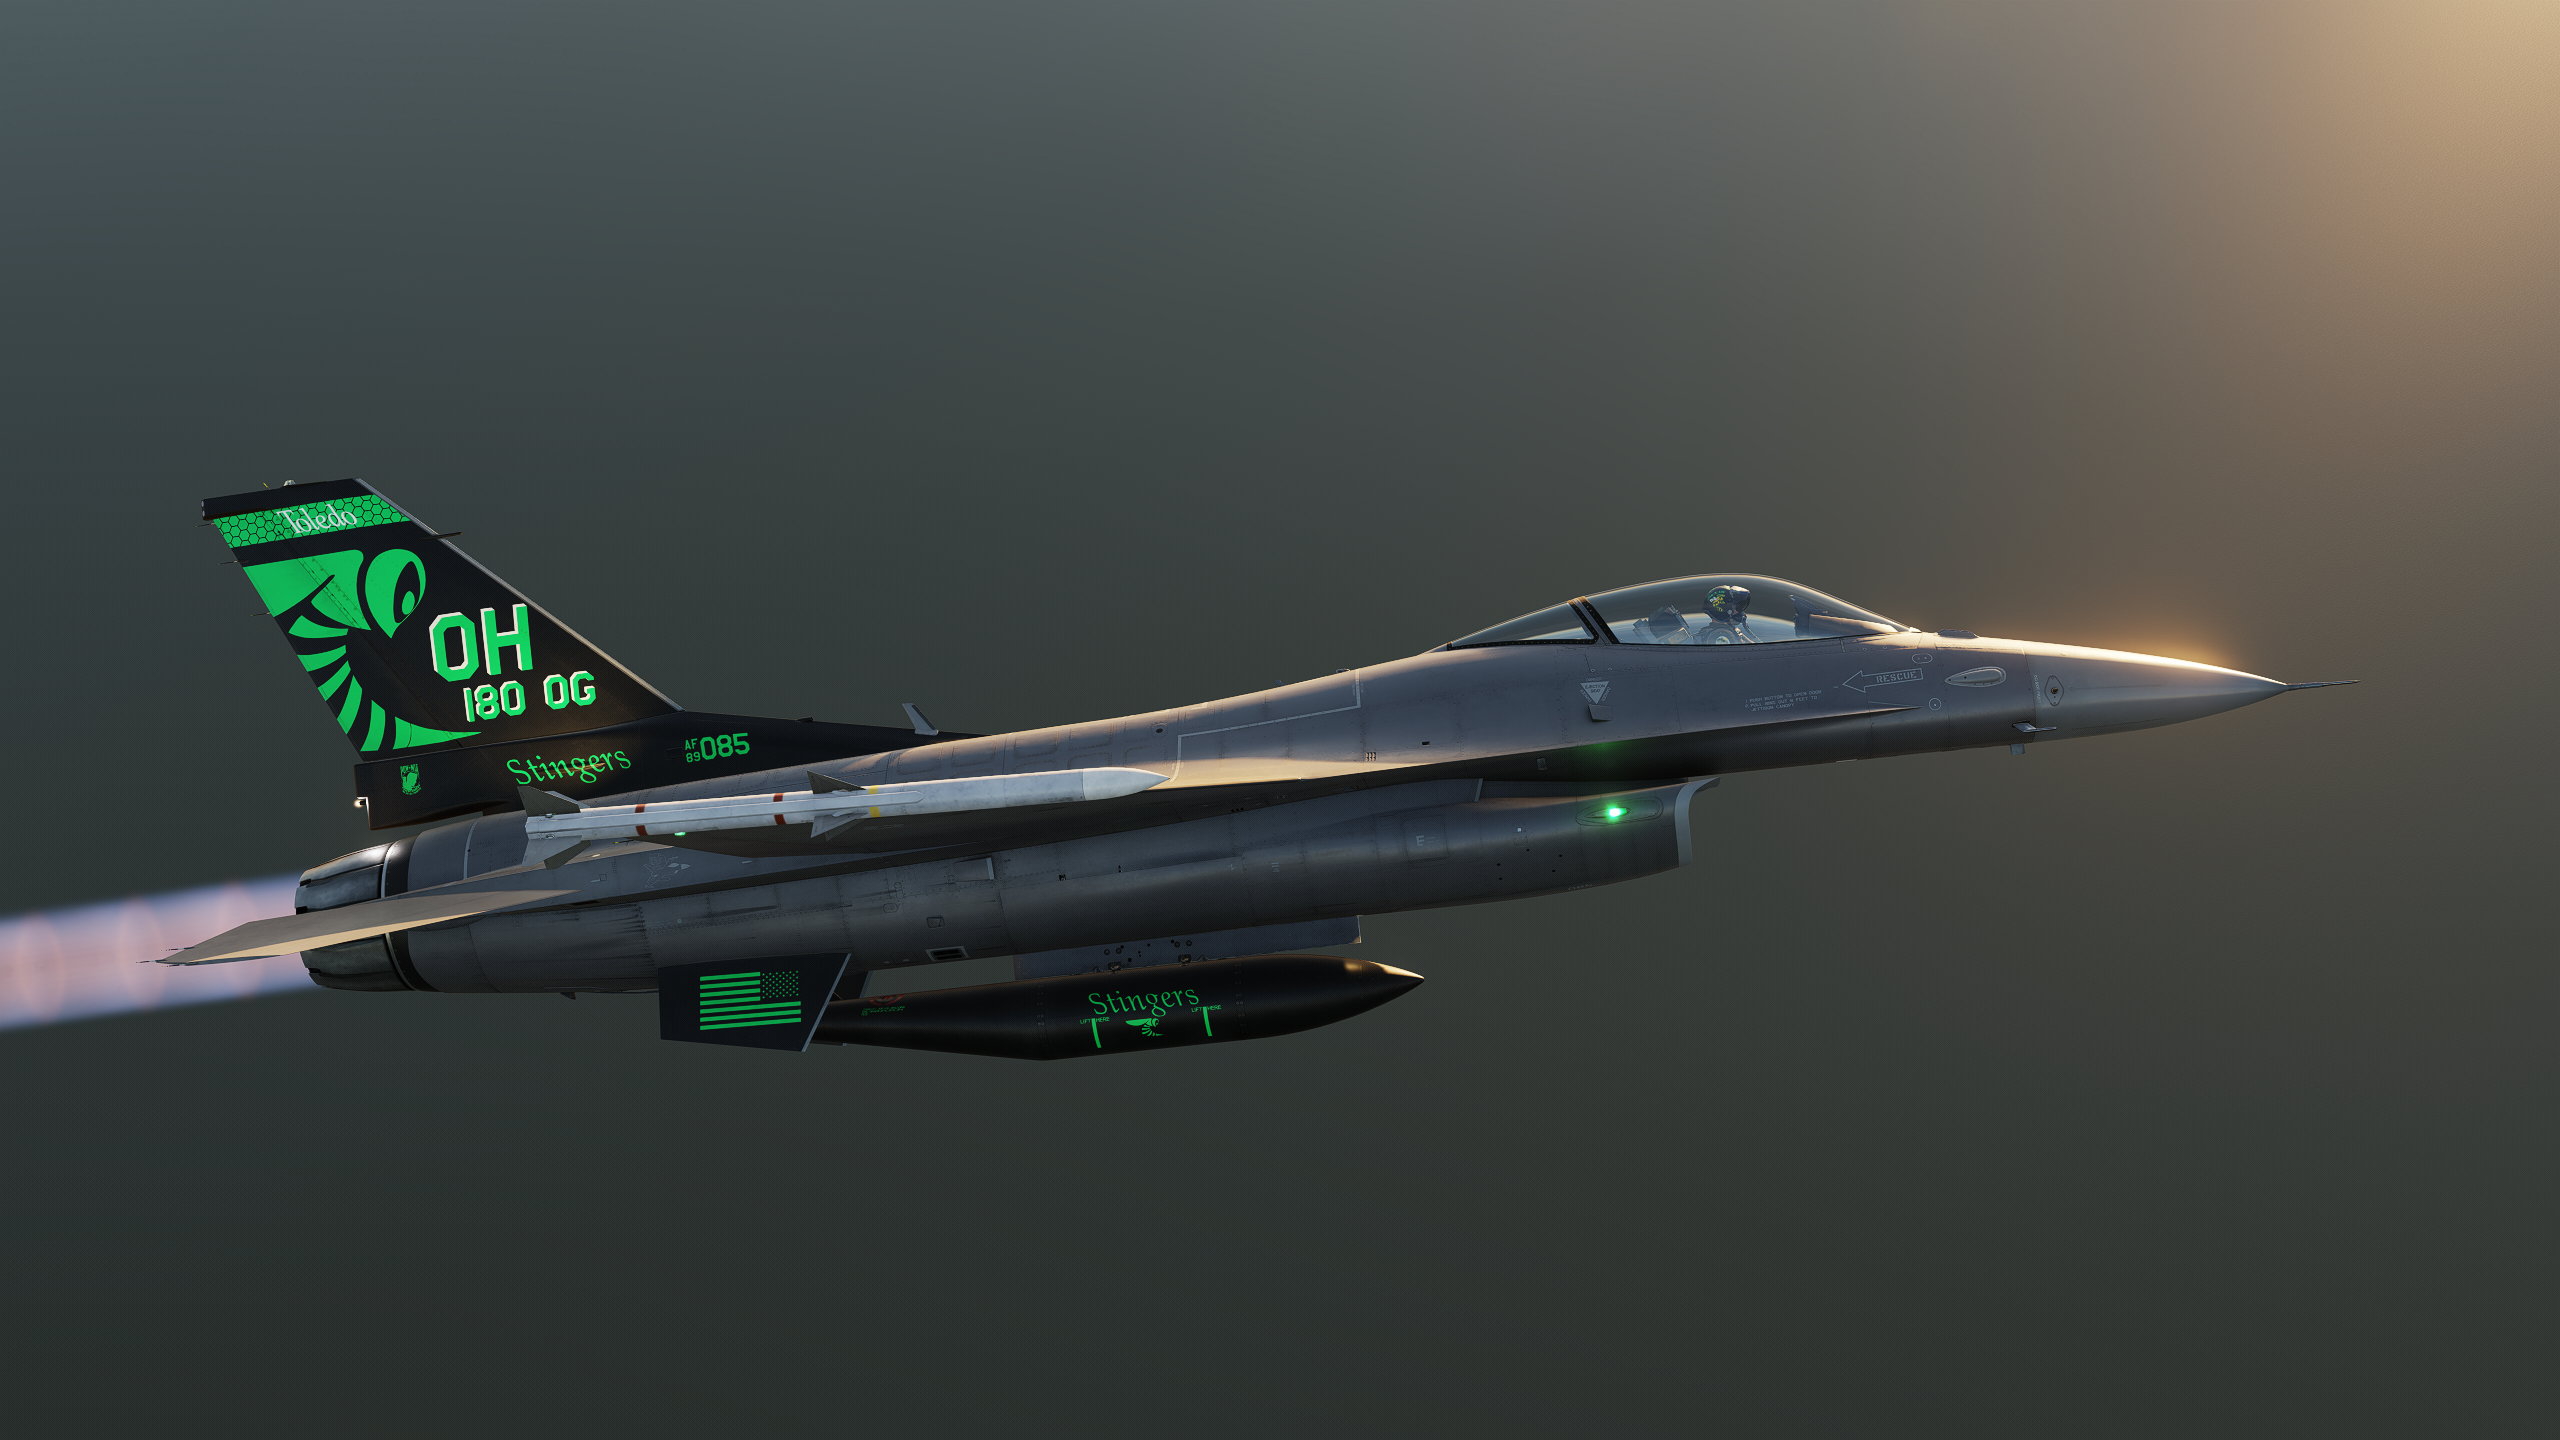
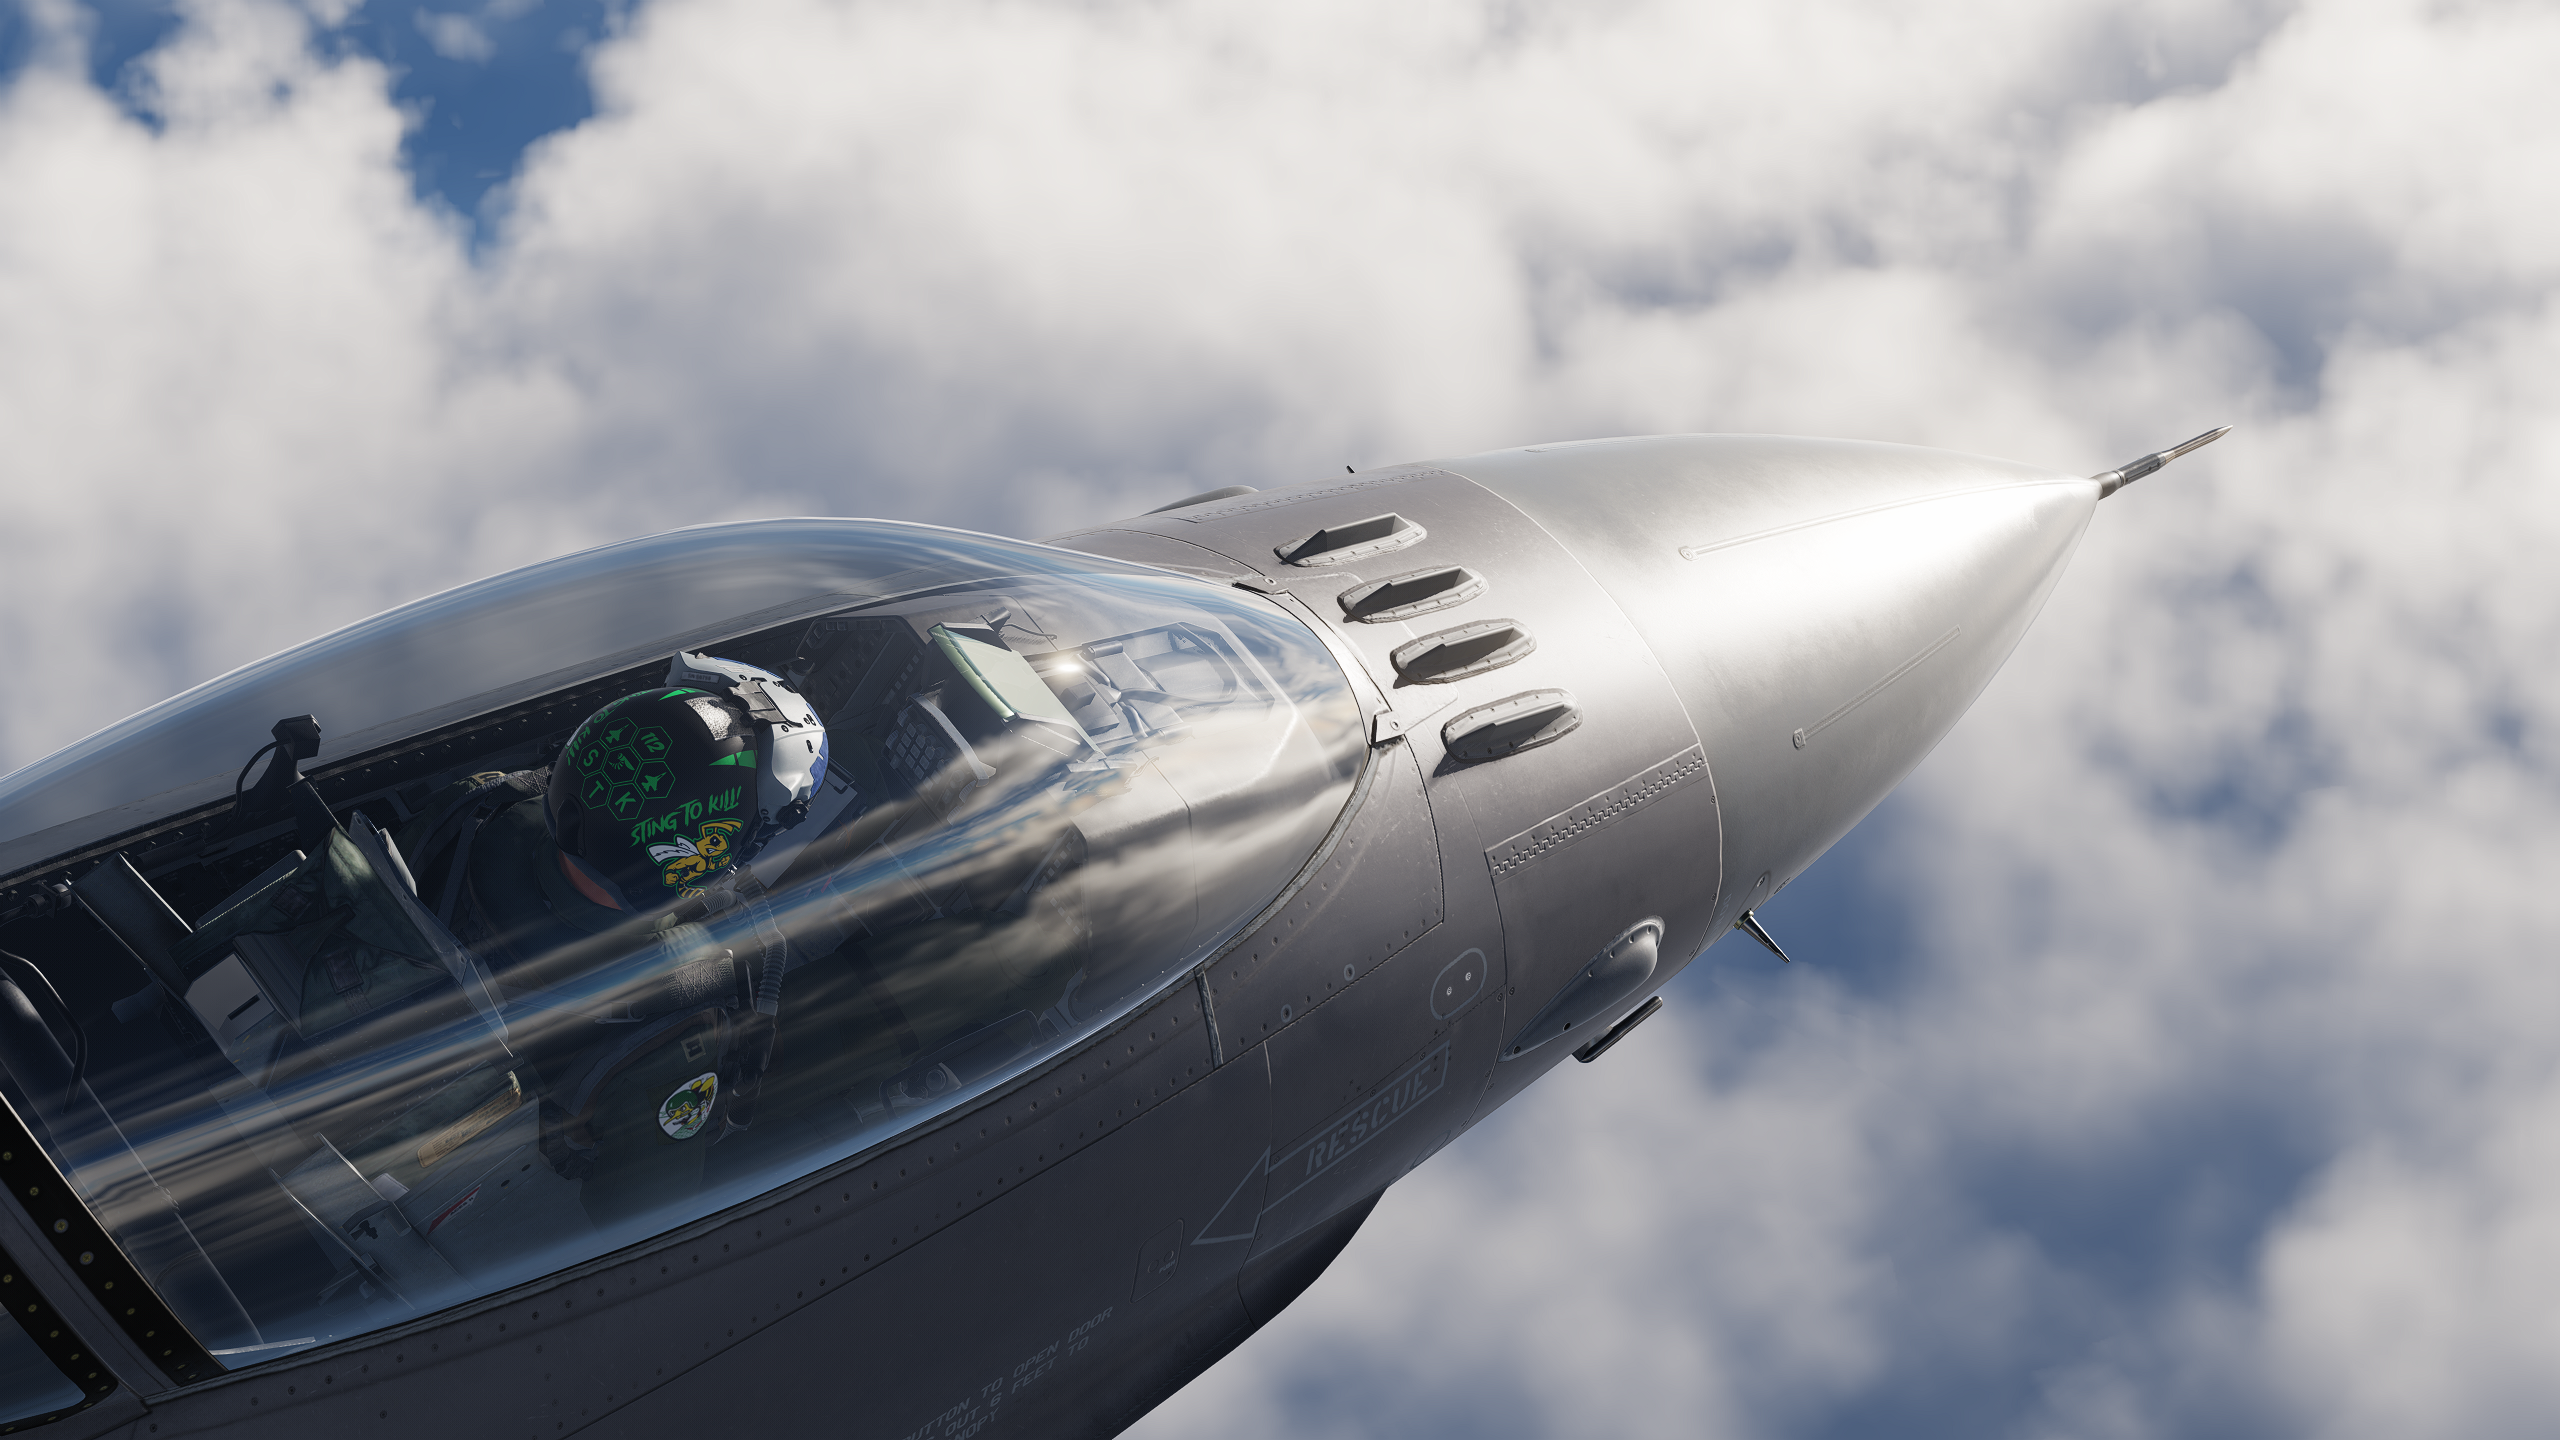
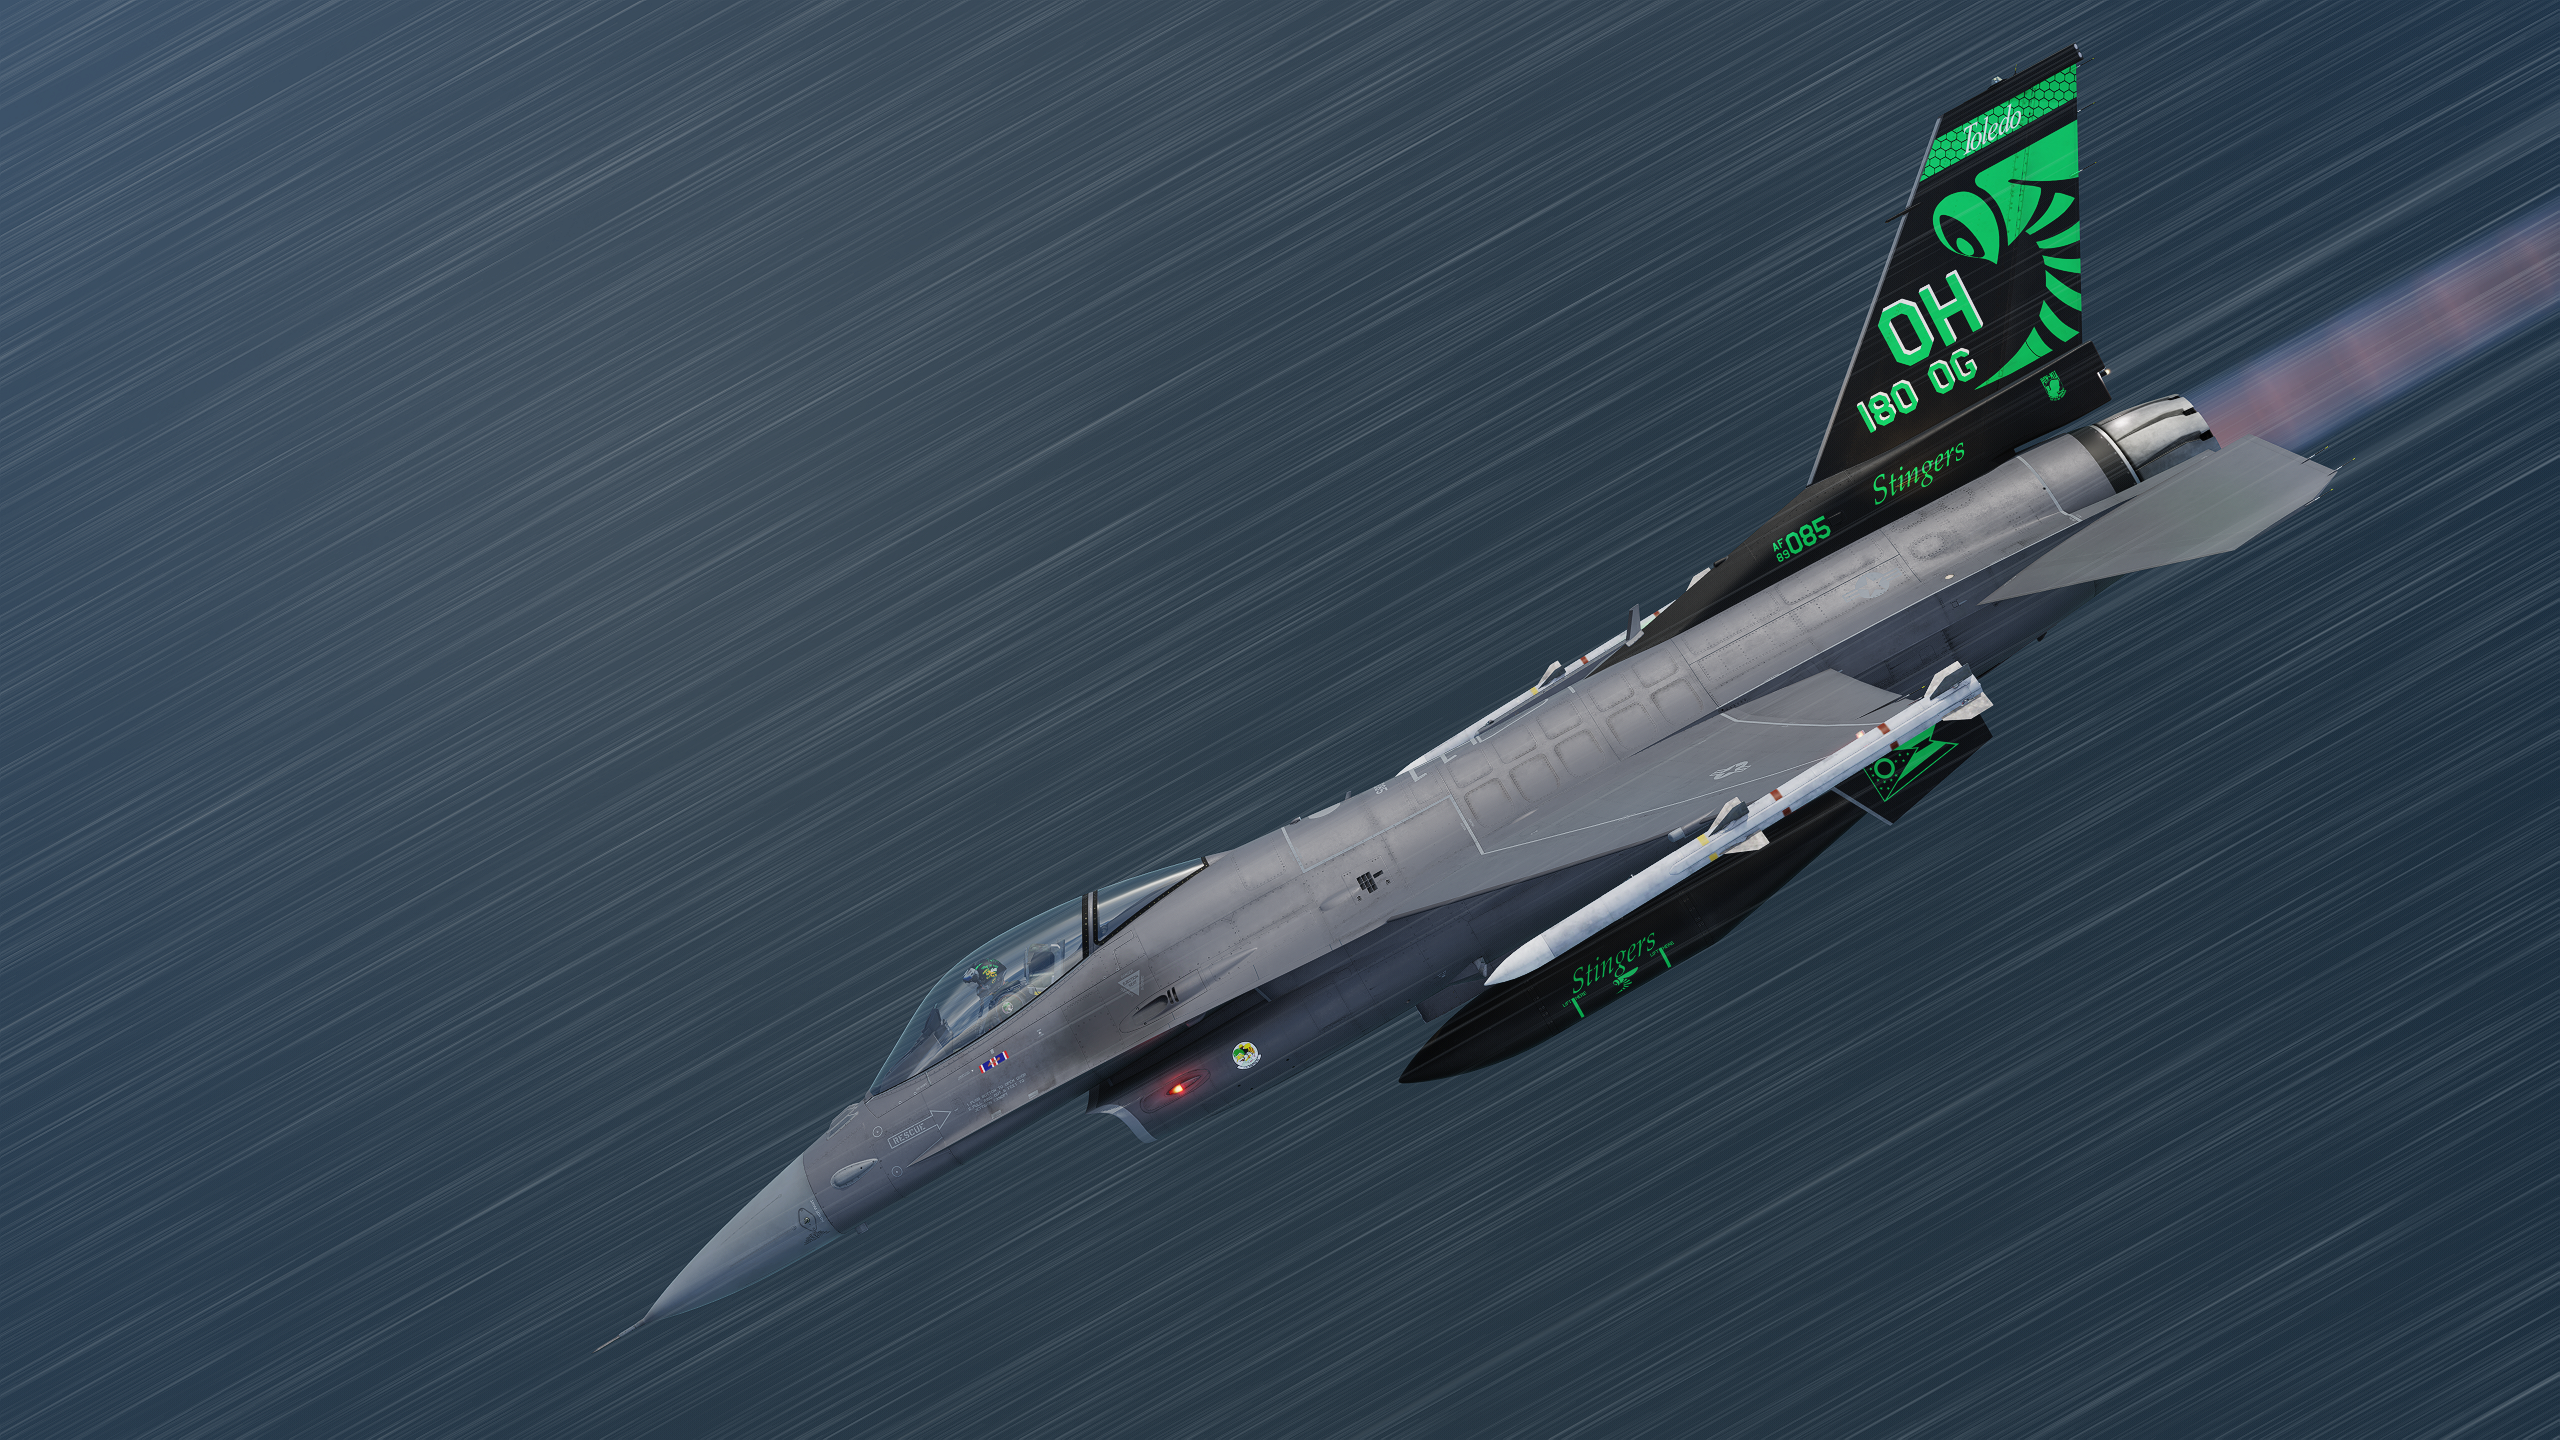
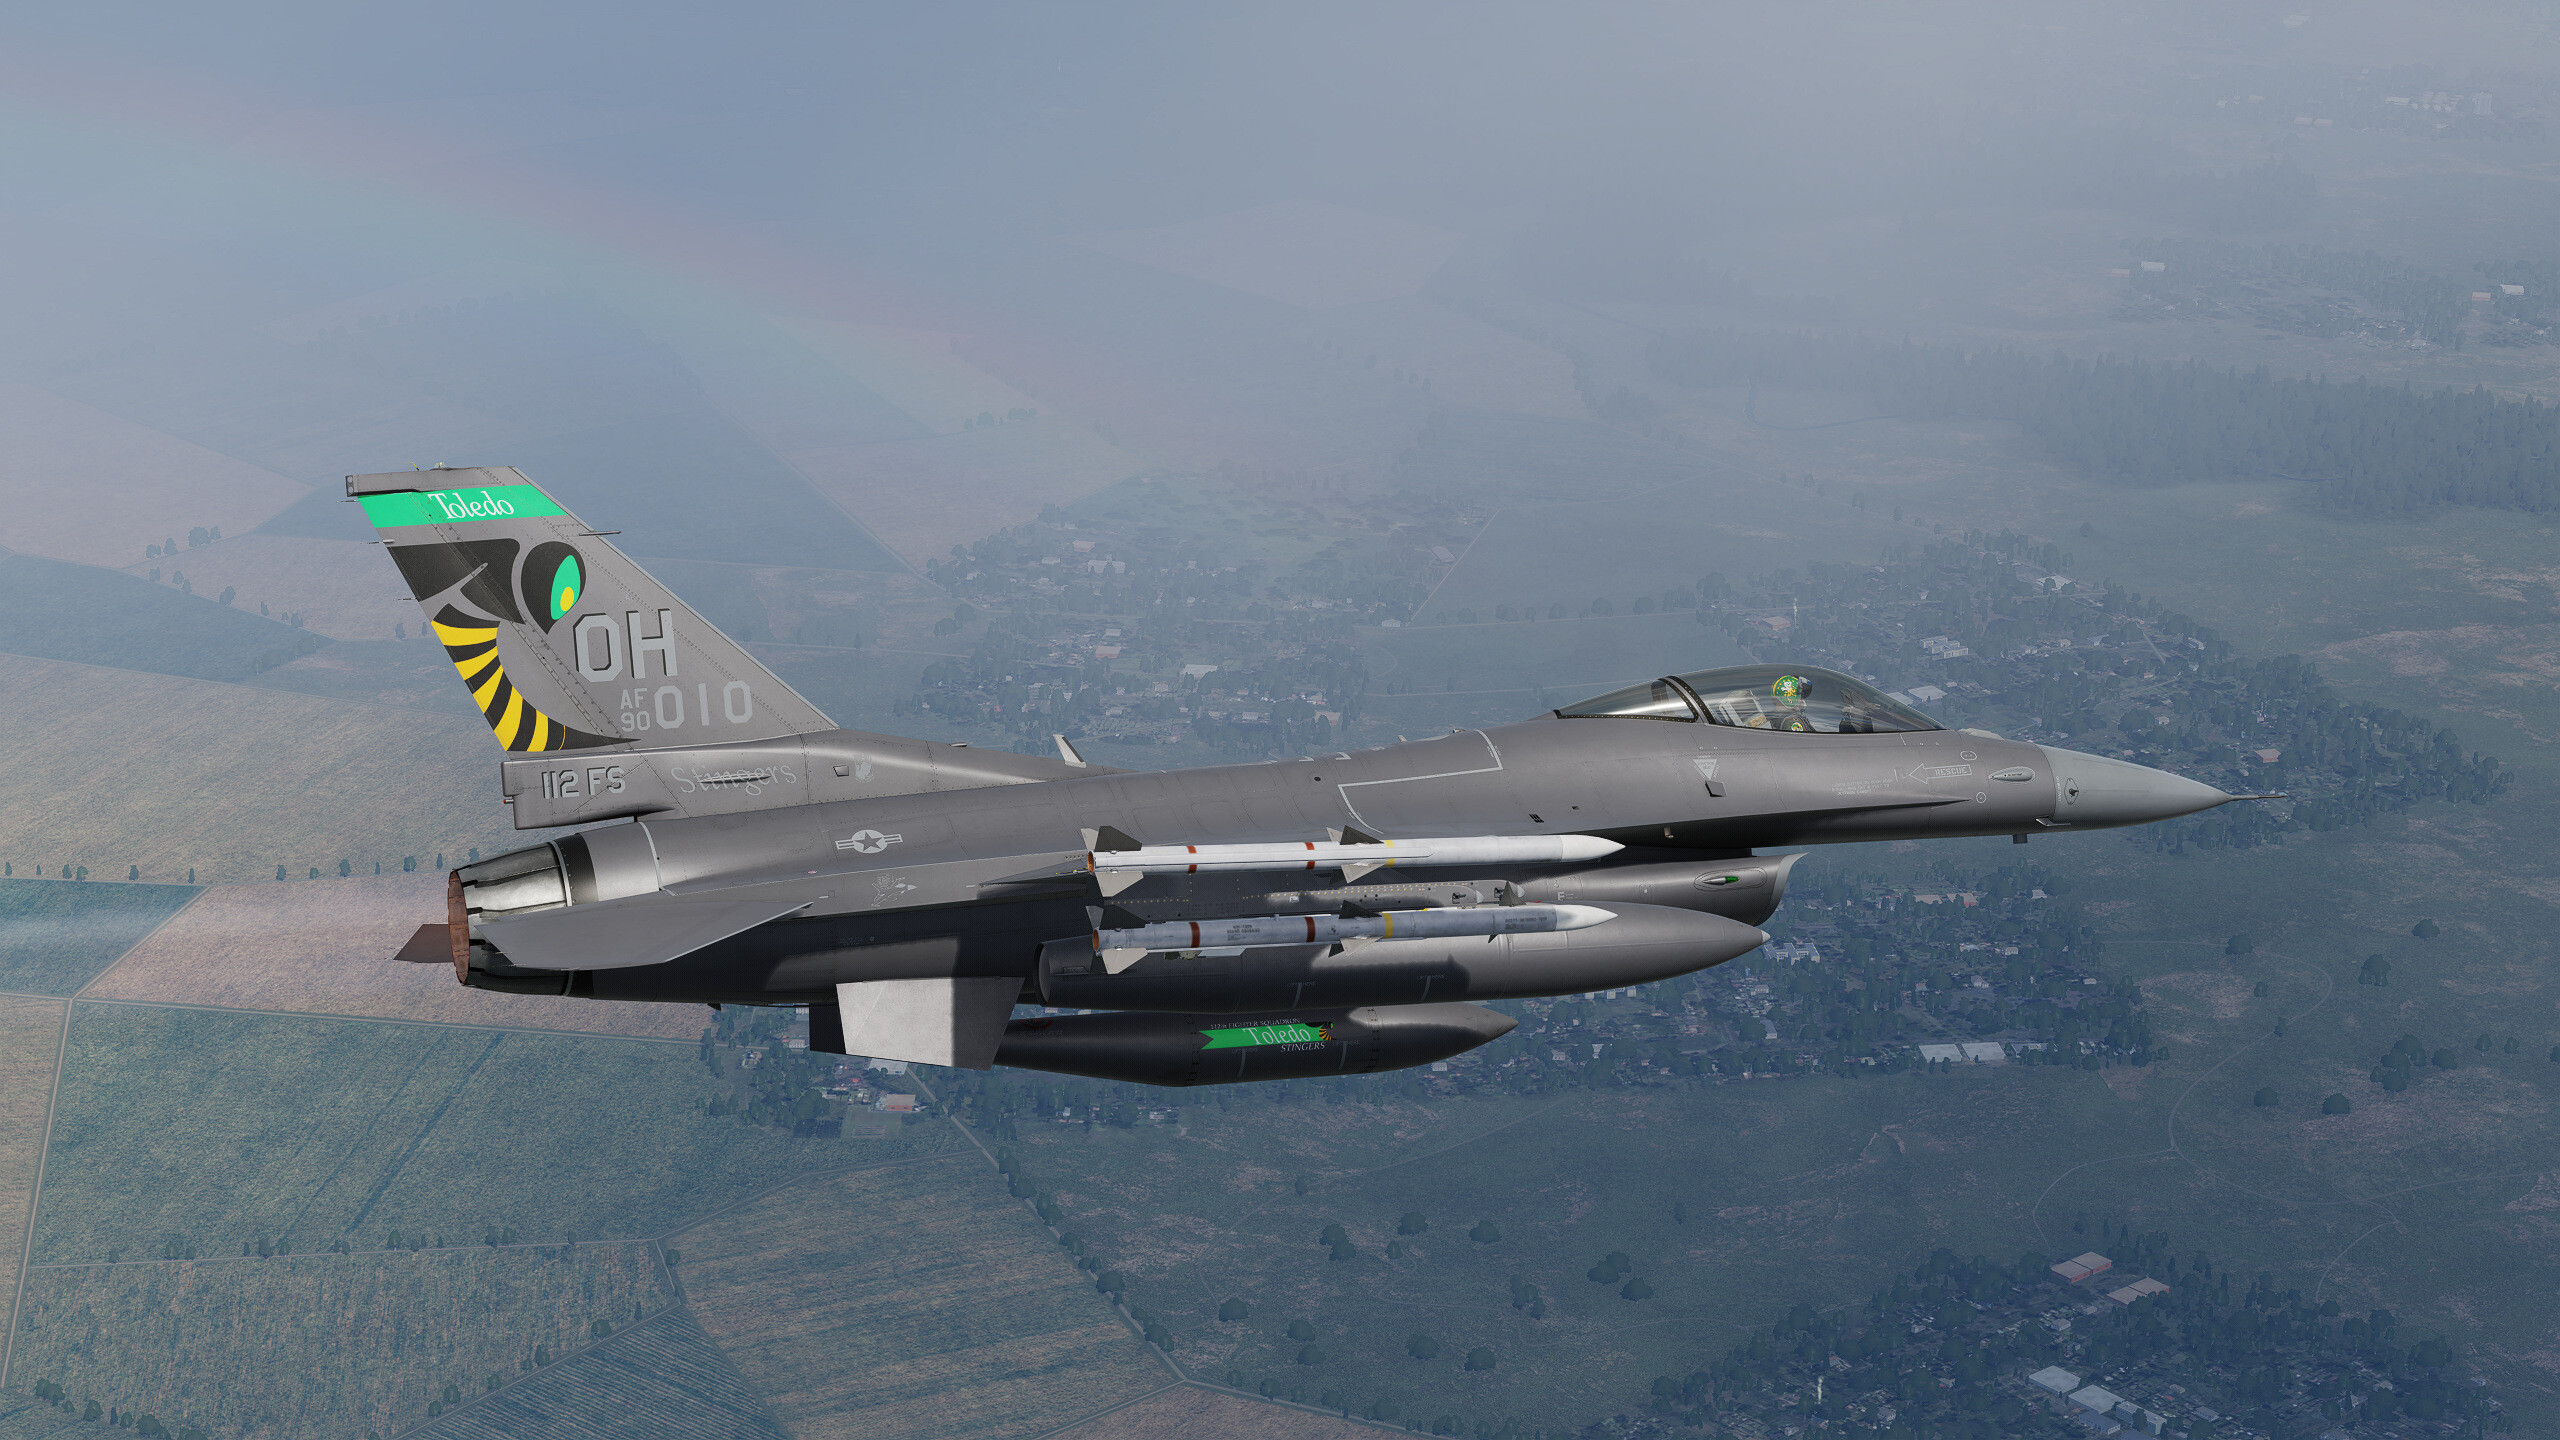
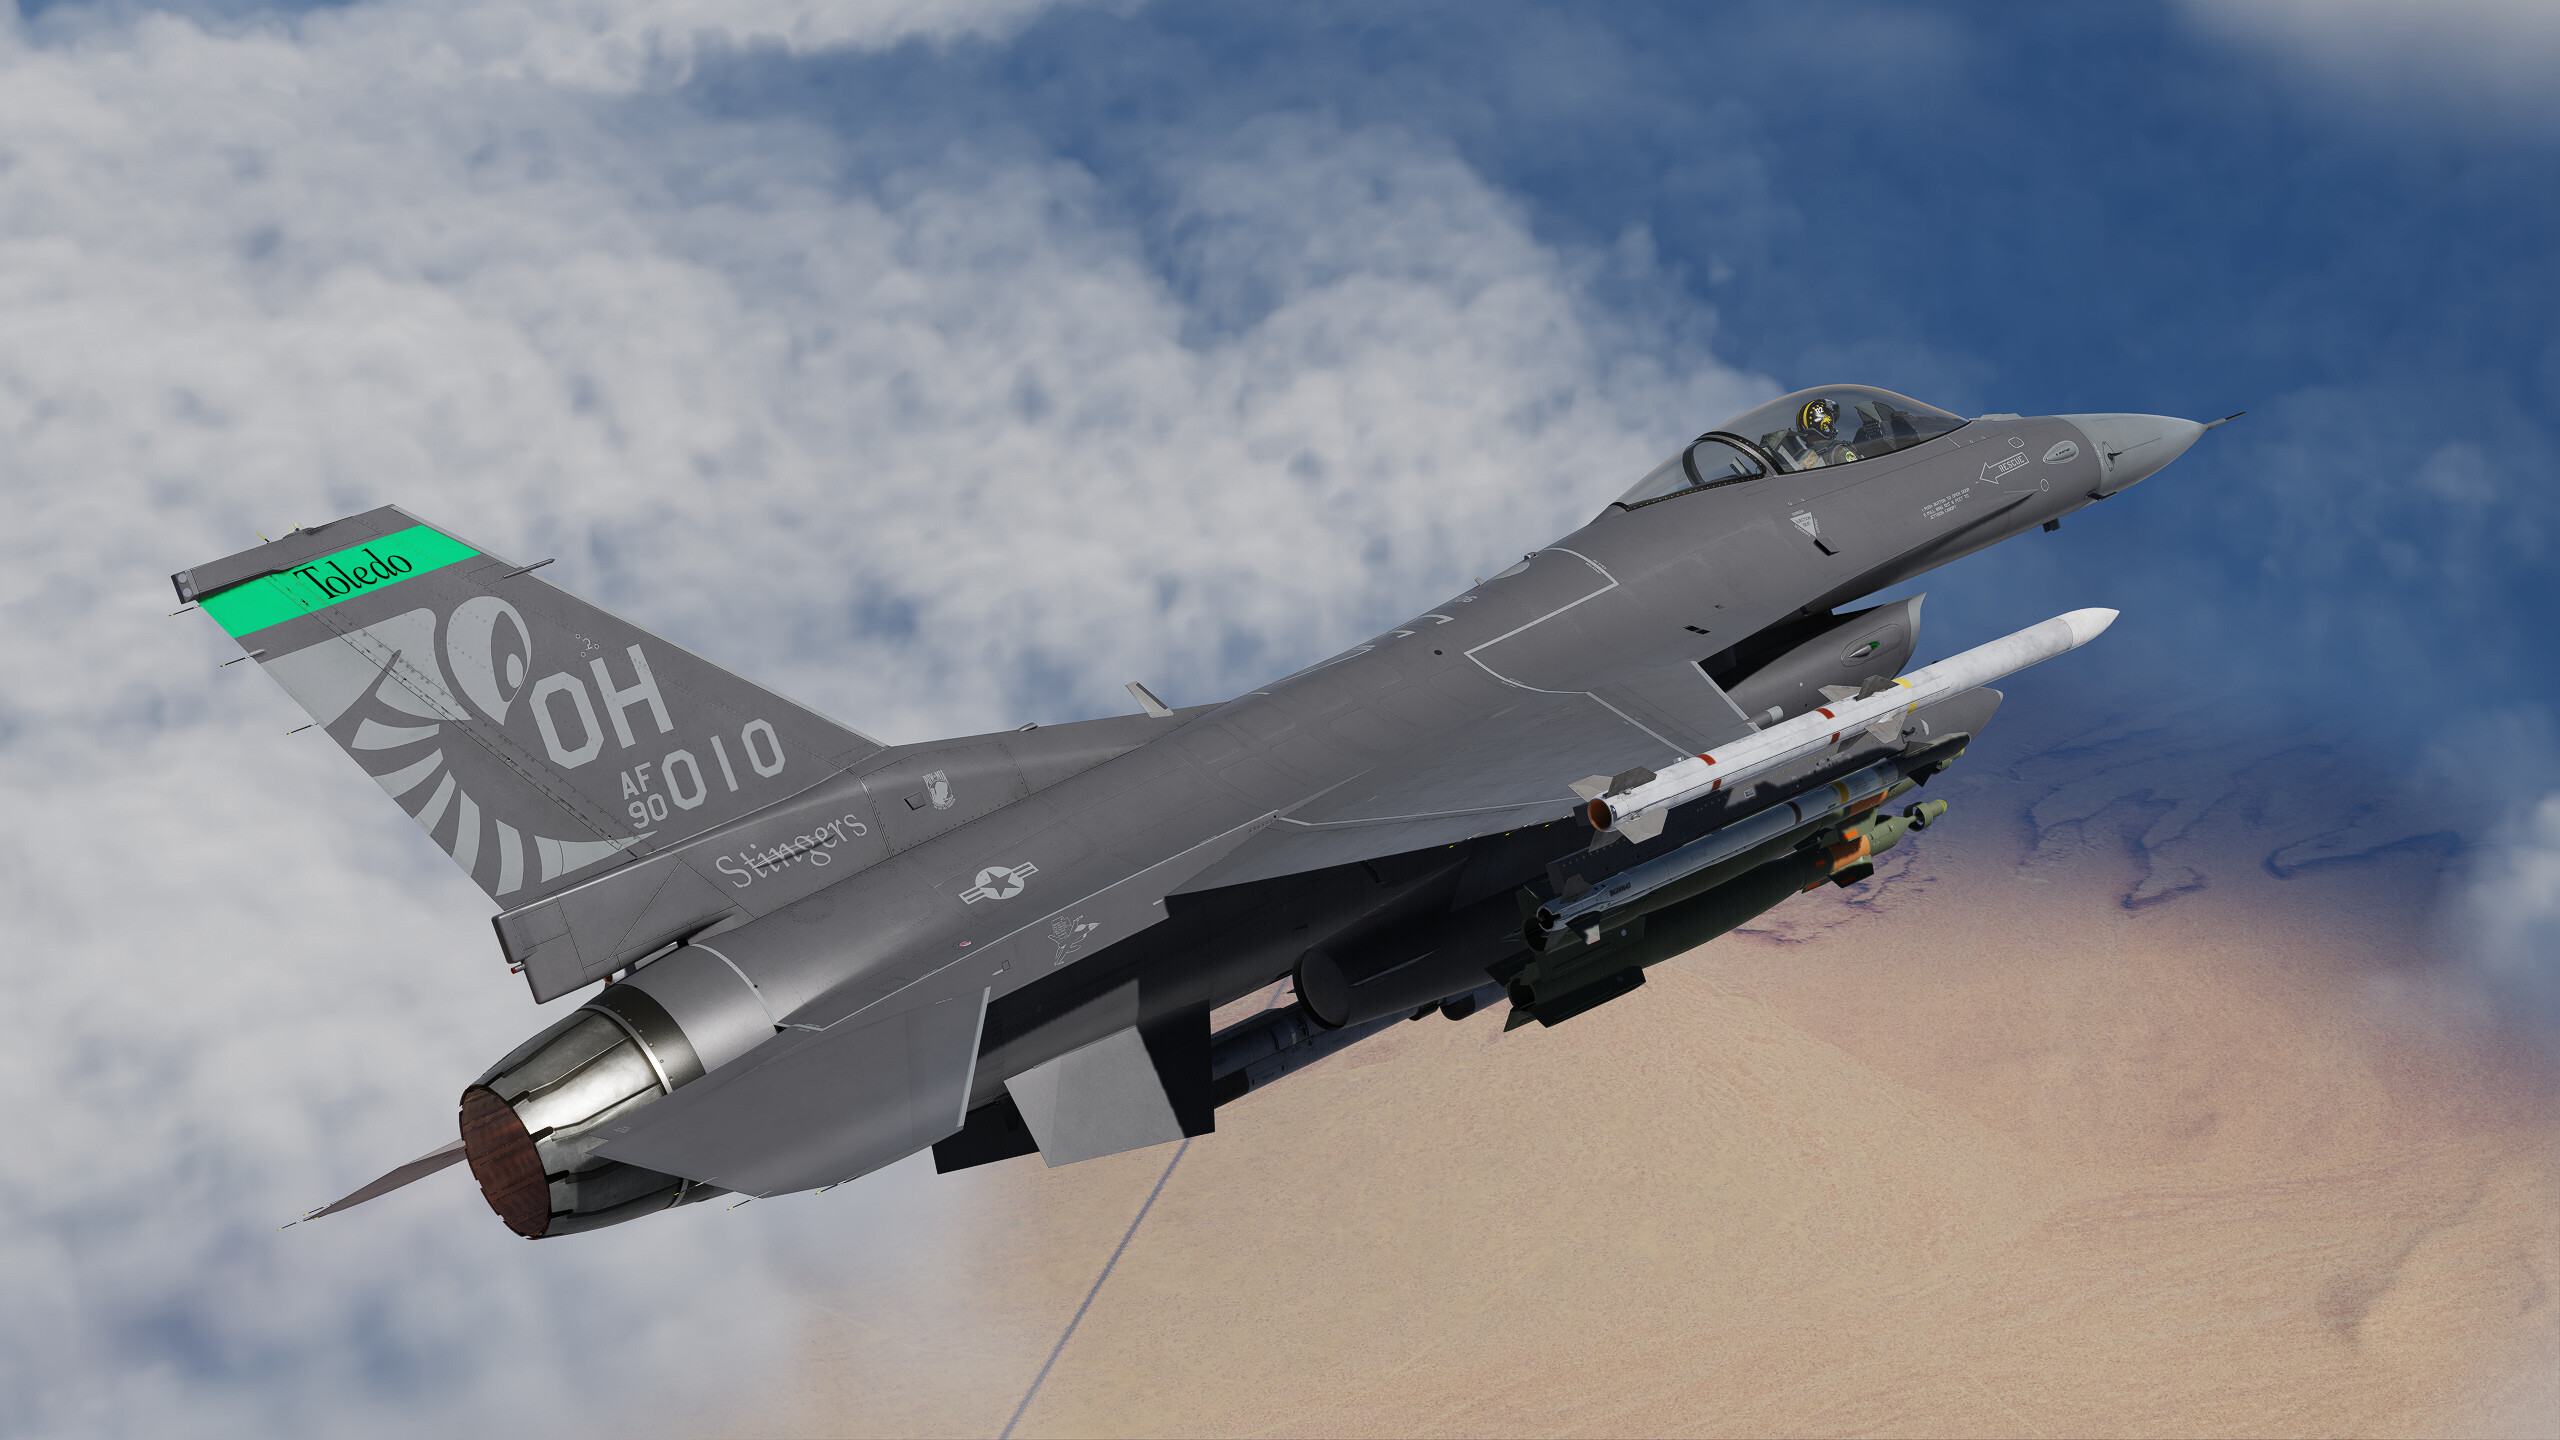
Stinger 89-2085 https://www.digitalcombatsimulator.com/en/files/3347180/ V3 uploaded. Color - https://www.digitalcombatsimulator.com/en/files/3343723/ Gray - https://www.digitalcombatsimulator.com/en/files/3343722/ Change log: New have glass paint color Roughmet/color fixes Pilot patches - added roughmets and normal maps. Pylons - Higher resolution text Fuel tanks - Higher resolution text and decals, new 300 gallon fuel tank art Custom HMD pilot helmet
-
Hmm, I just tried on my install and the parachute texture shows up fine for both liveries on all maps. I haven't been able to reproduce this. I didn't change the parachute texture and there isn't any reference to it in the configuration file so it should call ED's default texture located in :\DCS World OpenBeta\CoreMods\aircraft\F-16C\Textures\F16C_Pilot.zip It will be called pilot_f-16_parachute.dds and should look just like my screenshots assuming you installed it correctly and haven't made changes to ED's default textures. Questions: Did you modify the description.lua in the zip folder? Did you extract the zip file with all the textures and put the folder in saved games or copy the zip to the core mods F-16C livery folder like the readme said? It shouldn't matter but just trying to figure out how you installed it so I can test. Are you trying to add the desert suit to another livery that already has custom pilot textures?
-
Line version of the 79th tigers. I have versions for both green and desert tan flight suits. Desert tan requires downloading green. Desert Tan Flight Suit: https://www.digitalcombatsimulator.com/en/files/3343146/ Green Flight Suit: https://www.digitalcombatsimulator.com/en/files/3343145/
-
Added mod links
- 1 reply
-
- 1
-
-
DCS World 2025 Screenshots and Video Thread
Cydrych replied to ST0RM's topic in Screenshots and Videos
These guys make some cool videos! -
Nice job. If you load the cockpit model in model viewer there is a blue button near the top that will allow you to generate a description.lua. That will give you the code to call those textures. People will be able to copy paste the textures to the livery folder of their choice and then copy paste whatever code is needed to the description.lua. It is a little more work but won't get overwritten with updates and won't change cockpit textures for all liveries. I had to do this for the pilot suit textures I'm working on.