rafalg78
-
Posts
72 -
Joined
-
Last visited
1 Follower

-
Please check out my post if you are interested in FFB and VP Force Rhino.
-

Honey, I developed FFB joystick (DIY)
rafalg78 replied to propeler's topic in PC Hardware and Related Software
Please check out my post if you are interested in FFB and VP Force Rhino. -
Please check out my post if you are interested in FFB and VP Force Rhino.
-
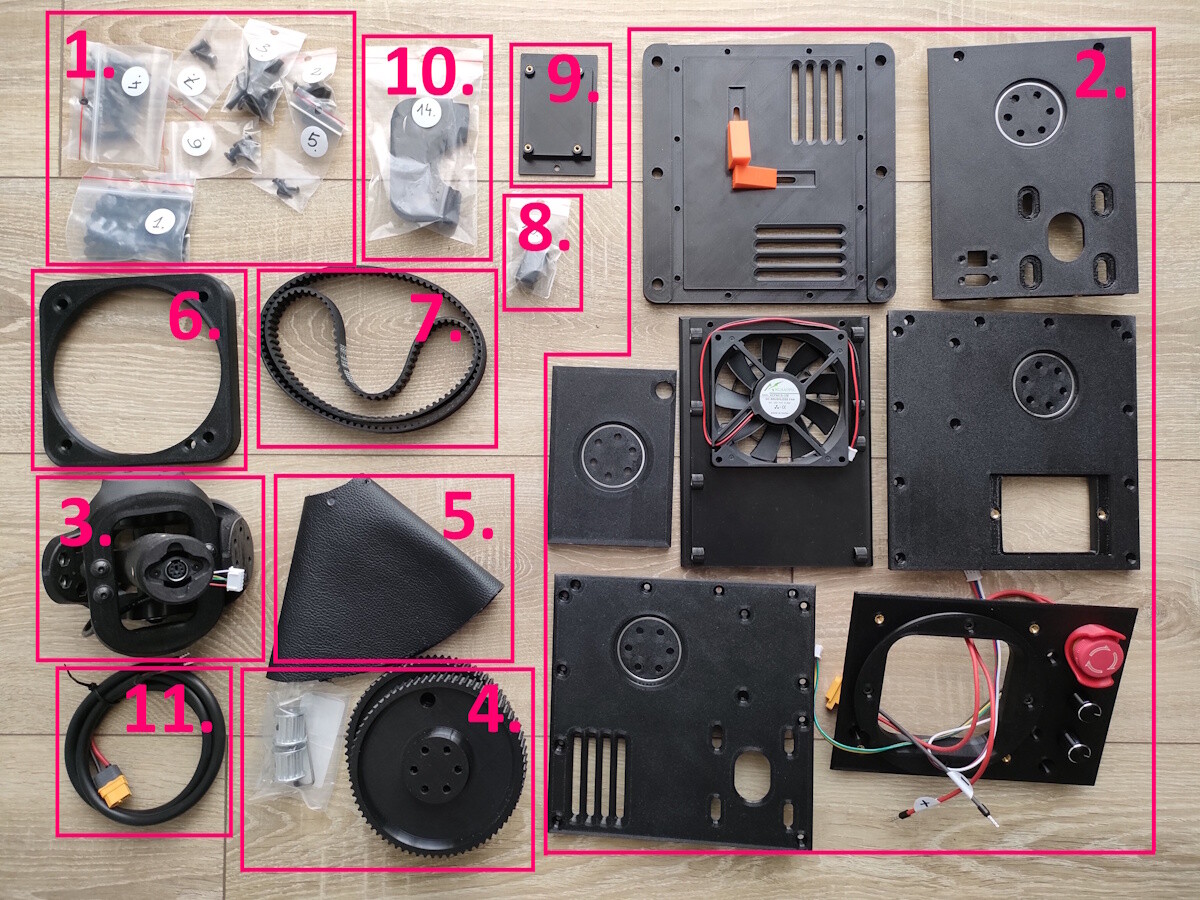
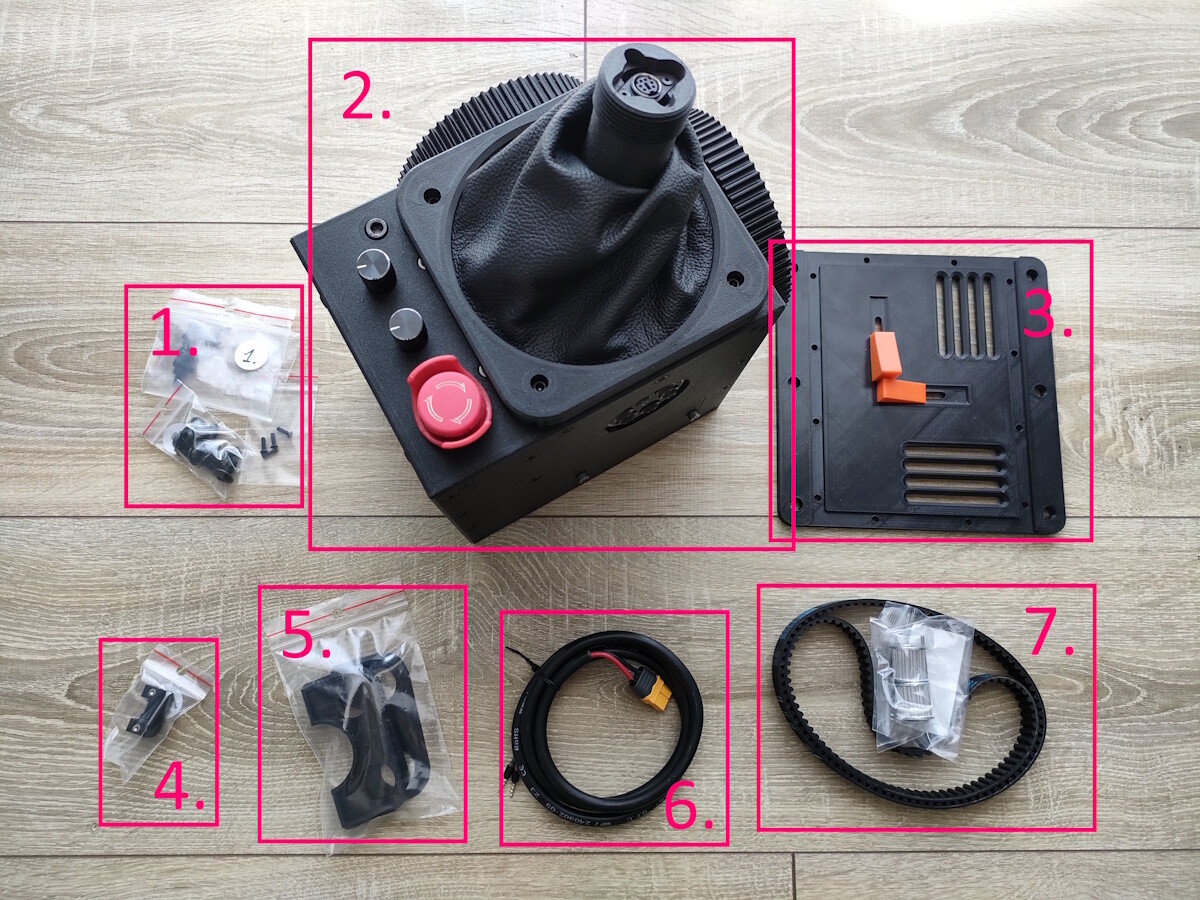
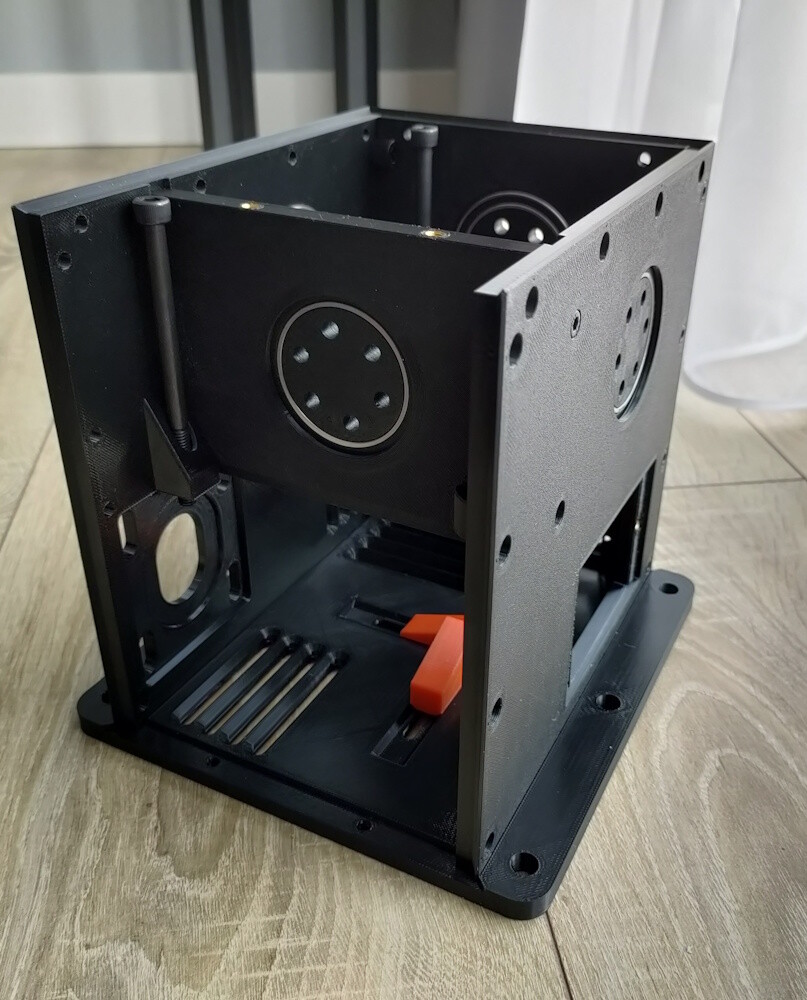
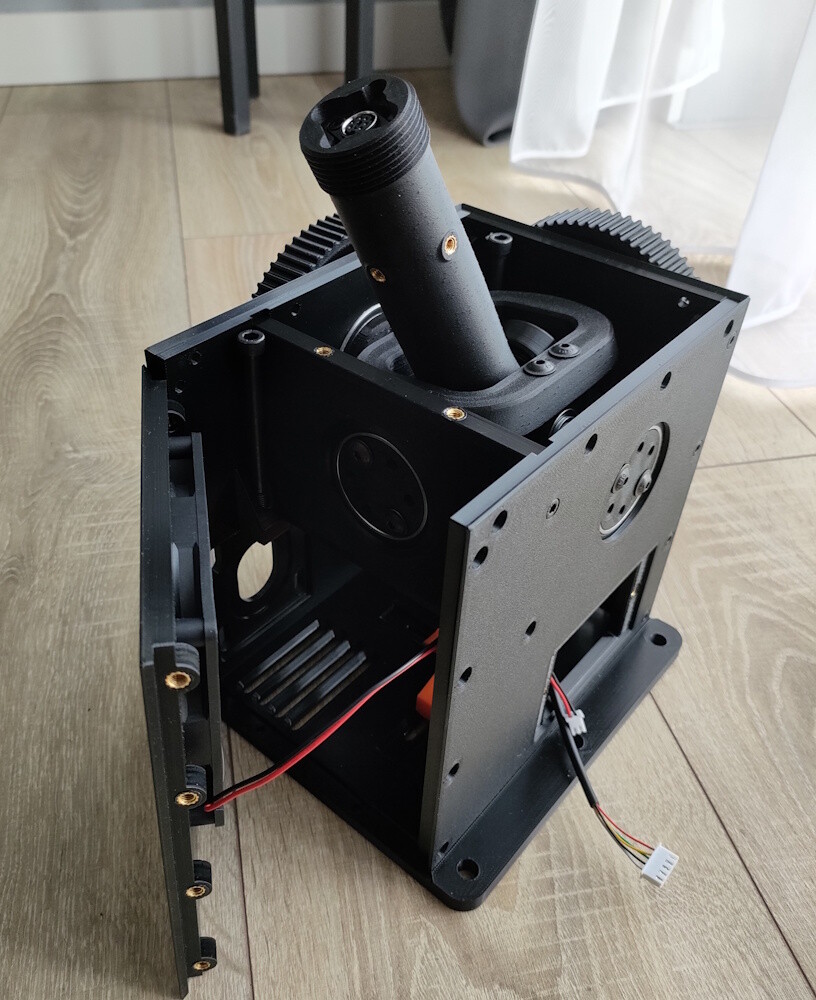
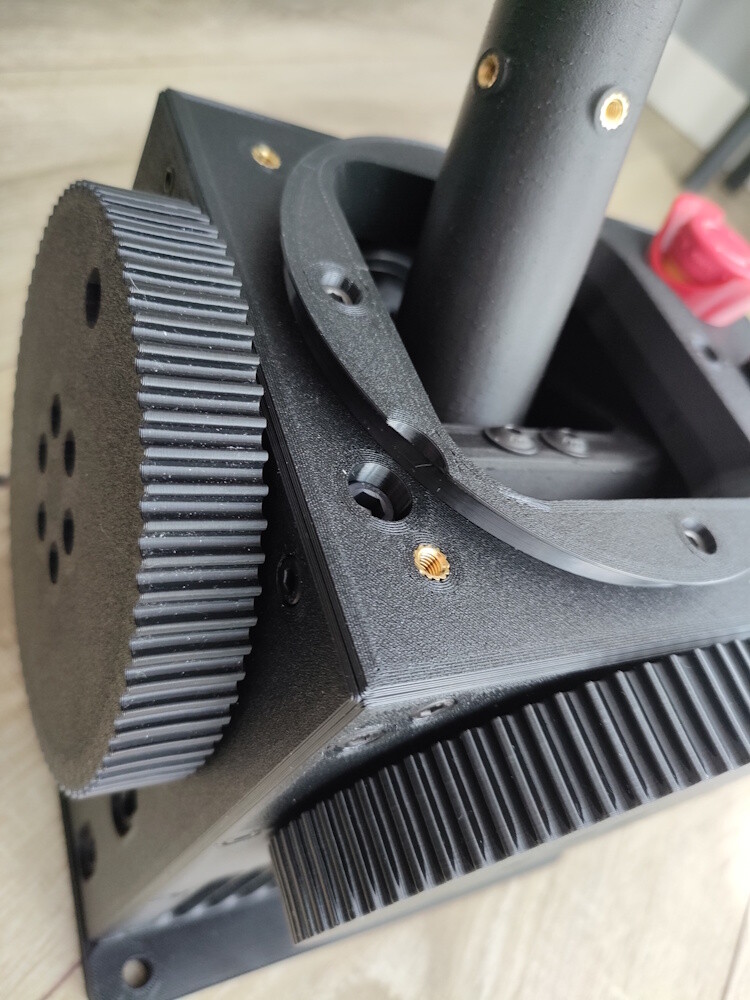
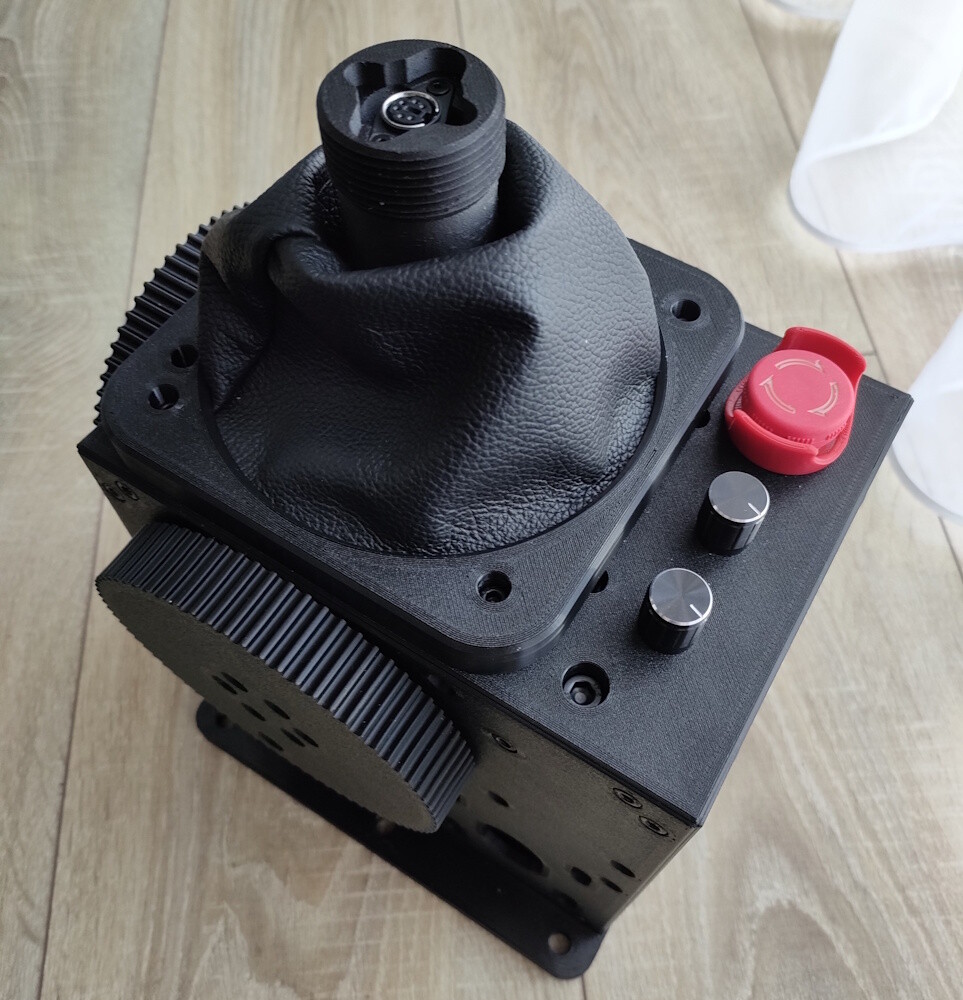
You don't have to wait any longer to feel the new quality that Force Feedback gives you. To build a Force Feedback Base you will need: 1. DIY FFB kit: 57BLF03 x2 + USB - 299€ (+VAT) 2. The complete Case Kit that I am promoting here 3. 19-24V/min. 10A power supply, e.g. this one What makes my Case Kit design unique: - designed for easy assembly - designed for 3D printing (can be screwed and unscrewed - threaded inserts were used), printed with PETG - timing belt tensioning system - moving gimbal elements made of durable material with the addition of carbon fiber (PETG CF) - engines support system for better stability and durability - easy access to the control board - XT60 safe power connector - large 90mm cooling fan - available for shipping right away if in stock, other within 2-3 weeks from order What is included in the Case Kit (option 1) 1. All required screws 2. Preassembled walls (x7) 3. Assembled gimbal 4. Gear wheels (x4) 5. Joystick bellow (made of natural leather) 6. Bellow cover 7. Timing belts (x2) 8. USB connector support 9. Board holder 10. Centering inserts 11. Power cord 12. Assembly instruction Price: 349€ + shipping cost There is also an option 2 order in which the entire Case Kit is assembled and all that remains is to install the VPforce Kit. What is included: 1. All required screws 2. Preassembled box 3. Bottom wall 4. USB connector support 5. Centering inserts 6. Power cord 7. Gear wheel 12T 8. Assembly instruction Price: 379€ + shipping cost Additional options: - gimbal printed from engineering material like PC ABS, PA12+CF, PC+CF (depending on the material: +15÷30€) - limiter with different angles (the original allows the joystick to be tilted 22° degrees in each direction). For example, with a 20cm extension, my limiter is: roll 18° and pitch 20° (for free if it replaces the original) - adapting the design to individual needs (individual pricing) What more is needed to run the device: - USB cable (type A to B) - any flight joystick grip compatible with Thrustmaster (other grips like WinWing and VKB needs an adapter – available here) Contact: I am located in Poland. I can send more pictures and videos in a private message. If you have any questions, feel free to write: rafalg78@gmail.com

- 1 reply
-
- 4
-

-

-
- force feedback
- rhino
- (and 5 more)
-
Let me share my updated project - Mouse Ring v2. Previous design is there. It's designed to support mouse clicks in VR by having Rings (left and right) with mouse clicks and wheel scroll emulation. There are couple of Improvements over original version: joystick instead of tactile buttons one more button two modes of working power switch eliminated and replaced by "deep sleep" improved ergonomics easier to assembly ring diameters from 19 to 24mm minimal design - as small as possible info about battery charge status All details how to make them are available on the instructables. Because I have components left and recently free time (temporarily unemployed) I can prepare a few pieces. To be agreed in private.
-
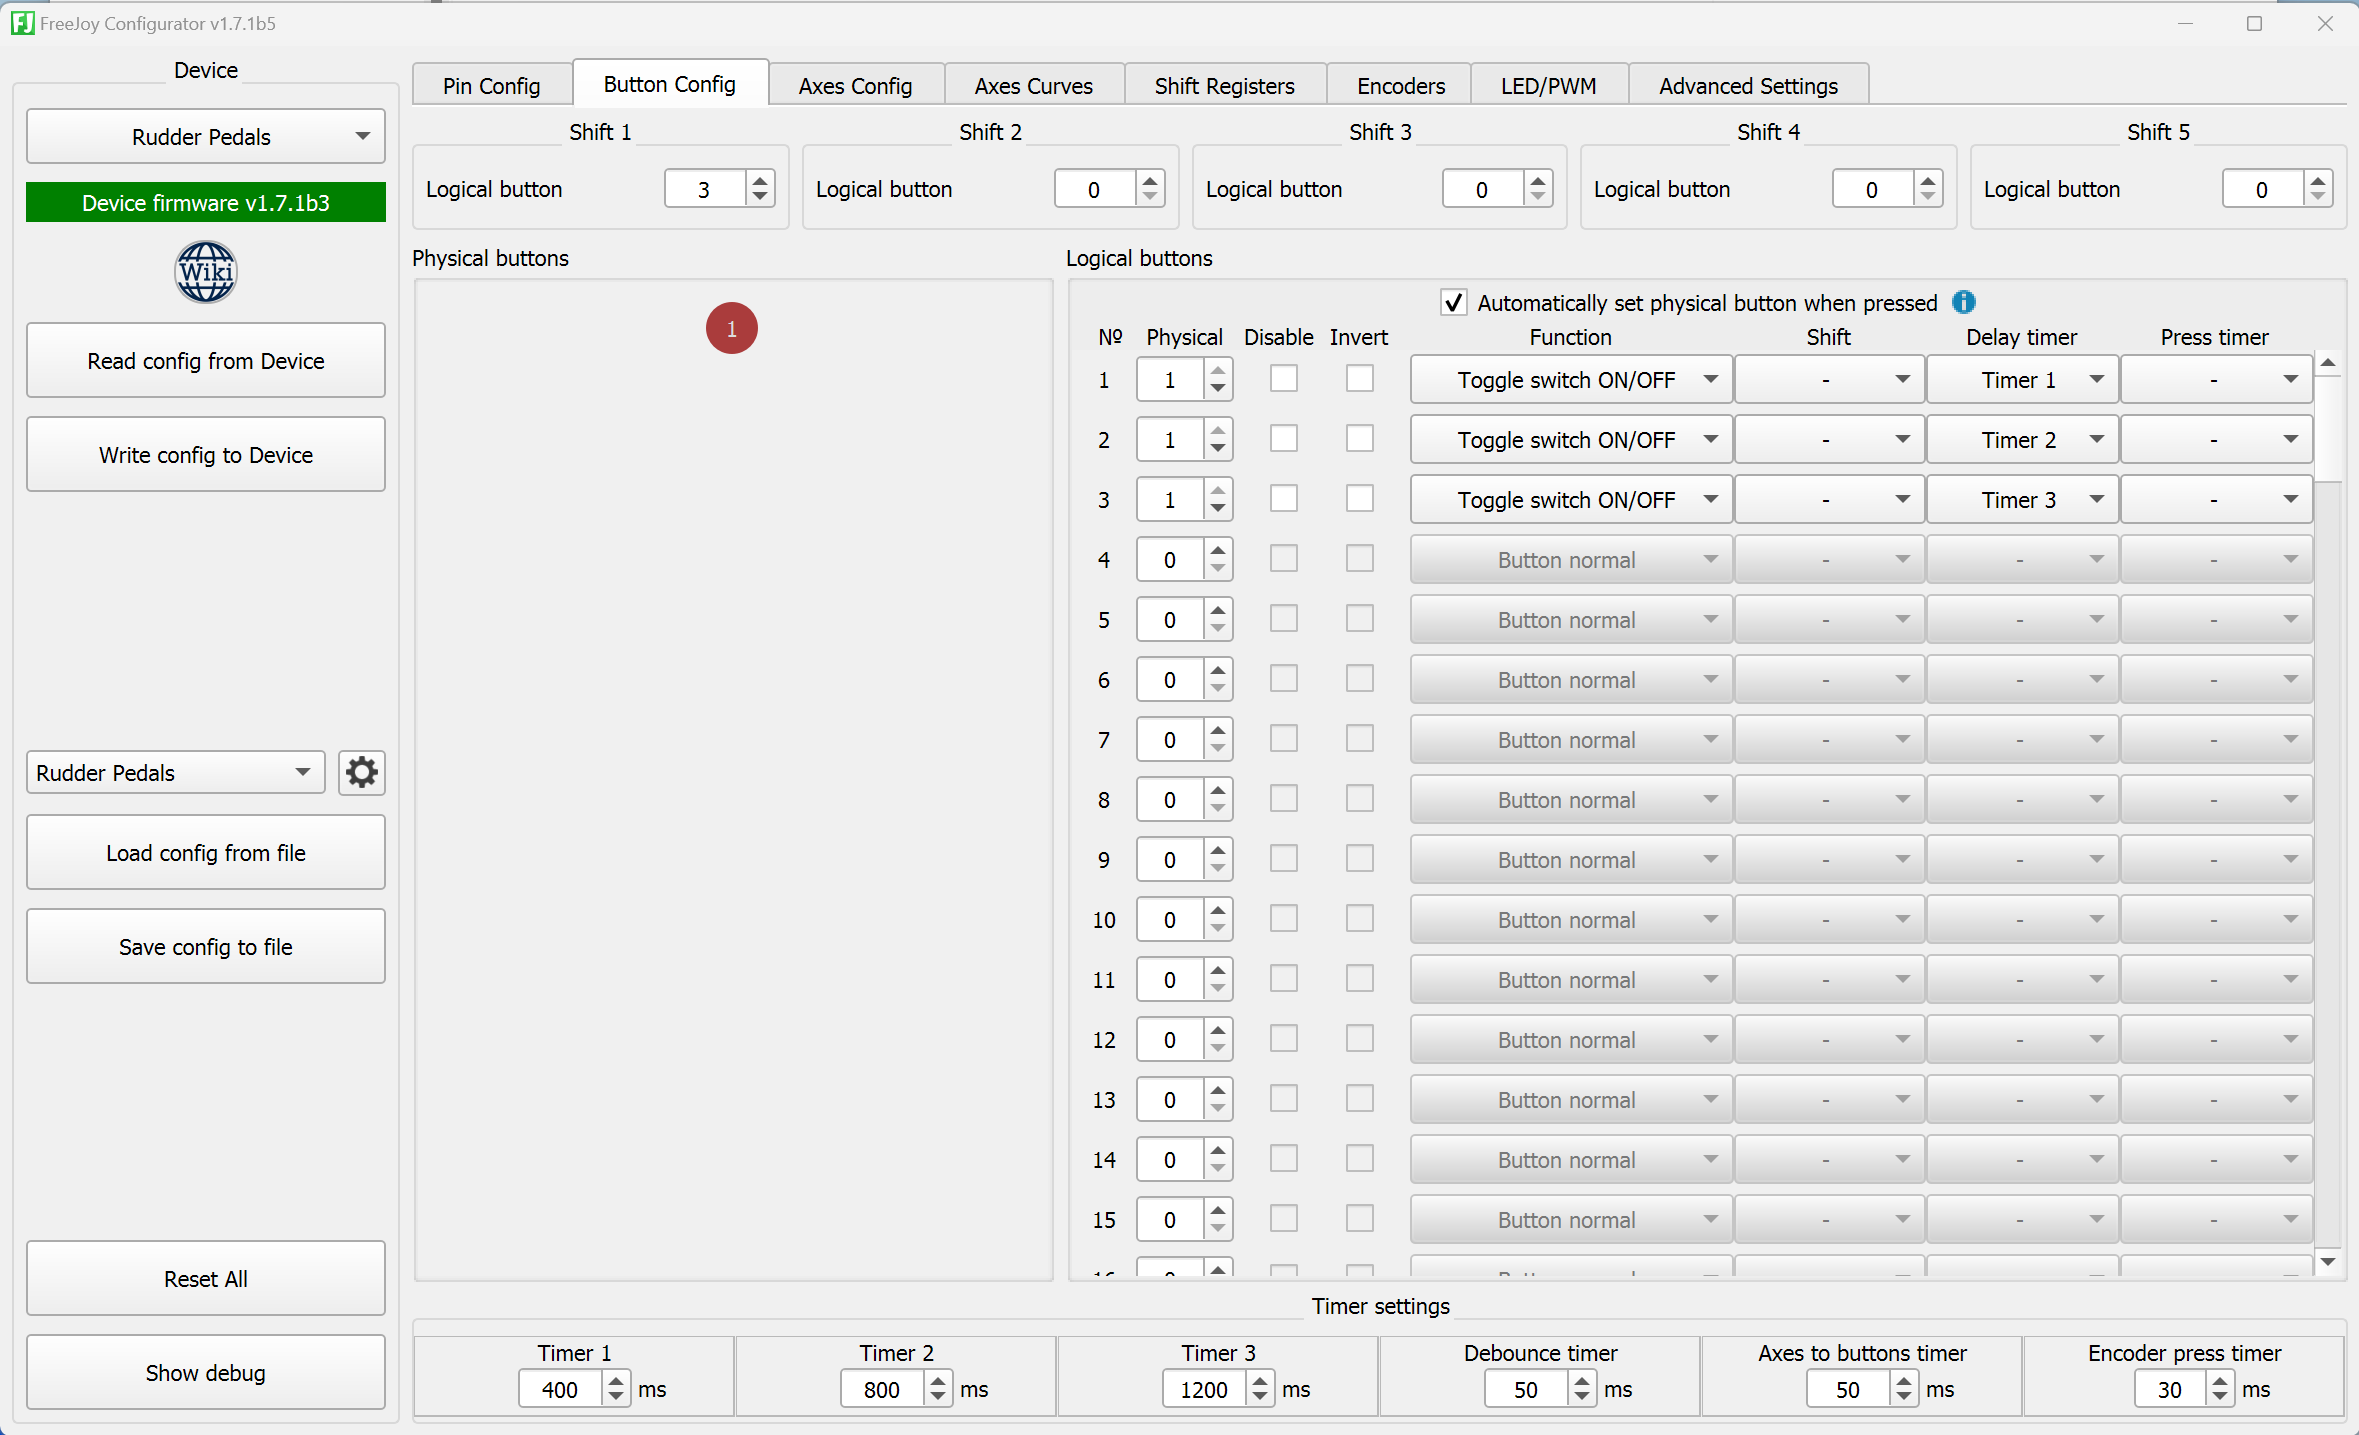
Apart of the fact that I fully agre with you, maybe I can propose my case. I don't know how you use the button to trigger the seat ejection, but maybe my solution will help you. I programmed 1 physical button in FreeJoy to simulate 3 logical buttons pressed one by one. It works quite nice.
-
This is my thing to attach Leap Motion to the Pimax Crystal Light: Leap Motion holder for Pimax Crystal by rafgaj - Thingiverse I believe the front cover is exactly the same as Crystal so should works. The holder gives perfect position of Leap Motion to track and does not refer with cameras.
- 365 replies
-
- 1
-
-
- hand tracked cockpit clicking
- oculus
- (and 2 more)
-
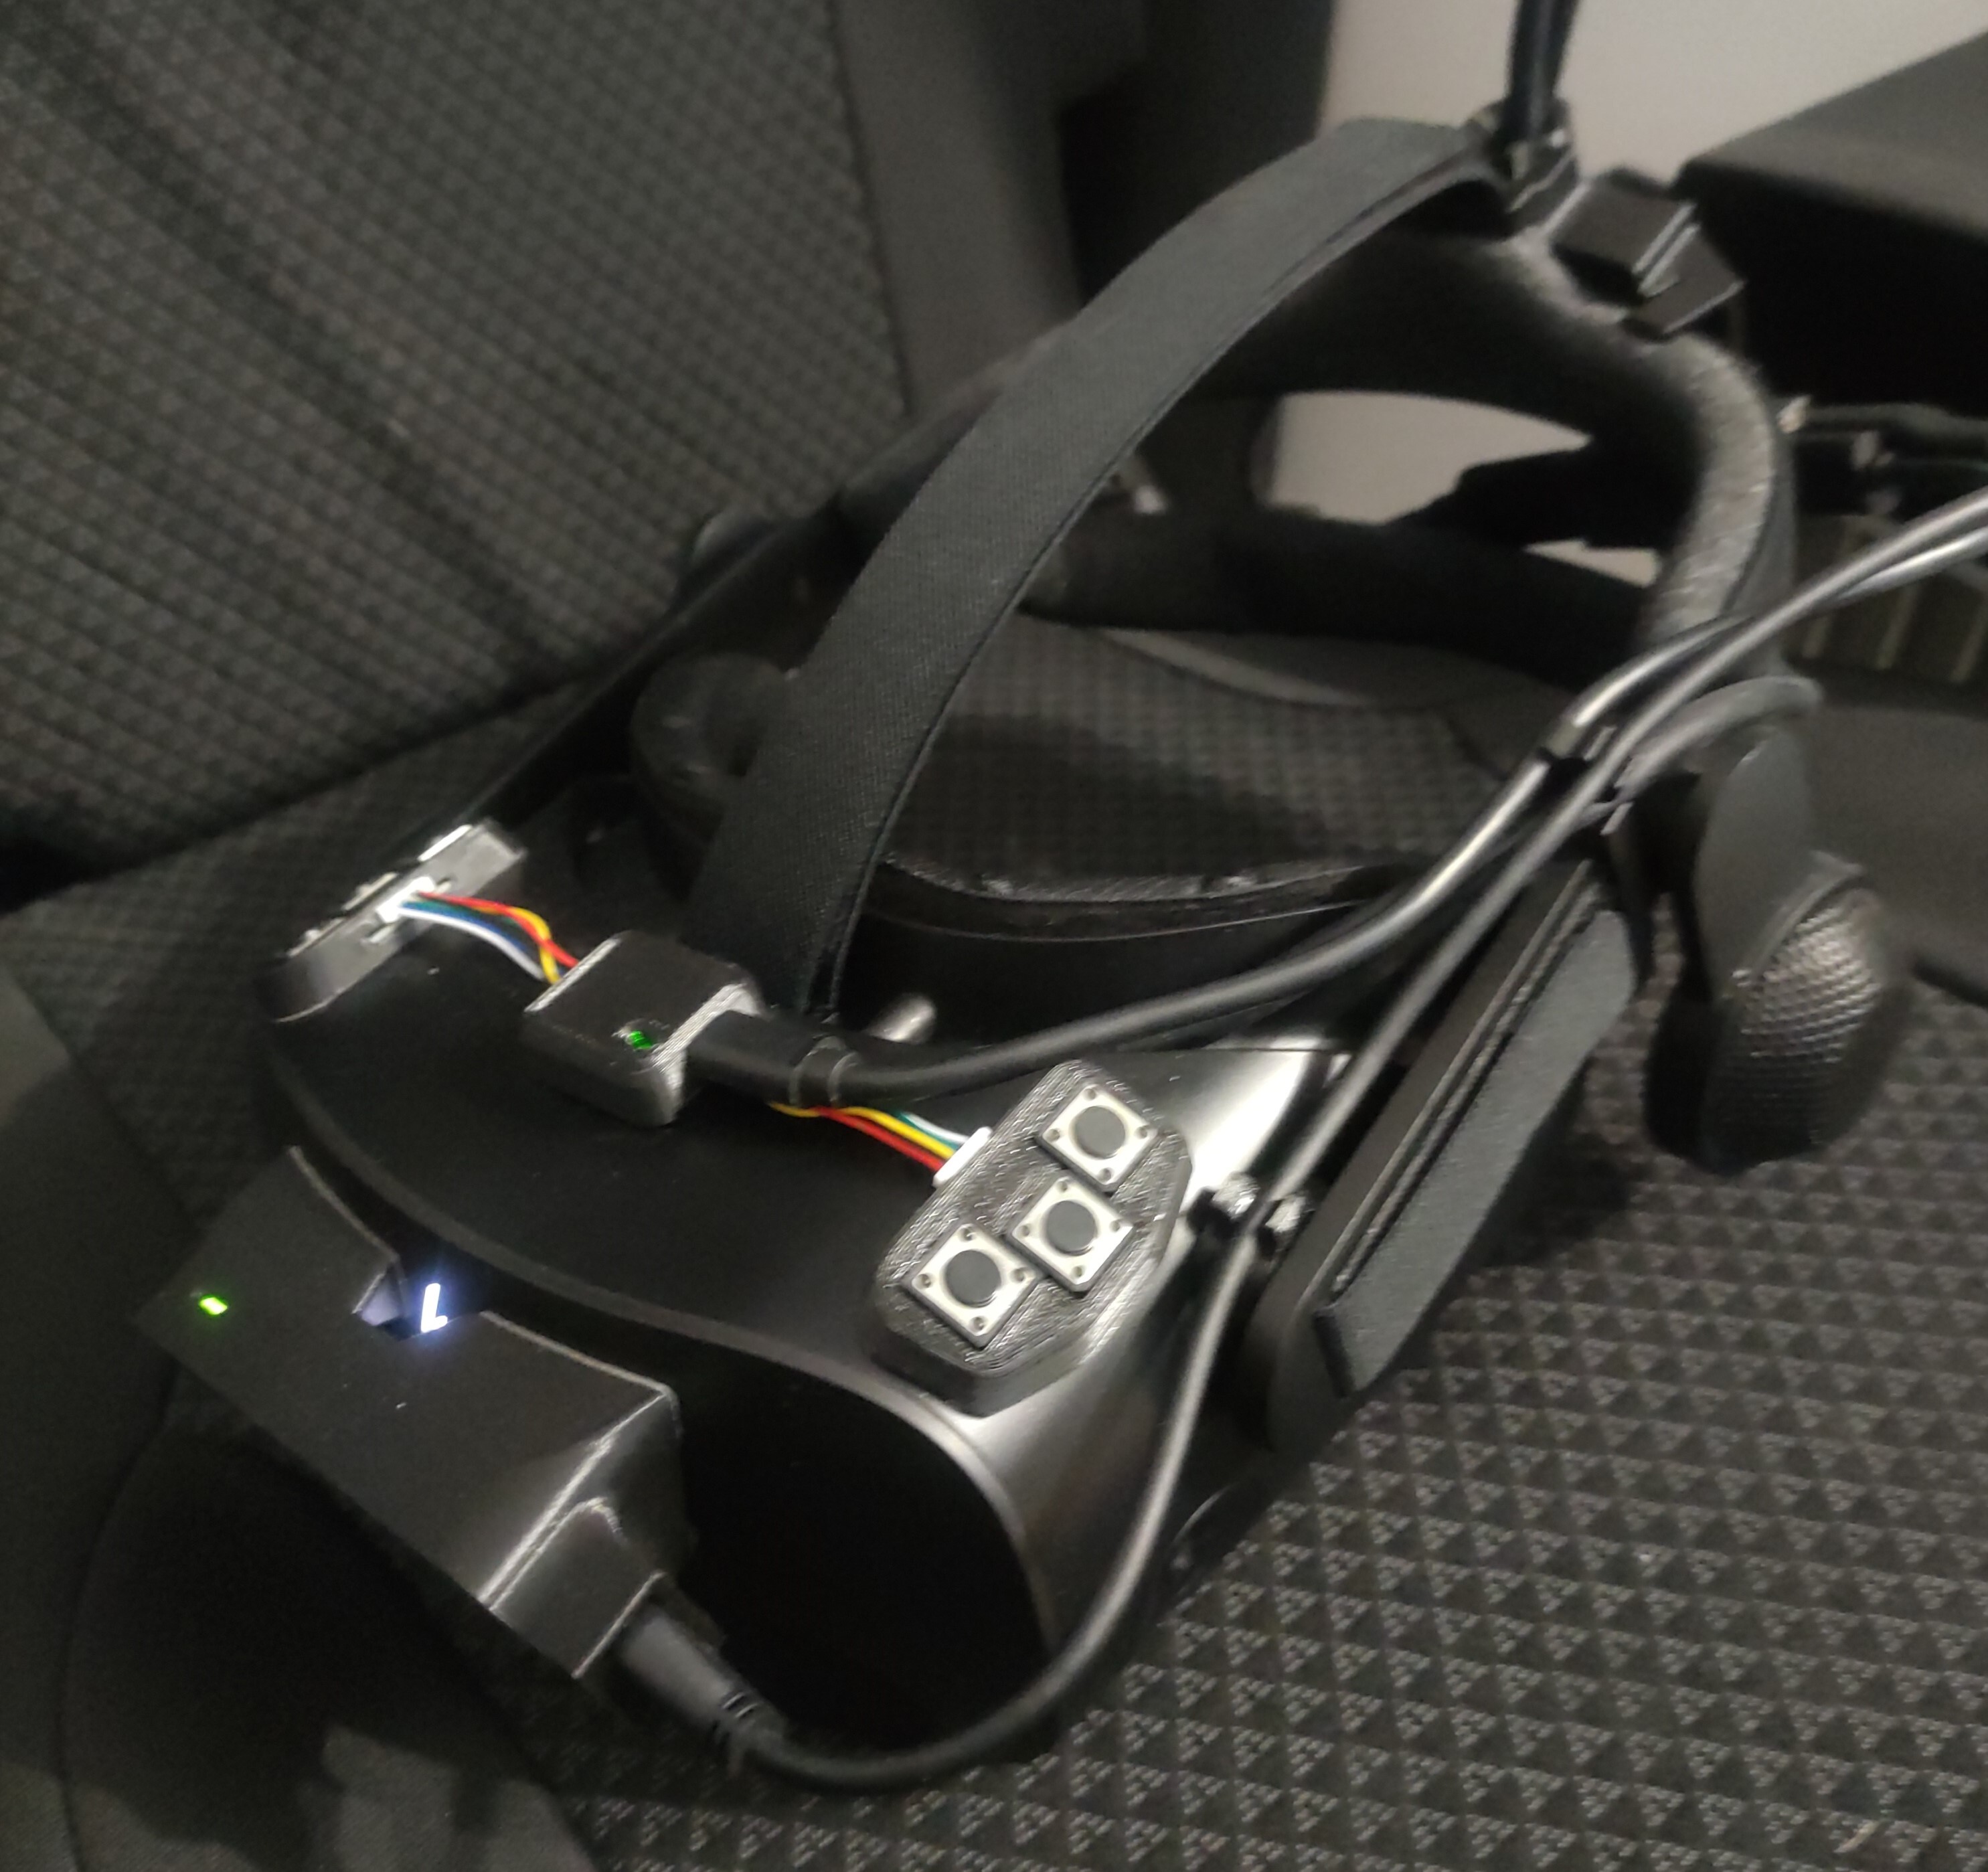
Hi, I have my Reverb G2 for sale, used, 100% functional. Controllers are not included. Leap Motion visible in the photos is also not sold in the set. However, there are a few improvements: - front sponge changed to a more comfortable one (the original one is also included in the set), plus an additional one to replace, - additional buttons installed. There are 6 of them and they are visible as an additional controller. Various functions can be assigned to them, - more ergonomic cable management thanks to additional hooks (printed), - additional counterweight at the back for better balance of the goggle, - Leap Motion holder (of course I can remove it on request). Very good condition, clean lenses (always protected by additional lenses to correct my vision defect). Of course, full wiring for connection is included (factory). The PC connection cable is version 2.0 (improved because the previous one caused connection problems with certain PC configurations). Price: 250€ + shipping cost (around €15, depends of destination).
-
Here is my design for HP Reverb G2 and Leap Motion: Leap Motion holder for HP Reverb G2 and cable managment by rafgaj - Thingiverse I am gonna make it also for Pimax Crystal Light as soon as I will get it
- 365 replies
-
- 1
-
-
- hand tracked cockpit clicking
- oculus
- (and 2 more)
-
VR Flight Guy in PJ Pants, here are attached files to improve rings behavior. There are better implementation of clicks, faster wheel rolling and energy improvment by reducing leds light. You have to connect ring through usb cable. Make backup of code.py and then replace. Same for both rings ofcourse. left_ring.zip right_ring.zip
-
Write to me on priv or rafalg78@gmail.com
-
Thrustmaster Cougar Throttle USB standalone adapter
rafalg78 replied to antares190's topic in Thrustmaster
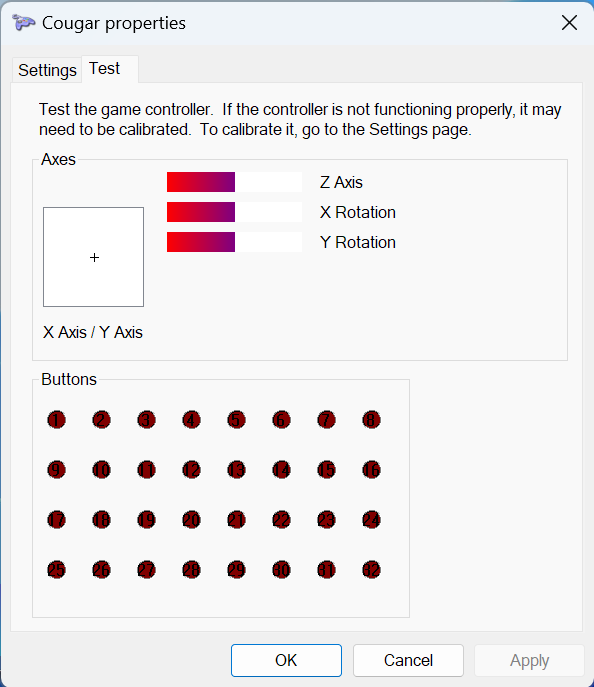
antares190, are you willing help me run this device? I did hardware and software according to "Difficult Way". I was able to upload software to the board and device is already vissible as Cougar. But there is no any response of the buttons and axis.
-
yes, please
-
I am selling my rings at material costs. I already have v2.