jvanes
-
Posts
86 -
Joined
-
Last visited
Content Type
Profiles
Forums
Events
Everything posted by jvanes
-
Love the switch panels, nice work! What do you use as a controller? Keep up the good work!
-
iControl DCS (Another iPad pit)
jvanes replied to boarder2's topic in PC Hardware and Related Software
Just bought a copy of icontrol and i love it. Very easy to setup once you have read the online instructions. I only had to assign the IP on the ipad app and runs perfect. The only thing i noticed is a little drop in framerates. Keep up the good work boarder Regards, Jedi -
Mission planning on second pc ( problem activation? )
jvanes replied to jvanes's topic in Payment and Activation
Nice, thanks for the reply Peter :thumbup: Sorry about missing the already excisting thread ....- 1 reply
-
- 1
-

-
Hi there, I gotta question about installing DCS A-10 on a second pc just for planning missions. I am in the luxury position of having a simpit wich flies very nice but for planning missions it is not that good. 3H2Go setup, laying slight back and a keyboard wich almost stands verticaly is not comfortable for planning. So i thought: What if i install DCS on a second pc just for planning, will it hurt my activation? Regards, Johan
-
Nice vid, tnx
-
Patch 1.1.1.0 for DCS: A-10C Warthog (English) Released
jvanes replied to pvtkramer's topic in DCS: A-10C Warthog
Hell yeah!!! ... Thanks a lot DCS!! -
Awesome! ... That looks great! Man, i would love to spent some cash on such panels Keep it up
-
Very nice, love those switchpanels.
-
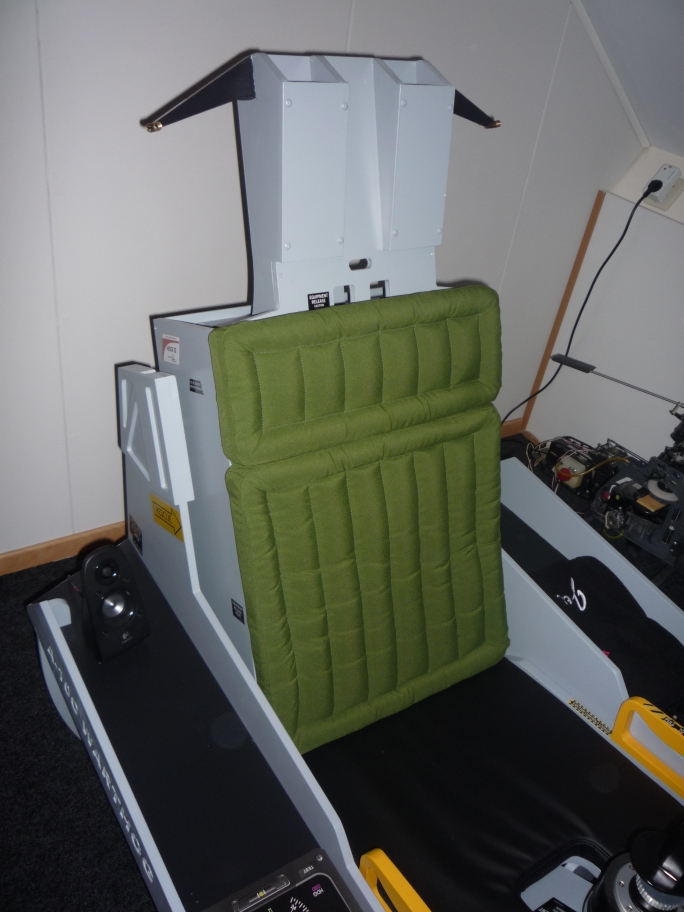
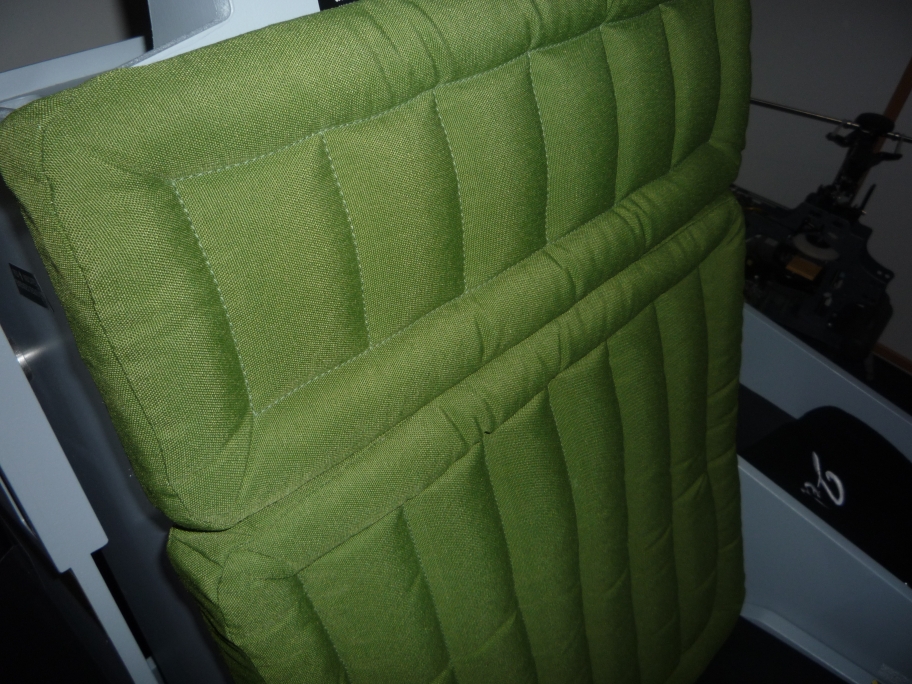
Had some nice cushions made for my pit :thumbup:

-
Very nice! I am also thinking of mounting a buttkicker. Probably direct under the seat pan.
-
Man, that is just sick! .. Tnx for sharing
-
Very nice
-
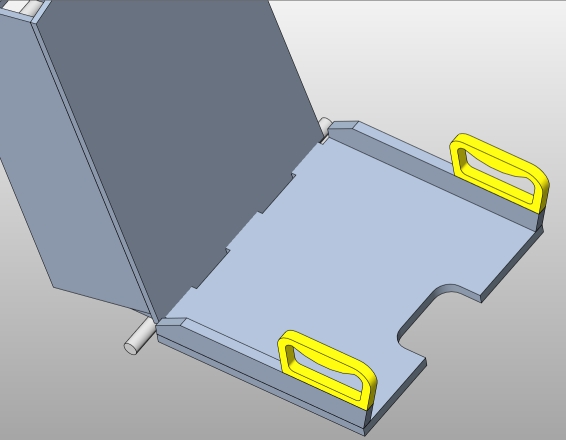
Nice, one small thing, swap the handles on the seat. The one with the two handles belongs on the right side. Sketchup viewer can be found here: http://sketchup.google.com/intl/en/download/gsuviewer.html
-
@Weldzian For your information see attachments. your parts.pdf sideparts.pdf
-
A little extra are these home made stickers to put on the panel.
-
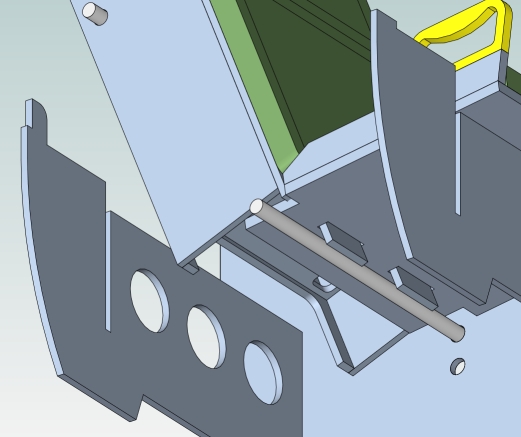
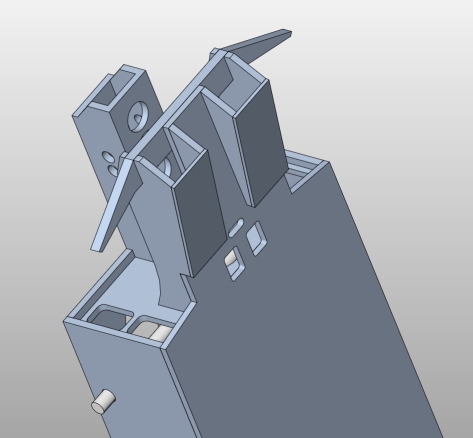
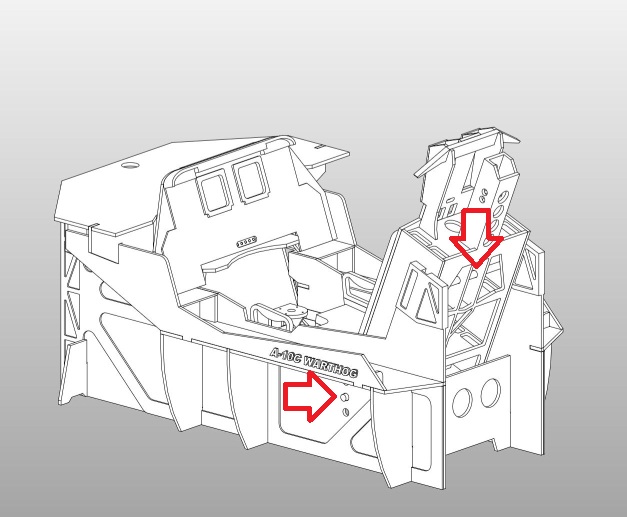
Hi wlezian, No problem to anwser your questions. First, no i do not have a step by step instruction manual, but most of it is pretty straight forward. Could u tell me what parts you are refering to? Maybe i can explain it then or make a small assembly picture. Second, no there is no reinforcement between the seat and the backrest. The backrest just slides in the 2 slots of the seat. Somting i added later were 2 little brackets behind the steel pipes for stopping the seat moving forward. Third, the slots in de seat are wider because the backrest slides in on a angle. Also the seat is adjustible in height so is needs some free margin. (see pictures) Fourth, i will look it up to see i have missed anything there. EDIT: yes, you are right, it was somtin i had changed later when i had the pit cnc-ed, the 12mm extra should not be there. Keep u posted :thumbup:
-
Very promising
-
That's a beautiful piece of hardware :thumbup:
-
note to all, further needed for this pit are 2 steel pipes wich hold the seat and backrest. Dimension for theses pipes are: - seat support: 25mm/550mm - backrest support: 25mm/510mm
-
Thanks again g
-
Nice progress Ragtop
-
I used a MDF primer. Finish is much smoother and yes MDF absorbes. I used a roller (or how do you call this) for the big surfaces and a brush in the corners.
-
That's sweet! .. somtin i want to do for my pit too. Kinda scary for a noob on electronics like me.
-
I've updated the stick hub by extending it 25mm. See the attachment for details. Whartog Home Cockpit by Jedi updated stick hub.zip
-
Love to see this in the next update