jvanes
-
Posts
86 -
Joined
-
Last visited
Content Type
Profiles
Forums
Events
Everything posted by jvanes
-
That would be great geneb, thanks for the offer. The drawing is finished except for the higher stickhub. I will change this next week and upload the file again.
-
I have done some dimensions to help you guys. Btw, this week i changed the hub height, put it up for about 2,5cm. Now i have more free movement so please keep that in mind when you are copying the plan Whartog Home Cockpit by Jedi with dimensions.zip
-
I would if i could Ryyy but it is only one file. I have send it to you now unziped, hope this works. Gr, Jedi
-
Wierd, of course my brother had some work on this file to trace every piece to be sure that all lines were closing, that all the pieces with the right thickness were on one sheet and to point were to cut but that's it.
-
@ryyy Well it is possible that the parts are 3d. Let me explain what i have done here. I build my pit not in Autocad but in Revit wich is a 3D modeling program wich i use for my job as a building enigeer. When the model was done i took it virtually apart flattend it out on a sheet. Then i had it exported to Autocad, so it is possible that the object still have a 3D shape/thickness. For CNC work it only uses the 2D shape of the parts. Hope that this will clear things up a bit. @all I have started to do the dimensions for the plans to help you out. Expected end of this week.
-
That's right Gadorc My brother who CNC'd it all has used 2 types of milling bits. A small bit for the panel (like the cut outs for the MFCD's) and a large bit for the the large parts. Unfortunally i don't know the diameters but let me say that the roundness just give a fine look to it.
-
If there is some request for dimensions of my plan, let me know. I will take some time to dimension it for you guys.
-
Good luck with the build Ragtop.
-
I would like te see an external mission planner so i can plan a mission on my second pc instead of sitting in my cockpit setup wich is nog ideal for planning missions. Just my 2 cents ;)
-
Would be a beautifull HUD display
-
Thanks for the info guys, i'll check it out.
-
Thanks for the comment TulsA-10. I am not familiair with Helios, tell me more
-
I made a quick walkaround :) http://www.youtube.com/watch?v=uywu-iQSDOo&feature=mfu_in_order&list=UL
-
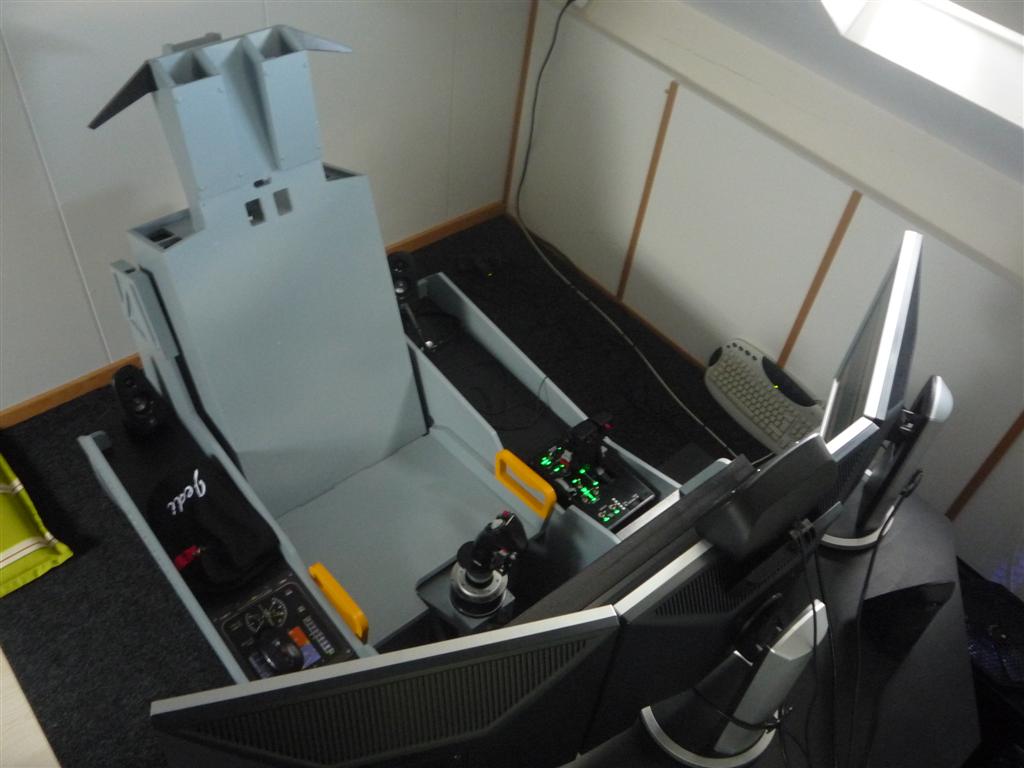
Stickhub and total shots

-
Like Hammer we where on the same project :)
-
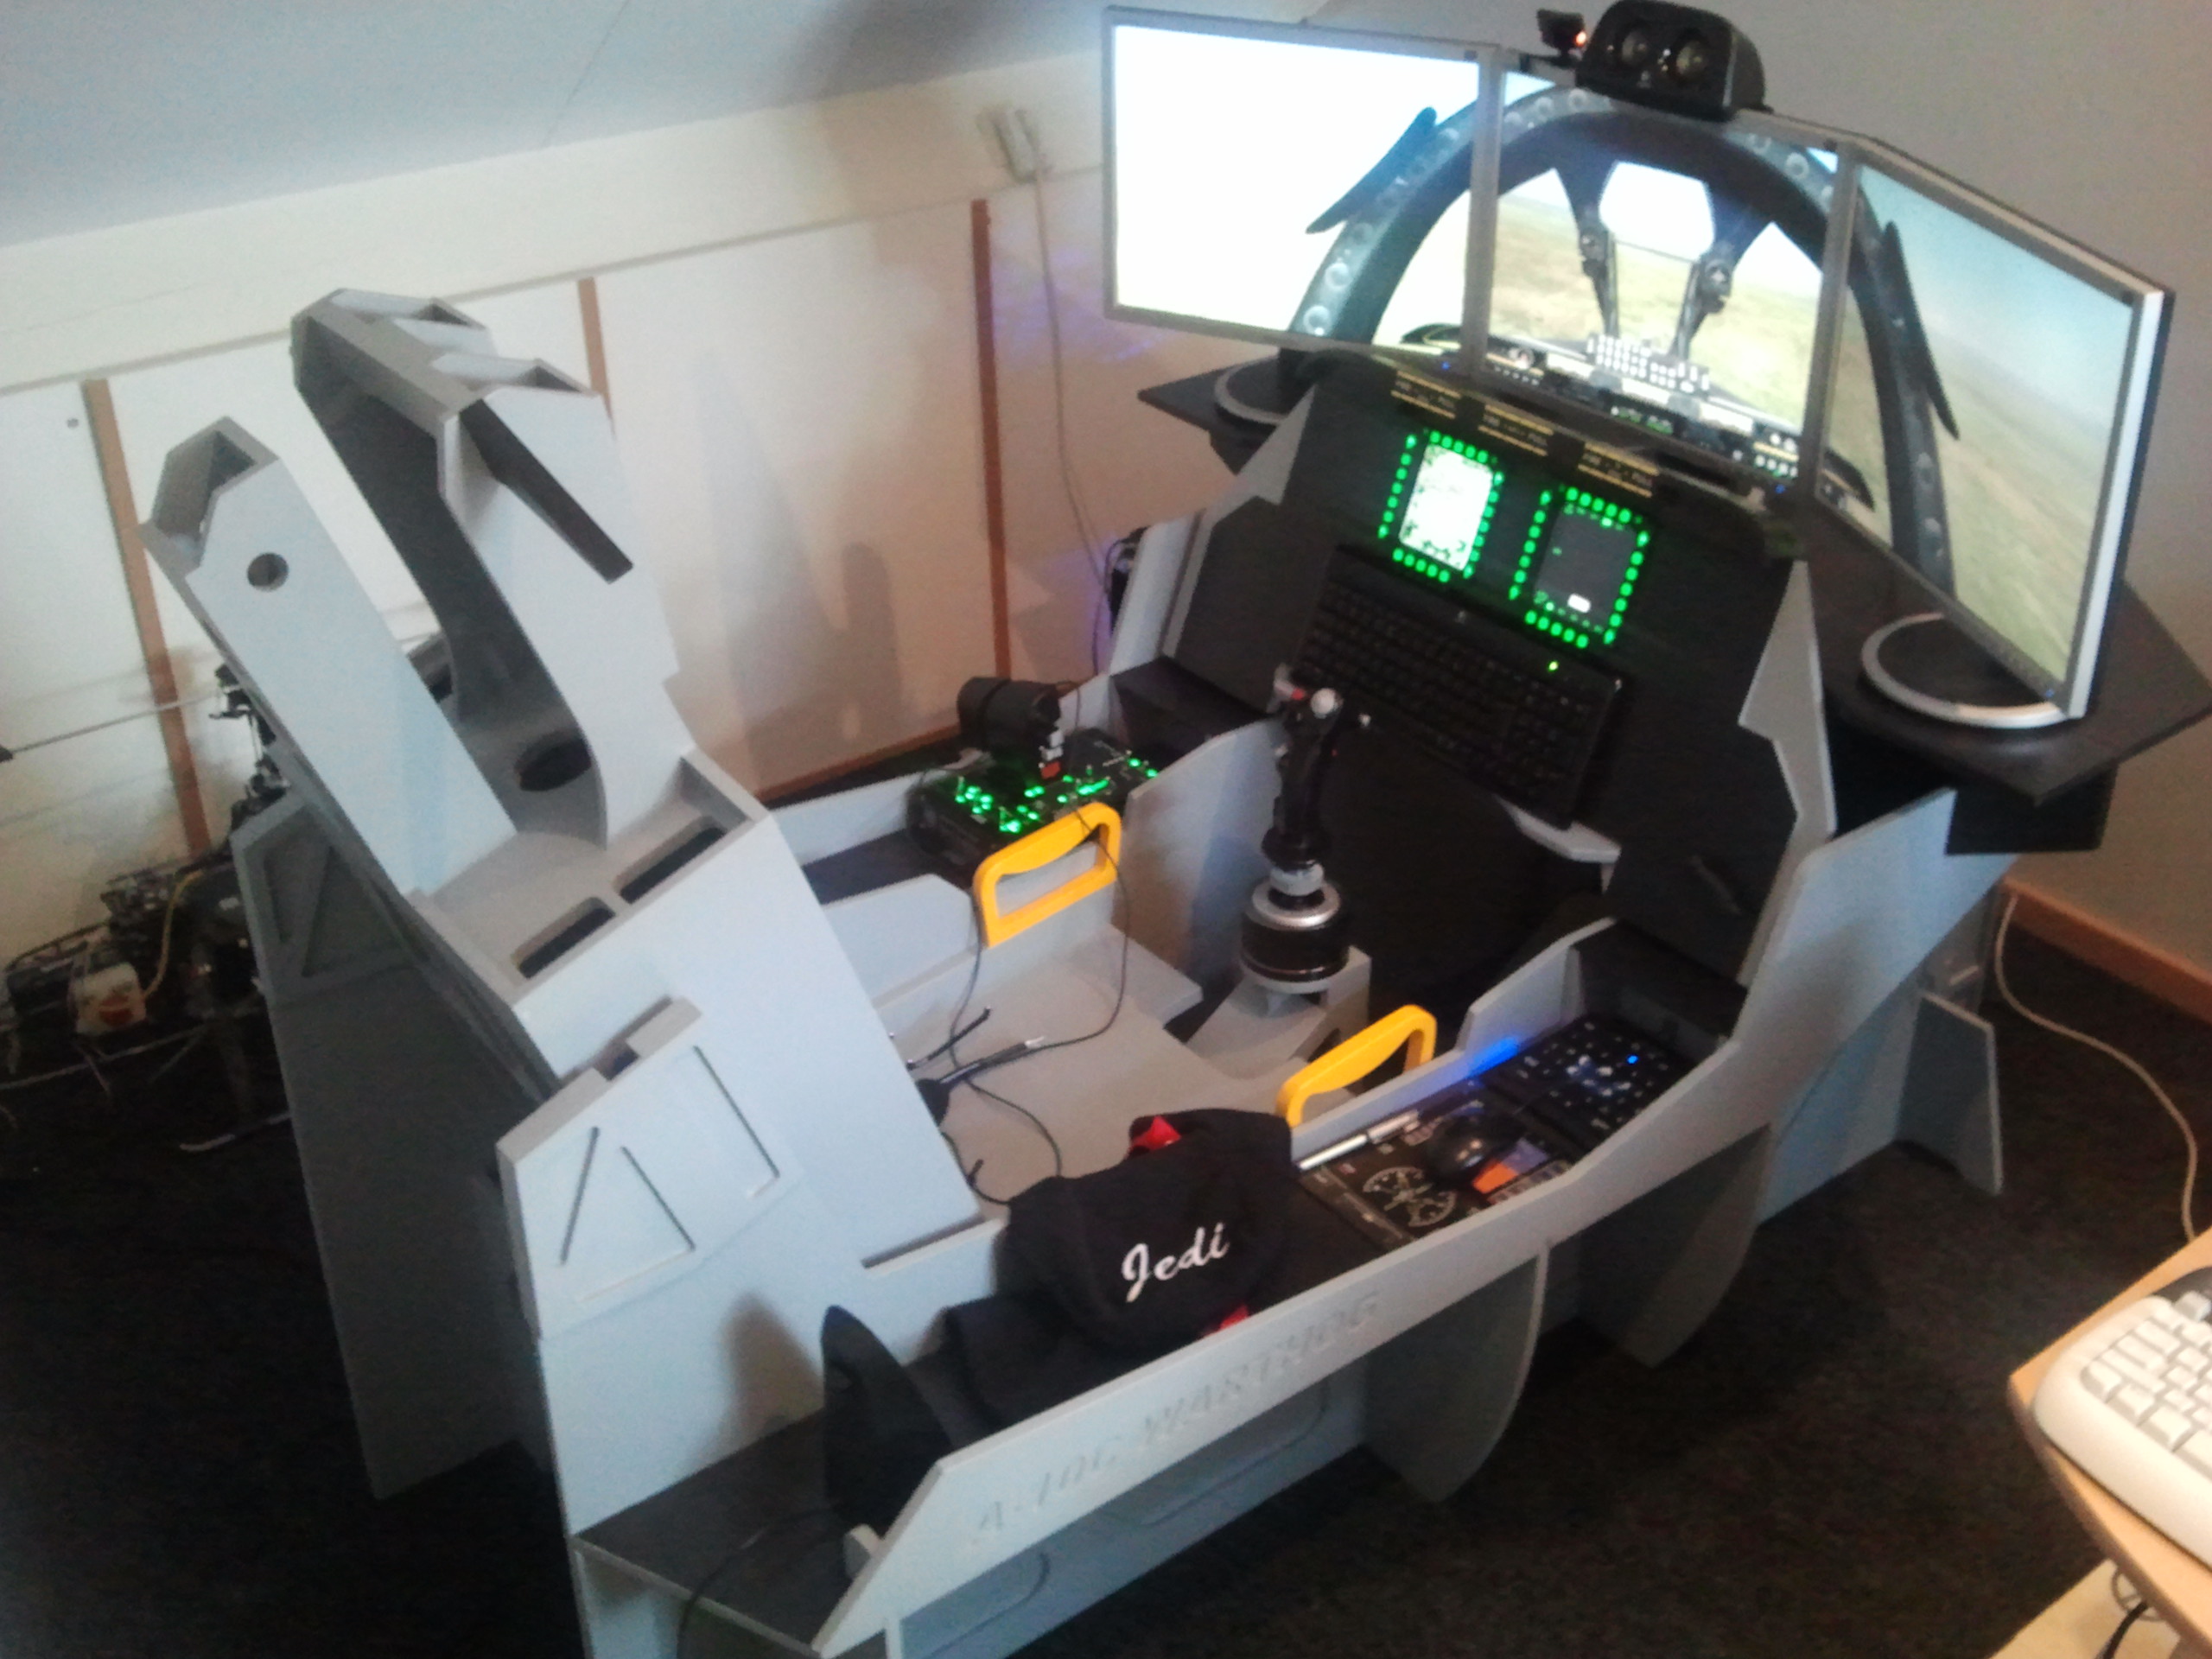
I used RAL7001 (Ghost Gray) to paint the pit and RAL 9005 (Jet black) to paint the panel. Check out the link in my signature for the result. :smilewink:
-
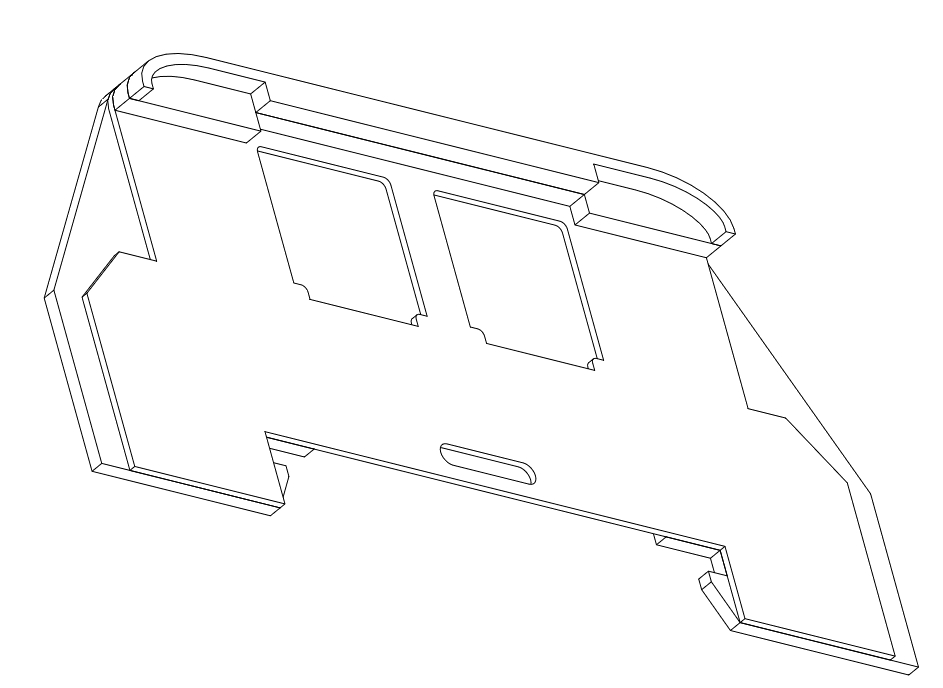
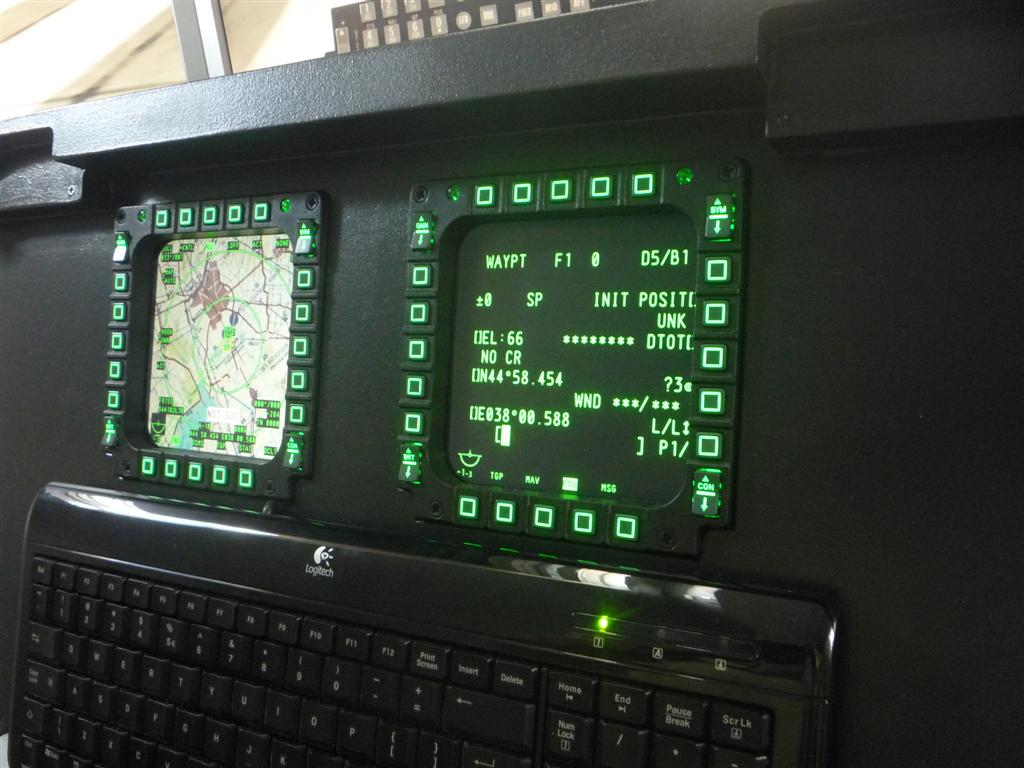
Frontpanel Note: the oval slot in the front below is to have acces for powering up your monitor Also note that the dimensions are metric in mm. EDIT: note that the panel and the place of the MFCD's are based on one 17" monitor.
-
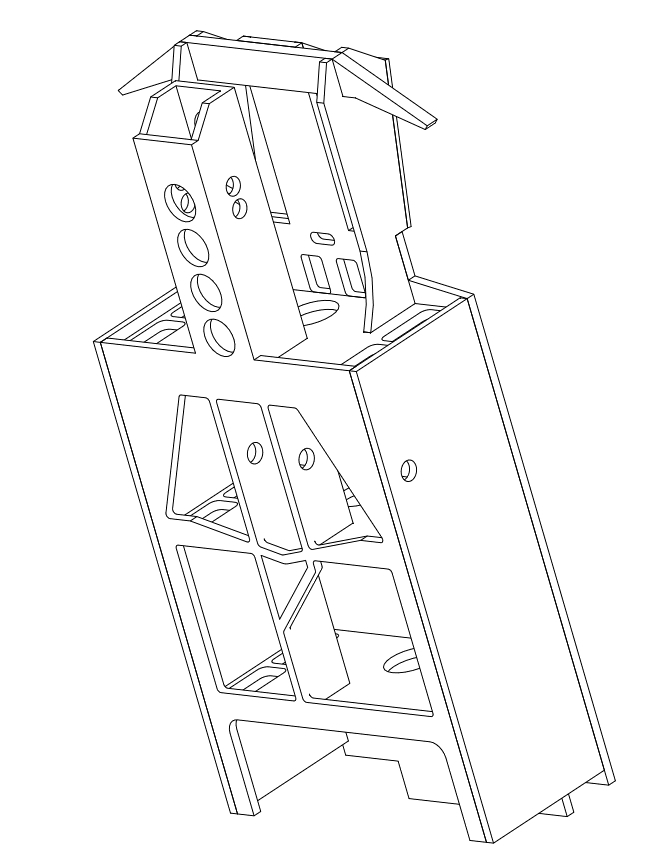
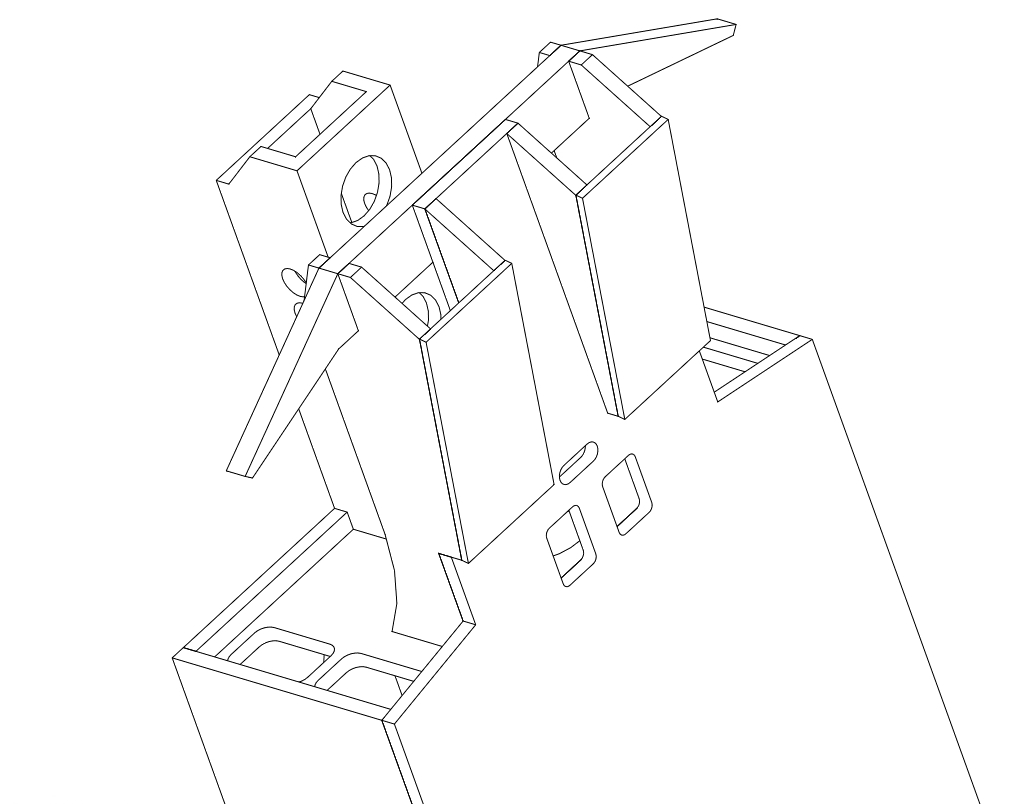
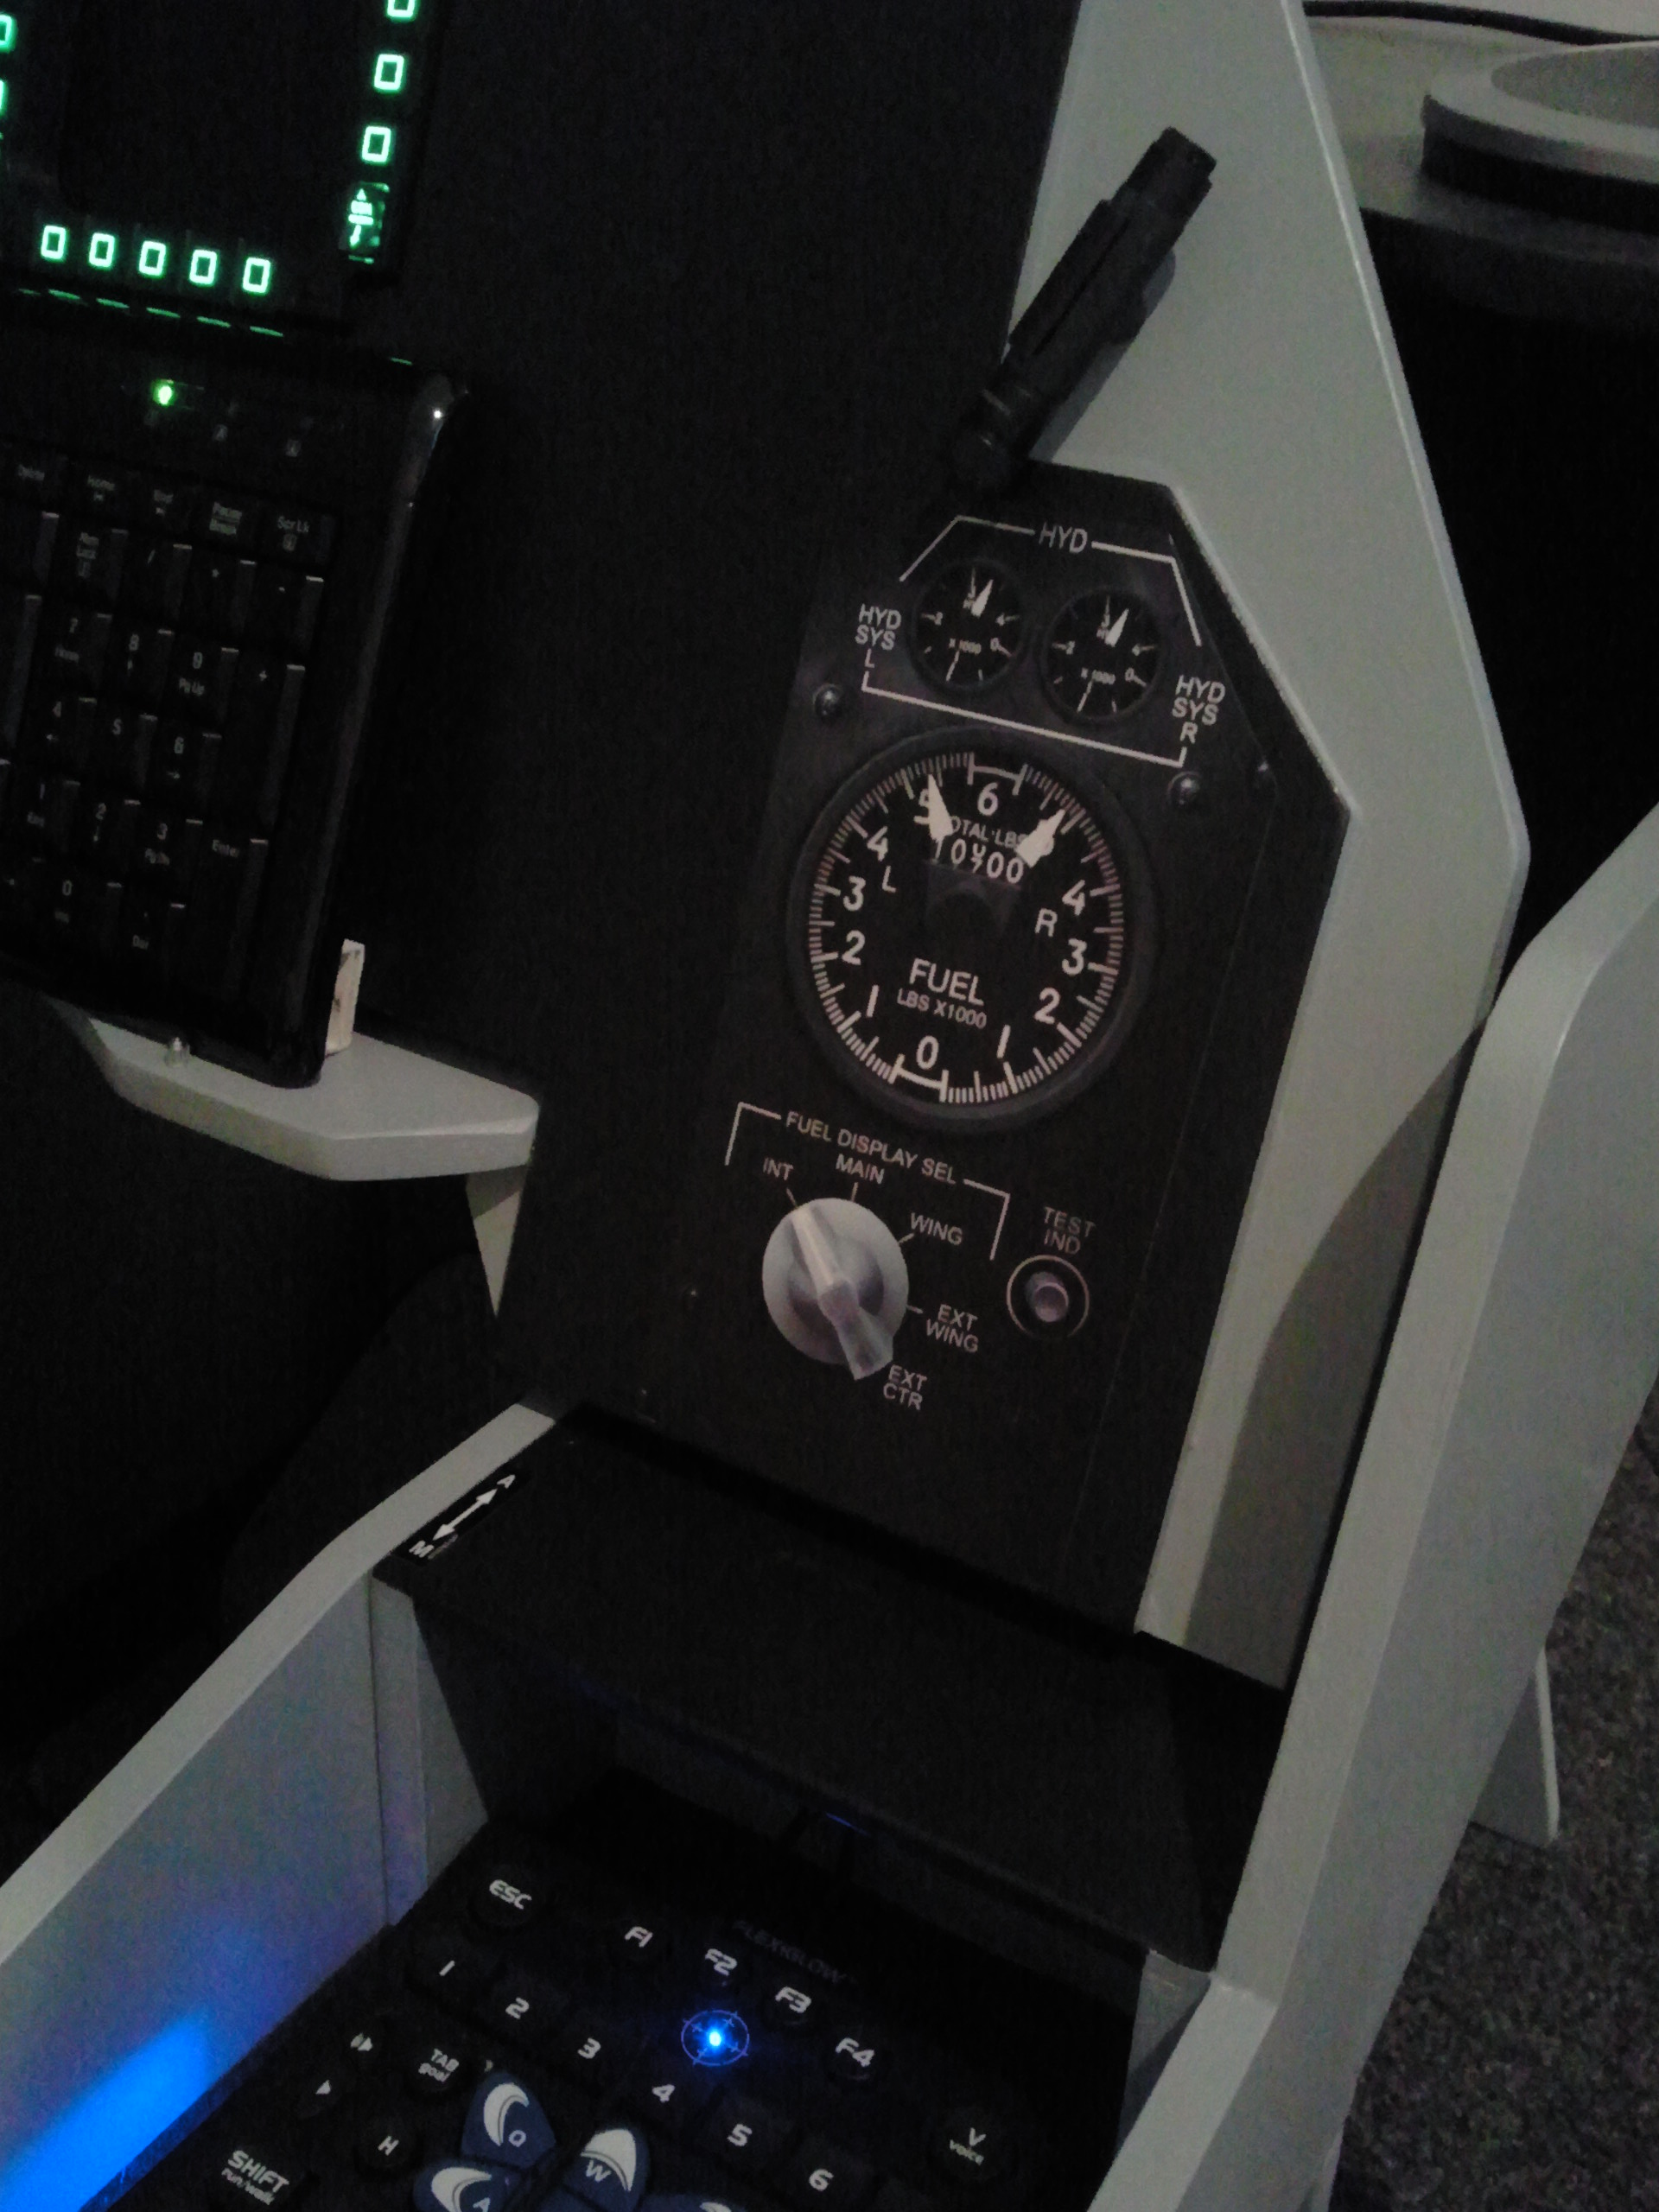
Okay guys, here are the first couple of detail pictures. You will notice that the headrest is not a exact replica is of the original. I had to make some adjustments to make it a bit bulky dealing with flat wood. So this is just my creative version ;) More to follow along this week ... Note: dimensions are metric and in mm
-
Sweet !
-
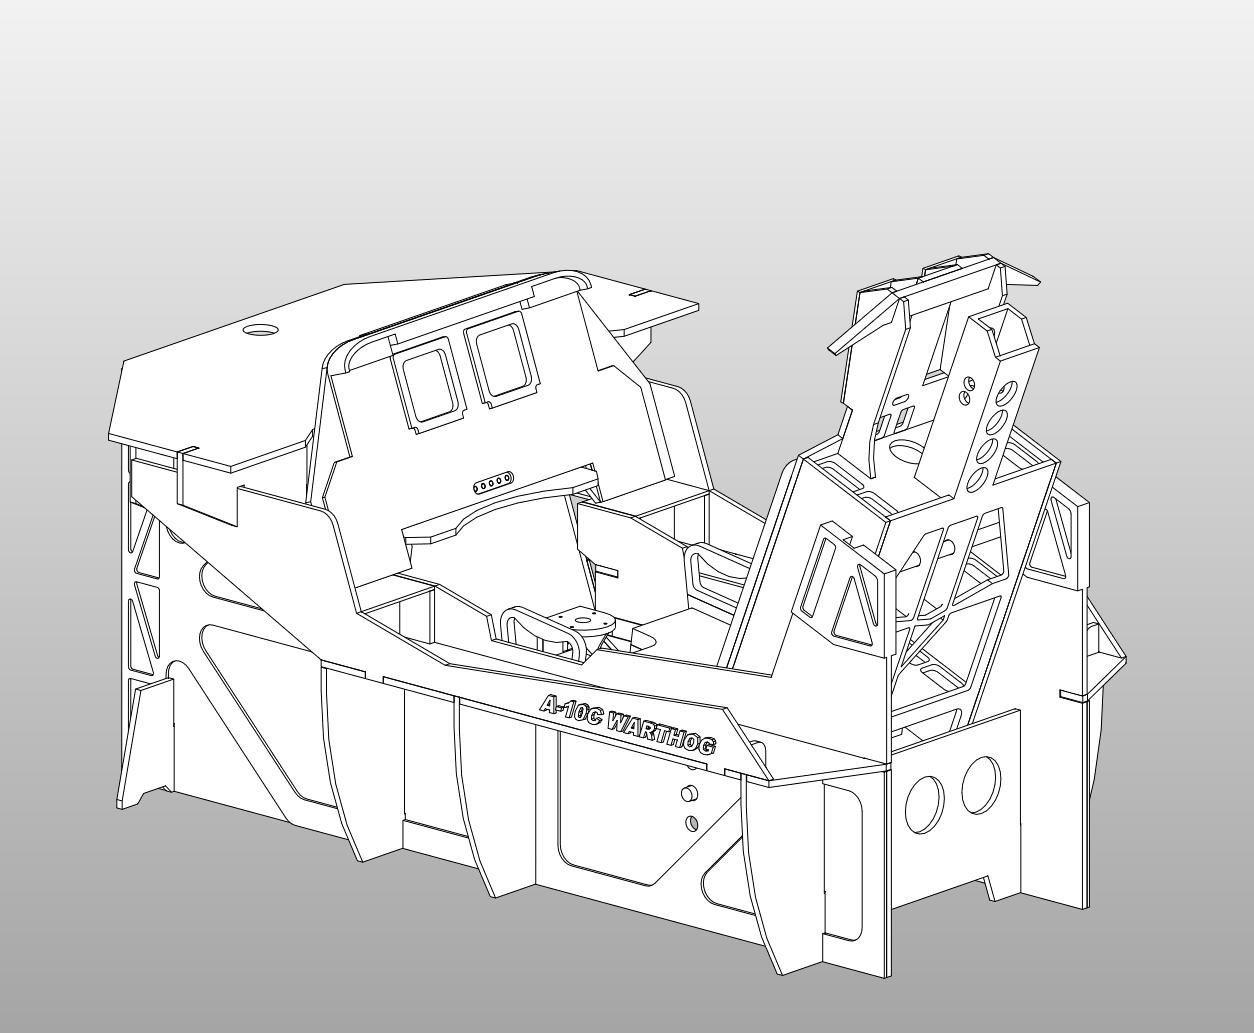
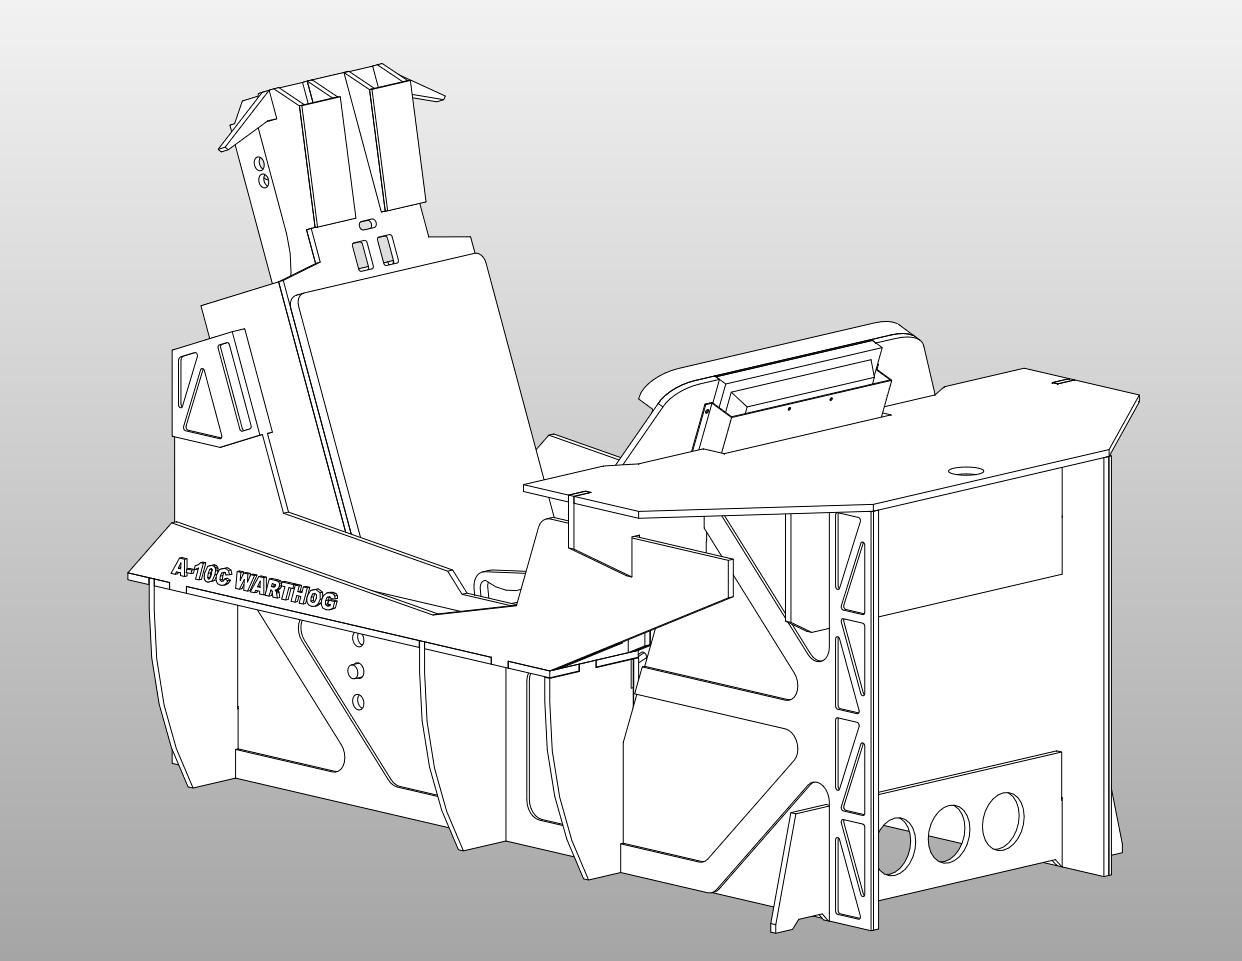
Hey guys, Great response to get a copy of the plans of my cockpit. Okay, here's the deal. The plan i worked out to get mine was to make a 3D model and get every piece flattend out on a sheet. This sheet went straight into the CNC machine wich sawed the (about) 78 pieces perfectly. After that is just an IKEA buildingkit So what i have is a sheet with pieces but without dimensions. You need to get the dimensions of the file just by measuring. The sheet is a Autocad file (DWG format) and on metric schale. I wil send this file to you all who PM'd me today. Next week i will post some 3D screenhots of the model how to put it together altough most of all is pretty straigt forward. edit: i now realize that is not possible te send a attachment via PM so please include your email when you are interested.
-
Altough the plans of Barnes/Akers are free for use we specificly asked them to use their plans and to modify them with their aproval . We've got their aproval wich stated: Plans are free to use for the FS community but not for buisness purpuses. (excuse my english but you know what i mean ;) ) Our version is a heavely modifided version of that of B/A A lot of hours went into it but also these plans are free to use. Just send me a PM and i will send it to you. note: Give me a couple more days to make the format a bit more understandable Grtz, Jedi
-
again thanks for the comments guys :thumbup: That CDU is not compatible with A-10 but for use with B737 in MSFS. Mladen and i are also FS simmers for a long long time. I myself also has this CDU wich works perfectly with PMDG and Project Magenta. It is distrubited by Engravity.
-
Well the cockpit is designed to be taken apart and to be transported in a normal size car. Therefore the pit is split in to some big parts and the rest are all flat surfaces wich you can pile up in your car. For instance, the seatrest is one complete part. The panel (with screen) is also a complete part. The two boarders left and right (where mouse and throttle are placed) are 2 complete parts. All the rest are flat surfaces wich you can take a part without any screws. All these surfaces slides into eachother. And yes, you do that very carfully ;)
-
Thanks for the comments guys :thumbup: And yes indeed, the setup will evolve through time. Keep you posted Grtz, Jedi
-
Hi Folks, As a newbie let me first introduce myself. My name is Johan (Jedi as callsign) and i live in the Netherlands. I fly sims, especially MS FlightSimulator for over more then 10 years now. Joined a club called DFSO and flew 767's and 737's over IVAO's network. This year a friend of my and also member of DFSO asked me to try somting completly different. You guess right: DCS A-10C Warthog. Now, Combatsimming is someting totally new to me so i had to (still am) learning every day about the systems and tactics. It's a steep learningcurve but i'm hooked :) When i flew with MSFS i had build a simple 737 setup at home. Someting like that i wanted to build also for the A-10. My friend started the idea to take as base the Akers and Barnes design. With their aproval we started. As a CAD engineer (Revit) for profession i started to make a model. In a nut shell: One month past and we came up with a model. After we both where satisfied with the design we started building. See the result below. Grtz from Holland. Johan "Jedi"