tacca
-
Posts
160 -
Joined
-
Last visited
-
Days Won
2
Content Type
Profiles
Forums
Events
Everything posted by tacca
-
Version 2.0.3 Released. See Here for file and full release notes. - added fade at edge and dark ring. - still minimal instructions but user can control shape and size
-
Hey guys, thanks for the input. The reason why the original mod was so great that with the change of a few numbers anyone can achieve the size and position they want. This is now already implemented in my version 2.0.2 and within the next couple of releases I will include full instructions
-
Thanks Grand, when you come off full time 3rd and 4th year uni maths study (exams last week) while also working 4 days a week the brain is pretty well primed and ready to do stuff like this.
-
Version 2.0.2 Released Version 2.0.2 Released. See Here for file and full release notes. - added parametric mask
-
Do you mean you like it without the dark rim around the NVG circle?? Thanks Zaelu, I get what you mean now about wanting it more centered vertically. The MI-8 cockpit is definitely a bit different to the huey. The huey/a10 panels take up alot more of the bottom half of the screen compared to MI8 hence my my higher nvg placement. Im going to make it so that (by default but people can change if they want) for NATO craft it stays at the higher location but for russian aircraft it is more centered. Got user defined parametric masks working this morning (ie in laymans terms the shape isnt defined by a picture, it is defined by numbers that every person can change to what they want). I will refine it a little before I release the next version here is a quick example.
-
Hi Zaelu, Im guessing being from Nice English isnt your first language?? As in the description it is very wide (horizontal) for this version because it was easy. I am working on it to make it like the old modification where you can make the size and shape to whatever you like. It will be a few days before I achieve this though. If anyone has screen shots of how the old mod looked in the KA-50 and MI-8 can you please post them; I dont own either of them so Im not exactly sure what they looked like shape wise. Thanks
-
Fixed upload file, folder structure was wrong for JSMGE :/
-
Version 2.0.1 Released. See Here for file and notes
-
Quick update, A10C color, intensity and noise working. Very tired (3am morning here). Will post current work tomorrow morning AUS time. Frenchy
-
Hey everyone. work is coming along well. The code nrgized put together with some input from PeterP and others is quite remarkable, the amount of time he must of put in is really something. Anyways, the main problem with the adaption (read time consuming) is the the HLSL code changed between DX9 and DX10 (DX11 is pretty much exactly the same as DX10). The change is definitely for the better but means any of the shader mods have to be completely re written to the new standard. All posts will now be on a new thread here where I will keep the first post up to date. ANY QUESTIONS ABOUT THIS WORKING IN DCS1.5 and DCS2.0 MUST GO IN THE NEW THREAD!!!!
-
VR USERS - I DONT HAVE A VR HEADSET, I cant troubleshot any of your problems. Other people might be able to support you but please stop asking me Tacca's NVG mod for DCS 2.8 Version 1.4 - 22 March 2023 Features: NEW - Change colour, noise levels or contrast NEW - Ring/tubes/google number option - simulate monocular/biocular/quadocular NVGs - THANKS TO RYUK47 for this code addition Set NVG center point, size and ring dimensions Black ring effect with adjustable thickness settings. Variable render mode options Fixed folder naming issue to be truly OVGME ready Download here. OVGME read. As per old mod, change settings BEFORE APPLYING MOD Instructions 1. Extract from .rar to JSGME mod folder 2. Adjust variables as per guide below in “JSGME MOD FOLDER/Tacca's NVG mod 1.3.1/Bazar/shaders/common/MOD_nvg.hlsl” to change shape etc. You MUST change the variables before applying the mod in JSGME 3. Apply Mod in JSGME Variables Guide Render Mode: 0 = full screen, 1 = NVG with no ring, 2 = NVG with Ring, 3 = NVG with ring and slight zoom (not functional) Eye Size and position: EYE_CENTER = sets center point of NVG effect on screen as percentage of X and Y starting at bottom left corner. eg (0.5f, 0.655f) = 50% across and 65.5% up. EYE_SIZE = Sets X and Y diameter of NVG as percentage of screen size. eg (0.47f, 0.75f) = 47% of width of screen and 75% of screen height. Since most monitors aren’t square the y value will have to be larger than the x value to make a perfect circle; the ratio between the two numbers will be the same as your monitor aspect ratio Ring Thickness: Note – if using render mode 1 nvg will only be size of RInner. ie size = RInner(percentage) * Eye_Size = actual size. ROFade = % radius of circle where black ring starts to fade out to regular view RMerge = % radius of circle where black ring becomes 100% black on inside edge RInner = % radius of circle where green NVG lens start to transition to black ring I personally prefer a thin ring and this mod is released as such but some real world users (thank you Giaco) recommend the following ring sizes (that you need to set yourself): TUBES - New!!!!: ONLY WORKS IF RENDERMODE=2 Tubes = sets which type of goggle/rings to use. 1 = Monocular, 2 = Biocular and 3=quad Bioffset = distance between center of biocular tubes Quadoffset = offset between center of quad outer tubes Gain/Color/Noise controls - NOW WORKING!!!!: NVG_LIFT = gain multiplication value (50 for A10 and 40 for KA50 are good starting points) Collorize_COLOR = hue of NVG color as a percentage of 360 degrees when using a HSL color wheel (eg divide Hue value by 360) NVG_NOISE = noise division value, larger value means MORE noise (0.2 for A10 and 0.4 for KA50 are good starting points) Version 1.4 - 22 March 2023 Change log Added noise, color and gain controls Added ocular/tubes number options - thanks Ryuk47 Refinement of comments and default values - thanks Ryuk47 Simplification of calculations - thanks Ryuk47 Removed nvd2.2 file as it is obsolute Version 1.3.1 - 15 March 2023 Change log Fixed for to work with DCS 2.8 and Multi threading versions. Removed noise files as DCS incoportates simplex and perlin noise calculation .lua's Version 1.2.0 - 27 March 2018 Change log Added ability to change rendermode. 0 = full screen NVG, 1 = NVG without black ring and 2 = NVG with black ring. Default is set to Rendermode = 2 Version 1.1.0 - 26 March 2018 Change log Added black ring effect with adjustable thickness settings. Fixed folder naming issue to be truly OVGME ready Version 1.0.0 - 25 March 2018 Only includes working option for NVG center and size (like old mod) Does not include Black Ring Cannot currently change colour, noise levels or contrast

- 410 replies
-
- 13
-

-

-
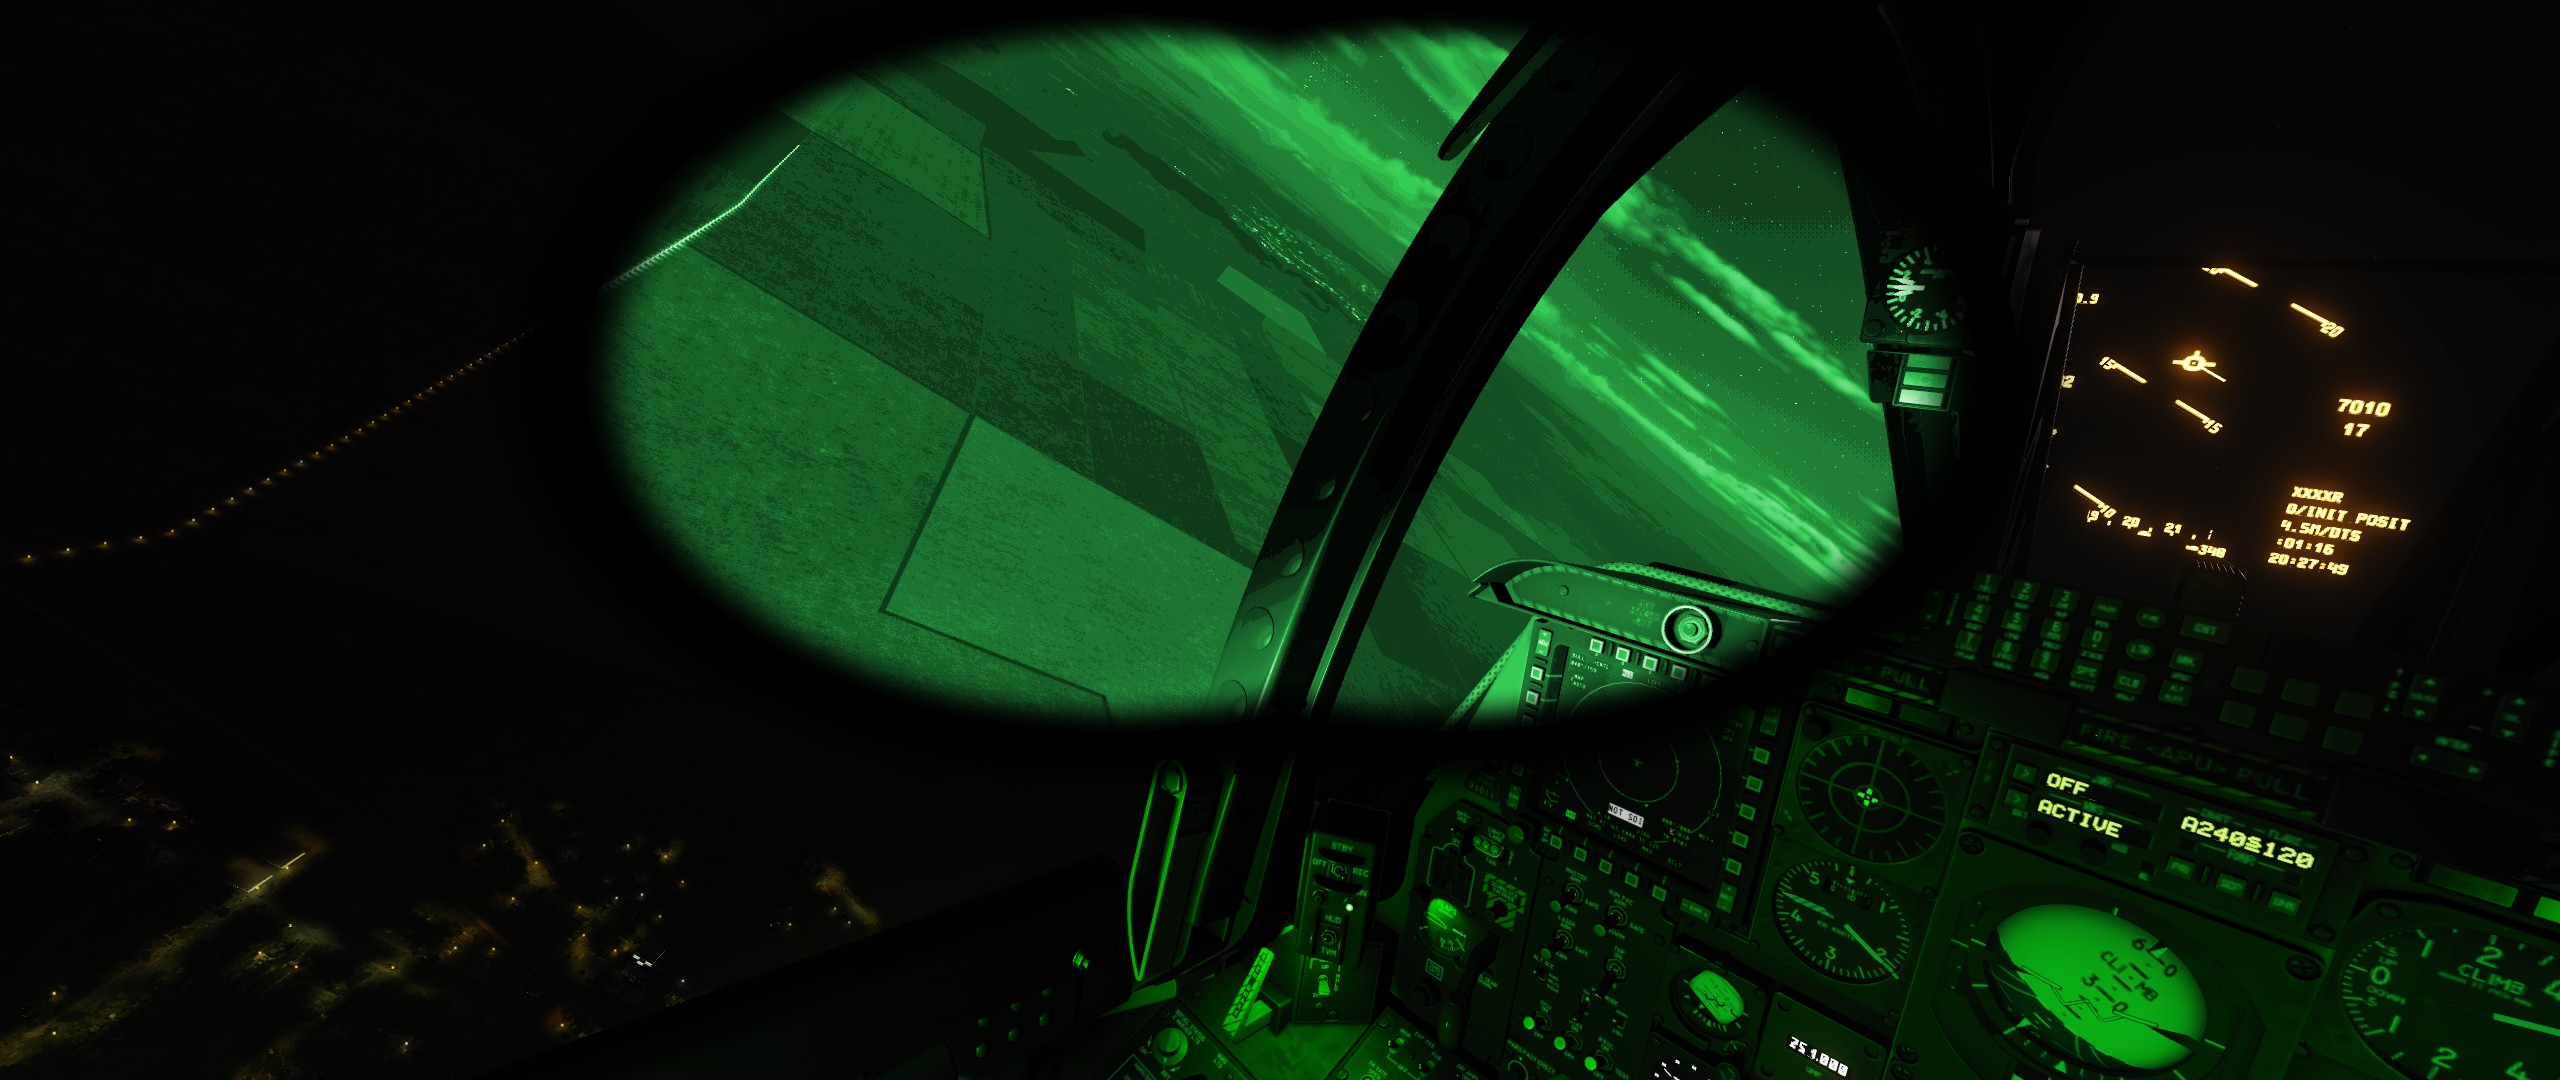
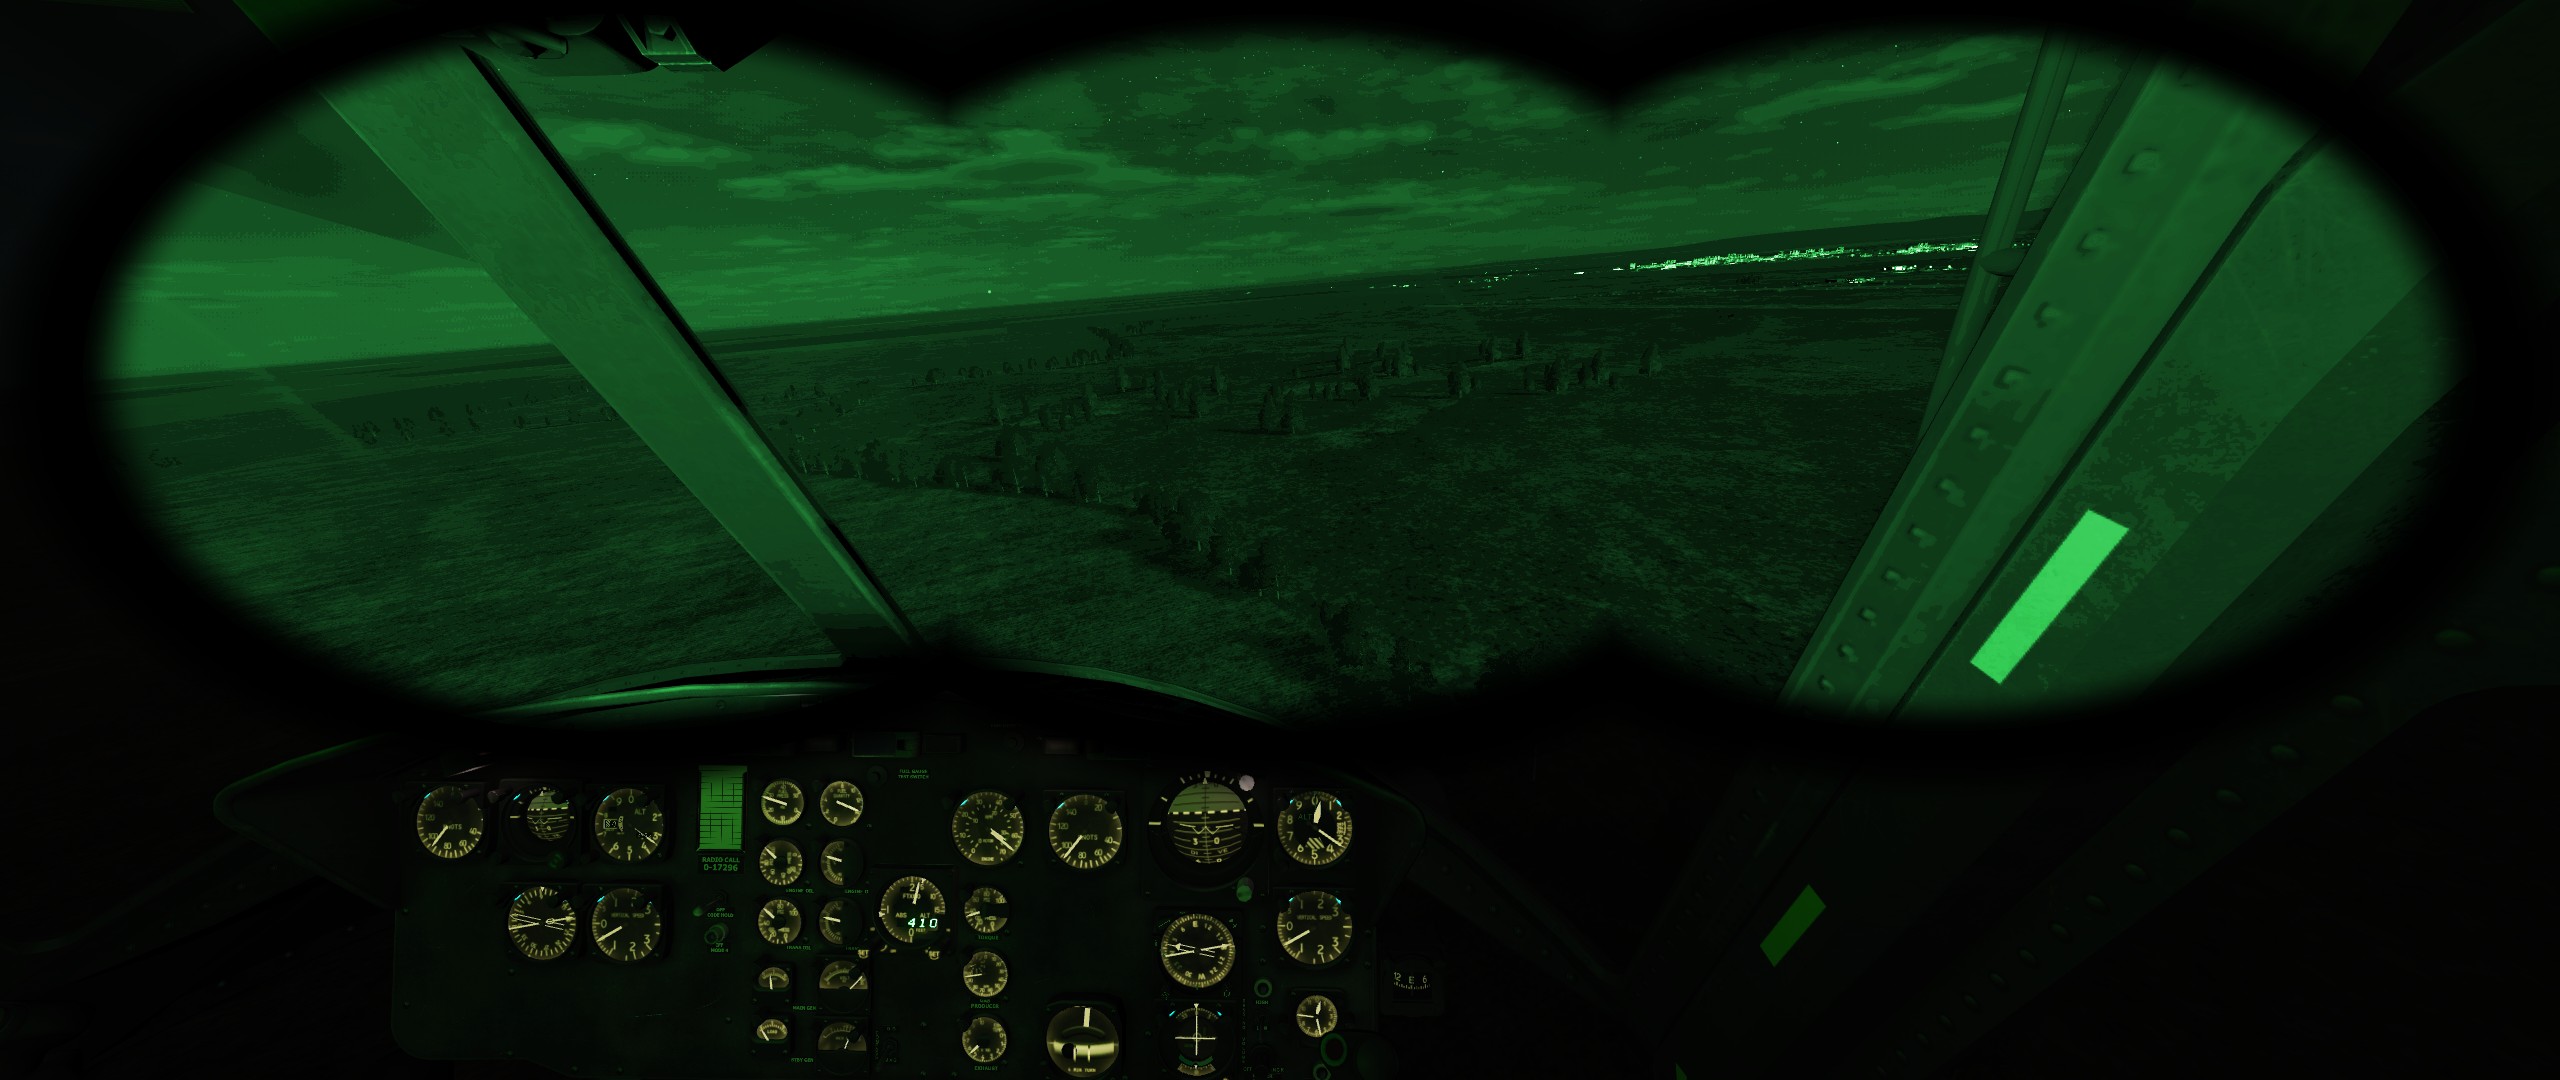
Hey guys, Uni is finished and this is number 1 on my to do list. Spent all day breaking down the standard DCS NVG implementation and learning some basics of HLSL. Im now confident in how to make basic color and intensity changes. Ive just started looking into what this actual mod did and how. Will take me a little bit (next few days around work etc) to figure it all out but I think I will be able to achieve something similar :) if not it will at least be stepping stones to getting close. My plan of attack is first and easiest (i think) should be the color/intensities. next will be the noise (or lack thereof if the scene is bright) and then finally the zoom and ring. PS. I dont have the black shark so the A10 is my primary concern but once done i might get the blackshark and try to do that one as well.
-
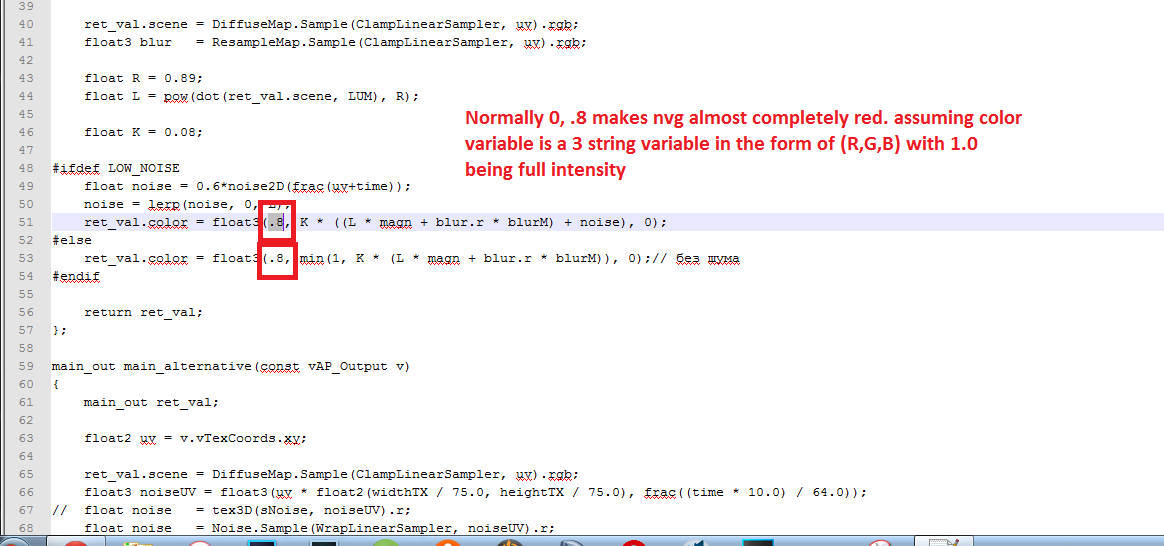
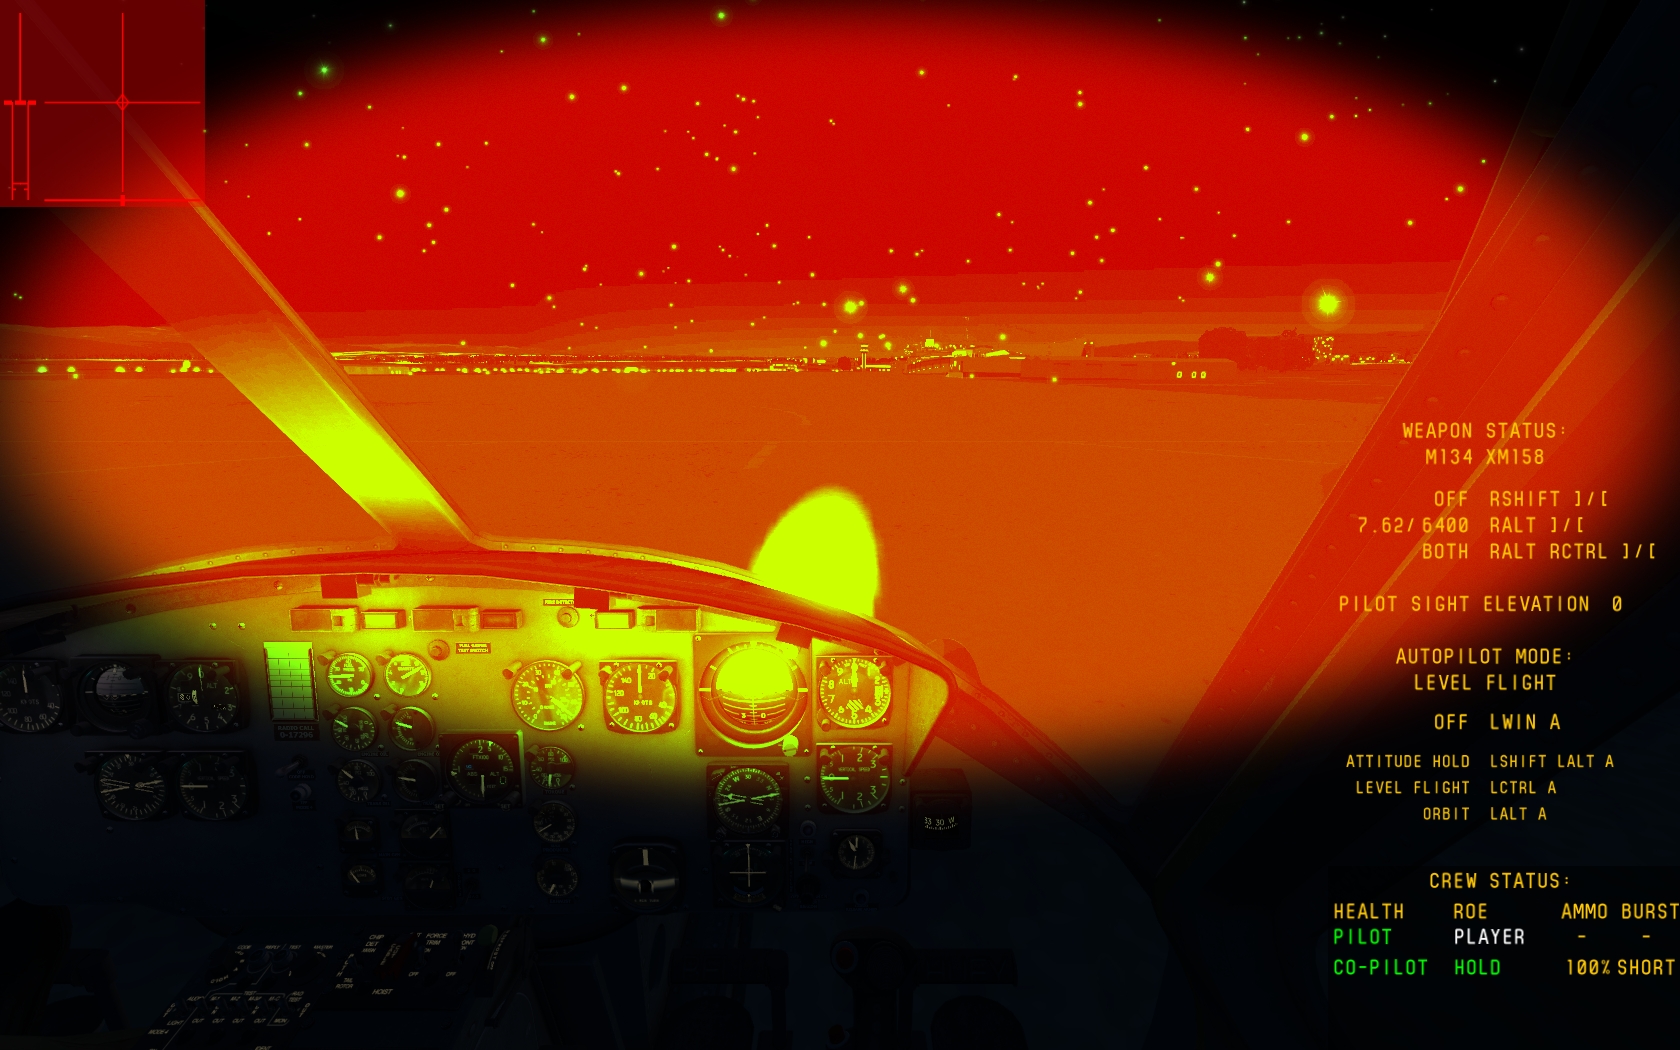
Hey guys, just a little more info. like I say below changing values of some of the code in Eagle Dynamics\DCS World OpenBeta\Bazar\shaders\PostEffects\nvd.fx can create the following change. I made the change to an extreme value for clarification :) Dont hold out hope on me making this mod work (at least anytime soon). Im a few weeks out from finishing my bachelor in maths so I'm having to focus on that. Maybe once thats done I will give it a crack, only thing is Im a pretty shit coder :/ and the hlsl stuff makes no sense to me at all at the moment
-
Hey guys, did a bit of research today trying to get this mod working. No luck but I do have some useful information for those that a code savy. As grand said, the whole Precompiled graphics component has been removed from the graphics.lua. I tried putting them back and no joy. I then started checking folder structures and nvg related files and found there is a new folder in DCS 1.5 at "E:\Program Files\Eagle Dynamics\DCS World OpenBeta\Bazar\shaders\" called PostEffects that now contains the the nvd.fx file (1.2 etc has the file in the folder PostMotionEffect\NightVisionGoggle\ which now doesnt exist) Having a play with the new nvd.fx file i could get some basic changes happening to the color of the nvg circle but couldnt change the size of it all. Then, looking back at old mods I tried changing the size/brightness of the elipse of focus.png at "E:\Program Files\Eagle Dynamics\DCS World OpenBeta\Bazar\Effects\PostEffects" and that did change the size and effect of the NVG in game. Thats all I have managed for now, im not too good at understanding the code in the nvd.fx but others should hopefully get us back to a great NVG display.
-
Hey everyone. I know some people are transitioning to Reshade aka SweetFX 2 but I thought I would post this anyways since it might help some people. Below are graphs of the different curves that are available in SFX 1.51 To those that dont understand what is happening I will try and simplify as much as possible so below might not be "technically correct" but will give you a good idea. The game generates a value for brightness (luma) and color/saturation (chroma) for every pixel, sweet fx then takes the values and modifies them according to all your settings. Imagine the game value being entered along the x axes and where it hits the curve it outputs a value along the y axis. All the curves below are designed to boost contrast, some more so than others and some affect different regions. They essentially take dark values and make them darker and brighter values brighter without clipping or completely crushing the blacks (photog/video terms) Now alot of the current SFX installs floating around use option 9 on both luma and chroma. This is the second strongest curve so if you are finding that your game a bit to harsh or cartoony I recommend choosing either curve 3 for mid level effect (and is the quickest for computers to run) are curve 2 to only have a subtle effect. Maple code for reference (using equations directly from curves.h file) with(plots); yx := plot(x, view = [0 .. 1, 0 .. 1], color = black, legend = "y=x", legendstyle = [location = right], size = [900, 900], scaling = constrained, axes = boxed); curve1 := plot(sin((Pi*.5)*x)^2, view = [0 .. 1, 0 .. 1], color = blue, legend = "curve1", numpoints = 1000); curve2 := plot((x-.5)/(.5+abs(x-.5))+.5, view = [0 .. 1, 0 .. 1], color = brown, legend = "curve2", numpoints = 1000); curve3 := plot((x*x)*(3.0-2.0*x), view = [0 .. 1, 0 .. 1], color = green, legend = "curve3", numpoints = 1000); curve4 := plot(1.1048/(1.0+exp(-3.0*(2.0*x-1.0)))-.1048/(2.0), view = [0 .. 1, 0 .. 1], color = purple, legend = "curve4", numpoints = 1000); curve5 := plot(x*(x*(1.5-x)+.5), view = [0 .. 1, 0 .. 1], color = yellow, legend = "curve5", numpoints = 1000); curve6 := plot((x*x)*x*(x*(6.0*x-15.0)+10.0), view = [0 .. 1, 0 .. 1], color = orange, legend = "curve6", numpoints = 1000); curve7 := plot((x-.5)/(.5/(4.0/(3.0))+abs((x-.5)*1.25))+.5, view = [0 .. 1, 0 .. 1], color = red, legend = "curve7", numpoints = 1000); curve8 := plot(.10*(x*x)*(2*x-3)*((2*x*x)*x-3*x*x+3)*((4*x*x)*x-6*x*x-3), view = [0 .. 1, 0 .. 1], color = plum, legend = "curve8", numpoints = 1000); curve9 := plot(.5-.5*(abs(2*x-1)-2)*(2*x-1), view = [0 .. 1, 0 .. 1], color = navy, legend = "curve9", numpoints = 1000); display(yx, curve1, curve2, curve3, curve4); display(yx, curve5, curve6, curve7, curve8, curve9); display(yx, curve1, curve2, curve3, curve4, curve5, curve6, curve7, curve8, curve9); Curves 1 through 4 (with y=x as comparison) Curves 5 through 9 (with y=x as comparison) All curves for complete comparison but a bit hard to see
-
Hey guys As far as I believe its a pretty close approximation. It might be out a few mm here and there but its close, alot of different forum searching went into it for some specs but there isnt anything really definitive out there. Some more pics as asked for. Should be able to click on them and take you to full size pics The throttle mech works by having a screw run through the outer cylinder into a potentiometer that is mounted to the main inner shaft using a small right angle bracekt. The travel distance is set by how much of the main shaft is cut away. I believe the real thing is 210 degrees but ive got about 190 at the moment and its fine.
-
collective Q's and more pics First off, thanks for all the love :pilotfly: yep im pretty happy with it. Hey, what printer do you have and what material do you use. This was done using PLA on a makerbot replicator 2 at medium res and it still turned out great. I use an adjustable friction clamp made of delrin/acetal (acetal is the dupont brand name). Its almost like a plastic chopping block but with a more consistent level of friction. Even with my not so perfect main axle its super smooth and if I crank up the tightness i can lift the whole unit and supports of the ground without it moving :) I got a couple blocks from here http://www.ebay.com.au/usr/gentoolco?_trksid=p2060353.m2749.l2754 my first version was only about 12mm thick and worked fine but the current one is about 26mm thick which is shown bellow Will do, dont have pics of the throttle mech ATM because its not very pretty for a prototype but works. also just need to add some bushes at the bottom of the throttle twist grip for a little bit more friction. Might have the pics tomorrow Yeah the bearings make it feel great, also made assembly easier not having to make pillow blocks or mounts myself. They are also self aligning so if you mounting holes are a little off it still works smooth as butter :) Yes, as above the black bit is the friction device. very basic but jeez it works great. When I saw someone else do it on a DIY i thought it might be bit a bit rough but it isn't. I have now also seen it used in $5000 plus home heli cockpits and they swear by it. here is a couple more pics and this is a link to the whole album so far [imghttp://damienstpierre.com/blog/wp-content/uploads/2017/12/Collective-1093.jpg[/img]
-
Hey guys, Im a member of the online 229th Battalion. We have a really good bunch of guys over there and as part of a project I made a DIY collective controller and will be creating a how to for them. It cost me about $270 AUD to make with all single run costs. If people get together and order the 3D printed head and anodised button panels together you would be able to get it down to around $200 AUD. I know its still a fair bit for people and it was for me as well; Im a full time uni student working part time. If anyone has suggestions on how to make it cheaper Im all ears. It uses a teensy 3.1 micro controller for the interface with a full custom HID descriptor and coding. A hall sensor is used on the primary access with code for 16 bit resolution which means an 12-13 bit effective resolution (remove usb etc noise) for 30 degrees range of movement. That means 0.004 of a degree resolution, it feels buttery smooth in sim Im currently writing a full How to and putting it up on the 229th forums so check that out if you want more details Anyways, everyone likes eye candy.
-
thankyou spinter. I will give it a try
-
anyone??? or is not possible?
-
Hey guys, I was just wondering if anyone knows the code to add new cargos to DCS using a .lua file in the MODS folder structure. For example I know I can select and add a static object in the mission editor (and it will appear in the mission) using the a lua with the following (and relevant shape and textures in the right folders) -- CONE TEST STATIC OBJECT -- This uses the system where object files are placed in the shapes folder and texture files in the textures folder mount_vfs_model_path (current_mod_path.."/Shapes") --Path to model file mount_vfs_texture_path (current_mod_path.."/Textures") --Path to texture file GT = {}; set_recursive_metatable(GT, GT_t.generic_stationary) set_recursive_metatable(GT.chassis, GT_t.CH_t.STATIC); GT.chassis.life = 1000 -- initial life level GT.visual.shape = "ConeTest" -- object file name GT.visual.shape_dstr = "ConeTest" -- destroyed object file name GT.CustomAimPoint = {1,1,0} --Burning after hit GT.visual.fire_size = 0 -- relative burning size GT.visual.fire_pos = {0,0,0}; -- center of burn [long, vertical, transverse] GT.visual.fire_time = 0 -- burning time (seconds) GT.time_agony = 180; -- ?? GT.Name = "ConeTest" -- MUST BE THE SAME AS OBJECT FILE NAME GT.DisplayName = _("ConeTestC") -- Name in mission editor drop down and F10 Map GT.Rate = 1 -- ???? GT.DetectionRange = 0; GT.ThreatRange = 0; GT.mapclasskey = "P0091000076"; GT.attribute = {wsType_Ground,wsType_Tank,wsType_NoWeapon,wsType_GenericFort, "Fortifications", }; GT.category = "Fortification"; add_surface_unit(GT) to make it a cargo instead I think i have to change the following lines but i have no idea what to change them too. I also think i need to add a line stating its weight and possibly coordinates of its attachment point. GT.mapclasskey = "P0091000076"; GT.attribute = {wsType_Ground,wsType_Tank,wsType_NoWeapon,wsType_GenericFort, "Fortifications", }; GT.category = "Fortification"; add_surface_unit(GT) any help would be greatly appreciated. ps. i have tried the search and lots of googling as well with no luck
-
I thought I should post this in case anyone comes across this looking for similar answers. Here is what it should be as far as i know (which isnt much) to just be a static object and not a unit GT.attribute = {wsType_Ground,wsType_Tank,wsType_NoWeapon,wsType_GenericFort, "Fortifications", }; GT.category = "Fortification"; and change out GT for CWTX or whatever prefix you are using (although it might have to be GT)???
-
yeah, i got the same reply just now. there working on it
-
I tried that, no luck. Tried pretty much everything in the forums and considering this is happening to multiple people at once im guessing something is wrong on the DCS end.
-
Im the same as well :( was fine yesterady