Search the Community
Showing results for tags 'homebuild'.
Found 3 results
-
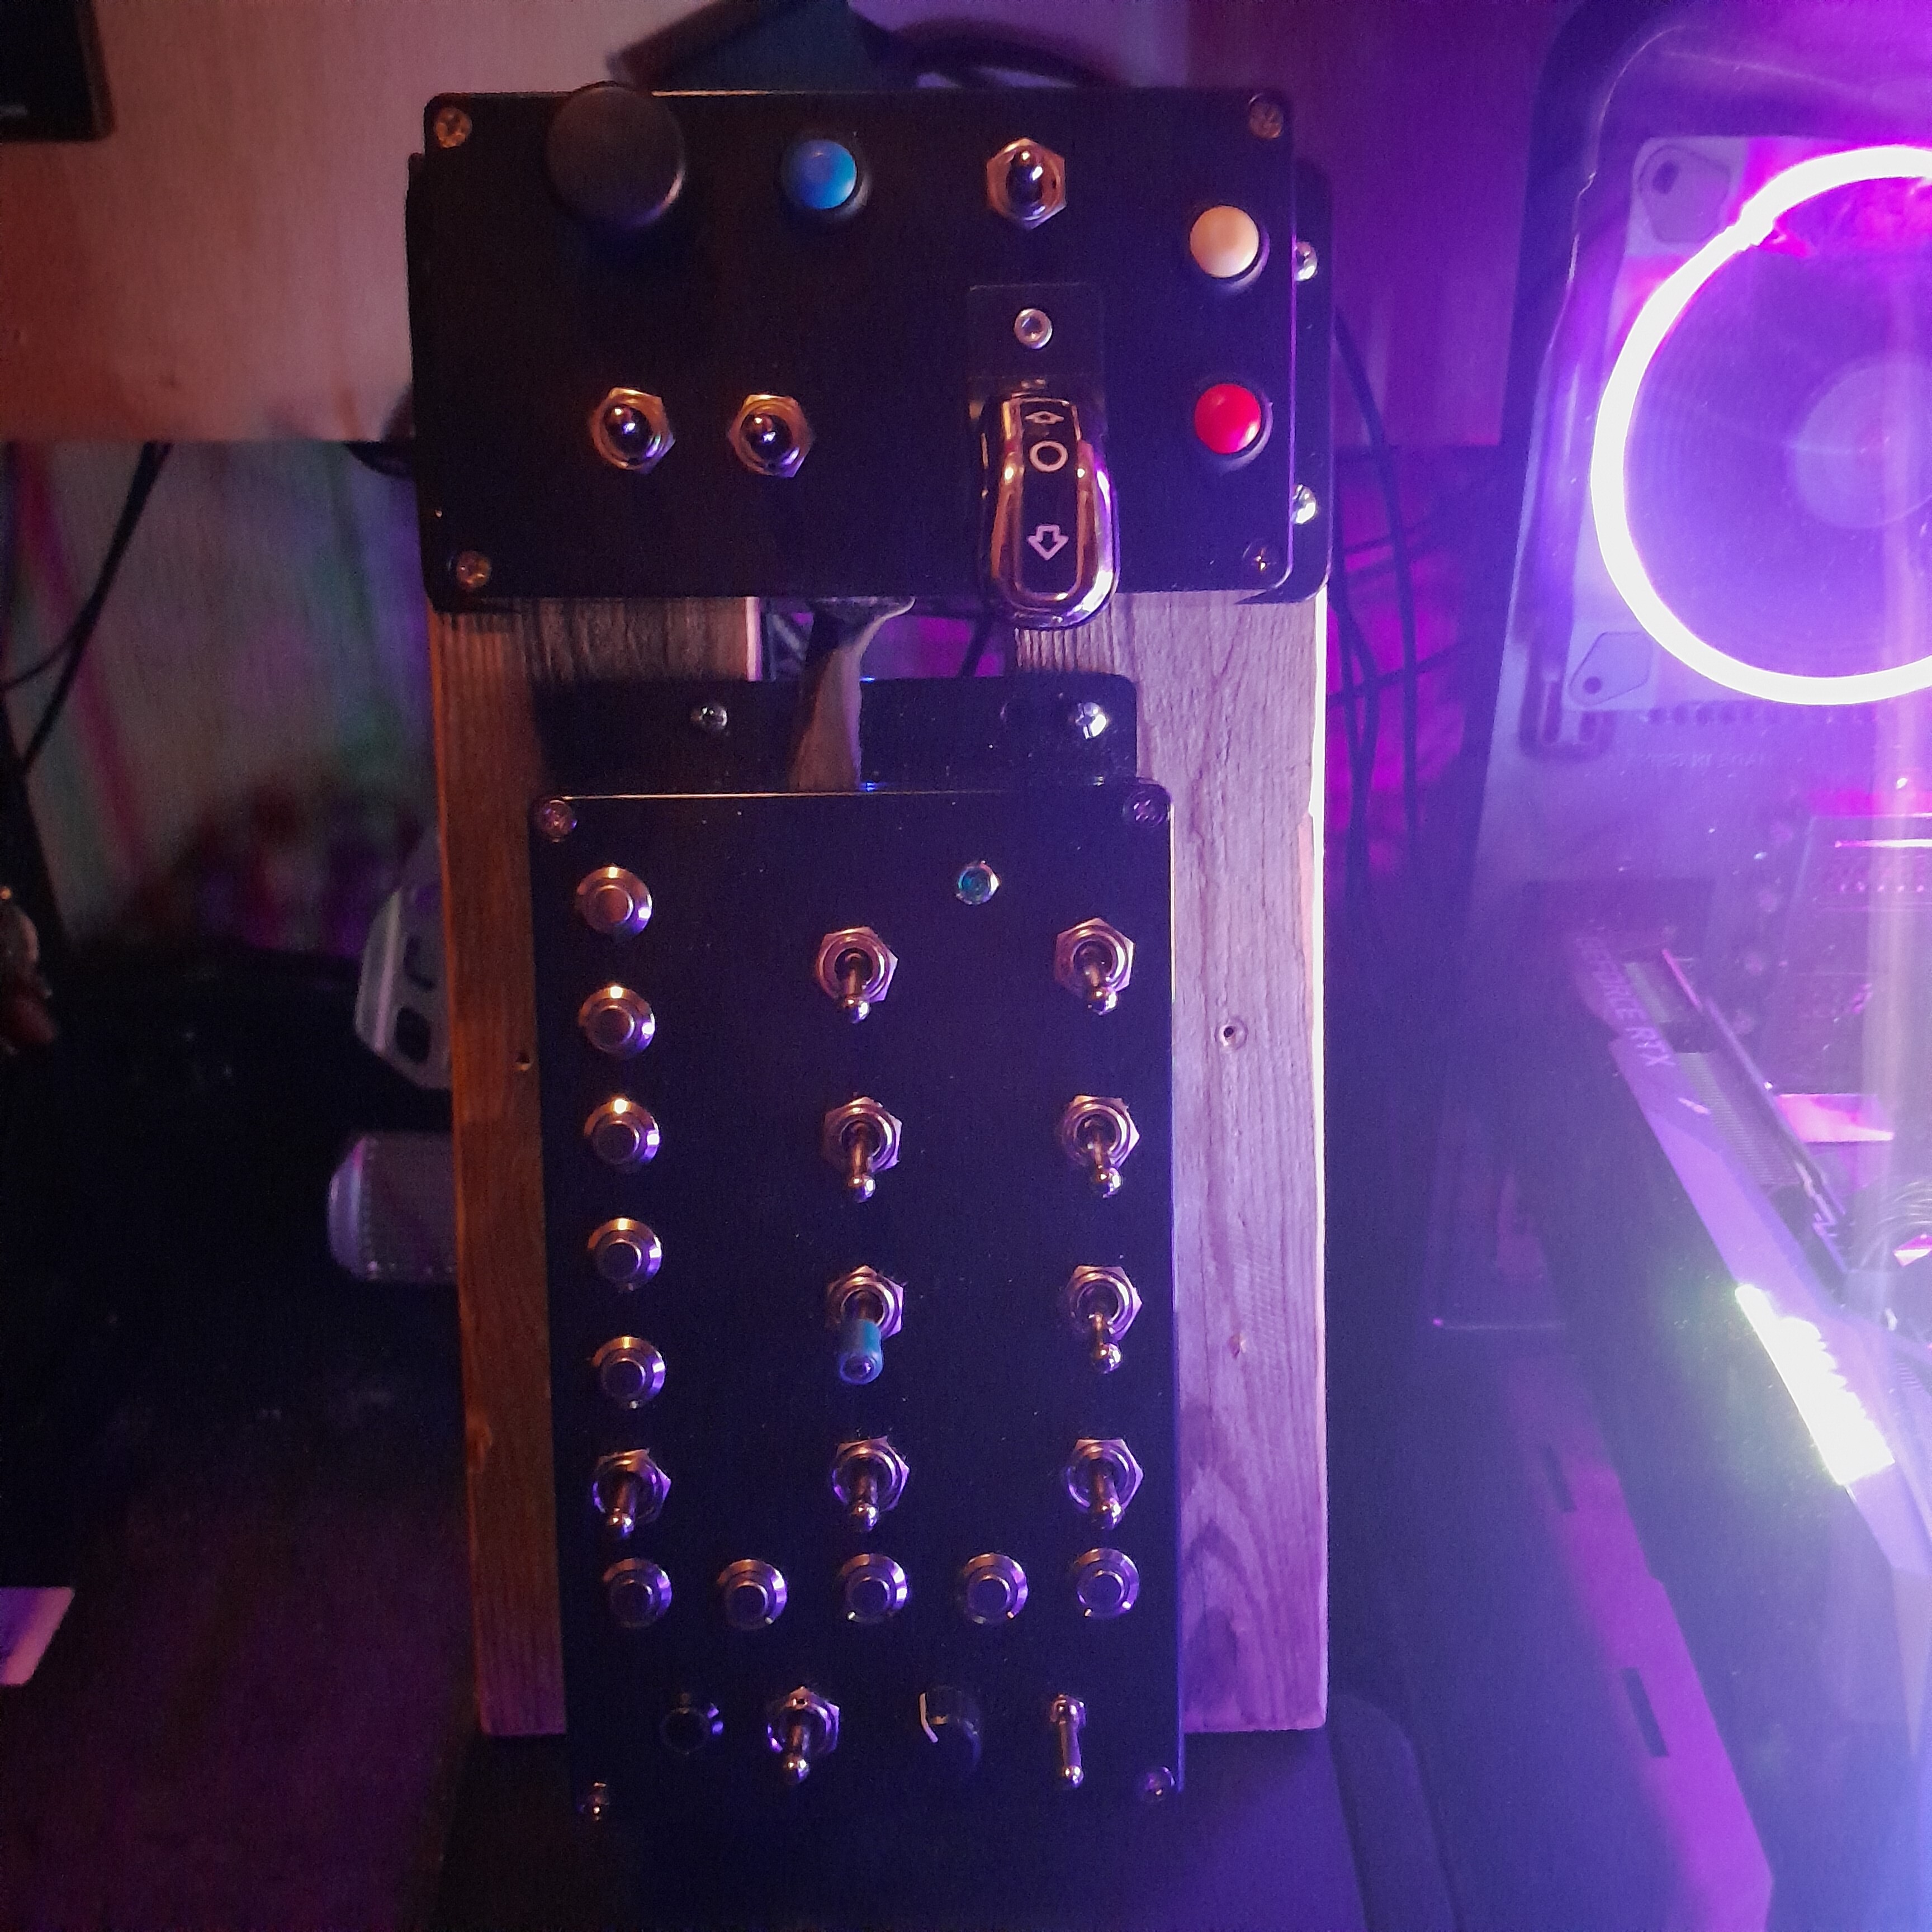
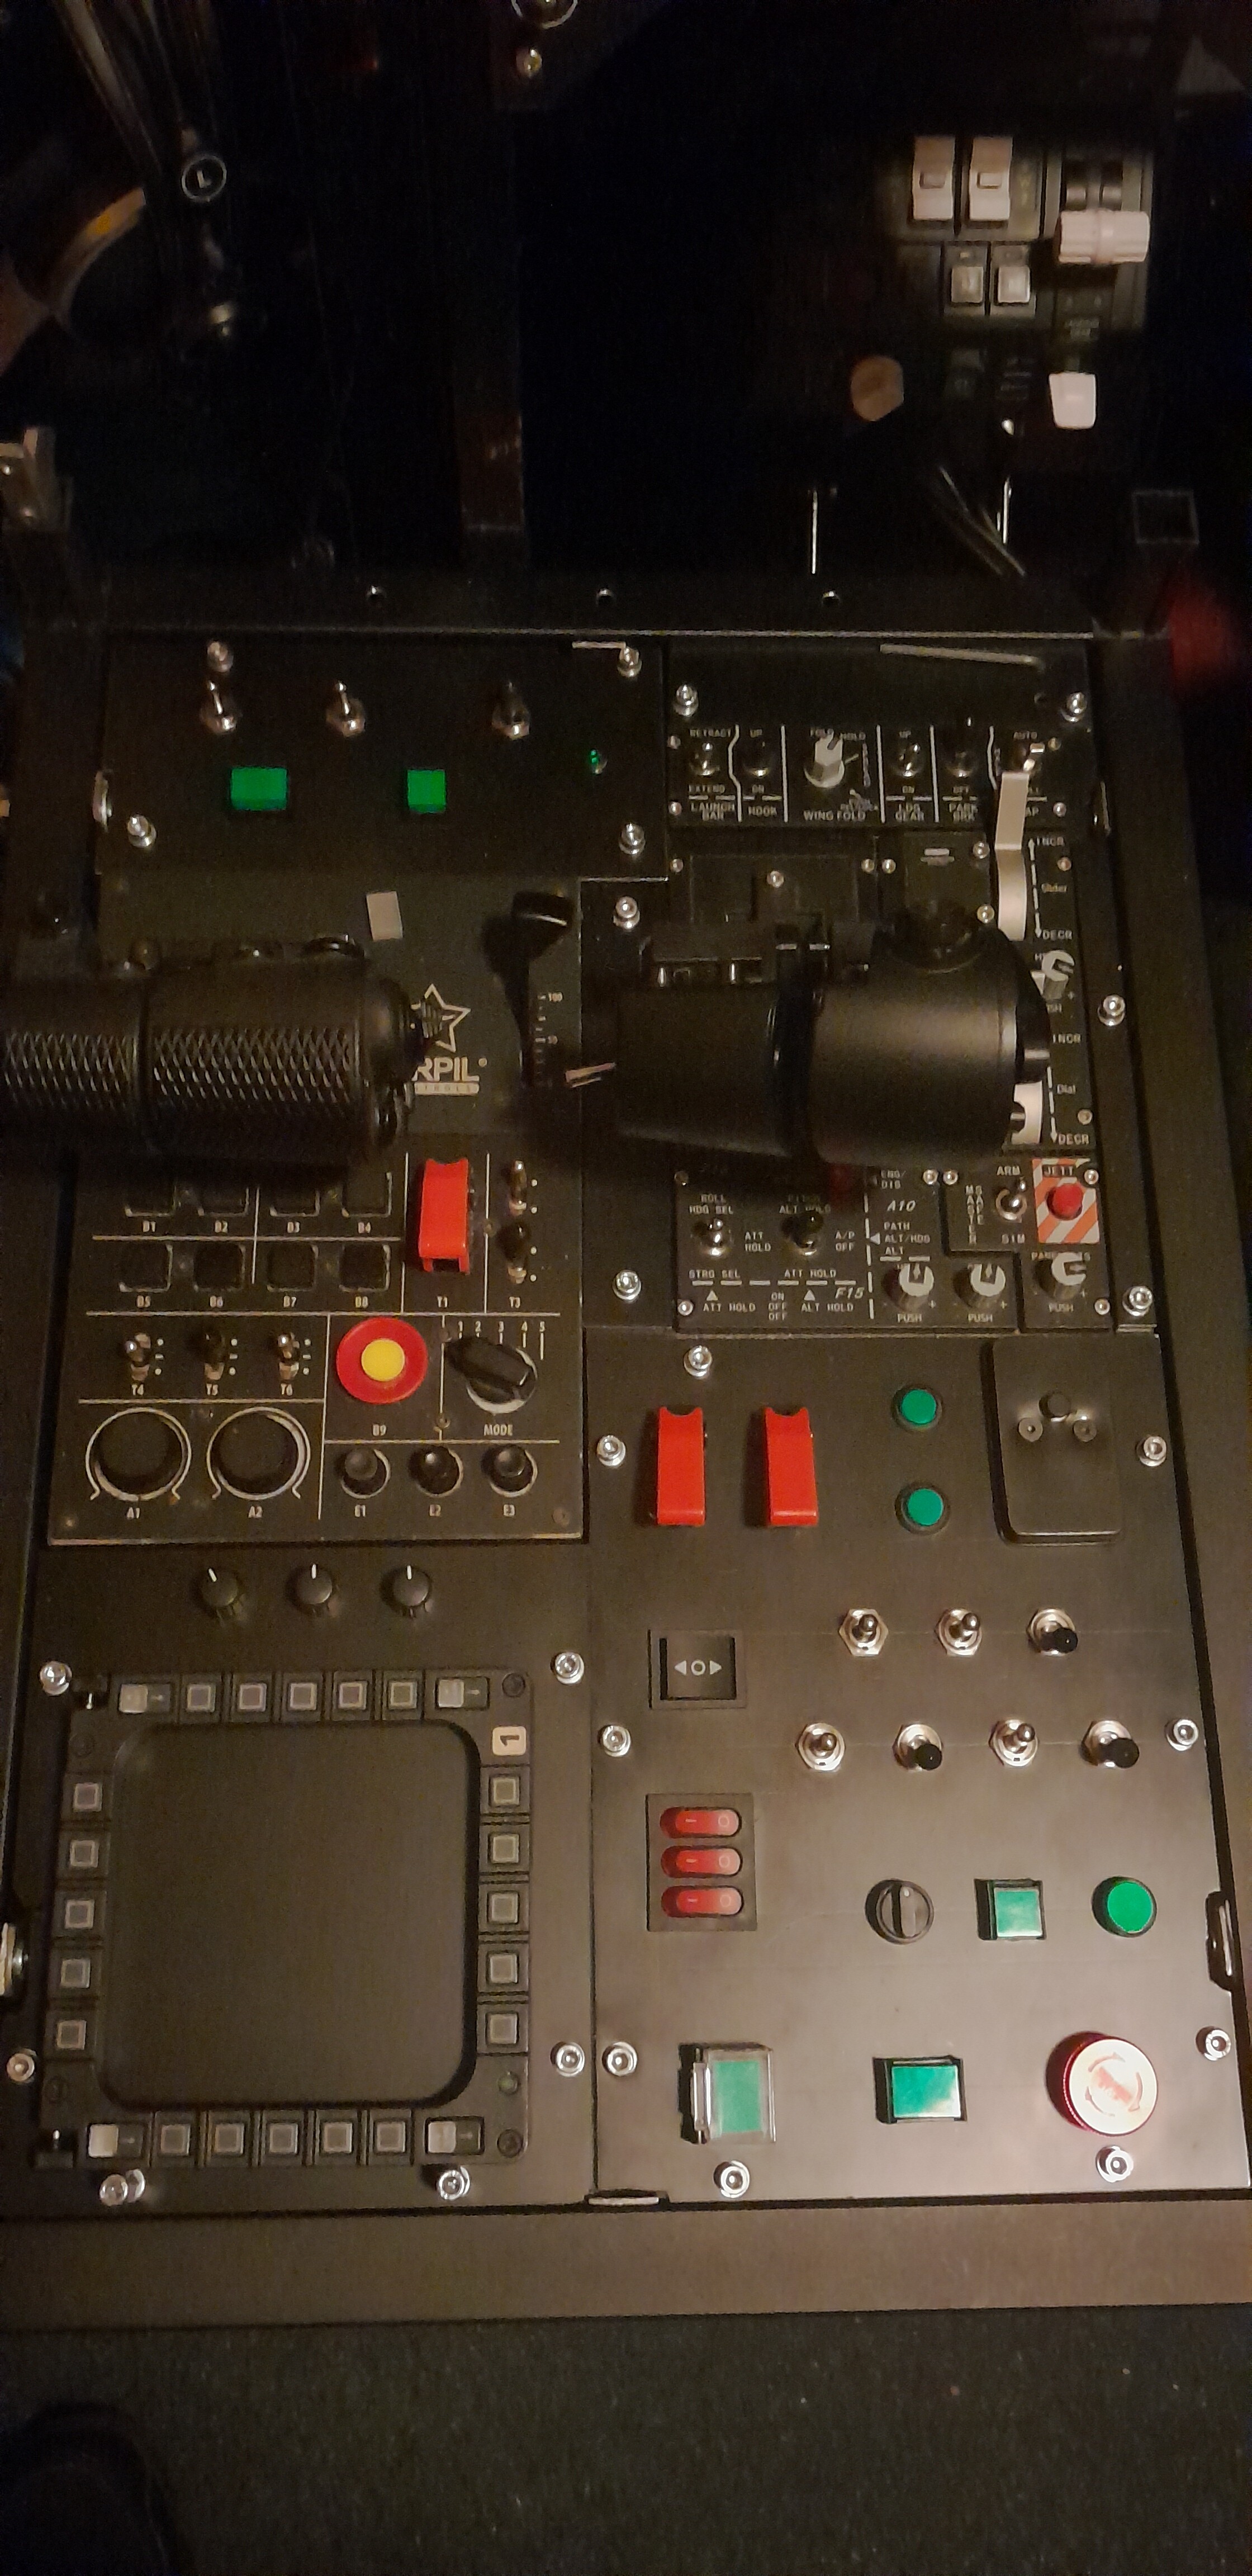
Some may remember a year ago, I was whining about the price of button boxes, which naturally followed in making my own, which resulted in this: Past year, I've been playing with Winwing Orion 2 and Virpil Mongoost v1, screwed down inline on an old speaker cabinet, not the best setup, having to reach almost behind me operating the Virpil throttles when flying the Mosquito, also no good platform to expand on (the cabinet was too small and actually had the Virpil hanging off the back), so that needed to change when the chance arrived Well, chance arrived when my company dumped some old modular displays, consisting of square steel pipes and connecting pieces This gave me a roughly 54x37 cm 'table' which could put the 2 throttles side by side, it was a little too high, but instead of the chore of sawing through steel 4 times, I opted to 'drop' the plateau on which it all was screwed, which lowered my throttles level with the edges, of course this left 2 'cavities' forward and back and I, for the time being, filled them flush with 1mm plastic sheet Using a front plate designer on the PC and the plastic sheet as template, began working on designing and adding a button board, at work found an old +/- 4mm 'address board' that used to be screwed to the gate, which was plastic reinforced with laminated aluminum foil, perfect for my plan When I had some drafts, I got (another) Bodnar BBI-64, went shopping in China for various switches and buttons, started puzzling the RL layout and found I had way more space than I had connections on the BBI, but I still had a TM MFD lying around and figured I could add its functionality and fill space with it So far, this is the result: Though still mostly built by hand like my first try, this time, I put in a bit more effort/precision in the actual drilling of the holes (still won't win any beauty contests up close ) Modeled some configs from the F-14, like the top left plate has engine L/R start and inlets (since it would be above the Virpil and furthest to reach, figured I wasn't gonna populate it too much), the AFCS toggle layout, a 4-way hat as Target Designate Switch, and the rudder trim (unused in DCS) on the bottom right panel For fun also put in an emergency stop button (probably will be using it as ejection seat arming) Still need to work on the bottom left panel, the encoders need to be soldered and connected (that 'area' combined with the Virpil rotaries and axes will function for radio's and volumes), after which I'm gonna ponder what I'm gonna put in the space inside the MFD as I will still have some 10 terminals free on the Bodnar Now I also need some solution to power the led-equipped buttons, the Bodnar apparently can only do 1 led

-
fa18_simpit.ino I noticed theres not a lot of info pertaining to planning the circuits and building the code with "Arduino" and "DCS bios " or maybe its buried in the archives so I'll leave this here. This is my attempt to future proof my starting point on my flight panel build, in an attempt to use as little storage and pins as possible. you'll see I'm using a clunky but simple method to combine DCS bios global variables with ad-mux-library channels and also kept the loop as short as possible to maintain a high refresh rate as the build goes on that will likely change. I have yet to verify this even works as I am waiting for supplies and wanted a starting point with the code to familiarize with and test as i build. any ways let me know what you guys think
-
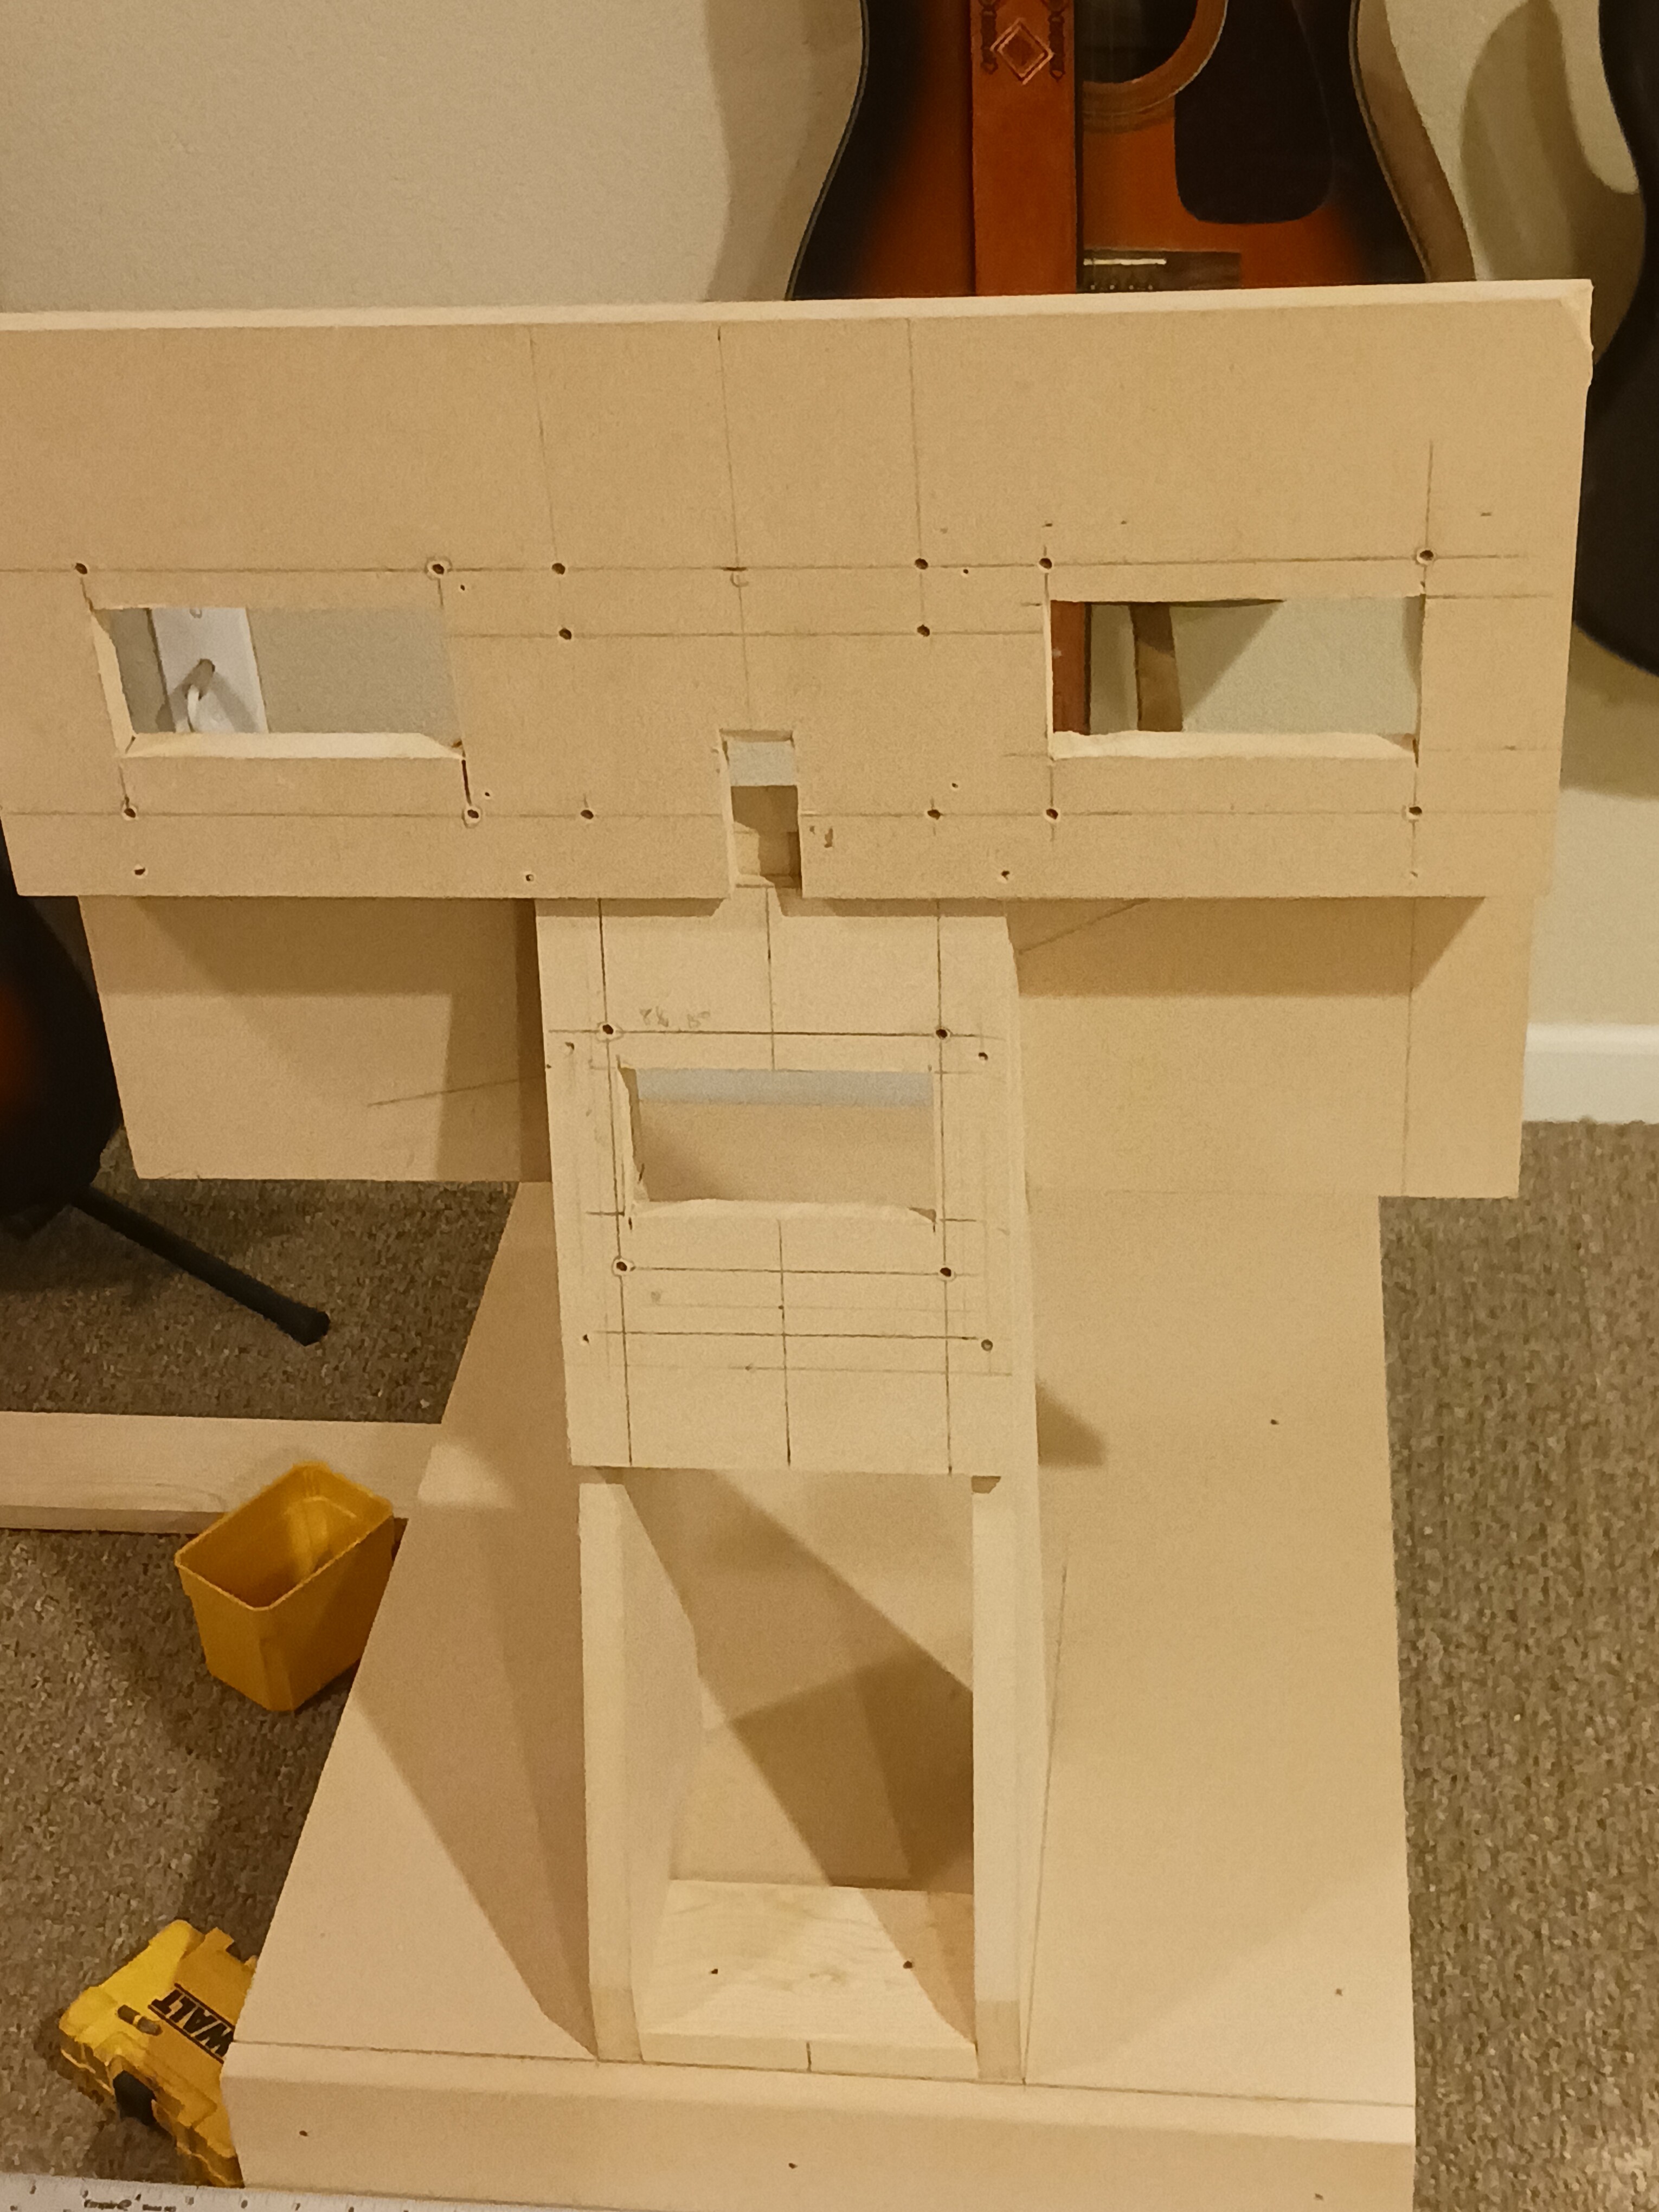
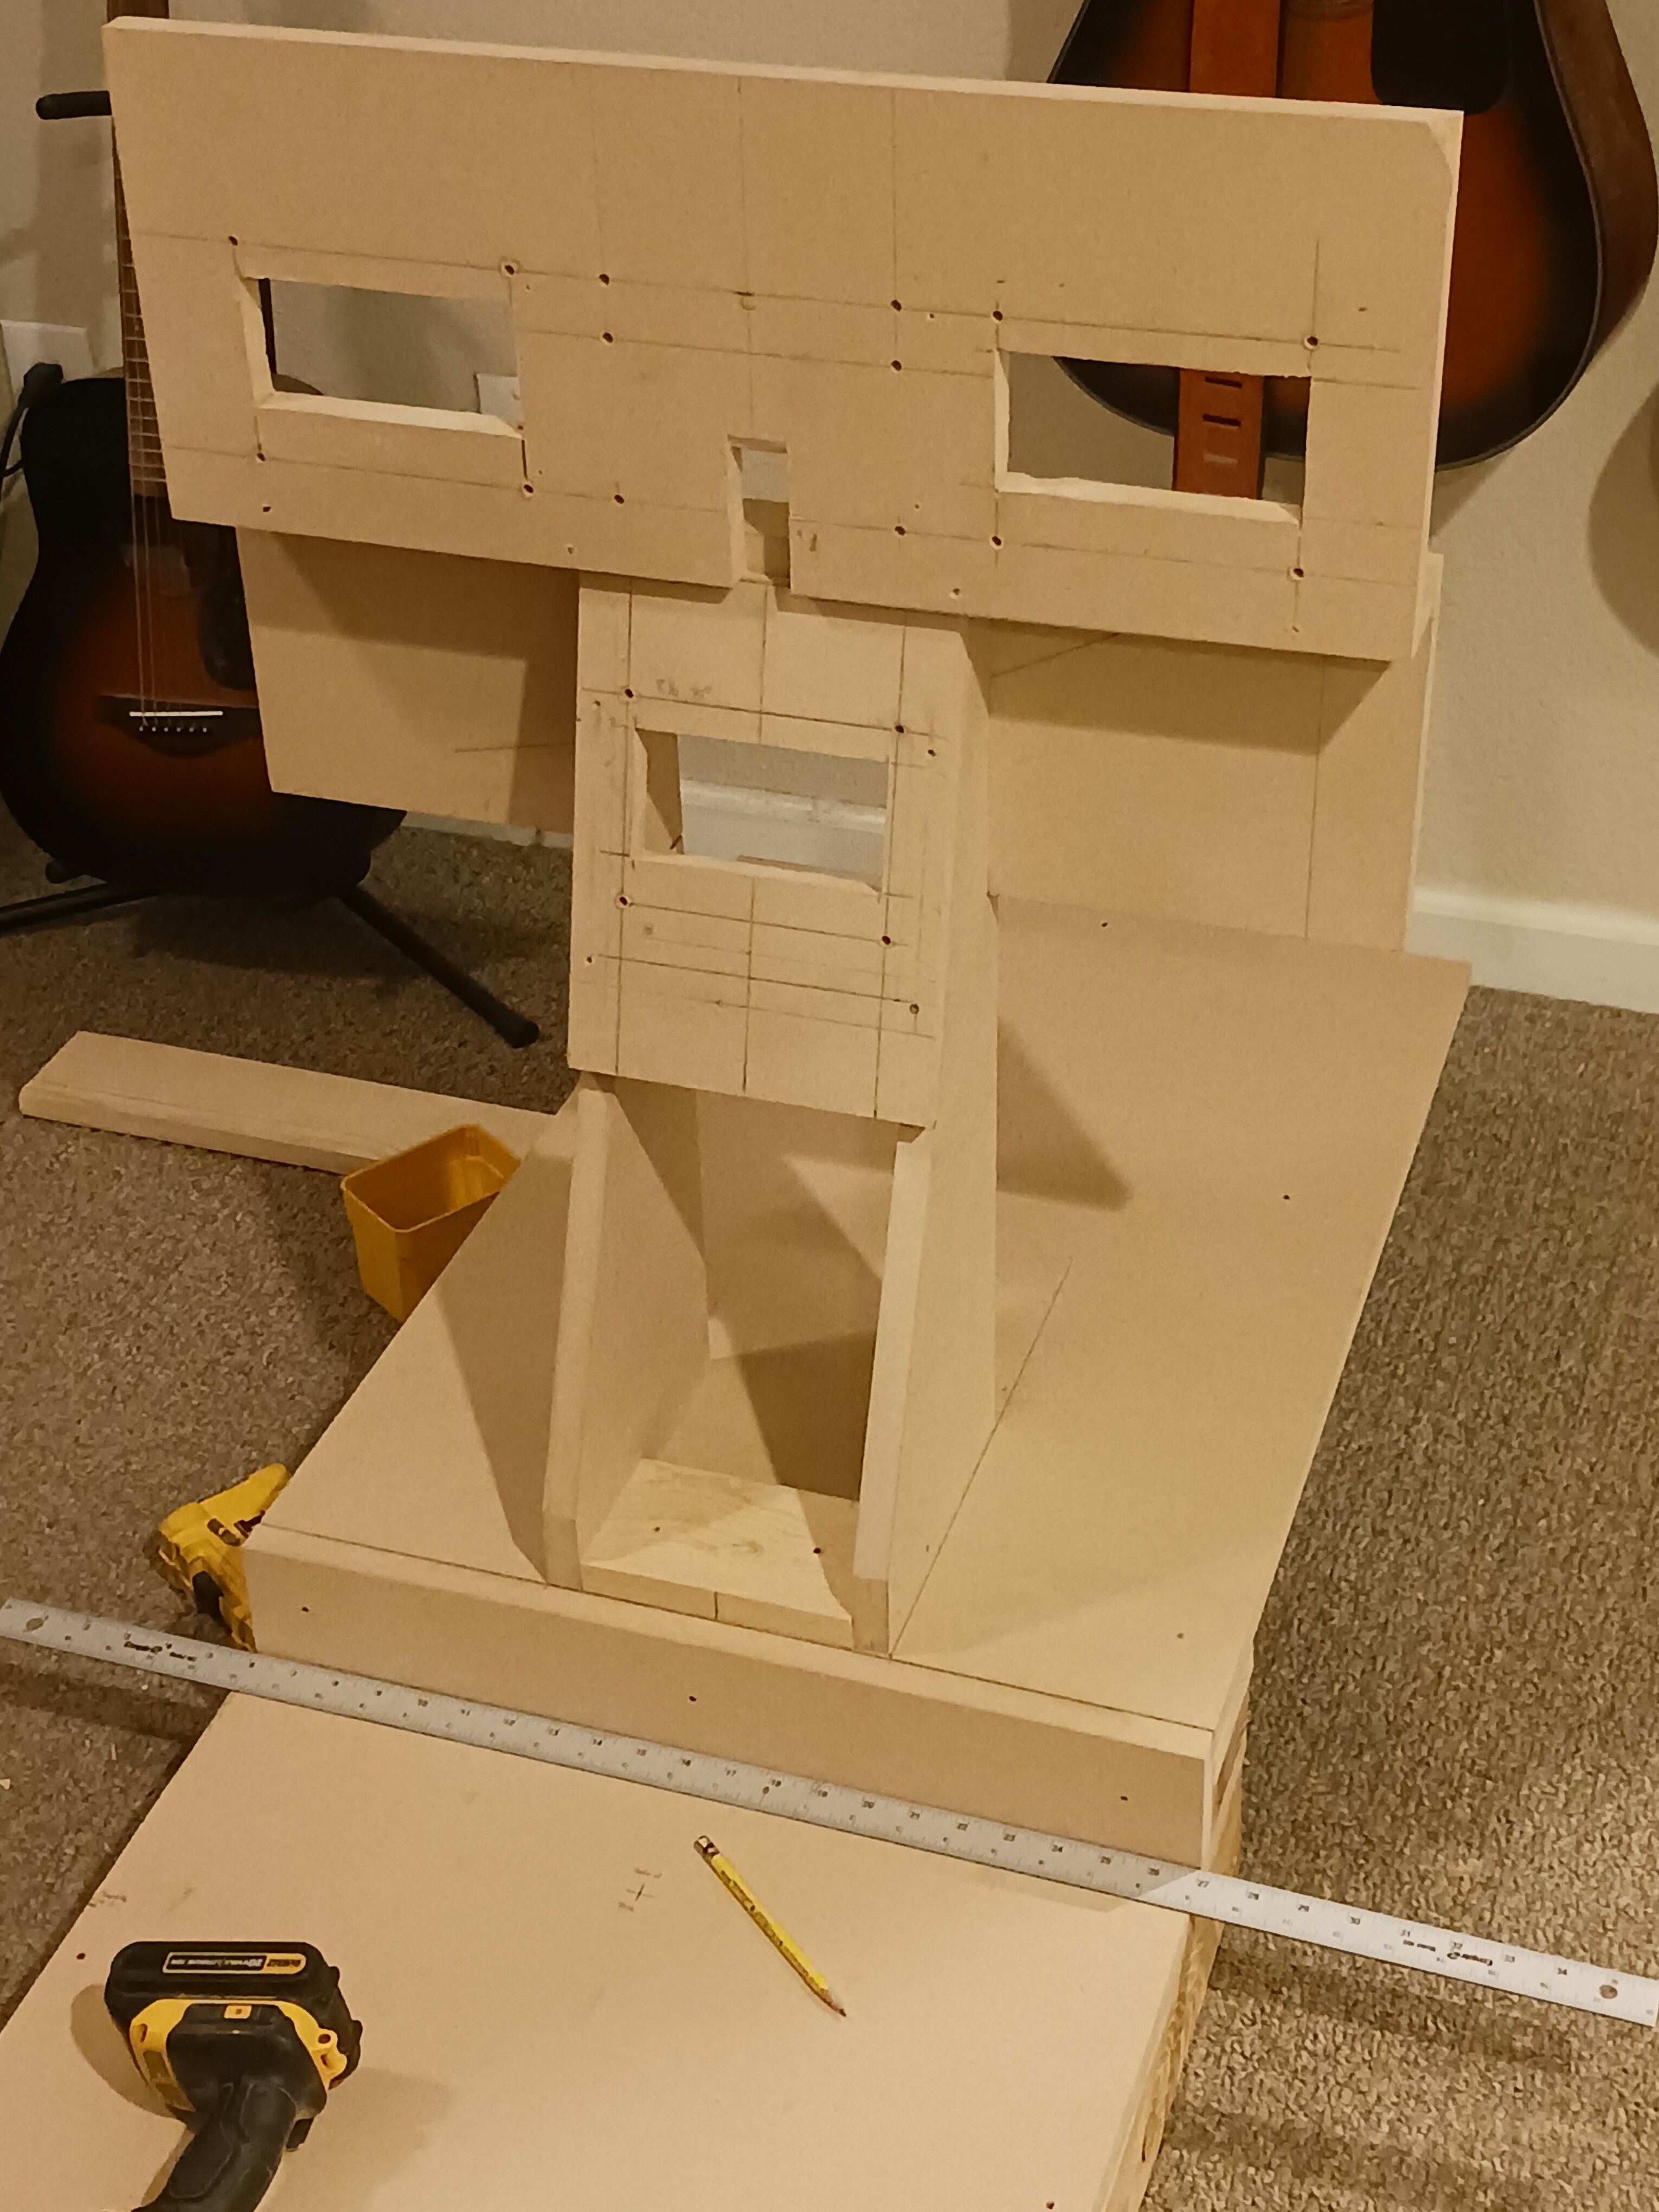
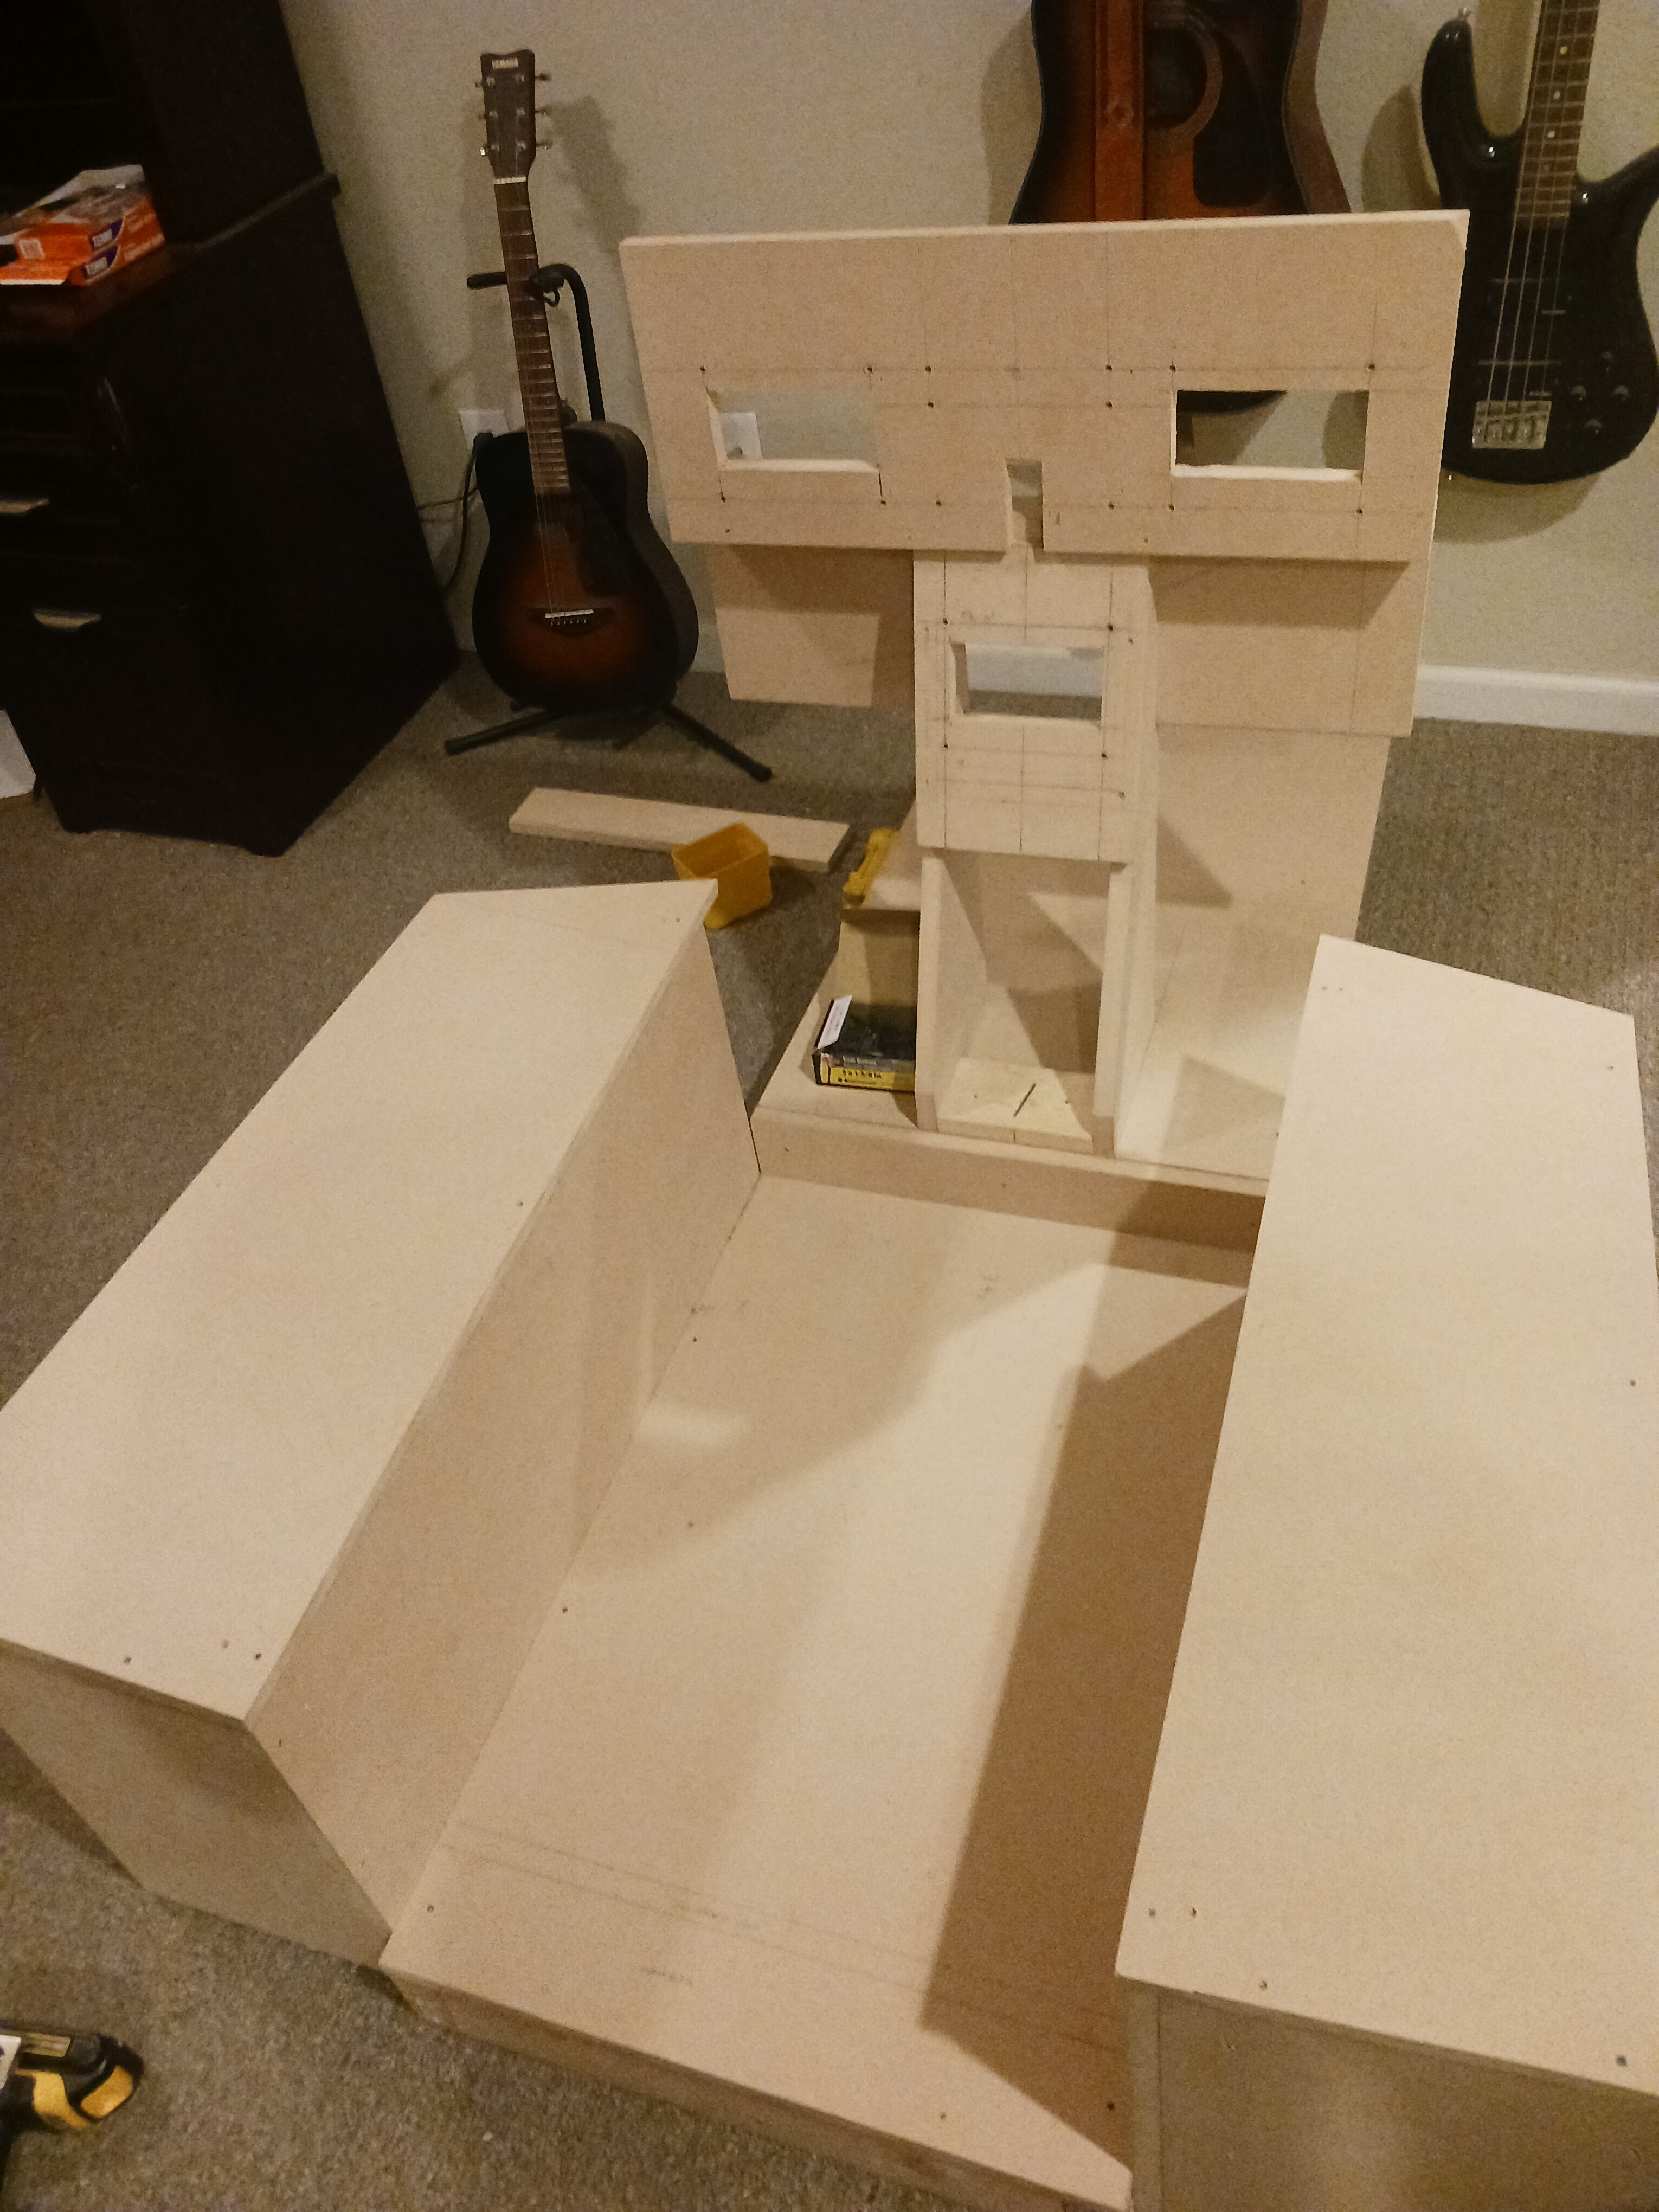
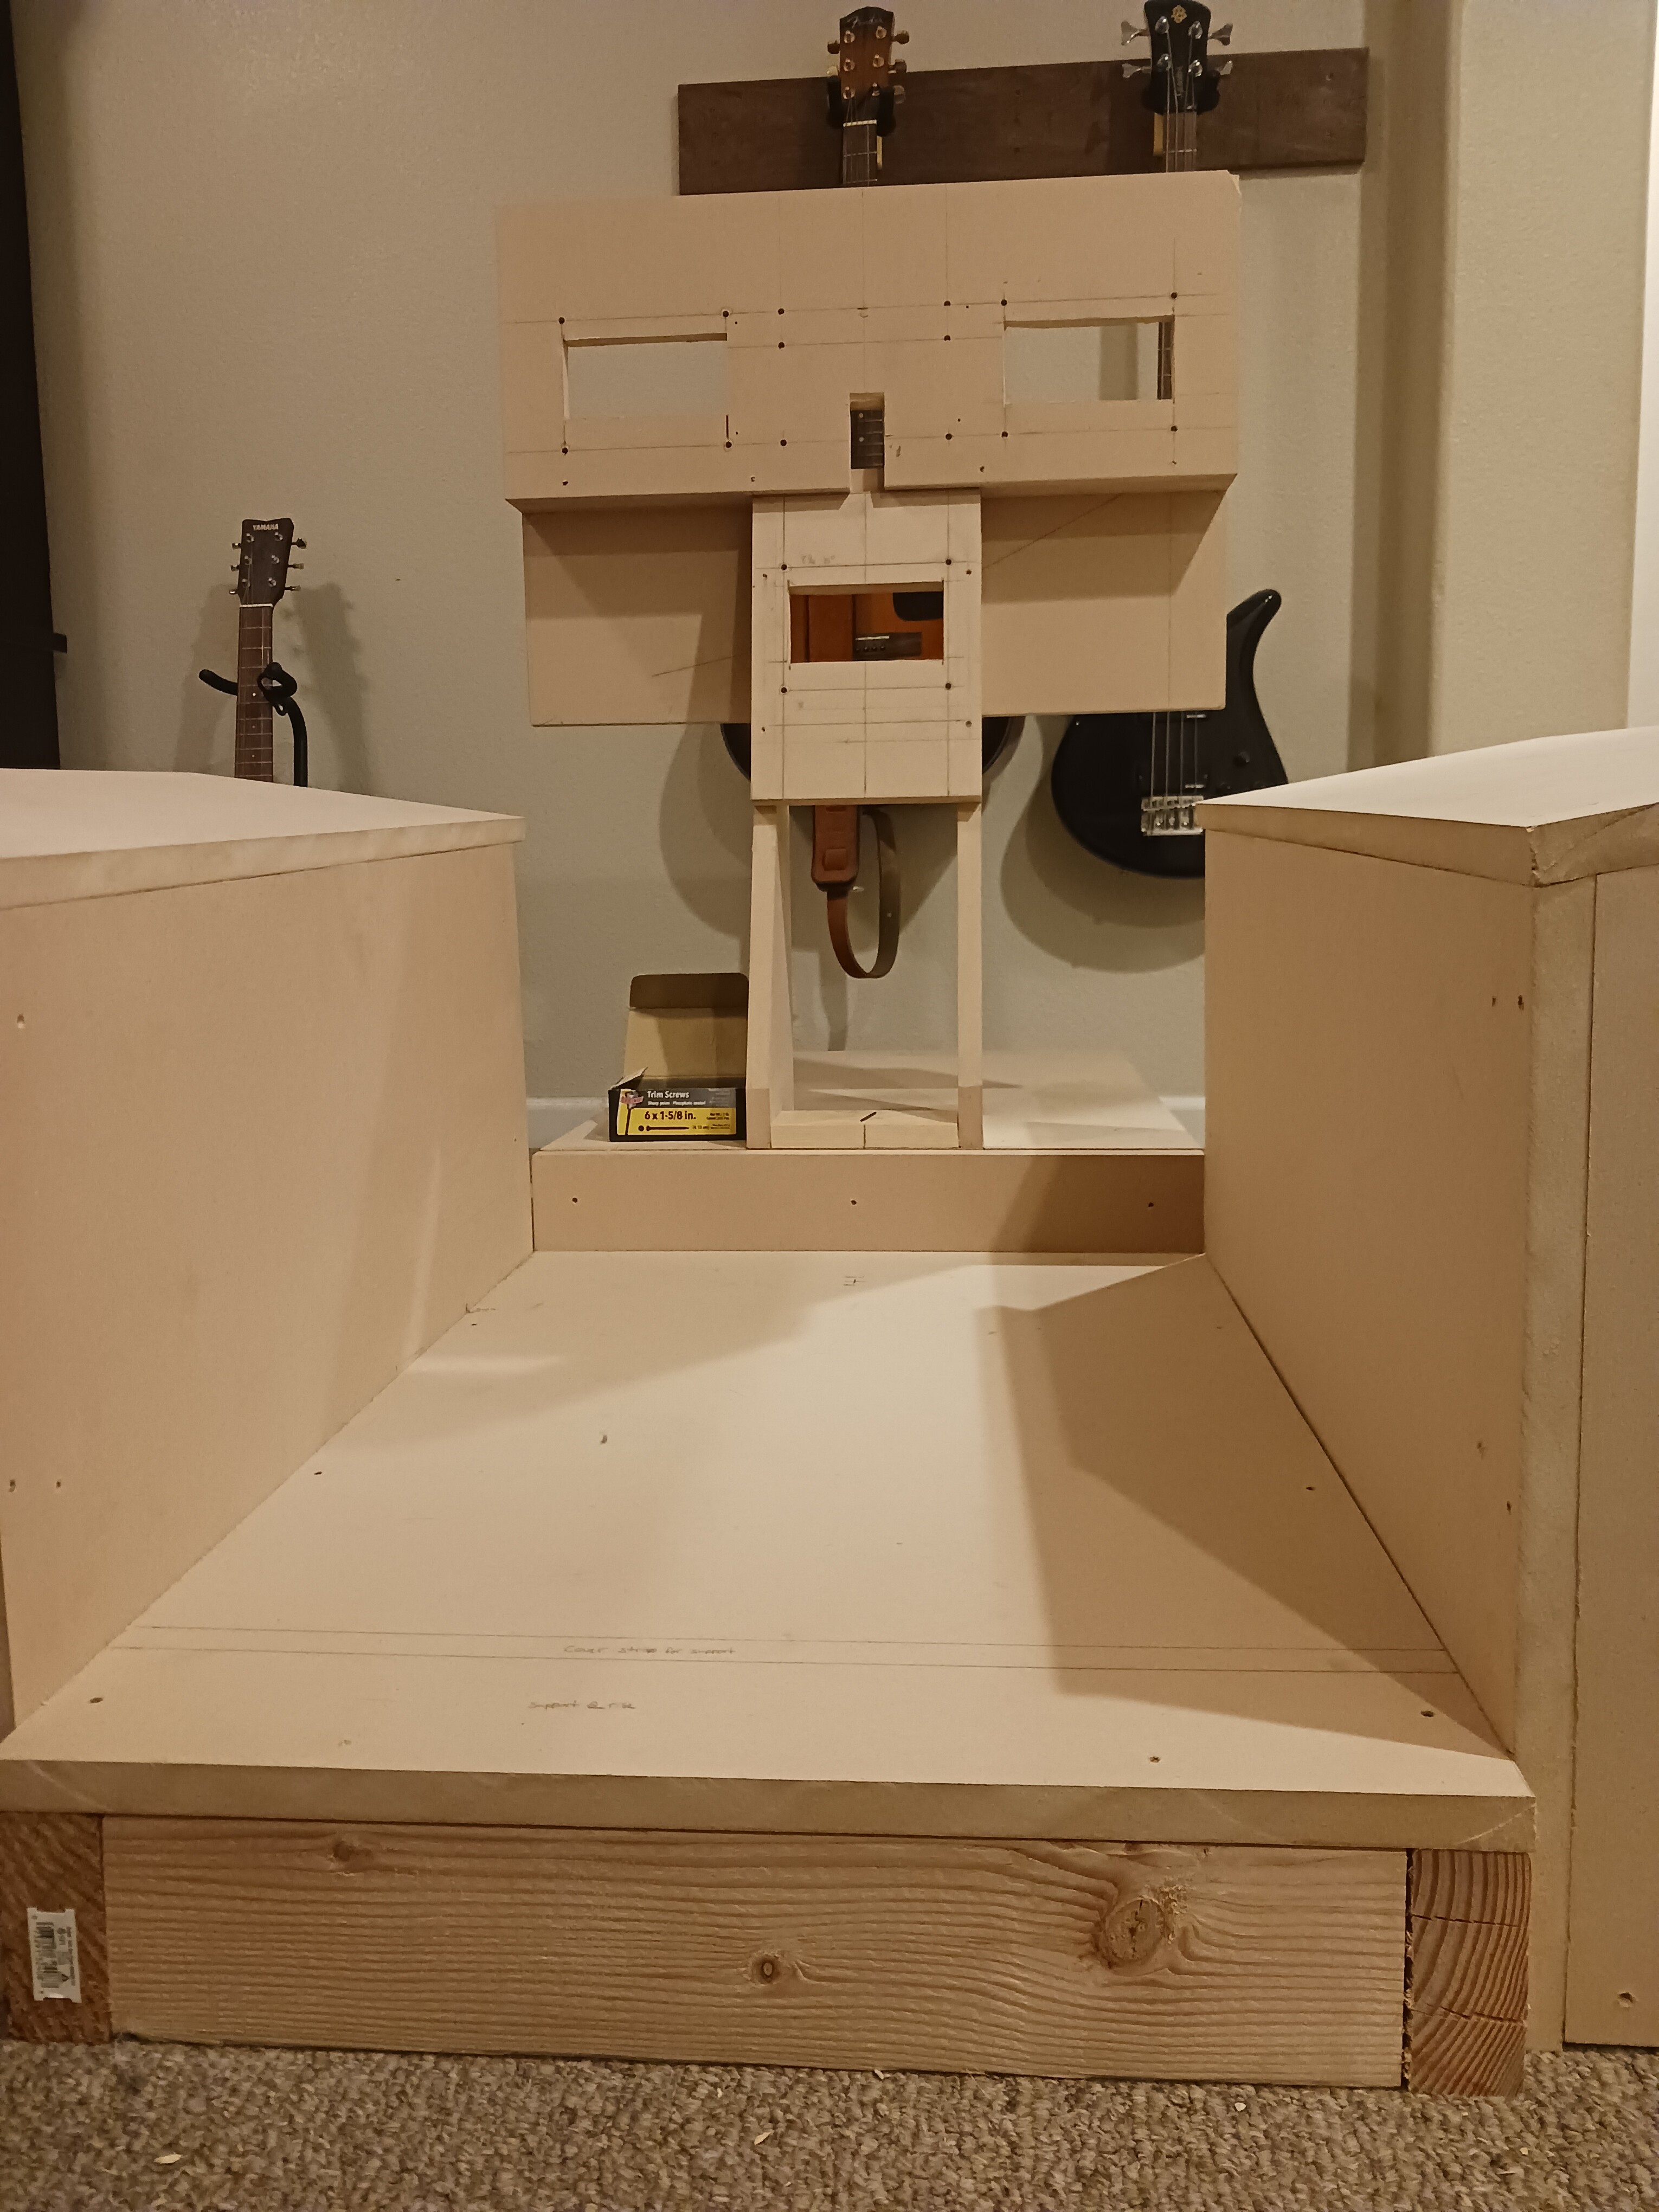
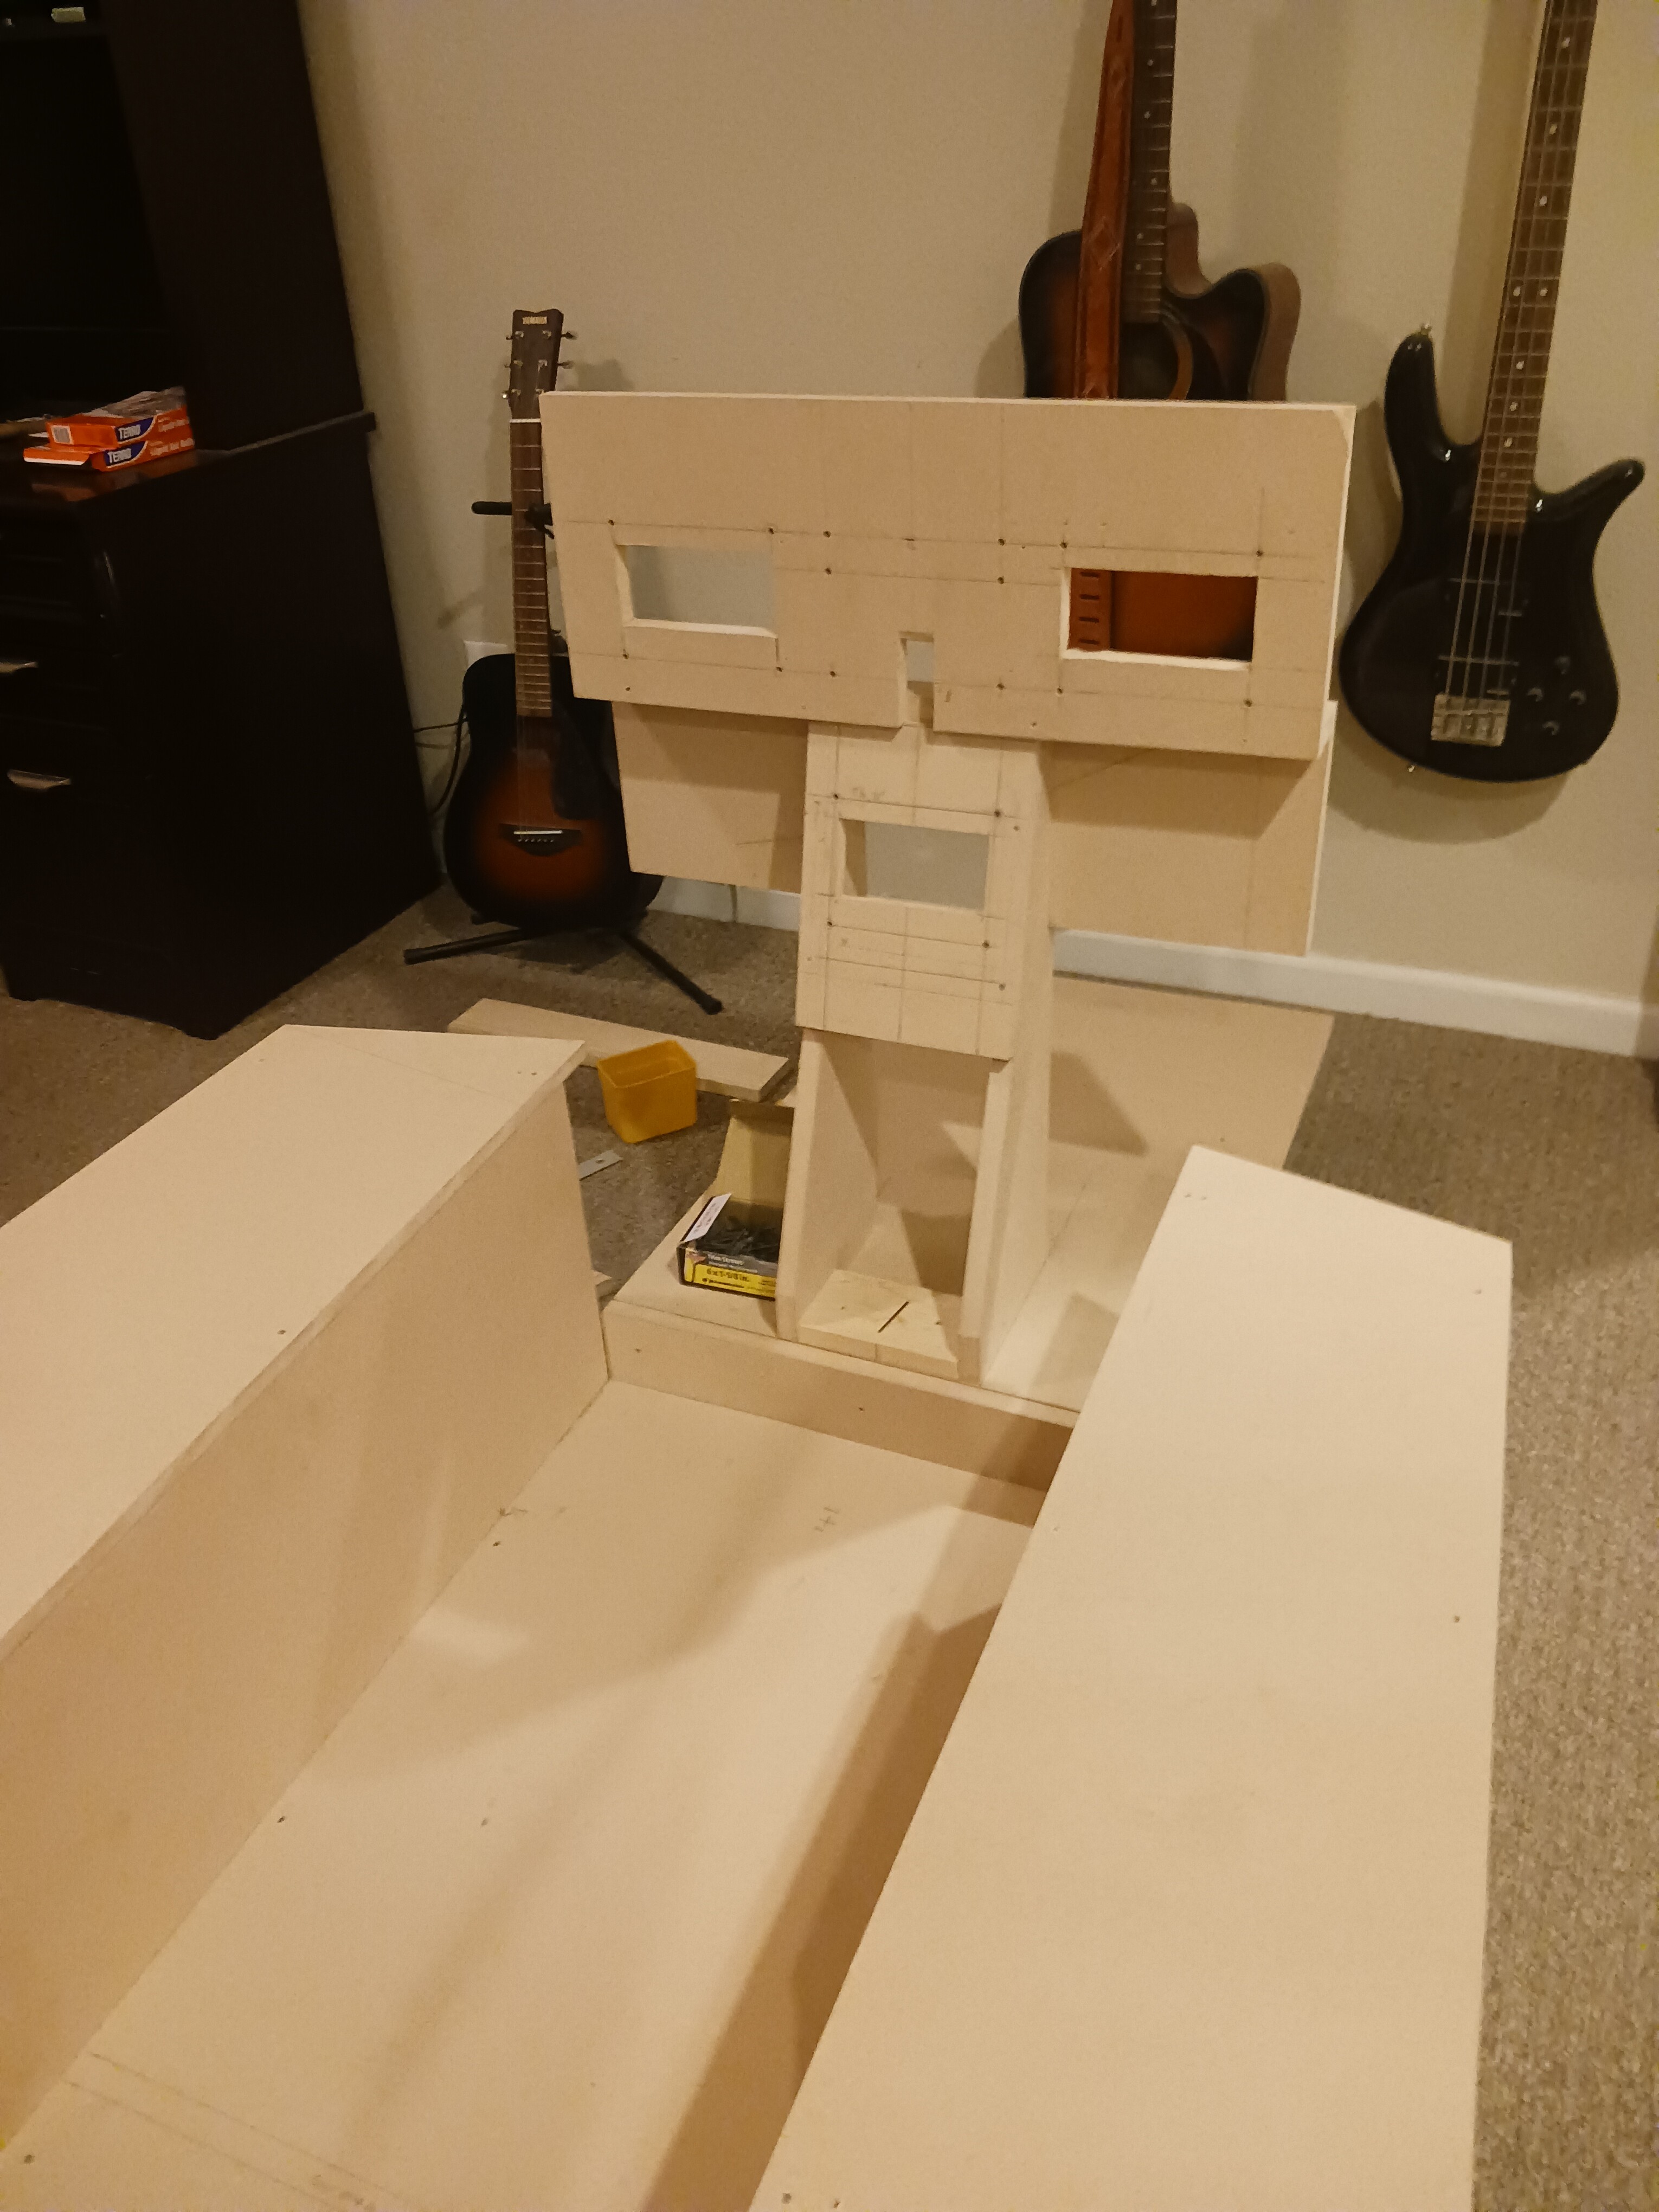
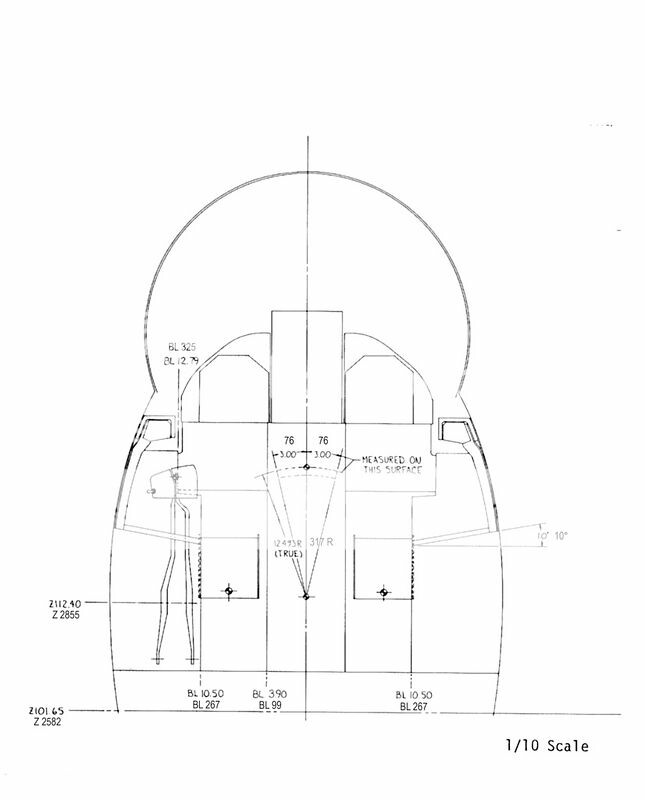
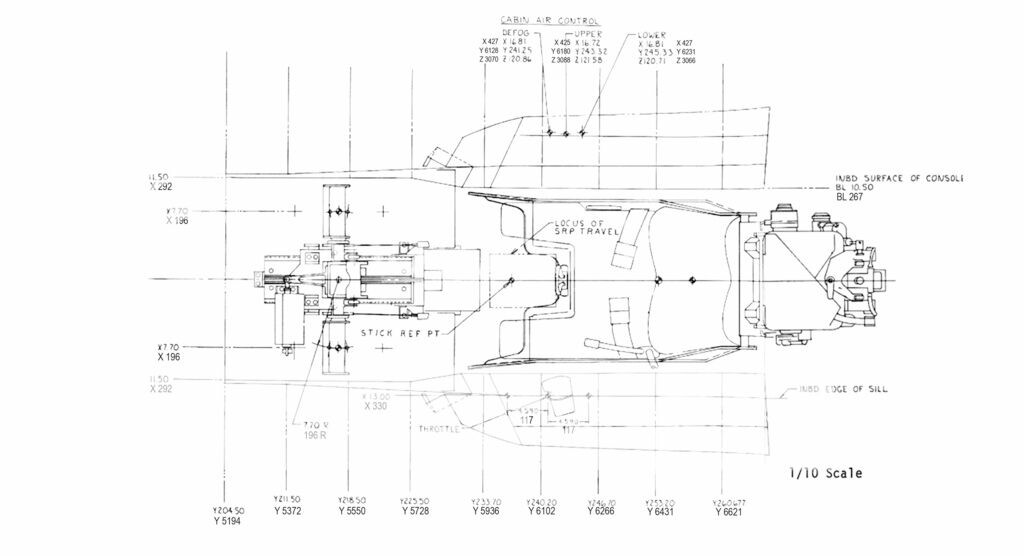
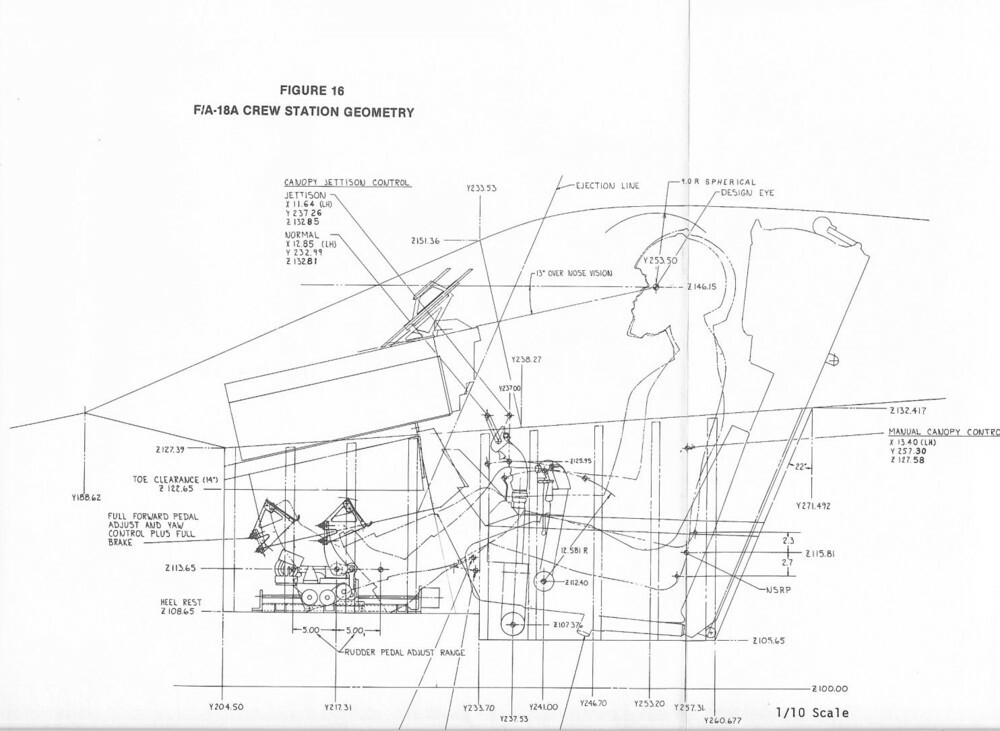
This is how far I've come over the past 3 weeks or so. The biggest parts of the structure are close to completion. Now I'm trying to find ways to keep it pure. I don't want a keyboard shelf because I'm hoping to have all the essential controls (and eventually all of the accurate panels) on board, so I won't need to break the immersion using one. I'll likely build a seat for it from similar materials, but with decent padding, because of simplicity. So far, quite a challenge. There are very few square angles on this thing. Almost every flat surface has an odd angle, including a downhill slope on the side consoles front to back at (best I could measure) of about 1 1/4" over their length of nearly 30". I've obsessed over drawings and many other diagrams that came from these forums and other sources. It turns out that the diagrams in the back of the NATOPS manual is actually very close when blown up 400%, but not exact. I used the drawings as a template laid out on the sheets of 3/4" MDF that I would cut up to build the structure, measuring angles instead of just trusting the drawings and assuming their scale would be 100% accurate. So far, off to the races! I'll post some pictures of the reference material I used, and then what it's turned into so far.