pitbldr
-
Posts
538 -
Joined
-
Last visited
Content Type
Profiles
Forums
Events
Everything posted by pitbldr
-
Nice build guys!! :thumbup:
-
Hey, I am trying to avoid reservations or "pre-orders" since I can't give guaranteed time lines on when I can finish these. I'll continue to make them until I no longer have any interest though, so you can be sure you'll get one. :)
-
:D PM Sent.
-
Thanks guys! :D The price for this would be $140 plus shipping. The panel, with all its parts, takes more time to cut out and assemble than most of the other panels I am making, so the cost is a bit higher. I have one I can sell right now and will be making more in the future. EDIT - If you want this panel, please post here in the thread so others will know it's spoken for. :)
-
Hey all, Responding to a few requests on how I made my caution panel. Here's the process. 1. I cut out the parts for the indicator panel from .0625" black acrylic. 2. These are then glued together. 3. I cut out the indicators themselves from .125" green acrylic. I use the masking tape to hold them in place for painting and then gluing into the panel. 4. I put one coat of black paint on the indicators, then glue them into the panel. Next I spray on a couple coats of black onto the assembled indicator panel. 5. The indicators are then engraved. 6. I cut out a "diffuser" panel from .0625" white acrylic and then using a mask, paint the edges black. 7. Next I cut out the two pieces that form the bezel. These are cut from .125" clear acrylic and then glued together and painted black. 8. Next part is the panel the holds the LED's. This is cut from .0625" black acrylic. The holes allow me to use LED holders to insert the LED's into. 9. I cut out the baseplate from .125" clear acrylic, then glue it and the LED holder panel together and paint. The picture of the finished part is from the bottom side showing how these are assembled. 10. After everything is painted and engraved, all parts get a couple clear coats sprayed on. 11. Everything is assembled And here's a couple pics of my panel side by side with a real caution panel. The text on my panel is not that visible, the camera flash is just lighting it up.:)
-
I expect it will be. :D
-
It's not too late! I'm building another and can take some pics of the process. I'll get those up as soon as it's finished.
-
Yeah, things have finally let up some for the last week or so and I've been able to get some real work done! :D I could easily make the switchplate for the AHCP panel longer so that the HARS fast erect panel could be mounted to it as well.
-
It's all done on the laser, not the CNC. Way back when I started experimenting in making the panels, I tried the CNC and it worked, but even as precise as the CNC was, it doesn't compare to the laser. And engraving on the CNC was very difficult. Sure. After the panel was completely painted, I used tape (masking tape basically) that is 6" wide to cover the entire panel. Then I just laser cut through the tape and removed those sections. After that, I use yellow spray paint and lightly built up several coats. I found that if I put in on to heavy, it can bleed through the tape. After I finished this panel though I had a though of trying to put on a clear coat before the yellow. That may help seal the "stencil" before applying the yellow paint.
-
Thanks guys! :)
-
Just finished up my prototypes for the Landing Gear and AHCP panels. Obviously I've not cut out a spot for the flaps indicator yet. I need to wait and see exactly how I will implement that. Nice thing about the laser though is I can just go back and cut it right out of this panel. :D
-
Hopefully they'll get some better photos of the cockpit this time around! It's a great resource but some of those photos were too dark. I don't think a flash was used at all on a few of those. :unsure: Or better yet, they should just purchase the images KLaFaille took! Those are very well done! http://forums.eagle.ru/showthread.php?t=76188
-
:clap::clap::clap:
-
I should also mention that I keep the cutting bed in my laser the whole time and don't use the engraving table. I found that the position did not match up if I switched those out, so I just leave the cutting bed in all the time.
-
I had several made at http://www.pcbnet.com/. They have a new customer special which helped keep the cost down. :) I think I paid around $20 per board at the time (several months ago). That's very easy. Keep the piece of acrylic that you cut it out from and use that as a guide. I design my panels in Corel Draw and have at least two layers per panel. On one layer is the panel shapes and on the other is the text. I cut panel parts, assemble and paint them, then put the "guide" back in the laser and put the panel in the cut out. This works great. At long as you don't change the shape of the guide and can consistently put it back in the original position, you should've have any problems. Good idea! I may have to give this a try. thanks! :D
-
Oh, forgot to answer you about the feel of the buttons. Since I have not assembled it yet, I can't really say. I plan on using SMD tactile push button switches. Not much travel on them, but the tactile response when you push them will work well I think.
-
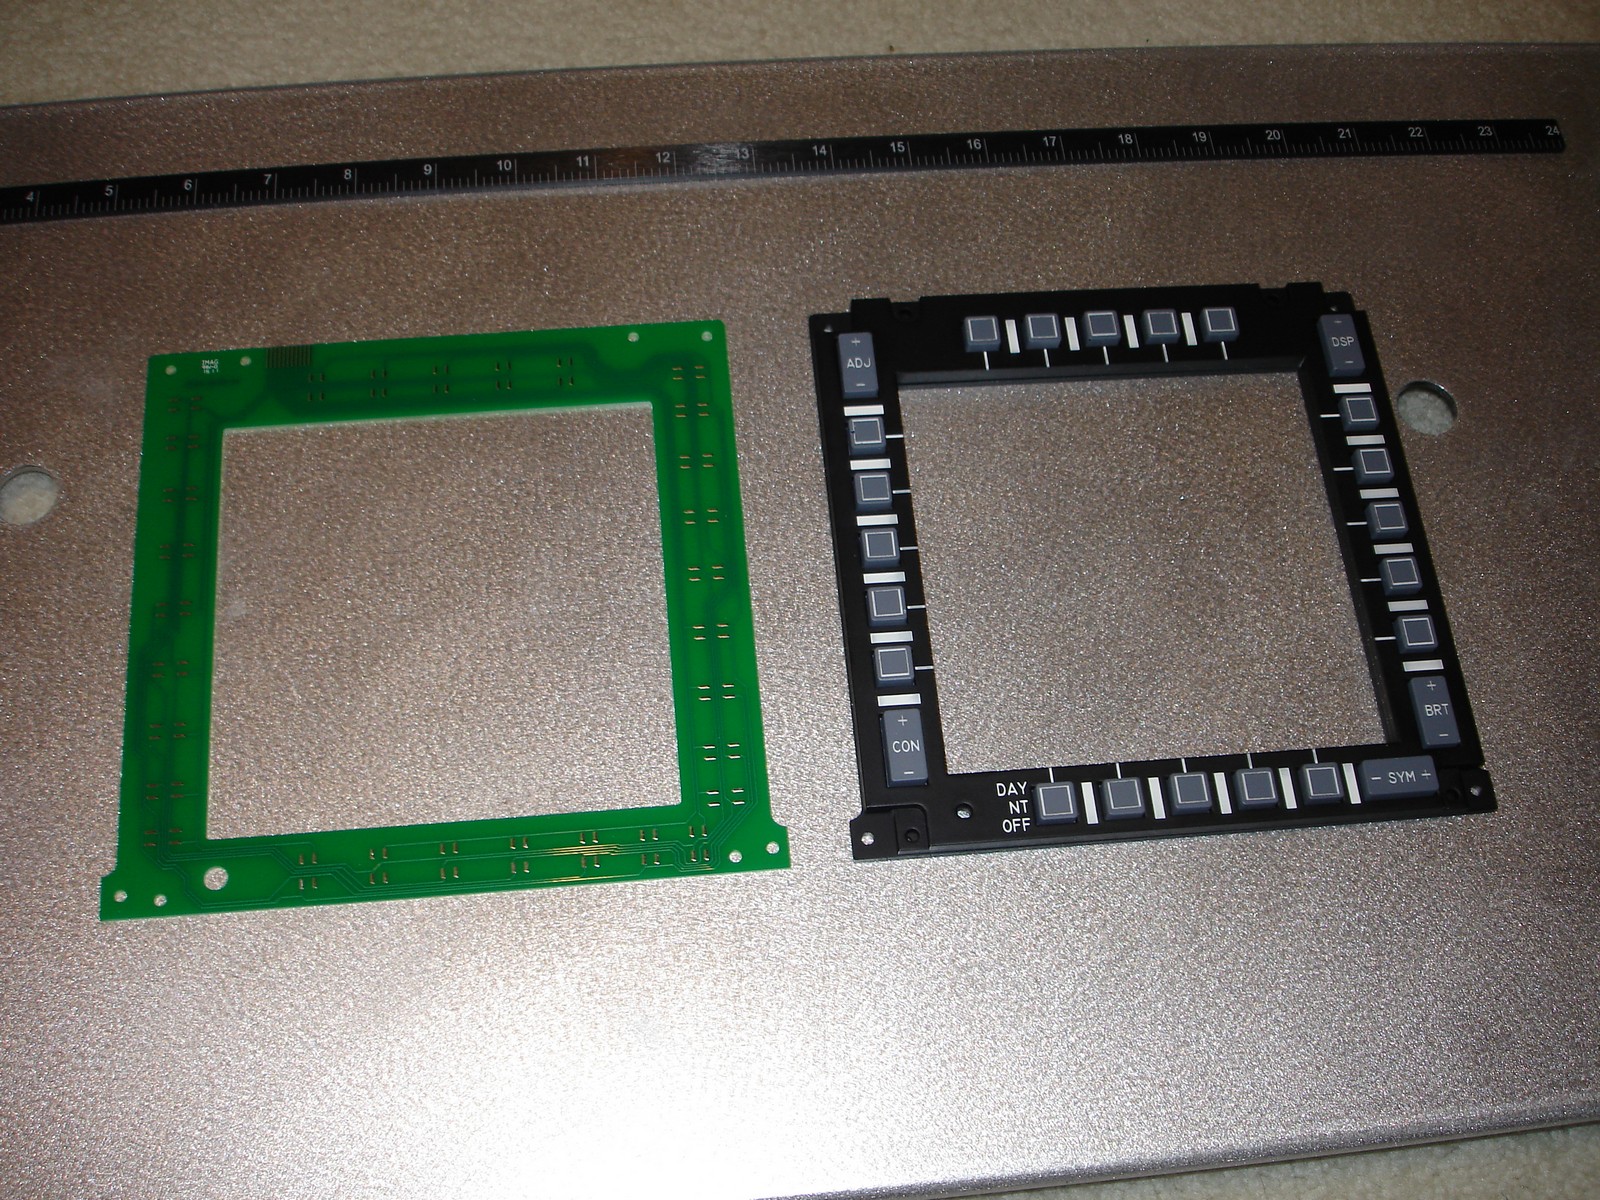
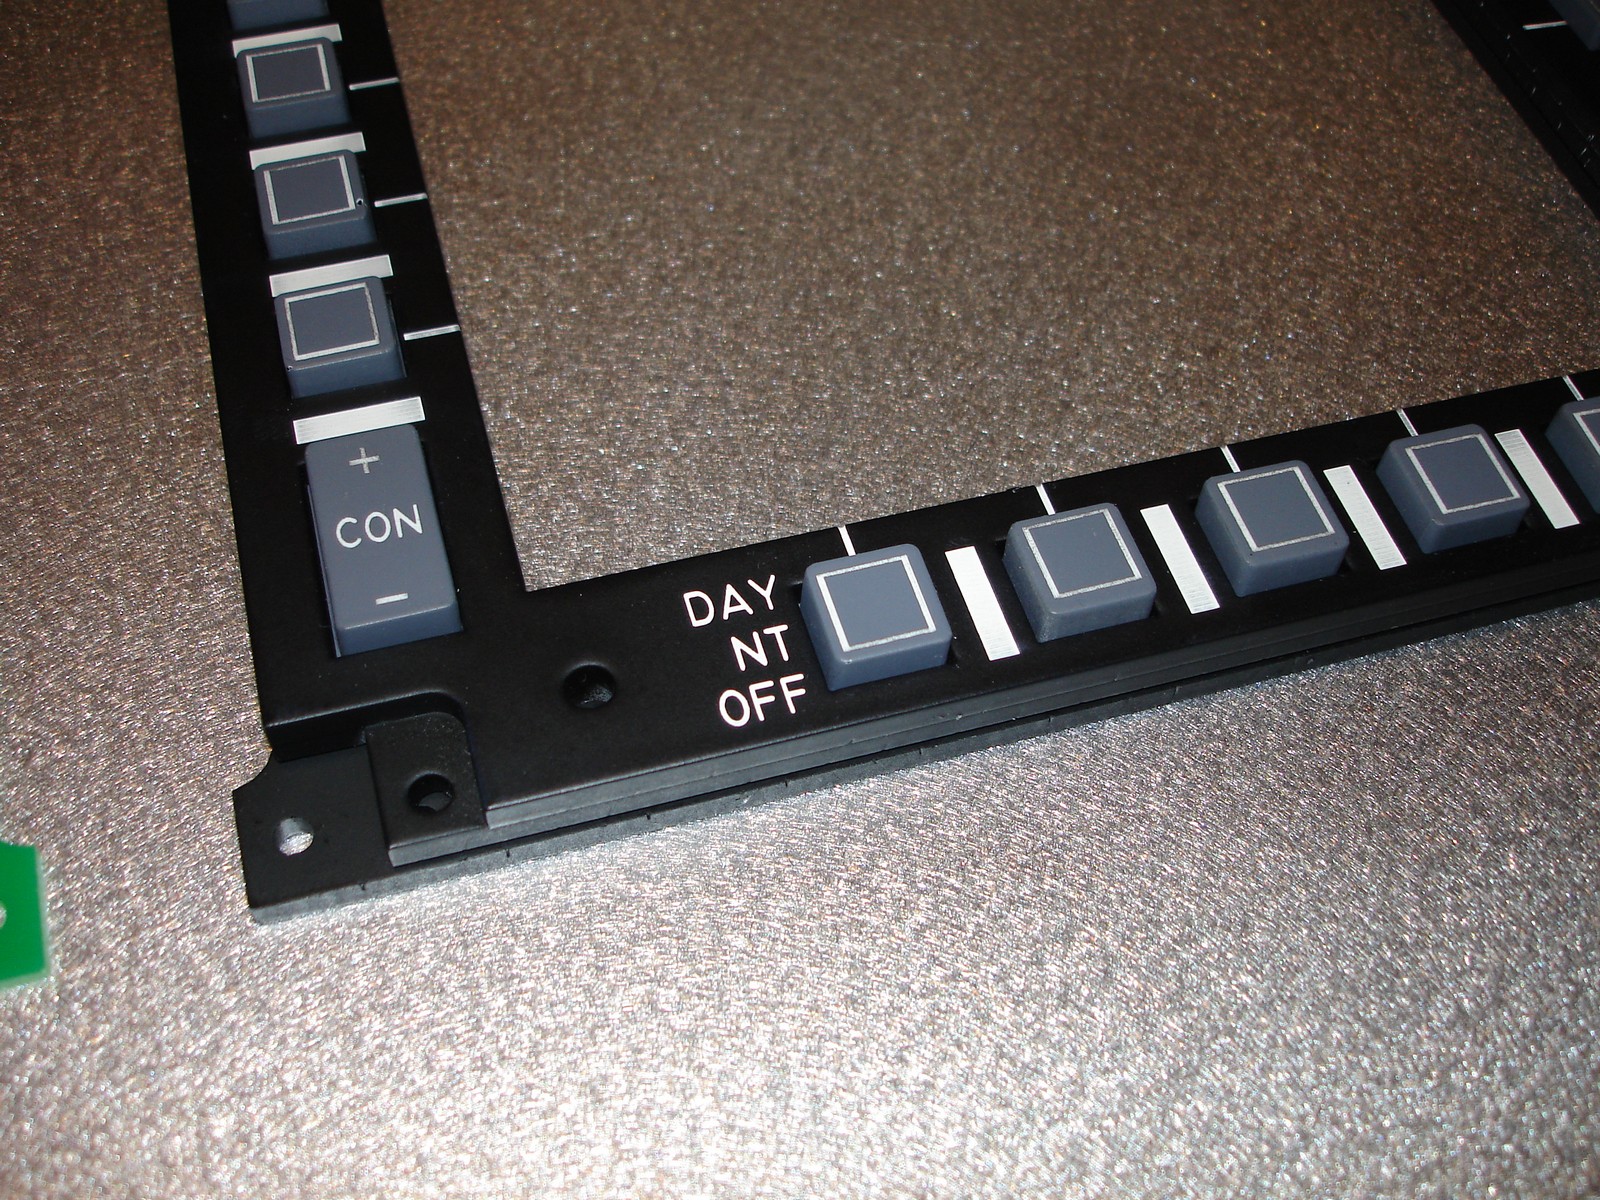
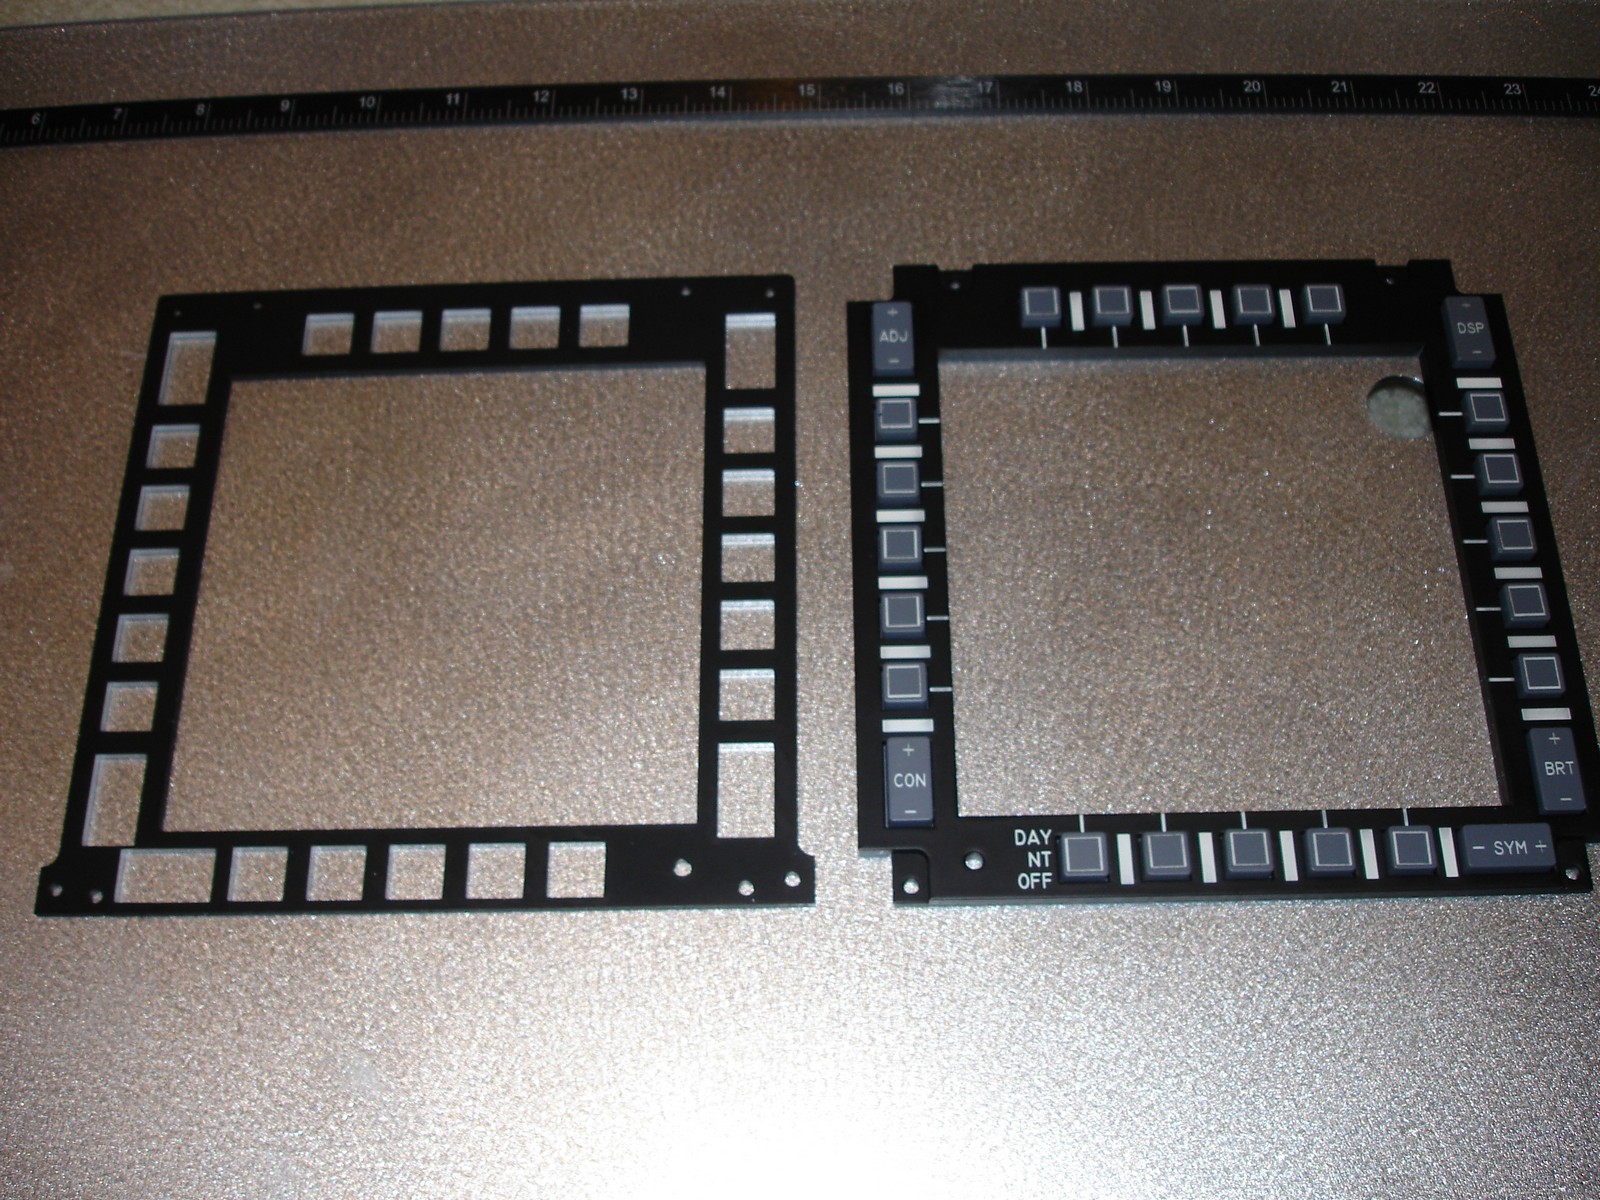
Nice work on the separators! The thought crossed my mind to try that, but I figured trying to manually glue those on straight would be a frustrating exercise. I think you have more patience than I do and steady hands! :D I did mine by first painting the acrylic white, using several coats, then one coat of black (as even as possible). Then I just engraved off the black paint. Took some trial and error and still lose a few panels that way, but when you pull it off, it looks great! The other option is to use white acrylic. Then it does not matter how thick the black paint layer is, so you can engrave at normal power/speed and still get consistent results. Here's pics of my first attempt at this. Did these several months back and need to redo them at some point. You can see that I just engraved away areas in between the buttons for my separators. :music_whistling: They're made up of three layers of .125" acrylic. Top two layers are glue together and the bottom layer is separate. I had a good reason for doing that at the time, but now can't recall why. :lol: The fourth layer is the PCB. I have yet to try soldering on the push button switches. Work on the MFCD's took a back seat to getting the left and right consoles done. Once I start working on the front dash, I'll revisit these.

-
I'll make more but I won't be doing "preorders". Instead I'll just make five or six and offer them for sale when they're ready to ship.
-
My "main" thread is here: http://forums.eagle.ru/showthread.php?t=59668 But I've not updated that one in an while and had to remove some pics I had uploaded (it was before I was hosting them elsewhere), so take a look here: http://forums.eagle.ru/showthread.php?t=76185 and here: http://forums.eagle.ru/showthread.php?t=76962 Man, didn't realize I'd separated this stuff out so much. Need to keep it together. :doh:
-
I went with a playseat too and it's working well and it's comfortable! :D
-
I'm afraid not. I've not yet played around with any 7 segment displays. For the time being, I'll just be exporting those frequencies to my second monitor and using HELIOS to control them. I believe that's Ice's EMC utility will pull all of that information and display it.
-
Nice! That looks very solid and I really like the folding "wings". Great way to save some space! :)
-
Exactly.... As Gadroc mentioned, I will be selling some panels from time to time. I am currently finishing up a batch of UFC panels for several folks. But I doubt I'll ever establish a formal store or anything along those lines. I expect I'll just make a batch here and there and then offer them up for sale. All the reasons he mentioned are why. My real job has kept me so busy for the last 2-3 months, I've struggled with finishing these UFC's. And actually working on my own pit or flying, that was non-existant until about 2 weeks ago. Now I will promise that if I hit the lottery or have dear relative pass away who leaves me a buttload of cash, I'll quit my job and work on pit stuff full time! Until then though, I'll just do what I can do, when I can do it. :D
-
Thank you guys! :D Depends..... if it turns out to be the Hornet then it's a very strong possilbity for me to do so! I'll need a bigger house at that point though!! :lol:
-
Sure. I currently get it all from Delvies Plastics. I have been looking for a local source though as sometimes, shipping it pretty high when I place a large order. I try to get cast acrylic instead of extruded since I believe it cuts/drills better.