Blue73
-
Posts
473 -
Joined
-
Last visited
Content Type
Profiles
Forums
Events
Everything posted by Blue73
-
Great work there!
-
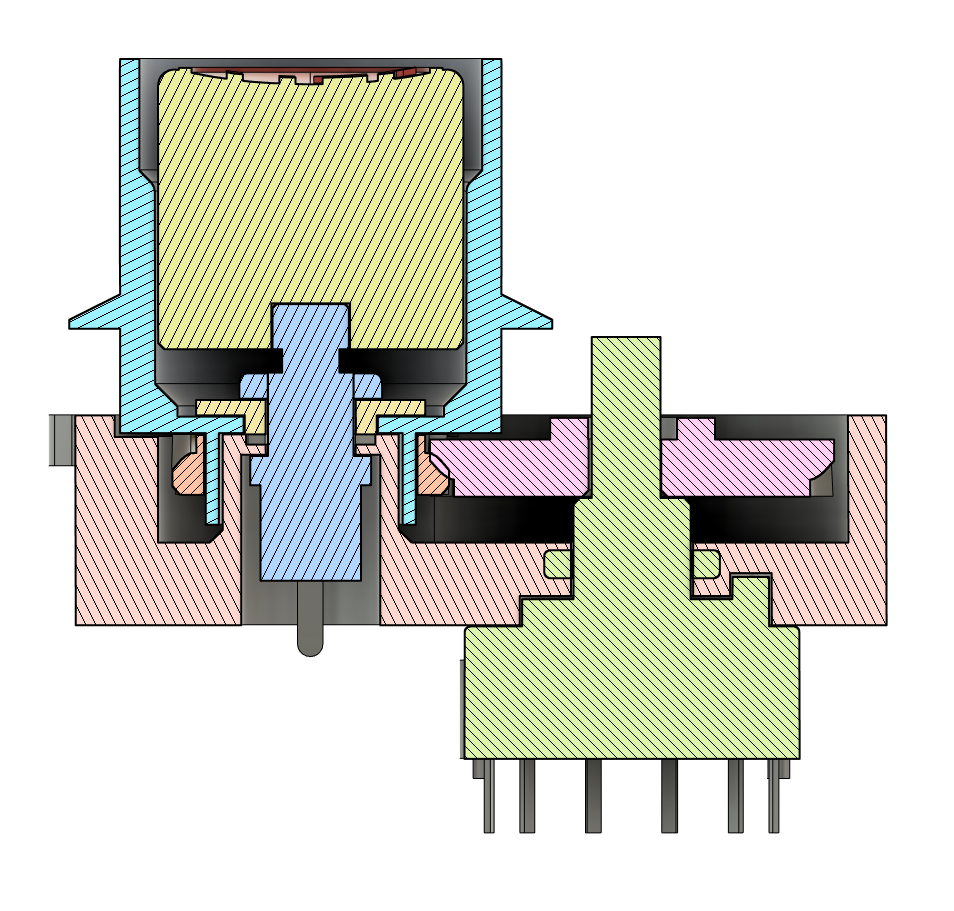
Hi Les, you could write a simple smoothing/velocity function before sending to your gauge/servo? Put this in your Loop function, lower fTimeInc to smooth out the response but will react more slowly. g_fGaugeValueOut = g_fGaugeValueOut + ( fSimValueIn - g_fGaugeValueOut ) * fTimeInc; Define g_fGaugeValueOut globally. fTimeInc small values 0->0.001 range. cheers John
-
These days you don’t need a Zortrax, I see plenty of much more affordable printers producing similar results. My bus uses GND lines between RX and TX lines. E.g. +12V, +5V, +5V, GND,RX,GND,TX,GND,GND (9 lines/pins) cheers John
-
Thanks, it was a fun build, learnt allot along the way. You’ll enjoy the creativity process. A good printer means more time designing and less time getting frustrated with the printing process. You want to get to a point where you design it once, send it to the printer, wake up in the morning and it’s done. Yes they line up to pass the bus through to the next module. However for the main front panel they are connected via ribbon cable, but the same process. I later added ground lines between the signal paths, I recommend doing that. If you have any questions let me know, happy to help. cheers John
-
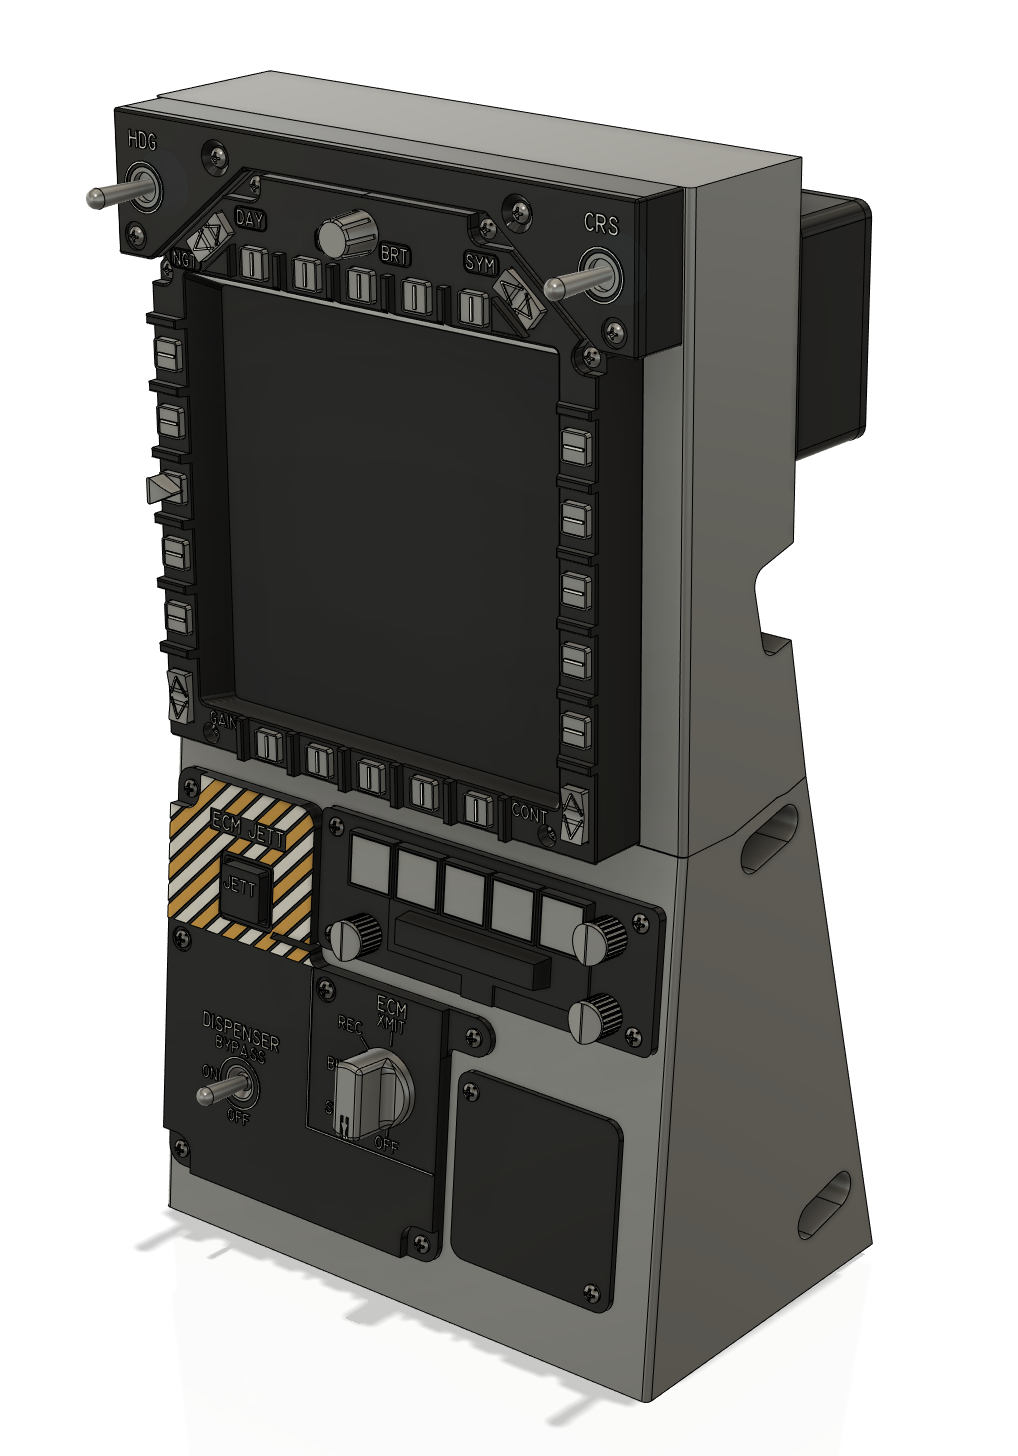
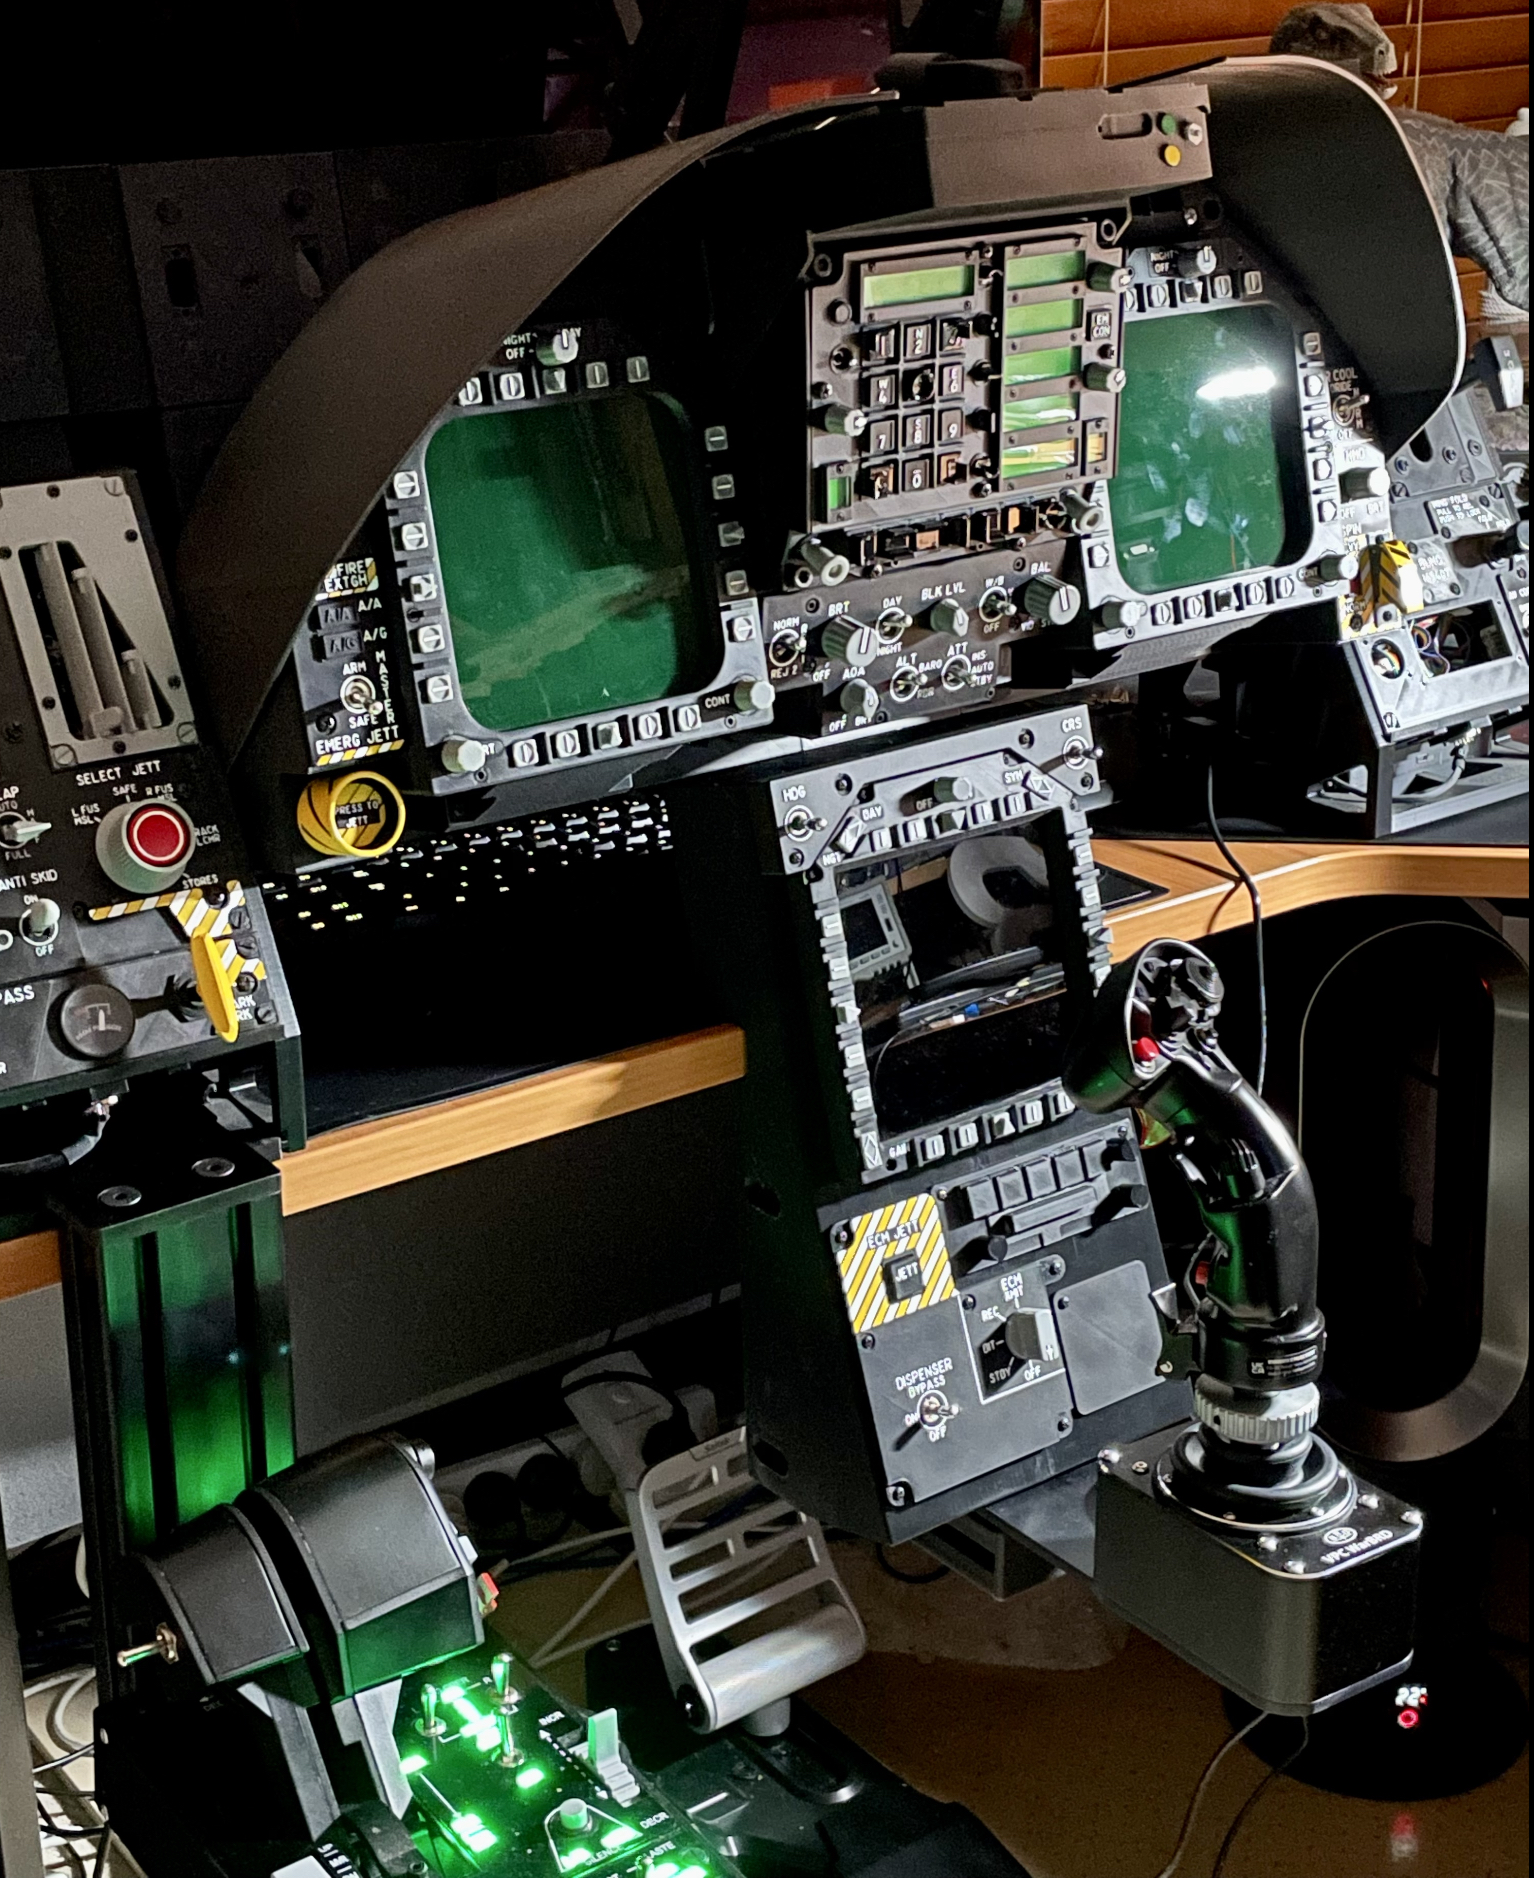
Hi All, I've been away for a while. Just finished the lower centre console unit. I have it mounted to the MonsterTech joystick mount. All buttons/knobs controlled by an Arduino Nano. Some of the buttons look odd as they've been swapped for VR friendly buttons.

-
Thanks bojack, yes you're correct it does control this knob. I can't see any other "knob" control that could control the RWR Audio Control Knob. cheers John
-
Hi All, I'm having issues with this message/control not being recognized by the sim. Has anybody got this control to work? I'm assuming it's the RWR Audio Control Knob shown in the image. from my FA-18C_hornet.lua. (\Saved Games\DCS.openbeta\Scripts\DCS-BIOS\lib ) definePotentiometer("RWR_RWR_INTESITY", 53, 3008, 216, {0, 1}, "RWR Control Indicator", "RWR Intensity Knob") Thanks! cheers John
-
Hi, You can try my solution. cheers John
-
They do not charge before they ship, I ordered 6th June, charged 15th June and nothing yet has shipped. So two weeks after payment my order hasn’t changed status. Edit: My order has just shipped, looking forward to trying their base, hopefully AA refueling is a little easier
-
Hi All, I've redesigned the push button to fit the more popular PBS-110 Mini Push Button type. 3MF files attached. cheers John Jettison Control v2.zip Push Button Socket Tool.3mf
-
Thank you Purzel, great idea!
-
Thank you guys
-

Good VR Performance, but only when "Window is out of focus!"
Blue73 replied to a topic in Virtual Reality
Could it be because motion smoothing is only activated for the current focused VR application? The feature could be eating frames. -
HP Reverb2: Noticable increase in performance with Preview enabled
Blue73 replied to Blue73's topic in Virtual Reality
I tested with Persian Gulf and Channel map, made no difference, but the Syria map performance is much improved. There must be something off with my install. -
Hi, Recently purchased Syria and my performance over the cities was bad. I then clicked outside of the game window and noticed the performance up a good 25%, of course the game is not operable like that. I then tried enabling Preview in the Windows Mixed Reality Portal and the frames went back up. The screenshots show it below, went from 33fps to 41fps. Have others encountered this, do I have something not set right? Preview Off - 33 fps Preview On- 41 fps Thanks. cheers John
-
Hi, You can use a resistive ladder or shift registers to expand the number of input controls. But if you're talking about a whole cockpit I'd go the RS485 Master/Slave route. It's simple to get going.
-
Looking for Toggle Switch Cover that generates it's own event
Blue73 replied to TEMPEST.114's topic in Home Cockpits
If you're using DCS-BIOS you can send the open switch cover event before sending the toggle switch event. I've done this with mine. -
My pleasure Barny :thumbup: I'll also redesign for a more common push button.
-
Very impressive Deadman, you've got allot of dedication.
-
Hi, sharing some build pics from v2 of the left panel. Custom slave ccts. Header mounted to Nano. Bus boards Cable management loops, push fit to underside of top plate. FCS Panel Rocket Cover HE sensor Fuel Panel Fuel wiring complete. FCS and Fuel panel paired. IFF and Comms panel, Nano's here also drive Antenna and APU panels. cheers John
-
Hi All, I'm working on v2 of the panels, designing them closer to spec (MS25212). CAD work is almost complete. It's made to wrap around the Warthog throttle. Hall effect sensors on all rocket switch covers to sense when they're flipped up. cheers John
-
DIY MFD - should I have used shift register - how would it look like?
Blue73 replied to Jyge's topic in Home Cockpits
Hi, I'm also an electronics engineer :) For an MFD do you need to simultaneous press two buttons at once? If not then go the resistor ladder solution. If you want any help I can send you my code. Never had any issues using it, rock solid. cheers John -
Cheers thanks. The top panels are airbrushed with a satin clear coat. It deapens the black and takes off the shine that accentuates the 3d printing texture. Also the tops are now printed with an ABS/Polycarbonate filament. I sand the tops of the text, clean with IPA, hand brush with white paint, air-brush satin clear coat entire panel.
-
That looks sharp! :thumbup:
-
Thank you DERacing :thumbup: Zortrax M200 Plus and Zortrax M200. Print volume is 200x200x180mm I buy generic ABS filament from http://www.3dfilies.com. Nozzle diameter is 0.4, except for the top faces with text, the new panels of my recent posts are 0.3 all the other text is using 0.4mm. cheers John