Intrepid1
-
Posts
97 -
Joined
-
Last visited
Content Type
Profiles
Forums
Events
Everything posted by Intrepid1
-
Interest check: Landing Gear Panel, Flap Gauge
Intrepid1 replied to agrasyuk's topic in Home Cockpits
That looks fantastic I would be absolutely interested in purchasing one of these landing gear panel kits from you, when you have the integration with the sim down ..count me in Randy -
What if the missus won't let you have a home cockpit
Intrepid1 replied to Dave317's topic in Home Cockpits
Wow thats nice, Is the little furry guy on the desk in the first picture your R.I.O. or do you let him be the pilot once in a while:thumbup: love it Randy -
What if the missus won't let you have a home cockpit
Intrepid1 replied to Dave317's topic in Home Cockpits
That really looks like a slick solution to me It seems we (most of us) have the same problems with our significant others. Randy -
Thats a very nice rendition of a flap gauge .Your quite creative Randy
-
I had the seme problem and used a few pieces of velcro... just happened the black velcro matched the tv perfectly so when not in use it is not visable Randy
-
"Get the point" .... just wet myself..incredible video Patient wife too lol Randy
-
That is fantastic! your creativity is worthy of my applause Randy
-
Wow ! that looks freaking awesome.. a little time and a lot of creativity went along way Randy
-
I am in the process of getting a sign maker to do this in a vinyl lettering material laying over a frosted plexiglass ..If it cuts out with small enough detail it will definitely block out the stray light. If it works I will post pictures Randy
-
Those look swwweeeeet... I cant wait to see them integrated with your pit Randy
-
That is spectacular hegykc
-
Very nice video The help you gave me last week has allowed me complete my panel Thanks again
-
I have to say THANK YOU SOOOO MUCH I finally got some of the guages to work The time you took to teach an old guy a new trick couldn't be appreciated more. I have been messing around with this for about 40 hours and kept comming up frustrated. I am in debt to you sir .. have a virtual beer on me. I will keep posting my progress, now once I finish completing the bindings i can move on to some real switch panels I really cant tell you what a relief it is to show some progress with this...Thanks again
-
Thank you again OutLAW I will check it out when i get home from work
-
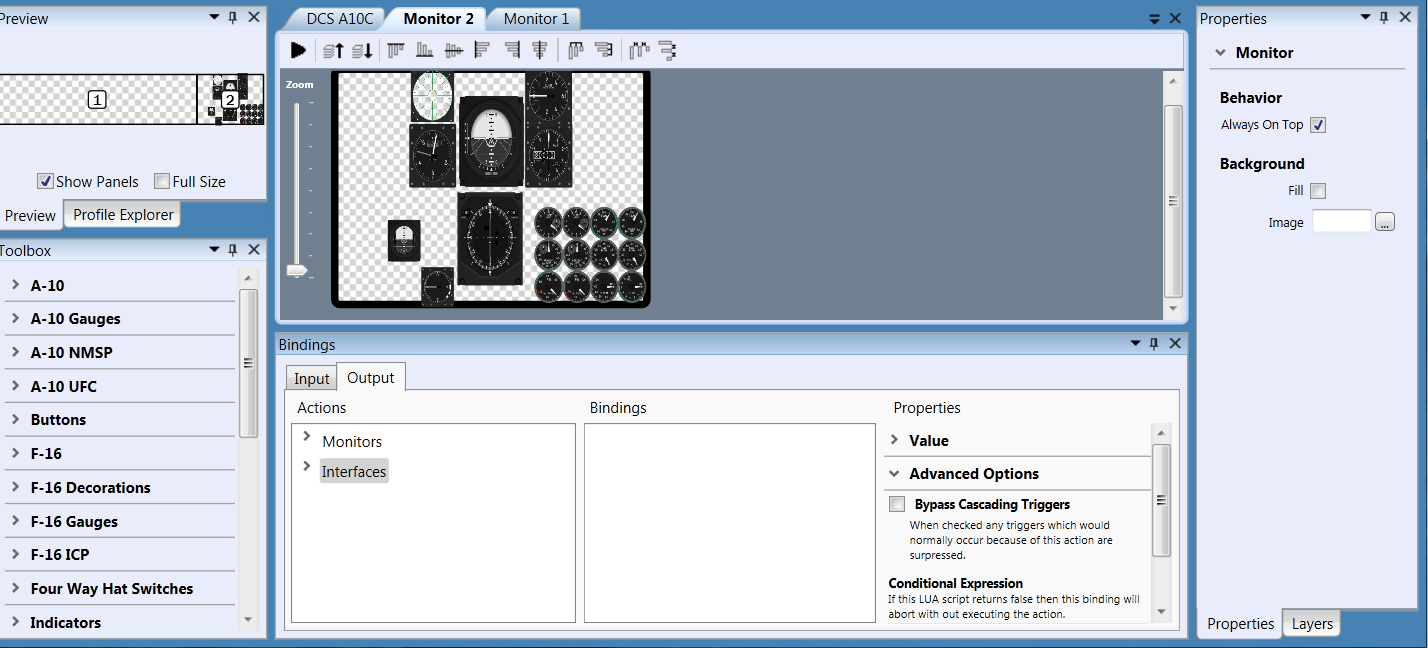
"You'll have to drag and drop the bindings after you setup Helios and create the gauges." I have the dcs a-10 c interface added, here is a picture of where I am. I am afraid I am a little computer challanged and do not find the direction I should go from here. As far as I can tell the Path direction is correct. A little direction on attaching the bindings for the altimeter would be greatly appreciated then I am sure I could progress from there

-
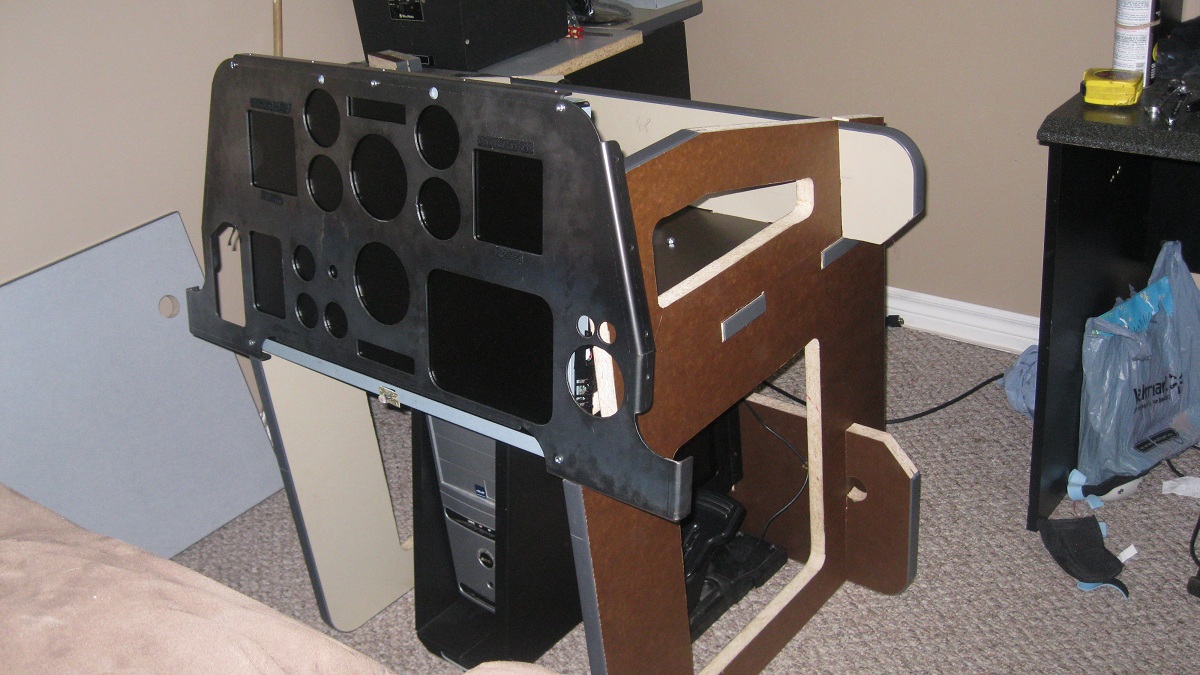
Thank you very much for that info OutLAW. I had already added it as an interface but haddn't gone further. Will let you know how it turns out Cali,JG14_Smil and Mr Powel I appreciate the compliments. The panel weighs about 12lbs but I wanted it sturdy enough to support the 28"tv that is screwed to it. The computer location works great ,I plan to cover it with a hinged switch panel when my budget allows
-
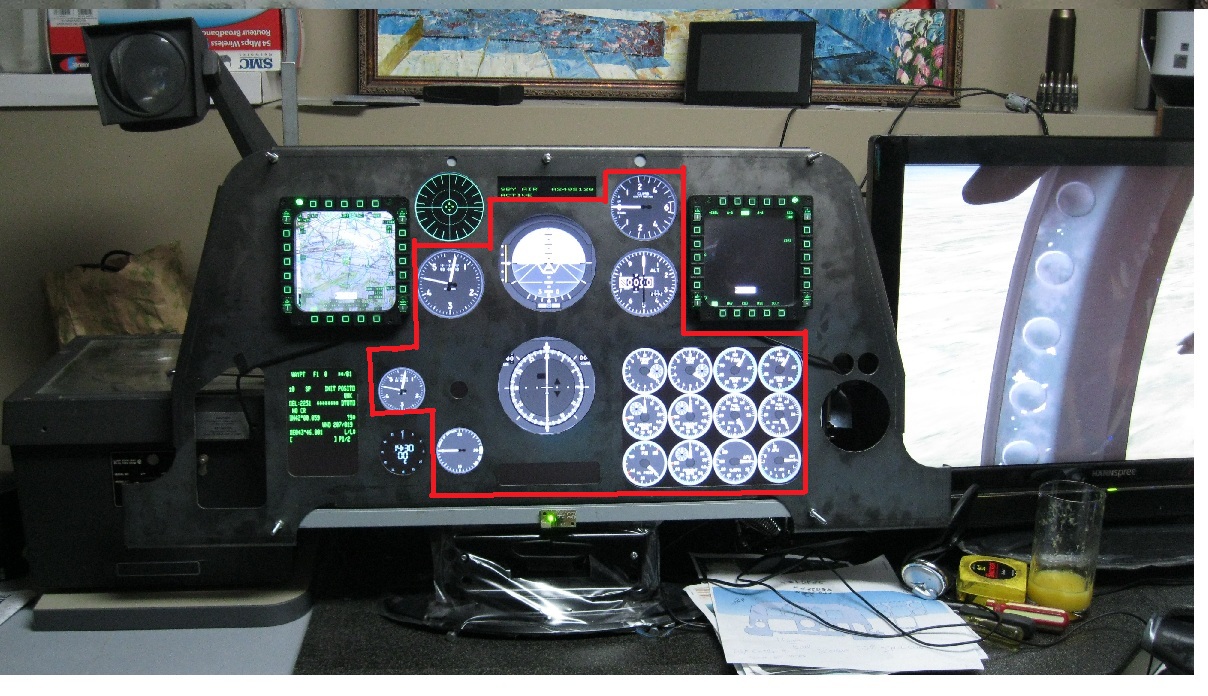
Once assembled, partially, it was time to at least get things turned on to see how it looked. I used Helois to place the instruments surrounded in red and opened view ports fo the others. I do plan to use a few of the GP 40's to create some side panels. At the moment I am stuck tho, the instruments I added with helios are stationary and dont react with the sim. I obviously have missed something in the installation,can anybody point me in the right direction?
-
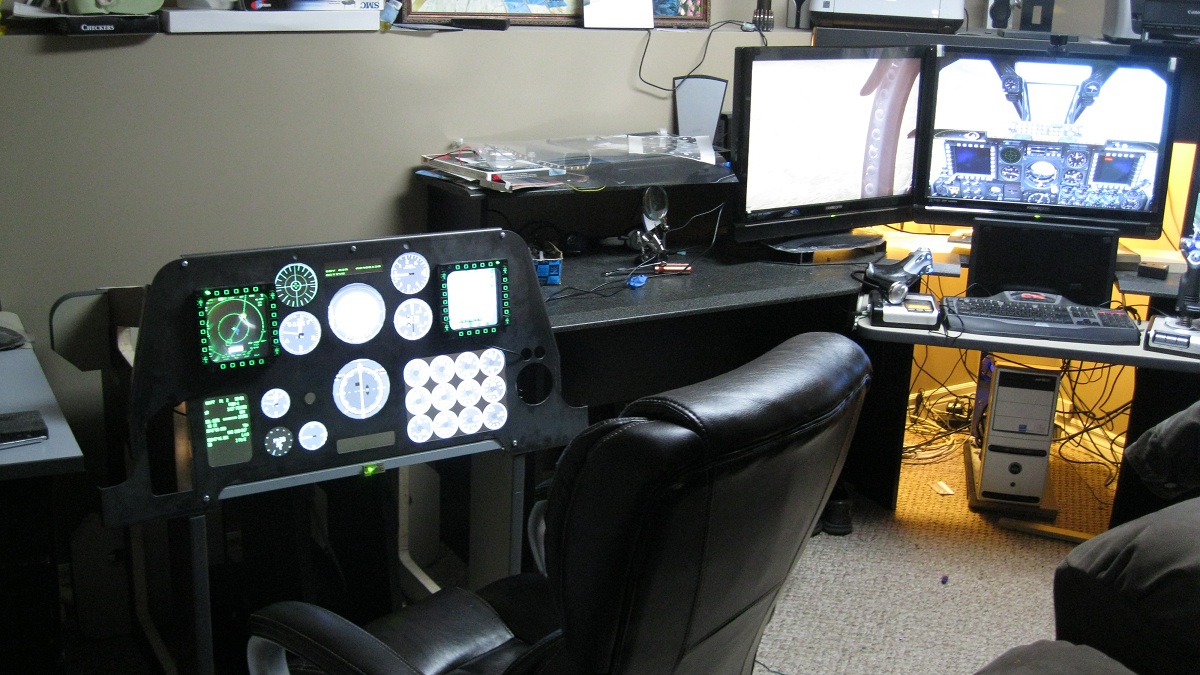
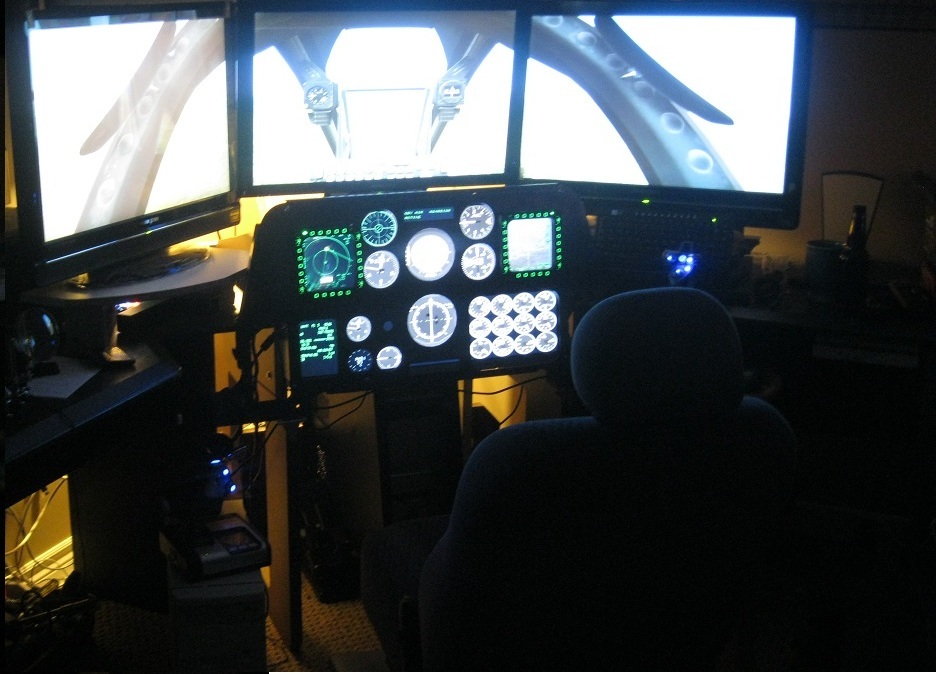
Hello to all out there in sim land, I have been creeping these forums for quite some time. With all the fine examples of home cockpit projects here,and all the obviously creative and helpfull simmers examples I finally have enough courage to show what I have been working towards. My first step was to study all the ideas here and use what I thought would be the best mix for my project. One thing I noticed was we all have the same basic needs,1 best value for the money 2 as much realism as we can afford 3 to keep our significant others from committing us to an asylum:) First picture was my try at sketchup,the panel and part of the pedestal are to be made of 3mm steel. The wood frame is 1"partical board and the steel was cut on a plasma machine my boss generously allowed me to use from work. In the second picture i took the bezel of one of my lcd tv,s (much to the dismay of my wife)and placed it behind my panel plate. With the help of the threads here and some experimenting with helios i was able to get the guages from the sim to the separate screen. The third picture shows my new computer location and the wood frameing style I used from the A.B. cockpit plans.