MilesD
-
Posts
968 -
Joined
-
Last visited
Content Type
Profiles
Forums
Events
Everything posted by MilesD
-
Thanks Hangover and Deck, I could not get the original to work, but this works great.:thumbup: Miles
-
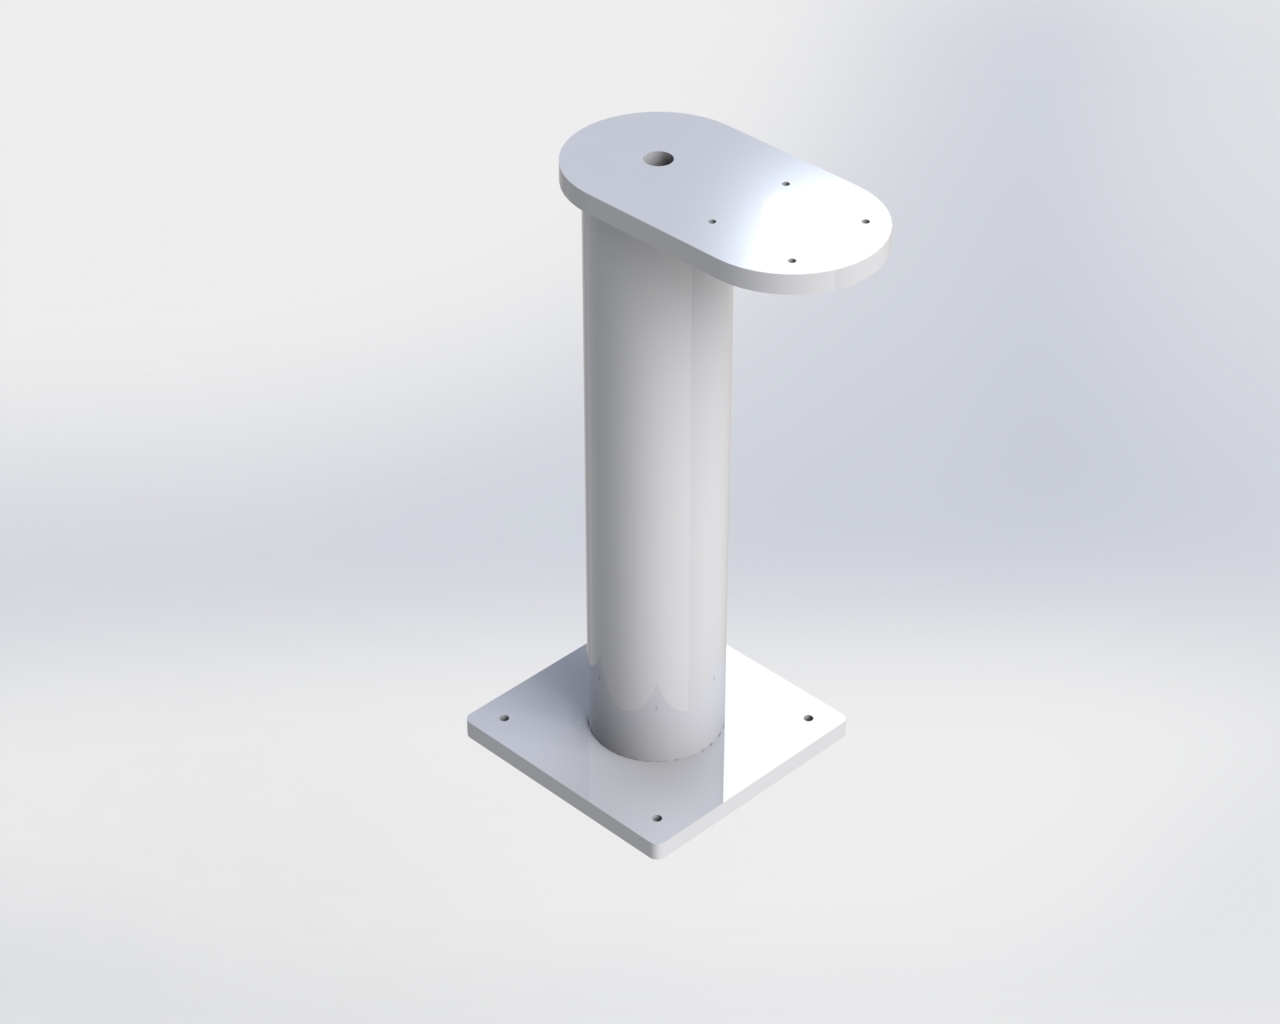
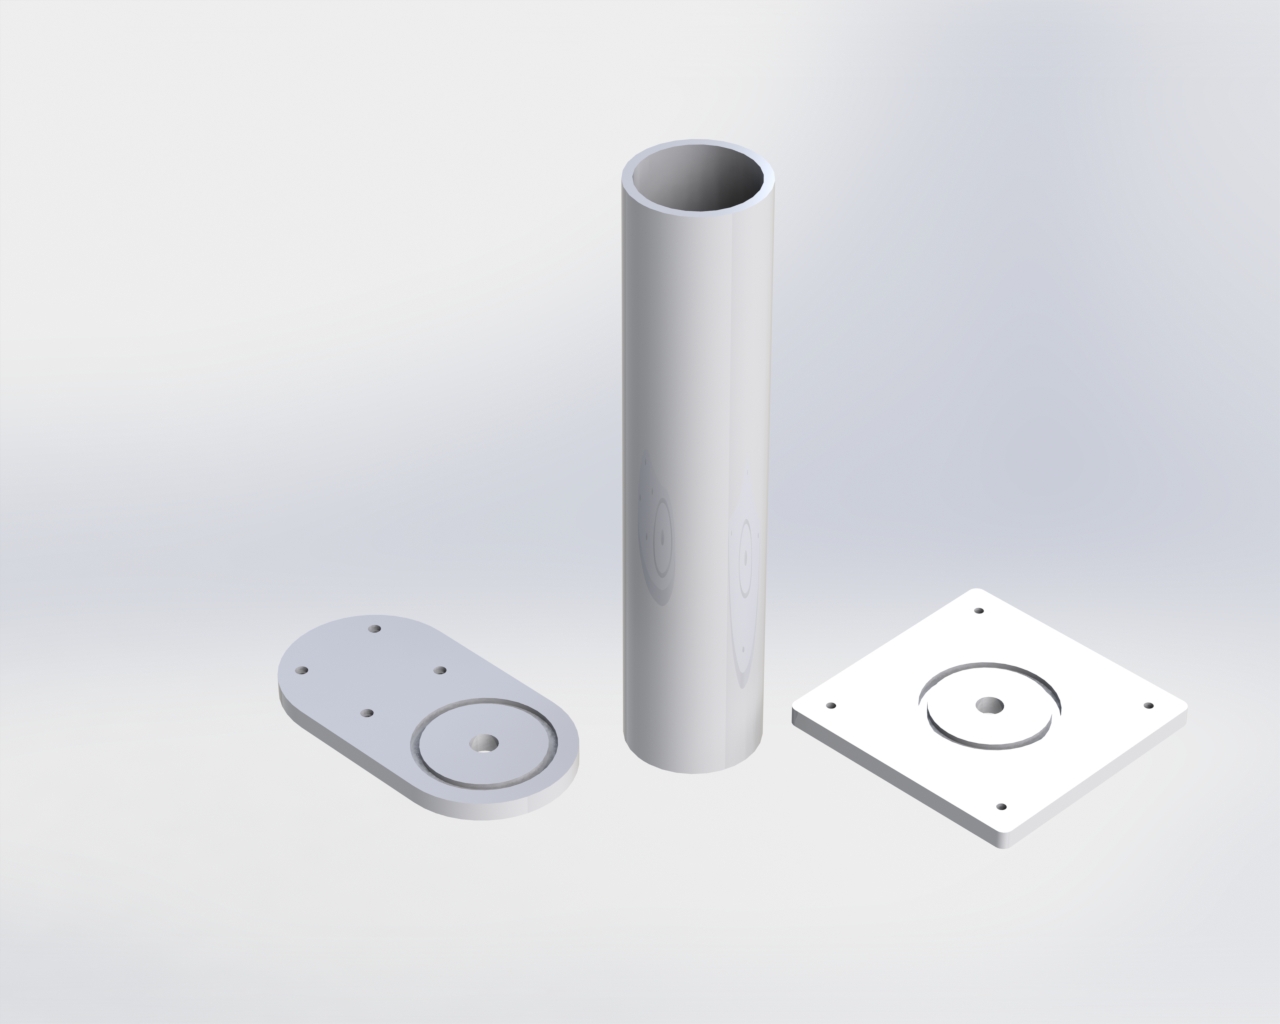
Hey Guys, Now that I am just about caught up on all of the hall sensor kits, I would like to make these available if anyone is interested. Basically its meant to be a simple solution for a center mount warthog. The plates are 1/2" gray PVC with the tube being 3" Gray PVC. It is designed so the joystick can overlap the lip of the seat to get stick positioned correctly. The USB can be passed down the center of the tube if desired. Any of the parts can be made available separately or the height of the tube can be ordered to your specs. I should have some production ones done next week. Thoughts? Miles

-
tqs and f22 pro boards Hi Roland, The replacement boards I made were for the old plastic TQS and the F22 Pro. They were not for the cougar. I was going to make one for the cougar but never got around to it. Basically the boards were drop in replacements to turn the old gameport controllers into PnP HID 32 button USB joysticks. With the F22 you even got most of the pinky switch duel functions read as just another button. Miles
-
While I am still building my pit, I was thinking of making a box with 1 momentary toggle on-off-on switch mapped to left mouse click, 1 rotary knob mapped as scroll wheel and either a small trackball or 4 way switch to move the cursor where its hard to turn your neck to. So basically you would reach for the same switch every time with your left hand, flip it once (it returns to center each time) to turn the cursor on in the center of your view, then look at the switch you want to flip and move the switch again. If its a knob you would reach for the knob instead. I know you could map this to the ministick also, but I like the idea of a dedicated switch and box to reach for. Miles
-
Price Increase Hi All, Thanks for all of your support for this kit. I am just about caught up on shipping. If you haven't received your invoice yet, feel free to PM me again. This has become a bit of work to make these and I finally did the math for my time and I need to raise the price as follows. Throttle Kit $40.00USD Flight Stick Kit $55.00USD Flat rate shipping and paypal fees for up to 2 kits is still $6.75USD in the U.S. and $17.50USD in and around Europe. Any PMs prior to this message the price is still $30.00 and $50.00. Thanks again, Miles
-
Very impressive build Deezle. I have been meaning to try the adjustable motorcycle dampers. Will they hold the collective in place or will it slowly drop like with a car steering damper?
-
Hi Roland I just use it as a standard windows controller and do all of the programming in DCS, Best bet for a thread is to just do a search. Miles
-
Hey, I just sent a invoice, sorry it took so long. I just made a batch and I am sending PMs and invoices now. Miles
-
CV1 is has been available for the last 10 min on best bestbuy.com, Just bought 2
-
Hi Guys, I am shipping kits again. Its going a bit slow but I am working through the list, You will get a paypal invoice when you kit is ready to ship. Thanks for your patience and sorry for the delay. Miles
-
I got your PM roccio. Sorry I am a few weeks behind in making these. Life keeps getting in the way of my Hobby. Miles [ QUOTE=roccio;2776037]I sent you another pm miles, but don t know if you have received.
-
Hey guys, I am glad the kits are working well for you , I hope they are working as well for everyone. Please PM me if you are having any issues. I do have some in stock now. I am trying to fill a order for Germany and I am waiting on some sensors that are back-ordered. If you are interested just PM me with your state or country, and which kits you want. I will send a paypal invoice when your kits are ready to ship. Unfortunately, these kits take me a lot of time to fixture and cnc machine, but the price is still $30.00 USD for the throttle and $50.00 USD for the joystick. I slightly raised the shipping cost to cover shipping, shipping supplies and paypal fees. Flat rate shipping for up to 2 kits is $6.75USD in the U.S. and $17.50USD in and around Europe. Thanks for all of your support. Miles
-
Unfortunately, all the parts that this kit attaches to are gone on the gimbal mod. Are your original hall sensors no longer available?
-
I think I am going to make a smaller version of this available for the cougar It would be a USB ready direct replacement without the ps2 connector shown, which was for external inputs. I crunched the numbers and I think I could do it for $35.00USD Miles
-
Hey Sierra, I know the PCB form factor is different, so I would have to make a new PCB. If there was interest I am sure I could make it work. The TQS would just be recognized as a standard USB HID 32 button joystick without any drivers required. You would not be able to use TUSBA because it would be USB already. Axis would also only be 10bit (1024 positions). If there was interest I could probably do a PnP board with microcontroller for $50.00USD. Miles
-
Hey Mack When I first launch DiView I have to move the joystick to all of its limits before I get a good read. Anyway is sounds like your hall sensors may be to close to magnets or maybe slightly twisted. You can just pull them back a little with your finger away from the magnet. You will notice in Di View your overall range will be decreased immediately. You will then probably move off zero a bit also. Then you can re-calibrate. You can also slightly twist the sensor to get it read dead center before calibration. It only takes a small amount of a twisting movement to make these fine adjustments. I will make a stick calibration video tonight showing these adjustments. I make these adjustments before shipping but they may get moved during shipment. Sorry for the inconvenience, please let us know how you make out. Miles
-
I just calibrated with the TUSBA and it worked great, obviously the values will be different. The standard 8 bit works fine also. Even with the calibration at 1/200 I can barely move it just 1 step, even when I really try. To me 8 bit on the throttle is fine.
-
Cougar throttle calibration(no dead zone) Here is is a updated video calibration procedure to take out the deadzone on the idle and full throttle. [ame] [/ame]
-
JoyStick hall sensor instalation video Here is the Cougar Joystick installation video. It is much simpler than the throttle. [ame] [/ame] Miles
-
Hi Andre I am going to try and do that tonight. Did you find it overall easier to get things working with the new parts ? Miles
-
Hi Brewnix As Sokol they look like JST and standard .1 pitch spacing, There are many diferent standards of the JST. It seem the joysticks use either JST-XH or JST-XZH, Yours look like the ZH, same as the Thrustmaster http://www.ebay.com/itm/10-Sets-X-ZH-1-5mm-3-pin-JST-Connector-Plug-With-Wire-Cables-150MM-YG-/121805303470?hash=item1c5c296eae:g:tuUAAOSwwbdWOB8F I have the board mounts for your 3 pin JST XZH I could send you for free. While it wont lock you should be able to plug the double row into these. http://www.ebay.com/itm/5PCS-2-Row-20-Pin-2-54mm-Pitch-Straight-Pin-Header-/182045871891?hash=item2a62c78f13:g:FBUAAOSwh-1W3Iik or just double up these http://www.ebay.com/itm/15pcs-Single-Row-2-54mm-Pitch-40-Pins-Straight-Connector-Header-/321294100519?hash=item4ace9ee827:g:PBoAAOSwPcVVlZRR I did the same arduino pro micro thing with the Thrustmaster TQS and F22Pro and just had them recognized as USB 32 button HID joysticks. No drivers or mmjoy to mess with.
-
Here you can see the stock bracket on the left and the retrofitted bracket in the center. The sensor is lowered in the mount. On the far right is what you have coming if its needed. Miles
-
Hi Icarus If you cant get to zero (low) with the magnet ring close to the PCB, pushing the sensor closer to the magnet ring will help. You may not even need to change the spacers. They replace the one piece unit between the PCB and the larger bracket. If you don't get a zero reading with the magnetic bracket rotated until it makes contact with the case you can swap the 2 thinner spacers for the original thicker one. This will allow you to get to a zero (low) reading when the magnetic ring just touches the case as in the install video. It takes a bit to get the hang of it, but one you start moving things around while watching the DIView screen it becomes more clear what each adjustment does.
-
Hi Icarus Because space is so limited there was not enough room to add another magnet. Nor could I just use 2 with space between them. I don't know if you installed your kit yet, but the replacement spacers and screws I sent you make it much easier to adjust. I am going to get another video out ASAP with more detail showing the adjustment. Basically if you slide the magnet as far away from the sensor as possibly before loosing the max throw it will limit the deadspace. Miles
-
Hey Guys Here is a new video showing a small deadspace issue on the throttle. It did not show up on the windows joystick app. Please evaluate before purchase. I dont use the detents but when I had them installed for testing the deadspace was not even noticeable to me.