Bubbles
-
Posts
59 -
Joined
-
Last visited
Content Type
Profiles
Forums
Events
Everything posted by Bubbles
-
Hallo Draken, really great work again. I'm curious about the EZ 42 with full functionality.
-

new project.. the third.. cockpit / cabin Mig 21
Bubbles replied to simulatoregp's topic in Home Cockpits
Really, you are an artist. -
Hello Neal, thank you for your effort. I will think about it.
-
Hello fbfan64, very good work. The construction type is a little bit similar to mine. I also tought about to use white paper for the projection area, but for me it is too glarish. So my screen has still the natural colour of the wood, because I can´t decide which surface I will use. What do you think about this? http://www.flightdecksolutions.com/forum/viewtopic.php?t=3583 https://en.wikipedia.org/wiki/Black_Widow_(paint_mix)#A_very_brief_history_of_DIY_painted_screens_and_some_of_the_more_popular_methods_and_mindsets

-
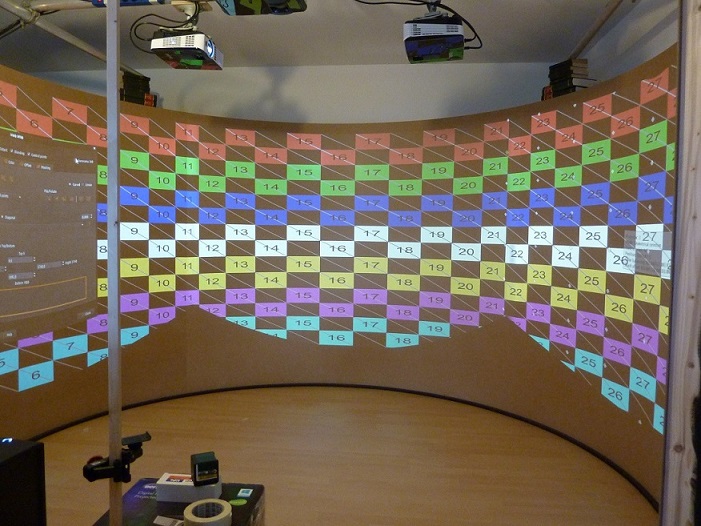
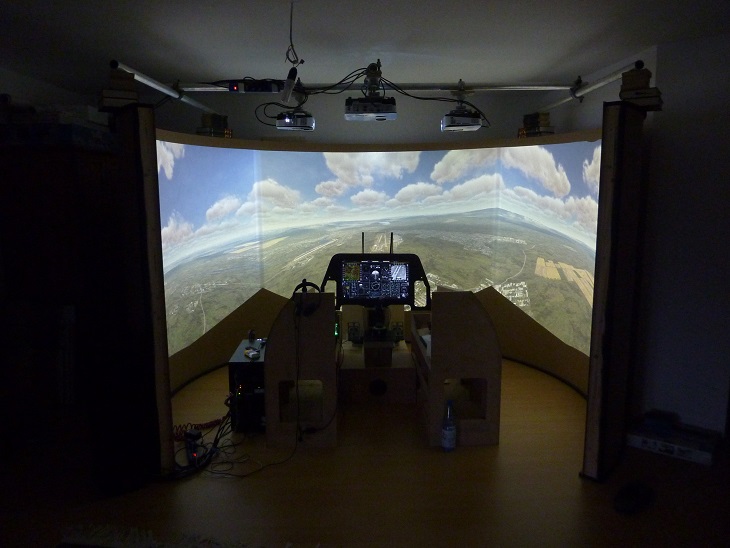
Hallo, the last months there was not very much time to continue the work on my cockpit, but in my summer holidays a view weeks ago, I startet again and here is a little update. Still at the beginning of the year, I did the warping of my screen and some tests because the colour. On one of the screen pictures, you can see the test with white paper. At the moment the screen still has the brown colour of the wood, because I found no other satisfying solution. In my holidays I startet the work with the front extention of the cockpit and the gimbal of my steering stick. For the steering I want to use the original thrustmaster sensor an card. Some weeks ago I got a Martin Baker MK10 seat from a Tornado. It is in a very good condition and complete, only the harness release box is missing. Maybe somebody of you know, where I can buy one. On ebay there is actual no proper offer. When I got the seat, it was adyusted at the highest potition to make the possible to store it in the upright position. But my height is 189 cm, so I had to find a way to adjust it down. The actuator of the seat needs 115 V AC, 400 Hz. I didn´t know, how to get this for an economically justifiable price in Germany. The Voltage is not the problem, but the 400 Hz and I dont know, if I can use a lower frequency. In Germany we have 50 Hz, 230 V AC in the public network. Maybe somebody has an idea, how to make the actuator electric adjustible. For the first I found a way to drill the actuator down manually. At this time I work on a frame to install the seat into my cockpit too.
-
Like your cockpit very much. It looks really incredible. Wish I where with mine as far as yours. My work was running slow the last months, but now in my holidays, I have time to work on it.
-
Incredible work, especially done with common tools.
-
Looks realy great :thumbup:
-
Warthog throttle calibration problem
Bubbles replied to Lymark's topic in PC Hardware and Related Software
Yes, your mark is right. But what is the alighnment of your trottle axis at the zero zone? If you have a zero value when both trottles moved back I would live with this difference. In my case the difference was much bigger and there was no zero value at the right trottle when I pushend both trottles back. -
Warthog throttle calibration problem
Bubbles replied to Lymark's topic in PC Hardware and Related Software
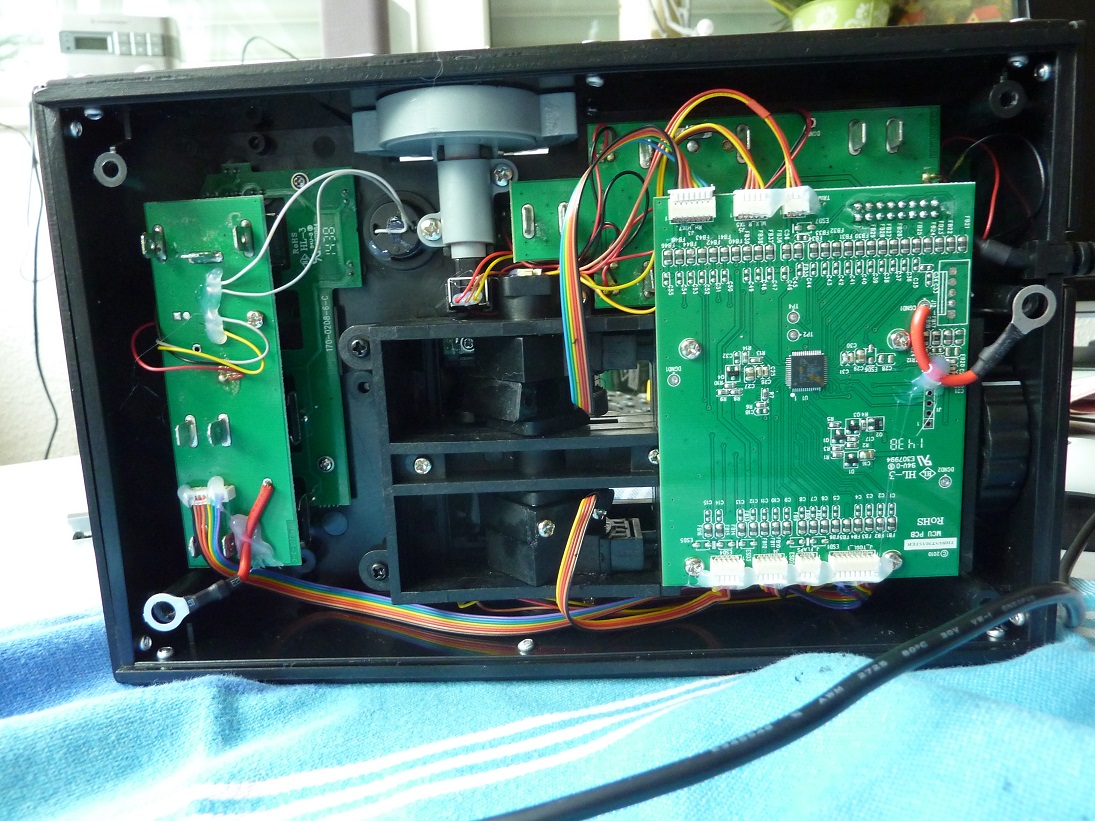
Hallo, the value of both after cleaning is the same now. Here are two pictures of the interior of the trottle. After revoving the circuid board you can remove the mounting of the trottles. By removing the plugs at the board you must be careful by removing the hot melt glue. One sensor you can see on the second picture. The magnet inside the plastic part observe. I spent 2 hours for reparing. But if the warthog is brand new, can´t you give it back and get another?
-
Warthog throttle calibration problem
Bubbles replied to Lymark's topic in PC Hardware and Related Software
Hallo Lymark, I had a similar problem and additional on the way of the axis, I got the hotkey for "Engine Off". In my case there was a little bit of grease betwen the magnet and the sensor. After cleaning, it worked well again. -
Hallo RK, that is realy great work you have done. Im excited to see more.
-
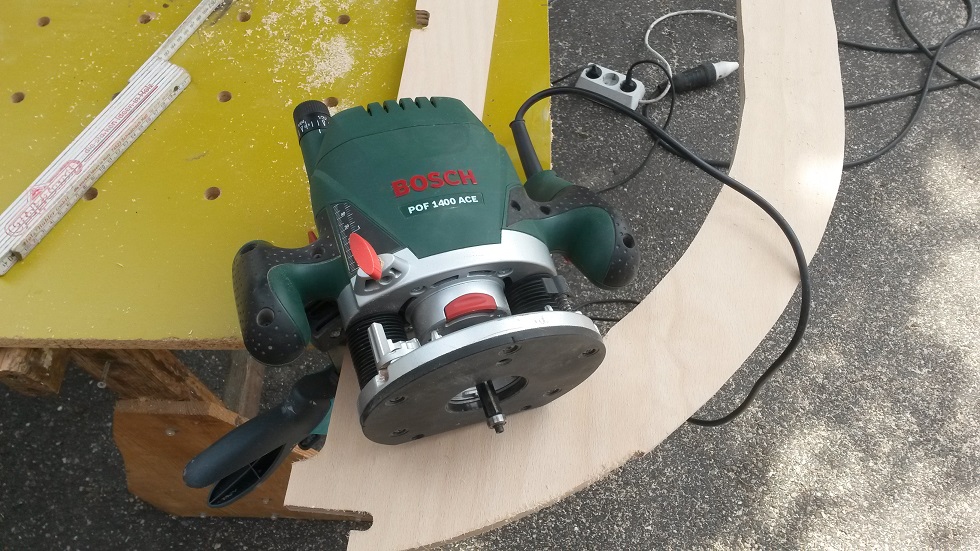
Hallo Mr_Burns I use Bosch blades T 119 BO which can be used for courved cuts in wood (from 2-15mm). The material is relly MDF 3mm, the same material you can get up 20mm, no cardboard. http://www.bosch-pt.com/de/de/accocs/zubehoer/172323/14588/stichsaegeblaetter-basic-for-wood/stichsaegeblatt-t-119-bo/
-
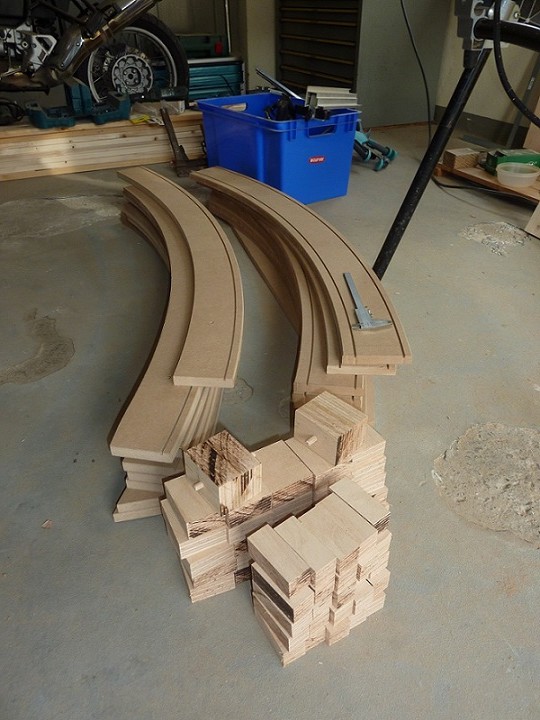
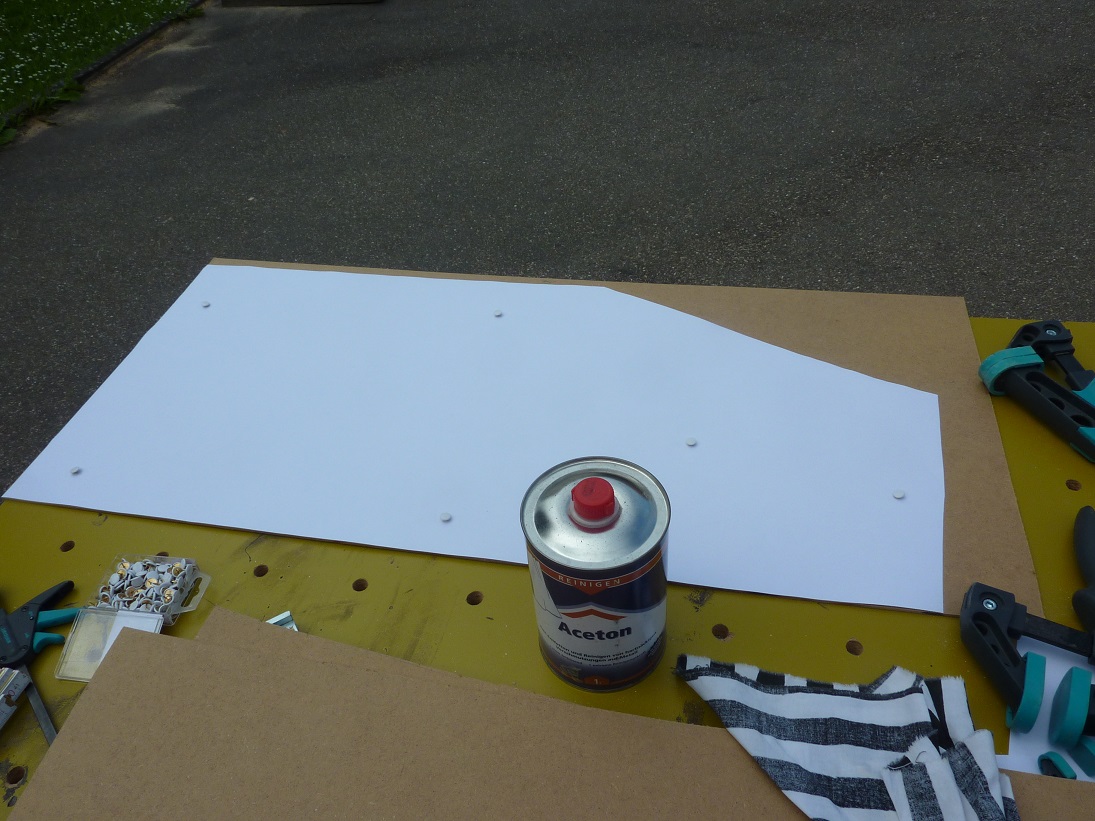
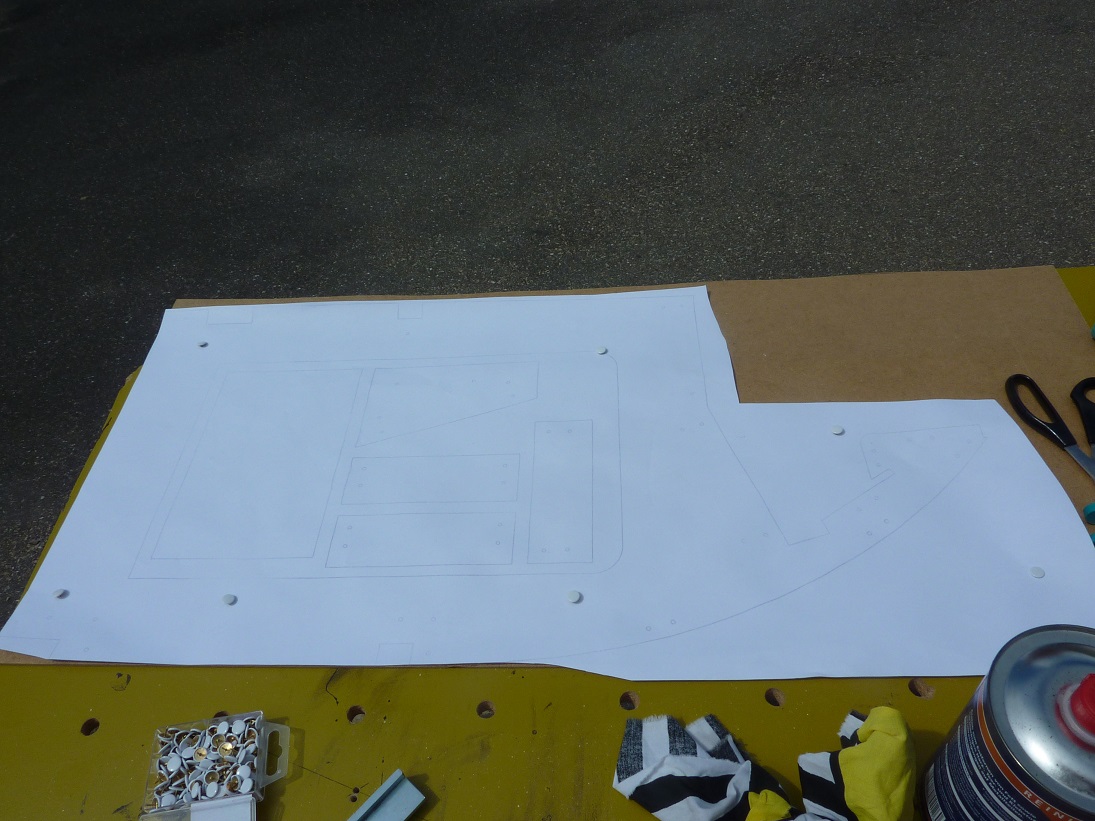
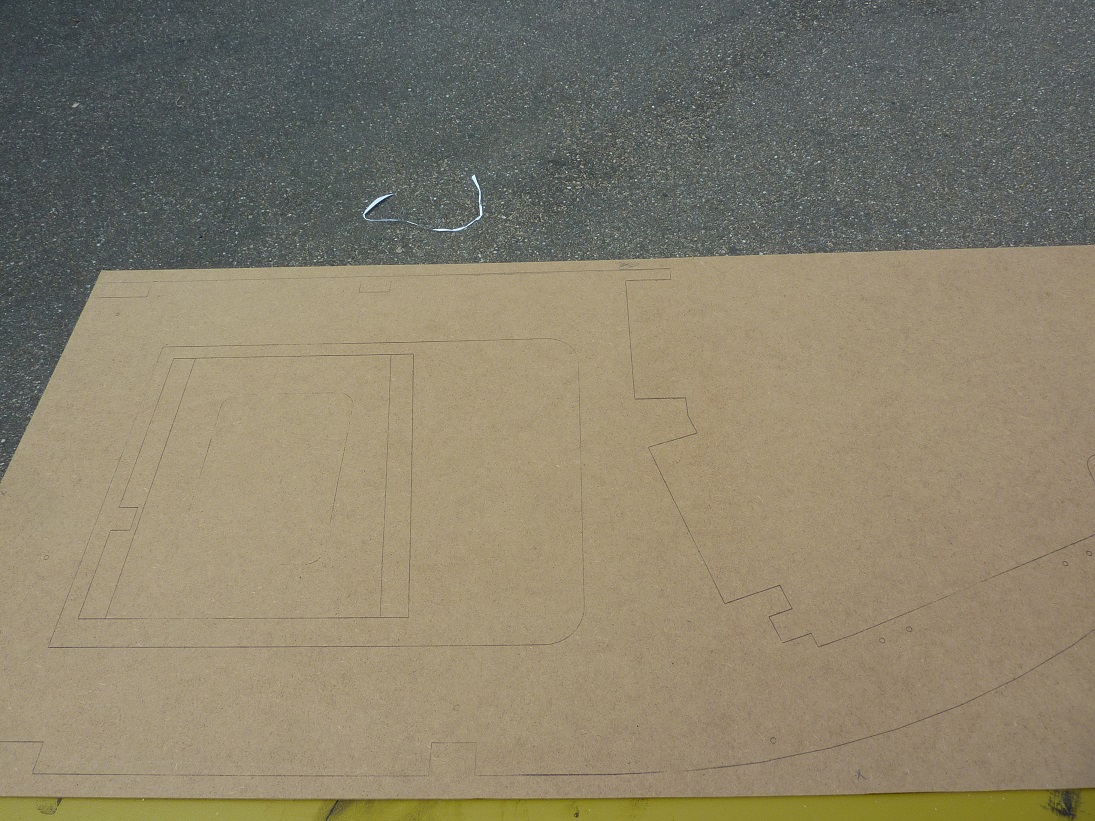
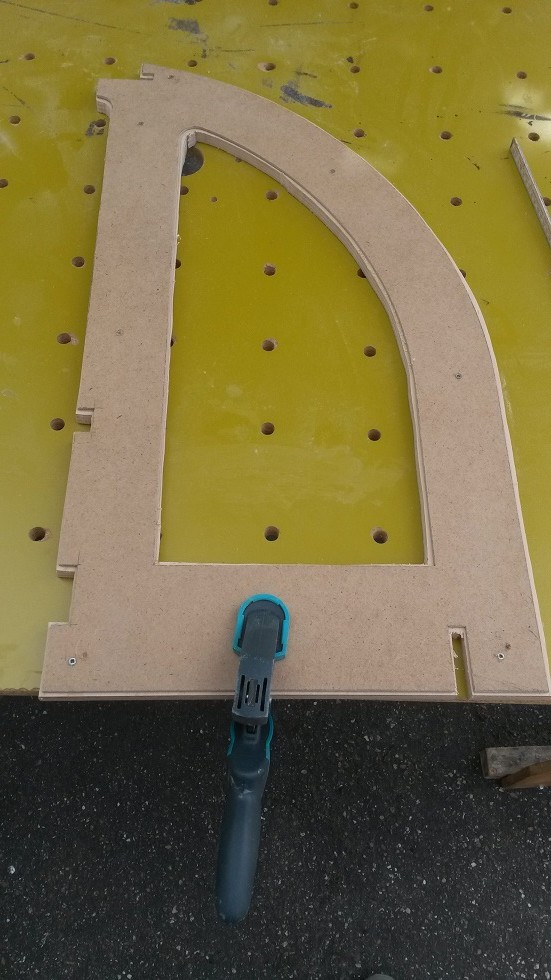
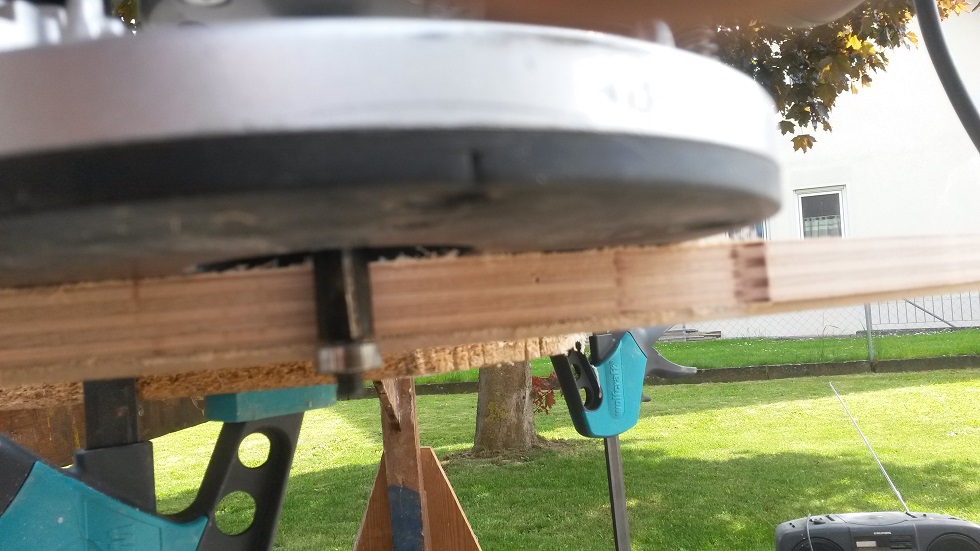
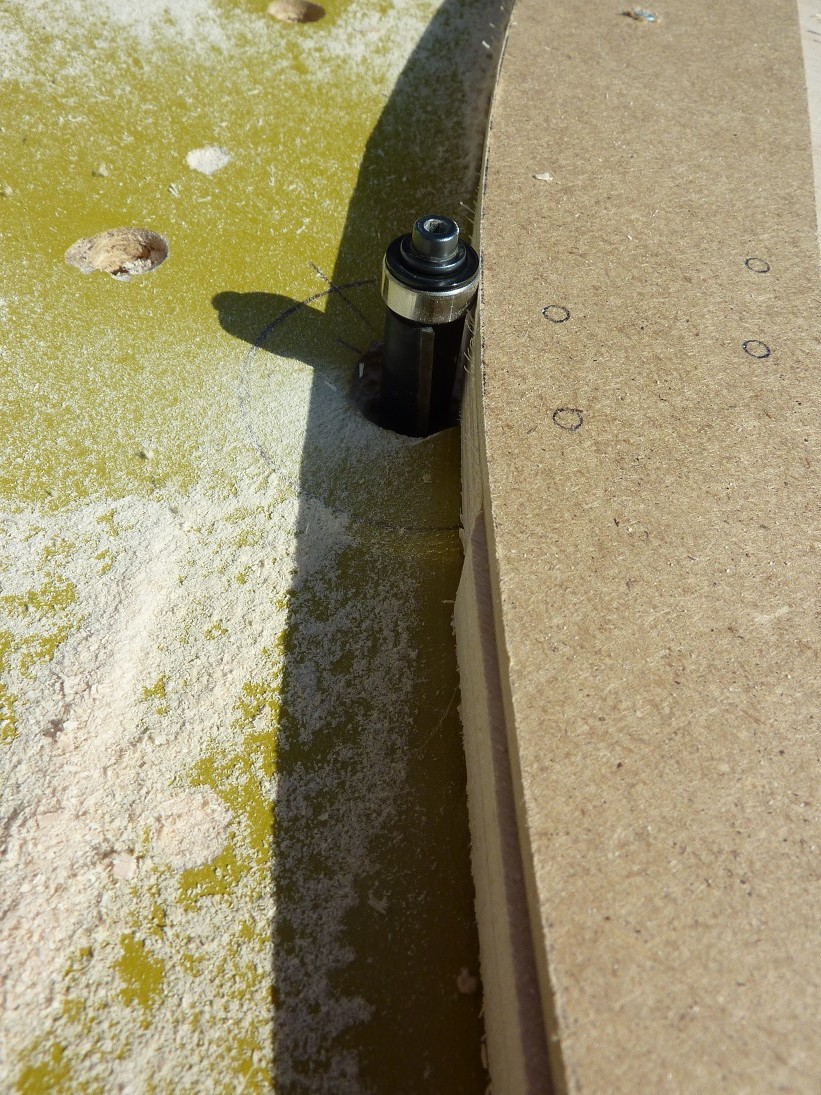
Hallo, another very easy method to copy a plan on the wood is to use a clamph cloth with Aceton. Important is, that the plan is printed by a laserprinter. I think the first 3 pictures can say more than 1000 words. If you wonder why I used 3 mm MDF (very easy to saw and sand exactly) I have added a view pictures to show my method of making the parts of my Cockpit by using an hand-guided router.
-
Danke JonnyJohn. Mich würde interessieren wie der Stand und die Art Deines Simpits ist. Kannst Du mal ein paar Bilder posten?
-
Nein, bin "Sesselpubser":)
-
Hallo zusammen, ich bin zwar aus BW und nicht aus NRW, aber ebenfalls am Bau eines A10 Simpits. Die letzten Monate hatte ich keine Zeit zum Bauen; bin aber gerade wieder dabei (Front des Cockpits und der Einbau des Stuerknüppels in die Bodengruppe).
-
Capt Zeen F-15C Helios Profile ! ! !
Bubbles replied to Capt Zeen's topic in PC Hardware and Related Software
Yes G3, that would be great!!!:thumbup: -
Need Help with Dual Projector (SIMPIT) setup
Bubbles replied to djkling's topic in PC Hardware and Related Software
That looks very courious. I think your warp software is the same that I use unter the brand of Fly Elise, but I've never seen an resultat like this. It seems that, the picture is doubelnd, but than the x-resolution of 3840 for 1 picture can not be. I use a monitor-lua with 3 cameras but I did a test for you with the monitor configuration "1 Camera" in dcs world and the suitable resolution. It workend fine. I'm very surprised, that your warping software only works in dcs not proper. Can you post the same picture without startend warping software and one picture with startend warp software, but without dcs (Desktop). P.S. Send also a screenshot of your configuration in dcs world and the configuration of your Displays in the warp software. By the way, do you have a manual for your test software? -
Hello, the plans and the construction manual are realy great. A very good and efficient design. It will be very interesting to see all the new cockpits in the forum and the further development of the other parts.
-
Need Help with Dual Projector (SIMPIT) setup
Bubbles replied to djkling's topic in PC Hardware and Related Software
Hello, I can't imagine how this looks like. I think there are additional Informations needed. - Please post a picture - your Monitor Setting, at the best the Monitor Setting lua-file - do you use nvidia surround or what else - what warping Software you use -
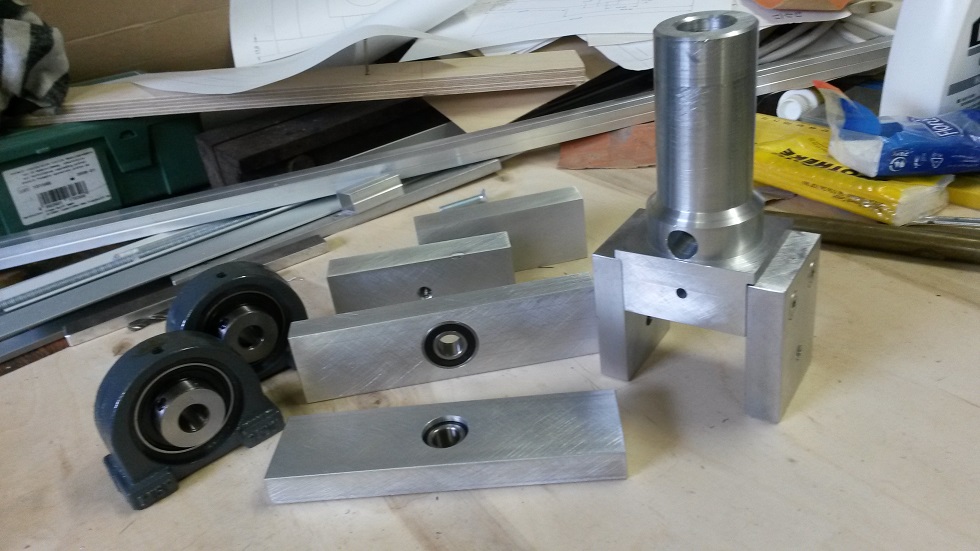
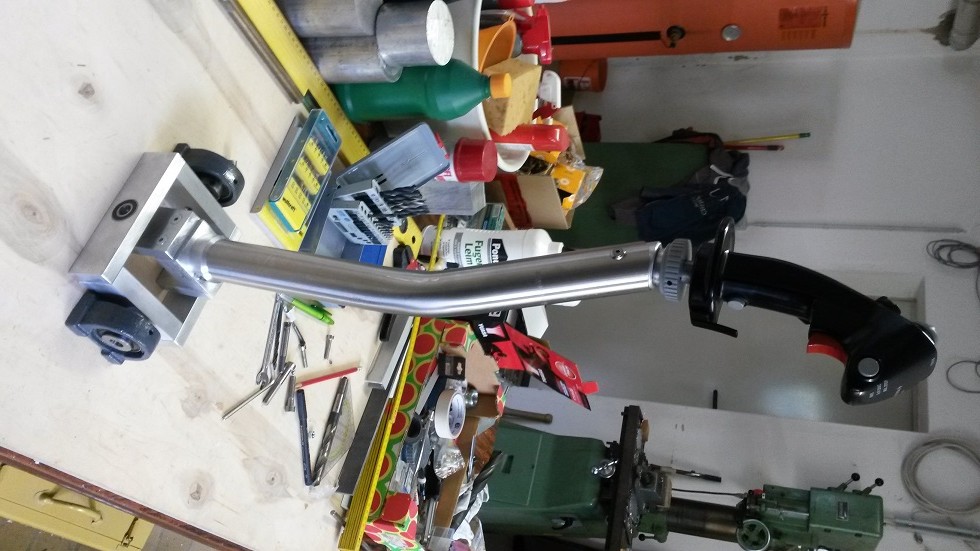
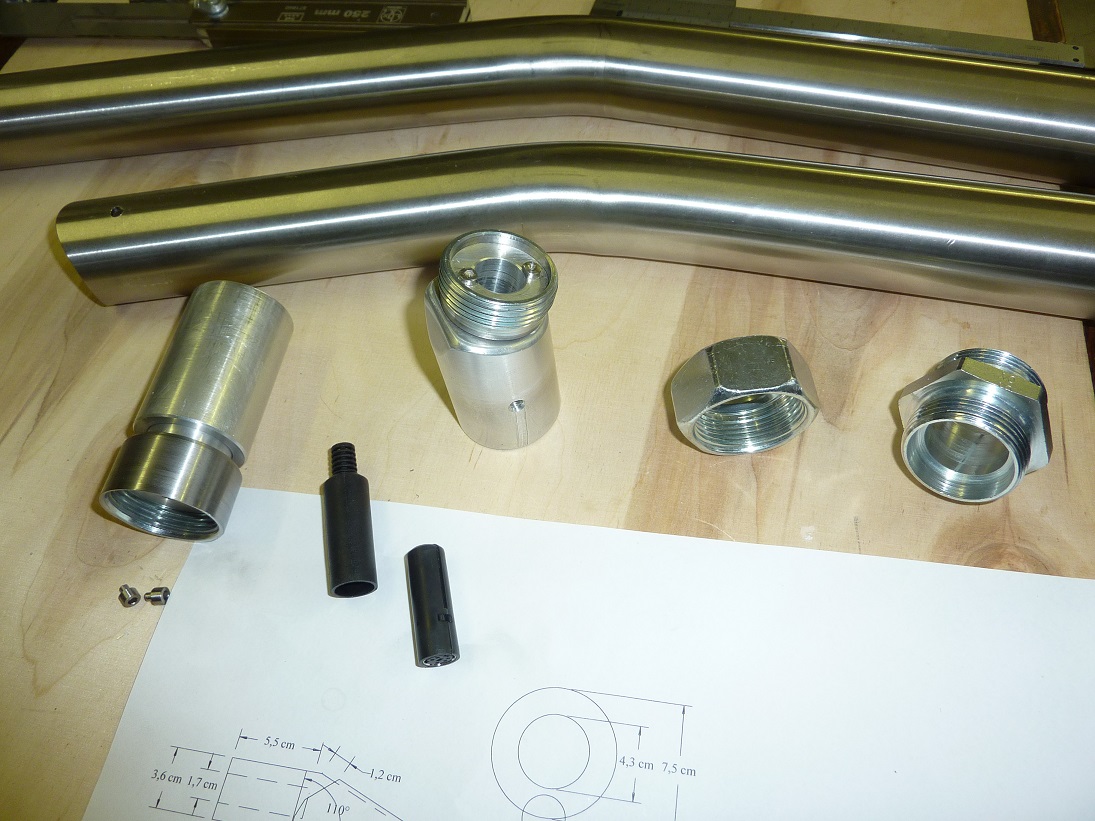
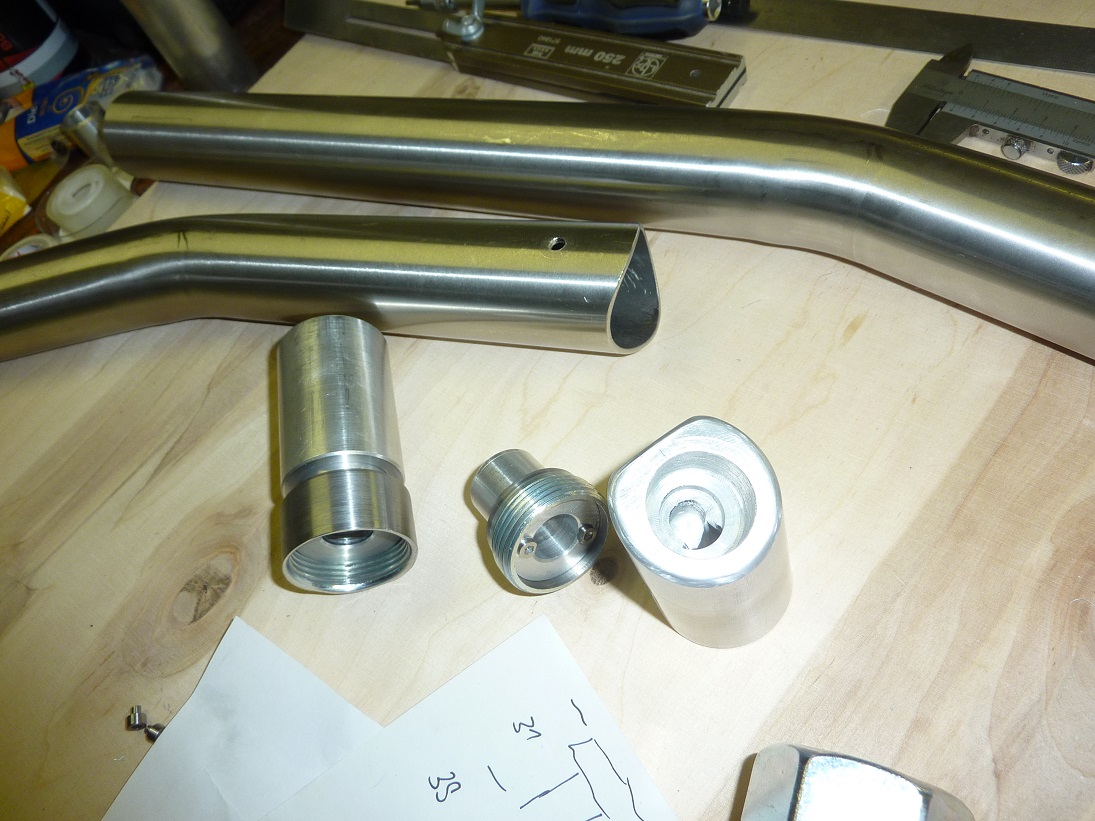
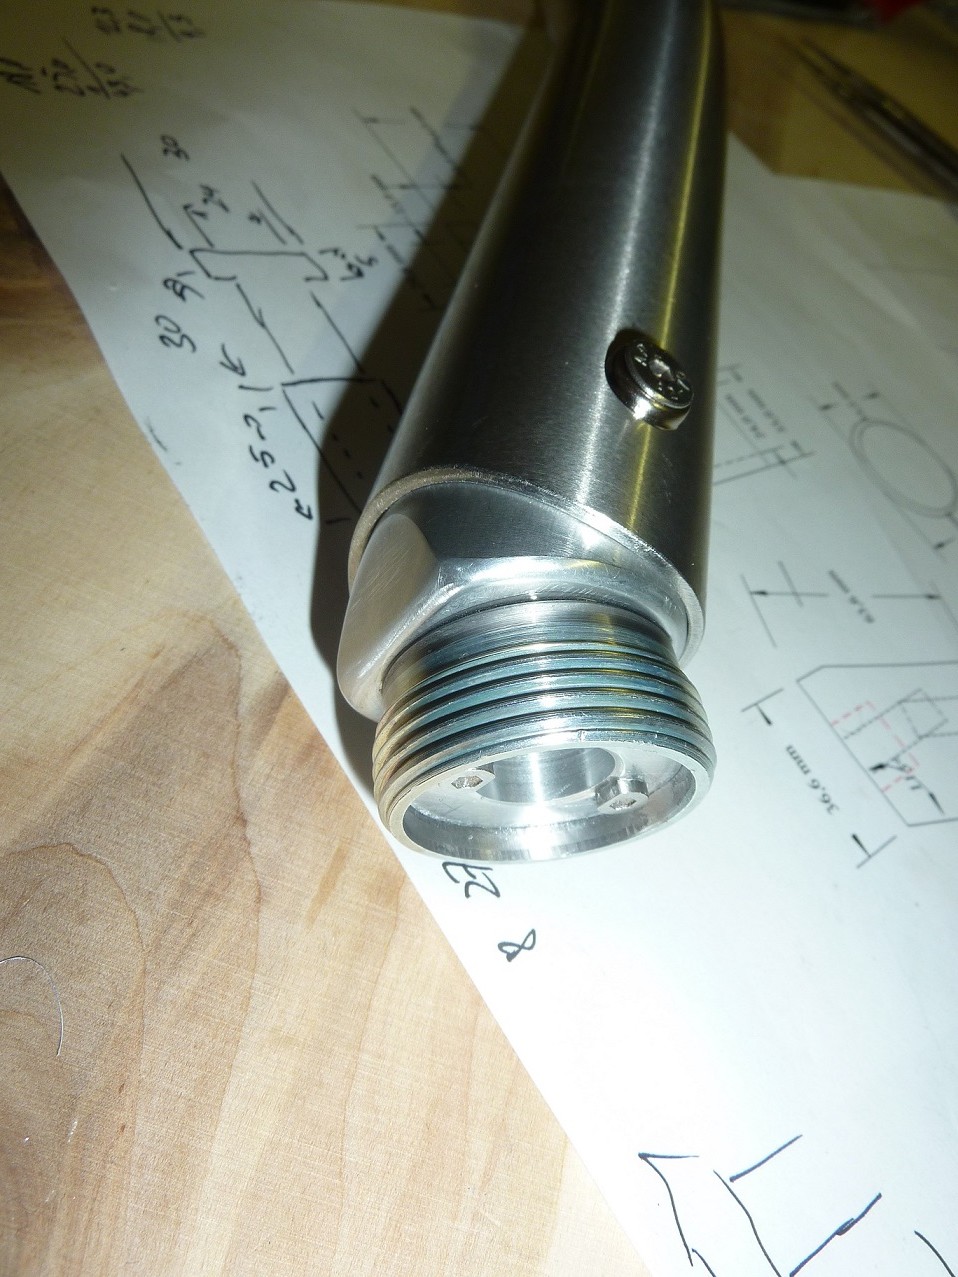
Hello Wayne, at this time I can use the extension only on the base of my TM Cougar. For use on the base of my TM Warthog with it´s plastic mechanism the stick is to heavy and the lever is to long. The springs of the Cougar are strong enough to hold the Stick in the upright position but of course, they are not strong enough to retourn it to cender. So I will build a more robust mechanism with ball-bearings under the cover plate of the floorsection of the cockpit. For the retourn to cender I think about to use a weight in the balance point of the stick, maybe with one weak tencion spring in the middle for support. At the moment I´m double-minded, if it´s better to use a new pair of hall sensors at the axes of the new machanism (a smart solution but I have no experience with that) or to use a machanical link to the warhog base. Maybe somebody can support me with know how (specification of useful sensors to work together with the card in the Warthog base ...). The attach to the Cougar I built with several adapter parts which I´ve made out of aluminum and a screw joint for hydraulic systems witch hat the suitable metric screw thread (M36x2). The first pictures show the original parts and my conversion to make the attach that it shows like the original. I´ve a commercial, no technical education, so it was the only way I saw, to realice this with the tools in the old workshop of my father and the skills I learnd from him in my young days. The stick is not ready. At the end it should look like this https://www.flickr.com/photos/klafaille/albums/72157627919445046the . A very important reference for me are the incredible photos of Keith LaFaille https://www.flickr.com/photos/klafaille/albums/72157626930907793, the best I ever seen from the A-10C Cockpit. Thank you very much Keith if you read this some day. To the HUD: The pictures I posted are in the HUD only view of the simulation. You cant´t see the HUD because I shot the photos from a distance of 4-5 meters.
-
Hello RK, if you want to change your decision and slip in the screen building between your amacing banel building, I can post some pictures of the very simple construction and the building of my screen. In Holidays I worked 5 days and the cost oft material was about 300 €.
-
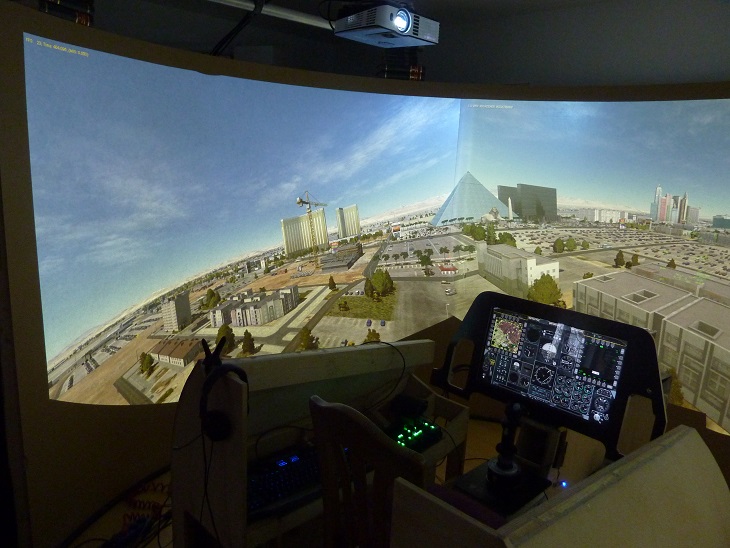
I use HD Short Throw Beamers (BenQ TH682ST).
-
My system is an i7-4770K CPU @3,5GHz, 16.0 GB RAM, NVIDIA GTx 780 Ti and the OS is WIN 7. With DCS, HELIOS and the warping software I can get between 30 and 70 FPS with settings "high" in most cases. In low-altetude flight over the mainstreet of Las Vegas, the framrate brakes down to 19-20 FPS, but this is o.k. for me at this time. I think about an upgrade at the end of the year. Meanwhile I will do some tests with Overclocking and running HELIOS from a seperate Computer.