GregP
-
Posts
1161 -
Joined
-
Last visited
-
Days Won
2
Content Type
Profiles
Forums
Events
Everything posted by GregP
-
Do you "Pause" or "Esc" on mission start? Latter just bumped my FPS 25%!
GregP replied to GregP's topic in DCS: A-10C Warthog
:) Well here's what happened, specifically ... I got up on Saturday morning with the fairly large project on installing 1.1.1.0 and getting all my customizations back in place (snapviews, controller configs, texture mods, etc.) which took a few hours. Rather than plug all my controllers in, load all their profiles, don the TrackIR headset, turn on VAC, etc., I decided to just start up the 'takeoff' mission and see how framerate was. And along with this shortcut was not bothering to turn my speakers on. So, when I found that 'esc' got rid of the briefing screen, and there were no other messages on screen, I just assumed I was truly 'in-game' and ready to take off. Of course, I never actually tried to take off ... which, in retrospect, would have been a good idea. :) Me? Really? Some config files, yeah .... but in general I'm much more a consumer of mods and the like than a producer. -
Do you "Pause" or "Esc" on mission start? Latter just bumped my FPS 25%!
GregP replied to GregP's topic in DCS: A-10C Warthog
Ugh ... how embarrassing ... I've just realized that I was never actually truly starting the mission. I did my tests with sound off and didn't realize that even after pressing 'esc', the game was still paused. Doing the requisite unpausing drops me back down to 21-22, as before. Off to go hide sheepishly in the corner now ... -
Do you "Pause" or "Esc" on mission start? Latter just bumped my FPS 25%!
GregP replied to GregP's topic in DCS: A-10C Warthog
So .... almost two hundred views and not a single "hey, me too!"? Not even from SoftTH users? -
I don't know if this has something to do with my triple-screen setup or what, but I consistent gain an extra 25% FPS as long as I don't use the 'unpause' method of starting a mission! After lots and lots of trial-and-error to solve a separate problem I was having, I came across the following, although I have absolutely no idea why this works: In 1.1.0.9, on mission start, you are forced to 'unpause' the game to start the mission. On a simple sitting-on-the-runway test mission I use, my FPS would be 21. In 1.1.1.0, on mission start, you have the option of 'unpausing', hitting 'Esc', or clicking on the 'fly' arrow. If I 'unpause', I still get 21, just like in 1.1.0.9. But doing either of the two latter options in the same test mission gives me 26 FPS! Additionally, the 'auto-zoom out' "feature" (an annoyance to me) only occurs in 1.1.1.0 if I 'unpause' the sim -- not if I do the other two options. Does anyone know why ED changed the mission start options in 1.1.1.0? AFAIK this wasn't mentioned anywhere in the patch notes. And why should this have any effect on FPS?
-
New Warthog? Here's the TARGET tutorial I wish I'd had.
GregP replied to GregP's topic in PC Hardware and Related Software
That's the file where I define all my commands. I didn't attach it before because at least some of the commands I use are not DCS defaults -- I've redefined a few and defined a few that previously did not have key combos assigned yet. I've attached it here for your convenience, but note that you'll have to cross-check this list with what your particular install of DCS has for each command (in-game). The vast majority should be defaults though. (Note that I've changed the file extension to txt so that the forum will let me upload it -- remember to change it back to ttm) DCSA10Cv2.txt -
Anybody else noticed this curious-looking file? \Mods\mod_plane_sample.lua local world_id = CurrentModPlane -- set up numeric id CurrentModPlane = world_id - 1 -- set up numeric id for next mod aircraft my_custom_plane= { Name = 'Wunderluft', DisplayName = _('Wunderluft'), HumanCockpit = false, Picture = "Su-25.png", Rate = 40, Shape = "Su-25", shape_table_data = { { file = 'su-25'; life = 32; vis = 3; desrt = 'su-25-oblomok'; shadow = 'shadow4'; fire = { 300, 2}; username = 'Wunderluft'; index = world_id; }, -- su-25-oblomok { file = "su-25-oblomok"; fire = { 0, 1}; }, --[[ { --destruction_shape }, { --various pieces }, { --etc } --]] }, WorldID = world_id, mapclasskey = "P0091000025", attribute = {wsType_Air, wsType_Airplane, wsType_Battleplane, world_id,"Battleplanes",}, Categories = {}, ------------------------- M_empty = 10099, M_nominal = 12750, M_max = 17350, M_fuel_max = 2835, H_max = 10000, average_fuel_consumption = 0.4895, CAS_min = 64, V_opt = 180, V_take_off = 72, V_land = 68, V_max_sea_level = 292, V_max_h = 271, Vy_max = 60, Mach_max = 0.82, Ny_min = -3, Ny_max = 5.9, Ny_max_e = 6.5, AOA_take_off = 0.192, bank_angle_max = 60, has_afteburner = false, has_speedbrake = true, main_gear_pos = {-1, -2.009, 1.352}, nose_gear_pos = {2.808, -2.15, 0}, tand_gear_max = 0.577, tanker_type = 0, wing_area = 30.1, wing_span = 14.35, thrust_sum_max = 9856, thrust_sum_ab = 9856, length = 15.36, height = 4.8, flaps_maneuver = 0.2507, range = 1250, RCS = 7, IR_emission_coeff = 0.69, IR_emission_coeff_ab = 0, wing_tip_pos = {-2.7, -0.611, 7.18}, nose_gear_wheel_diameter = 0.754, main_gear_wheel_diameter = 0.972, brakeshute_name = 4, is_tanker = false, air_refuel_receptacle_pos = {0, 0, 0}, engines_count = 2, engines_nozzles = { [1] = { pos = {-3.793, -0.391, 0.716}, elevation = 0, diameter = 0.6, exhaust_length_ab = 8.631, exhaust_length_ab_K = 0.76, }, -- end of [1] [2] = { pos = {-3.793, -0.391, -0.716}, elevation = 0, diameter = 0.6, exhaust_length_ab = 8.631, exhaust_length_ab_K = 0.76, }, -- end of [2] }, -- end of engines_nozzles crew_size = 1, crew_members = { [1] = { ejection_seat_name = 9, drop_canopy_name = 34, pos = {3.029, -0.092, 0}, }, -- end of [1] }, -- end of crew_members fires_pos = { [1] = {-3.084, -0.595, -0.112}, [2] = {-1.003, 0.189, 2.237}, [3] = {-1.618, 0.175, -2.408}, [4] = {-0.82, 0.265, 2.774}, [5] = {-0.82, 0.265, -2.774}, [6] = {-0.82, 0.255, 4.274}, [7] = {-0.82, 0.255, -4.274}, [8] = {-2.87, -0.596, 0.754}, [9] = {-2.87, -0.596, -0.754}, [10] = {-1.573, 0.145, -2.172}, [11] = {-1.924, -0.04, -1.934}, }, -- end of fires_pos -- Countermeasures SingleChargeTotal = 128, CMDS_Incrementation = 32, ChaffDefault = 64, -- PPR-26 ChaffChargeSize = 1, FlareDefault = 64, -- PPI-26 FlareChargeSize = 1, CMDS_Edit = true, chaff_flare_dispenser = { [1] = { dir = {0, 1, 0}, pos = {-3.677, 1.012, -0.859}, }, -- end of [1] [2] = { dir = {0, 1, 0}, pos = {-3.677, 1.012, 0.859}, }, -- end of [2] }, -- end of chaff_flare_dispenser --sensors detection_range_max = 0, radar_can_see_ground = false, CanopyGeometry = { azimuth = {-145.0, 145.0}, elevation = {-50.0, 90.0} }, Sensors = { RWR = "Abstract RWR" }, HumanRadio = { frequency = 127.5, modulation = MODULATION_AM }, etc...
-
I too have been thinking of getting something like the 720s for use as a CDU; what has been your experience using that? I seem to come across a lot of reviews that say the touch precision is lacking.
-
New Warthog? Here's the TARGET tutorial I wish I'd had.
GregP replied to GregP's topic in PC Hardware and Related Software
I'll now post my current TARGET configuration; this uses keypress emulations on all of the joystick buttons (as opposed to DX assignments) but leaves most throttle buttons as DX buttons, allowing the latter to be assigned in-game: include "target.tmh" //here we link this file to the file that contains the default Thrustmaster function code include "DCSA10Cv2.ttm" int main() { Configure(&LMFD,MODE_EXCLUDED); Configure(&RMFD,MODE_EXCLUDED); if(Init(&EventHandle)) return 1; // declare the event handler, return on error //script and function functions go here and before the } // shift button SetShiftButton(&Joystick,S3); // set pulse and delay lengths SetKBRate(50,100); ////////////////////////////////////////////////////////////////////////////////// // Joystick and Throttle Axis Definitions ////////////////////////////////////////////////////////////////////////////////// MapAxis(&Joystick, JOYX, DX_X_AXIS); MapAxis(&Joystick, JOYY, DX_Y_AXIS); MapAxis(&Throttle, THR_LEFT, DX_ZROT_AXIS); MapAxis(&Throttle, THR_RIGHT, DX_Z_AXIS); // Uncomment following two lines if you want Slew Control axes available in-game MapAxis(&Throttle, SCX, DX_XROT_AXIS); MapAxis(&Throttle, SCY, DX_YROT_AXIS); // For now, don't do anything with the Slew Control pressed in MapKey(&Throttle,SC,0); // Assign zoom control to gray throttle friction lever KeyAxis(&Throttle,THR_FC,0,AXMAP2(LIST(0,40,60,100),Zoom_in_slow,0,Zoom_out_slow)); //////////////////////////////////////////////////////////////////////////////////// // Joystick Button Definitions //////////////////////////////////////////////////////////////////////////////////// MapKey(&Joystick,TG1,Gun_trigger_first_stage); MapKey(&Joystick,TG2,Gun_trigger); MapKeyIO(&Joystick,S1,Reset_trimmers,HOTAS_Master_Mode_Control_Button); MapKeyIO(&Joystick,S2,TIR_center,Weapon_release); MapKeyIO(&Joystick,S4,Eject,HOTAS_nosewheel_steering_button); MapKey(&Joystick,H1U,Trim_nose_down); MapKey(&Joystick,H1D,Trim_nose_up); MapKey(&Joystick,H1L,Trim_aileron_left); MapKey(&Joystick,H1R,Trim_aileron_right); MapKeyIO(&Joystick,H2U,Aircraft_view,HOTAS_TMS_up); MapKeyIO(&Joystick,H2D,Cockpit_view,HOTAS_TMS_down); MapKeyIO(&Joystick,H2L,Flyby_view,HOTAS_TMS_left); MapKeyIO(&Joystick,H2R,Chase_view,HOTAS_TMS_right); MapKeyIO(&Joystick,H3U,Screenshot,HOTAS_DMS_up); MapKeyIO(&Joystick,H3D,Quit,HOTAS_DMS_down); MapKeyIO(&Joystick,H3L,Pause,HOTAS_DMS_left); MapKeyIO(&Joystick,H3R,Active_pause,HOTAS_DMS_right); MapKeyIO(&Joystick,H4U,SEQ(CHAIN(PULSE+Toggle_zoom,D(150),PULSE+Zoom_fwd_left_console),Toggle_zoom),HOTAS_CMS_forward); MapKeyIO(&Joystick,H4D,SEQ(CHAIN(PULSE+Toggle_zoom,D(150),PULSE+Zoom_NMSP),Toggle_zoom),HOTAS_CMS_aft); MapKeyIO(&Joystick,H4L,SEQ(CHAIN(PULSE+Toggle_zoom,D(150),PULSE+Zoom_left_console),Toggle_zoom),HOTAS_CMS_left); MapKeyIO(&Joystick,H4R,SEQ(CHAIN(PULSE+Toggle_zoom,D(150),PULSE+Zoom_right_console),Toggle_zoom),HOTAS_CMS_right); ////////////////////////////////////////////////////////////////////////////////////// // Throttle Button Definitions ////////////////////////////////////////////////////////////////////////////////////// MapKeyIO(&Throttle,MSU,SEQ(CHAIN(PULSE+Toggle_zoom,D(150),PULSE+Zoom_HUD),Toggle_zoom),VAC_comms); MapKeyIO(&Throttle,MSD,SEQ(CHAIN(PULSE+Toggle_zoom,D(150),PULSE+Zoom_CDU),Toggle_zoom),DX5); MapKeyIO(&Throttle,MSL,TIR_enable,DX6); MapKeyIO(&Throttle,MSR,SEQ(CHAIN(PULSE+Toggle_zoom,D(150),PULSE+Zoom_radios),Toggle_zoom),DX4); MapKey(&Throttle,MSP,DX2); MapKey(&Throttle,SPDB,DX8); MapKey(&Throttle,SPDF,DX7); MapKey(&Throttle,BSB,DX10); MapKey(&Throttle,BSF,DX9); MapKey(&Throttle,CHB,DX12); MapKey(&Throttle,CHF,DX11); MapKey(&Throttle,PSB,DX14); MapKey(&Throttle,PSF,DX13); MapKeyIO(&Throttle,LTB,Toggle_zoom,DX15); MapKey(&Throttle,CSU,DXHATUP); MapKey(&Throttle,CSD,DXHATDOWN); MapKey(&Throttle,CSL,DXHATLEFT); MapKey(&Throttle,CSR,DXHATRIGHT); MapKey(&Throttle,EFLNORM,DX16); MapKey(&Throttle,EFRNORM,DX17); MapKey(&Throttle,EOLMOTOR,DX18); MapKey(&Throttle,EORMOTOR,DX19); MapKey(&Throttle,APUON,DX20); MapKey(&Throttle,LDGH,DX21); MapKey(&Throttle,FLAPU,DX22); MapKey(&Throttle,FLAPD,DX23); MapKey(&Throttle,EACON,DX24); MapKey(&Throttle,RDRNRM,DX25); MapKey(&Throttle,APENG,DX26); MapKey(&Throttle,APPAT,DX27); MapKey(&Throttle,APALT,DX28); MapKey(&Throttle,IDLELON,DX29); MapKey(&Throttle,IDLERON,DX30); MapKey(&Throttle,EOLIGN,DX31); MapKey(&Throttle,EORIGN,DX32); } int EventHandle(int type, alias o, int x) { DefaultMapping(&o, x); } The last remaining step is to ensure coordination between the TARGET profile and the "Thrustmaster Combined.lua" file that DCS will create when you first run DCS. The problem is the contradiction that you choose to use TARGET specifically because you want some functionality beyond the automatic assignments that DCS will make when it detects you have a Warthog ... but DCS doesn't know this, and so still automatically assigns all the commands in the lua file, which may now conflict with the assignments you've made in TARGET. The way around this is to check that all of your DX button declarations in TARGET are being assigned to commands in the lua file, but that your other button assignments in TARGET do not appear in the lua file. This process can be simplified when you realize that the lua ONLY needs to have the actual commands that your joystick+throttle are directly (i.e. by using DX buttons/axes) calling. You can safely delete every unused function in the lua file (and there are hundreds of them), leaving you with the likely 10-32 functions that you DO directly call. This makes it easier to read and to ensure you only have the needed commands in there. For the sake of completeness, I've attached my "Thrustmaster Combined.lua" file. And with that, I'll wrap up this already way-too-long post. I'm not so sure this is as clear as I'd intended, but nonetheless I hope some new TARGET users find it useful. I know I sure would have! Thrustmaster Combined {1D265880-E6BB-11e0-8002-444553540000}.lua -
I bought a Warthog in late September and it took me about a full week to get my TARGET profile up and running, as it took me some time to learn how to translate my "thinking in Foxy" into TARGET syntax. Since then, though, DCS was crashing on me every single time I ran it, anywhere from 5 to 30 minutes into a flight. I suspected it was due to my Warthog not being set up correctly and "flooding" DCS with keypresses, but it was only yesterday that I finally got it all worked out and the problem solved. I figured it might be worthwhile to compile a bunch of the useful info that I've come across in learning about TARGET; if I'd had all this info in one place when I started, I could have saved an immense amount of time. While the official TARGET documentation is useful, I found that it inexplicably left out information that, for my uses at least, was absolutely critical to setting up a profile. If you plan on customizing your HOTAS layout for DCS using TARGET, I would highly recommend that you read its documentation first. After that, but before wasting hours trying to straighten out your confusion, come back here and re-read the info below. I should note that pretty much ALL of the info below comes from other people on this and the SimHQ TARGET Programming forum, people like ivanwfr, PeterP, etc. All I've done is gather it all together in one place. Note that in the following, when I talk about using TARGET, I'm talking about using the Script Editor, not the GUI. Although the GUI is probably 'easier', the Script Editor makes it much easier to utilize the incredible flexibility and power of TARGET. So here goes: First and foremost, there seems to be a lot of confusion (myself included, at first) about the different usage options for the Warthog within DCS. They are as allows, in increasing order of complexity: 1. Pure plug-and-play, i.e. pure DirectX mode. The result of an impressive collaboration between Thrustmaster and ED, you can simply plug in the Warthog, completely forget about anything to do with TARGET, and when you start up DCS, "everything just works". All of the buttons and axes on both the joystick and throttle will automatically be assigned to their correct functions in-game. So if you want your Warthog to faithfully mimic the real A-10C HOTAS and not do anything else, this is the option for you. Although convenient, this method also has a lot of limitations. For example, although in DCS you can assign a joystick button to act as a 'shifted' state, this will only give you access to a second 'layer' of commands, whereas TARGET lets you essentially create six layers (unshifted and shifted, for U(p), D(own), and M(iddle) states of a 3-position switch of your choosing). Those additional layers (beyond 2) will NOT be available to use if you use option #1, however, because DCS does not by default recognize them. Also, you won't be able to make use of more complicated key assignments that involve things like pauses and repeat functions. So, while these limitations are probably OK for a lot of people, they're worth pointing out in order to draw a contrast with the other methods of using the Warthog in DCS. Before going any further, it is important to understand the limitations of using a controller in pure DirectX mode. When DirectX sees a controller that you've plugged in, it will recognize a maximum of 32 buttons and 8 axes on that controller. These can be 'directly' used in-game and are often automatically set to perform certain default functions, e.g. Button1 = DX1 = fire guns. You can also manually assign them in-game in the controller properties page, e.g. click on "Fire guns" and then press Button1 on your controller. But what happens if you have more than 32 buttons or 8 axes on a single controller? In that case, those 'extra' buttons/axes are not assigned DirectX names, and so from DirectX's perspective, they're not even there. However, you CAN pass keyboard assignments through those buttons/axes, provided you have some programming utility outside of the game (TARGET, Foxy, etc.) that can handle that. So, let's say you have a 33rd button on your joystick. By default, pressing this button in-game will do nothing, because DirectX doesn't see anything beyond 32 buttons. But if you've programmed that button from outside the game to represent, for example, 'G' for landing gear, now when you press that button in-game, the game simply sees 'G' and doesn't care where it came from. So given all of the above, how does DCS manage this automatic assignment of HOTAS functions on your Warthog? DCS sees your Warthog as two separate devices -- joystick and throttle -- each with up to 32 buttons and 8 axes available. For every device that DCS detects, it creates a separate lua file in C:\Users\[name]\Saved Games\DCS Warthog\Config\Input\A-10C\joystick\, which lists every possible function available within the game, and it is these lua files that change when you manually assign a controller button or axis to a specific command via the in-game controller options. Specific to the Warthog, because DCS 'knows' that your Warthog button is supposed to correspond to a specific function, it automatically assigns the button to do that in the lua file. Here's an example: In the Joystick.lua file, if you were using a stick other than the Warthog, you'd see this entry: [158] = { ["up"] = 351, ["name"] = "Weapon release", ["category"] = "HOTAS", ["down"] = 350, }, -- end of [158] Nevermind the actual numbers (158, 350, 351); what this is showing you is that DCS has a command available called "Weapon release", but that no button on this controller has currently been assigned to it. If you have a Warthog plugged in, though, you'll see this in your Joystick - HOTAS Warthog.lua file: [158] = { ["combos"] = { [1] = { ["key"] = "JOY_BTN2", }, -- end of [1] }, -- end of ["combos"] ["up"] = 351, ["name"] = "Weapon release", ["category"] = "HOTAS", ["down"] = 350, }, -- end of [158] And this is now showing you that Button2 on the joystick (=DX2) has been automatically bound to the "Weapon release" function; DCS already knows that DX2 on a Warthog joystick is supposed to activate the "Weapon release" function. DCS follows this logic for all the other assignments on the Warthog, and that's how it "just works" when you plug it in for the first time: it will automatically assign the 19 buttons (+POV hat+2 axes) on the joystick and 32 buttons (+POV hat+axes) on the throttle to their appropriate commands within DCS. 2. Plug-and-play with some in-game assignment changes. This one is almost identical to #1 except that now instead of just using all the default controller assignments that DCS has set for your Warthog, you then go into the controller options screen and manually change some of the assignments. You still don't need TARGET or need to muck around with lua files, but again you're going to be limited to only using unshifted button states on your Warthog. 3. Using either joystick or throttle as plug-and-play device, with the other programmed via TARGET. Although I can't readily think of why you'd want to do this, it is possible. This would allow you to have one controller operating as a pure DirectX device (i.e. no shifted states available, and with the 32/8 limitation) with the other being controlled through TARGET and acting as a pure keyboard-emulation device or hybrid DirectX/keyboard-emulation device. In this case, you need to EXCLUDE the 'DirectX-only' controller from your TARGET profile with a line like: Configure(&Throttle,MODE_EXCLUDED); Note that this is also how you exclude your Thrustmaster MFDs, if you have them and want to assign them in-game rather than thru TARGET. In that case you'd use: Configure(&LMFD,MODE_EXCLUDED); Configure(&RMFD,MODE_EXCLUDED); 4. Using both devices through TARGET. This is by far the most flexible and powerful option, and was the way I wanted to go because I knew that even though I wanted the majority of my Warthog's buttons and axes to be assigned realistically, I wanted to customize some of the buttons on both the joystick and throttle beyond what could be done via the in-game controller options. If you go this route, you're going to have to work on the lua file itself in addition to your TARGET profile. When you set up and run your TARGET profile, DCS is now going to see your Warthog as a 'virtual' controller called "Thrustmaster Combined". Apparently this creates some problems because, while DCS still tries to automatically assign functions to your HOTAS in-game, this can conflict with what you're telling TARGET to do. The result is that you need to make sure your TARGET profile and Thrustmaster Combined.lua files are coordinated (more on that below). Here's a very important point (first made by ivanwfr): for some reason, if you try to assign actual keypresses to the buttons on your throttle via TARGET (as opposed to simply letting them act as DirectX buttons that can be bound in-game), DCS often has trouble interpreting them correctly and may unintentionally hold them down, so to speak, such that DCS ends up getting 'flooded' by excess keypresses that will eventually crash it. Frustratingly, these 'excess' keypresses are invisible to any keypress analyzers (like TARGET's Event Analyzer) so you won't necessarily know that this is what is crashing your game. The solution, then, is to try to keep as many of the throttle's buttons and axes operating as DirectX buttons/axes as possible. Thus you must present these buttons as DX buttons to DCS. You can do this in TARGET by simply 'declaring' the correspondence between physical button and DX number, like the following: MapKey(&Throttle,FLAPU,DX22); MapKey(&Throttle,FLAPD,DX23); And for any buttons or axes on the throttle that you want to assign a more complicated function, you can do that without messing up the other buttons being simple DX buttons. Here's an example that toggles a 'zoom CDU' function on the Mic Switch Down [shifted] button, with the unshifted simply appearing to DCS as DX5, which can then be assigned a function in-game (or via the lua file, which is the same thing): MapKeyIO(&Throttle,MSD,SEQ(CHAIN(PULSE+Toggle_zoom,D(150),PULSE+Zoom_CDU),Toggle_zoom),DX5); But, as I said, you'll want to minimize the use of assignments like the above on the throttle; if at all possible, you should use as many of the allowed 32 DirectX buttons and 8 axes on the throttle and then assign them in-game (i.e. via the lua file). Note that when explicitly passing DX buttons to DCS via TARGET, you now can use shifted states on these buttons, because you're defining the shifted assignment through TARGET (see above example). At this point it probably makes sense to list the correspondence of DirectX button name with physical button name (inexplicably, this does not appear in the TARGET documentation anywhere!). Note, again, however, that these codes cannot be used together at the same time inside of TARGET, because you're only allowed a total of 32 buttons and 8 axes on your virtual "Combined" controller. The main use for the first list (the 19 DX buttons on the joystick) would be for option #3 above where you make use of the joystick from within TARGET (presumably using a combination of DirectX button assignments and keypress emulation commands) but allow the throttle to "just work" by EXCLUDing it from your TARGET profile and letting DCS see it as a pure DirectX controller. The second list (the 32 DX buttons on the throttle), however, is useful for most people who would use option #4, combining both controllers in TARGET but keeping most throttle buttons as DX buttons. Note that, if you could somehow create a TARGET profile that included the joystick and throttle as separate DX controllers with all of the assignments below, you'd get the exact same result as option #1 where you simply plug the Warthog in and it "just works" -- because DCS would simply see two separate controllers that are pure DX devices, and it would recognize that it should assign specific DX buttons on each to specific functions in-game. Joystick: TG1 = DX1 TG2 = DX6 S1 = DX5 S2 = DX2 S3 = DX3 S4 = DX4 Trim Control H1U = DXHATUP H1D = DXHATDOWN H1L = DXHATLEFT H1R = DXHATRIGHT TMS H2U = DX7 H2D = DX9 H2L = DX10 H2R = DX8 DMS H3U = DX11 H3D = DX13 H3L = DX14 H3R = DX12 CMS H4U = DX15 H4D = DX17 H4L = DX18 H4R = DX16 H4P (Hat4 pressed down) = DX19 Throttle: Slew Control SC (slew control button pressed in) = DX1 Mic Switch MSP (mic switch button pressed in) = DX2 MSU = DX3 MSR = DX4 MSD = DX5 MSL = DX6 Speedbrake Switch SPDF = DX7 SPDB = DX8 Boat Switch BSF = DX9 BSB = DX10 China Hat CHF = DX11 CHB = DX12 Pinky Switch PSF = DX13 PSB = DX14 Left Throttle Button LTB = DX15 Engine Fuel Flow Norm/Override Switches EFLNORM = DX16 EFRNORM = DX17 Engine Oper Motor/Norm Switches EOLMOTOR = DX18 EORMOTOR = Dx19 APU Start/Off Switch APUON = DX20 Landing Gear Warning Silence LDGH = DX21 Flaps FLAPU = DX22 FLAPD = DX23 EAC On/Off EACON = DX24 RDR/NORM RDRNRM = DX25 LAAP Autopilot Switches APENG = DX26 APPAT = DX27 APALT = DX28 Throttle Idle Detents IDLERON = DX29 IDLELON = DX30 Engine Oper Ign/Norm EOLIGN = DX31 EORIGN = DX32 Coolie Switch CSU = DXHATUP CSR = DXHATRIGHT CSD = DXHATDOWN CSL = DXHATLEFT Continued below...
-
Can't seem to export ABRIS and Shkval in BS2
GregP replied to Froglips's topic in DCS: Ka-50 Black Shark
I'm running 2.07; my config.SoftTHconfig: [main] renderResolution=5430x1080 nonlocalFormat=RGB16D keepComposition=0 smoothing=1 debugD3D=0 zClear=1 vsync=0 tripleBuffer=0 screenshotFormat=bmp dllPathD3D9=auto dllPathDXGI=auto dllPathD3D11=auto [overrides] forceResolution=0 antialiasing=0 anisotropic=16 processAffinity=1 FOVForceHorizontal=0 FOVForceVertical=0 [head_primary] sourceRect=1355,0,1920,1080 screenMode=1920x1080 [head_1] ; Autodetected as \\.\DISPLAY2 at NVIDIA GeForce GTX 470 devID=1 sourceRect=3350,0,1280,1024 transportResolution=1280x1024 transportMethod=auto noSync=0 [head_2] ; Autodetected as \\.\DISPLAY3 at NVIDIA GeForce 8400 GS devID=2 sourceRect=0,0,1280,1024 transportResolution=1280x1024 transportMethod=nonlocal16d noSync=1 [head_3] devID=3 sourceRect=4630,0,800,480 transportResolution=800x480 transportMethod=nonlocal16d noSync=1 [head_4] devID=4 sourceRect=4630,480,800,480 transportResolution=800x480 transportMethod=nonlocal16d noSync=1 Multimonitor file: _ = function(p) return p; end; name = _('1Camera+MFCDs'); Description = 'One monitor configuration' Viewports = { Center = { x = 0; y = 0; width = 4630; height = 1080; viewDx = 0; viewDy = 0; aspect = 4.148148; } } LEFT_MFCD = { x = 4760; y = 0; width = 540; height = 480; } RIGHT_MFCD = { x = 4760; y = 480; width = 540; height = 480; } UIMainView = Viewports.Center options.lua: ["graphics"] = { ["VSync"] = true, ["multiMonitorSetup"] = "1camera+mfcds", ["color"] = "32", ["heatBlr"] = 1, ["scenes"] = "high", ["water"] = 1, ["fullScreen"] = true, ["visibRange"] = "High", ["treesVisibility"] = 6000, ["aspect"] = 2.97872, ["haze"] = 1, ["shadows"] = 1, ["TranspSSAA"] = false, ["effects"] = 3, ["textures"] = 2, ["lights"] = 2, ["MSAA"] = 2, ["height"] = 1080, ["civTraffic"] = "low", ["HDR"] = true, ["clutterMaxDistance"] = 500, ["width"] = 5430, }, -- end of ["graphics"] -
Can't seem to export ABRIS and Shkval in BS2
GregP replied to Froglips's topic in DCS: Ka-50 Black Shark
Froglips, if all you want to export is the ABRIS and Shkval, I'd recommend using SoftTH alone. That's what I'm doing, exporting them to 2 7" USB monitors, and it works just fine, pretty much exactly analogous to A-10C (I just copied my SoftTH config file and multimonitor file over, modified the options.lua in C:\Users\Greg\My Documents\Saved Games\DCS BS2\Config, and everything just worked). BTW, that UIMainView line only actually does what it's supposed to for multimonitor setups that run via Eyefinity or Nvidia Surround -- doesn't do anything under SoftTH, at least in my experience. So, if it's crashing your game, I'd just take it out altogether--you won't be losing anything. -
How can I tell if BS2 installed the 64-bit exe?
GregP replied to GregP's topic in DCS: Ka-50 Black Shark
PeterP to the rescue once again -- and yes, I'd already tried that but didn't realize the lack of 32 meant 64. So am I indeed running 64! Thanks. -
Compared to the folder structure that my A-10C install has, my BS2 install has a 'bin' folder with an exe but does NOT have the 'x86' folder that A-10C has. I read that the install will automatically detect your OS's version and install the appropriate exe, but now I'm not sure if it did it correctly. So how can I tell?
-
Update: the Cougar's been sold. Sorry to everybody else who was interested.
-
You're running EIGHT screens off a single GTX 580?!? Holy crap!
-
I should note that I've had it running under Windows 7 64-bit Professional for more than a year now with no problems; the worst that ever happens is it loses the calibration, or can't find the firmware, and I have to re-flash it. But AFAIK, that's a general Cougar problem and not specific to Win7.
-
OK, PeterP, I tried your suggestion and it does indeed work. The only downside, of course, is that the center picture doesn't use the entire screen height, but we knew that beforehand. I've posted pictures of the before and after outcomes below. I can finally read the info bar on the left and everything's lined up (it doesn't appear so in the picture because of the perspective, but when I'm sitting in front of the monitors, they're lined up). Thanks! BEFORE: AFTER:
-
I recently bought a HOTAS Warthog after 10 years of faithful service from my Cougar. I'm going to miss it (I had almost begun to think in Foxy code after all that time) but I finally decided the Warthog was worth the investment since DCS is my primary flight sim these days. So now it's time to sell my Cougar. I pre-ordered it from Amazon way back in 2000 or 2001, whenever it came out, I can't quite remember. Over that time I've put well over $800 worth of mods into it, including: - IJ's original Uber Cougar 'center play removal' mod - Evenstrain's original gimbals + Hall Sensor mod - CubPilot's HS1 throttle mod (just last summer, when I noticed some spiking in my throttle's response) I have never tried a Cougar with any of the newer mods, so I can't really comment on how they compare. What I can say is my Cougar has a completely equal resistance in all directions, with no center or side 'notches' perceptible whatsoever (a HUGE change from the default retail version). To be honest, I actually even like the feel of it slightly more than that of the Warthog. I've taken very good care of my Cougar over the years, always keeping it protected by Cougar Covers when not in use. Also, for a few years I didn't put much time into flight sims, so it was rarely used during that time. None of the lettering is faded or scratched, and there are no scratches anywhere on the entire HOTAS. I never encountered the broken speedbrake switch problem that people seemed to have early on, and all the buttons and axes work just fine. And the remaining pots (ANT, RNG, microstick?) seem to be doing fine, not showing any spiking that I can detect. So, given the total of over $1100 that I've put into this HOTAS, and the great condition it's in, I think asking $275 shipped within the lower 48 is reasonable, especially given the likely costly expense I'll incur shipping this beast. HOWEVER, if you live in the DC/MD/VA area and want to just come pick it up, I'd be happy to do say, $240. While I am of course looking to offset the cost of the Warthog by selling my Cougar, I'm also motivated to see it end up in the hands of someone who will really use it, as it's got plenty of years of use left in it.
-
Hotas Warthog : how to program friction
GregP replied to Joker73's topic in Controller Questions and Bugs
How are you using the Warthog? Are you loading a profile through either the TARGET GUI or Script Editor first? That config line I posted would be used in a TARGET Script Editor profile. If you're not doing either one of those, your friction slider may not automatically show up as mappable within DCS. At a minimum, you'll need to start up the TARGET GUI and make sure your friction slider is mapped as a valid DirectX axis. So bottom line is -- although a lot "just works" by simply plugging in the Warthog and starting up DCS, I don't think the friction slider is one of them, and requires some manual setup steps outside of DCS first. -
Hotas Warthog : how to program friction
GregP replied to Joker73's topic in Controller Questions and Bugs
Joker73, I struggled with this for awhile too; the problem was that directly binding the axis in-game caused the zoom function to be unstable whenever I moved the friction slider. Try this instead: KeyAxis(&Throttle,THR_FC,0,AXMAP2(LIST(0,40,60,100),Zoom_in_slow,0,Zoom_out_slow)); It creates a band from 40-60% of throw that does nothing, but 0-40 zooms in, while 60-100 zooms out. Works fine for me. -
One other helpful detail that I discovered is that I didn't need to explicitly bind the TDC slew functions to the unshifted state in TARGET -- rather, you can assign the axes in-game: they'll work as TDC slew when in-cockpit, but will 'turn off' when you go to an external view. Doing this has now given me smoother TDC slewing than when I specifically bound the TDC slew functions to the axes in TARGET (as shown in my first post).
-
Got my answer here, by the way.
-
Fish, that's an amazing video, nice job. Care to share your VAC and TrackIR profiles? You seem to have MUCH smoother and more versatile TrackIR panning than I'm able to get. Also, I'm curious about your default cockpit view: I'd love to be able to see that much of the cockpit when flying, but don't you find that you can't read the HUD because your eyepoint is too far back?
-
With Foxy on my Cougar I used to have the TDC Cursor mapped to the microstick's unshifted state and mouse control on its shifted state, but I can't find any analogous way to do this with the Warthog's Slew Control. From the TARGET Script Editor manual I figured out that I could use the following to do slew control: KeyAxis(&Throttle, SCX, 'o', AXMAP2(3, HOTAS_slew_left, 0, HOTAS_slew_right)); KeyAxis(&Throttle, SCY, 'o', AXMAP2(3, HOTAS_slew_up, 0, HOTAS_slew_down)); But from what I understand, using 'KeyAxis' prevents me from using the 'MapAxis' command that would let me assign the shifted state to mouse control. Is there some 'mouse command' (but one that is not an axis like MOUSE_X_AXIS) that I could use in another KeyAxis statement? Anybody have any ideas?
-
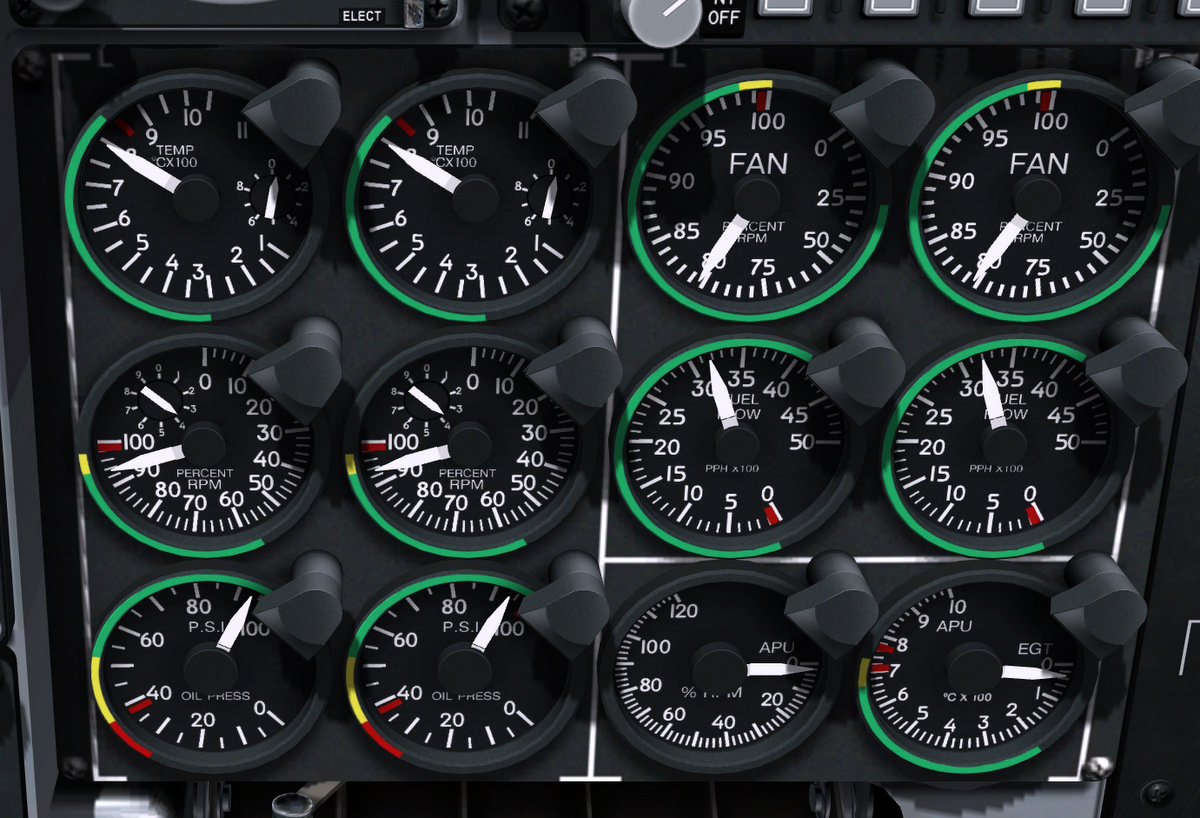
I've extensively searched this forum, AND yes I've seen the FAQ entry about maximum RPM for the engines, but I think I still have a question that has not been answered: I noticed that when I go to max power on takeoff (even just using the keyboard), my Fan RPM reads just slightly over 80% while my Core RPM reads just under 94%. I know that max Fan RPM on takeoff is supposed to be 82%, but what Core RPM should I be seeing associated with that? The manual say that normal operating range for Core RPM is up to 98%, but I can't get that high ... is it because I can't even get Fan RPM up to 82%?