Leaderboard


Popular Content
Showing content with the highest reputation on 06/17/11 in Posts
-
Hey Guys, I created my second guide for this Community. It´s a laser Guided Bomb Tutorial. As you know it from my Start up Tutorials so again I used pictures to make the process more understandable. This Tutorial is in first ment for all those who are new to DCS A10 or still have problems with the GBU´s as I still have with JDAM and GPS targeting. This is the very first Version, further ones are planed. So better pictures and may be some fixed errors will be part of the next Version. For now have fun with this. Download regards MemphisBelle EDIT: First Error noticed and Fixed in step 1 it´s not DMS up long but TMS up long2 points
-
Здравствуйте. Появилась идея создания Ил-76 для ЛО. Потом немного подумав вспомнил про модель Сергея Варнавского, она довольно неплохая, имеет щадящее количество полигонов, всего их 46 000. К настоящему моменту завершена практически вся анимация за исключением освещения и модели повреждений. Скриншотики.... кто что думает по этому поводу. в дальнейшем хотелось бы проконсультироваться по модели повреждений, где как и что должно будет отрываться :)1 point
-
Hi! everyone, I am pretty sad because today I will leave for the rest of the summer and will have to let my Hog behind... But, before I leave, I wanted to share a new mission that I have made that I think is quite entertaining... It is tested with 1.0.0.8 and works fine. get it here : DEATH CANYON.miz Here is the briefing : 0500 AM, bad weather, Black Sea coast. You are in very dangerous territory surrounded by SAMs. The only way to win is to destroy the ennemy's CCC situated on the bank of a mountain lake at the end of a very deadly canyon run (at waypoint 11). Take off in real bad weather and stay very very low to reach the canyon and fly low through the whole flightplan. Be careful to not take a wrong turn, there are SAMs in all lateral valleys. (manage your wingman so that it stays in trail, as close as possible). Once you reach the lake, you will have to turn right very quickly and you will have a split second to lineup for a MK-82AIR delivery on the big smoking factory that houses the ennemy's CCC (Waypoint 11) If you miss or you want to make a U turn, be very careful because there are more SAMs on the other side of the lake's valley and the cloud ceiling is at 6000'. Once the factory is destroyed, you turn back the way you came in and make your way through your waypoints in reverse order (dont take a wrong turn!). If you did destroy the factory, most ennemy units on the way back will explode when you pass them! Get back to base flying very low. Suggested avionics : prepare everything before takeoff because things will be happening very quickly! DSMS : select Mk-82AIR bombs. ARM all systems right away. TAD : if you whish, select TAD on both MFCDs to have a easier look at each turn. Coutermeasures : put on full auto. Alt Alert : select a 200' altitude alert in order to fly real low. Be ready for real action! THERE ARE ABOUT 200 SAMS there, most of lower threat but still... (please, turn off labels for more suprise and fun!)
 1 point
 -
В этом файле (\Scripts\Database\plane\il-76MD.lua)прописываем все окраски: В файле db_countries, для каждой страны прописываем конкретную окраску1 point
-
This feels the same for me as a rep. :)1 point
-
Updated OP with direct forum link for .rar archive.1 point
-
USB and SATA are very different beasts, and I'm not sure using USB3 as your primary drive is realistic yet. Speed is not just determined by the theoretical bandwidth limit, just like you can't tell real CPU performance just by clock speed (remember how fast those 3Ghz Pentium 4s are compared to current i7). I sure as hell wouldn't spend the kind of money you do on a SSD and drop it on USB, especially if that USB controller has anything else hung off it. Here are some benchmarks I could find comparing USB3 to SATA. Notice the only one where USB3 is better requires a "USB3 Turbo Mode" which I have no clue what it is. http://www.sansdigital.com/performance-comparison/eliteraid-usb3-performance-feature.html http://www.crunchgear.com/2010/02/05/esata-is-faster-than-usb-3-0-at-least-right-now/1 point
-
Uh... no? Mirrors are mounted permanently. With screws. Most Pilots aren't taking srewdrivers with them on a flight and they mostly dont have the time to make a break on the side of the air way to disassemble a mirror. So, no, it'ld be really unrealistic. Beside that, I still dont understand why you would do that? Reducing your SA?1 point
-
No need to "put them into an existing category" - just type your own in! I personally use: unitPayloads["A-10C"]["tasks"][xx][yy]["category"] = "HoJo"1 point
-
Тут полетали немного на чужих серврерах боевых и опять пришли к выводу - нужно делать возможность выбирать подвески списком нормальным (но ограниченным миссиоделом, причем осветительные и маркеры модно неограничивать :) ), чтобы внешние и внутренние пилоны загружать как нужно для выполнения задания, а не так как есть есть в куцем списке. А то вот есть мисси где группой если идти желательно маркеры или осветительные или ОФП2, так неповесить их. Причем сие нужно для всех вариаций в ДКС акулы и А10 и возмождной ГС31 point
-
I don't speak on behalf of Eagle Dynamics, only on account that, like Deadman above, I have an ARU-2B/A sitting on my shelf over there. Stuff (1 of 2) by KLaFaille, on Flickr Stuff (2 of 2) by KLaFaille, on Flickr And there is this:1 point
-
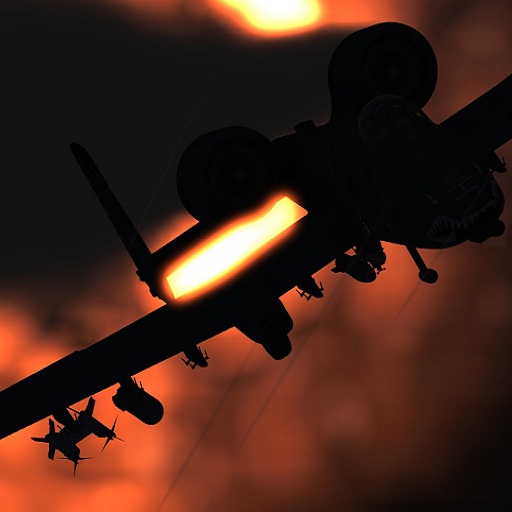
-- Available for Download -- I have been playing around with the Sun today and have uploaded the results to the User Files section. I also found out how to remove the Sun's glare and keep the lovely HDR effects. 1. Navigate to the following folder in your DCS A-10C install folder - \DCS A-10C\Bazar\Effects\PostMotionEffect\options 2. Make a backup of the file hdr.lua 3. Open the original hdr.lua with notepad++ 4. Find the following text and replace 3.0 with 0.0 to remove the effect -- sun glow radius hdr['glow_radius'] = 3.05. Start DCS A-10C and enjoy flights without the glare in your eyes... Screenshot Comparisons below, enjoy and happy hunting. Toby SUN GLARE EDIT Comparison Screenshot HERE It just removes the milky effect that covers the screen. It doesn't remove the bloom effect of the sun (lightening and darkening of screen) Look at the third image, in both the cockpit is hard to see because of the bloom effect darkening the screen but on the right, imho, the image is more realistic. You are still affected by the sun but the cockpit remains clear.1 point
-
Во-первых, квад 6600 далеко не дохлый проц, во-вторых, внимание, вопрос- на чём основанны ваши выводы?1 point
-
Thanks for the update headspace....1 point
-
Just from my experiance as an Aircraft Tech on Iroquois, Hornets and Pigs.1 point
-
All the credit goes to Lighningltd over at winseven forums for this tweak. He has a bunch of em but I only do a few. Here is how to move temp folders in win7. http://ask-leo.com/how_do_i_change_the_location_of_windows_temporary_files.html Use this tweak to make win7 think your saved games folder is on C:.... Moving parts of Windows 7 to another drive... It has been asked what other little things can be done to squeeze a litle more performance from Windows 7 on our SSD drives... One thing that helps maintain performance on an SSD is the percentage of free space available to the SSD controller to execute 'wear leveling'. Basically, spreading out the load to the least used empty memory cells. In order to do this, we need to fool Windows and other programs into looking elsewhere for stuff that is necessary, but rarely used and taking up a lot of disk space. This part is only useful IF you have your operating system on your SSD AND it is formatted as NTFS and have a second drive available (NTFS) with space free to use. What we are going to do is move certain directories to the other drive, then make Windows (and the programs) think it is still on the boot drive. We do this by using an NTFS 'junction'. Think of a junction as a pointer to a location. To the operating system, the files look like they are in location A, but they are really physically in location B. For the tutorial, we are going to assume that the SSD is C: and the second drive is E:. Substitute your drive letters as needed. As always, MAKE A BACKUP FIRST! If you are still with me, here is how to do it (the easy way): Go to Link Shell Extension and download (and INSTALL) the link shell extension software (and VC runtime, follow the instructions on the site) for your flavor of Windows 7 (or barf Vista ). Make sure explorer is set to SHOW hidden and system files (Tools/Folder Options/View tab, Show hidden, uncheck Hide protected operating system and hide extensions) Create the following directories: E:\WinSystem E:\WinSystem\Windows Boot into safe mode. Open explorer and navigate to C:\Windows. Right click on the Installer directory and select CUT Navigate to E:\WinSystem\Windows right click and select paste. It should have created the directory E:\WinSystem\Windows\Installer with files in it. Right click the directory E:\WinSystem\Windows\Installer and select Pick Link Source. Navigate to C:\Windows and right click in the directory and select Drop As and select Junction. You should now see C:\Windows\Installer is back (with a wierd link on the folder icon)... The OS now will put installer files on the other drive and look for them there, but think it is still on c:! Other directories I do this with are the HP install directory (C:\SwSetup) and MS Office setup directory (C:\MSOCache). In the previous tutorials, yo learned how to move the TEMP and internet Temporary files... This is a good place for them too. Here is the directory structure on my E:\WinSystem directory: E:\WinSystem\MSOCache E:\WinSystem\SwSetup E:\WinSystem\Temp E:\WinSystem\Temporary Internet Files E:\WinSystem\Windows\Installer Just make sure to drop the junction in the same place as the original directory and the OS will be none the wiser and you will have moved GIGABYTES of seldom used stuff of your SSD (and redirected some more writes)! The only down side that I have found is as follows: If your backup strategy is like mine WAS, then you would only be making a backup image of the SSD. The problem is, that image backup software does not see that you moved the files, so they cannot copy the files in the E:\WinSystem directory with the image. The fix is quite simple if U are using Windows 7 backup: Along with the system image, have it back up the directory E:\WinSystem. Then it will keep them together and in sync (you restore the image AND the directory that went with the image). Undoing the junction is easy too, if you want to. Simply delete the junction from the C drive and move the directory back where it was (hence the reasoning I had you create WinSystem\Windows\Installer instead of WinSystem\Installer as a reminder of where the directory was when U started (thinking of WinSystem as the root)! Disclamer: Dont blame me if you bork your win7 install. Make a backup before and after you do this. If you follow the directions to the T this works perfectly I've used this same tweak to move My pictures/My documents/Downloads/Temporary Internet and many other directories off the C: Drive. If you've done all of this and made a backup you next windows installation will be a breeze. Ive got my Steam games and Everything backup up so when I do reinstall later its a snap and already updated. (Backup Often) Uploaded this Pic of how it looks on my D drive.
1 point
-
Funny story, did those flights occur in ACE COMBAT or Hawx2?1 point
-
Да уж... "Битва за Кавказ" это ну просто ооочень политично, непатриотично и крамольно. :) Да и вообще - название довольно странное, особенно с учетом того, что в игре ТВД находится на Кавказе. :D Видимо нужно было назвать: "А-10С: Битва за Татуин"1 point
-
Oh thanks for posting, didn't noticed at first. So yes, I will update as soon as I can.1 point


-
Recently Browsing 0 members
- No registered users viewing this page.