SrSosio
-
Posts
323 -
Joined
-
Last visited
Content Type
Profiles
Forums
Events
Everything posted by SrSosio
-
I think it would be more expensive and complicated. Besides, the Xbox controller (even 2 of them) does not have enough inputs. The TEDAC is running about 80 buttons and switches. Yeah, granted that you won't use some (or many) of them, specially not until the FCR comes out, and yes, you can use modifiers, but you take realism out of it. I finally got some SMD diodes I was waiting for (it took about 35 days from China), so I can resume my development, which will be simple and also ready-to-fly, since Arduino Pro Micros are automatically identified by Windows as gaming devices. I just need to do some troubleshooting, but I'm still working on it, and I will try to make it for everyone to build it as easy as possible.
-
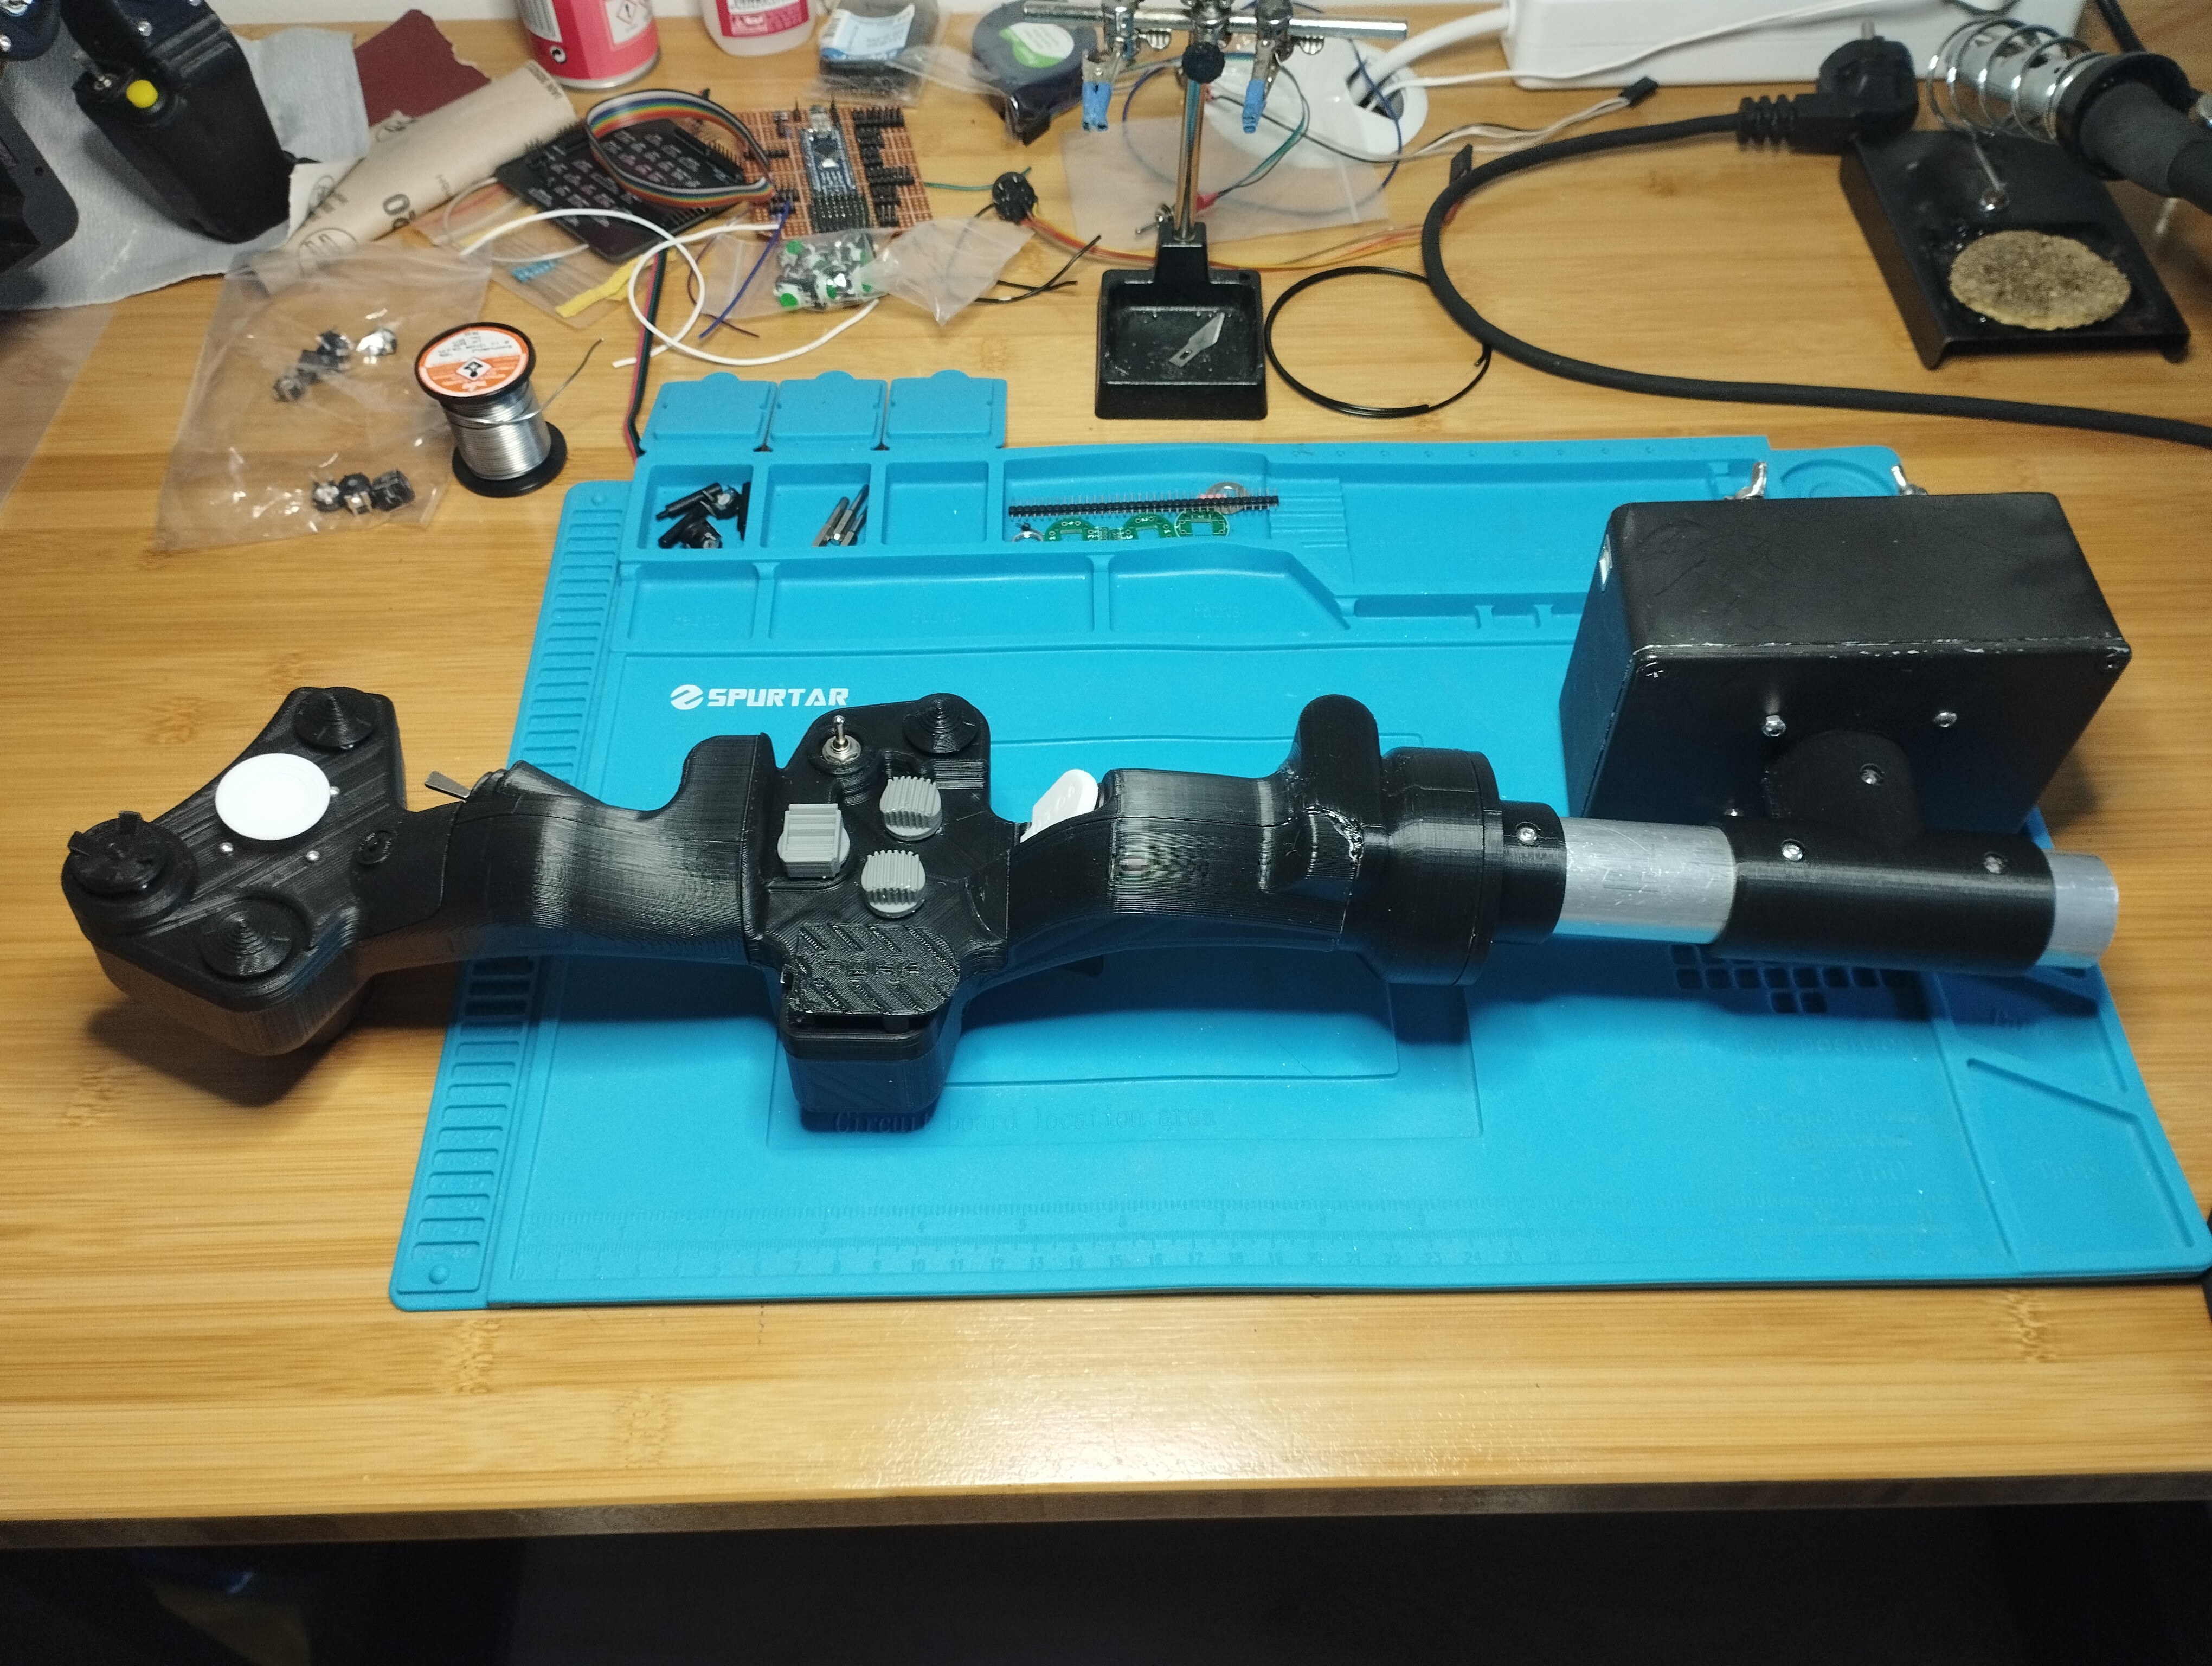
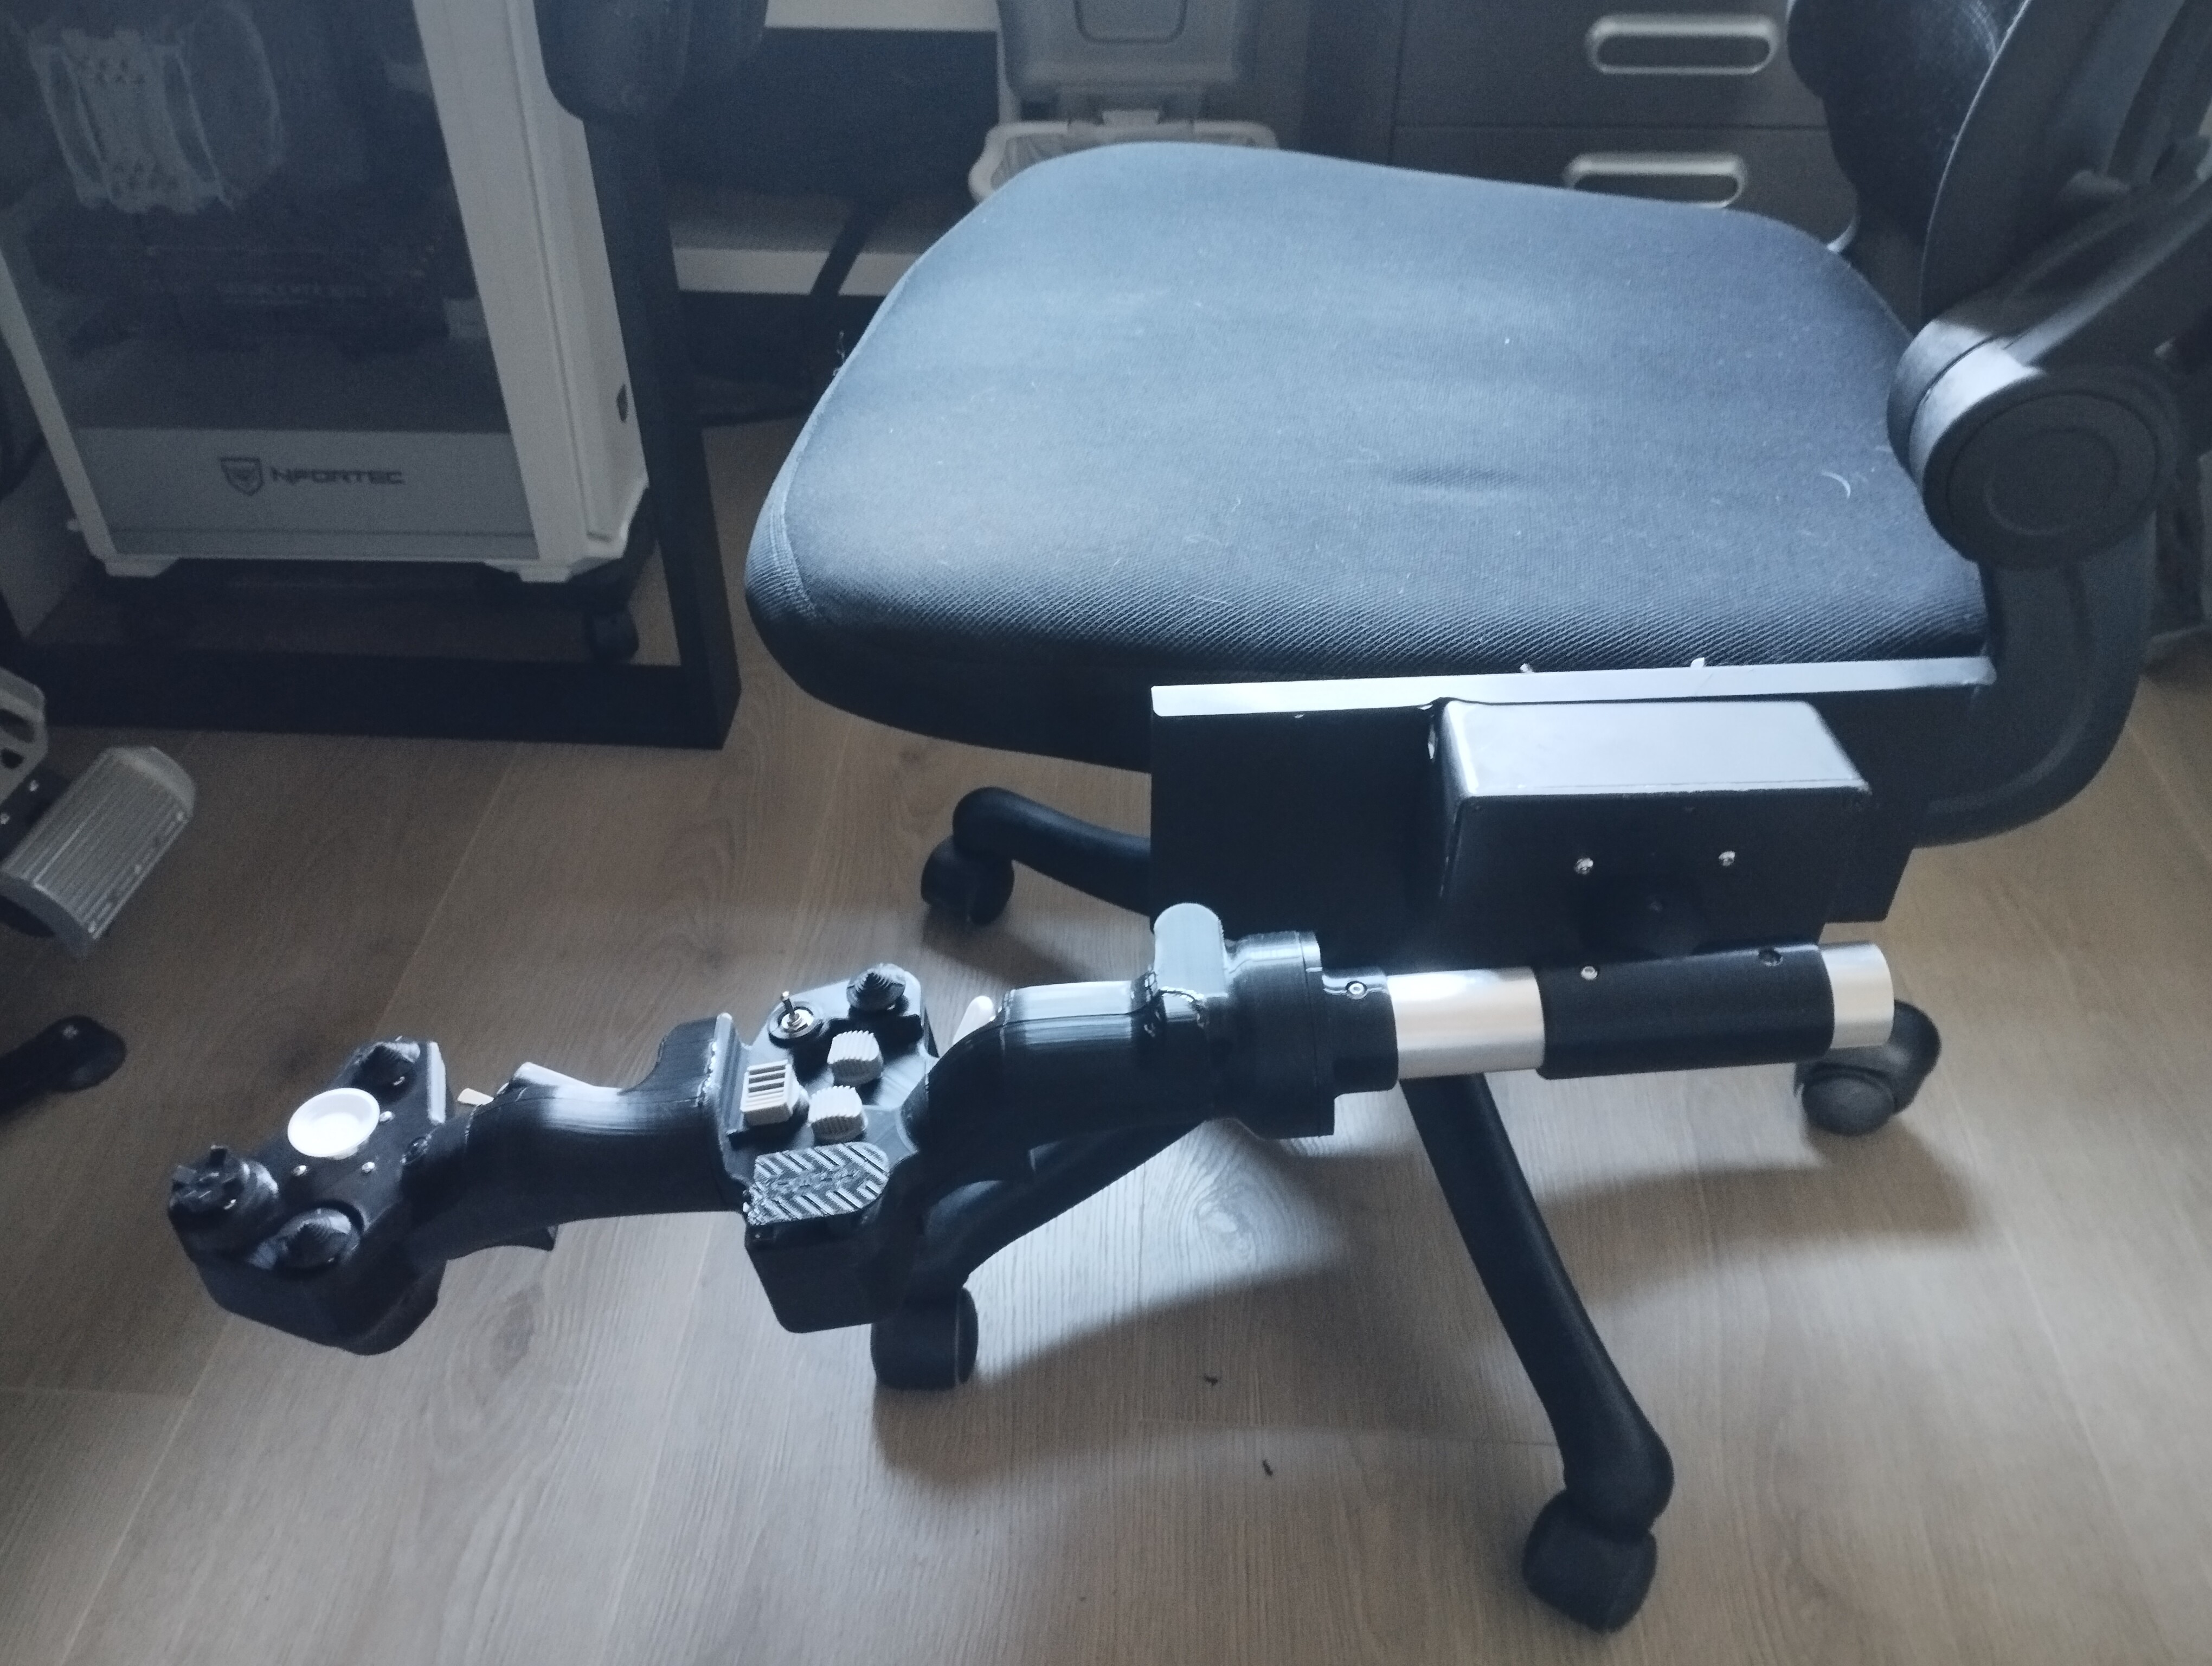
My new DIY Apache Collective!! I'm so happy about it Since I'm stuck with the TEDAC, as I'm waiting for some SMD diodes I need (freaking long shippings from China), I decided to focus on the other build I had half done and finish it, and it's finally done!! at least 99%, as I plan on printing a counterweight box. But it does feature a friction ring, so I can actually tighten that for the time being so it stays in place. The pictures are from yesterday. Since then, I've raised it a bit so it will sit at a small positive angle (in the pictures you can see it drops a bit too low). It features an adjustable friction ring, all fully functional buttons, triggers, 4 way switches, thumb joystick, and even a two way switch + push for the nose switch and a limit switch to activate the Jettison cover action. It also has an analog potentiometer as well as a hall effect angle sensor, so you can chose which one you like better (personally I like the analog one better), and a front USB type B female for easy removal when not using it. I'm stoked about it! Yes, I know the CHOP and Jettison covers are not the correct color. That will come at some point later.

- 4 replies
-
- 10
-

-
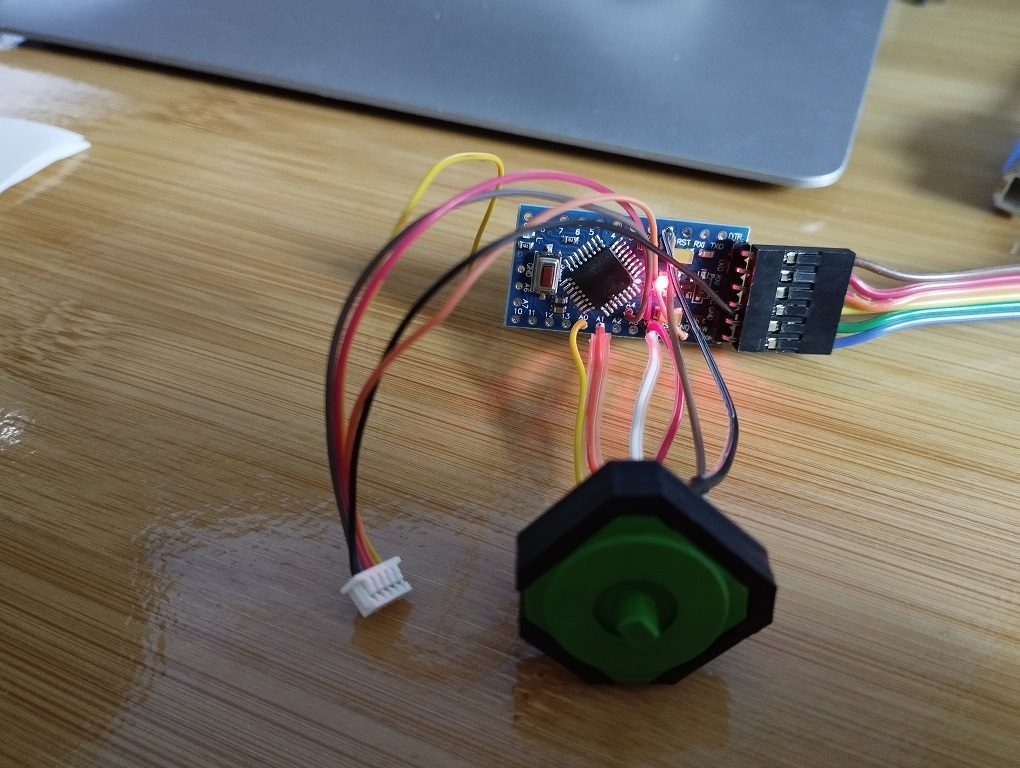
It was doing weird inputs. It's probably either the fact that the prototype I built it with a nano as an auxiliary board connected via I2C to the Micro, or the manually soldered in a pcb breadboard matrix with diodes. I've figured out how to use a port expander, so I no longer need an auxiliary nano, and also designed a PCB for the button matrix, with SMD diodes (which I'm waiting for), so hopefully that will provide a more steady build and response.
-
I'm not selling my design. I actually used your grips, and designed a different button plate, as flanker did,but the rest of the grip is yours. I'm sharing my build process completely for free, but I got stuck because I have some troubleshooting to do. I did build a full (prototype) unit and thought it worked, so I started building a second one for the sole purpose of documenting and sharing the process. At this point I realized that the prototype one was actually doing some funky things, so I'm now working on fixing those problems. Eventually, I would love to fully redesign the whole grips and make them a bit more similar to the real one with the intention of resin printing them for a better experience, but my 3D design skills are very limited, specially for non-geometrical objects like those.
-
Interesting. I've never worked with shift registers before. I'll do some research to explore that possibility.
-
Very cool. Are you building one? I need to troubleshoot some problems I had, that's why I'm a bit in a standstill. I'm also looking for alternative build methods, specially in regards to the microcontroller. I'm going to try to do it with an Arduino Mega. Also, I designed a button matrix PCB. I've ordered it already. I'll test it and if it works, I'll upload it.
-

APKWS II to be ported to F/A-18C Lot20, UH-1H etc etc.
SrSosio replied to Fri13's topic in DCS Core Wish List
1st point: yes, of course it's out of scope, that's why this thread is in the wishlist forum. It wouldn't make sense to have a wishlist section if we were only allowed to request things that are already in scope. 2nd point: sniper pod and ASRAAM are not yet modeled in DCS, APKWS is. If the first two were to be modeled, then yes, I would not see a reason not to have them available to the hornet. You missed my question. If I owned an F/A-18C circa 2005 right now in my garage, would I be able to install an APKWS system on it? There are USMC liveries available, what if I wanted to create a fictional campaign centered on a USMC Hornet squadron in 2020? Is it really that bad having this available, considering it is technically accurate? Isn't it better to have something and let the community if they need/use it than not having it at all? Again, it's not like we're asking to be able to mount a GAU-8 under each wing of a spitfire. It's a request that is not historically accurate, but technically it is. -
APKWS II to be ported to F/A-18C Lot20, UH-1H etc etc.
SrSosio replied to Fri13's topic in DCS Core Wish List
I think you are not getting the point of this request. I believe Canada and Australia are some countries that have these planes (I know they do have F/A-18Cs, not sure if they are circa 2005 or something else). If I were the Defense Minister of one of those countries, would I be able to purchase APKWS systems and install them on my planes? If it's technically possible, why aren't we allowed to have a fictional scenario where that is the case? Why can't I create a fictional campaign where Canadian hornets decide to install APKWS in their currently (2023) in service hornets? As mentioned by the OP, if technically possible, it should be up to the campaign designer to make them available or not. Honest question, because I really don't know the answer, where circa 2005 hornets already able to carry Aim 9Xs? Feels like a very modern weapon (though maybe they were indeed) -
APKWS II to be ported to F/A-18C Lot20, UH-1H etc etc.
SrSosio replied to Fri13's topic in DCS Core Wish List
Why are we discussing about when and who and where mounted the APKWS pods? Last time I checked, DCS was a simulator GAME. I don't think adding a weapon such as the APKWS to a hornet would be unrealistic, even if it historically didn't happen. Have they had the need, I'm sure the USN would have figured it out without too much trouble. It's not like we're asking ED to include x-wings, laser guns and proton rockets... As far as I know, a wide open military conflict in Iran, other than a couple of ship strikes in the strait, hasn't ever happened between the US and Iran. Should we not allow those campaigns because they are not historically accurate? -
I believe that's the software you need to use to update the firmware.
-
Hi Kipp. I have advanced in the documentation for the wiring of the buttons, the matrix and all that. There's still some work to do, which I will do in the near future, but you can already advance in your project if you were stuck at this point.
-
Hi Kipp. I'm on holidays now, but when I return, at the beginning of August, I will be documenting that part of the process, with pictures and instructions. Very briefly, you will need a bunch of general purpose diodes and yes, I strongly recommend using a breadboard and pin connectors. Trying to solder all the wires together would be very challenging and messy.
-
I did not, now I do, and that seems to have fixed it, thank you
-
Hi. I have a TM Warthog and some of the inputs require them to be done twice for the game to detect them. For instance, when starting up the A10, when moving the throttles to idle I have to move them back to off and then back to idle again for the input to be detected. I haven't done an extensive testing, but I think that happens with the APU switch and flaps as well. I believe it only needs to be done once. After doing it twice the first time, then the inputs are detected normally. Does anyone have an idea of why this could be happening?
-
Just to be clear, the above should fix double imaging in the exported screen? because I had two issues, that, and some doubling of the tedac screen in the cockpit screen. The first one I fixed with your above solution + modifying the TEDAC_init.lua (I had try_find_assigned_viewport("AH64_TEDAC") and changed it to try_find_assigned_viewport("TEDAC")). But I still have the below issue:
-
Hi. Where do you remove that from? is it the custom screen configuration in Saved Games\DCS.openbeta\Config\MonitorSetup? because if I remove the AH64_ from it, it exports nothing. Mine looks like this: _ = function(p) return p; end; name = _('Apache'); Description = 'AH-64D TEDAC Screen' Viewports = { Center = { x = 0; y = 0; width = 1920; height = 1080; viewDx = 0; viewDy = 0; aspect = 1920/1080; } } TEDAC = { x = 2020; y = 0; width = 870; height = 768; } UIMainView = Viewports.Center GU_MAIN_VIEWPORT = Viewports.Center
-
To anyone following this topic, I'm sorry I'm procrastinating a bit and moving slowly. But although slowly, I'm moving forward and advancing on the build process in the website. Just be patient, visit it regularly, and if you started the project and have some questions that are not yet resolved in the site, feel free to contact me. I'll announce when it's finished nonetheless. Best regards
-
Me too and obviously a resin printer will give a much smoother and beatiful finish, but it can be perfectly done with an FDM. I only have an Ender 3
-
Depends on your 3D printing skills. ABS is hard to print and more prone to shrink and warp. Also, this device doesn't need to widthstand high temperatures, which is the main reason to print with ABS. If you asked me, I'd say go for PLA, but you can print it however you want, actually.
-
Didn't know that, and I was looking for that function in the controls window forever. How do they did it when the upgrade happened? they simply clicked "enter" in the colective's cursor joystick?
-
Thank you. The latter has a trigger cover? I'm not at home rn, but I think to recall there was a keybind to open BUCS trigger guard. BTW, so you confirm it's only 1 stage triggers, right?
-
Hi everyone. Quick question. The Apache collective has two triggers, one on each half of the handle, correct? what do they do? do both of them do the same? are they 1 or 2 stage triggers? Thank you
-
I can use another Arduino to try to read it. I'll try that next. I do not have an oscilloscope, and I don't even know if I knew what to do with it anyway. Thanks
-
That's weird, because I was going to ask @Deltaalphalima1 about the DIY solution I'm working on, which has a joystick that works with a sketch that reads it's values as expected (I don't have a pushbutton), but doesn't when I load the sketch he uploaded in the instructables page. Don't know what could be wrong. This is my setup: In the sketch, I've only changed the analog pins, because I'm using A0 and A1, and he has 3 and 4 (not sure, which analog ports are those in the Pro Mini). There must be something wrong either in the sketch, or the connection to the warthog's board. The VCC and GND can't be as the board turns on as expected, and the SDA and SCL pins, which are 2 and 3 in the connector (following his numbering in the instructables) connected to A4 and A5 in the Pro Mini. Now if you say that the deltasim has also stopped working, maybe there was some kind of update in the warthog's driver or something? Unfortunately, I cut the wires from the original one, so I can put it back to test it, but I don't think it would also have stopped working, it would be a mass failure among all TM Warthog users.
-
Man the expectation is building up!! This map looks sick, can't wait for its release. I'm guessing no news yet, right?