Ragtop
-
Posts
604 -
Joined
-
Last visited
-
Days Won
2
Content Type
Profiles
Forums
Events
Everything posted by Ragtop
-
Looks like you're off to a... Flying start :P I'll be leaving now! Really though you're doing great by the looks of it, after starting my own pit it's fascinating to see how others progress.
-
Looking forward to following your progress Ice, it's like looking at where I was 3 weeks ago, so i'll be very interested to see how things progress for you! Shoot me a PM if theres anything I can help you with.
-

How To - Assigning toggle switches to DCS using Helios.
Ragtop replied to Ragtop's topic in Home Cockpits
Go ahead, as long as I'm credited! :P -
How To - Assigning toggle switches to DCS using Helios.
Ragtop replied to Ragtop's topic in Home Cockpits
Thanks guys, I'm glad it can be of some use to people, I know it took me some time to figure out! -
They look perfect. Video tutorial on the thread I just made is uploading now :)
-
How To: Build a A-10 flight panel controller
Ragtop replied to TigersharkBAS's topic in Home Cockpits
How to assign toggle switches to DCS A-10 using Helios. Hi guys, just put this together, hopefully it'll explain this process a little better for you who don't want to play around with the Lua files, making the job a lot easier. -
How to assign toggle switches to DCS-A-10 using Helios Here you go guys! I'm going to try to make a screencast on doing this for you aswell.
-
EDIT: This thread will now play host to any videos I make on this topic. If the demand is there I'll cover things in a little more detail with some proper videos in the future Potentiometers are explained in post #18 Here is a list of inputs you will require for your toggle switches, and what type. I have not differentiated momentary or latching so please research this first At the request of a number of members, I decided to write this tutorial for people, who like me, are building panels with toggle switches using USB boards like the Leo Bodnar BU0836X or the Groovy Game Gear GP-Wiz 40. If you're interested in doing this, check out TigersharkBAS' excellent tutorial on it. This tutorial is mainly aimed at people that want to assign switches into the game, which are not properly recognised. One of the issues I had, was that when I went to use my SPST (ON/OFF) Switches to a switch such as Battery Power, the ON signal turned the Battery on, but of course turning it off did nothing. Turning it on a second time sent another signal, turning the Battery Power off, and switching it back off a second time, of course, again, did nothing. This is because an ST switch only sends one signal, ON. Off is simply seen as a break in the connection, and is not sent to the game. This CAN be fixed by going in and playing with the Lua files for DCS, but a lot of people would rather leave this sort of thing alone, as it can get a bit messy if you're not very good with it. That's where Helios comes in. It is able to distinguish the constant state of the switch, ON and OFF, and assign different values to each state. Those who are using DT (ON/ON) switches should be able to assign their toggles directly inside DCS, but I have included instructions on how to to it in Helios, incase you use a mix, and want to set it all up in one place. (ON/OFF/ON) Will still need to use Helios, again because of the off signal. Sorry it's so quiet, first time I've used my headset mic! How to assign toggle switches to switches inside DCS-A10C, using Helios. For those of you that prefer a written guide, enjoy!
-
Like I said, check out KLaFailles pictures, once you've cut out the front panel you can see that the consoles sit where the curved knee cutout ends.
-
I'd DEFINITELY recommend you buy yourself a workmate bench, you can get pretty cheap ones from most places, but something you can clamp onto is a must - hence, 3-4 good G-Clamps are VITAL. Without those two things I'd never have gotten to where I am so far, that is no exaggeration.
-
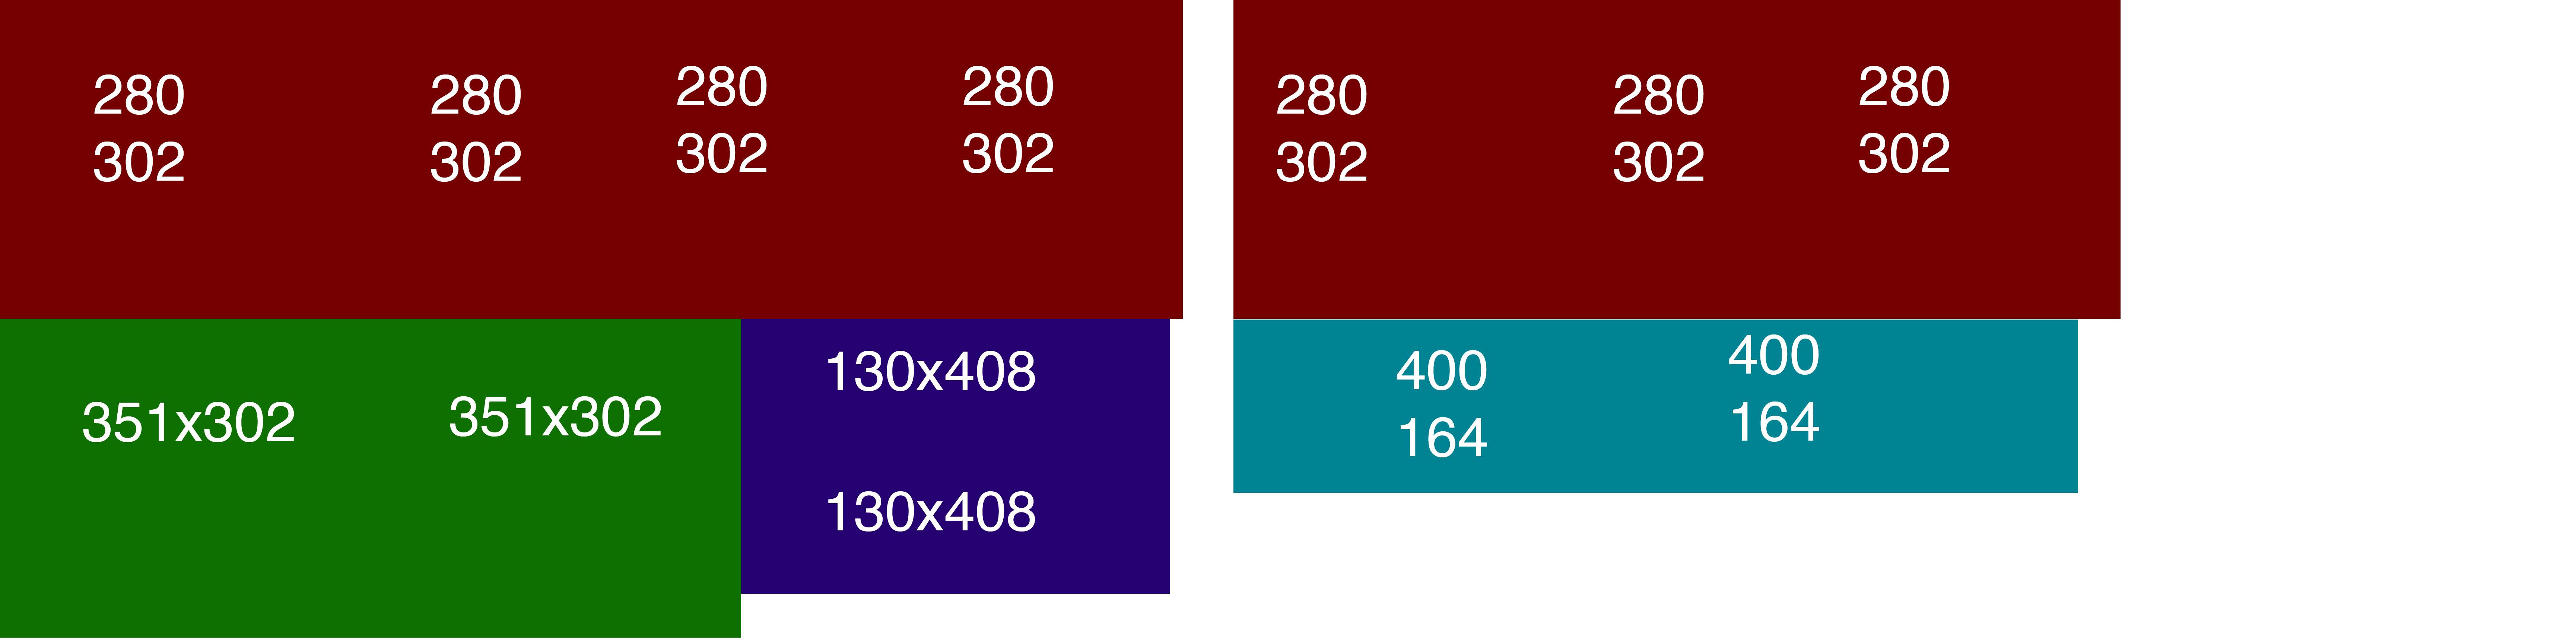
Haha, as long as you get all of those rough shapes cut out there's enough there for it all! the 400x164mm parts will cut perfectly into 2 risers, so one of them for each console. As far as cutting the sections, I drew it all out on the cut shapes, using a protractor to get all the angles right and so on, a couple were a little off for me so a bit of tweaking here and there to get it all right. Once I had done that I drilled into the inside angles, giving me a place to put the jigsaw, then used the jigsaw to actually make the cuts. Just go slowly, and it'll all be ok. Remember, you can measure as many times as you like, but you can only cut once. Strix I'll write a guide for assigning switches in Helios, it looks like a few guys could benefit from this!
-
Fair point! Nope, that's enough for both consoles! You'll want a few sheets of 6mm, I'm not sure how much exactly as I had some laying around, I think I've used 3 so far, but I also haven't made the outer cover for the left console, because it is against the wall.
-
Yep, ejected pilot. I'd love to be able to move in and out of the pit. Start your mission walking out from the pilots quarters! Remember to pick up your helmet and flight notes!
-
Haha, both my girlfriend and I were both a little bit concerned about that! Ah I see, well they should be able to get it all cut down to the right sizes for you. Spend some time checking over my picture to figure out how to best cut the panels first, to save yourself some problems when you're there! I'd recommend you build the Electrical and Fuel panels, as you can get the engines started without using the mouse this way!
-
Yep, an SPDT-B would be perfect for that, just like for the inverter switch. Just a bit of configuring in Helios to do for it. When you tackle that drop me a line and I can guide you through the steps. For me Tassau was the 19x32mm Kiln Dried Softwood. Wickes sell it in packs of 8 for £5 odd, which will be enough for the whole thing. If you decide to build the Dzus rails for the panels the same way I did you may need one or two more beams. I just strapped the MDF to the roof of my car, two straps crossways and one lengthways did the job perfectly. It's only a little Audi A3 aswell! I will be tackling the centre console soon, but I'll probably be building mine custom, the replica is a little too in depth for me at the moment, as I'm not planning on having all the parts that are mounted on it. My plan is to have a front panel which has the Gear panel, the AHCP, MFD's and a select few other parts. Eventually a UFC would be cool too!
-
+1. I found that while most dims are pretty comfortable, I've made my own adjustments now and then, how far forward the seat is etc, I felt a little far from the throttles and where the front panel will be, so I just shifted it a bit, that sort of thing really makes a difference when you're in game.
-
Take a look at the specification tab on the switch link, it shows you which each model is. I'm using the SPST (£2.99), and the SPDT-B (£3.49). You could use DP if you wanted to attach other circuits to it in the future, for instance you could use one on the EMER FLOOD switch, to turn on real LED's in your pit, aswell as sending the signal to the sim for the in game floods. These are spade connectors, they crimp onto the wire and slide on to the switch terminals, meaning you do not need to solder anything. Wickes do cut, however I did it all myself at home. I'm not sure what their cutting service is like however (How accurate they are, how much they charge etc.)
-
I've done a lot of research recently and not found anything that close yet, but to be honest Dimebugs stuff is excellent, it'll get you most of the way there, with a bit of working out by looking at the real thing while using the measurements you do have to hand will help you work most other bits out. For instance, I couldn't find out how far apart the consoles should be, so I took what I did know and used that. I know from Dime's drawings how wide the front panel should be, and from KLaFaille's photo's , I knew where the consoles should sit in relation to it. To make certain, I got the measurements from ACES II links I could find, which all added up.
-
They're identical to the TM:WH switches. Unfortunately, you're correct, per switch, I was shocked aswell, but, you do pay for the quality, these things are TOUGH. They also have spade connectors which means wiring is a cakewalk. I'm using the ON-OFF, single pole single throw, and one ON-OFF-ON for the Inverter STBY/OFF/TEST switch. Ideally this switch should be an ON-OFF-(ON) *(ON) meaning momentary, it releases back to off when you let go* But they do not sell that particular switch in that configuration, which to be honest isn't a huge deal. It just means you need to push it back out of test mode. ON-OFF is better for me as it requires half as many connections on the Leo Bodnar BU0836X board. The downside to this is you need to use Helios to assign the switches, as the switch does not send a release signal. However Helios can see the switch as ON or OFF, and assign different functions to this accordingly. To be honest everyone should be using Helios anyway!
-
These are the toggle switches I'm using, they work very well. All my other supplies are from Wickes. I'm using 18mm MDF for the primary consoles, along with 19x32mm softwood for the rails and side supports, however you might consider using plywood for the ribs and ends of the consoles, as MDF split on me a couple of times. It's still VERY solid, but something to be aware of. My panels are made from 6mm MDF in 2 layers, one for the switch plate and one for the top covers, however if I were to do it again I'd use 3mm for the top, as the switches don't protrude as much as I'd like through 6mm. The side covers are also 6mm MDF. The blanking plates are made from 12mm MDF. Here's a picture I made to plan your cuts from the 18mm MDF/Plywood. It allows for best efficiency when using a standard size 2440x607x18mm/2x 1220x607x18mm sheet from Wickes. You might consider measuring each panel 1mm larger however, to account for saw width, a mistake I made which left me with a variation of ±1mm in a couple of areas. Not a crisis but enough to require a bit of rejiggering now and then! With this and the 19x32mm rails you'll end up here.

-
Looks like you had a great day, even with the weather being so dull! I love The Blades, those guys impress me every single time I see them.
-
Thanks for the link. I haven't seen any my self but I know someone over at Viperpits.org made some non functional switch tops to make normal toggles look more like safety ones!
-
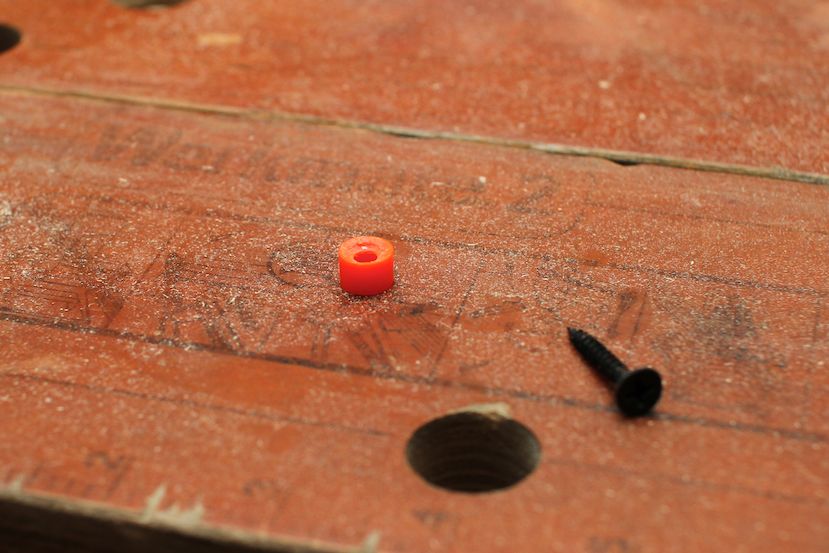
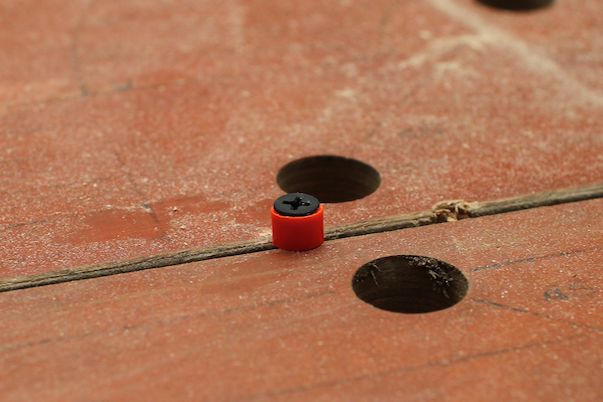
Morning Update Little update before I leave for work, hunted around for something to make a Dzus spacer out of, and all this time it had been sat in my cupboard. The trusty Meccano spacer! I sized it up, and it literally could not be a better fit. I'm ordering a load of black ones from a spares website now, all I need to do is drill a countersink in them for the screw head. Right now I could only find phillips head screws, but to be honest it's not a deal breaker for the now.
-
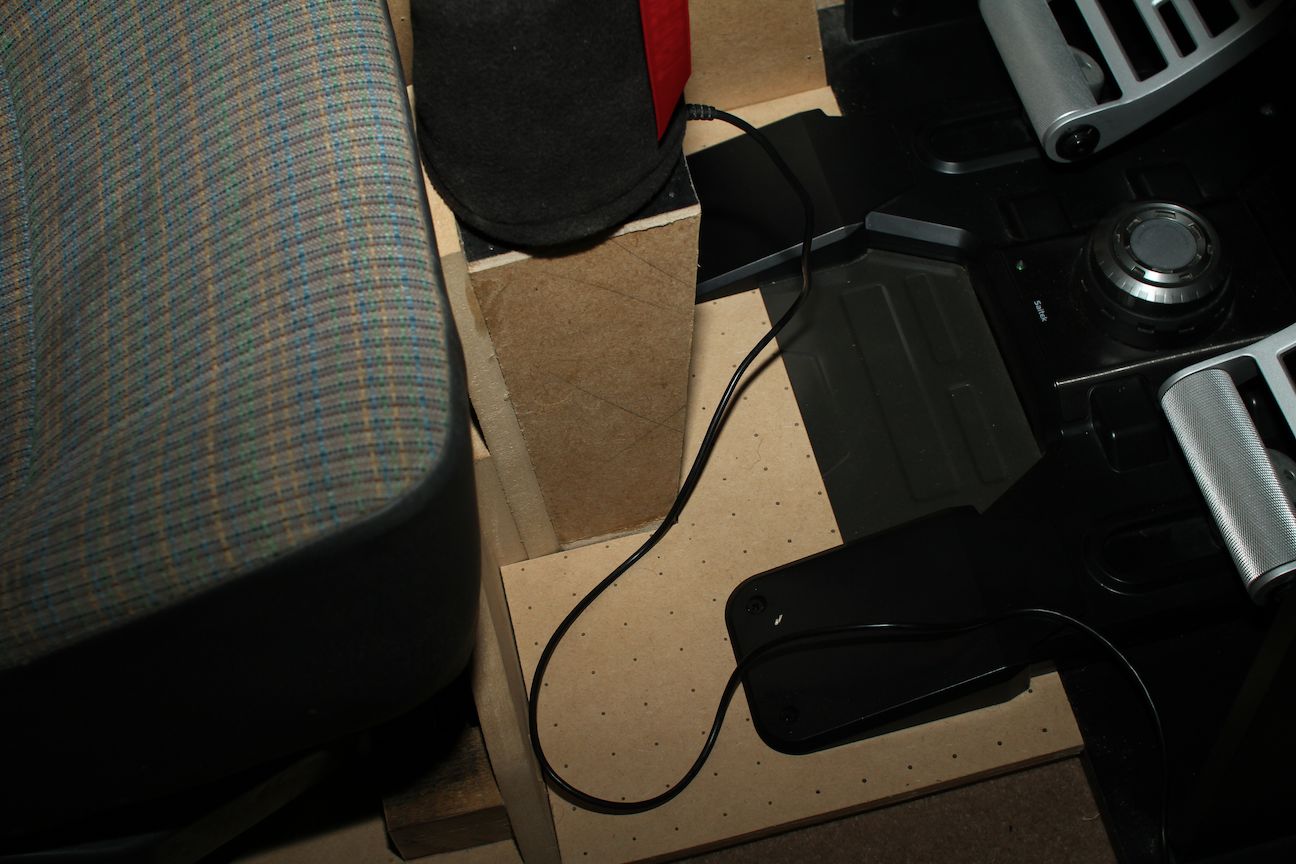
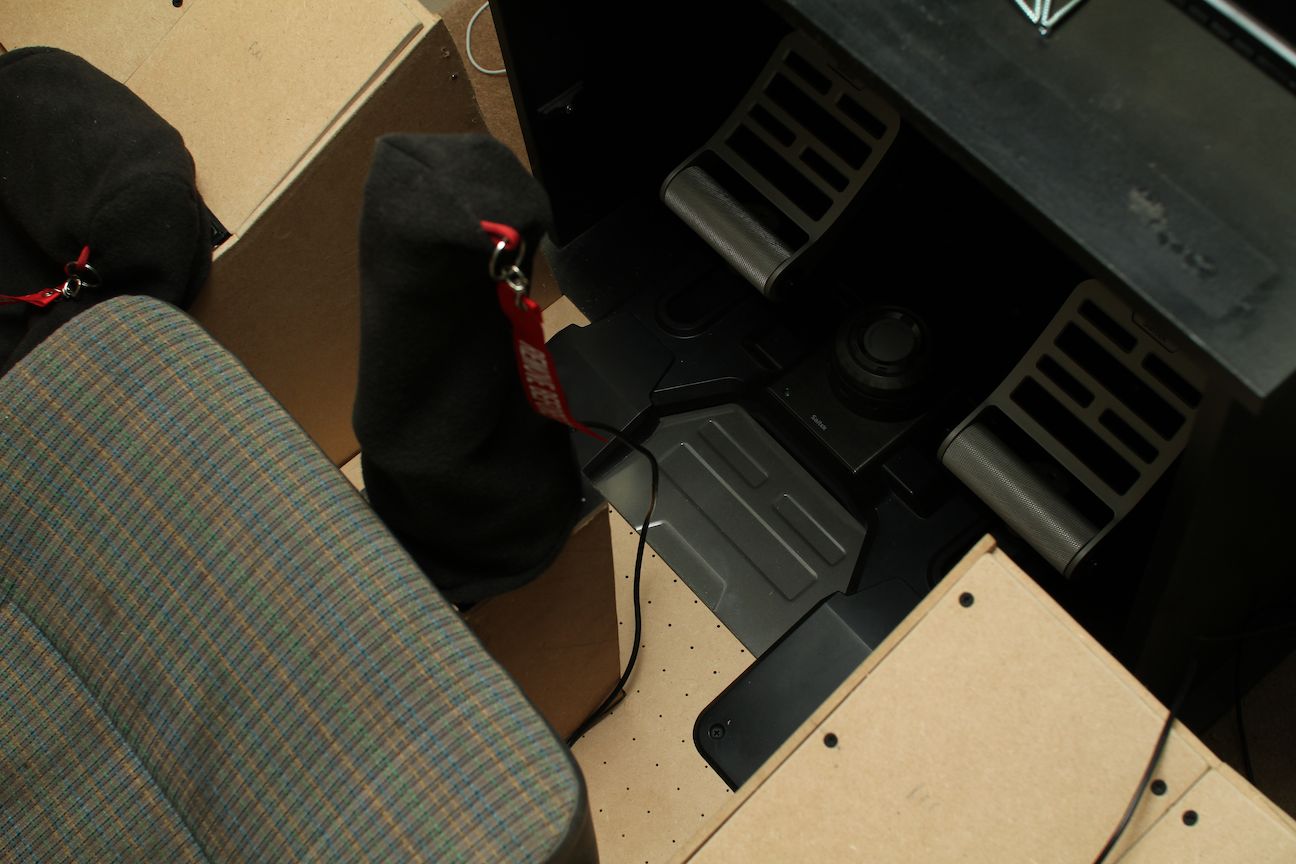
Been a bit lazier today, but nonetheless, steps in the right direction! Got the floor built, fixed the stick base a little better, rudders screwed down into the floor and cabinet. I also got the blank panels screwed down for a test fit. Starting work on cuts for the top panels on the right console, over time I'll be adding to these. I think I'll tackle the fuel panel next so I can get the plane started up without using the mouse. Ideally I'll get to the point where the mouse is used as little as possible during SOP's. I never got round to painting today as I've still got a little bit more work to do in getting all the shapes right first, I don't want to paint then do more cutting, as it'll just need painting again, however I think the frames and floor are ready for the grey, then I'll get to the panels after.
-
Haha, I'll be tackling that soon too! Hopefully I can find a solution haha, I'm thinking an arm from the wall on the left might be a good idea.