Viper1970
-
Posts
2290 -
Joined
-
Last visited
Content Type
Profiles
Forums
Events
Everything posted by Viper1970
-

Universal military aircraft homecockpit project
Viper1970 replied to Viper1970's topic in Home Cockpits
Hi, thank you very much, this is very helpful for me. I had no plan yet what exactly I want to use besides KiCAD. Your approach sounds very good. I think this will also be a start for me. And I like the idea of being able to see all in 3D before doing any further, very much. That's a real good way! -
Universal military aircraft homecockpit project
Viper1970 replied to Viper1970's topic in Home Cockpits
Just ordered 20 pieces of doublesided 150x100mm copper PCB's. Now the PCB production can also start, provided I get along with it as well as with 3D printing. I will try to use KiCAD for this and test it with some other combinations of freeware to get my projects done on the CNC. It's probably going to be just as strange a mix as I did with my 3D design. But what the heck, the end result has to fit. -
Universal military aircraft homecockpit project
Viper1970 replied to Viper1970's topic in Home Cockpits
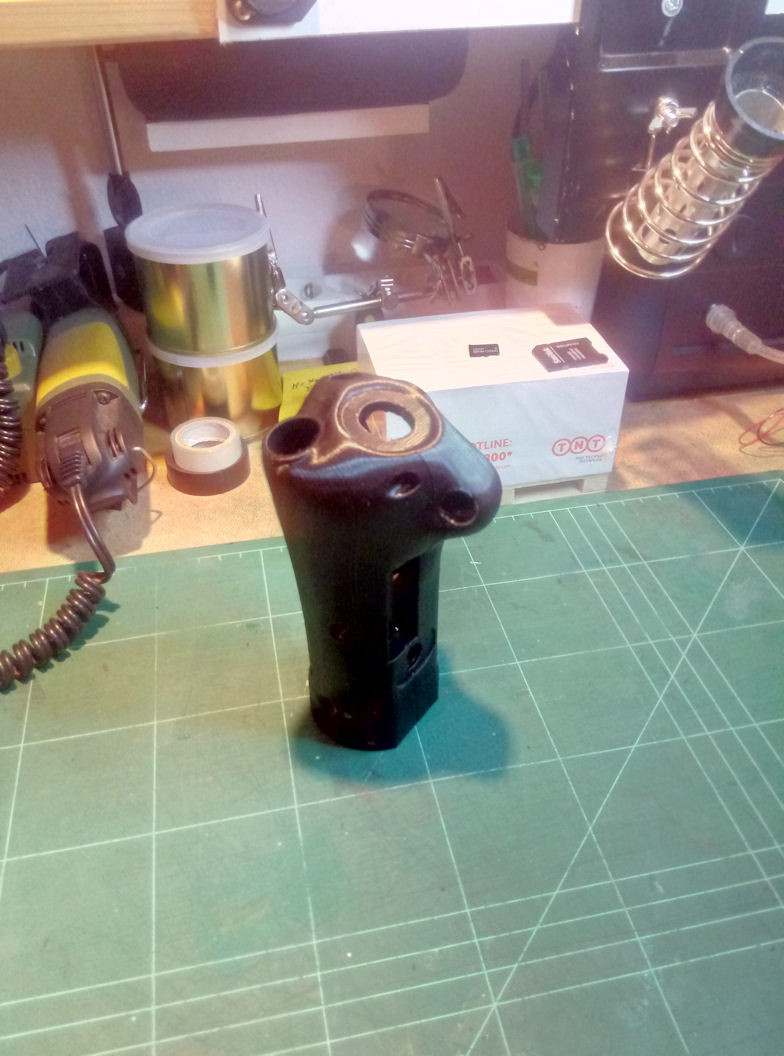
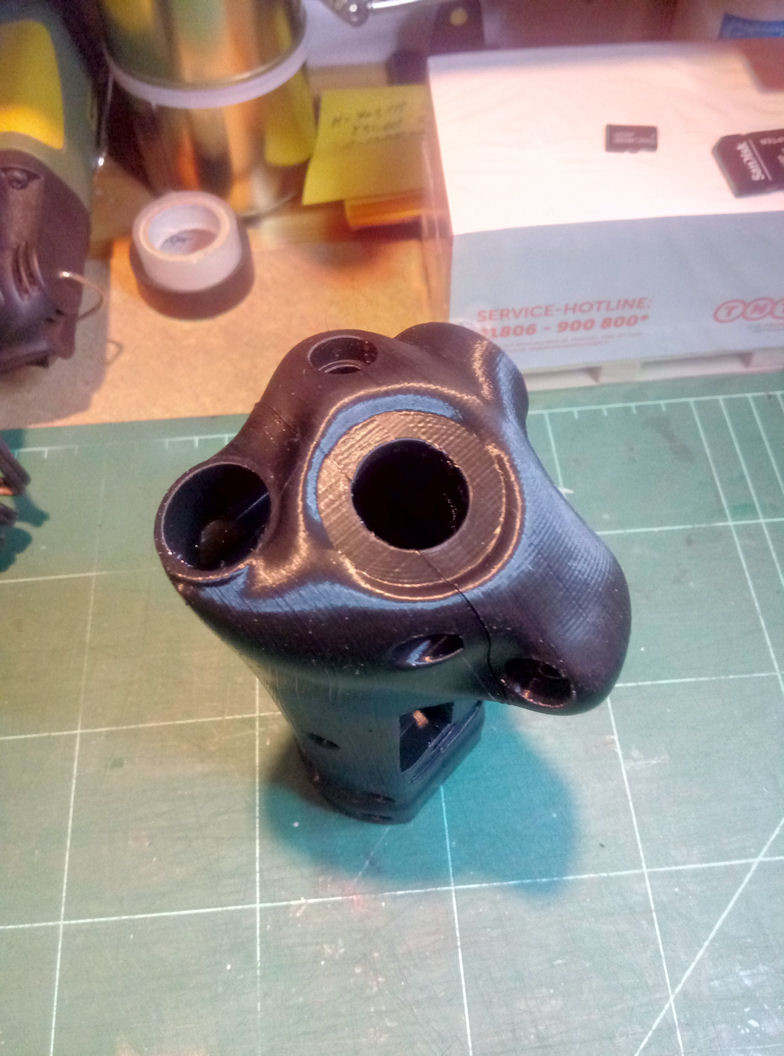
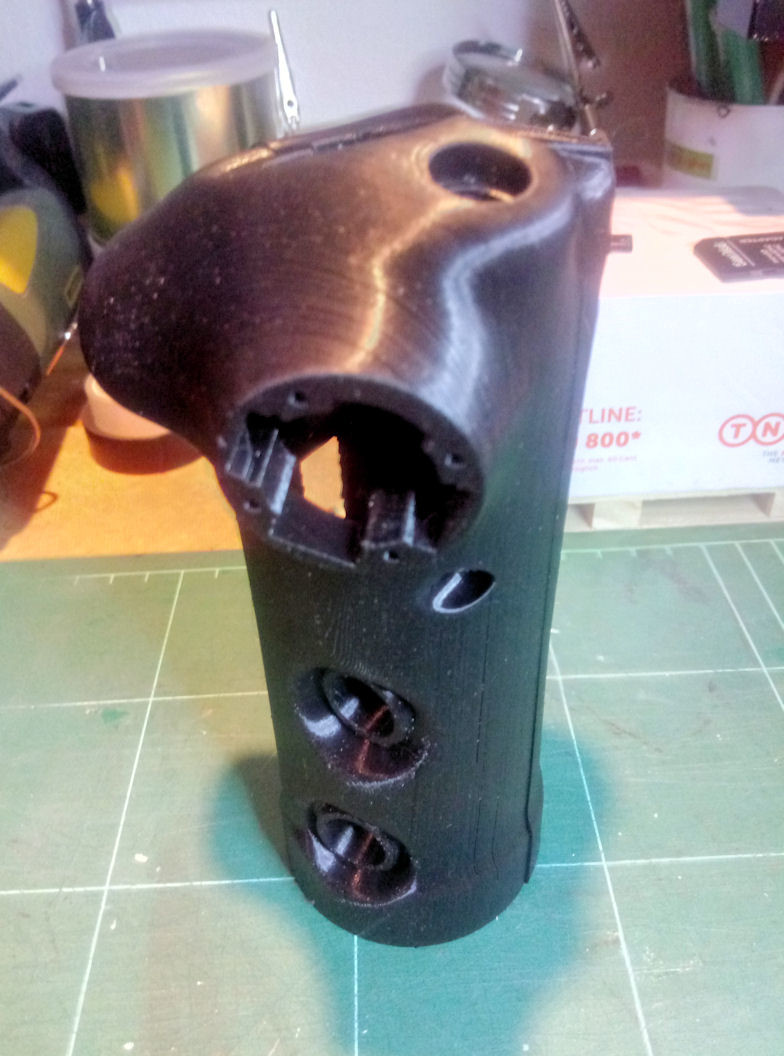
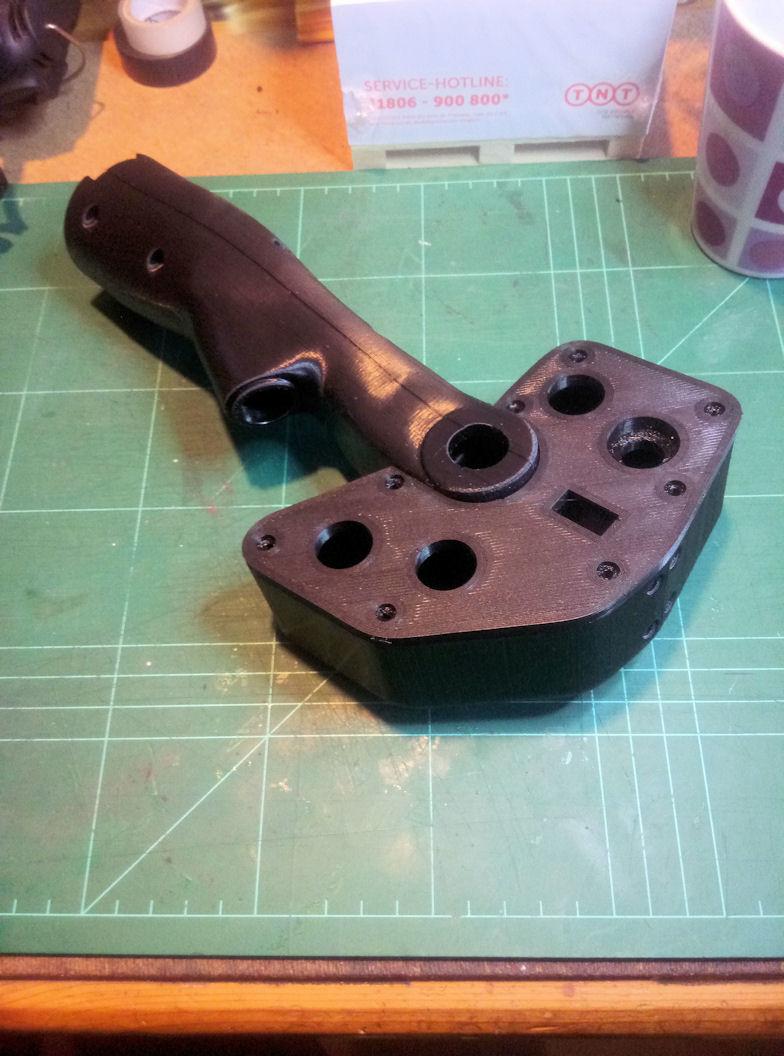
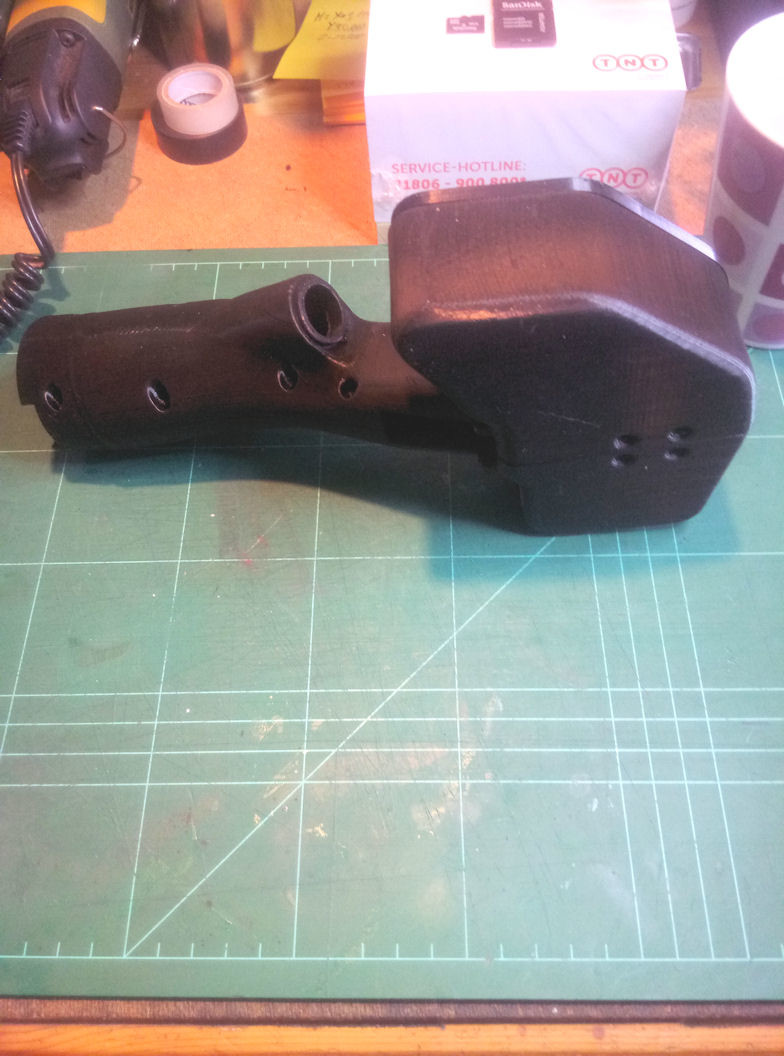
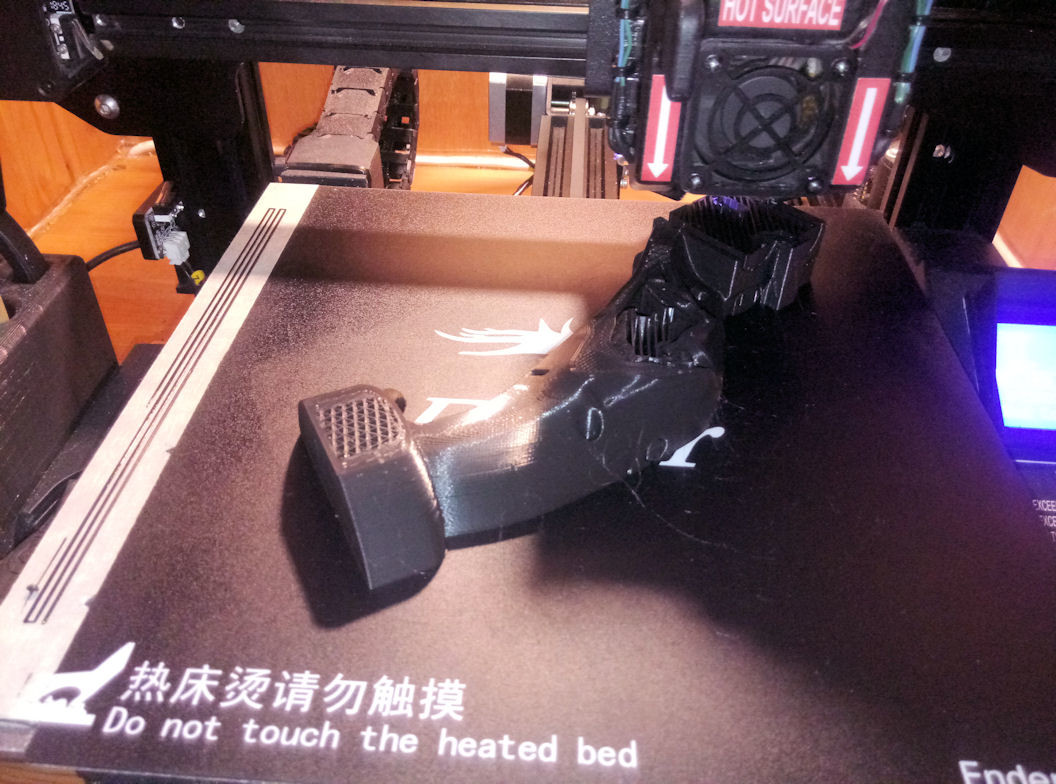
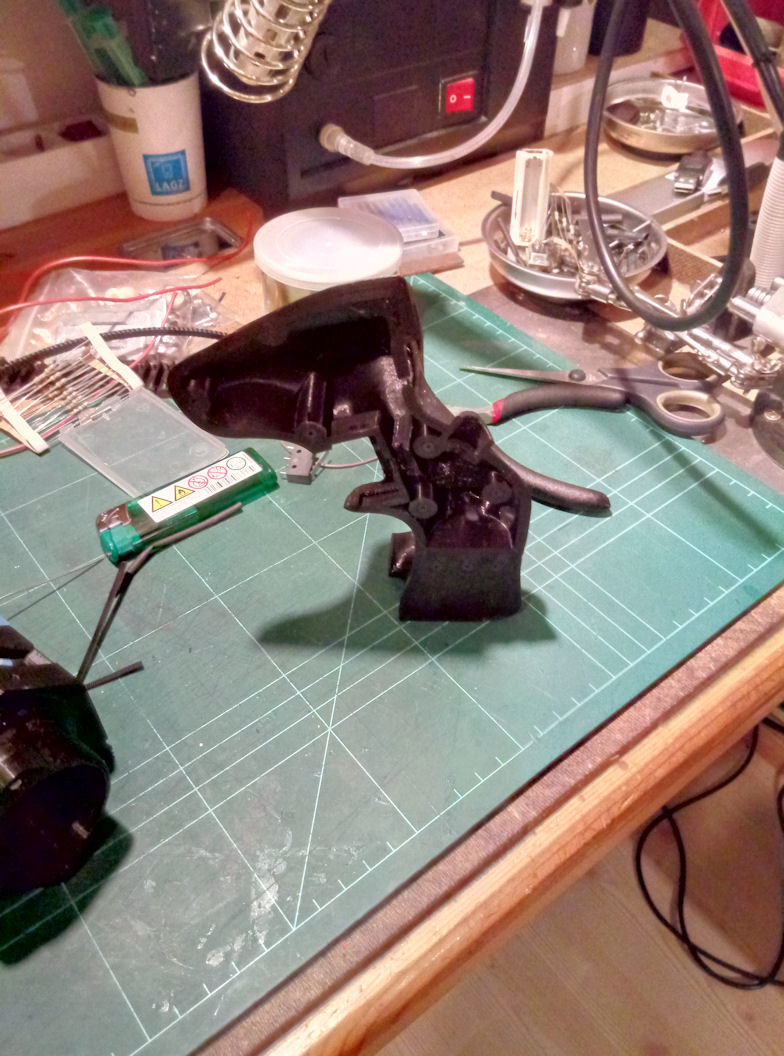
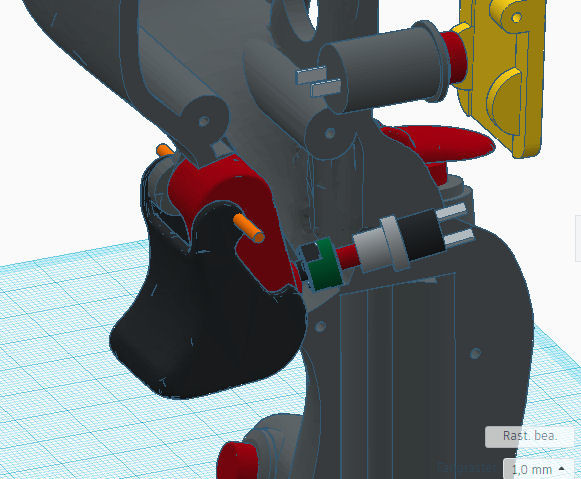
The AV-8B Harrier II throttle grip. Once again only supports removed and loosely placed together, just like it came out of the printer. Next will be the AH-1Z/UH-1Y cyclic and collective head.
-
Universal military aircraft homecockpit project
Viper1970 replied to Viper1970's topic in Home Cockpits
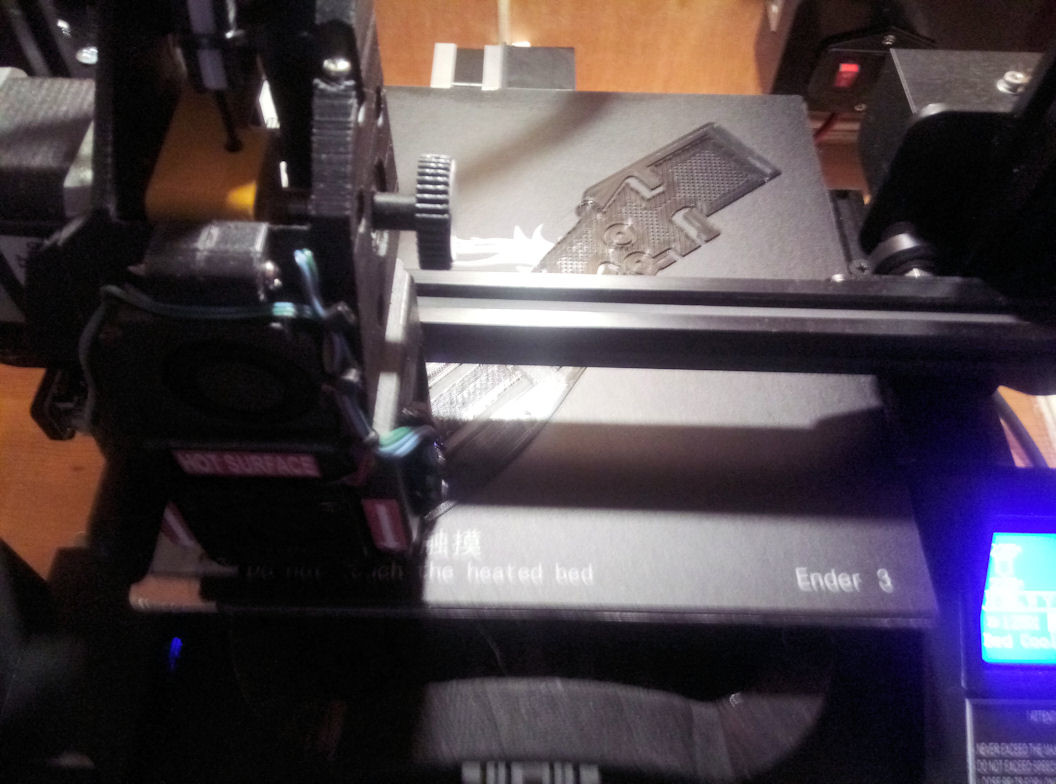
Just printing the AV-8B throttle grip shells. First one is already done and the second is at 64% now. Meanwhile I'm fighting with my CNC. The included offline controller is completely useless and cannot execute more complex G-code. Most of the time it does nothing at all. Code that runs fine with Candle or the Android GRBL controller is usually not executed by the offline module. So I need another offline control module than this cheap original one on the CNC. Since I do not want to leave my smartphone constantly on the mill, I am now building a new holder for a cheap china tablet, which was originally intended for my cockpit as a CDU/FMC input device with appropriate Android interface software. Unfortunately, this software is no longer compatible with the now completely outdated Android 4.4 on the tablet and for the cockpit I probably have to get a new cheap tablet for this purpose. But this little thing works perfectly together with the CNC using the Android GRBL Controller after I made it OTG capable by rooting Android and changing the USB settings in the OS using a tool. The advantage of the tablet is that I can leave it permanently attached to the machine and it can also be permanently charged by a DC power supply which is using an independent input plug from USB and can even charge the tablet while the OTG connection is in use. -
Universal military aircraft homecockpit project
Viper1970 replied to Viper1970's topic in Home Cockpits
UH-60L/M Blackhawk HOCAS ready for reworks and paint job! The big parts of the collective are printed and for the cyclic I will use an old modded TM X-Fighter, I made back those days I did not have a 3D printer. Both parts have to be reworked and sanded before painting, but the raw work is already done. The remaining cable from the old X-Fighter will be removed and one of the sockets of my new connection will be system attached. P.S: The UH-60 collective has also a trigger like the L/M versions have, but this is somewhat difficult to see in the pictures.
-
Universal military aircraft homecockpit project
Viper1970 replied to Viper1970's topic in Home Cockpits
Just did a loose test on my FANATEC handbrake lever in the pit-rig with the left and right grip shells of the Blackhawk (print of the right half was finished after 30 hours and 17 minutes ). The recess for the axle fits perfectly. The feeling with the intergrated damper and a real mounted grip must be sooo coool! I WANT TO FLY!!!! But there is still a lot to do before this will happen. If the cover of this collective is also ready printed, I will post pics again. -
Universal military aircraft homecockpit project
Viper1970 replied to Viper1970's topic in Home Cockpits
The Blackhawk collective is still printing . The left shell took arround 20 hours and the right is at 87% after 27 hours and 3 minutes of print time! I use a layer height of 0.12mm, an cubic infill at 60% at a printspeed of 55mm/s, but have set it to 125% speed at the printer to get them finished a bit "faster" . The nozzle is a 0.5er. The cover is also still missing. Those are really the biggest single parts I've done so far, even bigger as a single grip of the Apache collective. The Blackhawk collective is also a real monster . -
Universal military aircraft homecockpit project
Viper1970 replied to Viper1970's topic in Home Cockpits
There is a nice guy here in the forum who makes shift register boards which are compatible with Thrustmaster and I think also Virpil (would be logical ). Here is a link to his thread (scroll down until the shift registers are mentioned): The connection system itself is also no problem, just use Gardena nuts or M36x2 hydraulic coupling nuts (I used the last ones for my connections of my DIY-extensions to the Cougar and the Warthog bases - the connection between the grips and the extensions is my own system). -
Universal military aircraft homecockpit project
Viper1970 replied to Viper1970's topic in Home Cockpits
Thrustmaster used those little red sticks a long time at their TQS throttle. They called it "eraser head" and it was a nightmare, but still an improvement compared to the mini trackball the very first versions had. Then they changed the slew to a thumbstick in the Cougar, which was a lot better and at the Warthog they did the "eraser head" thing again and even much more worse. Never understood why they used this kind of input again, although it never worked properly even then on the TQS. -
Universal military aircraft homecockpit project
Viper1970 replied to Viper1970's topic in Home Cockpits
Thank's for the links! They are very helpful. -
Universal military aircraft homecockpit project
Viper1970 replied to Viper1970's topic in Home Cockpits
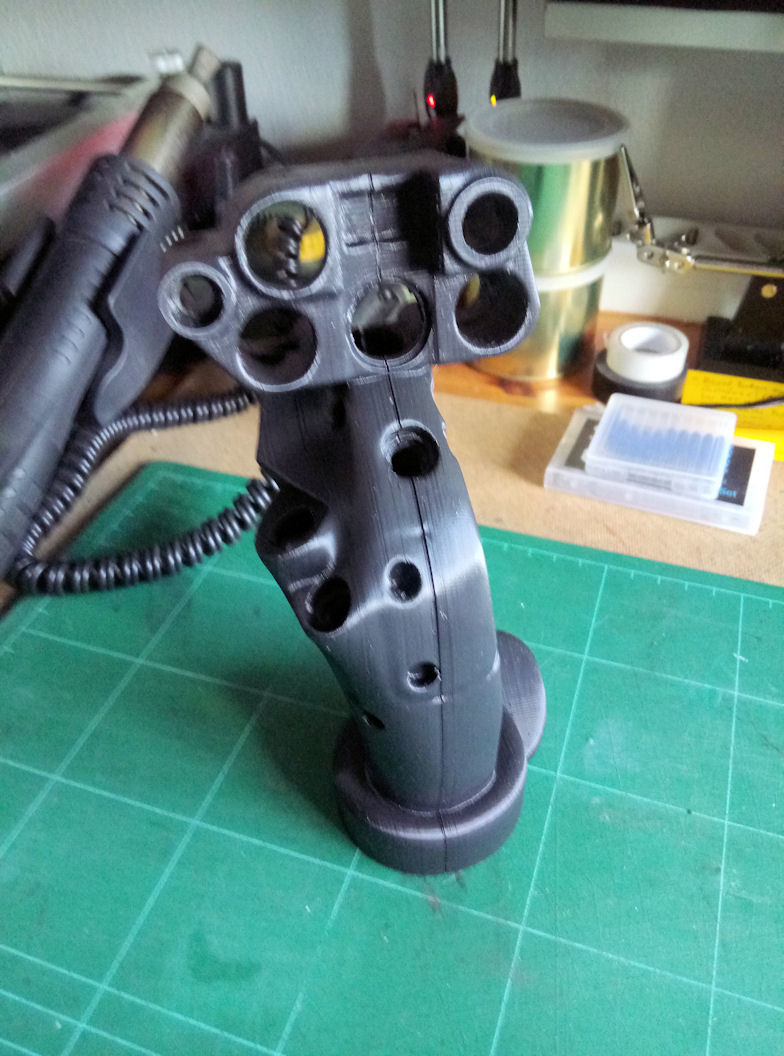
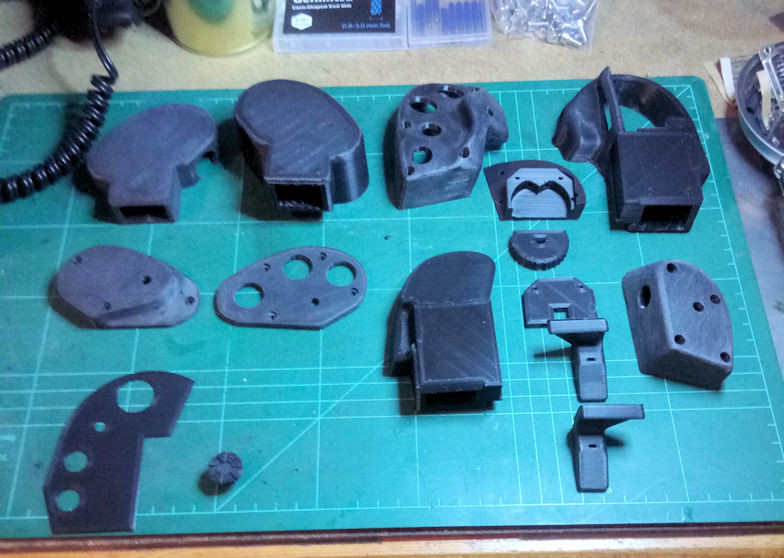
@Rockeyes Which kind of POV electronics do you use? Those little China-5Way-POV's for smartphones? I have also a lot of them here and they are really good for a 4way POV, but make problems if you also want to use the push-function for a 5way POV. Cause they are meant for very small caps, the leverage is getting to big if you use aircraft-POV-caps. This results in always accidentally activating the push , while you only want to go in a direction. If no push is attached and the hat is only used as a 4way, this isn't a problem. The big Kiowa parts are also ready now. All smaller HOTAS parts, like the missing triggers, POV etc. will be printed at a later time. First the parts which should be spray painted are important. The parts on the picture are only loosely put together without screws or anything else and also not reworked or sanded yet. They are just like they came out of my printer and only the supports are removed. My Kiowa cyclic has a bit more big holes, cause I will use more POV's (some will be 5Way) like the original has and also some extra switches, to be able to use the pilot and the co-pilot functions with the same grip. Where the pilot has a button and the co pilot a POV, I will mount a 5way POV to simulate the pilots button with the push function and the co-pilots POV with the direction functions or vice versa. The Cyclic has also a socket instead the type of mounting the original grip has, cause it should be interchangeable with my cyclic extension system. I don't want to make another special extension for such kind of grips eg. the Kiowa and some other helos do use. The next part, the collective for the Blackhawk, is just at the beginning of it's print.
-
Universal military aircraft homecockpit project
Viper1970 replied to Viper1970's topic in Home Cockpits
Thank's for the pictures! The idea with the boat switch is very good. Yes, I also looked up at Thingiverse as I made the HOTAS and have also downloaded the two big POV collections, but I had no time to do a closer look which kind of POV's are exactly included, until now. I mainly focused on the POV-mechanics, cause I thought that I can do the missing ones by myself. If you have an Android smartphone or tablet, you can use a little app named "GRBL controller". It's freeware and works like a charme. You can get it in the Playstore. There is also a paid version which offers a little bit more and costs arround 10$, but all really needed things can also be done with the freeware. There is a github side for it also. I have made a small smartphone holder out of my old unused drilling rig, which is located directly behind my CNC, but I mainly use it only to setup my CNC with all the right parameters and running some programs to test the setup. Maybe I will look for a used smartphone which will then be exclusive for this purpose, cause I need my phone. It's not so good if a 3 or 4 hours job is running on the machine and while it is running, I can't use the phone. The little offline controller is very difficult to code commands. You have to use Notepad++ to set the right line feed characters at the end of the code line, after you have created some code with a software at the computer. If they not setup correctly, the controller ignores the commands sometimes. If it runs and you know all the tricks, it can do alot, even a z-probe. But I had to search hours on the web to find all the information about it. The exclusive smartphone would be the easier, nicer and smarter solution. Unfortunately my laptop is placed too far away from the CNC and i don't want to lay an USB cable across the workshop as a foot trap. In addition, the machine should also be able to run independently. My 3D printers are also all set up that way. That's the reason I wanted to use this little offline controller. I never thought that it is that difficult to use. -
Universal military aircraft homecockpit project
Viper1970 replied to Viper1970's topic in Home Cockpits
Wow, that's looking outstanding amazing!!! Are those really my parts? Did you made the POV's by your own or used some from Thingiverse? I have seen that there are some matching ones, but a lot for the Apache is special and I still have to make 3D's of them by myself. At the moment I'm just printing the Kiowa collective head parts. Cyclic is finished. If all Kiowa parts are ready, I will post a pic of them all together. The collective grip will still be missing, cause many of my collectives use the same dual-twist-throttle-grip, which still must be printed and only the heads are different (eg. Kiowa, Viper, Venom, Huey share the same twist-grip). I'm still fiddeling around with the little CNC, respectively with the offline controller which makes a bit of trouble. The CNC itself is working fine if connected to the laptop or my smartphone, but if I use the offline controller, it misses some parts of the g-code. I have to find out why this is happening, to be able to use it completely standalone. The smartphone method would be a solution, but during running a job I can not use my smartphone any more. Not a very clever solution . The laptop is too far away and I also don't want to move it arround everytime I use the CNC. P.S: What did you use for the lettering? Inkjet or laser decal foil? I have thought about this. -
Universal military aircraft homecockpit project
Viper1970 replied to Viper1970's topic in Home Cockpits
No, no, I have not thought that it's meant critical, but there are for sure some things that could be better! The inside space of the grips is very small, but I only use wires inside and have the "grip-PCB" located inside of my bases. I did it this way, cause first I thought this is much easier to do, as to connect all the wires from the buttons, switches and POV's to a tiny PCB inside the grip and at second that there is no need to make a PCB for every grip, if I want to make additional ones at a later time. Drawback of this method is the numbber of wires which go from the grip to the base. I use very flexible LIYY cables for this. It's a bit ugly looking, cause the cable get out of the grip at the sockets front and down to the base without any revetment. I did this to be able to easy switch between the different grips and also to prevent using very expensive connector-systems, like professional CPC connectors which maybe could have been mounted inside the sockets of the grips. I use simple Sub-D 25pol and Centronics 36pol connectors, I have still lying arround, for the attachment to my bases. But at my research of photos from original HOTAS, I have seen that even some grips of real aircraft and helicopters have cables from the grips to the console or floor, that aren't covered and only zipped to the grips extensions. -
Universal military aircraft homecockpit project
Viper1970 replied to Viper1970's topic in Home Cockpits
So, the basic functions of my CNC are setup and working. Now I have to try out some first simple tasks. if I am familiar with it, I will try some more complex things and I'm hoping that I'm very soon be able to do some simple circuits with it. That would be a dream and help a lot with my project. -
Universal military aircraft homecockpit project
Viper1970 replied to Viper1970's topic in Home Cockpits
Looking good! Yes, I know some things are far away from perfect . I never thought that so much guys wanna have my HOTAS parts. I really did them for myself and tried to keep things relatively simple. The hats and buttons were really meant to hot glue them at most positions. At first I had a more professional mounting in my mind, but I very soon changed this, because of the mass of parts I wanted to make for my universal pit and the time it had cost to do this also. It's much easier to glue the parts with hot glue and even Virpil or TM do this very often. If something hot glued is broken it's totally easy to remove it. Just take a little brush, a bottle of spirit and brush the place where the hot glue is full with spirit. After this it's a trifle to remove the broken part. Not nice or professional but an easy DIY solution . The supports are sometimes really hard to remove and I have also cursed a lot to myself while removing them , but on the other hand I don't really know how to get a good solution on this, as to reconstruct all the parts to more pieces. That's something I really don't want, cause this also makes new connections necesarry and the parts again more complex. For the buttons, pov's and switches all holes should have the right size. I posted somewhere in the thread which parts I want to use and made the holes for. -
Universal military aircraft homecockpit project
Viper1970 replied to Viper1970's topic in Home Cockpits
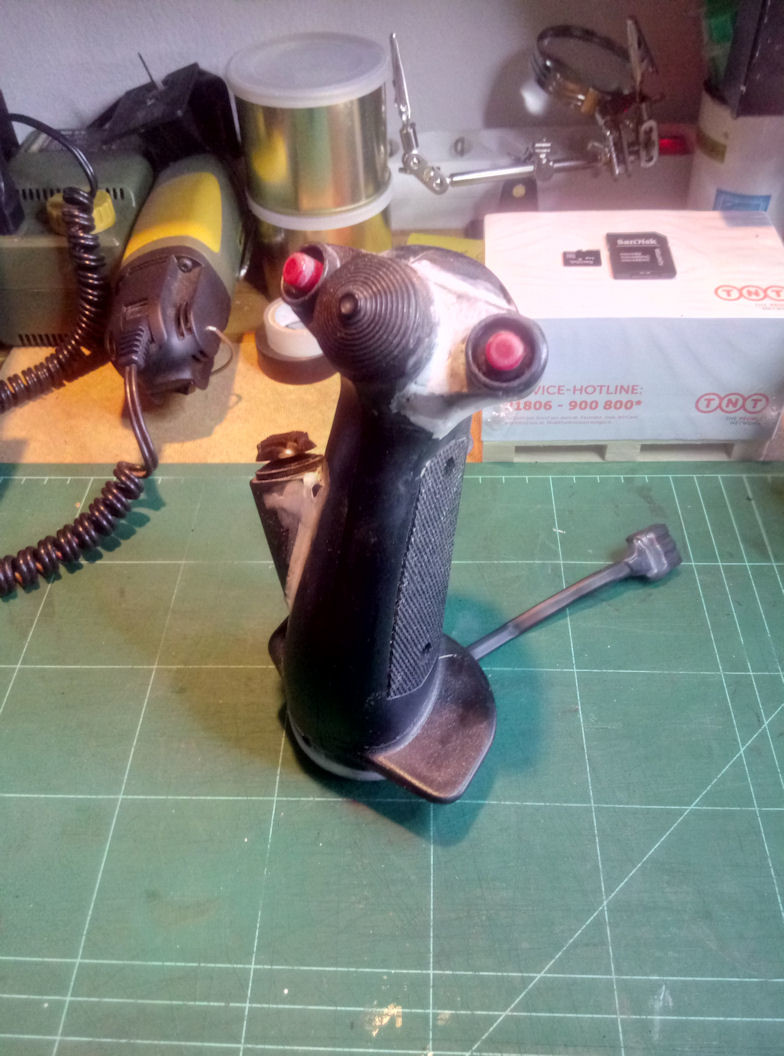
First two parts of the Kiowa HOCAS are ready. The back-cover of the cyclic is still missing.
-
Universal military aircraft homecockpit project
Viper1970 replied to Viper1970's topic in Home Cockpits
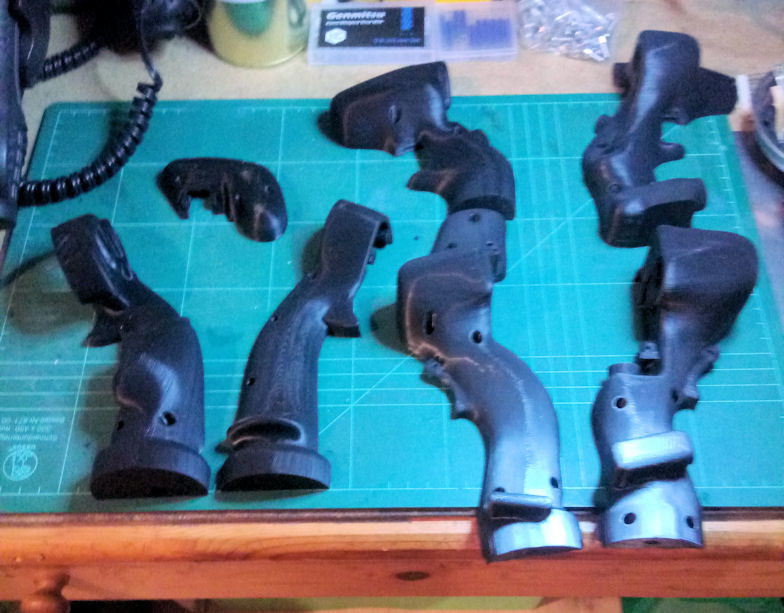
The last part of the Apache collective shell and the first part of the Kiowa cyclic during print. and all grip parts I did so far (without all the extensions that are already done)
-
Universal military aircraft homecockpit project
Viper1970 replied to Viper1970's topic in Home Cockpits
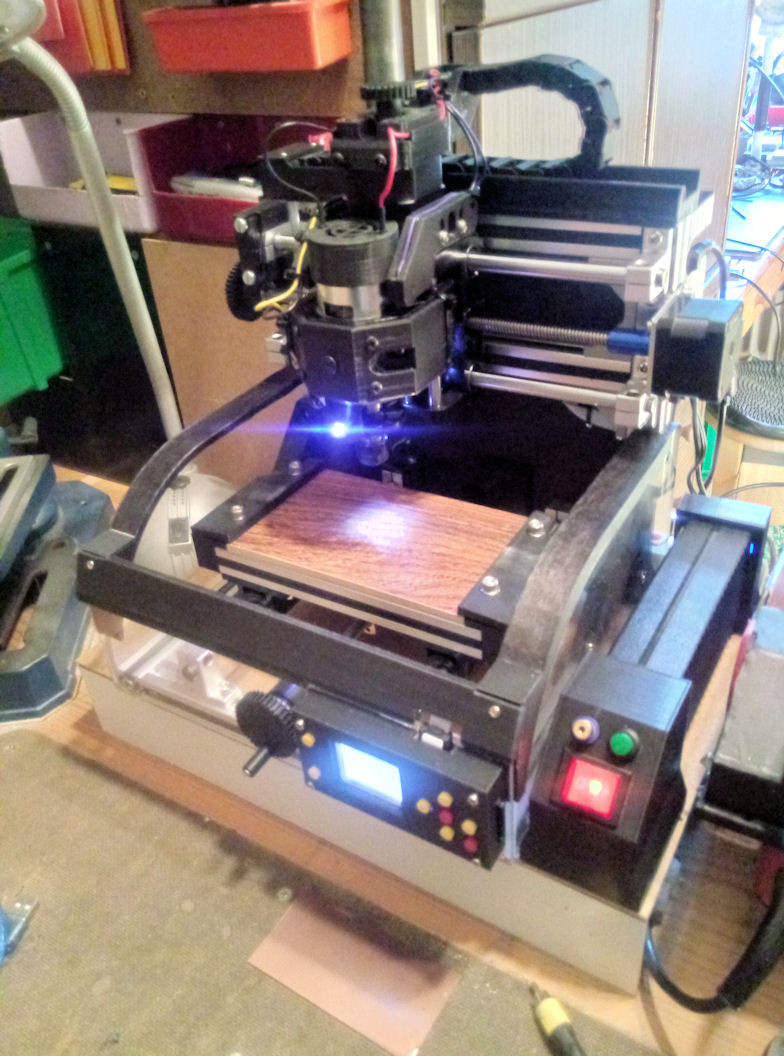
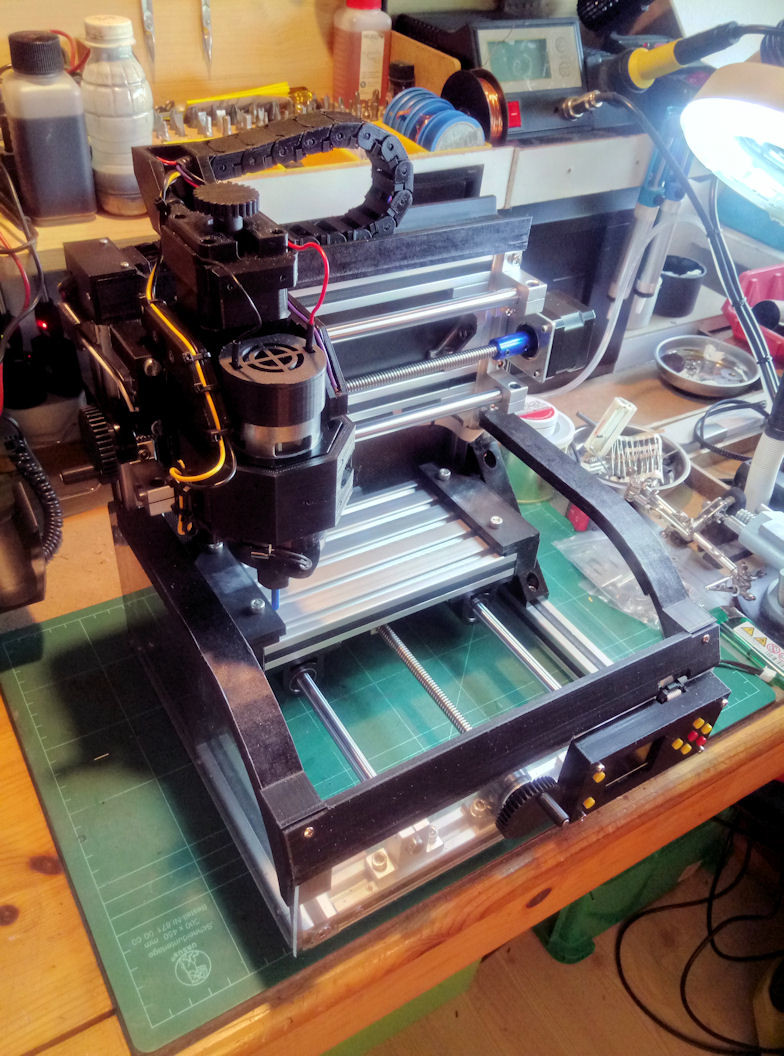
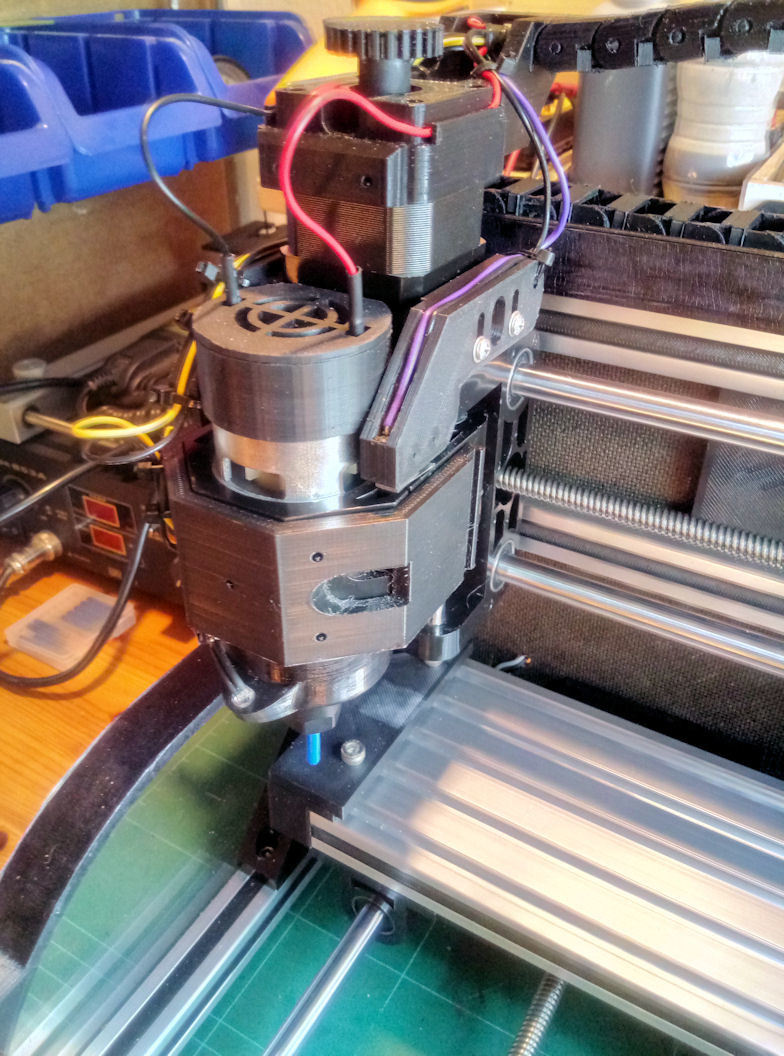
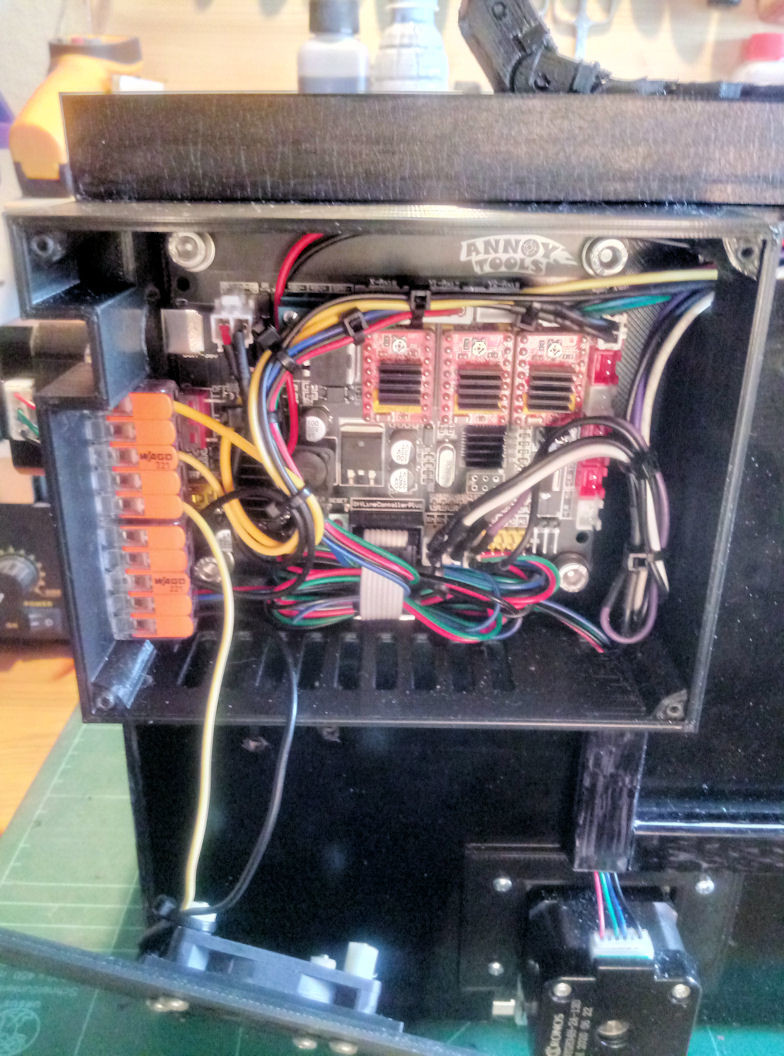
The new little love is on it's place and working ! Homing also works like a charme with the three endstop switches, even with the offline controller only. The projects will saved to an SD-card and then transfered to the CNC, which runs independently from a PC. I wanted to have it this way (and make it the same with all my 3d-printers), because i didn't want the computer to have to run all the time when producing a part. I made some addons for the power supply with a lighted power switch, an external reset button and integrated an cinch-plug for a removeable probe system. Now the work at some PCB's for my HOTAS could also begin, provided I learn the creation of circuits and how to mill them properly, also. The print of the Apache collective is finished (some of the supports where really hard to remove - sorry again to all others that made it also - but those are my first selfconstructed HOTAS ) and I've started with the first part of my OH-58D Kiowa cyclic.
-
Universal military aircraft homecockpit project
Viper1970 replied to Viper1970's topic in Home Cockpits
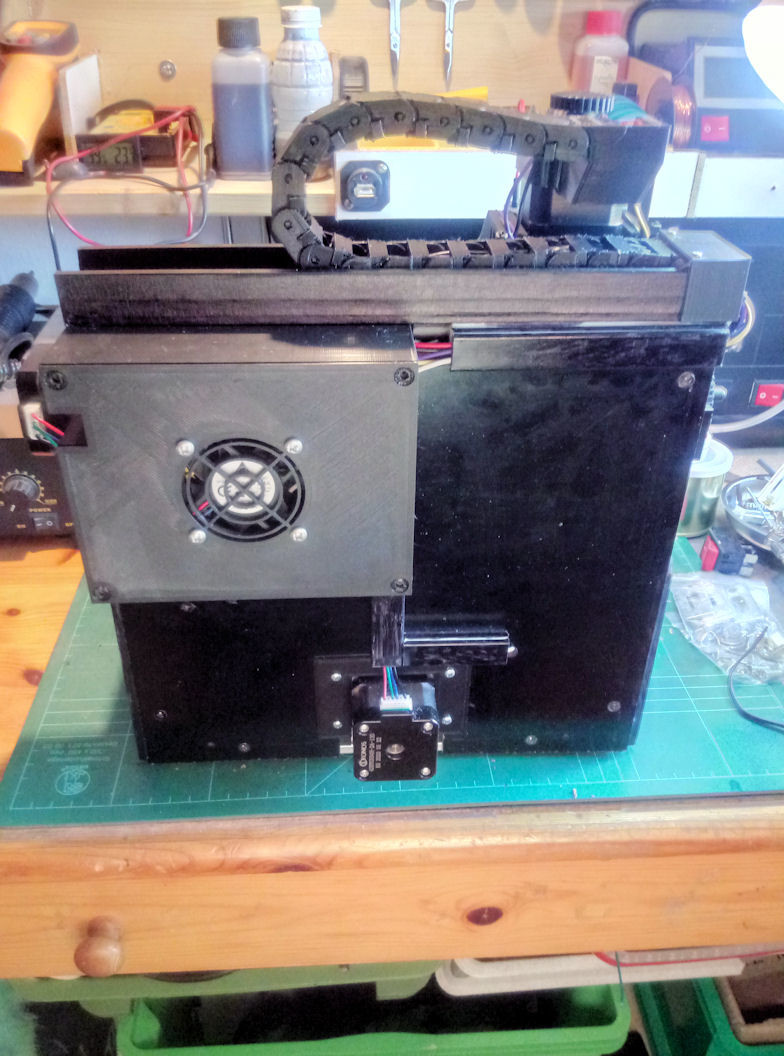
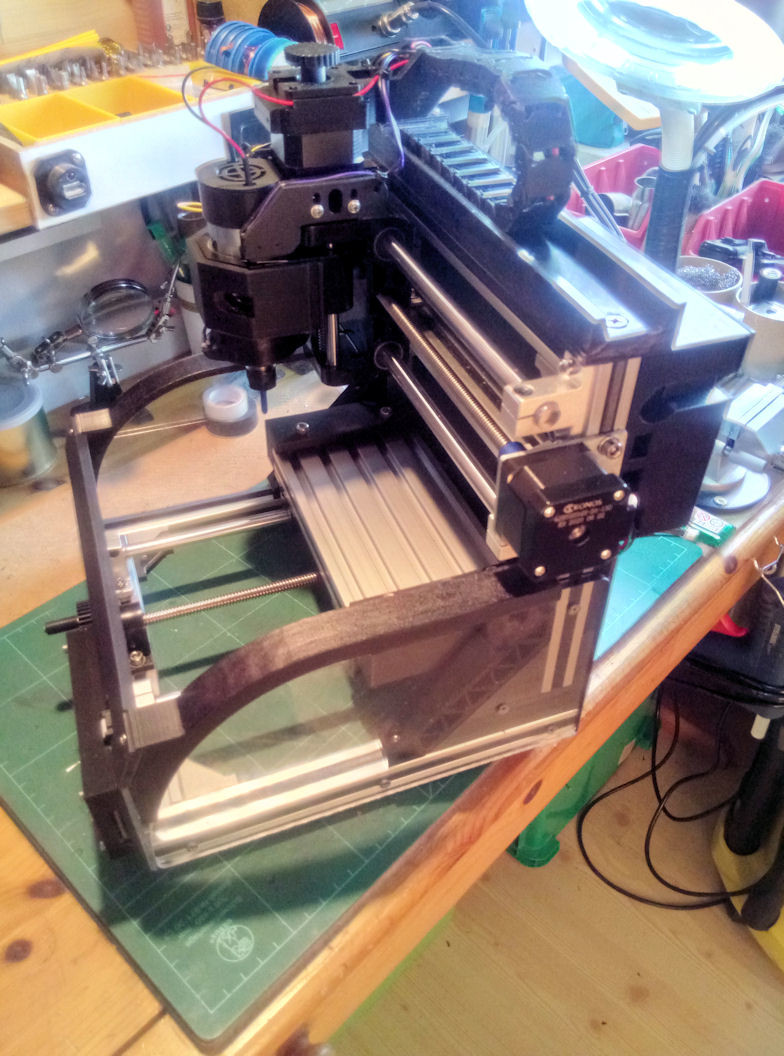
Hey Rockeys, thats great! Post some pics if possible. I'm very interested in it . My new little love is ready now . Ok, just seen I still missed some small screws to fix the frame arround the motor mount and two at the drag chain holder . But's that's done within minutes, the holes are already there. The ER11 milling chuck can still easily be removed. I only must unscrew the frame arround the motor mount to do this. But I will very rarely have a reason to do this an change this chuck with anything else, cause this machine is mainly meant for PCB making. I also corrected the z-height 25mm up, to be able to use the full z-travel. Don't now if I ever need it, but I want to have it . I used a printed frame part for this. Now I have to construct a small housing for the PSU with a lighted 230V main switch on it. I don't want to have the PSU always attached to the 230V power network. The little microswitch on the mainboard will always stay in the on-position and the CNC 's power will only be switched with a big switch on the PSU, which is placed to the right side of the mill then. The first picture is what i got and the rest what i made from it :
-
Very commercial, but I always loved this song : and because it fits so well :
-
Universal military aircraft homecockpit project
Viper1970 replied to Viper1970's topic in Home Cockpits
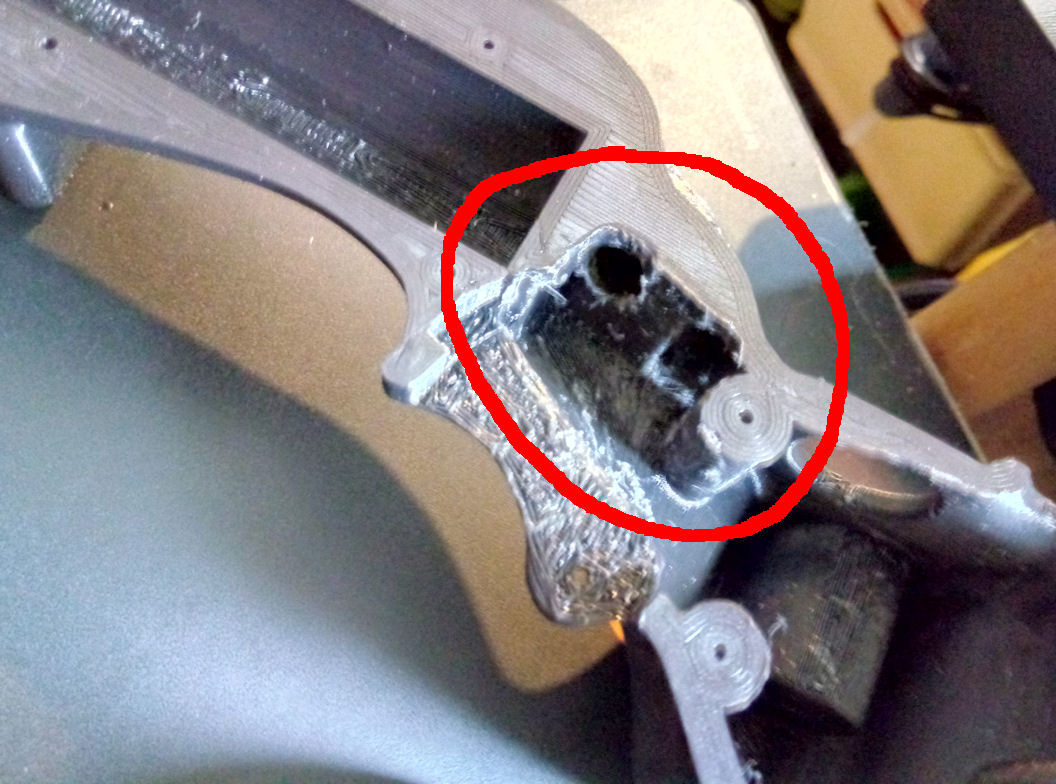
Small update for anyone who prints my Apache collective. I've made a construction mistake at the bottom trigger section! This is really not good for FDM printing, cause it's a pain to remove the support at this particular place of the part. I used a Dremel and did some "corrections" to it . Sorry for this! Maybe block supports at this little section (the hole is small enough to print it without support or reconstruct this part a bit. I will make an update to my parts at this section at a later time, cause I have still so much other work to do, but as strong as the whole print is, I think it will never break and it's very unlikely to need a spare part somewhwere in future.
-
Universal military aircraft homecockpit project
Viper1970 replied to Viper1970's topic in Home Cockpits
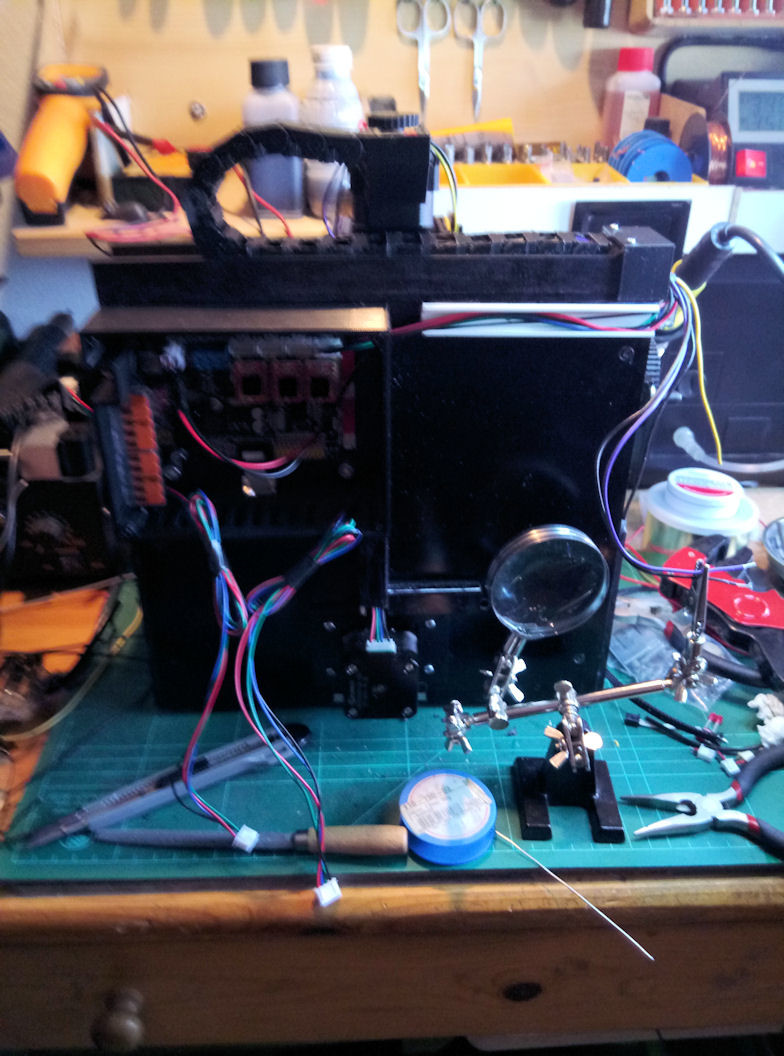
Thanks! the work on the Apache parts is progressing, at least as far as printing is concerned. In about an hour I can start to print the last part. After that I will print the Kiowa HOCAS and the collective of the Blackhawk. For the Blackhawk, I'm using a modified Thrustmaster X-Fighter grip from my inventory as the cyclic. At the CNC there is also further work to do, because I still have to make all the wiring and all my stock solid cables are of course a bit too short, because of the used drag chain. Therefore, I have to extend some, which I really hate. Soldering without being able to rest my arms somewhere has become a real torture due to my health restrictions and as much as I used to like doing this fine work, it's even harder for me now. Unfortunately the table is full when the CNC is on it and so I can put my arms nowhere. Working lying on the floor is probably also not a solution. The workshop is simply too small for an old, battered man .
-
Universal military aircraft homecockpit project
Viper1970 replied to Viper1970's topic in Home Cockpits
Top right grip is ready now and bottom left is in the production.
-
Universal military aircraft homecockpit project
Viper1970 replied to Viper1970's topic in Home Cockpits
Hi Tehrawk, this is looking amazing! You did it with ABS, wow! I don't dare to use ABS. I only use ordinary PLA or sometimes PETG. But I prefer to make the HOTAS with PLA, because I get along better with it. ABS is much better to sand as PLA, thats a big advantage over it and also much stronger. I planed to use the lower trigger with the small buttons I bought and print a cap-frame for its top to put an 6x6x4,3 micro switch on top that all. Looks ugly but I've tested it and it really does function very well. All my dualstage triggers in all of my HOTAS Parts are made like this. I've thought about the way TM did it in their old grips, using two 12x12x4.3 microswitches in parallel and activating the first stage via a spring and the second stage with a piece of foam between the trigger and the switches, but this needs much more space to integrate it inside the HOTAS part. For me this was the better and easier solution. Drawback are the little wires from the microswitch that are unguided and "free hanging". I use very small lacquered wires, like they are used in headphones sometimes, for this. They are very flexible and do not break very fast. Here is a pic of my TC layout where you can see how I want to make it. The trigger-guard shown on this layout is history . I decided to do all my grips without them, cause it's much easier.