metalnwood
-
Posts
1578 -
Joined
-
Last visited
-
Days Won
2
Content Type
Profiles
Forums
Events
Everything posted by metalnwood
-
Right spent some time moving before wifey got back. She should be happy there is _less_ mess there than before. Just a bit of clean up to do :) I couldnt think of any acceptable way to mount the center monitor without making changes to the pit that I didnt want to do. I like how it is modular and I would have needed to at least put the front sections together to give some strength. In the end I ran out and got a ceiling mount for a TV and installed that. At least now I have some adjustability to line up the center monitor height with the side monitors. I was planning on making a very basic MIP whos only purpose was to use to mount the touch screen running helios. I now think that this is not the best idea. I might go and but another monitor arm and possibly mount the touchscreen on the wall in front of the pit. This way I can position it more comfortably without having to conform to the pit structure. I have just about enough room behind the pit to put the seat on rails. I have run out of linear rail, the more expensive stuff, so my idea is to lay down some angle iron like a railway and put the seat on roller bearings. The bearings will not run on top of the edge but will run inside. Think of the angle bolted to the floor and edge on it makes the letter L. The bearing will run on the bottom of the L and will be stopped from going to the left by the wall of the L. On the other side there will be the other angle with a mirrors L. It will run on the bottom of it and will now be fully constrained from going left and right by the wall of the other L. I should be able to hop in it and have no issue moving in to place. I will no doubt need a little latch when in place so I dont push myself back on the rudders. Of course a motor would be best :)

-
Sure, no problem, I will send it to you tomorrow but bare in mind that it was for my 42" screens so the cutouts for cables will be different and you wont need to have an area cut out to not interfere with the pit. I will post some pics tomorrow with the monitors in place because you will see whene it intersects with the ribs of the forward section. It wouldnt work if I had skinned that section already.
-
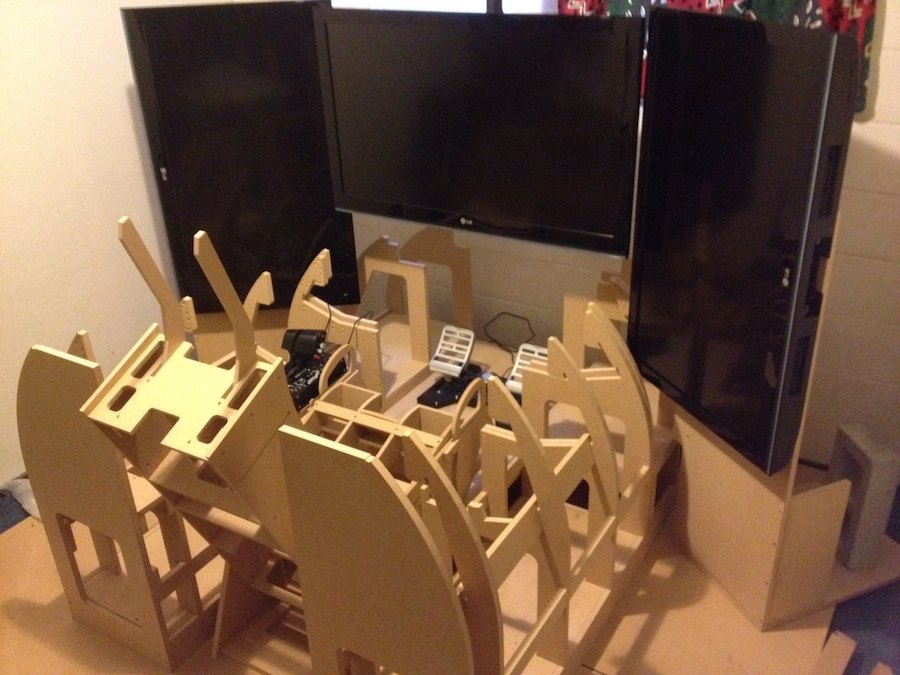
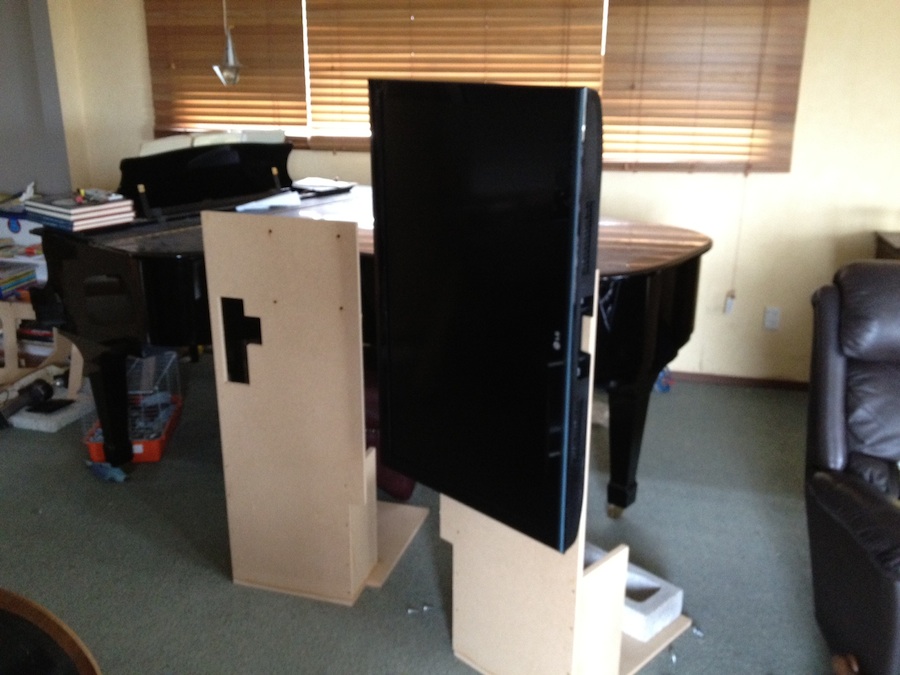
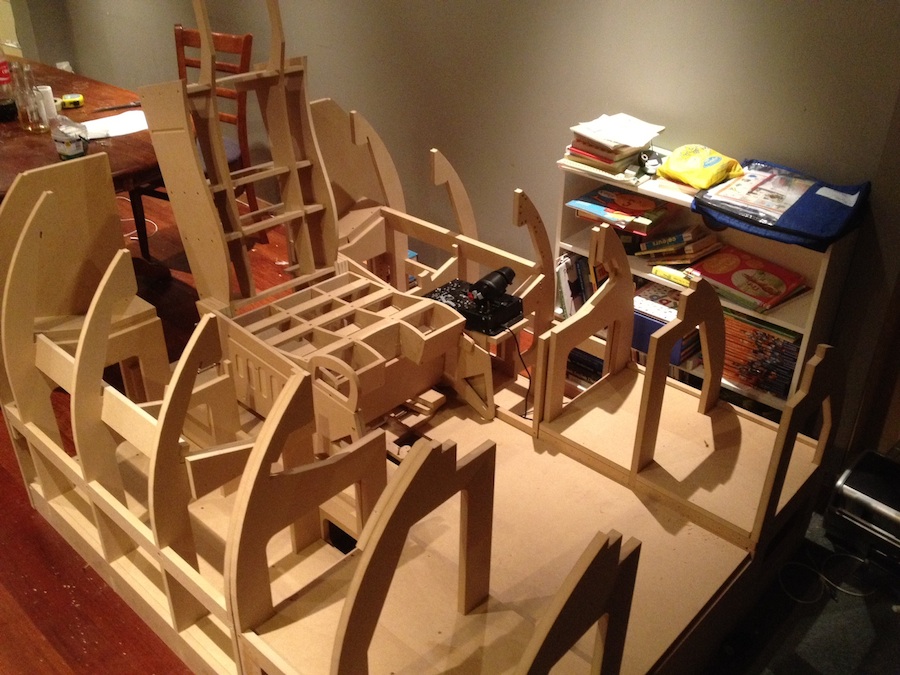
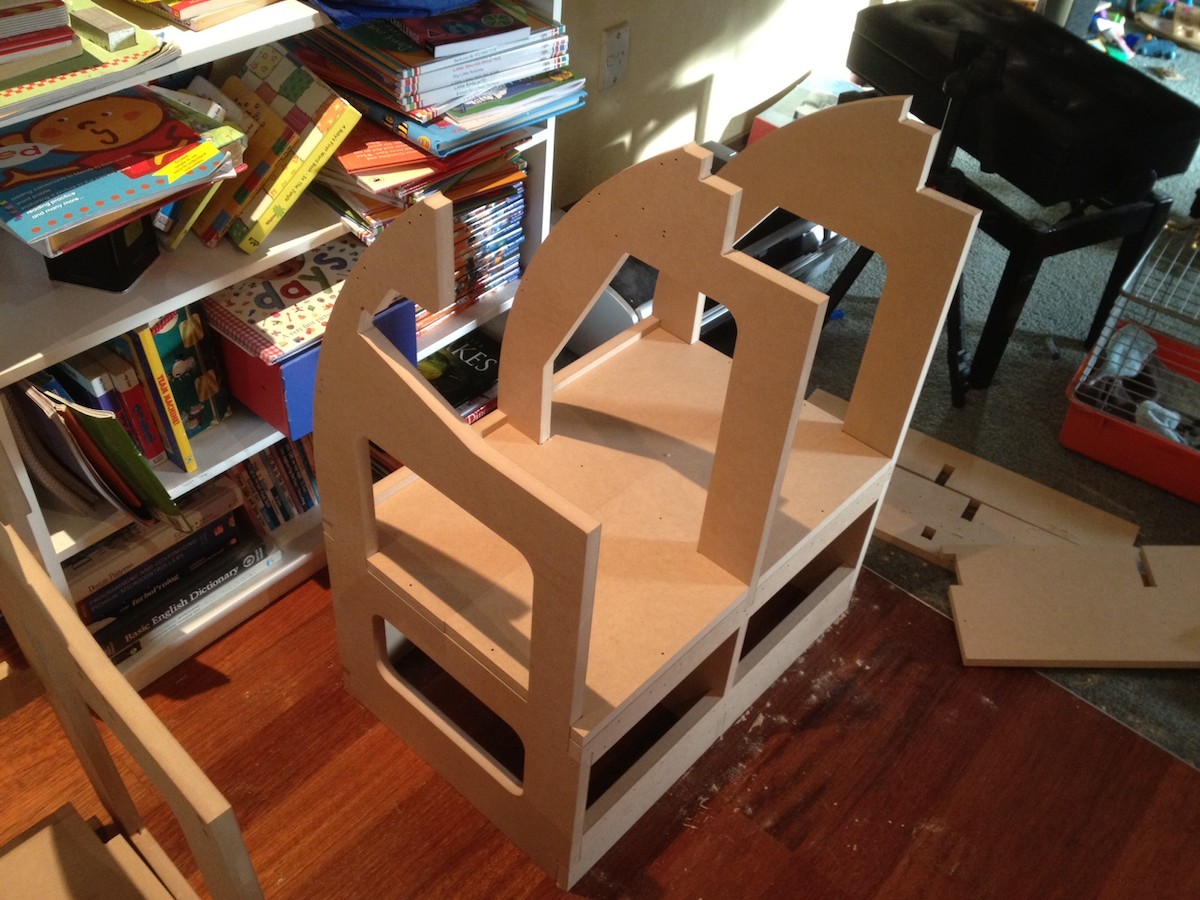
Thanks guys, doing a little bit but I need to get it down to my sim room before the wife goes apeshit. I didn't want to put it there until I had the monitor stands figured out. I still had issues with the monitors clearing the forward section of the pit. Similarly the monitor stands. I procrastinated a lot yesterday over the screens thinking it would just be easier to go multi projector. I then spent time looking for prices but came to my senses. There are no good projectors in NZ readily available and I am still not convinced I would be happy. So I got my ass in to gear and drew up a stand and cut them. They are working out ok. They do stand upright without the weight on the back as in the picture but they need to be on flat ground to do it, not carpet. Either way I will put a concrete block on the back of the base to be sure! BTW slowhand, I am slowly working through the kids books and once I get all the way from a through Z and throw in some numbers then I really will be in a position to do some cool stuff :) sorry about the out of focus.
-
It's already twice as expensive there before shipping. I know it's not a lot of money in the end but it is a pita.
-
I have lomac as well as fc1 and fc2. I didnt play fc1 or two but got them to have a look. I have since lost my lomac disc and cant find the bloody thing anywhere. No shops in NZ have it and I have spent 30 mins trying to buy it on the UBI shop with a VPN so it looked like I was in the states. I even used paypal so I didnt have to give NZ address details. Still no joy.
-
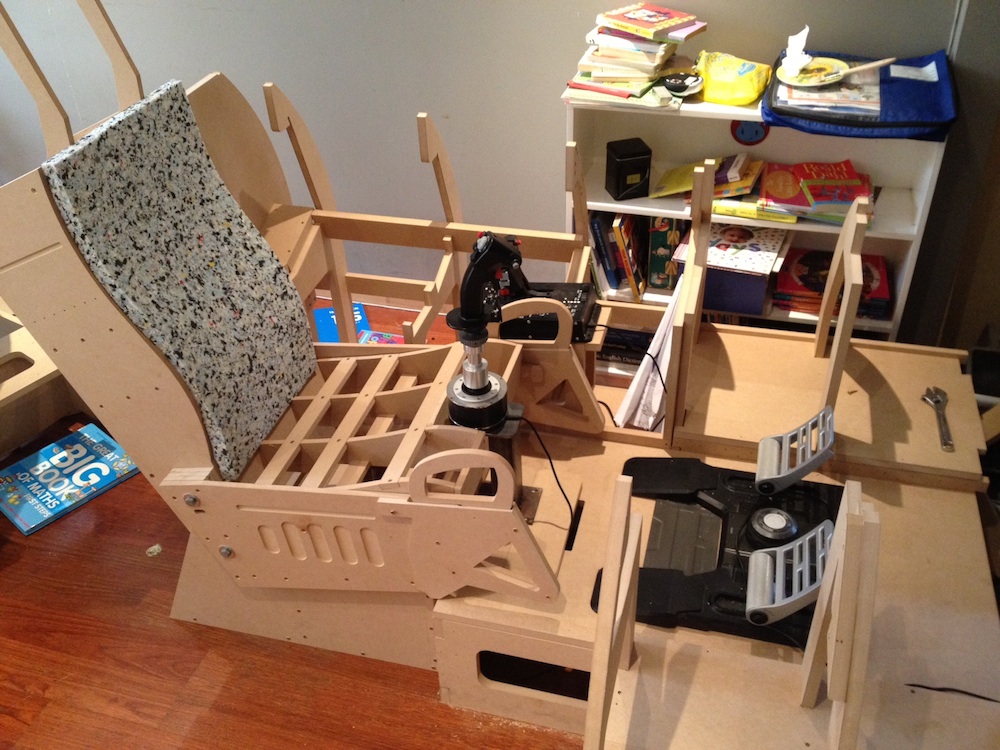
Spent an hour today trying to find the best position for the seat. I didnt really want to have to redo all of the base platform and found that I could do it by replacing the rear section and keeping the front. The seat is now on a base that it fits in to and reclines it at a good angle thats comfortable. Some of my weight is now taken along the bottom of my thighs. It was also done in mind for some 50mm foam padding which I will turn in to a cushion.. Luckily the stand for my stick in my other pit is exactly the correct height for the new pit as well. Getting time to figure out how to mount my helios screen and then the task of getting the monitors to fit around it. That I am sure will be tricky.
-
Curious what you do when you want to take your hands off the stick or use autopilot? It looks like the stick want to go full deflection with the weight? As others have said, really good work so far!
-
I have pretty much given up on first person shooters because I cant maintain a good posture. It doesnt take long before I start to get sore and I know when I have to stop, after not very long, before I will pay for it with a sore neck. I do like fps games though and this looks like it could be just the thing for someone like me because I dont have to maintain a position in front of a monitor. Hopefully the resolution is going to be good. Its just the thing I could see slipping on when games progress so we have some sort of arma like integration with dcs. Otherwise just a bit of arma and team fortress in the mean time :)
-
I havent seen the plans so I dont know how many sheets it takes to make it. That does sound steep allowing for a few full sheets as I think in the other thread you said you were supplying the material. It's really unfortunate having heard a few people recently getting fairly large quotes for these jobs. All I can figure is that the places you guys have been are reasonably busy for work and are quoting a little on the high side to get rid of you or if you accept they will certainly fit it in at that price.
-
I dont want to start a debate on it in my thread to be honest. Jeff (y2kiah) has released his plans for free, thats about the best that you can ask anyone to do. All he has said is dont take his work to profit off of it. That seems fair and reasonable to me. He doesnt hold the copyright over an a10 pit but he did design a unique construction of it. I do have a friend coming around next week and I am also making him a set, not for profit, other that he supplies the beer for after. I have no problem with that and as I said, if I wanted to make money doing this then I would sit down and create my own version. I have nothing but respect for someone who puts in the effort and gives his things away for free. On the other hand I also have a lot of respect for someone that puts in the effort to producing a great product and selling it. If someone wants to sell their own work why not? I am in the same boat as the owner of the seat plans. I have plans for products that I would not give away lightly when I expected it to make some income for me. If I was making something that I did not have an intention to sell then I would give away the plans as well. If I did have an intention to sell then I would not, its as simple as protecting my work from those who might look to undercut me because they have not had to recoup costs from the effort spent doing that, by using my work. Legalities or not, I know what I will be doing and that is honoring the requests by the people who have given me their work.
-
Hi Kuky, I cant sell any of these as they are not based on my plans. Being in NZ, a little closer to you than that states I know the shipping for this kind of thing is astronomical and makes it uneconomical for overseas people to buy this kind of thing from me. If I thought I could make some money I may have started from scratch but as it is I was quite happy using these excellent plans for my own personal use. So sorry, I cant help out anyone with cutting out this stuff. Kuky, for less than the price of shipping from NZ to aus you should be able to find a local company with a cnc to cut the plns. they are in y2kiah's thread.
-
I worked on the seat today but through operator error I mucked up one piece so I will have to wait until tomorrow to fix it, its the side piece on the other side. No bigge but stopped me fully assembling it tonight. Before anyone PM's me or asks, the seat plans are not mine and I cannot pass them on, sorry. I wont reply to anyone asking for a copy. Only issue is I think that the seat is a little too high for the pit. I have not screwed and glued the base of the pit so I think I will trim off the difference from the base parts to bring everything down a bit and get the throttle height right. I might not get to work on it for a few days. I was hoping to get the dzus rail in and put in my cdu and caution light panel just to see :)
-
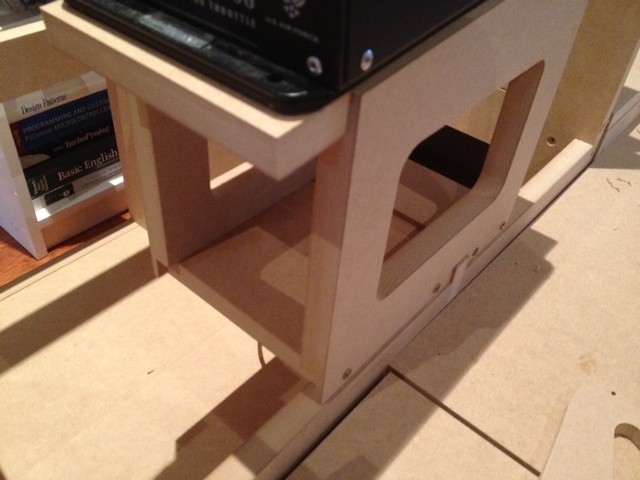
I had trouble with that piece, it didnt seem to fit what I thought was the bottom of that assembly. For the bottom I had to cut it in to two pieces because I think it should have ahad a dado running through it. Here is a pic of how I did it.
-
Thanks Avlolga, I am hoping it will be a beauty :) I have even been thinking about some of the 'optional extras' like painting the warthog eyes and teeth on the front section. I figured I could use my laser to cut the required 2 or 3 stencils so that I can spray on a good copy of one. Also my panels are some time from completion and I dont like the idea of looking at a barren skeleton of the pit so I reckon I will just laser out all of the panels front sections and lay them in there. There wont be all the knobs and switches working but it wont look so uncompleted. Too bad I am going to get busy for a few days so I will nip out and get the stuff I plan to skin it with so that I can do that on the weekend.
-
Trax, taking a break from assembling mine so I can answer to the sizes. The width between consoles is 53cm (20.86") This should be plenty for an automotive seat which I currently use in my other pit. I suspuect that you may need to raise the seat a little but not a heck of a lot. In my other pit the seat is on rails so it moves back and forwards but it is mounted ~ 40mm from the ground ~1.6". Adding to my post in case this helps. On my pit the top of the seat is 20cm (~8") above the floor, thats when I have it raised a little bit. I also have the throttle base mounted 20cm above the ground as well. For me this is the perfect place, heightwise, for it to be. I just measured Jeffs pit and the throttle will be mounted 24cm above the floor. If I had a car seat I would need to raise it to get it in to the correct position. I would guess that the aces seat has a higher profile then a car seat. So I think you have plenty of room to get the height of a car seat right - unless you prefer the throttle unusually high.
-
Thanks Linden, will keep at it. Only possible issue is that the width might interfere with the portrait/landscape/portrait configuration I have with my 42" screens. The center is OK and clears the height of the pit OK but not so sure about the side monitors. I will know better what I need to do when I get it in the room and start to look at it properly.
-
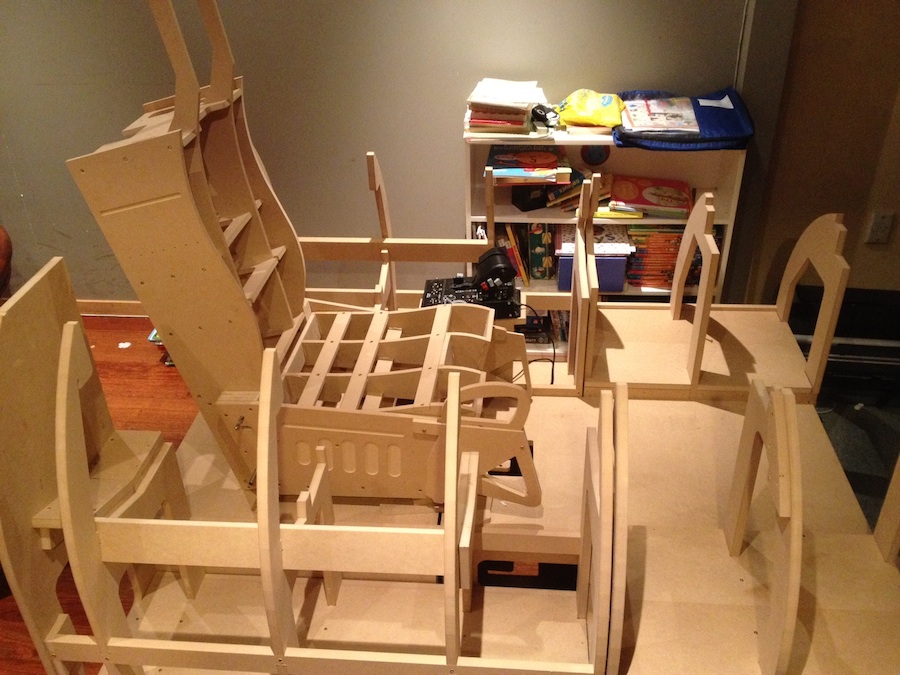
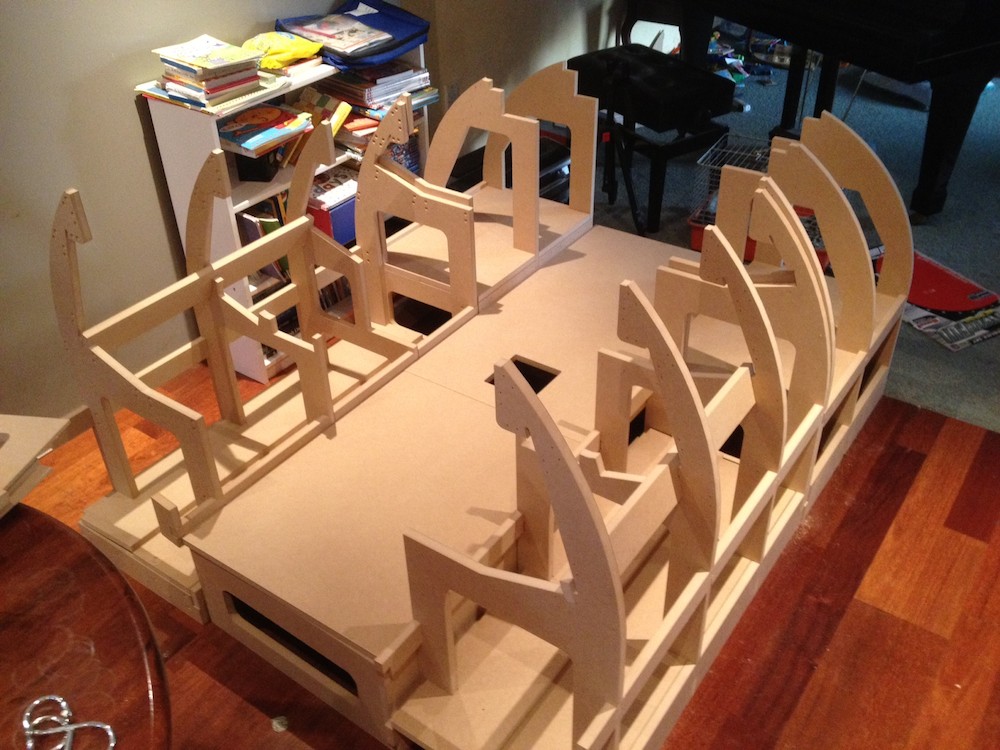
I cut the rest of the parts out today and did a bit of a dry assemble. First thing. OK, this is bigger than I thought. It really is fairly large but it would be wouldnt it, full size and all. Tomorrow I can start putting it all together with some screws and glue. I might go a bit simple for the skinning and use some 0.8mm high impact plastic sheeting. Very easy to put on. My wife might have something to say when she gets home and sees I made a huge mess of dust and rubbish in one of the main areas :)
-
Excellent, makes perfect sense. OK will jump back to my thread and update then :)
-
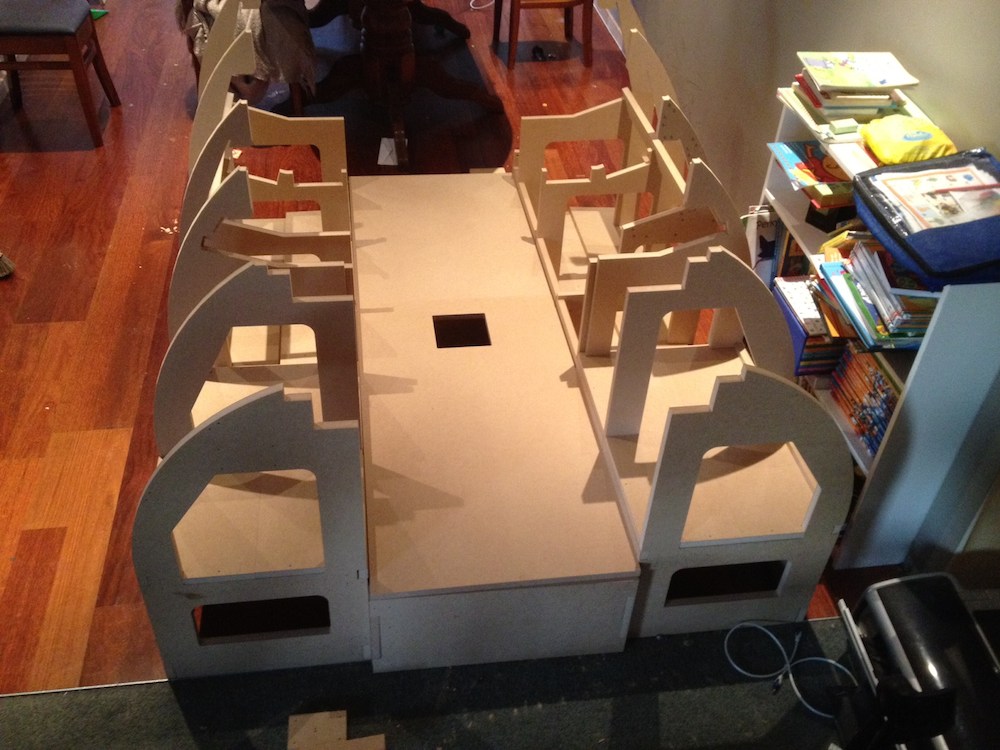
Jeff, I am a little unsure about the front sides connecting to the left and right side. Here are a couple of pictures of them together. Have I done something wrong or is this how they are supposed to be? You can see that they are not quite lining up properly.
-
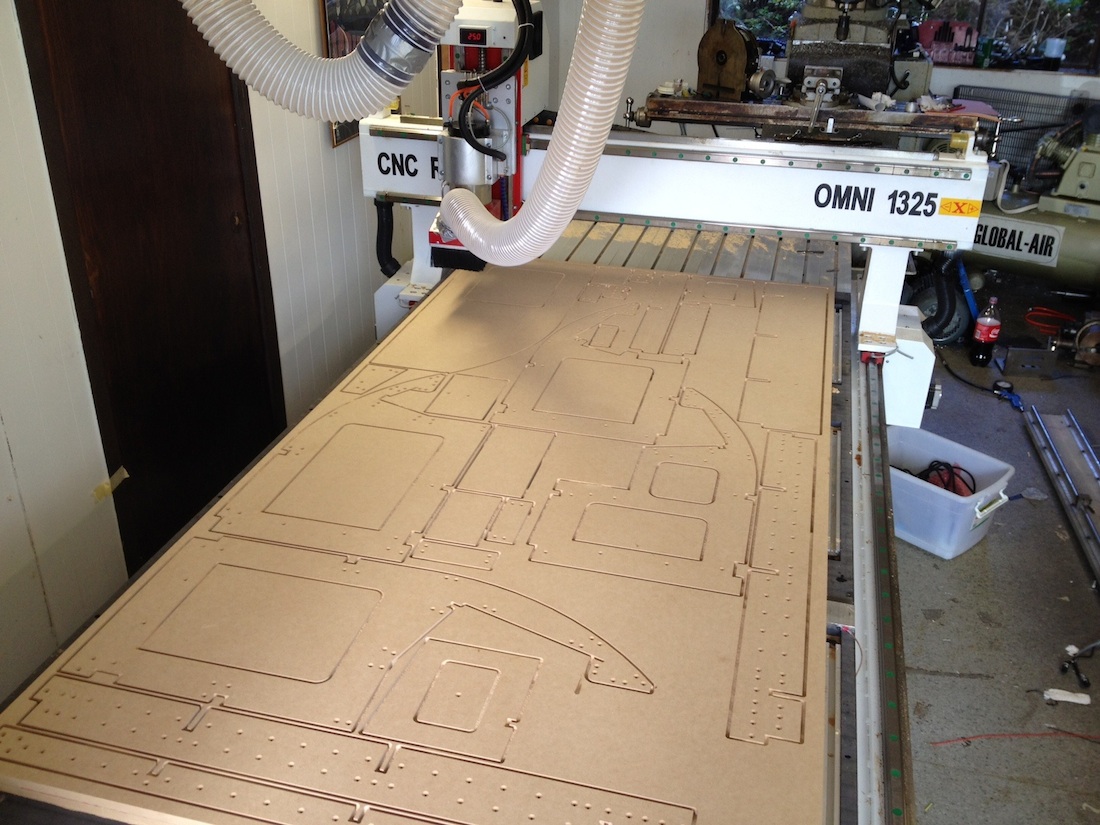
I started to assemble what I cut out today. It's supurb, the fit is great for the material I have which is slightly oversized so I can tap the joints in place. Exactly the kind of fit a woodworker is looking for. Of course I found there was little point in drilling and countersinking all the holes. given how they were nested to fit on the sheet some items will have been flipped in a mirror image so that the countersinking was now on the wrong side. No big deal.. Here is a quick look at the machine running.. It's not going too quickly and only cutting 1/4" at a time until I put a larger bit in it.
-
Right, a good day for me as it's the first time I have cut something useful from my new router. It was a real bummer selling my other one and then this taking so long to arrive. I had the privilege of starting to cut y2kiahs's plans out. As the cost of good ply is so expensive here I have gone for 18mm MDF. Not really an issue as it wont be getting wet any time soon. I did it a bit late in the day so I have almost run out of time but I will try and cut the rest tomorrow. I always liked a good 3d jigsaw puzzle and this is just the thing :)
-

A-10C CDU length and width dimensions needed
metalnwood replied to WildBillKelsoe's topic in Home Cockpits
Hey Bill, I think you may be biting off more than you can chew, depending on what exactly you are trying to do. Duckling gave you the dimensions and if you measure it up you will find that you need a screen a lot smaller than 8". I am using a 4.2" screen which is just about the correct size. Have a look here at mine The only way to get the CDU output is via a graphical output as DCS does not export the data to recreate the screen with text. There is a fair bit of work , there are I think 67 working buttons so you need multiple joystick controllers just to get the buttons working. There is also the buttons layout which really needs a custom PCB made to help with the layout and the wiring of the keyboard matrix. You will find there is nothing you can buy off the shelf to do this as it has some tight constraints to make a copy of the cdu and fit the pcb in there. Have you got an ipad? That could be an ideal way to get a cdu with some of the software around to export the cdu to ipad. -
Good idea, after having to build mine from scratch I would like to see a few kits around! I just got my new one, not the one I built, wired up yesterday and tried cutting air for the first time. Still a little more setup then on to making stuff :)
-
Flim are you building a joes 4x4 by any chance? Thats the one I previsouly had before I went full size. You are going full to half size, I know I am all out of room now :)
-
The link he posted looked like it was the acker barnes pit. An easy one to make. I suspect that the guy you talked to thought waterjet would be better than a router because of the slot together design and the router will not do square corners. If getting it done on a router is the easiest way for you then you can just square off the corners with a chisel. I made one years ago with a jigsaw and a cordless drill. The drill got a hole to get started for the slots. I can't remember but there wouldnt be more than a few hours doing it by hand and if you dont have a jigsaw+cordless drill I suspect you could get then cheaper than the cost of the CNC time and they would still be good for a little more work in the future.