Dropship Pilot
-
Posts
255 -
Joined
-
Last visited
Content Type
Profiles
Forums
Events
Everything posted by Dropship Pilot
-
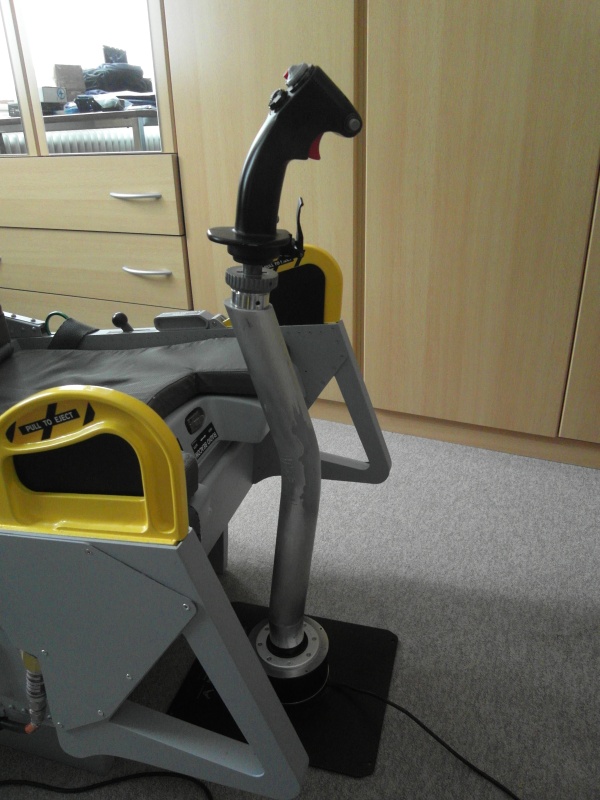
Hi Hans, coming from you that means a lot to me! :) Here a first WIP picture of the stick extension: Cheers, Stefan

-
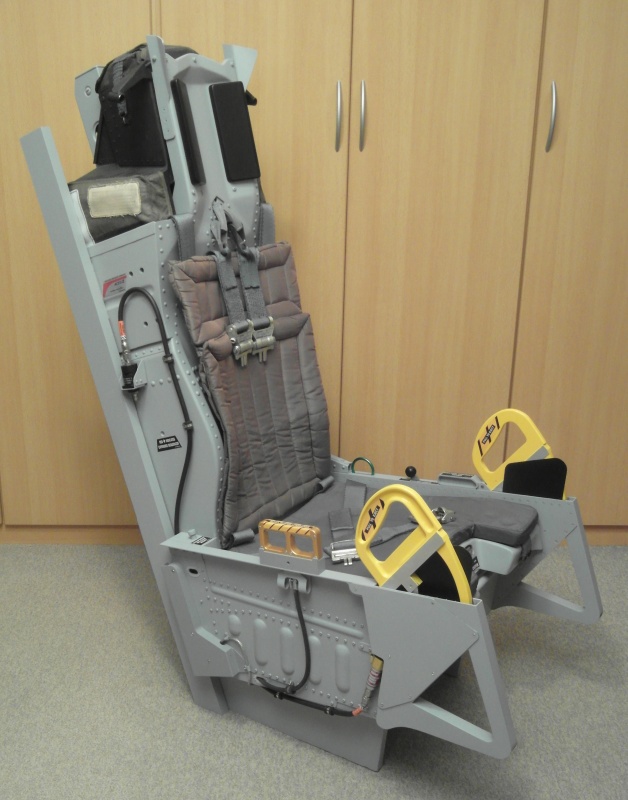
The seat angle is the same as in the A-10 (and thus quite differend than on the F-16) and the height fitted to my size. However, if I ever need to adjust the seat, it's quite easy to modify or replace the "feet". Also I build it somewhat modular (the side panels, the seat pan, the parachute container and the rocket assembly can be taken off by removing two screws each) so that it can be easily transported by one person. Those helped a lot when building the seat pan - thanks again! :thumbup:
-
Well, to be honest I don't really know. It took almost 2 years to get to this point, but I also spend lots of time doing other things. My guess would be about 150 hours. If I had spend the time I used for the seat at my job, I probably could have bought an original seat - but that's just not as satisfying as building one. Also you learn quite a bit about something you build (or draw) that otherwise would go unnoticed. - DSP
-
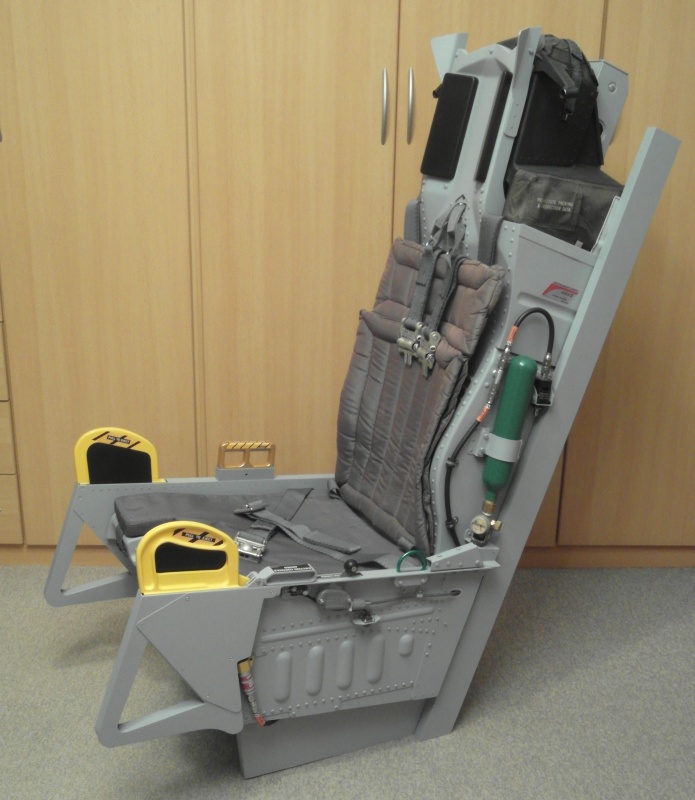
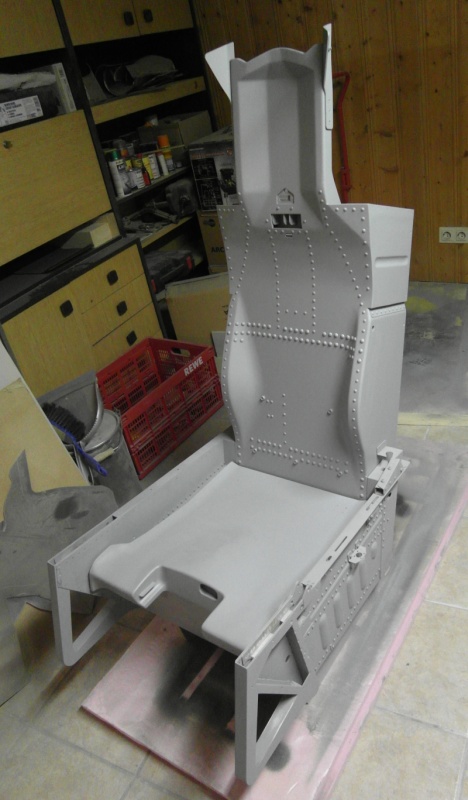
And finally: the finished seat. Actually there are still a few things missing like the redar hose and the buckles for the survival kit, but those will be added when I find them. Next step will be the pit floor with the stick and the pedals....
-
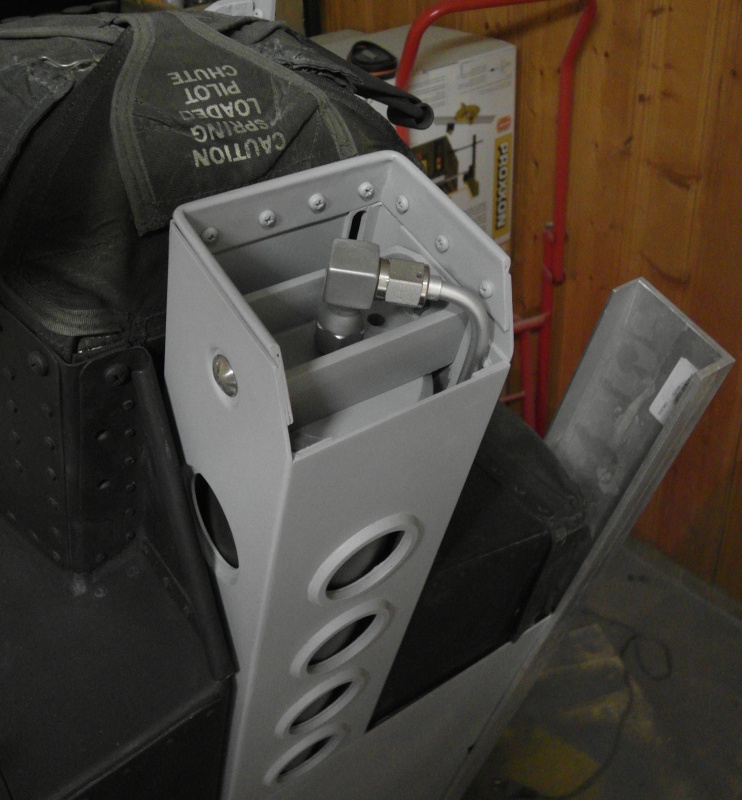
Happy New Year! Here a small update - added the pads to the headrest and installed the rocket assembly: And some more details of the rocket: Cheers, DSP
-
Looks nice and smooth. Good job. :thumbup: How do you find the zero position for the needle? Cheers, DSP
-
A quote from Viperpits: Did I express something else? So why the hostility? DSP
-
I'd be in (pedending of final price though). Cheers, DSP
-
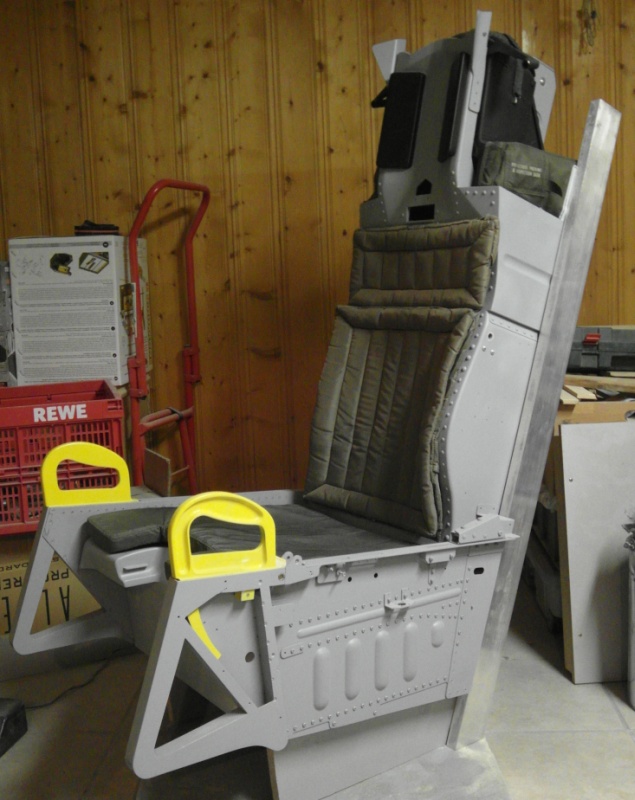
Actually, most of the seat is build from particle board, because initially it was only inteded as a simple setup to test the seating position. Then I added more and more details.... If I had to do it again, I'd use good plywood. You need a lot of filler to get smooth rounded corners with particle board! :music_whistling: Cheers, DSP
-
I used a mix of rivets, upholstery nails and round head screws to simulate the rivets depending on size and availability. Screws were used in areas where I need access for easy transport and maintainance. Cheers, DSP
-
Small details can make quite a difference: Before: After: Cheers, DSP
-
These pictures might help: Cheers, DSP
-
On the main motor housing there's a round connector that has 4 pins. I would expect these to be the ones that connect to the motor coils. If you measure the resistance between these pins it should be possible to determine how many motor coils there are without opening the motor. If you have any additional info on the Sensotec transducer, let me know (we are talking about the small cylinder on the back of the motor, right?). From my point of view this should be either a position or a velocity sensor (or a combination of both). Sensotec also does load cells (torque sensors) but as the torque should be directly proportial to the motor current, you wouldn't need a sensor for it (unless you need exceptionally precise torque data). Cheers, DSP
-
$25000? - That's a little more than I would want to spend on a FFB-Stick. :doh: The small cylinder at the end of the motor looks like a position encoder. If you are lucky it uses a standard RS422 interface. Then you should get that covered with about $200 for 3 units. Have you measured the resistance values between the four motor connectors? That should give a hint about the motor design. Again - with a little luck it's a simple DC motor with a stator and a rotor winding... Cheers, DSP
-
Looks great! :thumbup: What type of drive are you using? RC servos? Cheers, DSP
-
I think the idea with the book is a great one and I'm sure it will help a lot of future pit builders. However, I fear that it'll take too long for the book to be finished to be of any help in my pit build. Hmm, ok at my current building speed it might actually be! :music_whistling: But seriously: if such a book would be available right now I'd buy it in a minute. However in a year or two I hope that I'll have my pit more or less done and then I don't want to be reminded of all the things that don't match up. Cheers, DSP
-
Thanks a lot for those measurements! :thumbup: If I see it correctly (please correct me if I'm wrong) it's 36.7" from the front of the rear bulkhead (the one with the circular cutouts at the top) to the center of the the pitch pivot point of the stick. The pivot point is 13/16" above the cockpit floor. The last picture is somewhat hard to interpret for me. I'd say it's 13-5/16 inches from the front of the rear bulkhead to where the front of the ejection seat rail intersects with the cockpit floor. Correct? There are some additional dimensions I think many would be interested in: a) the height of the rear bulkhead from the cockpit floor to the top. b) the distance from the front of the rear bulkhead to the point where the dzus rails of the circuit breaker panel intersect with the cockpit floor. c) the angle between the cockpit floor and the circuit breaker panel. d) the height (from the cockpit floor) of the horizontal part of the right (left) instrument panel measured on the inside wall perpendicular to the floor e) the height of the right instrument panel at the front f) the angle between the cockpit floor (disregarding the foot pits) and the front of the right (left) instrument panel Thanks a lot, DSP PS: If it's ok with you I can repost some of your pictures with the dimensions marked in red.
-
Shouldn't be a problem. Just get me a sketch with the dimensions you need labeled A,B,C,.... . Oh, it's easy to swap the oxygen bottle for more important things... :D Cheers, DSP
-
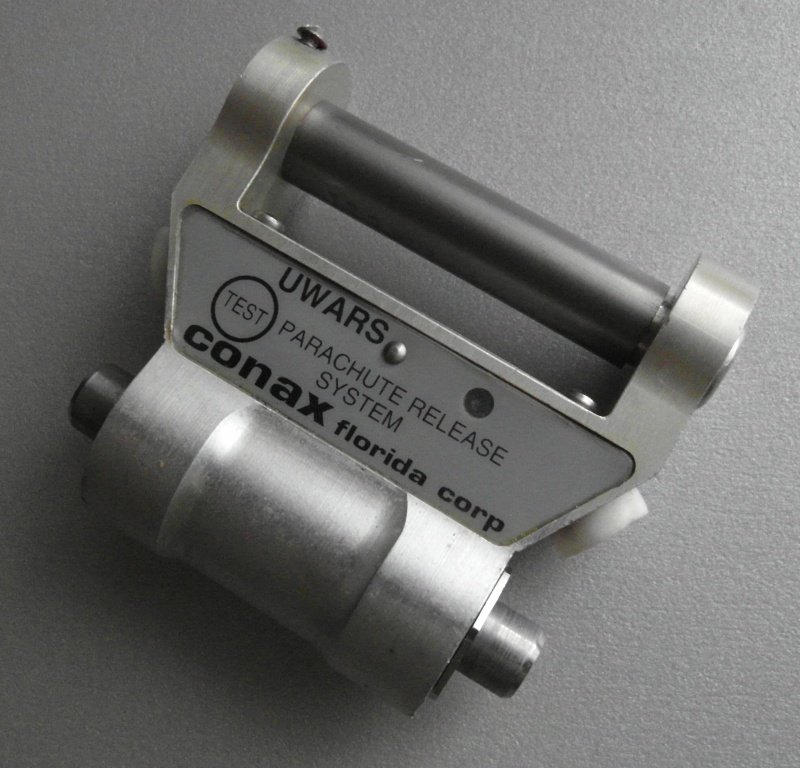
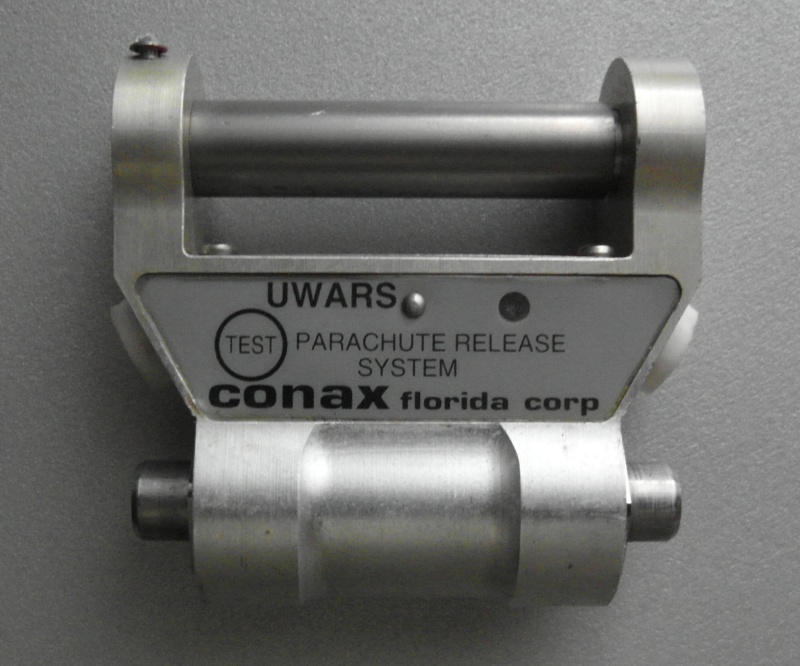
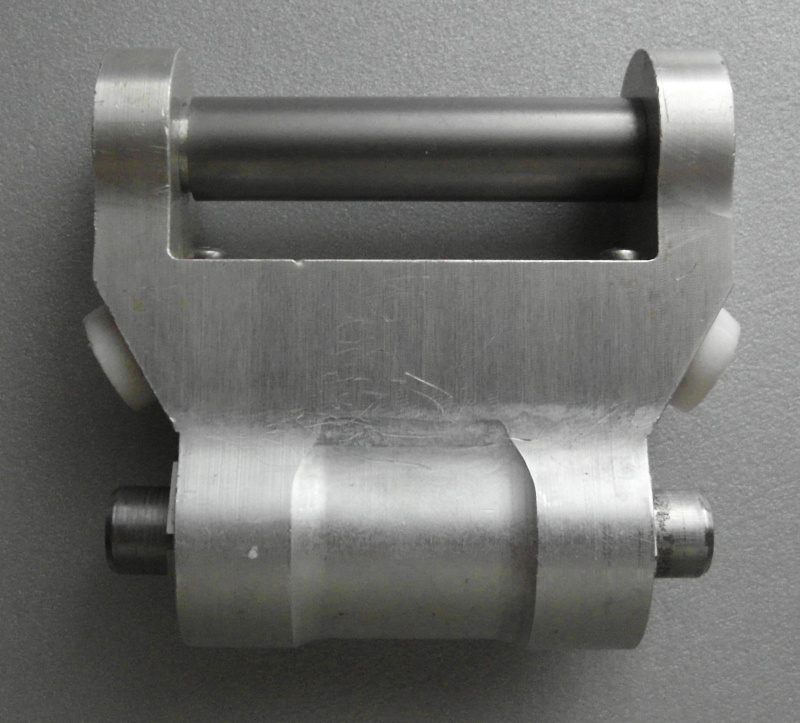
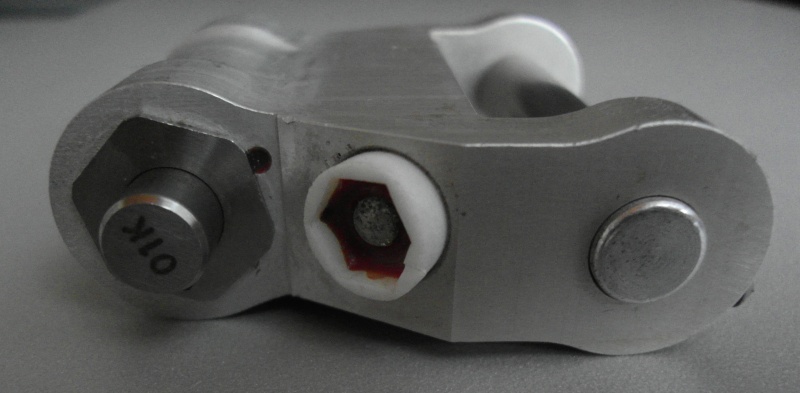
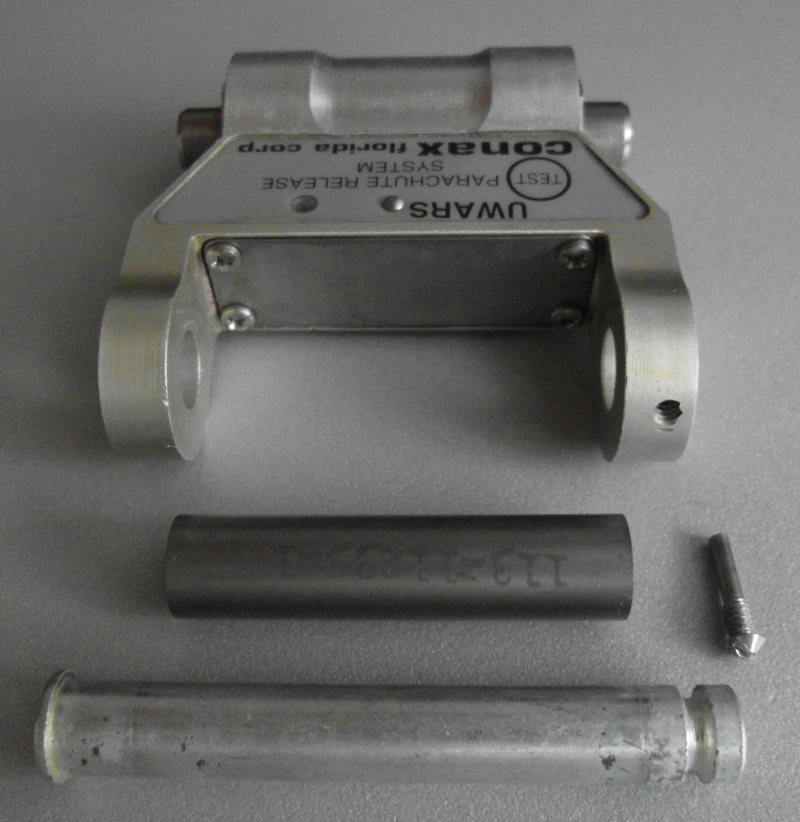
I was lucky and got a pair of UWARS for my seat. So without further talk the important stuff: Cheers, DSP
-
Looking good! I guess you will stick to the C-version. So, how will you deal with the main instrument panel? Are you going to modify it or will you make a completely new one? Cheers, DSP
-
Thats the best base for a pit build I can think of! As for the cleanup - I bet you could have gotten lots of volunteers from this board (including me). :smilewink: By the way - those torque motors look like they could rip your arm out. The motors in a Sidewinder FFB2 are tiny compared to these! :joystick: The cylinder at the back is probably an encoder for position feedback. Looking forward to see more of your build/restauration process. Cheers, DSP
-
Same here! Cheers, DSP
-
A-10 Aces II: http://www.ebay.com/itm/171127591609 Cheers, DSP
-
That seat is a work of art! And what amazes me even more is how quick you get all this together. :thumbup: It's about a year now that I'm working on mine and I'm still not finished (anyone with a spare sticker sheet? :music_whistling:). Cheers, DSP
-
Sounds like a great deal! However, I sure am no expert on projectors. So the only advice I can give is to make sure that it's really the same projector and not one of the same series but with a lower physical resolution or something like that. Sometimes the replacement lams are in that price region.... Cheers, DSP PS: I just saw that the contrast and brightness aren't too good with this one. Not sure if those values would work ok for a qube. What's the expert opinion?