SFC Tako
-
Posts
774 -
Joined
-
Last visited
-
Days Won
2
Content Type
Profiles
Forums
Events
Everything posted by SFC Tako
-

"Bay of Hogs" campaign available again.
SFC Tako replied to SFC Tako's topic in DCS: Mi-8MTV2 Magnificent Eight
Touche' :) -
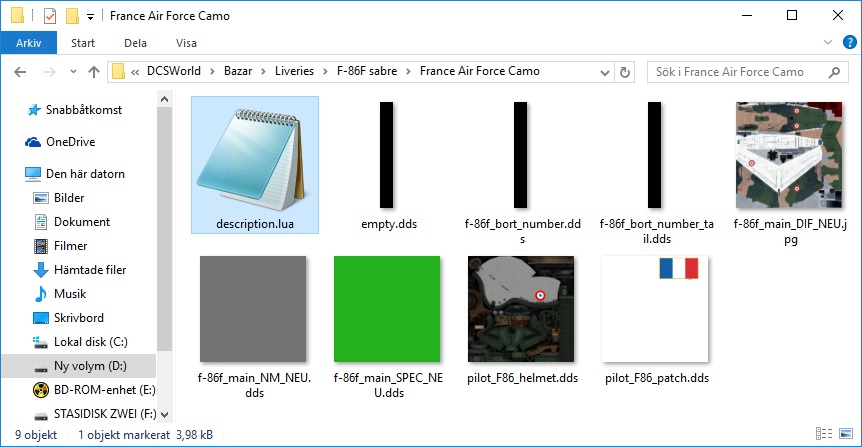
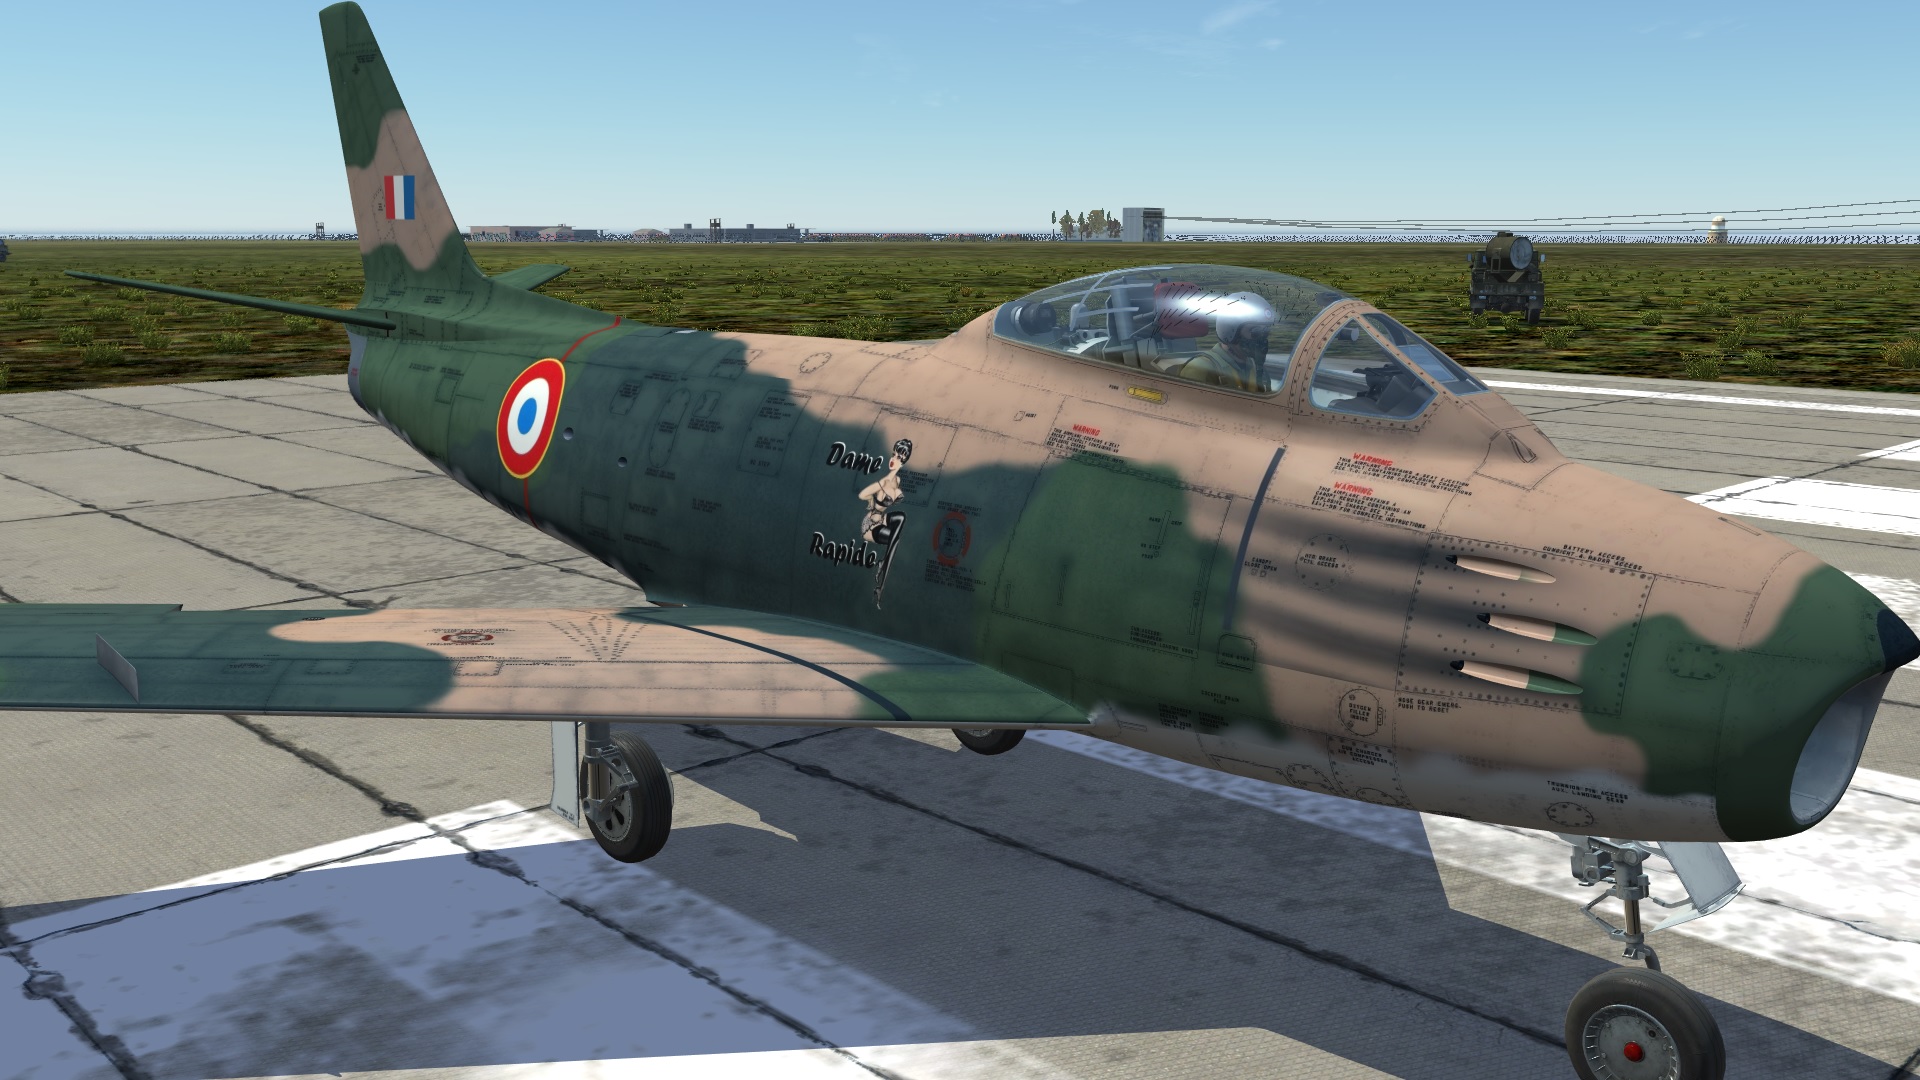
Alrighty then, I had to read up on this properly to get rid of this FEATURE. So here's a new working example of a description.lua I just copied all this from LcSummers latest file...who's been helped by you SZ. I just did some editing regarding my own filenames and that was that! So thanks for all the help, SZ. Maybe we can put this to rest now. Or not ;) livery = { {"F86_MAIN", 0,"f-86f_main_DIF_NEU", false}, {"F86_MAIN", 1,"f-86f_main_NM_NEU", false}, {"F86_MAIN", 2,"f-86f_main_SPEC_NEU", false}, {"F86_MAIN", 3,"empty", false}, --[[ Tail Bort Numbers ]]-- --Right Ones Digit {"F86_BORT_NUMBER_TAIL_R_01", 0 ,"f-86f_main_DIF_NEU",false}; {"F86_BORT_NUMBER_TAIL_R_01", 2 ,"f-86f_main_SPEC_NEU",false}; {"F86_BORT_NUMBER_TAIL_R_01", 3 ,"empty",false}; --Right Tens Digit {"F86_BORT_NUMBER_TAIL_R_10", 0 ,"f-86f_main_DIF_NEU",false}; {"F86_BORT_NUMBER_TAIL_R_10", 2 ,"f-86f_main_SPEC_NEU",false}; {"F86_BORT_NUMBER_TAIL_R_10", 3 ,"empty",false}; --Right Hundreds Digit {"F86_BORT_NUMBER_TAIL_R_100", 0 ,"f-86f_main_DIF_NEU",false}; {"F86_BORT_NUMBER_TAIL_R_100", 2 ,"f-86f_main_SPEC_NEU",false}; {"F86_BORT_NUMBER_TAIL_R_100", 3 ,"empty",false}; --Left Ones Digit {"F86_BORT_NUMBER_TAIL_L_01", 0 ,"f-86f_main_DIF_NEU",false}; {"F86_BORT_NUMBER_TAIL_L_01", 2 ,"f-86f_main_SPEC_NEU",false}; {"F86_BORT_NUMBER_TAIL_L_01", 3 ,"empty",false}; --Left Tens Digit {"F86_BORT_NUMBER_TAIL_L_10", 0 ,"f-86f_main_DIF_NEU",false}; {"F86_BORT_NUMBER_TAIL_L_10", 2 ,"f-86f_main_SPEC_NEU",false}; {"F86_BORT_NUMBER_TAIL_L_10", 3 ,"empty",false}; --Left Hundreds Digit {"F86_BORT_NUMBER_TAIL_L_100", 0 ,"f-86f_main_DIF_NEU",false}; {"F86_BORT_NUMBER_TAIL_L_100", 2 ,"f-86f_main_SPEC_NEU",false}; {"F86_BORT_NUMBER_TAIL_L_100", 3 ,"empty",false}; --[[Rear Fuselage Bort Numbers]]-- --Right Ones Digit {"F86_BORT_NUMBER_R_01", 0 ,"f-86f_main_DIF_NEU",false}; {"F86_BORT_NUMBER_R_01", 2 ,"f-86f_main_SPEC_NEU",false}; {"F86_BORT_NUMBER_R_01", 3 ,"empty",false}; --Right Tens Digit {"F86_BORT_NUMBER_R_10", 0 ,"f-86f_main_DIF_NEU",false}; {"F86_BORT_NUMBER_R_10", 2 ,"f-86f_main_SPEC_NEU",false}; {"F86_BORT_NUMBER_R_10", 3 ,"empty",false}; --Right Hundreds Digit {"F86_BORT_NUMBER_R_100", 0 ,"f-86f_main_DIF_NEU",false}; {"F86_BORT_NUMBER_R_100", 2 ,"f-86f_main_SPEC_NEU",false}; {"F86_BORT_NUMBER_R_100", 3 ,"empty",false}; --Left Ones Digit {"F86_BORT_NUMBER_L_01", 0 ,"f-86f_main_DIF_NEU",false}; {"F86_BORT_NUMBER_L_01", 2 ,"f-86f_main_SPEC_NEU",false}; {"F86_BORT_NUMBER_L_01", 3 ,"empty",false}; --Left Tens Digit {"F86_BORT_NUMBER_L_10", 0 ,"f-86f_main_DIF_NEU",false}; {"F86_BORT_NUMBER_L_10", 2 ,"f-86f_main_SPEC_NEU",false}; {"F86_BORT_NUMBER_L_10", 3 ,"empty",false}; --Left Hundreds Digit {"F86_BORT_NUMBER_L_100", 0 ,"f-86f_main_DIF_NEU",false}; {"F86_BORT_NUMBER_L_100", 2 ,"f-86f_main_SPEC_NEU",false}; {"F86_BORT_NUMBER_L_100", 3 ,"empty",false}; --[[Fuselage Forward Bort Nmmbers]] --Right Ones Digit {"F86_BORT_NUMBER_NOSE_R_01", 0 ,"f-86f_main_DIF_NEU",false}; {"F86_BORT_NUMBER_NOSE_R_01", 2 ,"f-86f_main_SPEC_NEU",false}; {"F86_BORT_NUMBER_NOSE_R_01", 3 ,"empty",false}; --Right Tens Digit {"F86_BORT_NUMBER_NOSE_R_10", 0 ,"f-86f_main_DIF_NEU",false}; {"F86_BORT_NUMBER_NOSE_R_10", 2 ,"f-86f_main_SPEC_NEU",false}; {"F86_BORT_NUMBER_NOSE_R_10", 3 ,"empty",false}; --Right Hundreds Digit {"F86_BORT_NUMBER_NOSE_R_100", 0 ,"f-86f_main_DIF_NEU",false}; {"F86_BORT_NUMBER_NOSE_R_100", 2 ,"f-86f_main_SPEC_NEU",false}; {"F86_BORT_NUMBER_NOSE_R_100", 3 ,"empty",false}; --Left Ones Digit {"F86_BORT_NUMBER_NOSE_L_01", 0 ,"f-86f_main_DIF_NEU",false}; {"F86_BORT_NUMBER_NOSE_L_01", 2 ,"f-86f_main_SPEC_NEU",false}; {"F86_BORT_NUMBER_NOSE_L_01", 3 ,"empty",false}; --Left Tens Digit {"F86_BORT_NUMBER_NOSE_L_10", 0 ,"f-86f_main_DIF_NEU",false}; {"F86_BORT_NUMBER_NOSE_L_10", 2 ,"f-86f_main_SPEC_NEU",false}; {"F86_BORT_NUMBER_NOSE_L_10", 3 ,"empty",false}; --Left Hundreds Digit {"F86_BORT_NUMBER_NOSE_L_100", 0 ,"f-86f_main_DIF_NEU",false}; {"F86_BORT_NUMBER_NOSE_L_100", 2 ,"f-86f_main_SPEC_NEU",false}; {"F86_BORT_NUMBER_NOSE_L_100", 3 ,"empty",false}; {"pilot_F86_patch", 0 ,"pilot_F86_patch",false}; {"pilot_F86_helmet", 0 ,"pilot_F86_helmet",false}; } name = "Armee de l'Air, Camo" countries = { "ABH", "FRA", }

-
I'll try that link - gotta learn this once and for all! Thanks :)
-
It's a recurring problem, about the tenth time now that all my skins get these hideous BORT numbers all over them. And this time I haven't been able to edit them away in the config file. Suggestion #1: Make BORT-numbers optional in the mission editor. For example, if you leave the bort number empty for a Sabre, there shouldn't be six empty BORT boxes all over your aircraft. Just make them go away. Suggestion #2: Make them go away permanently. I'd pay top dollar to get rid of them. Good riddance :)
-
Yup, looks plain awesome :)
-
Clever setup...DONATED!!!
-
That's some spooky stuff, gotta get fixed then.
-
You are workin' on FFB?! AWESOME! :) (I gots two MS FFB2...LOL)
-
Same here, zero problems so far. Strange...
-
Yup, and I actually do just that as DCS loads very fast for me. So no biggie :)
-
I'm so sorry again, no Vegas target range here ;)
-
So no, I don't fly over Vegas ;)
-
Big thanks for the swift response :) I'll go back to what I was doing ;)
-
As I've tested a lot of missions back and forth during mission creating, there is one thing that is always recurring unless I shut down the whole game and restart it: The loss of explosion sounds This happens regardless of what aircraft I use and it always occur the second time I play a mission (and following times of coure). Is it just me or is this a known bug? It's not a biggie but as I see things, it's a total immersion killer. Also, another reason I play a mission a second time is to get a smoother experience. WHAT?! Yes, if I play a mission for the first time all added sound effects (caused by triggers) create hangups lasting for two seconds at worst but when I play a mission for the second time...no hangups whatsoever. Seems like they are cached since previous play, or what? BUT THEN THE EXPLOSIONS ARE GONE! :mad: So, please let me know if anyone else has come across this. I mean, it could of course be my system that is causing this but still, I would find that a bit odd.
-
Manolo approves! :joystick:
-
"Bay of Hogs" campaign available again.
SFC Tako replied to SFC Tako's topic in DCS: Mi-8MTV2 Magnificent Eight
@JaVA_Platypus You made it?! AWESOME! :thumbup: Winners never quit! And thanks for the positive feedback :) Now of course, having made this mission AND tested it like a hundred times...it gives me a SLIGHT advantage in the skillz department ;) (something I gotta remember in the future, to differentiate between my own over-rehearsed "skills" and that of a guy who flies it for the first time). Your hints are all on target. Had to look up that trigger zone in the mission editor and sneaking in from the east might just buy you an extra ten seconds or so. Which is a LOT in this mission. The Gazelle huh? I really want to try it out but they never seem to get around releasing it on Steam. As with the Mirage, as with "IL-2 Battle of Moscow"...I'm smelling a disdain for Steam. Could it be that nothing worth buying will ever be released on Steam again? I wish they could tell it like it is and I'll move all my things over. Just a lot of work but it might just be worth it. A bit sad though as Steam has always worked perfectly and I've never had to keep a record of all my games/distributors/licenses and what not. But if they wanna ditch Steam they oughta tell us up front.
-
"Bay of Hogs" campaign available again.
SFC Tako replied to SFC Tako's topic in DCS: Mi-8MTV2 Magnificent Eight
Here's a walkthrough of the dreaded Mission #2 :joystick: -
Thanks Andrew and you go ahead and do that. I bet a lot of pilots will adjust that parameter. Ain't nothing wrong with that, it's a killjoy for most pilots in it's current state.
-
The chute does get replaced on a Mig-21 when rearming on a carrier. It should be the same for the Mirage. Watch at 10:15
-
OK, here's the full Mission #2. Having flown it a few times lately, it dawns upon me what a long and tedious mission it is. So I fully understand those who are frustrated by it. But war is hell ;)
-
Make the carrier go 50kph into the wind and make the wind go about 5-7m/s. That's pretty normal for carrier ops. And you'll have good a practice environment as well :)
-
@Zhen: Put in 50% fuel, it's what I consider absolute maximum for other aircraft when fooling around with carriers.
-
No worries and THANKS, rge75 :) Contemplating a new campaign soon, a new campaign yes, not another port of Outremer or Hogs. Will take difficulty levels a bit more seriously, perhaps making two separate versions from the get go (with proper design planning so I'll know what values to edit for the corresponding levels of difficulty). This has been a good talk and if I can't listen to people, I'll never grow up. But Hogs is just a nightmare to customize. Perhaps a campaign for the Gazelle is something to think about? Or the F-5! Or the Mirage!!! Whichever comes out first at Steam ;)
-
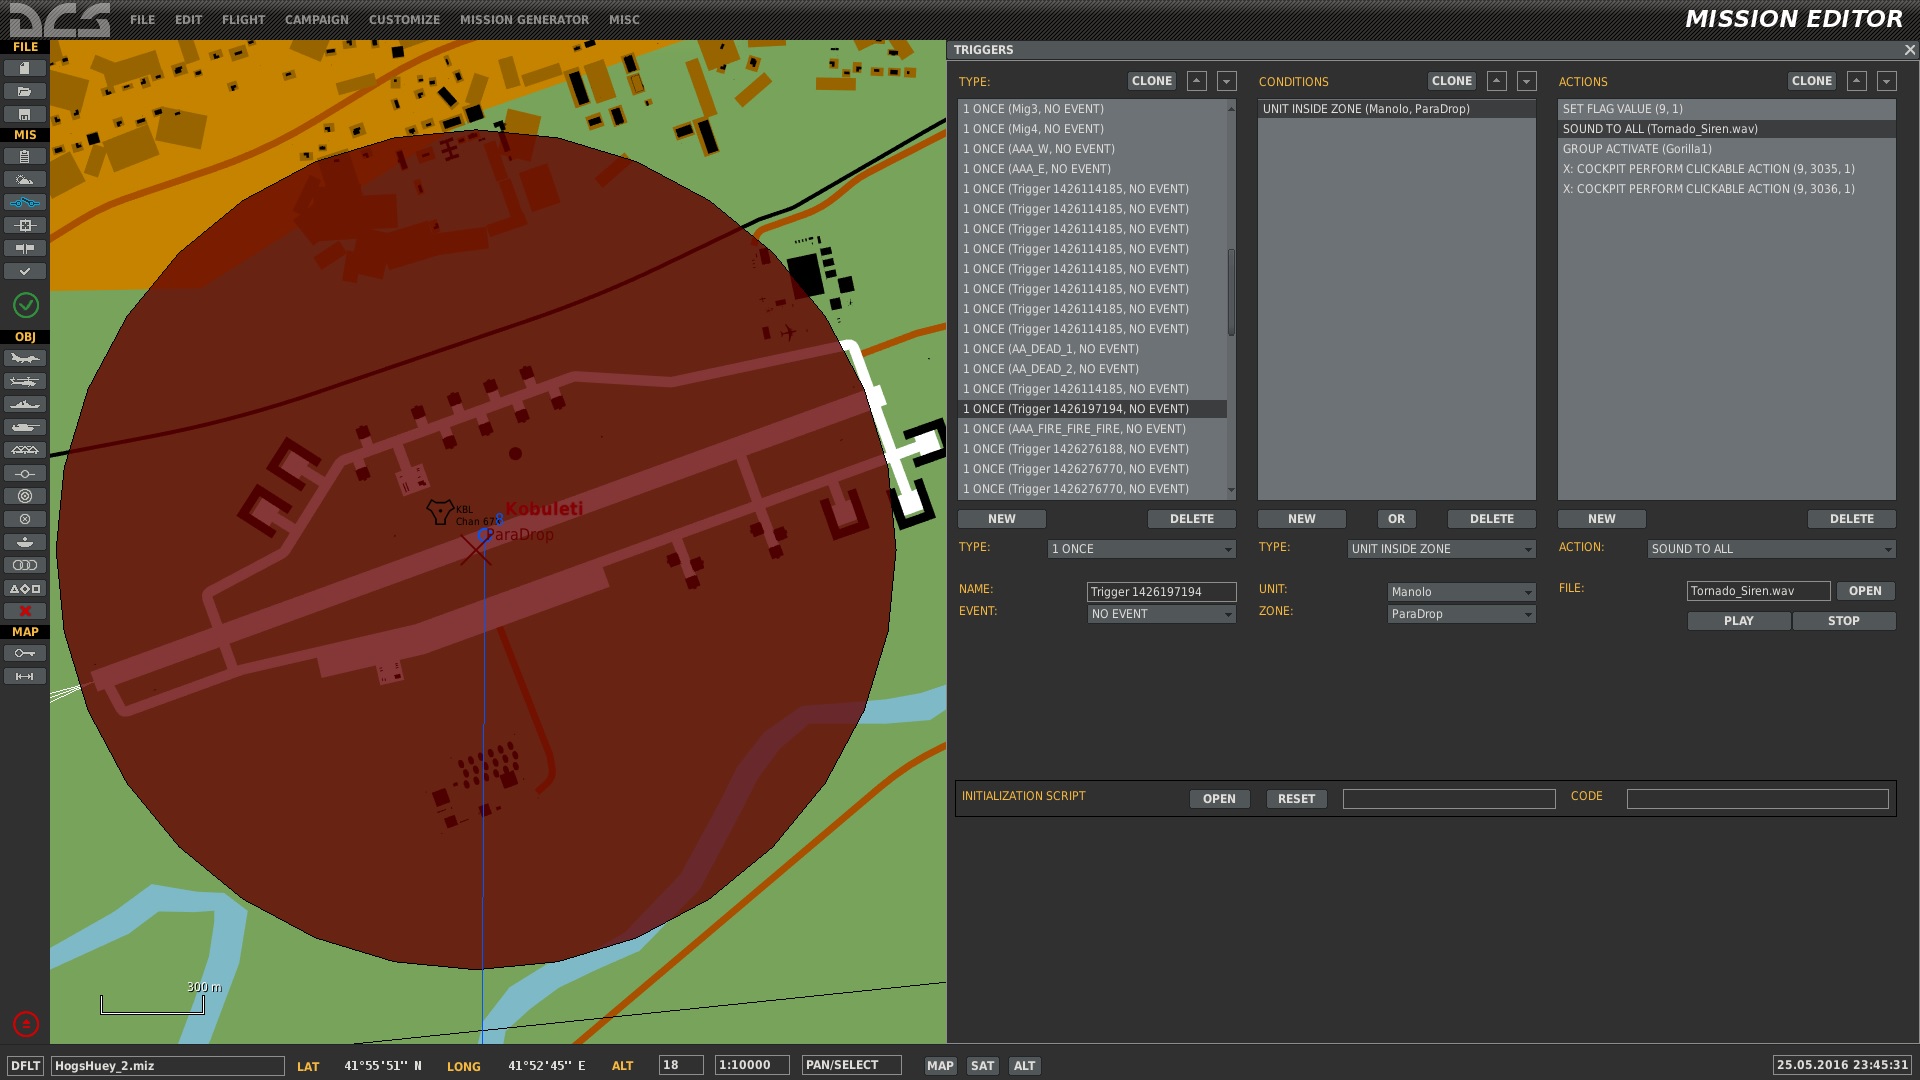
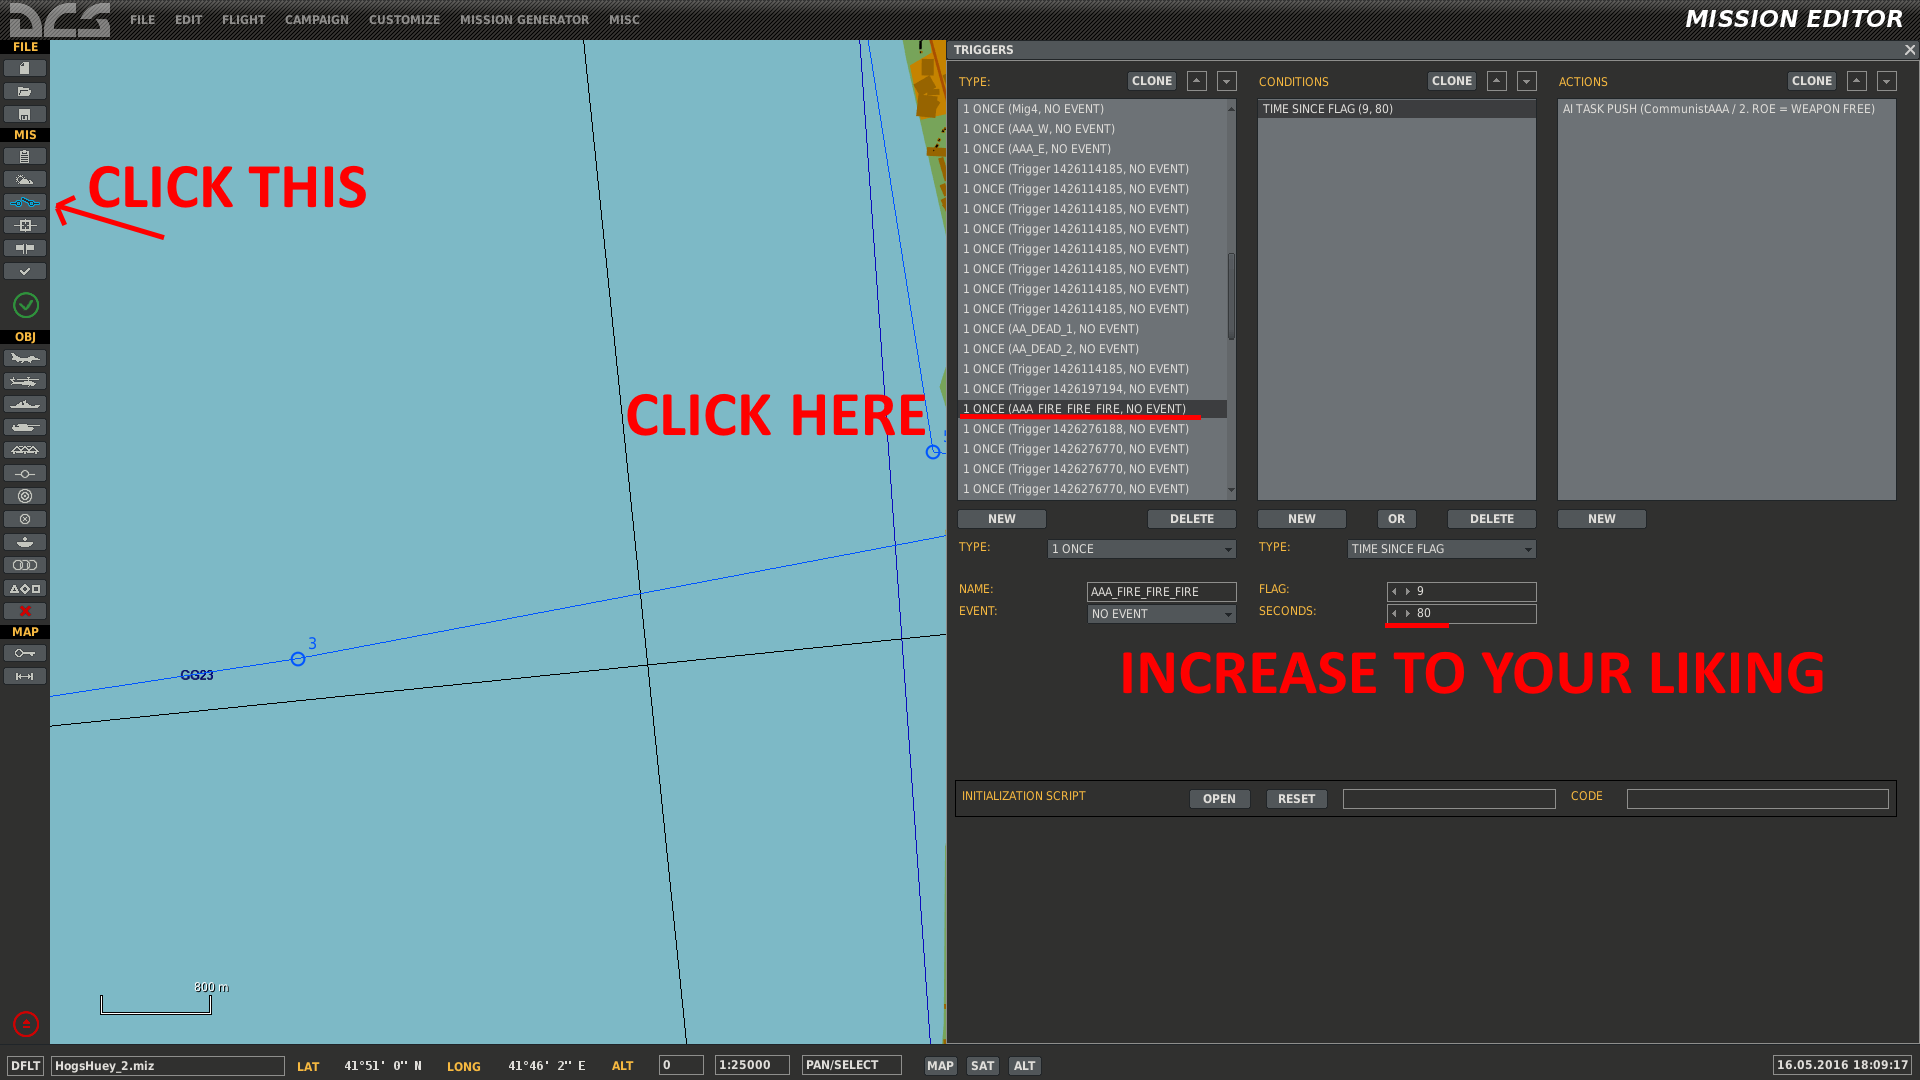
FOLLOW UP: The bad news first: This mission #2 is way too complicated to split up, it would take me a long time to get things working independently and quite frankly, even though it's a tough mission - you can complete it. In fact, I just tried it out and aced it on the first try. Now that doesn't mean a thing really as I've designed the damn thing myself and can probably fly it drunk as well. But consider that I haven't flown the Huey for well over six weeks and the fact that this is a long mission with several stressful situations. This might sound like a madman's defense but I seriously doubt people have to fly this mission ten times to ace it. Secondly, about the problems regarding the objectives - I've read the briefing and it's all there. For a detailed map of the AAA-sites, look at mission pic #3 in the briefing. Alright then, enough with this. The good news: If the AAA at the main airfield puts you off and you need more time to take them out, you can increase the amount of time until they are "manned". Just open mission #2 in the Mission Editor and follow my instructions in the picture enclosed. End statement: There are pilots who have finished this campaign in a hurry and then there are pilots who get stuck at mission #2. My only fair solution is to let the less fortunate pilots alter the balance slightly as I pointed out in the good news above. And trust me, I have given this thought, it's not me being lazy here. My motive is to keep things hard for the hardcore pilots out there, to let them go through this ordeal without any punches pulled. And if you still think this "solution" of mine is only a half-measure, you're free to tone things down further in the mission editor. But truth be told, this mission is a mess design-wise. It was one of the first missions I ever made and it's sort of hard to comprehend every function now, even for me. Hence my stance on not splitting it. Final "that's it, I've had it" solution: Open up the campaign file in the campaign builder and rebuild the campaign yourself, excluding mission #2. (solution provided by rge75) As for the prolonged level of stress in mission #2, ask any real Huey pilot that has flown in Afghanistan or Vietnam and they will tell you about stress lasting for hours instead of minutes. This mission ain't nothing.
-
@rge75: I don't have the briefing in front of me but I recall there being info in the mission briefing (after airfield-X) about taking out first the AAA-batteries and then the aircraft spooling up. Having done that, you will recieve further orders "in the saddle". And landing in the middle of the airfield? You mean the first airfield (airfield-X), right? That's correct, land there and Tony and the boys will disembark and set some demo-charges.