sharkfin61
-
Posts
422 -
Joined
-
Last visited
Content Type
Profiles
Forums
Events
Everything posted by sharkfin61
-
I used those from Amaz*: Push-pull switches
-
Hi Ninja1, first of all, it is great to see another one, still building the A-10C's pit in 2024, despite of all the new and shiny aircraft that came out over the past years, so I don't feel that lonesome anymore. Maybe the attached scematics helps a bit. I would also recommend to thoroughly study Craig S.'s (www.youtube.com/@CraigSmysimpit ) video on YT: Finally there are scematics from the Arduino Forum It also took me days to find out the right wiring (I neglected f. e. the mirroring of scematics a.s.o.) ), so just don't give up.

-
 https://www.printables.com/de/model/817079-toggle-switch-guard-cover Because they are quiet hard to find. All credits go to stefan_93158 and FirstGizmo @printables.com
-
- 5
-

-
nullBaby steps, but at least not crawling...
-
Thank you Rapti , already made some progress. Let's see what tomorrow has planned with me
-
Dear fellow builders, I think the time has come to ask for a little more advice and knowledge from your experience. As I'm in the middle of building my A-10C pit, I'm about to lose track and a bit of my motivation. I have the feeling that I am ordering more than I am building. It feels like I have done so little and there is so much left to do. Perhaps your advice can give a bit more structure to my efforts. (I certainly know that there is no "golden way" in the building process) Here's what I've done so far: - Read the forums, watched hundreds of helpful videos. - Getting the plans for the "woodwork" and starting to saw the front and side console parts, sanding, laying the foundation, sanding, painting, sanding, ...., screwing the parts together. - Choosing the right acrylic panels, cutting/milling the panels, sanding, painting, engraving, gluing. - Installing the LED backlight, soldering the small resistors and the tiny glowing suckers, wiring and leaving some wires for the electrical connection. (not finished yet) - Crimping the cables for the switches, buttons, encoders, potis, etc., wiring and soldering them, and finally installing them in the panel(s). (not finished yet) - Insert and wire any analogue gauges with their steppers. (not finished yet) - Installing metal rails with threaded rivets on my side consoles to screw in the panels. (not finished yet) - Planning how and where to connect them. (not finished yet) - Choosing the specific microprocessors or boards for each panel. (not finished yet) - Write or copy and modify the Arduino sketches for the panels. (not finished yet) - Ordering more and more parts that I forgot ... (here I am now) - .... So, maybe someone can help me with advice if I'm on the right track or if I've skipped a step (or more) in the process, as I'm kind of "wildly weaseling" between the steps. I hope this can be a small guide for the following people who are willing to take the plunge, accompanied by sweat, blood, tears of frustration and wonderful moments when things work out the way they should. My deepest thanks go out to all the people who have helped me so much to get this far. (Sorry for sounding frustrated, but that's just how I feel now)
-
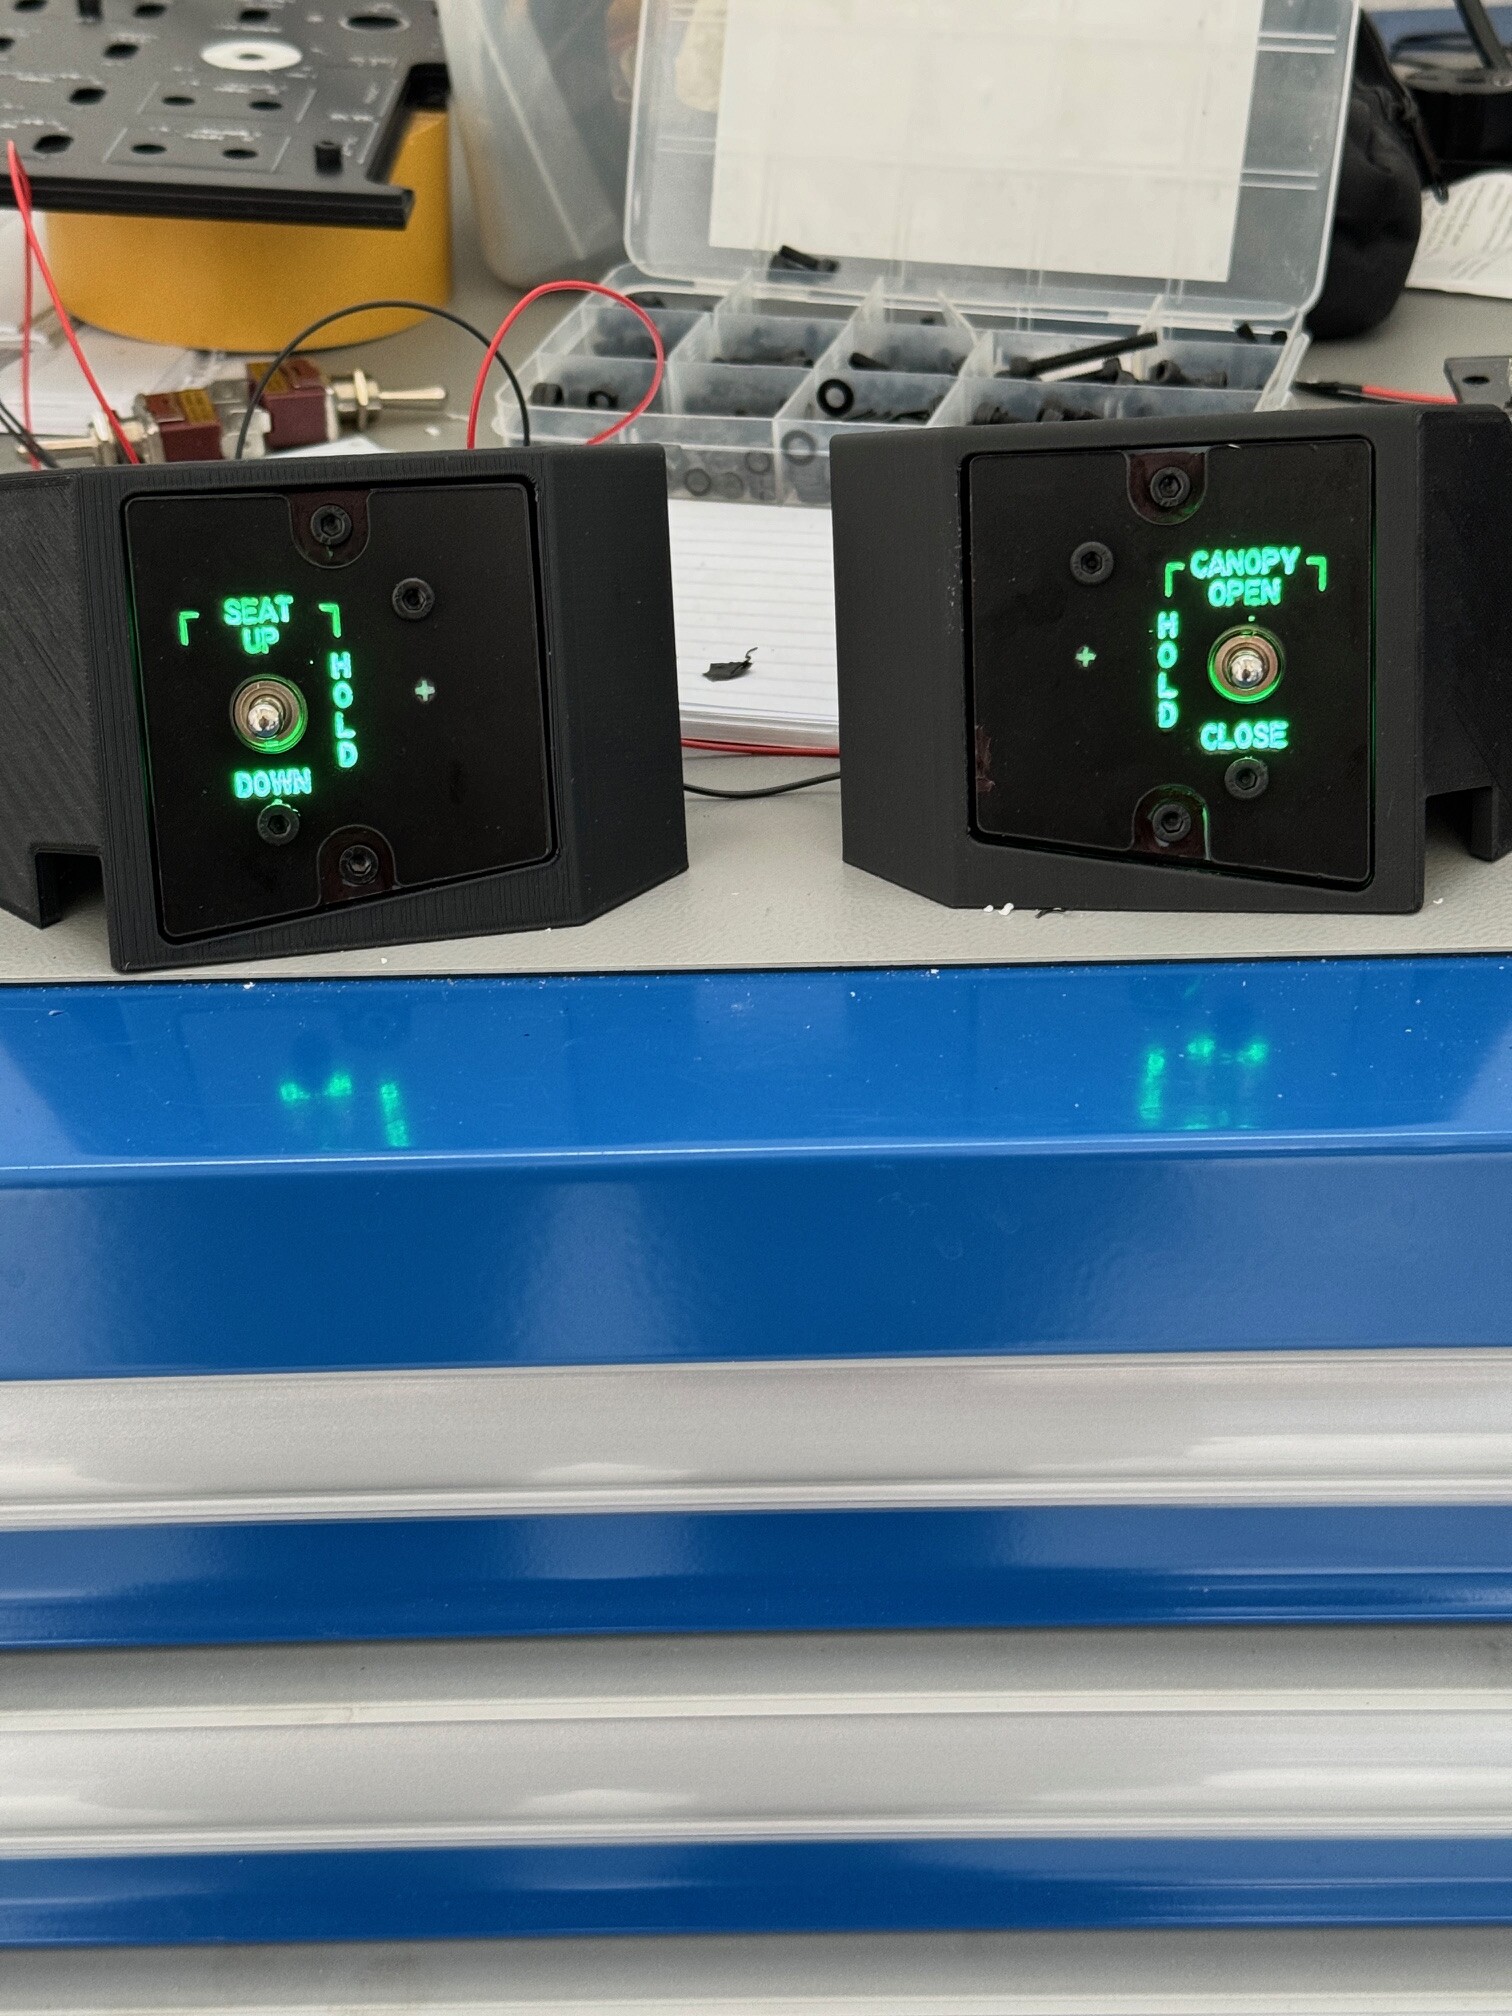
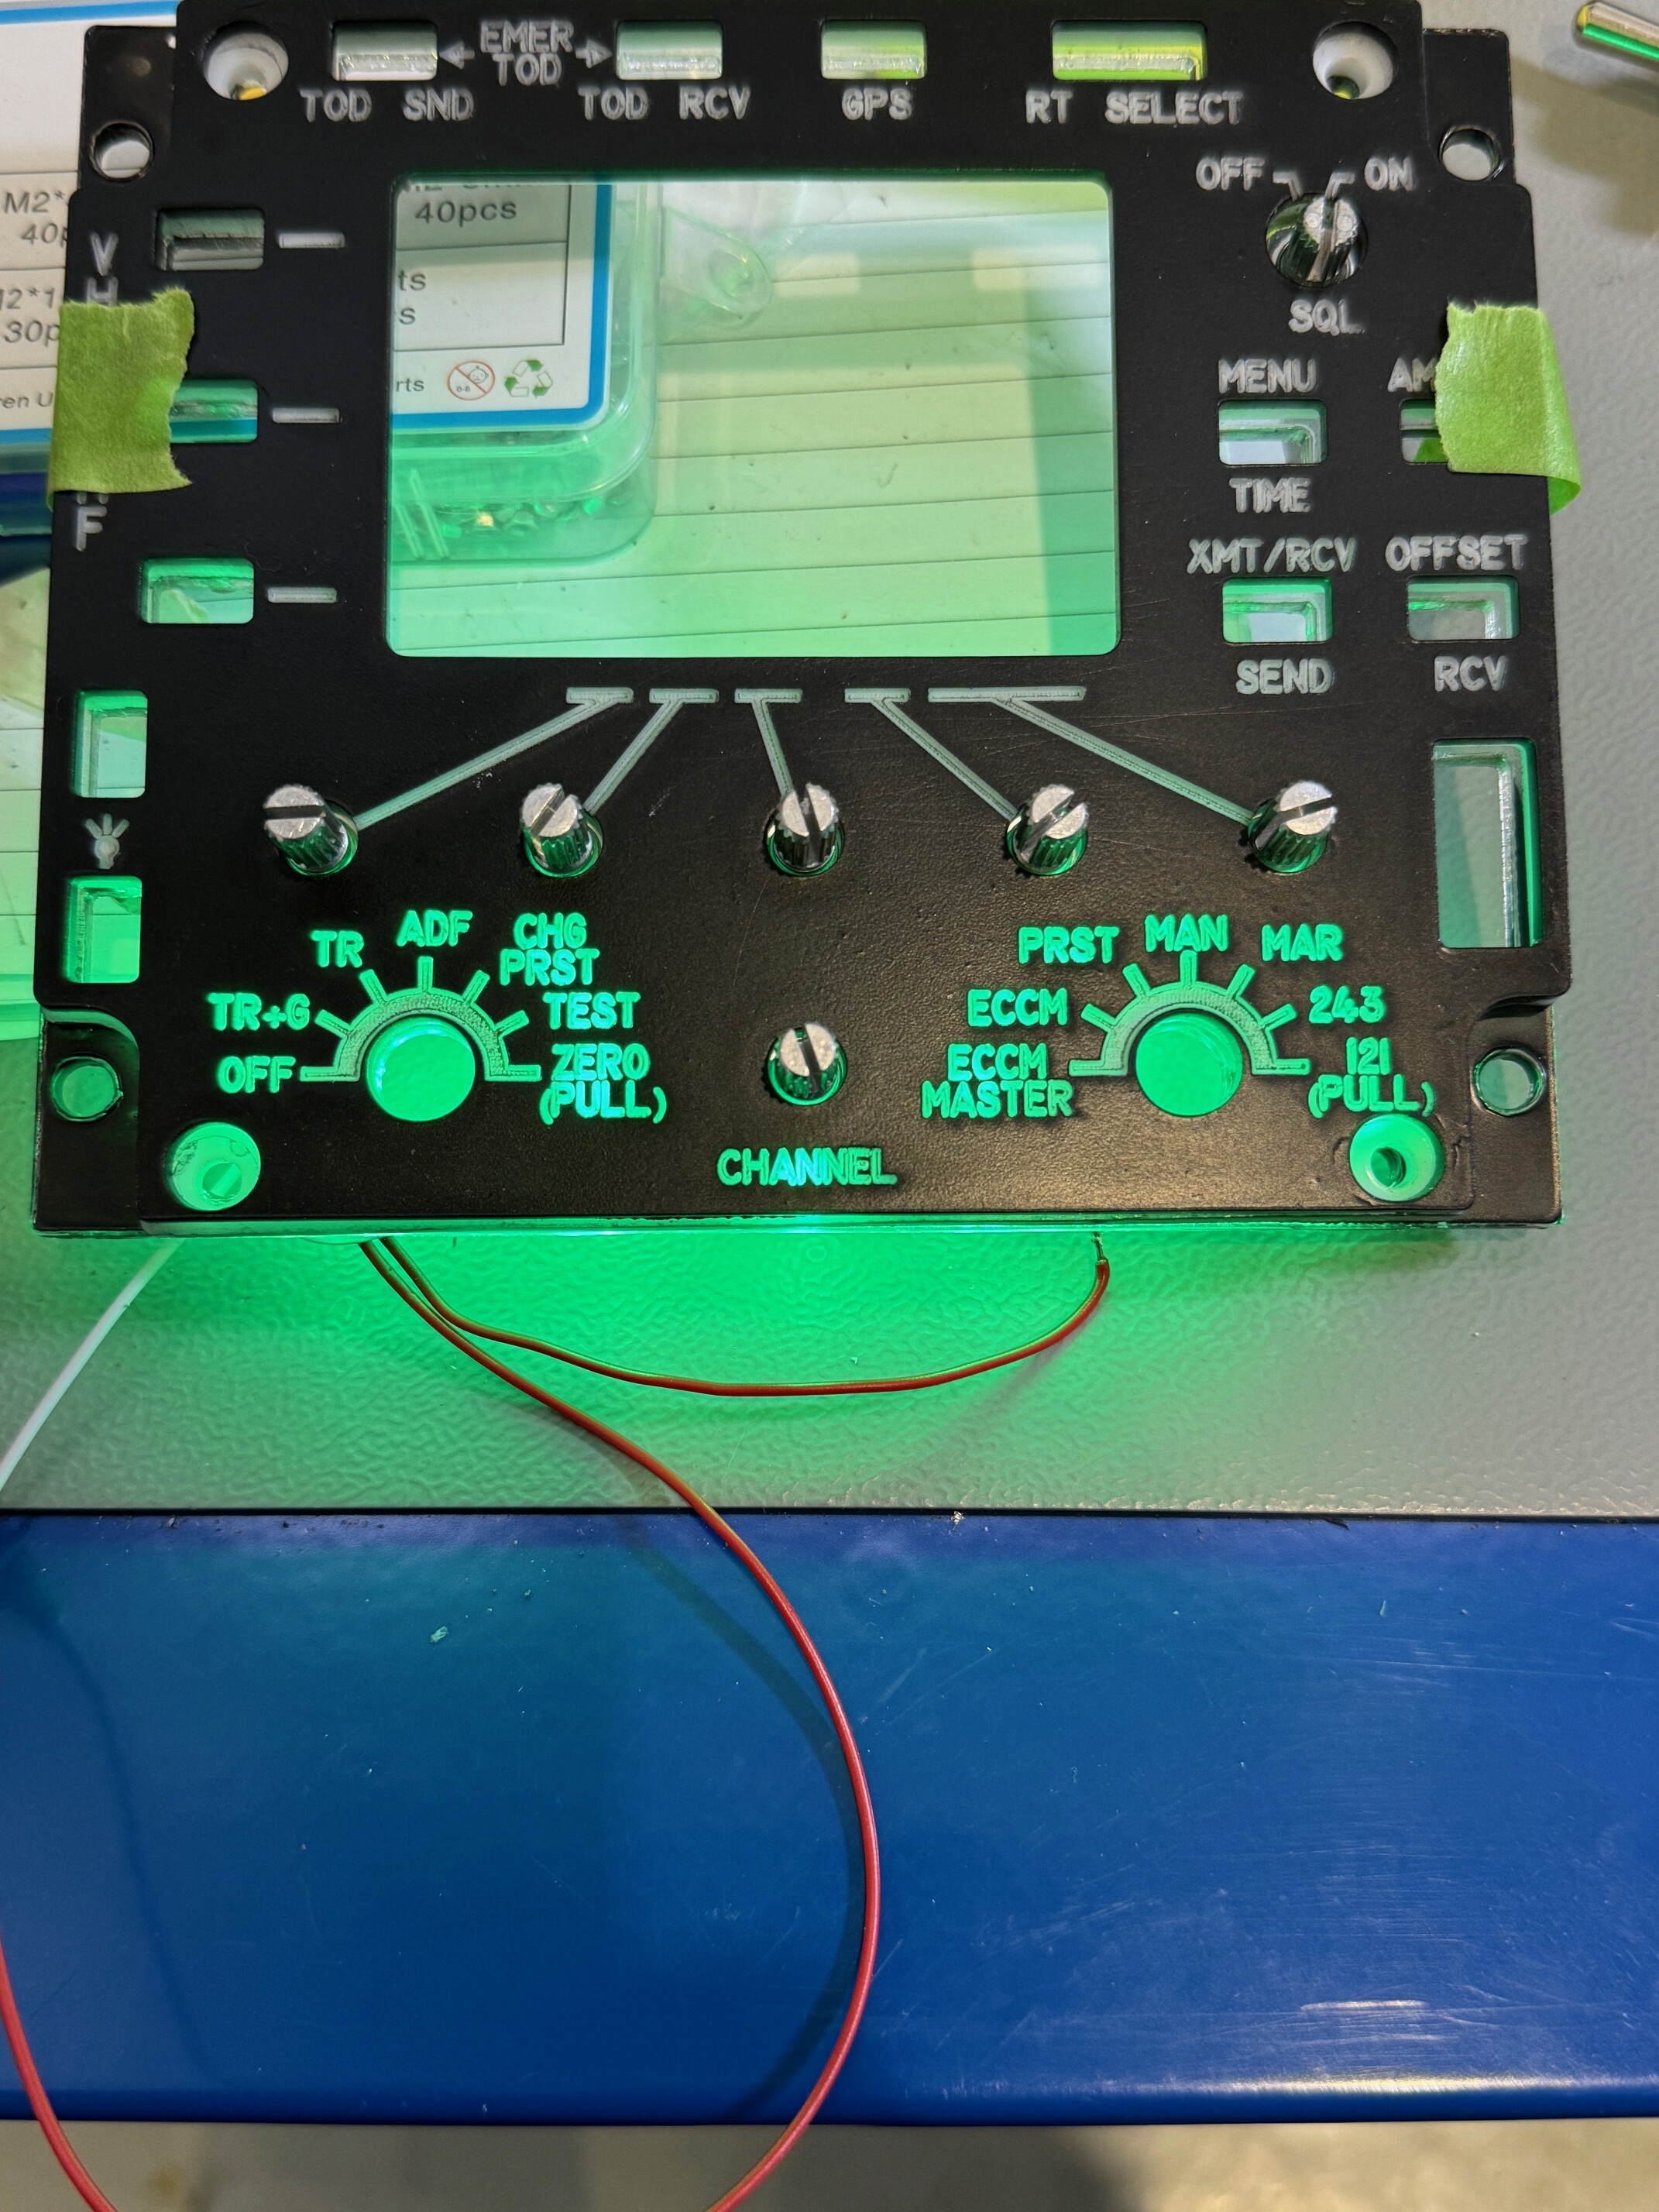
Well, it all came to a happy ending when I simply reduced the thickness of the spacer. I'm glad, I made it from several layers of acrylic sheet and didn't glue it yet, so I just had the reduce it from 21 mm to 12mm. The brightness is now ok for me, just have to change 2 LEDs as it looks like they went to LED hell.
-
Will test that in the upcoming hours. Also, I'm planning to put some refecting metal tape and cover the inside of the stand-öff part (between the LED baseplate and the engraved sheet) of Romro Kilos caution panel design.
-
Thank you, @No1sonuk and @Vinc_Vega. I have 1 led per caution field. The intcity is alreadyset to: lc.setIntencity (0,15); as per Craig's arduino sketch. So I think, the brightness cant be set any higher, even with an additional potentiometer. My suspicion was also, maybe the leds are the problem itself, because I used the ones with an internal resistor (datasheet attached). Lazy me @Vince_Vega PM Wilco (tomorrow). Grüne LED CautPanel_Kingbright_L-934GD-5V.pdf
-
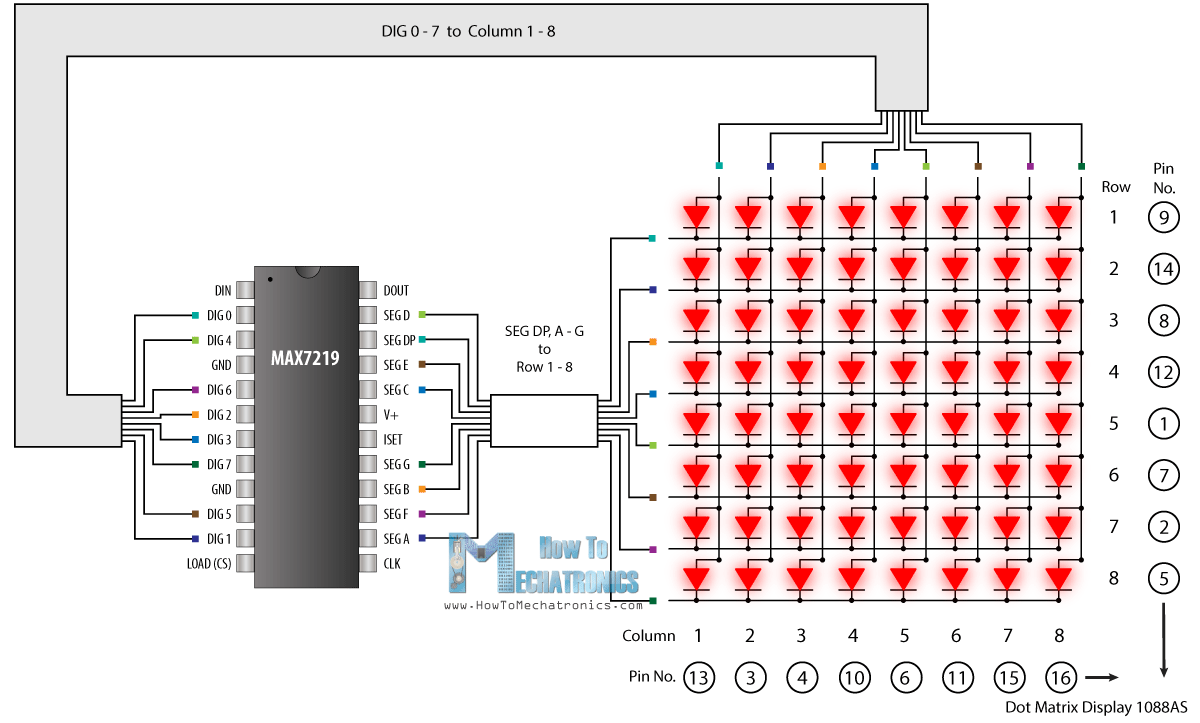
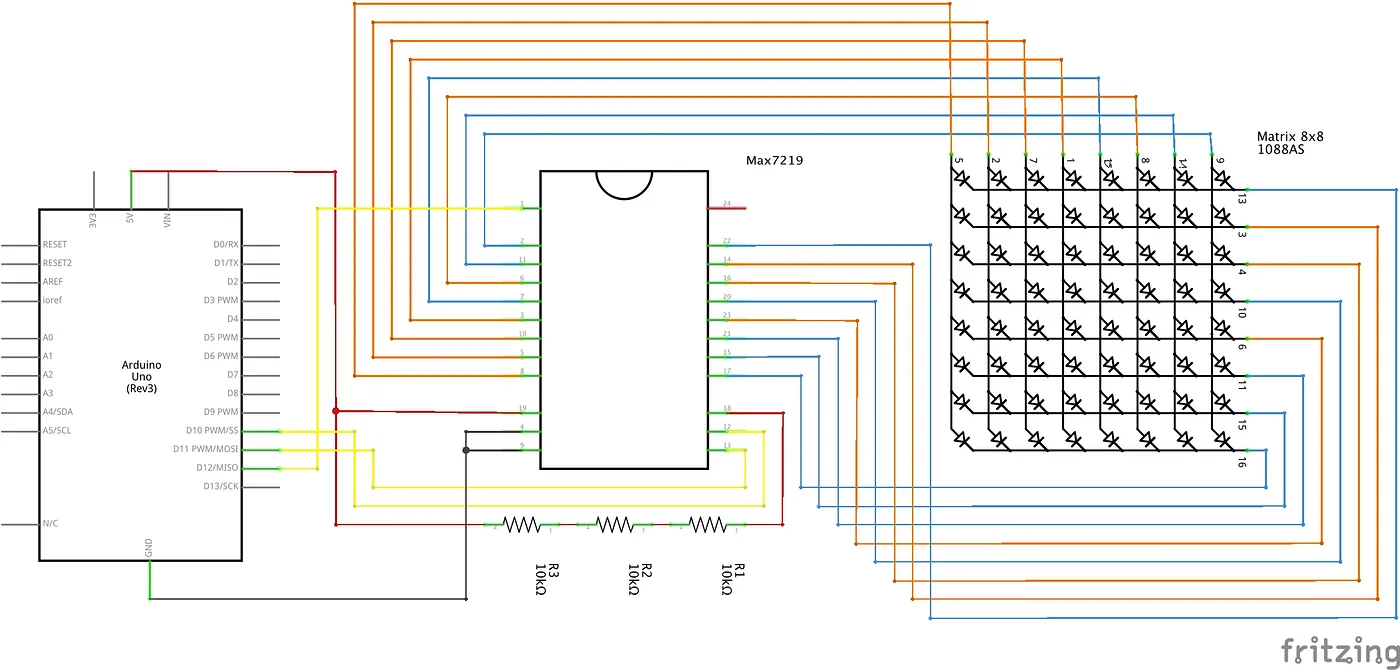
A question to all electronic affascinatos: When I soldered my MAX 7219 board that came with the 8x8 red dot panel, I had to put in a 10k resistor. After some time I brought my A-10 caution panel to life, however the lights were very weak. --> Can I change the resistor to ine with a higher value to gain more brightness on my 3mm green LEDs (3,2V forward Voltage & 20mAmp)? tyia
-
Maybe that helps:
-
Thanks, Vinc_Vega for your swift answer. Well, I have to check the adresses (system is dismanteld atm. New panels are prepared but not electrified or coded. (Great if you have a little spare time at work ) Happy easter as well, hope you're doing fine over there.
-
Reaching out to all the Arduino programmiing gods, is it possible to use "both" versions of DCS BIOS in th e game? F.e. my A-10C CDU is running perfectly with a sketch that was programmed with the "original" DCS BIOS, whereas my newly made A-10 panels should be programmed with the skunkworks fork of DCS BIOS. (FYI, I soldered my keys in a matrix array and I don't want to rip it apart again) Thank you in advance for your ideas
-
https://resources.sw.siemens.com/en-US/download-solid-edge-community-edition Solid Edge for makers from Siemens might be another candiate. (maybe after your subscribtion is over)
-
The landing gear knob of the warthog projects files isn't a stl file/ 3D printed. It is made out of several lasercut acrylic discs, sanded down to the desired formate. The discs are actually enclosed in the dxf file inside the landing gear folder. If you're still searching for the stl files, they are in the different panel folders (when you have downloaded the A-10C files folder https://drive.google.com/drive/folders/1axItbR_lMZ-5oa0x_59NkXgu5vaw4ljM?usp=drive_link). There are 121 .stl files up to now. E.g. the HSI heading knob stl is inside the HSI panel folder (C:\Users\???\Downloads\_A10C panels\A-10C Panels\1) Main Instrument Panel\Horizontal Situation Indicator (HSI).
-
Hi Leon, as I see nothing in common with 3D printed files, maybe you could be so kind and move your posting to the right section As for the PC, imho , I suggest an other graphics card, if affordable. Some people were very glad, when ramping up the memory from 32 to 64 GB, mostly for multiplay.
-
I think, in some cases customers had to be very patient with the Buddyfox boys, but they got an answer. When I ordered my UFC, everything went flawless.
-
Glad it worked out!
-
Or here:
-
I'll try to send you some screenshots, later on. In the meantime, this might come in handy:
-
I unchecked every patch but my A10CII patches in the according section, it worked! All viewports were exported correctly. Maybe you give it a try.
-
Anyone else having problems to apply the Helios patches after installing 2.8? I can export the dials and numbers for the A10C II but I dont have MFDs, CDU, RWR nor clock.
-
DCS Super Hercules mod by Anubis
sharkfin61 replied to Eight Ball's topic in Flyable/Drivable Mods for DCS World
Keep the last good installation or go, space permitting, for a parallel-installation. -
Proposal for a coming update
sharkfin61 replied to sharkfin61's topic in A-10C Iron Flag Part I Campaign
Just took a glimpse into your Tac Turns video, great stuff, geometry according to the books! Kepp 'em coming -
I don't know, if I'm the only one, who longs for some more written contens. Although I completed just the first 2 missions up to now, I learned a lot of those neat stuff through Biff explanations, that make that simulator so vivid and great. As I'm Wouldn't it be great to have all the explanations given by the instructors, in a single document to repeat in a silent hour of studying? Perhaps divided into the certain systems or missions? I know I can fly all those miissions again and again, if time would only permit. Maybe someone else feels the same need or has the same interest in having some kind of a "going deep into the system document" .