LASooner
-
Posts
252 -
Joined
-
Last visited
Content Type
Profiles
Forums
Events
Everything posted by LASooner
-
Life's been too busy to do much, so it's been slow going, but I found time to weld all the smaller parts together and connect it to my desk mount

-
Slow progress
-
I'm not prepared to make any of this stuff available, firstly I'm still working on all of it myself whenever I get a spare moment. Secondly, I dealt with some issues with the Tomcat stuff I made available that I wasn't real thrilled with. I model all my stuff in Maya.
-
It's in inches
-
I got this one, I haven't programmed it yet https://www.amazon.com/dp/B08JKCDHRW?ref_=ppx_hzsearch_conn_dt_b_fed_asin_title_9 Sent from my Samsung Chromebook Plus using Tapatalk /topic/350660-desk-mounted-ah-64-apache-cockpit-for-vr/#findComment-5462623 Sent from my Samsung Chromebook Plus using Tapatalk
-
where did you get this monitor? null
-
Each NATO panel width is 5.75" Sent from my Samsung Chromebook Plus using Tapatalk
-
These are in inches
-
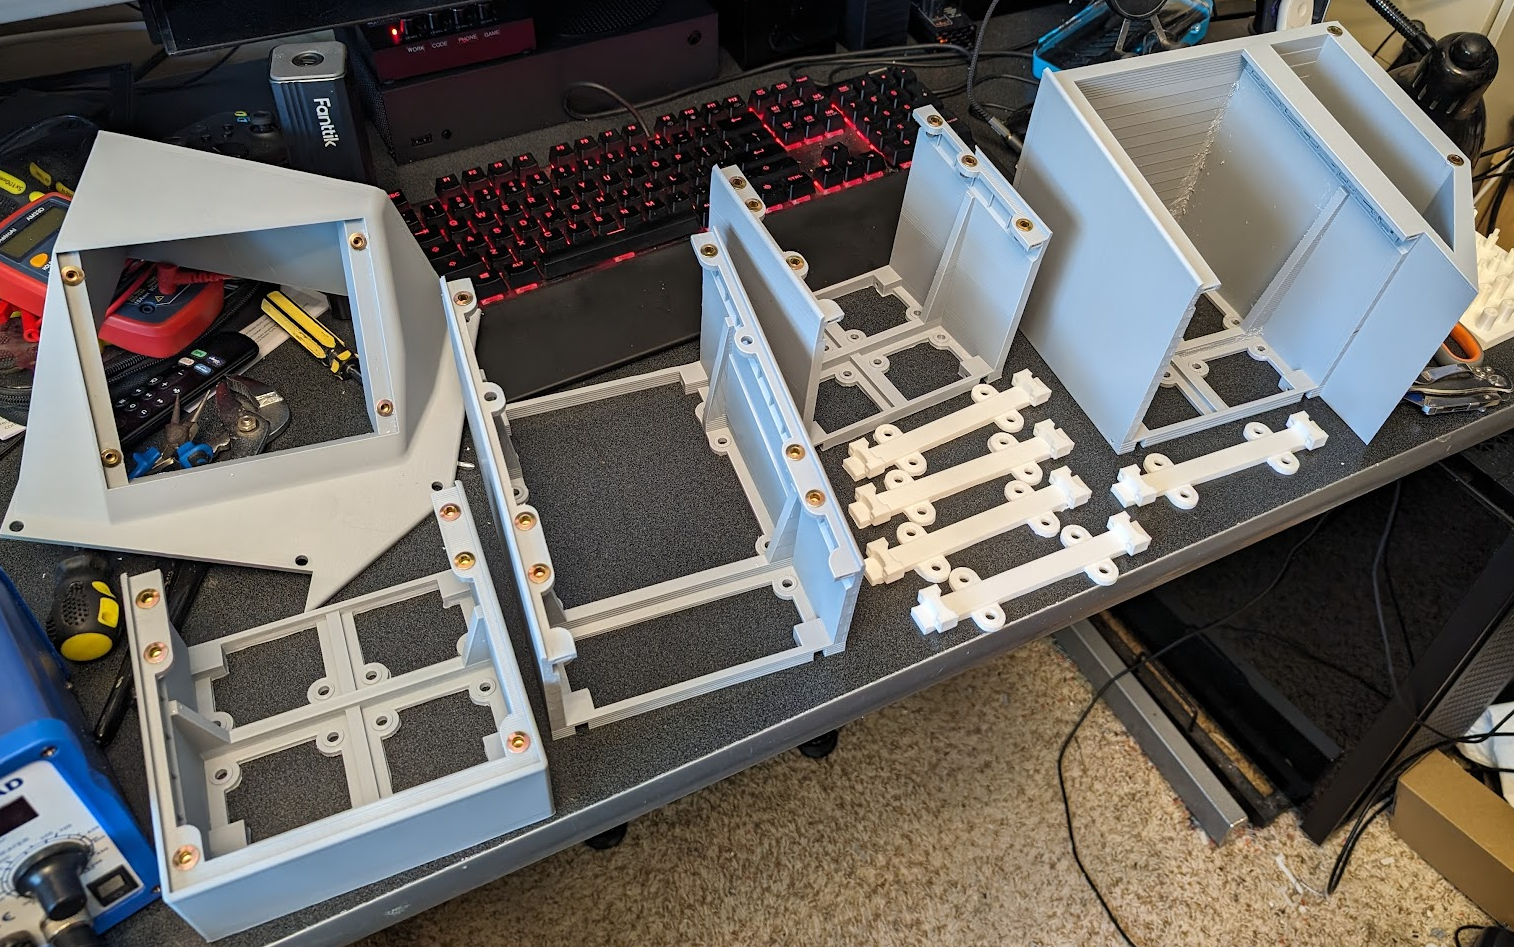
3d printed PLA, I used some fake stone texture to give it the bumpy look, but i'm not real happy with it, I think I may sand it down a little and repaint
-
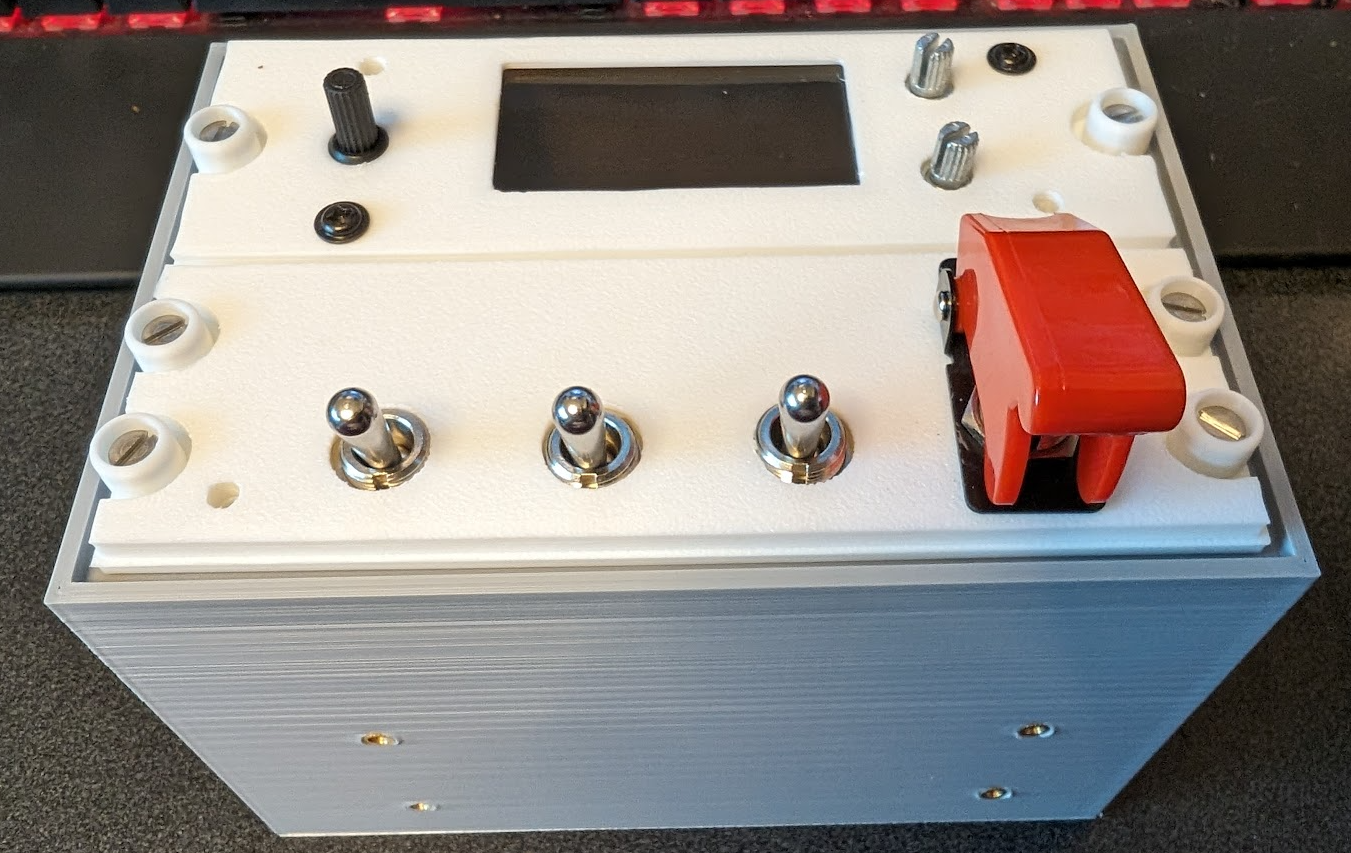
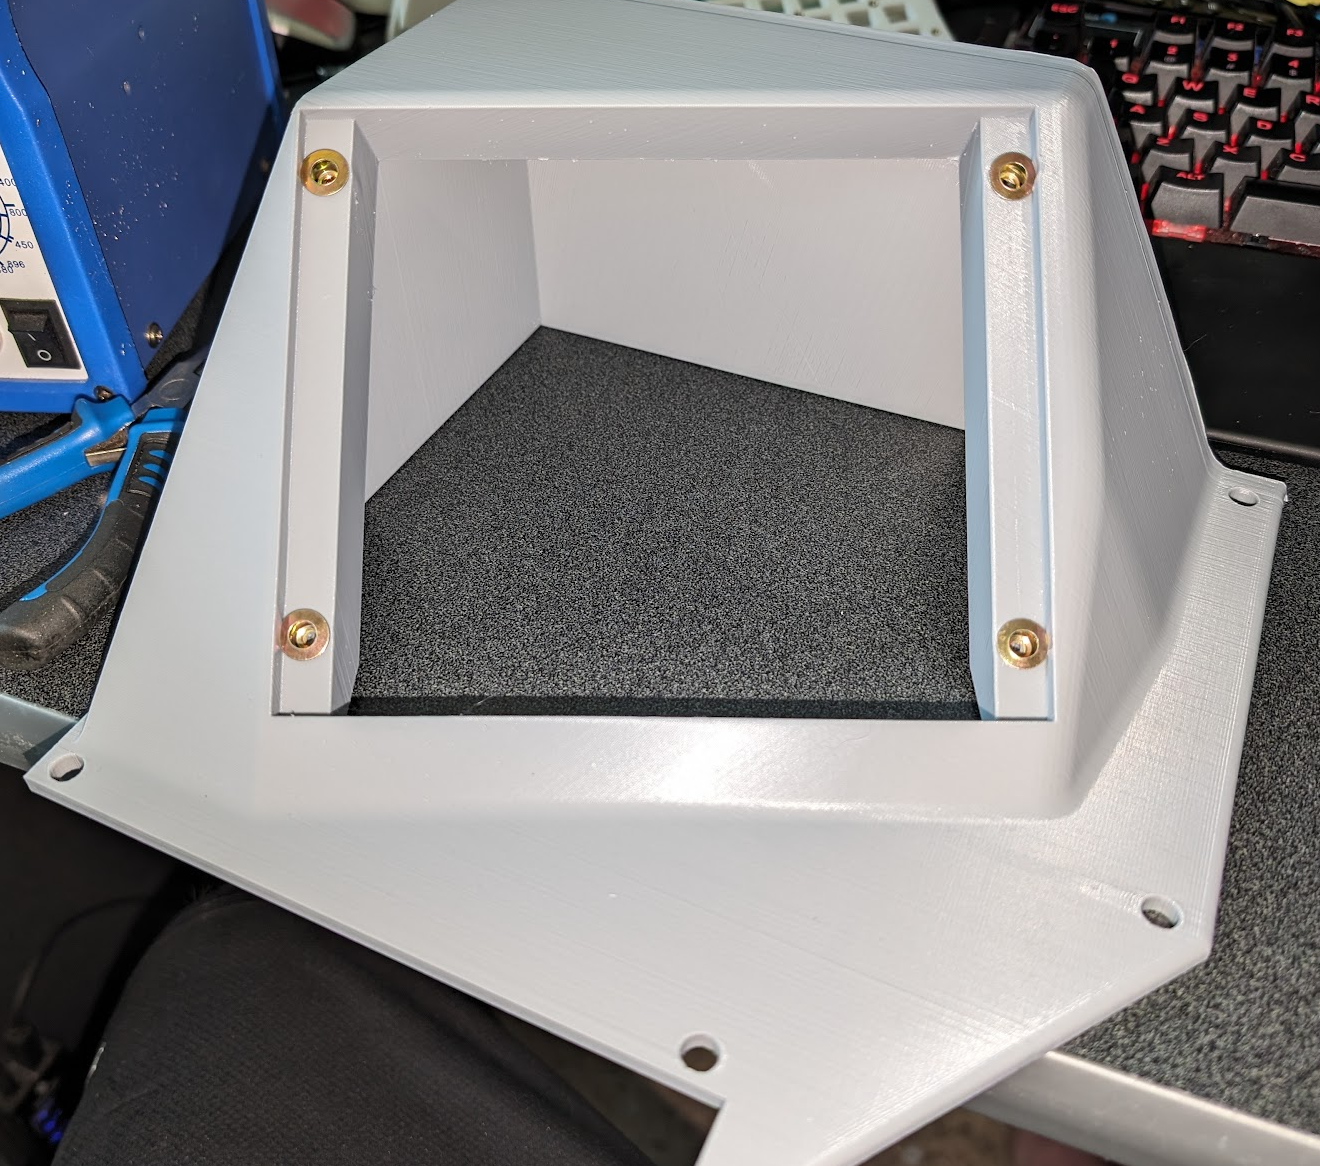
Counter Measures Panel and Box
-
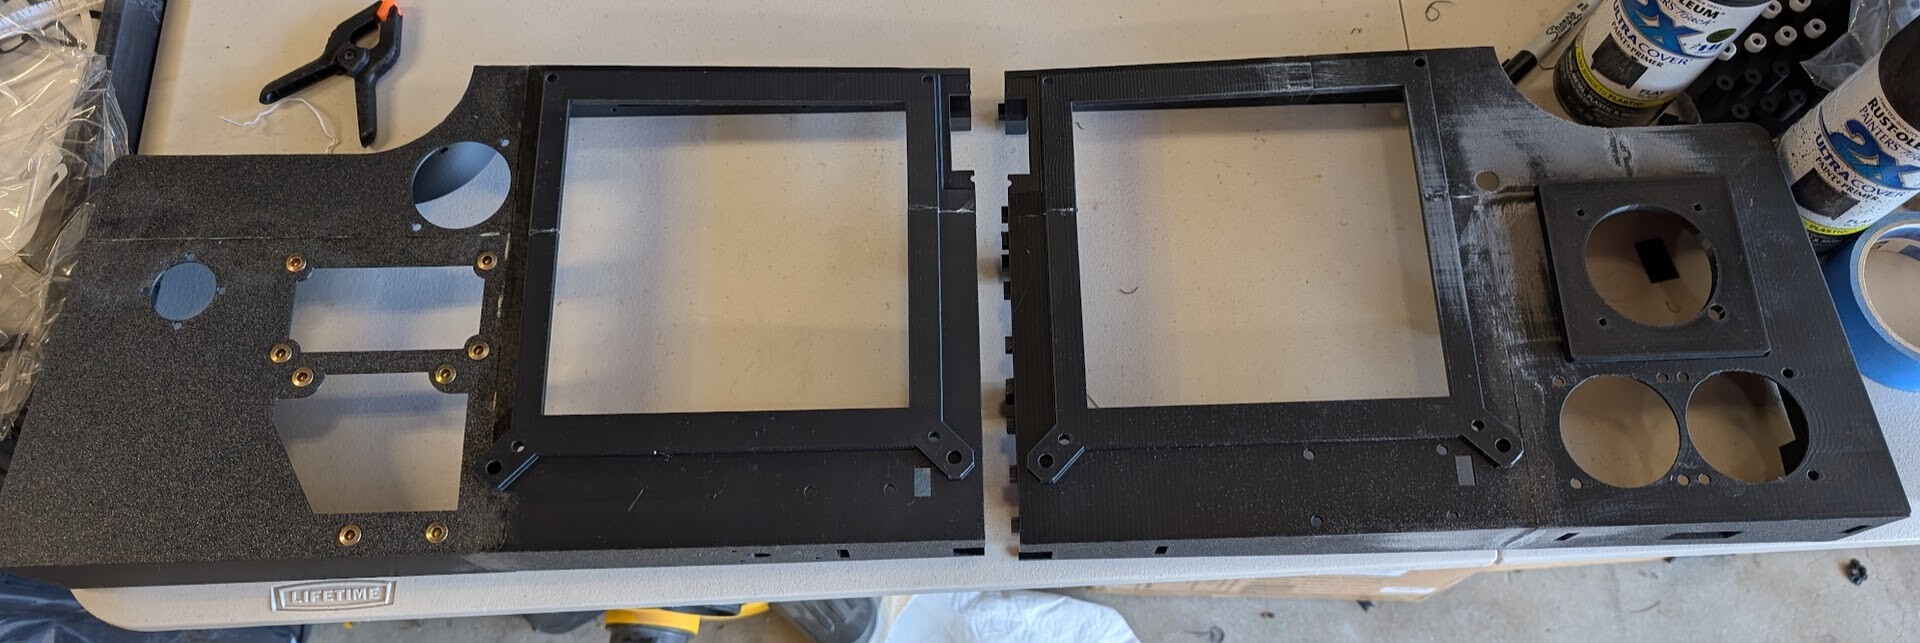
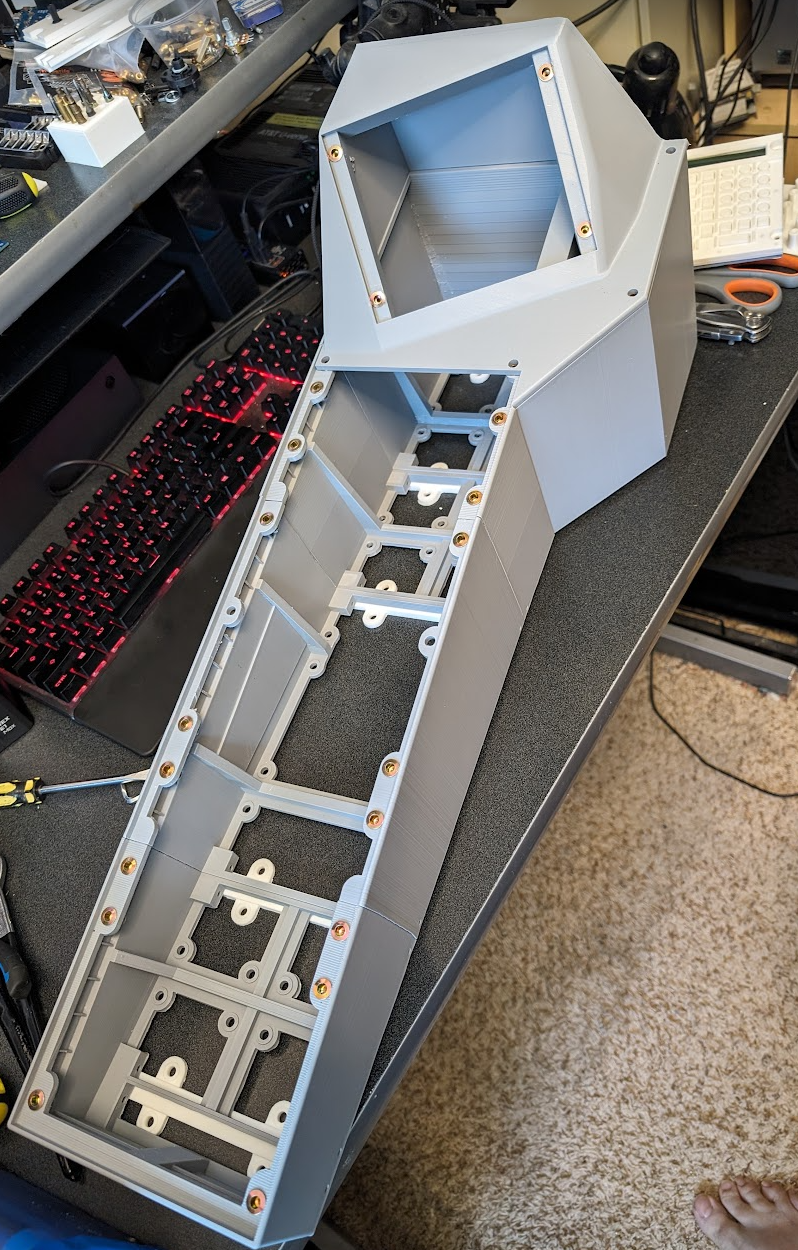
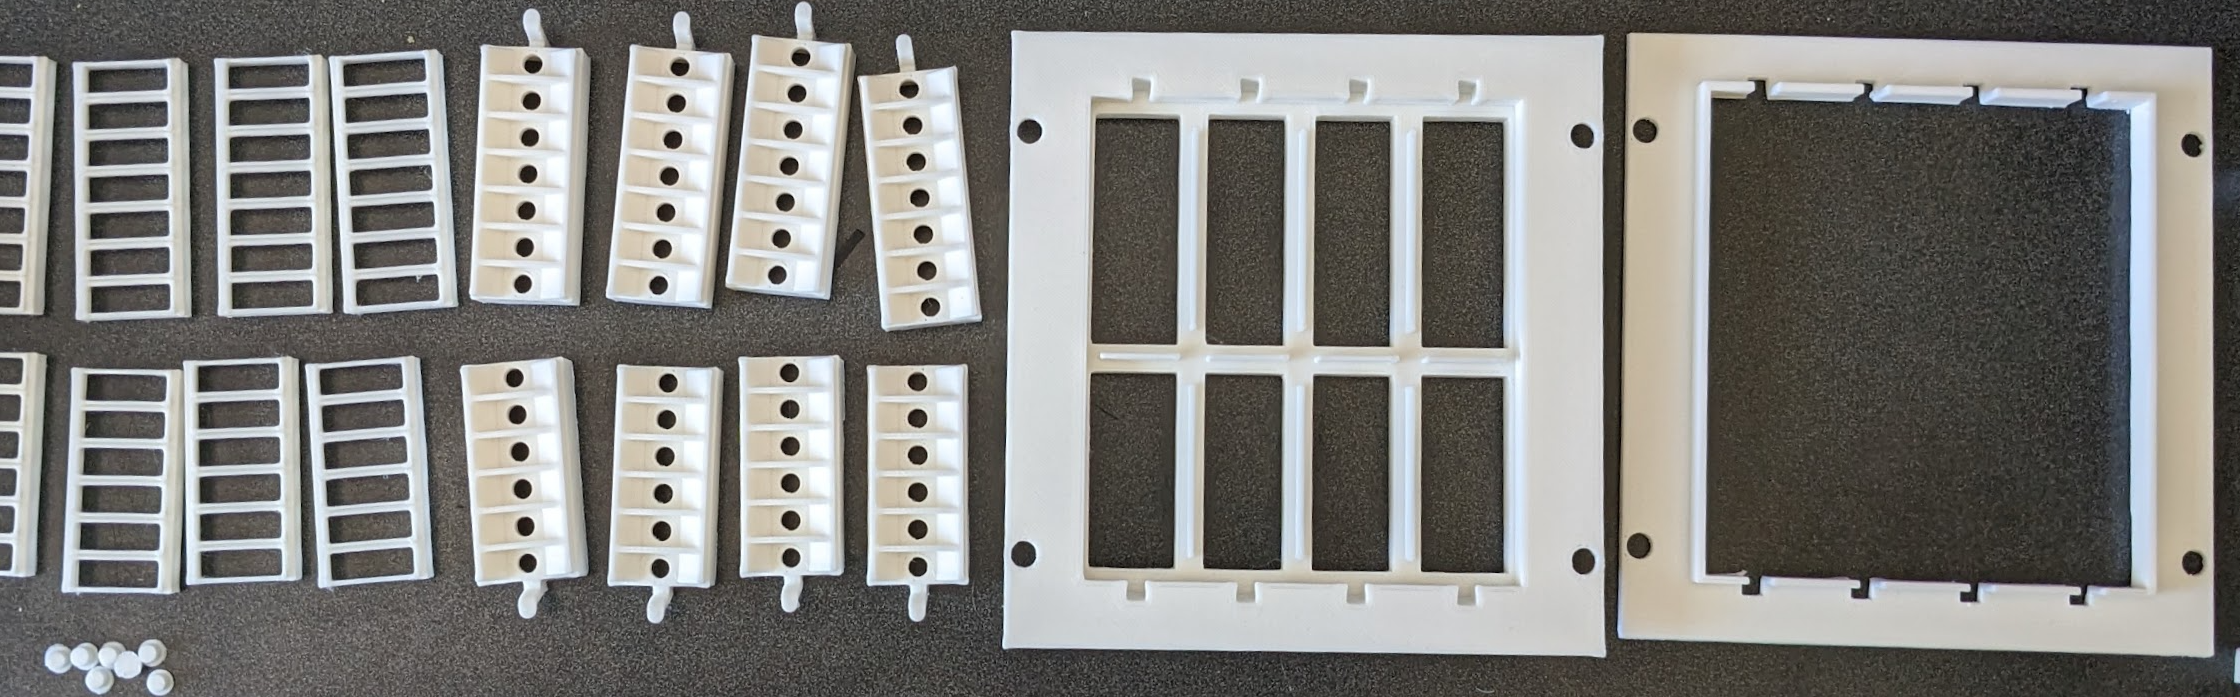
couple several day prints over 2 printers, but the base console mount is printed, and all the panels fit as expected. Because I have smaller print beds I had to break it up into several parts and will glue and screw it all together before putty, prime and sand.
-
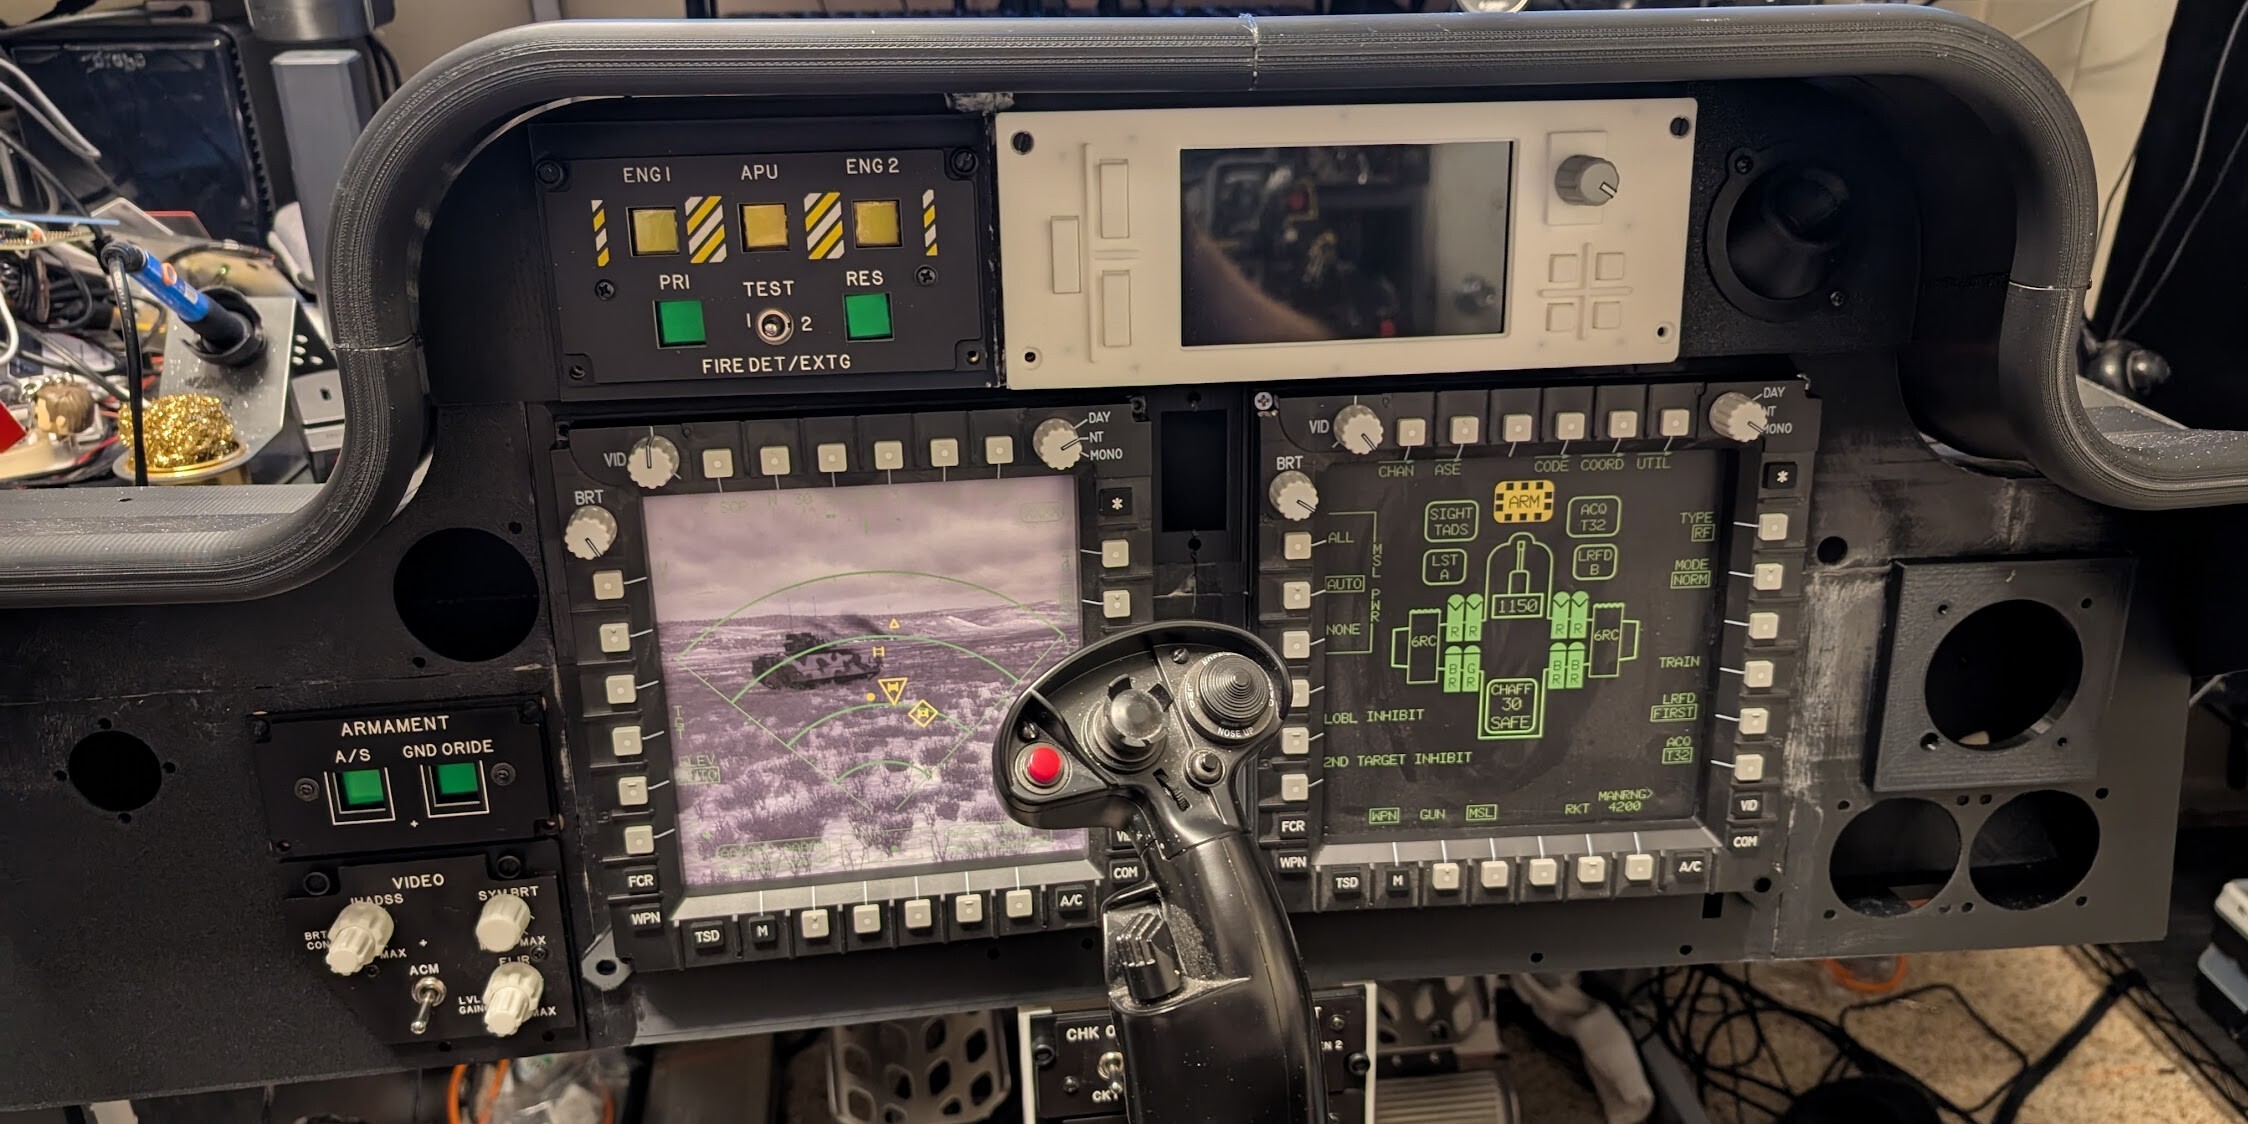
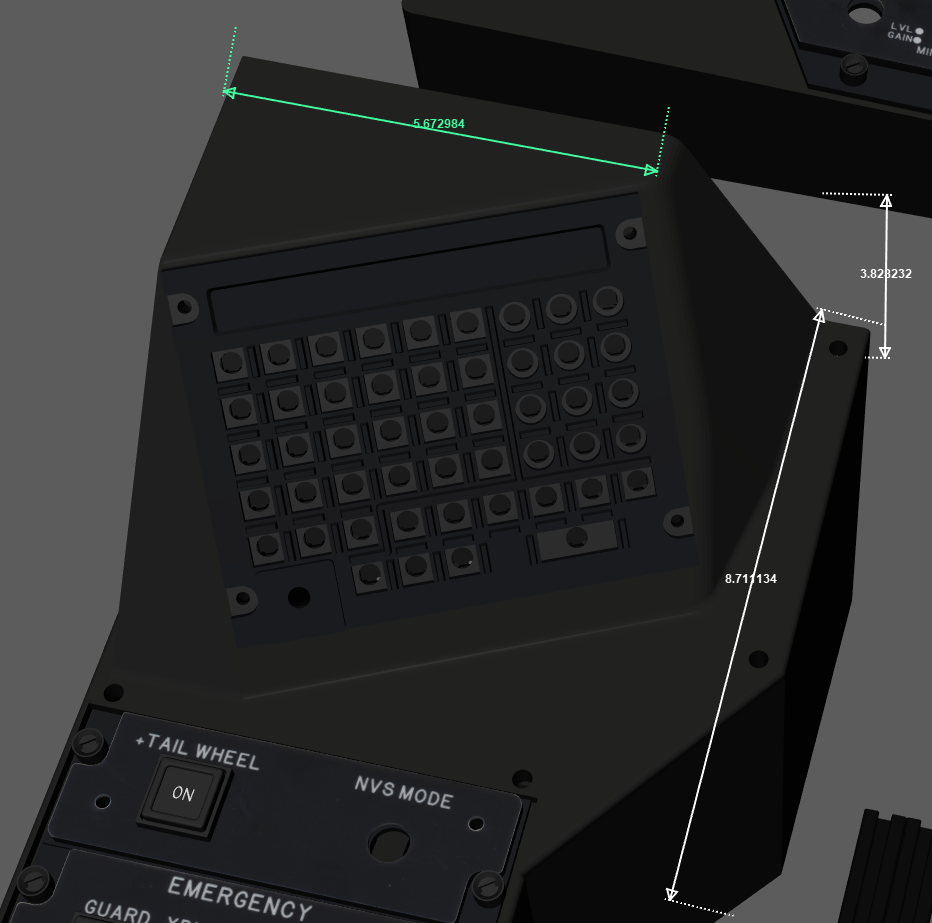
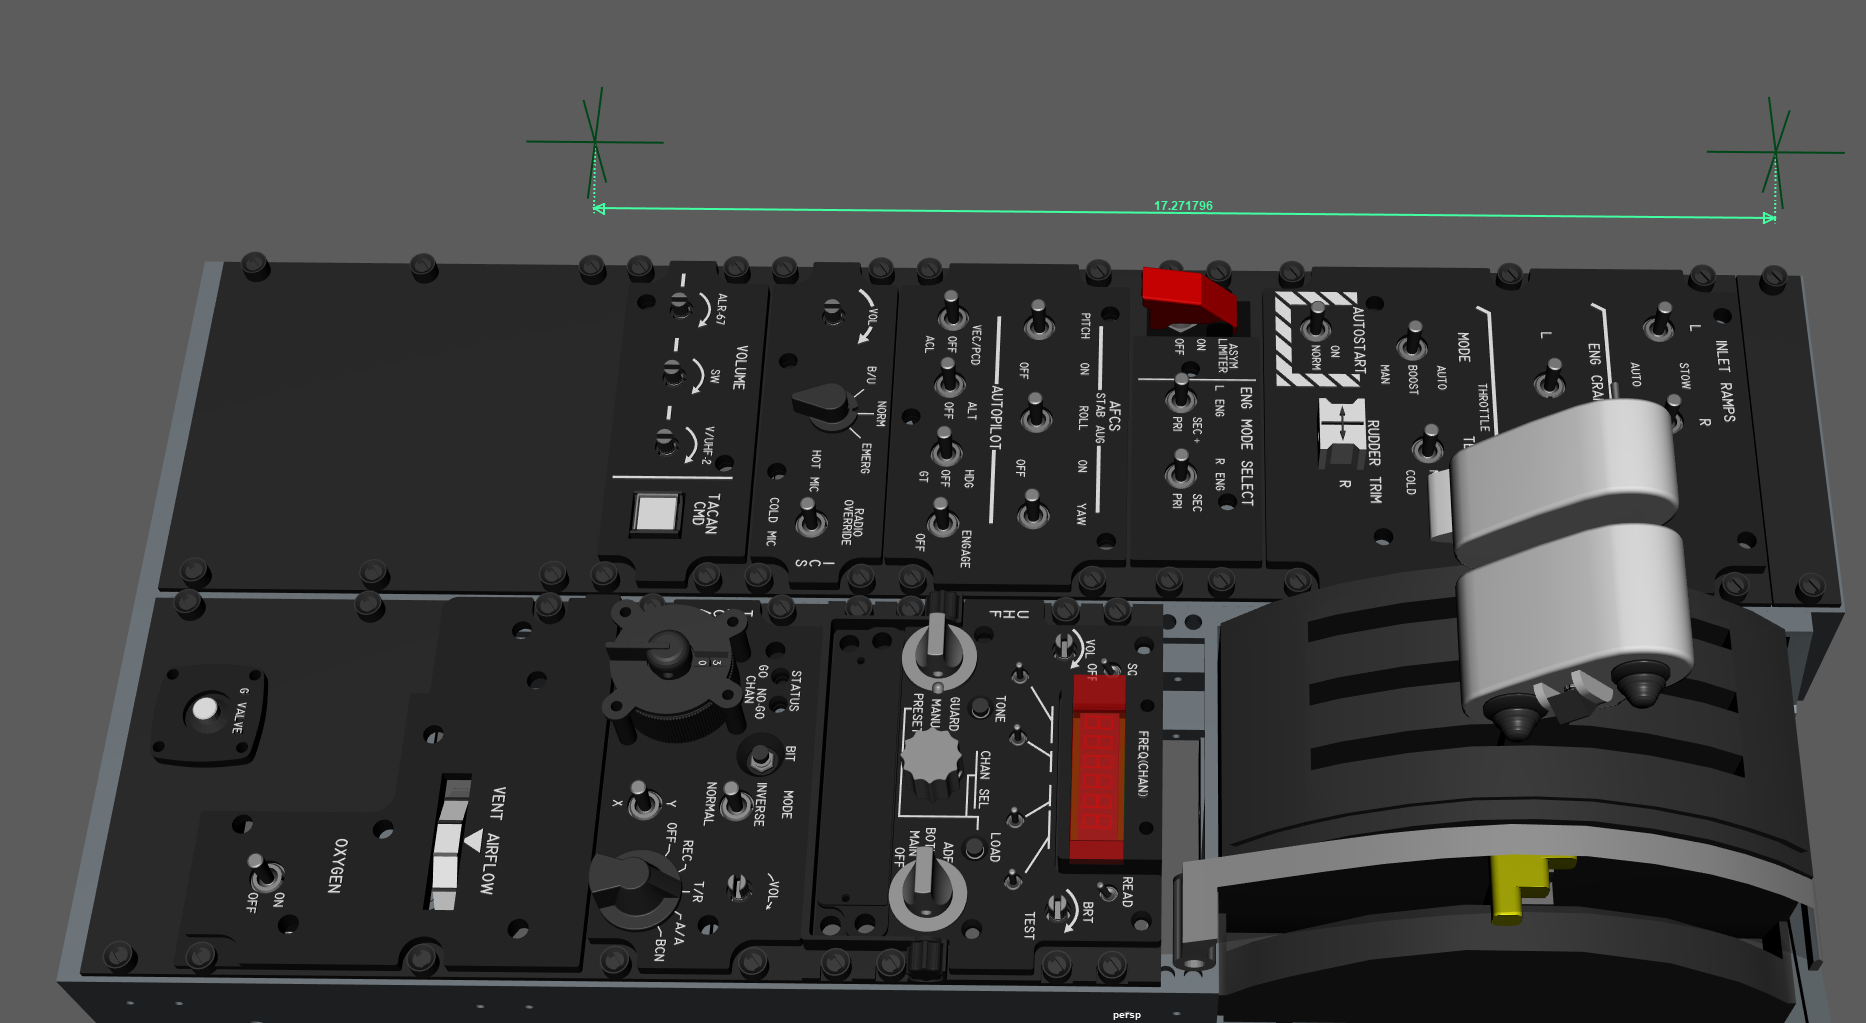
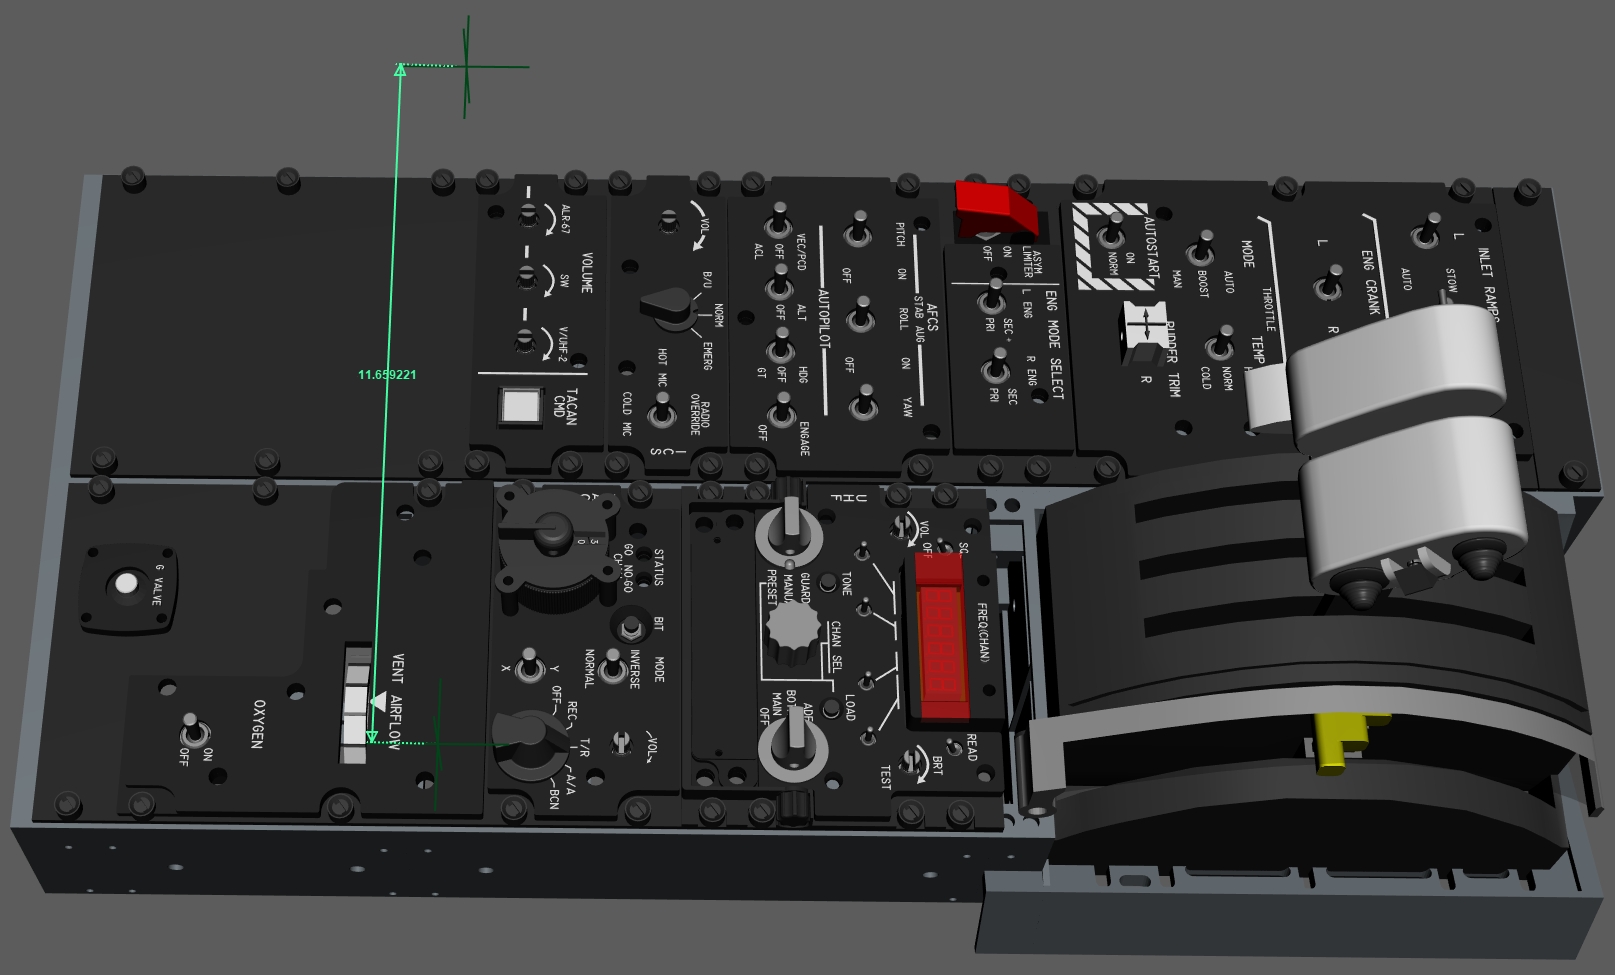
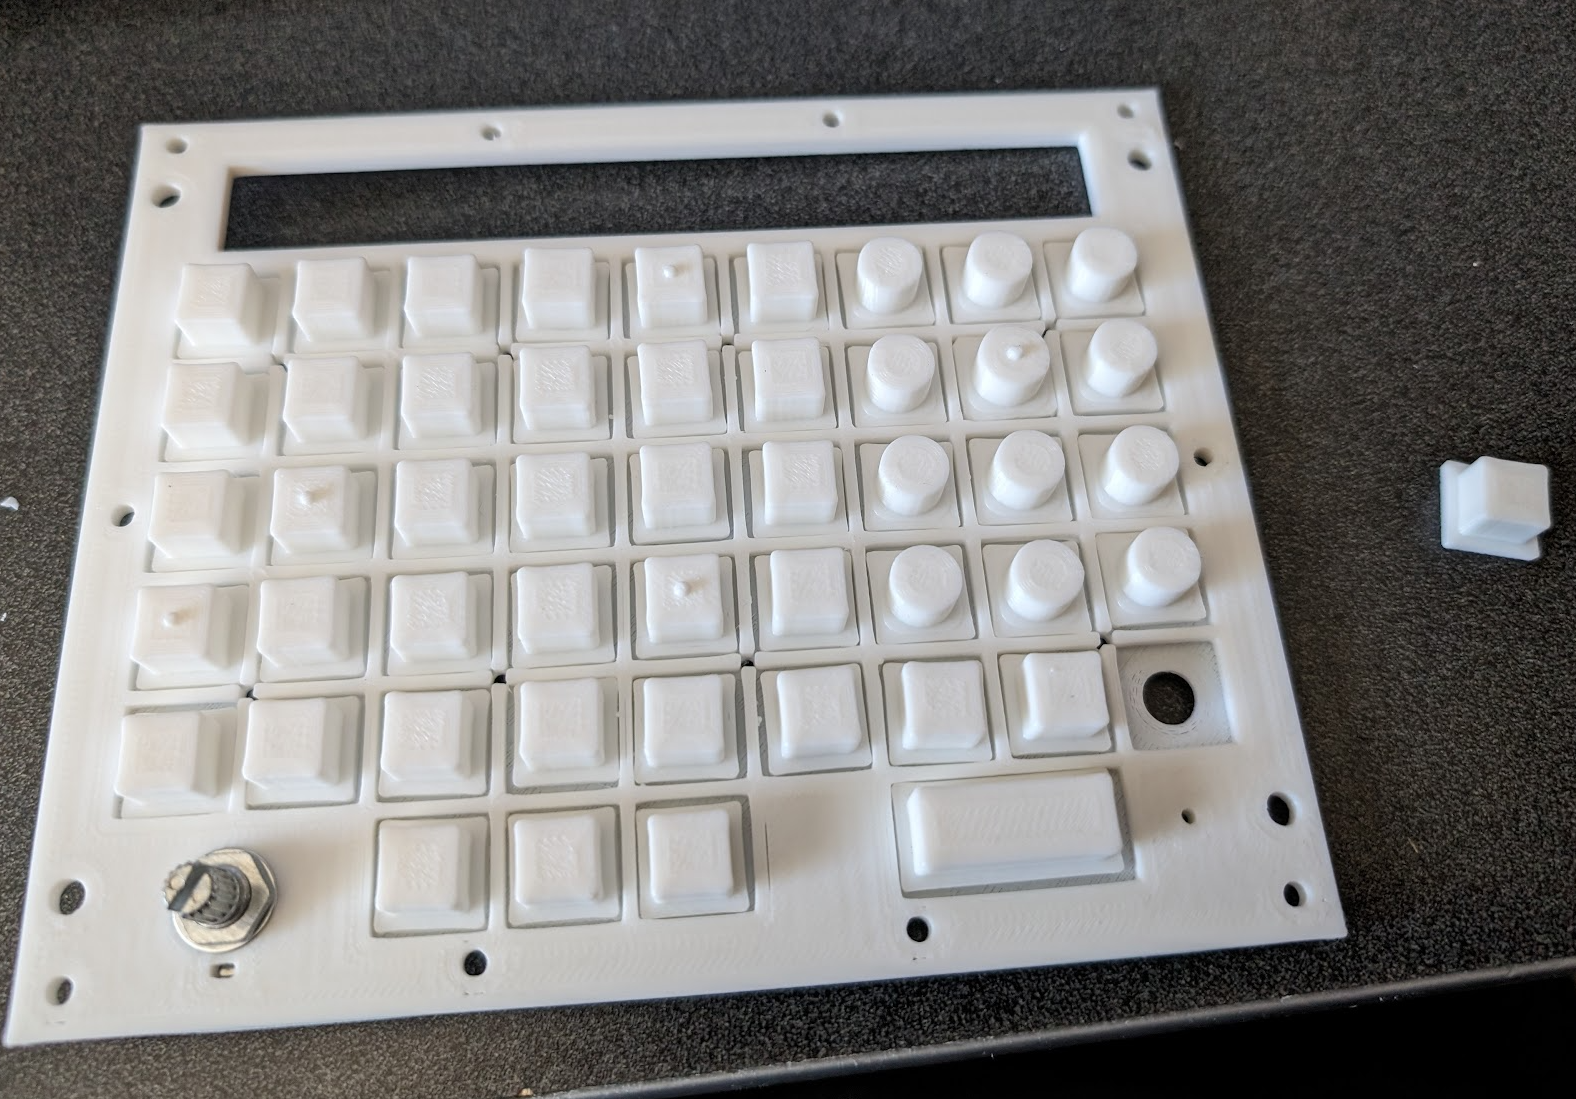
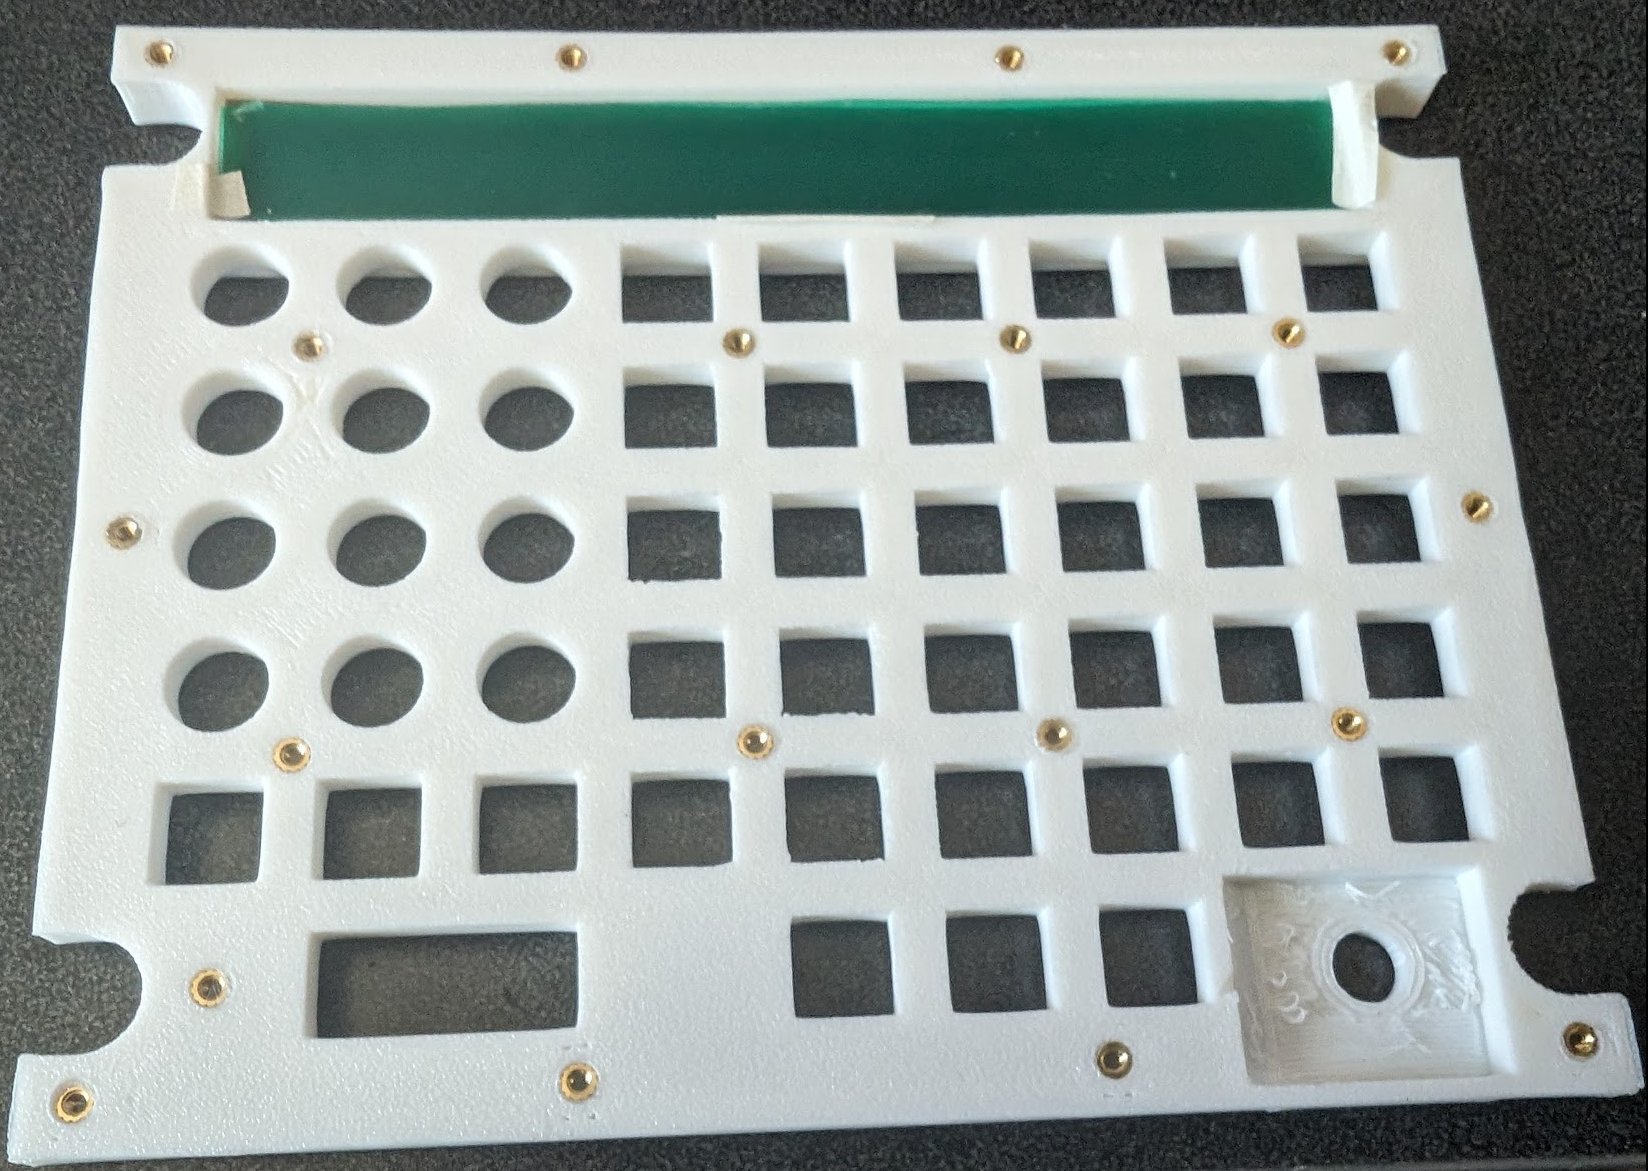
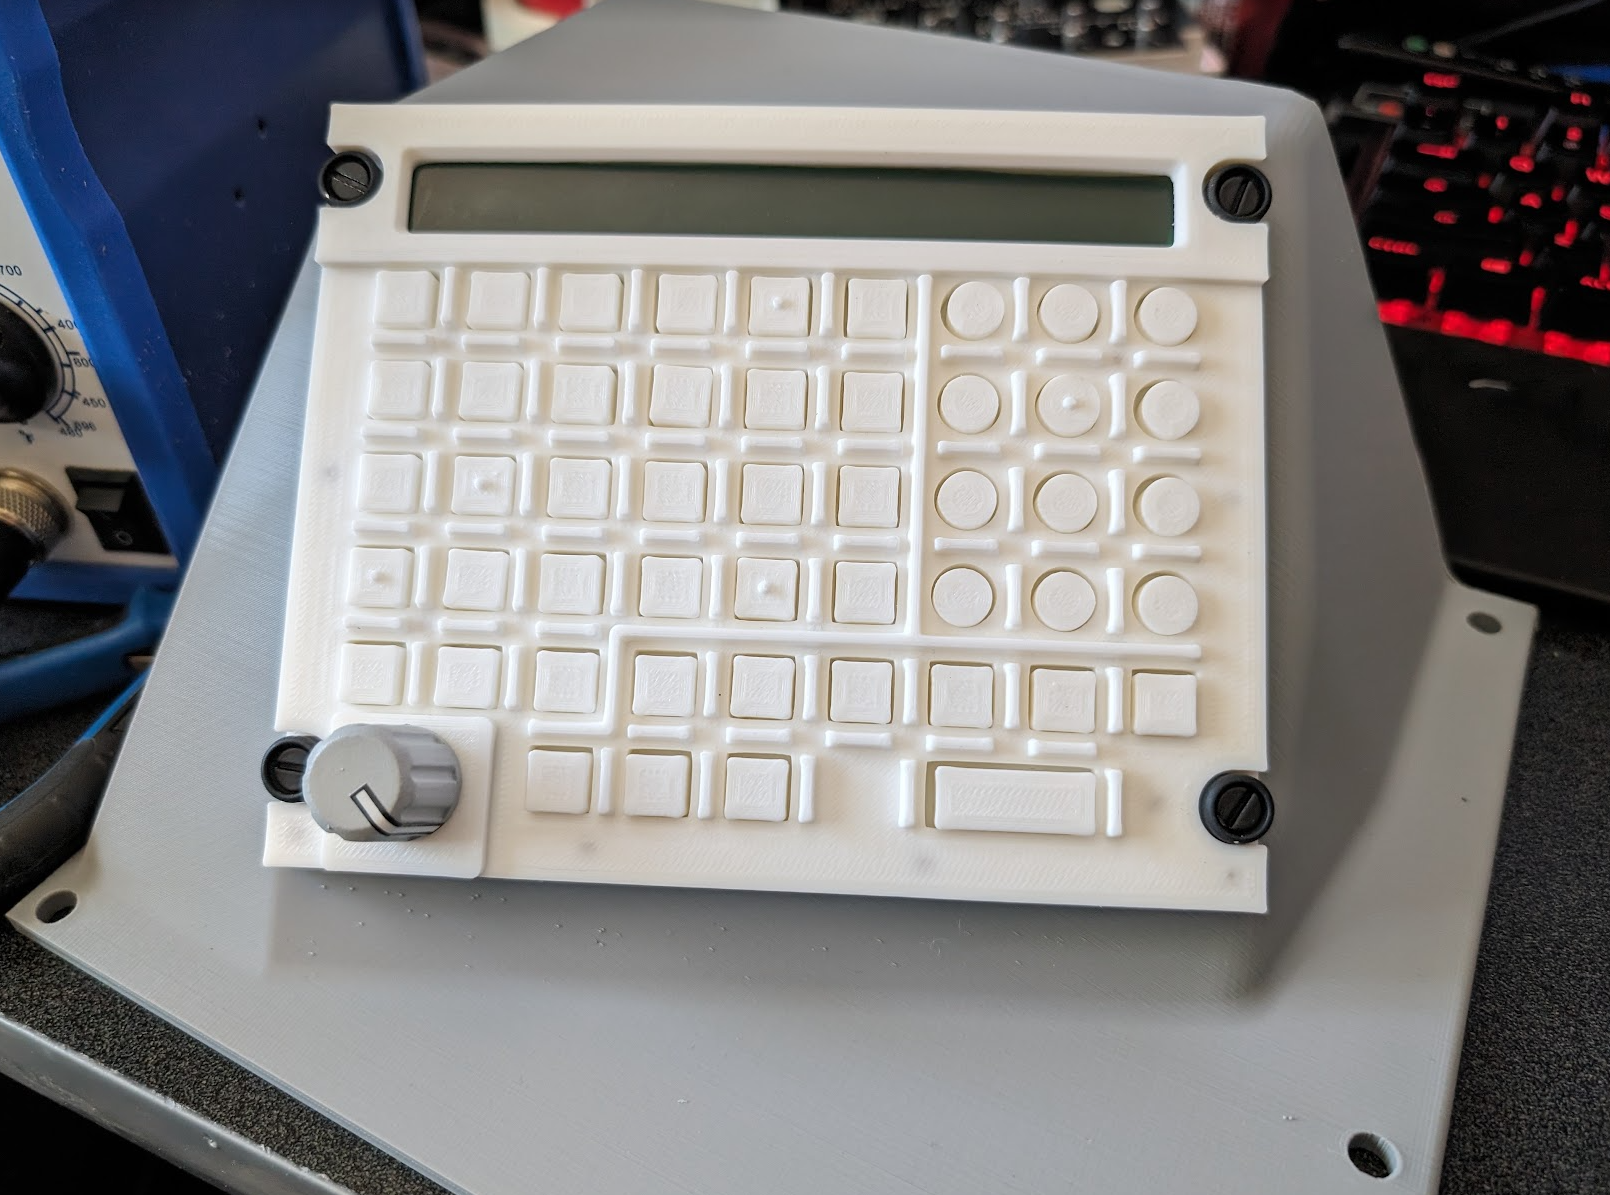
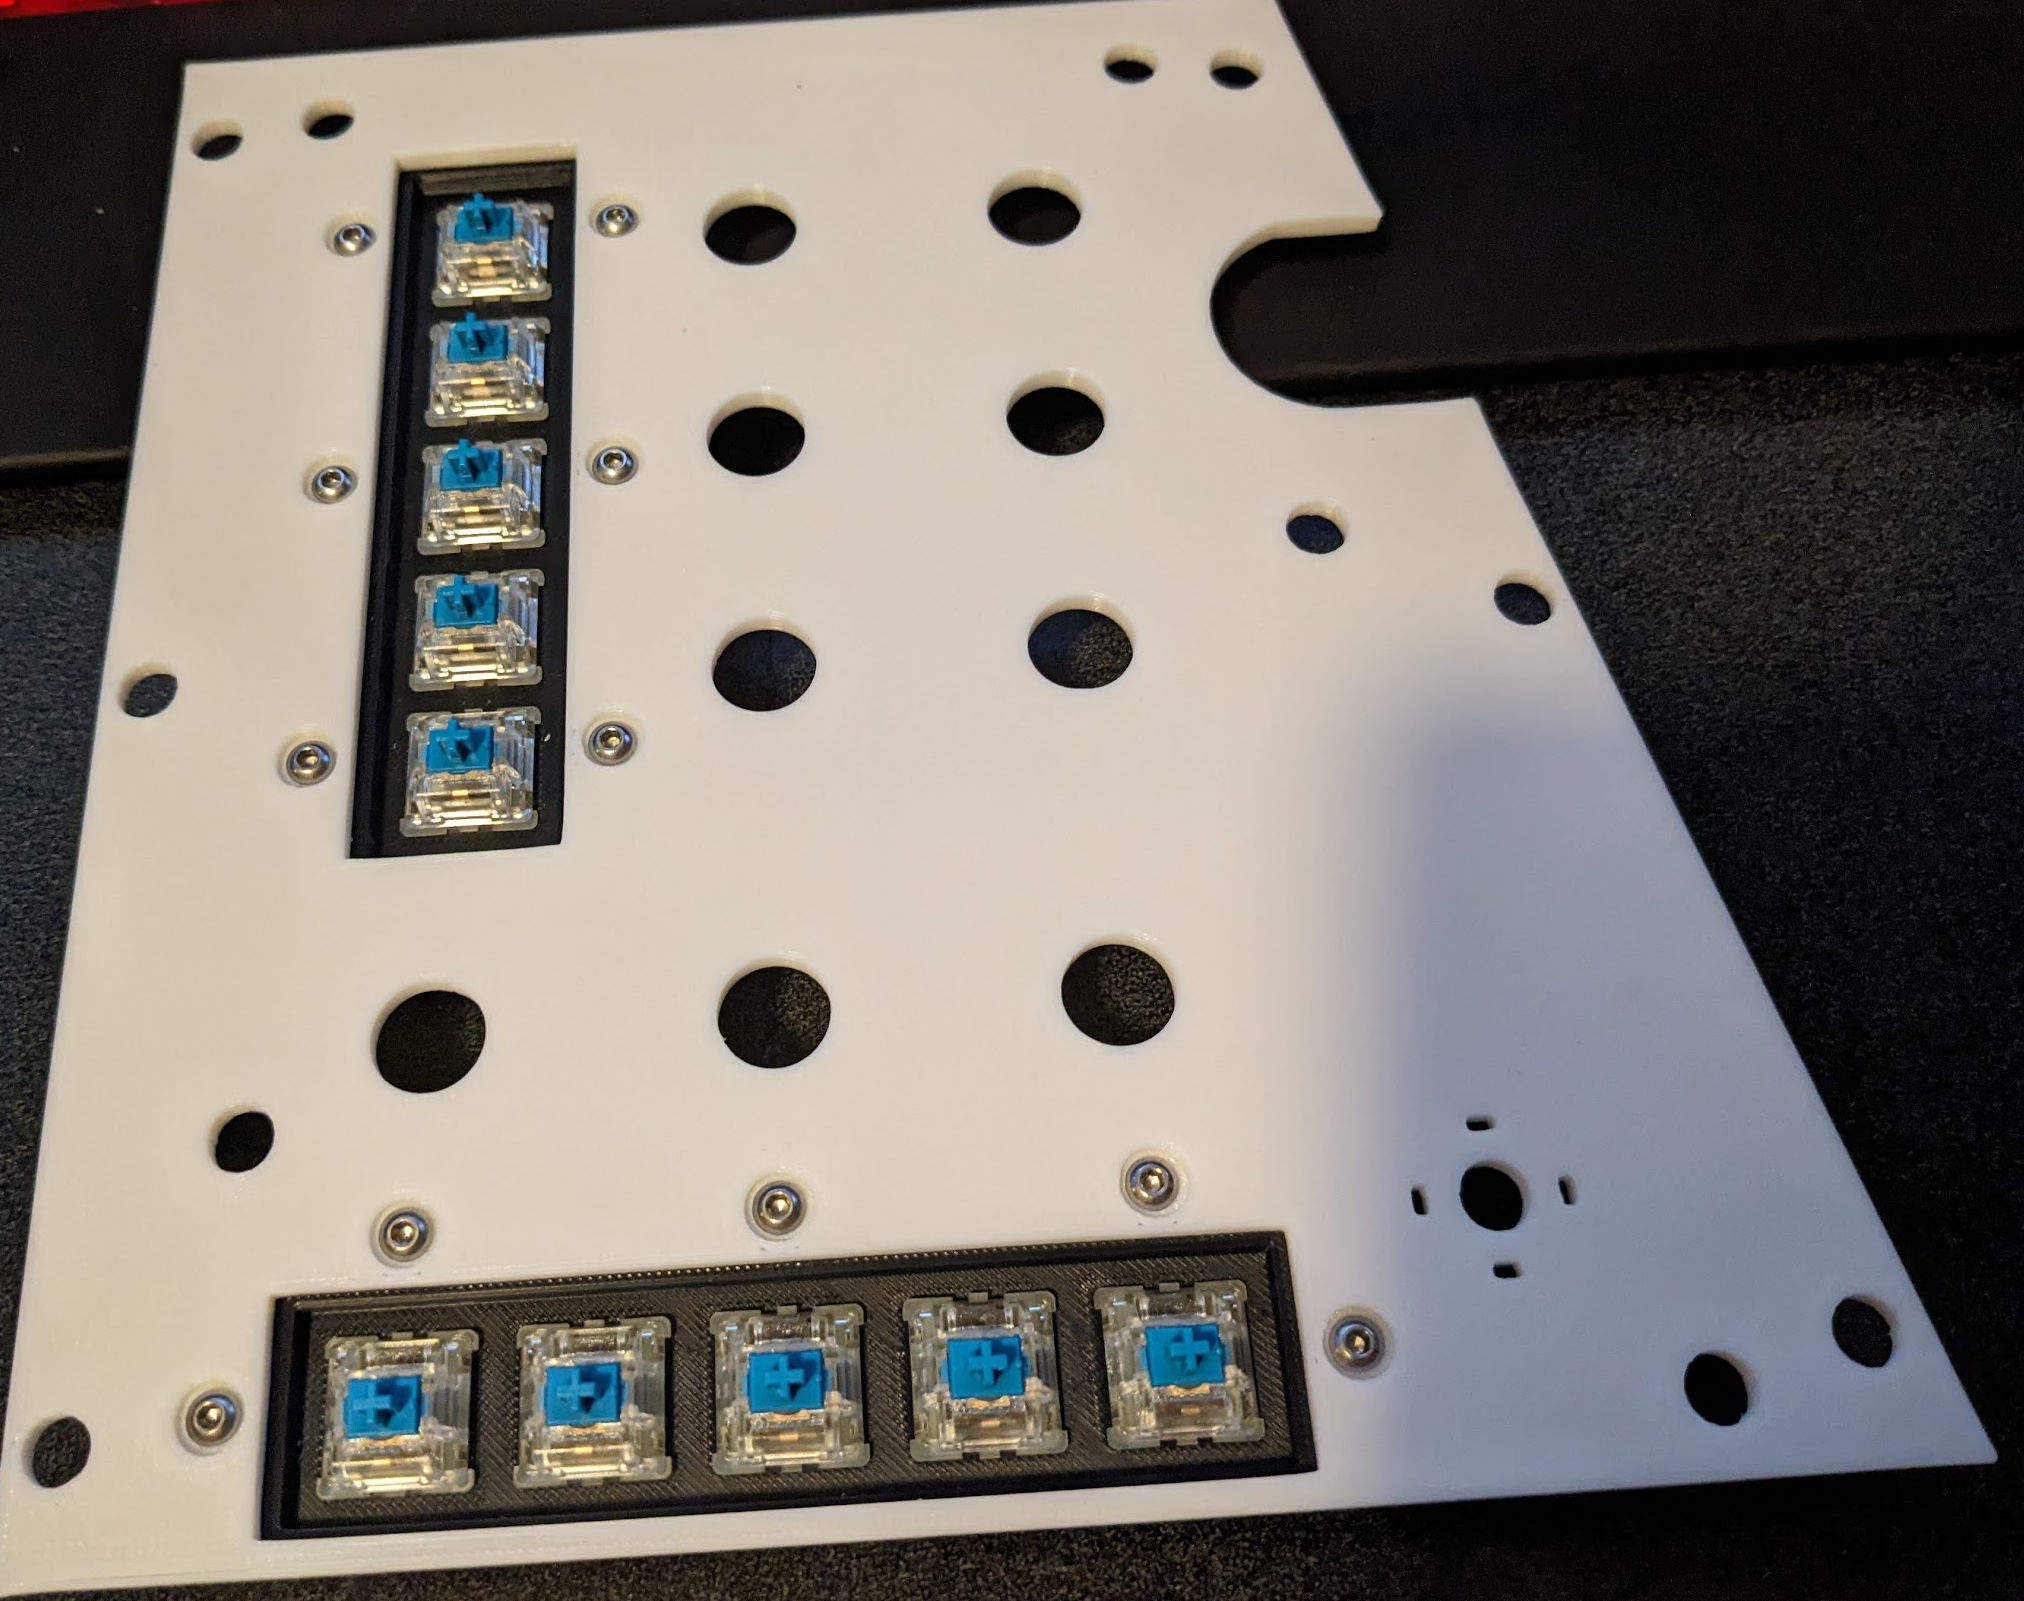
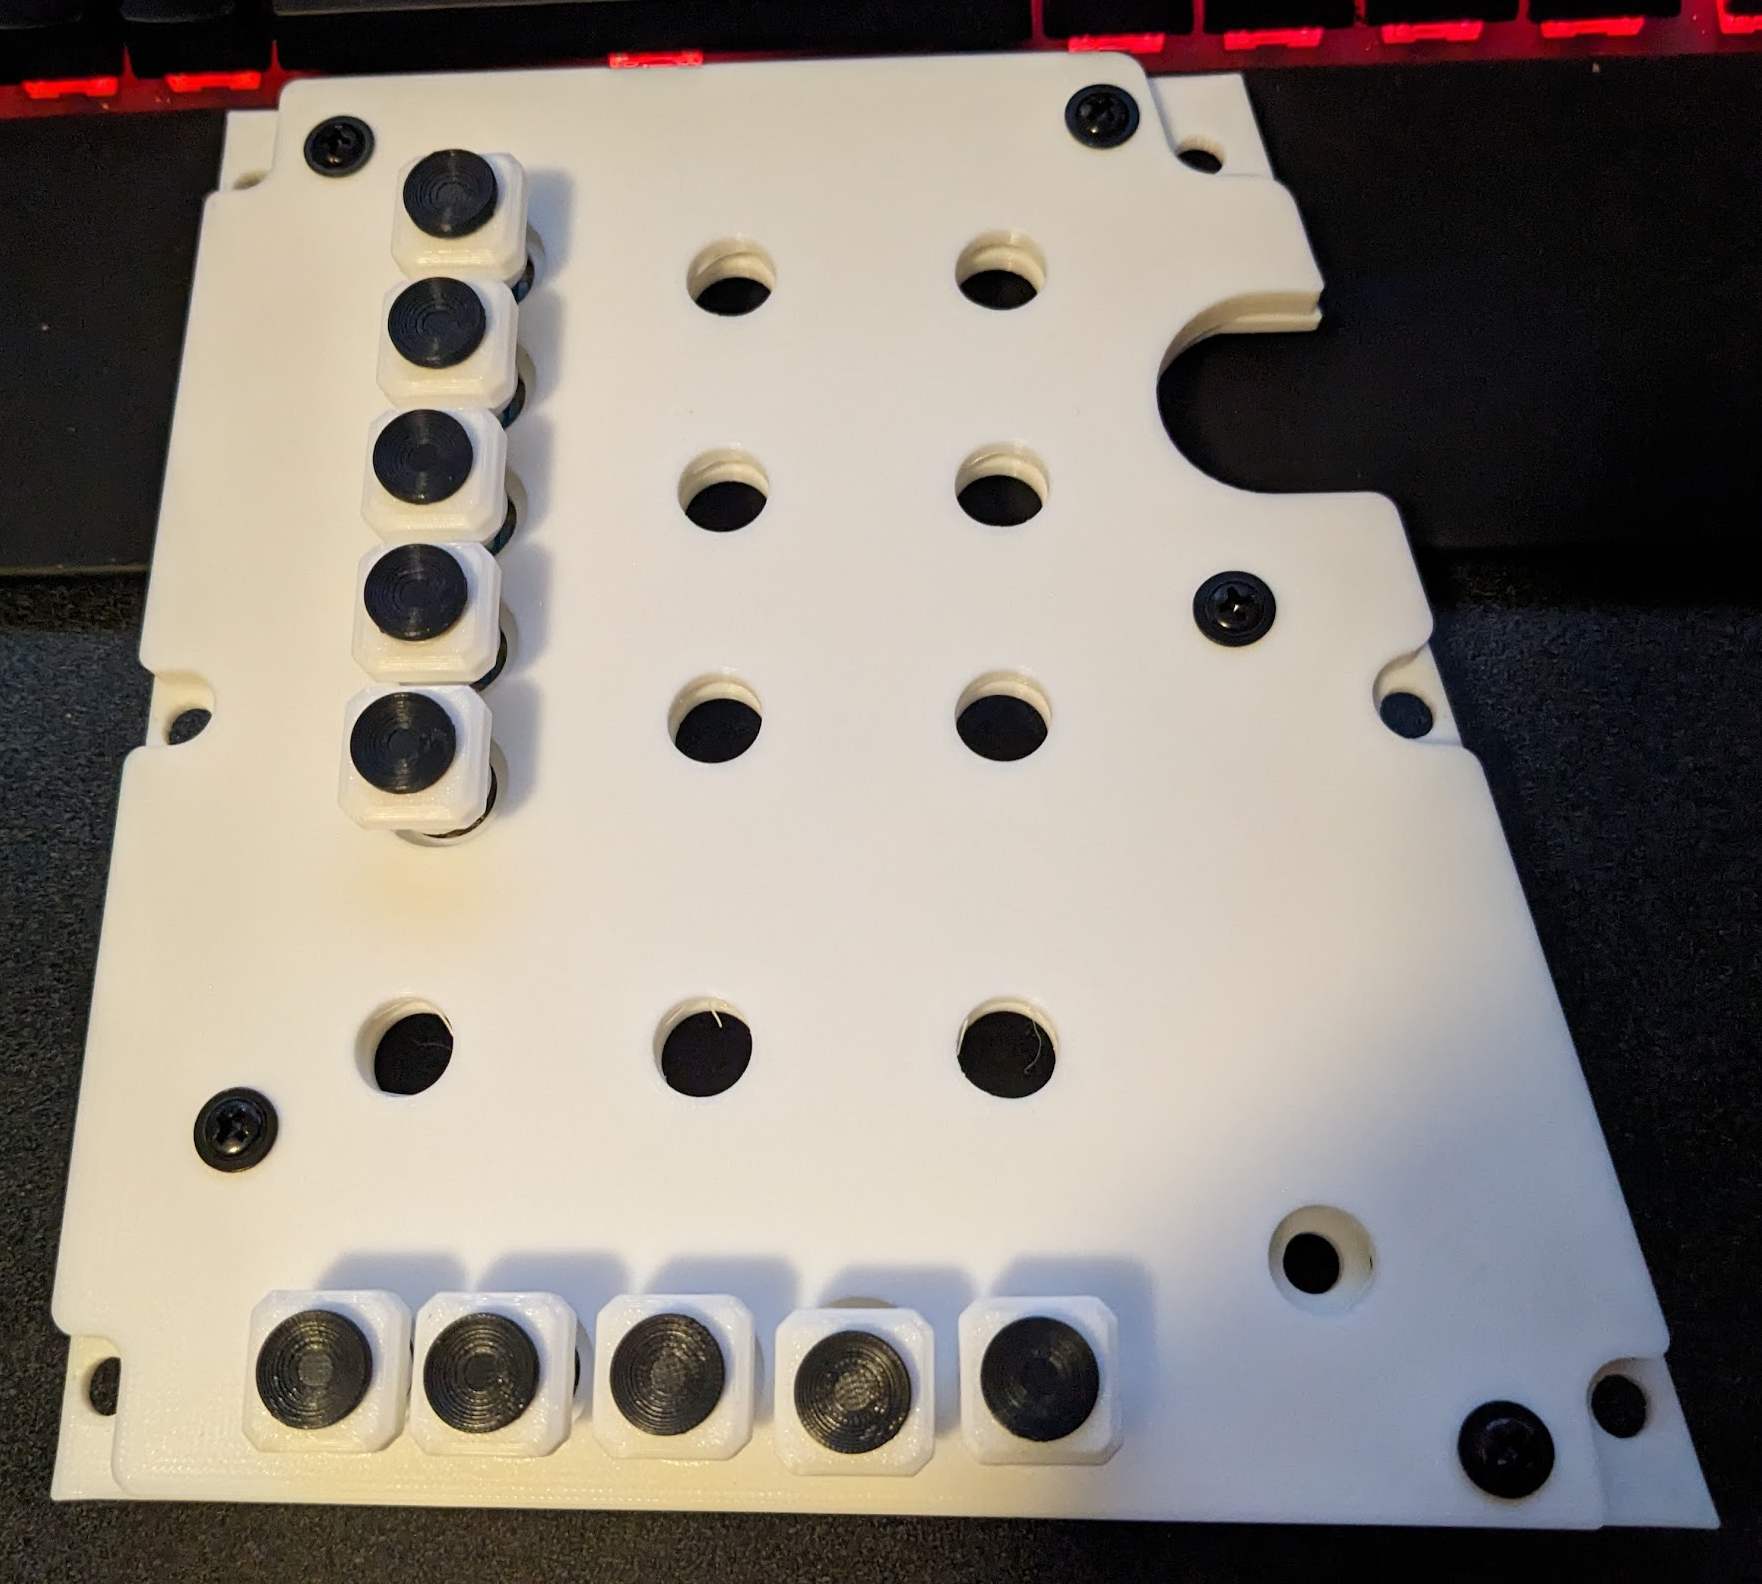
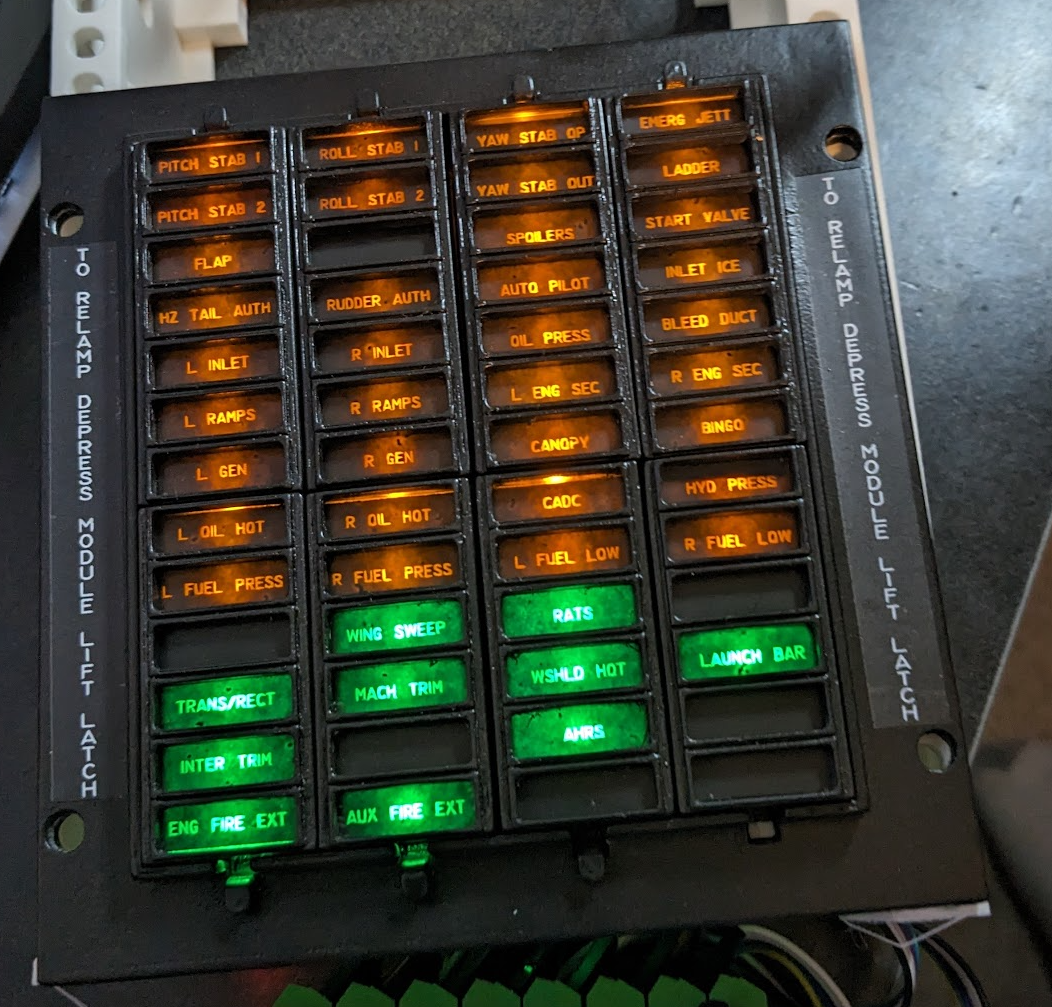
As I wind down on the F-14, I decided it was time to get back to the cockpit I started before that. Before I got my 3D printer I bought a bunch of AH-64 panels from TekCreations, but after getting my 1st 3D printer I took a several year detour to working on the Tomcat. It's time to go back to the Apache one and use all those panels I bought. But I obviously have to fill in the gaps on the parts I don't have. I thought I would start with the trickiest one which is the Keyboard unit and how it mounts to the controls. I'm still having issues with some of the buttons not contacting the microswitches cleanly so I'm going to try 6mm length switches instead of the 5mm I'm currently using. My plan is to build a purpose built console for the panels instead of the modular boxes I used on the tomcat. It will sit on an 2020 extrusion box like the Tomcat cockpit so I can move them out of the way when I need to use the desk. Storage is becoming an issue, so I don't know what I'm going to do about that. Here's the current state of the keyboard unit. No plans to put an LCD in. As it's hard to source a single line LCD that's about 4" long. If anyone knows of one let me know. I tried the 40x2 that some people are using but the dimensions are off. Same for the 24x2. So for now, an empty hole with some light gels taped in
-
Fixed and final
-

Running request - Bindable Button / Axis options
LASooner replied to maverickturner's topic in Bugs and Problems
Has anyone been able to get the covered switches to bind to a single switch position? I was able to get the inboard and outboard SPOILER ORIDE switches to work correctly setting the pressed to open the cover and the down to put the switch in ORIDE, And close when switching back to normal. But using the same function with the other covers, I'm not able to get it to work with the asymetric limiter, the hydraulic transfer, emergency gen reset and the hydraulic tests. The cover opens, but the switch doesn't move, like it needs a delay from when the cover opens to when the switch is thrown. Sent from my Samsung Chromebook Plus using Tapatalk -
I thought I was done with this one, then I realized I made a typo Need an up and a dn Sigh.... one day this war will end.
-
Thanks, I think I'm done, I don't want to have to sand and paint 10 more buttons :) Did you figure out which of those has the correct spacing? The piano switches that I have that I used on the tape player were too small to use. The panel would be about 75% of the actual size if I use them. Sent from my Samsung Chromebook Plus using Tapatalk
-
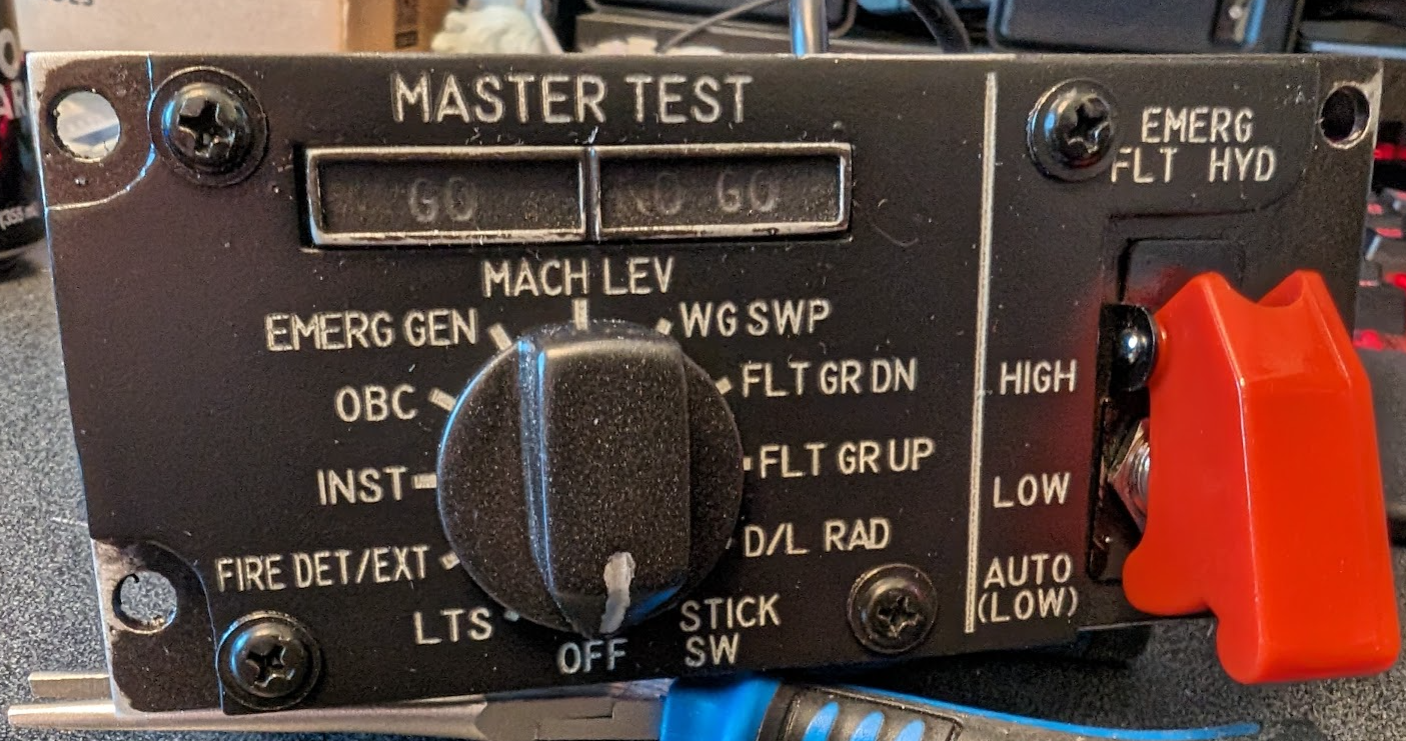
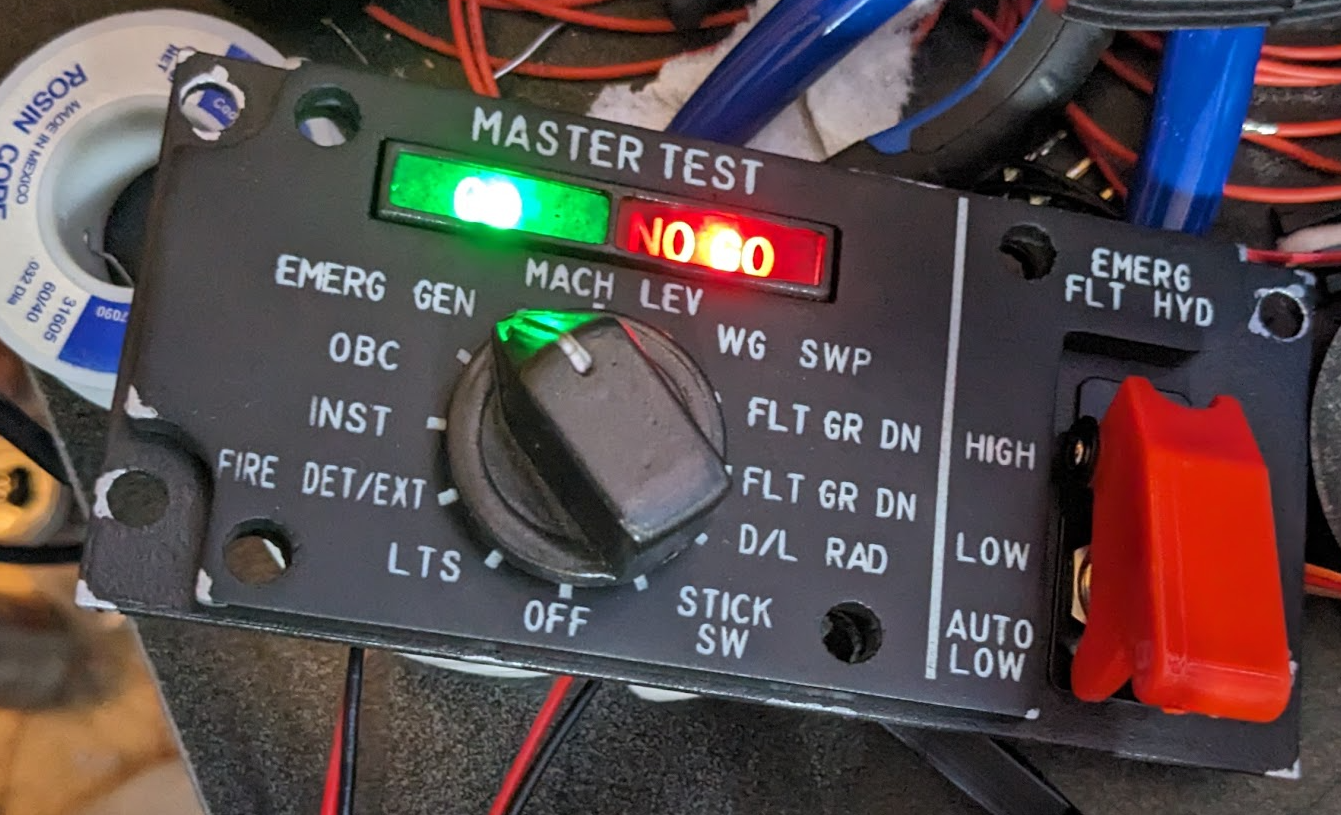
I finally got the master test knob working the way I wanted. I used a 12P1T rotary mounted on top of push/pull switch used for golf cart lights. It has it's own Arduino. I did have to decant the rotary and remove the limiter so it will rotate 360.
-
I would switch to FlightPanels fork, it's the only one being updated. There is a command file you edit to assign all your com ports for DCS Bios Sent from my Samsung Chromebook Plus using Tapatalk
-
I just want to clear something up, because I'm getting a lot of emails recently. I removed the HSD and VDI from the Shapeways store. The price they were charging to print was really unnerving, and since I wasn't making money on it, I didn't want to feel responsible for something someone paid close to $500 to have printed. So I removed those items. I will be reuploading them to Cults3D and Printables when I get a chance to package them up better. I will not be sending people STL's separately. I will let you know when I get them uploaded or you can just follow me on those sites. But nothing demotivates me more than people pushing me to do something before I'm ready. Those items will remain free, but not all the stuff I upload will.
-
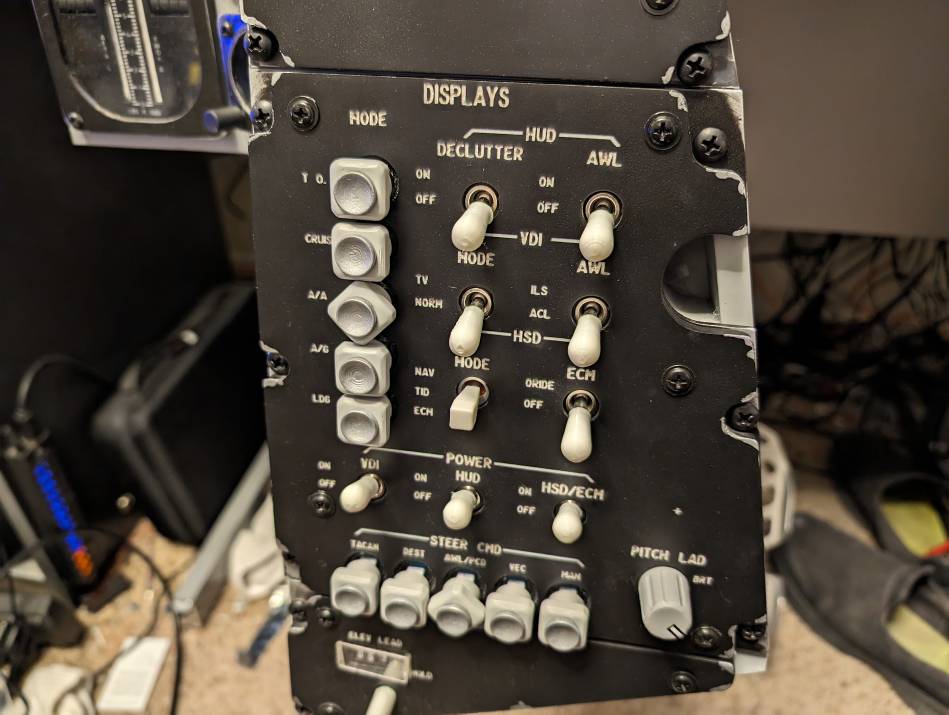
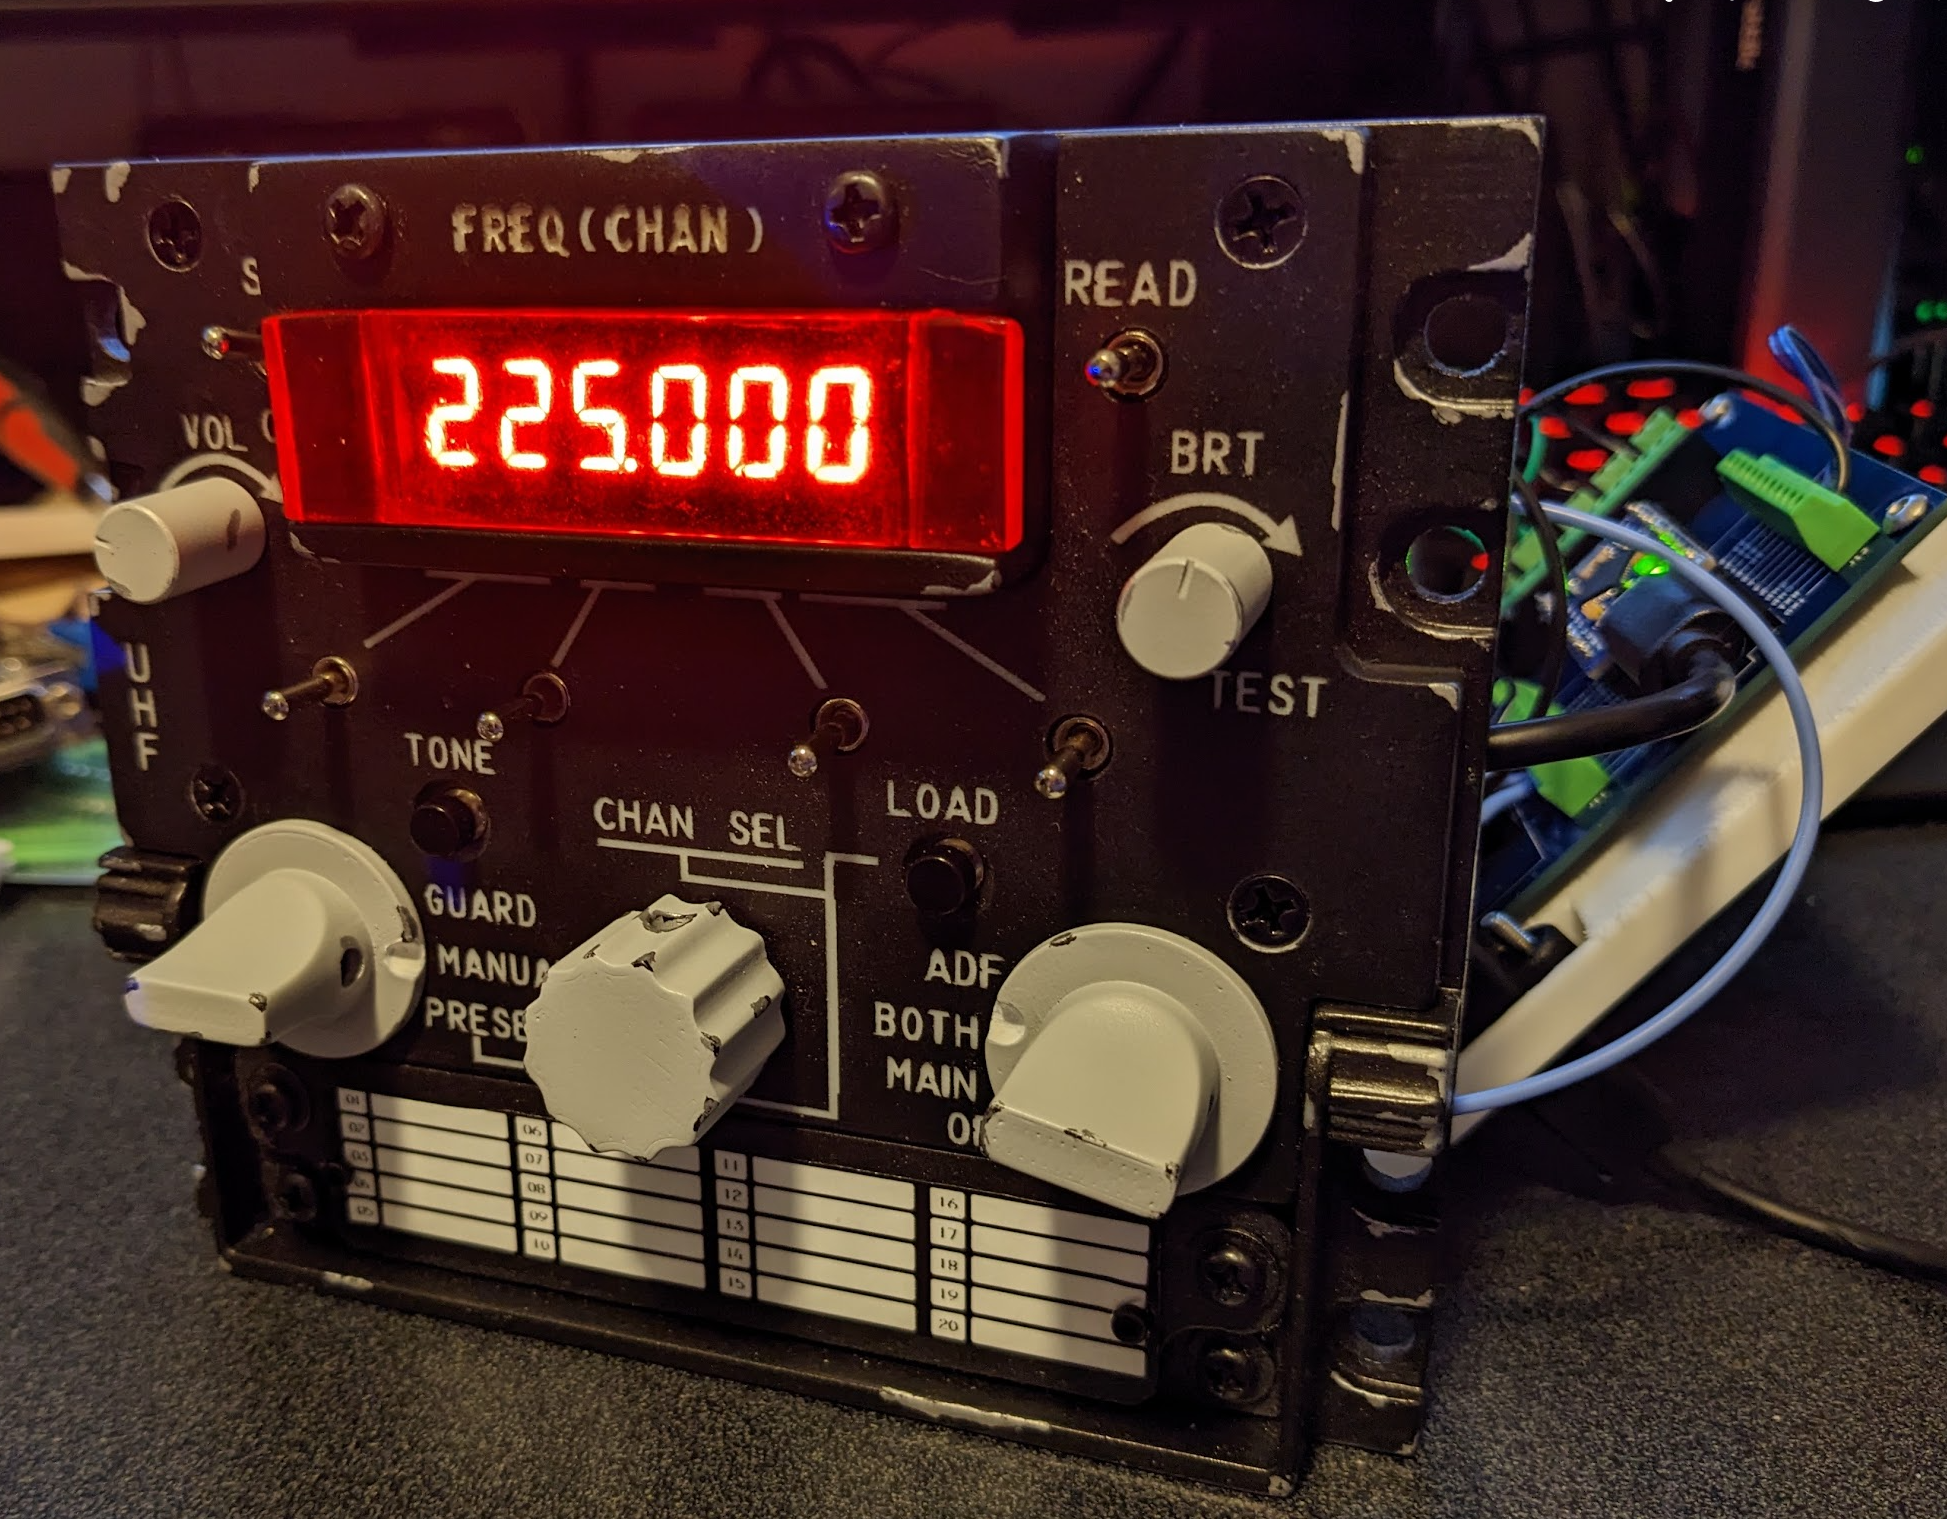
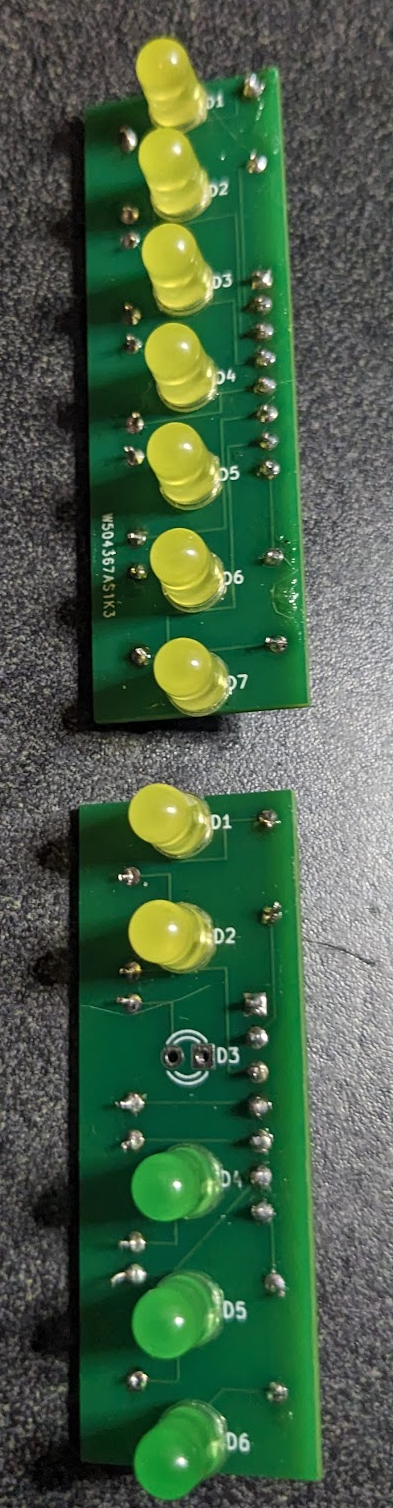
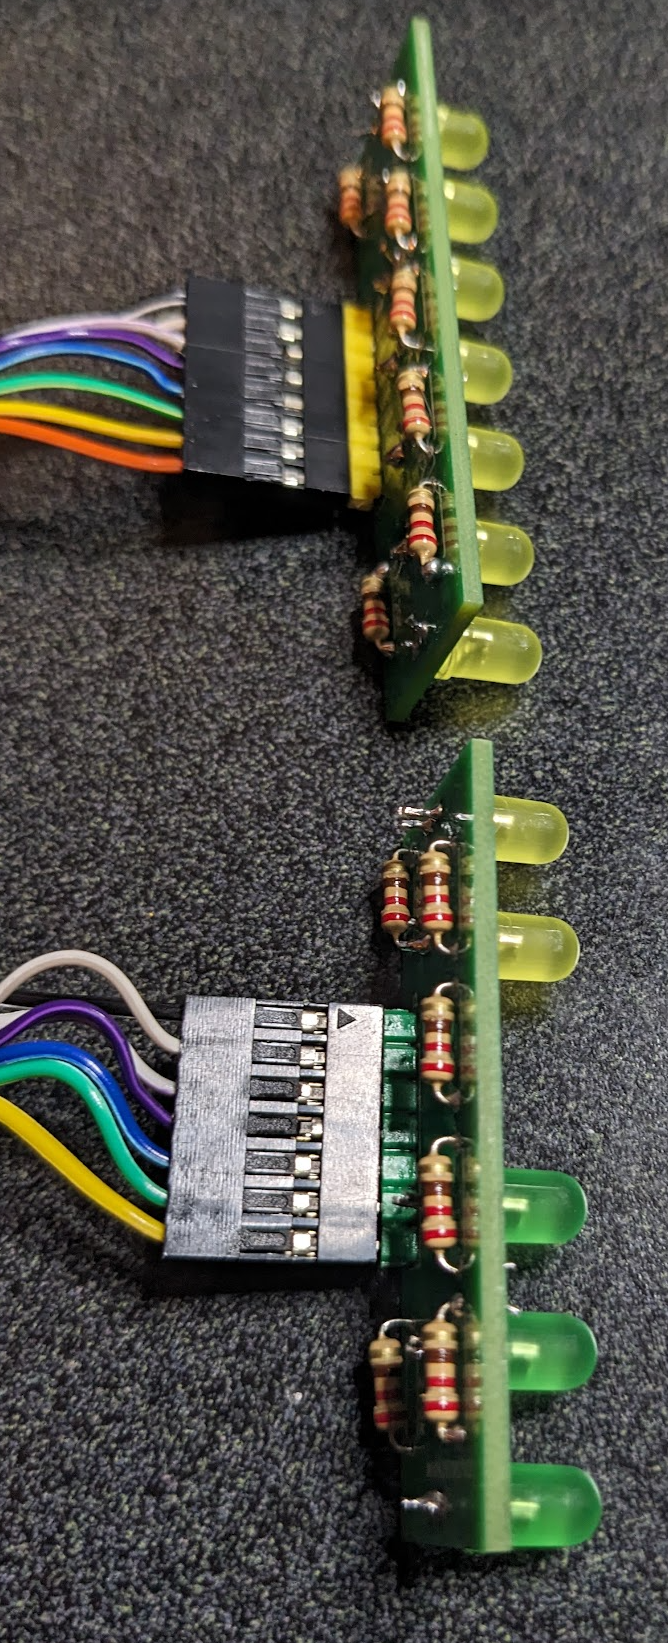
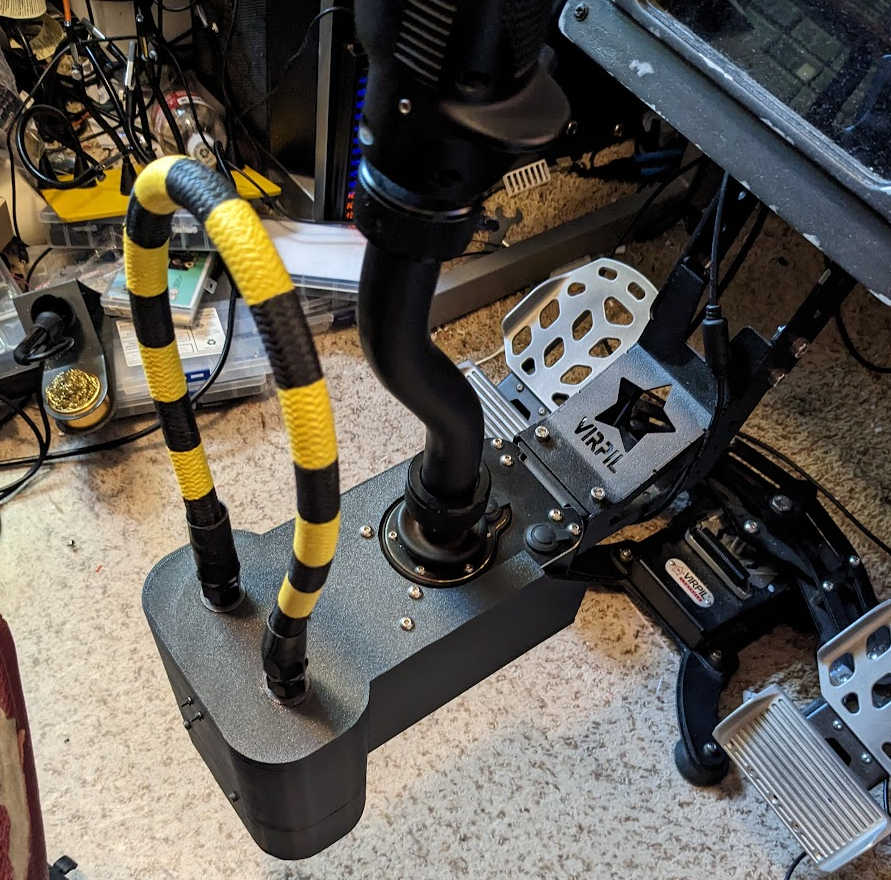
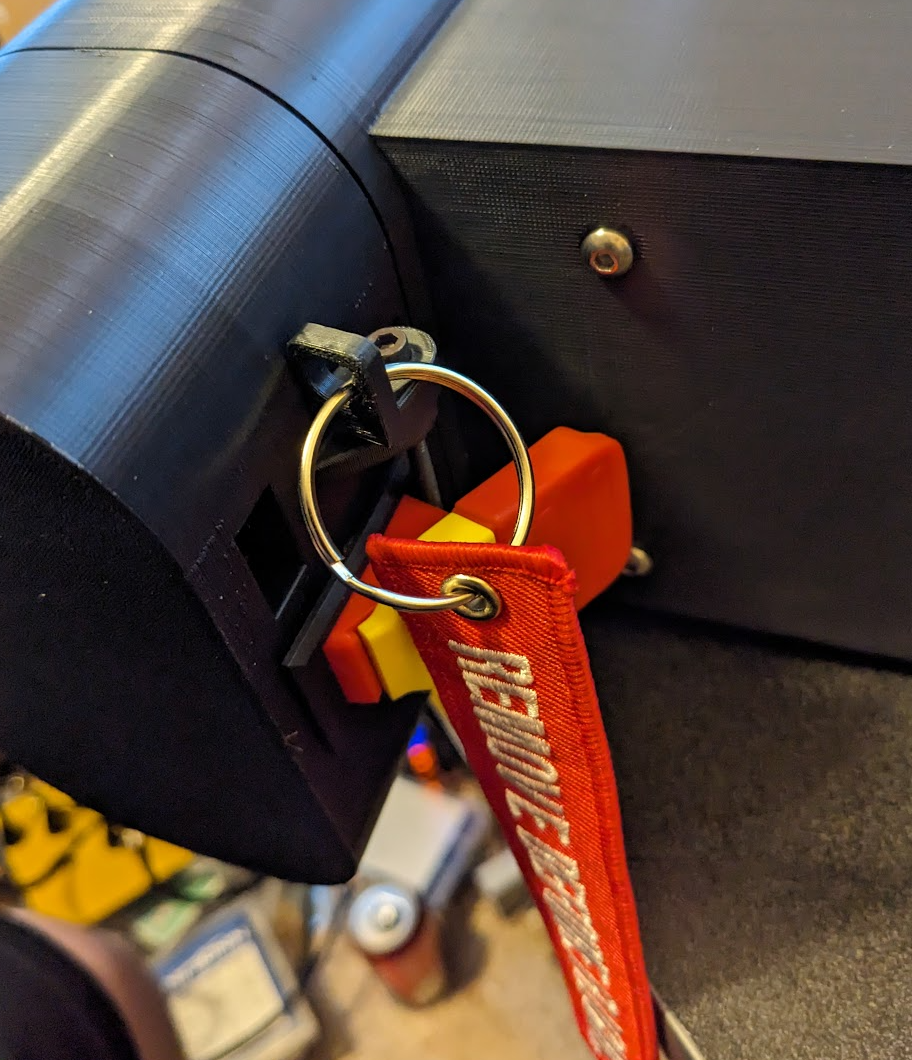
It's been a while since I updated, mainly because I don't get much time to do anything on it. I made an ejection handle that's mounted to my joystick base, it has an Arming switch on the back side I revised my UHF radio to look mor3e like the real thing and use a more commonly available 7 segment display, it's now functional and runs off an Arduino micro. Only the LED requires DCS BIos, the rest still functions as a generic HID device so I can use it with the simulator that shall not be named. I'm in the process of revising my Display panel with MX switches, as they allow me to use my own custom caps that look like the piano switches used on the tomcat. They feel better to press than the 10mm push buttons I have now. They won't spin and lock like the real thing, but they look nicer. Revised my master test panel And my warning panel They run off the same Arduino Mega and I created my own PCB's for the first time, making each module separate for easy replacement null Also added a magnetic attached hood to the acm and side panels It's mostly refining and the last 1% at this point
-
In increments of 5. I Just ordered some PCB's from PCBWay and the amount for the unpopulated board was the same amount for both 5 and 10 units, so size will definitely place into the price you get. My board was 4"x4" so I'm sure how it gets cut up on the larger waferboard plays into it. Sent from my Samsung Chromebook Plus using Tapatalk
-
Unfortunately the seller I sourced my square top switches has run out, I posted it earlier and I guess others cleaned out his supply. It's a Honeywell 11TW47-1 Sent from my Samsung Chromebook Plus using Tapatalk
-
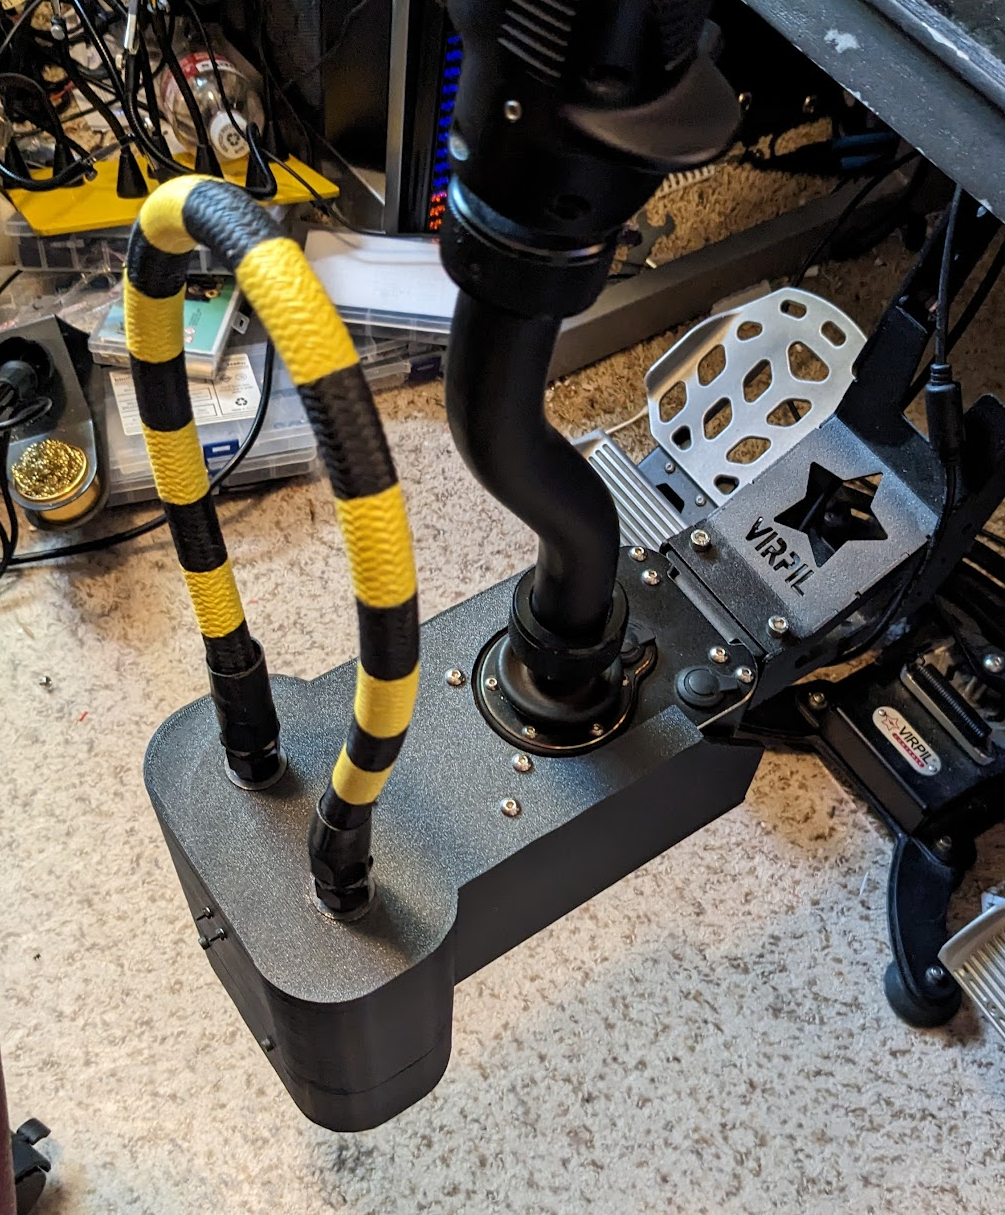
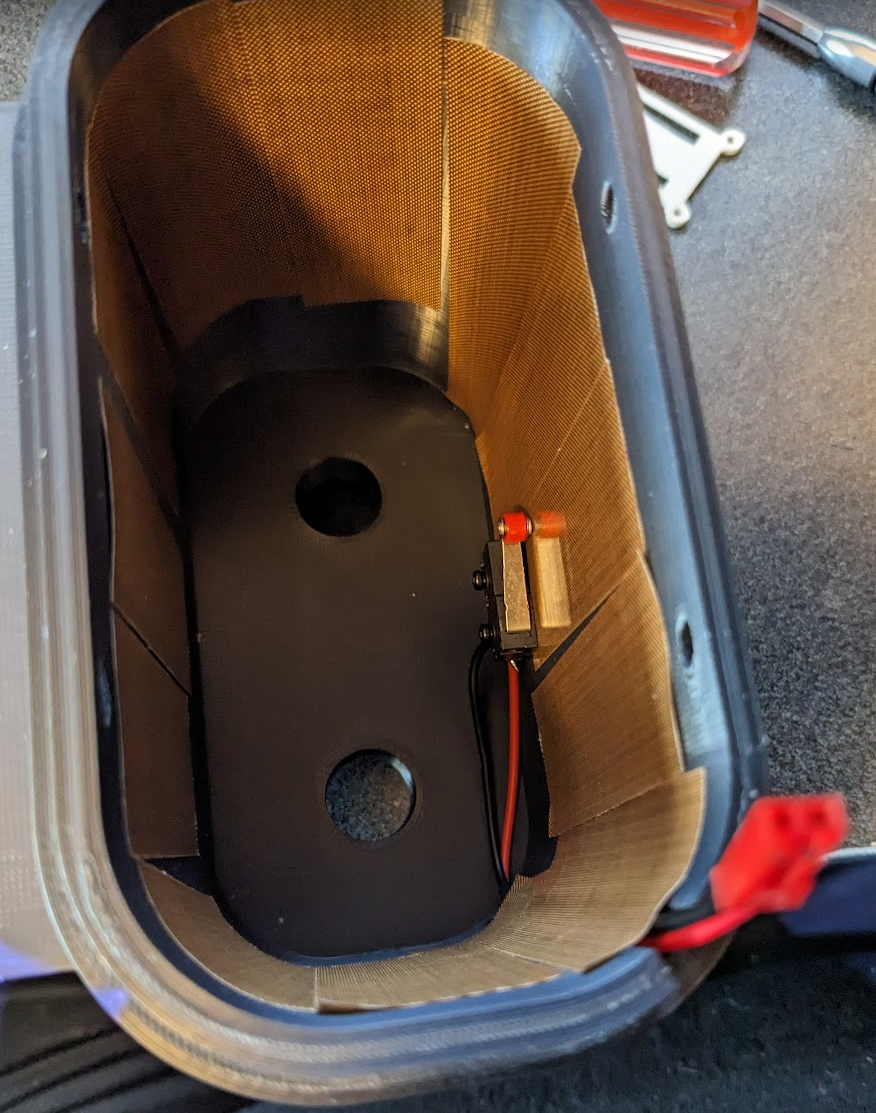
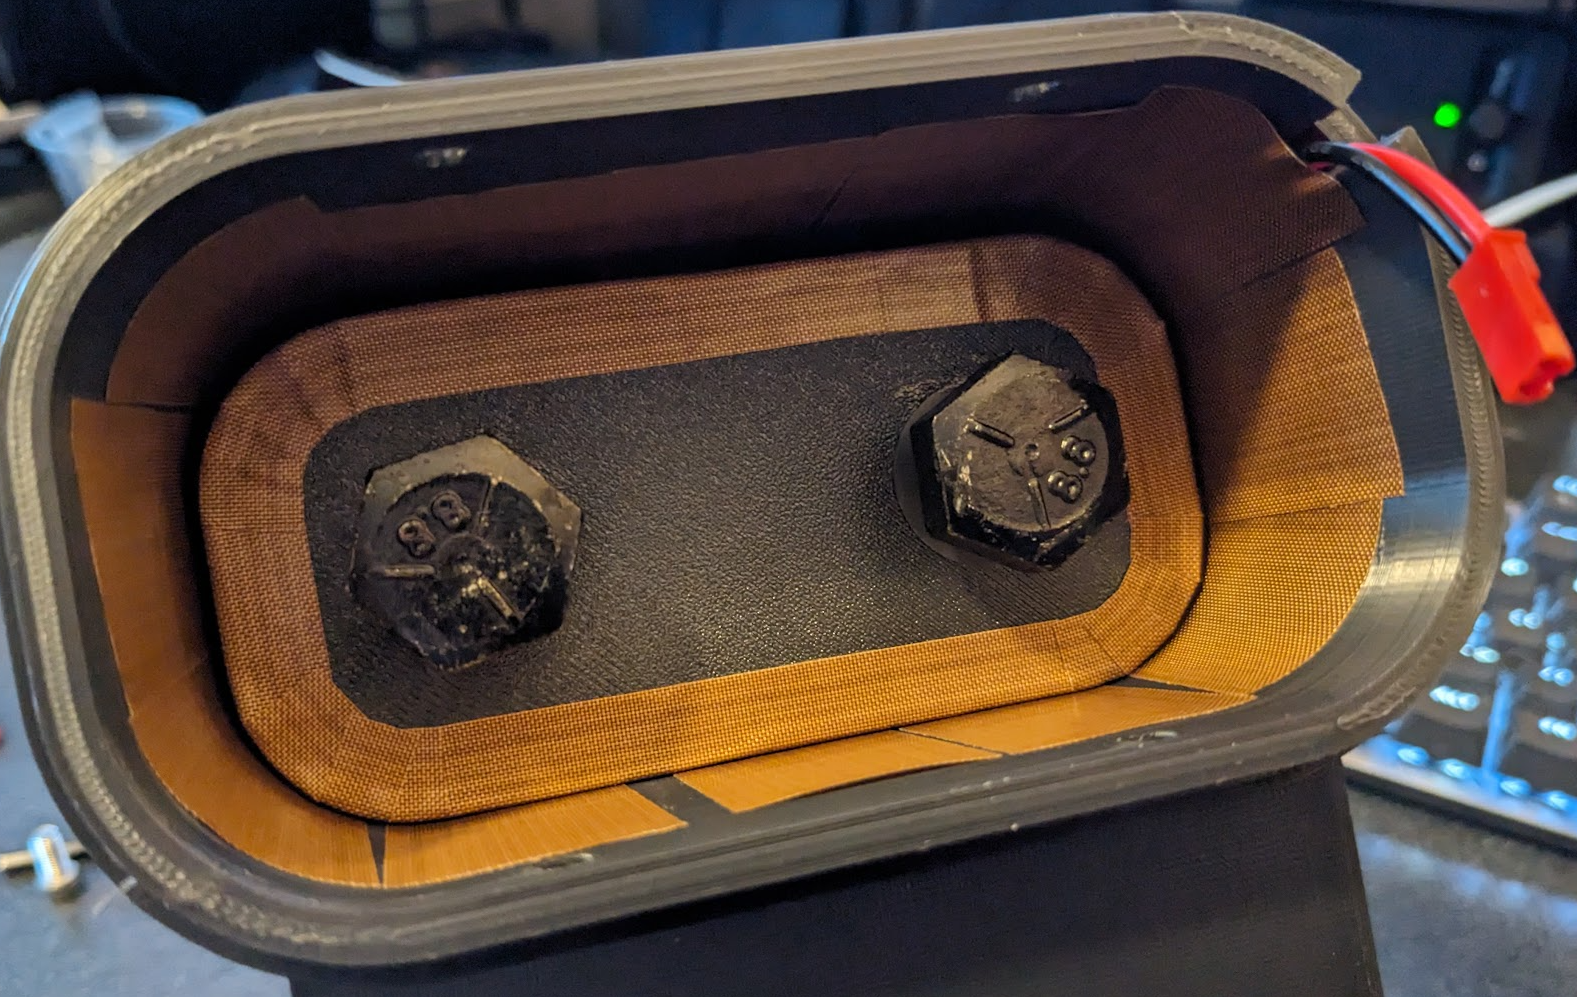
I took the mechanical aspects of your design and created 3d printed one that mounts to my virpil base, and I programmed the arduino to send 3 presses on a simple switch Added an arm disarm switch And covered the internal components with teflon tape for smoother action
-
I created my own modular system using interlocking boxes with holes spaced as DZUS rails, my plan is to put them up for sale on Cults3D when this is all done, I figured other people may find a use for them. I made a long box and a short box to have variable lengths. I also created some blank plates to fill in holes on top between panels. I use threaded brass rivets melted into the holes I need to put a screw in , you can see that in this picture of my console from August of last year. You could just put a bolt in and put a nut on the other side, but I could see early on that would be a royal pain in the ass to do maintenance on. I also realized some panels might go deeper so I created a box that has no middle support. As long as the whole cockpit isn't made of those it should be durable enough, especially with the panels screwed in to give top support. It's all mounted on aluminum extrusion which makes it fairly light to move around , I even have handles on both sides which you can see on the left side. This important for me because mine has to be free standing as I don't have a dedicated space for a fulltime pit. Moving them out of the way quickly is a necessity. I have a powered USB hub bolted to each console and one attached to each side of my desk so there's only a single cable going from each one to the PC. Because the throttle mount base was designed for my Throttletek, I also made a base for the Thrustmaster mounting style throttles. I have adapters to make it angled and flat and flat inner angled outer. I settled on 15 degrees, the real tomcat is 24 degrees but I'm fine with the 15 degree slope. A bunch of different mounting solutions. You can screw it together or glue it together, I did a little of both..
-
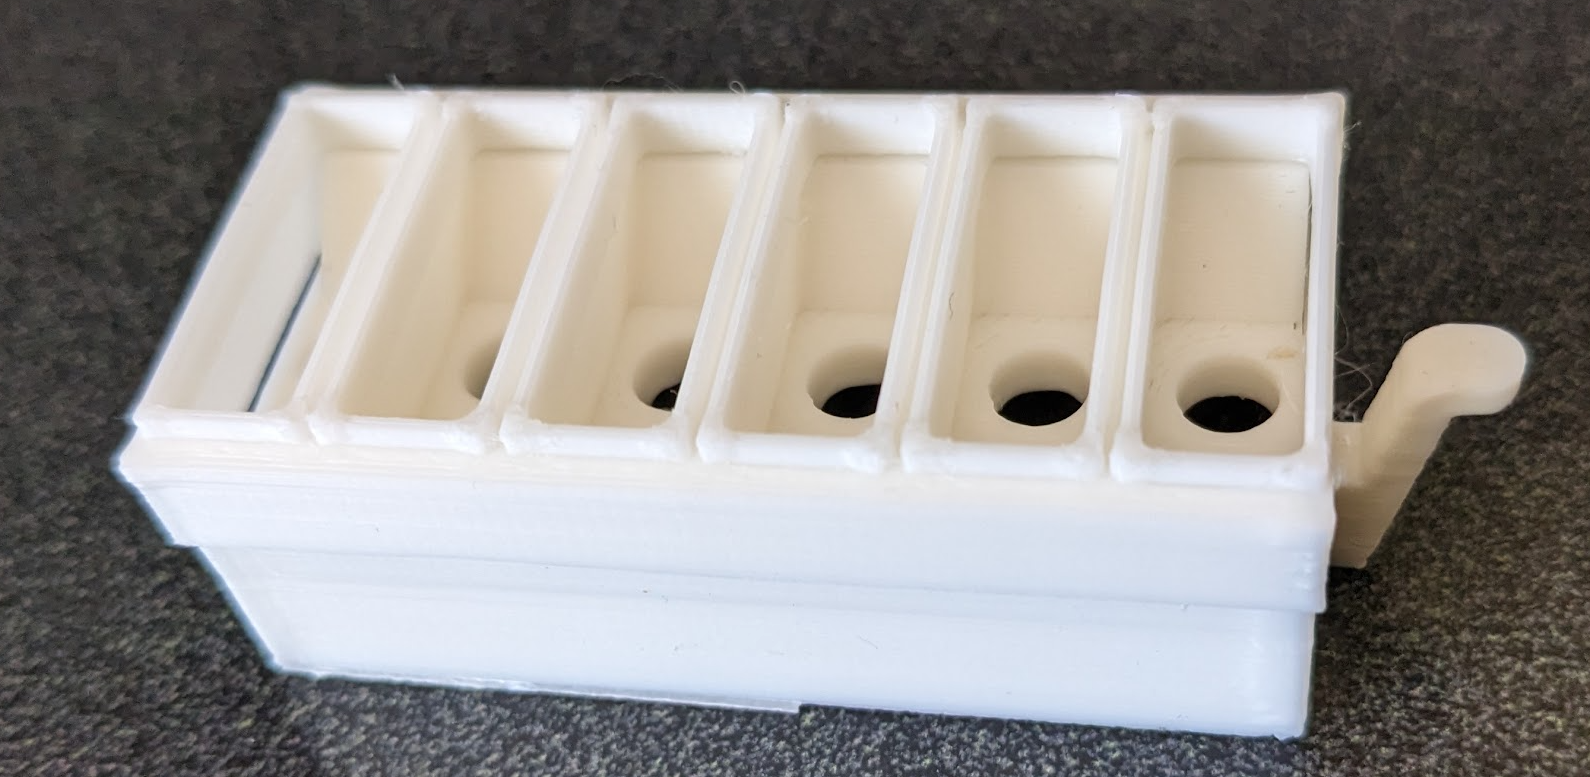
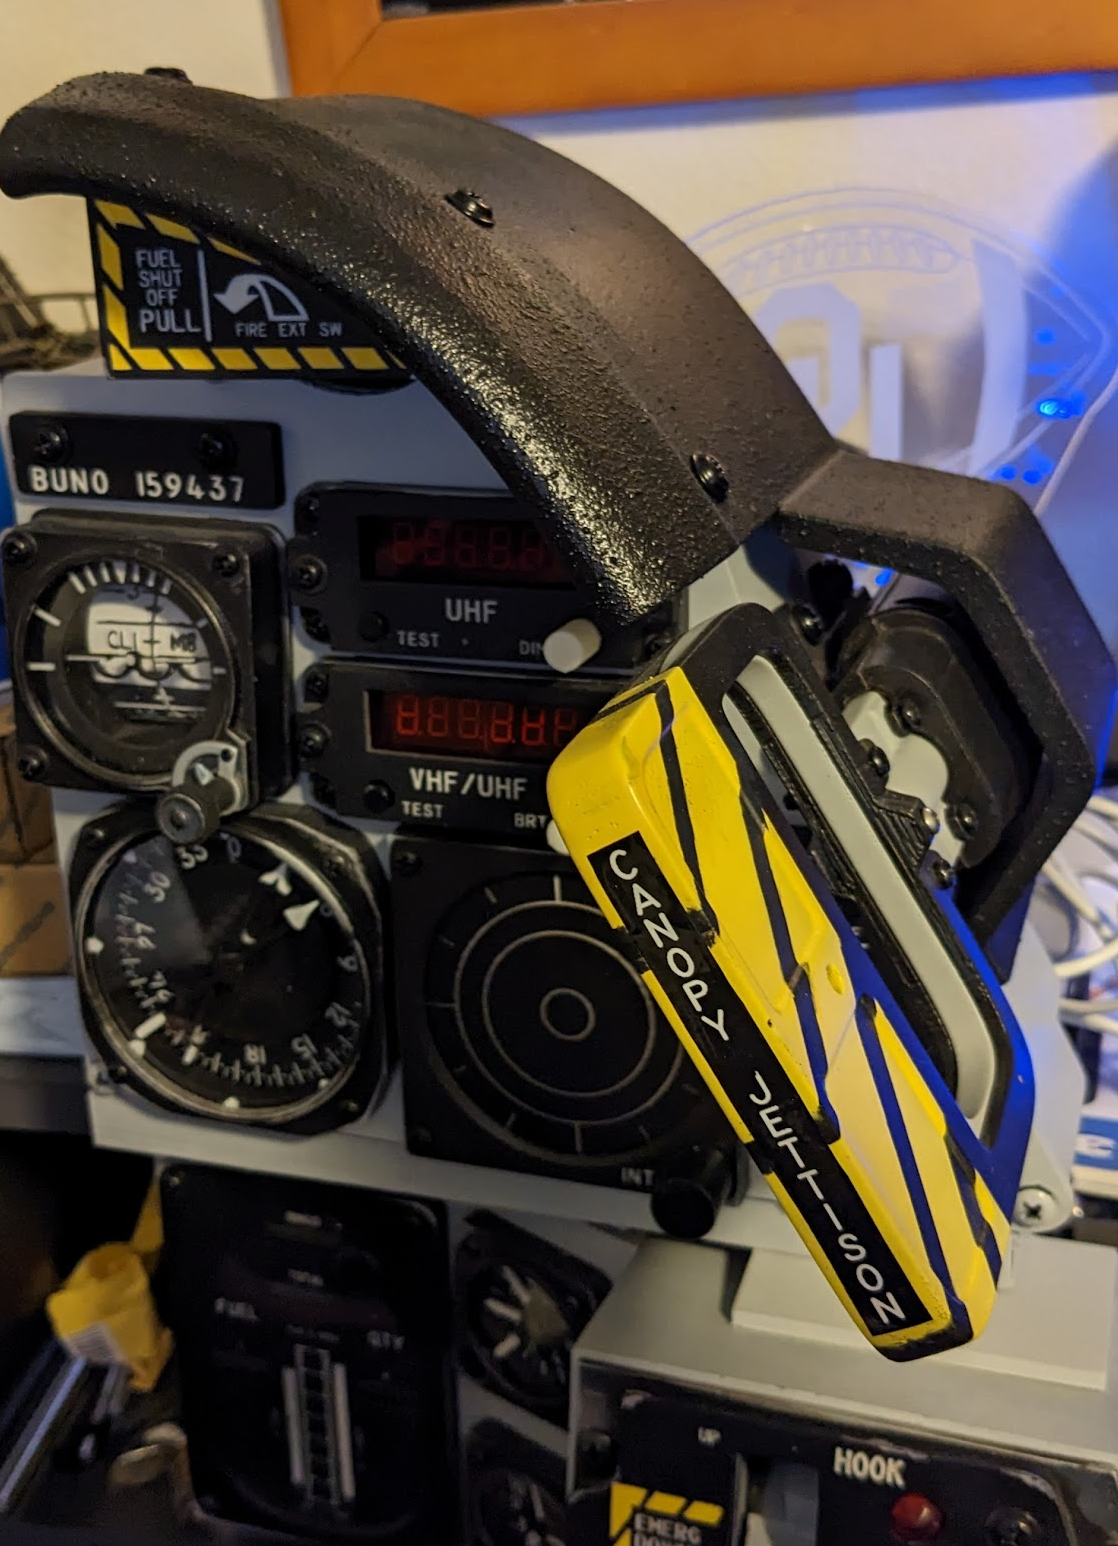
Trying to finish off the last bits of this. Canopy jettison handle is functional, just needs to be sanded and painted. I added teflon tape for all the friction points and it's buttery smooth. Also working on a glare hood held on by magnets for easy removal I thought that raised lip would be a good way of bringing the pieces together but I think it's just going to be annoyance, I'm going to trim it off. The center stack needs to be raised a few notches on the virpil deskmount. Once I'm happy with it, sand and paint and I should be "done" with this thing