Bruce_D
-
Posts
316 -
Joined
-
Last visited
Content Type
Profiles
Forums
Events
Everything posted by Bruce_D
-

[BUG] Nose wheel streering not enabling after landing
Bruce_D replied to Kula66's topic in Bugs and Problems
I had the same problem. What I discovered is that some times after landing you have to rise the launch bar. After that you can engage the nose wheel again. Edit: IronMike was faster than me on the answer -
[NEED TRACK] AI aircraft cannot sort themselves on deck
Bruce_D replied to Raisuli's topic in Bugs and Problems
Not only that, but F-14 has a strange behavior on the carrier. Bug.trk
-
Everyone who had posted on this tread is banished from the game. That's why you can not login! OMG, I have posted! I am banished too :doh: Hahaha
-
Controls question regarding using DLC on landing approach....
Bruce_D replied to Spirit X's topic in DCS: F-14A & B
Hi, You can use an axis to DLC. You said that you don't have any axis left, so just use a modifier button during land to engage an axis that you are using for a different function to be a DLC axis. If you are interested and have no idea on how to do it, reply this and I can show you on how to do it with a step by step. For example: if your joystick has 3 axis, with a modifier they become 6. -
Hi, I had the same question on this post: https://forums.eagle.ru/showthread.php?t=238778&page=6 Hope that can answer.
-
I have the same problem in single player not using the mod. I discovered a solution, but in your case it's not going to work, you will have to have a cold start. In single player, when it is working, go to the RIO position. Their you will see that the LIQ COOLING switch is on the off position. You can turn it on. The LANTIRN is going to work. When you land and rearm and refuel and turn off the LANTIRN you will have the same problem. To solve it go to the RIO pit and switch off the LIQ COOLING switch, turn on the LANTIRN. As soon as the LANTIRN is on, put the LIQ COOLING switch on the on position.
-
When you tune the axis there is a check box named slider. Mark it.
-
Try the same and increase if you think it is necessary. It is not necessary to try bellow that! Throttle: try a negative number with slider check. Mine is -15. Hope I could help
-
Try 25 with deadzone of 4
-
When you adjust the curves you will feel the difference. Follow the other guys tips, they are very good too!
-
Hi, First: set wings to bomb mode. Second: Did you set the axis curves for your joystick?
-
Open beta and having no problems with DLC
-
Which is your step by step before activate DLC?
-
You have to use the emergency gear Handel to activate the gear. I almost lost a campaign mission because of that :mad: hahaha
-
Ok, This is the same problem that the Mig-23 has. Even the original F-16 skins has this “0”. I found the other solution just looking on the original ‘description.lua’ and looking for the nose and fin detail, but in this case there is nothing different from one update to another. Maybe someone with more knowledge then me can find a solution.
-
Great! Just be aware that this post has been reported. When they fix it this code will not be necessary.
-
Good that worked!
-
You are using the wrong folder. The correct is \USER NAME\Saved Games\DCS\Liveries\F-16C_50\
-
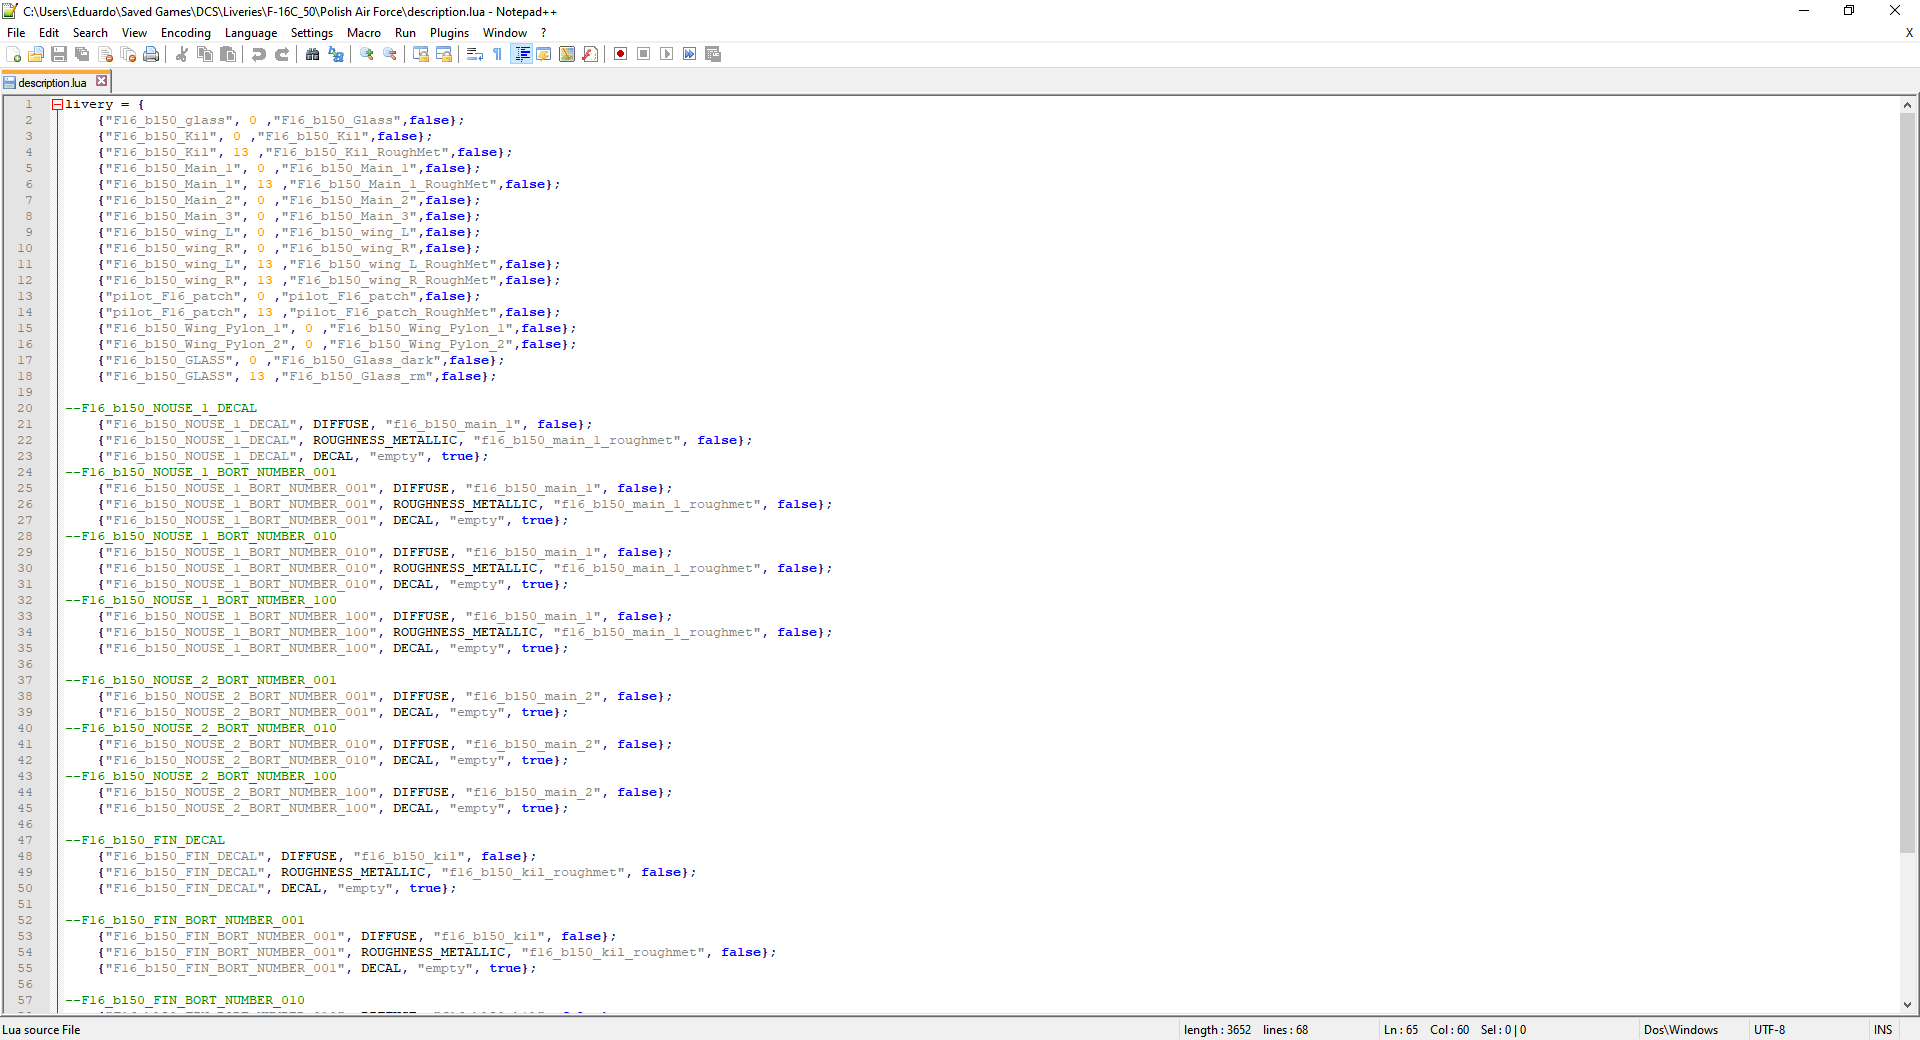
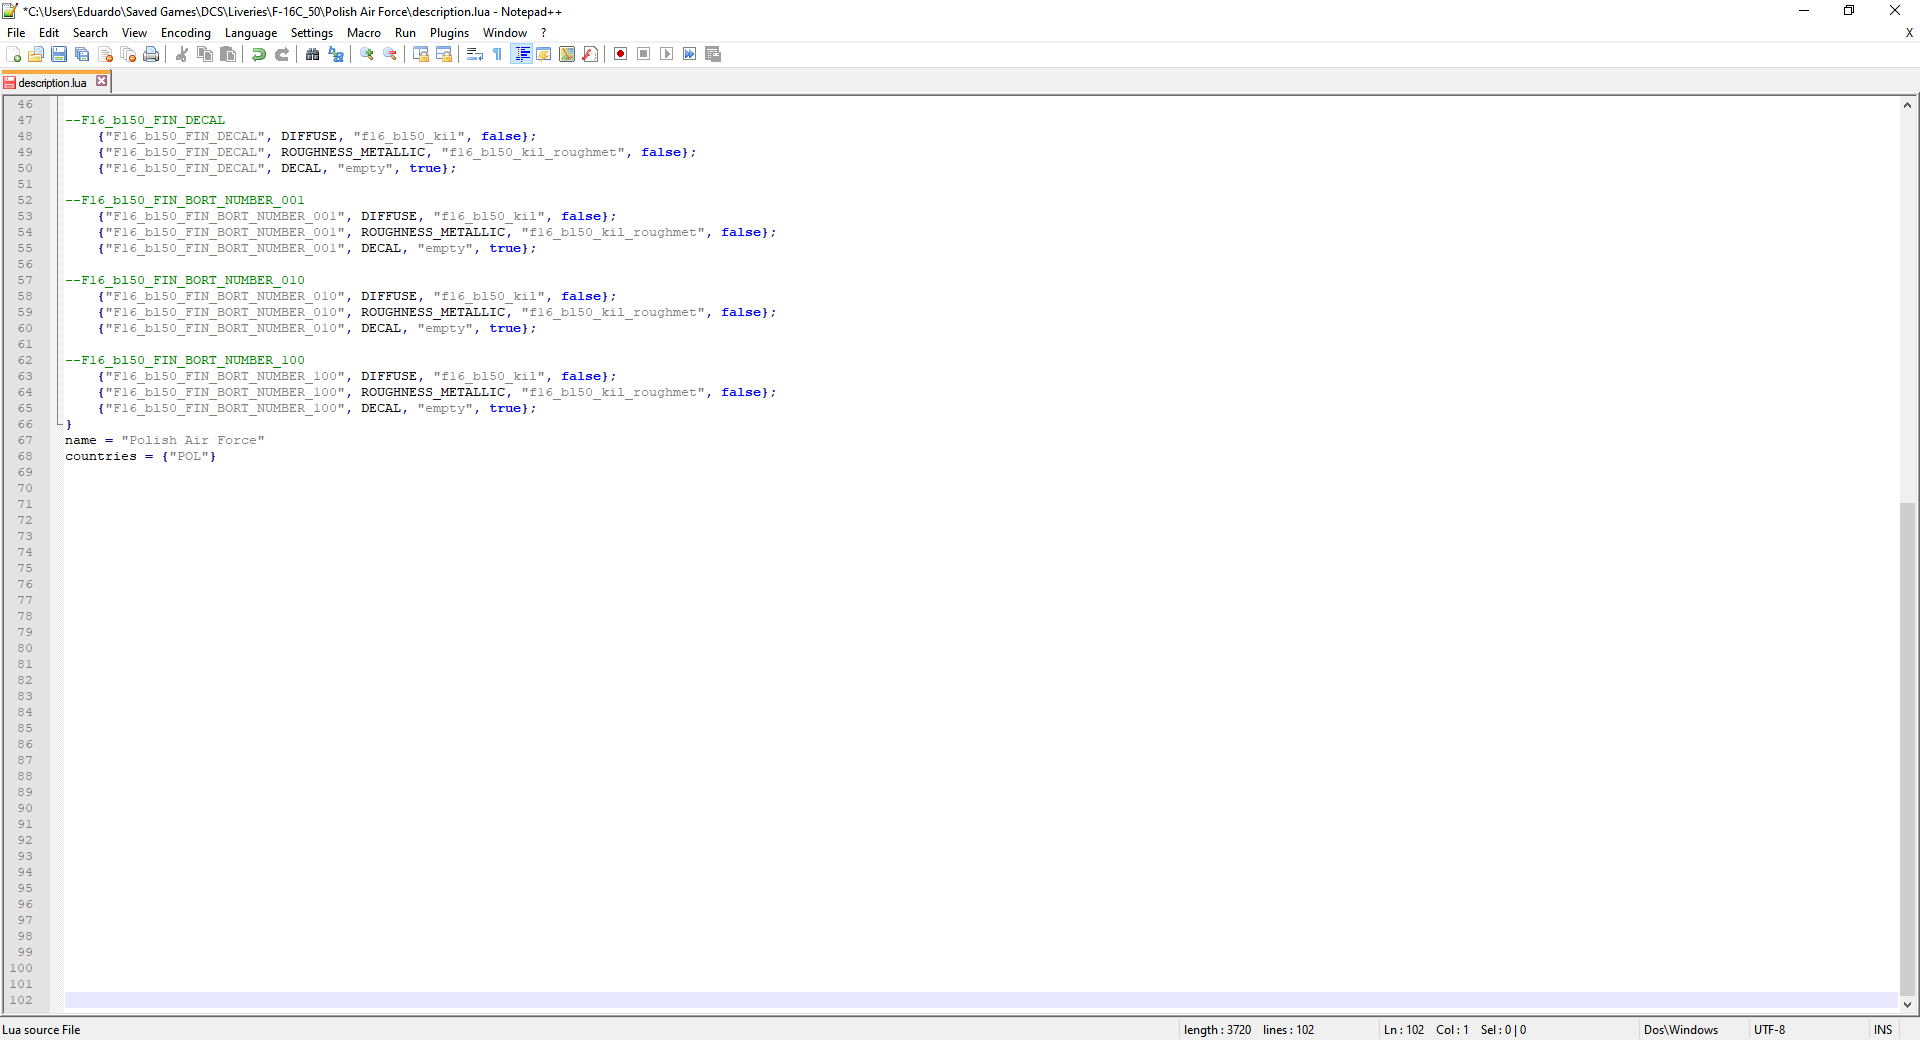
Hi, Sorry for the delay, I was preparing launch :) I will try my best to explain the step by step. 1) I will use the polish air force skin as an example: https://www.digitalcombatsimulator.c...files/3306489/ Open the folder “Polish Air Force” located in \USER NAME\Saved Games\DCS\Liveries\F-16C_50\Polish Air Force 2) Use “Notepad++” to open the file named “description.lua” (if you don’t have ‘Notepad++’ you can Google it and download or use the Windows Notepad, but I recommend ‘Notepad++’). The file will look like this: 3) On the same place as the picture below you are going to add the following code: --F16_bl50_NOUSE_1_DECAL {"F16_bl50_NOUSE_1_DECAL", DIFFUSE, "f16_bl50_main_1", false}; {"F16_bl50_NOUSE_1_DECAL", ROUGHNESS_METALLIC, "f16_bl50_main_1_roughmet", false}; {"F16_bl50_NOUSE_1_DECAL", DECAL, "empty", true}; --F16_bl50_NOUSE_1_BORT_NUMBER_001 {"F16_bl50_NOUSE_1_BORT_NUMBER_001", DIFFUSE, "f16_bl50_main_1", false}; {"F16_bl50_NOUSE_1_BORT_NUMBER_001", ROUGHNESS_METALLIC, "f16_bl50_main_1_roughmet", false}; {"F16_bl50_NOUSE_1_BORT_NUMBER_001", DECAL, "empty", true}; --F16_bl50_NOUSE_1_BORT_NUMBER_010 {"F16_bl50_NOUSE_1_BORT_NUMBER_010", DIFFUSE, "f16_bl50_main_1", false}; {"F16_bl50_NOUSE_1_BORT_NUMBER_010", ROUGHNESS_METALLIC, "f16_bl50_main_1_roughmet", false}; {"F16_bl50_NOUSE_1_BORT_NUMBER_010", DECAL, "empty", true}; --F16_bl50_NOUSE_1_BORT_NUMBER_100 {"F16_bl50_NOUSE_1_BORT_NUMBER_100", DIFFUSE, "f16_bl50_main_1", false}; {"F16_bl50_NOUSE_1_BORT_NUMBER_100", ROUGHNESS_METALLIC, "f16_bl50_main_1_roughmet", false}; {"F16_bl50_NOUSE_1_BORT_NUMBER_100", DECAL, "empty", true}; --F16_bl50_NOUSE_2_BORT_NUMBER_001 {"F16_bl50_NOUSE_2_BORT_NUMBER_001", DIFFUSE, "f16_bl50_main_2", false}; {"F16_bl50_NOUSE_2_BORT_NUMBER_001", DECAL, "empty", true}; --F16_bl50_NOUSE_2_BORT_NUMBER_010 {"F16_bl50_NOUSE_2_BORT_NUMBER_010", DIFFUSE, "f16_bl50_main_2", false}; {"F16_bl50_NOUSE_2_BORT_NUMBER_010", DECAL, "empty", true}; --F16_bl50_NOUSE_2_BORT_NUMBER_100 {"F16_bl50_NOUSE_2_BORT_NUMBER_100", DIFFUSE, "f16_bl50_main_2", false}; {"F16_bl50_NOUSE_2_BORT_NUMBER_100", DECAL, "empty", true}; --F16_bl50_FIN_DECAL {"F16_bl50_FIN_DECAL", DIFFUSE, "f16_bl50_kil", false}; {"F16_bl50_FIN_DECAL", ROUGHNESS_METALLIC, "f16_bl50_kil_roughmet", false}; {"F16_bl50_FIN_DECAL", DECAL, "empty", true}; --F16_bl50_FIN_BORT_NUMBER_001 {"F16_bl50_FIN_BORT_NUMBER_001", DIFFUSE, "f16_bl50_kil", false}; {"F16_bl50_FIN_BORT_NUMBER_001", ROUGHNESS_METALLIC, "f16_bl50_kil_roughmet", false}; {"F16_bl50_FIN_BORT_NUMBER_001", DECAL, "empty", true}; --F16_bl50_FIN_BORT_NUMBER_010 {"F16_bl50_FIN_BORT_NUMBER_010", DIFFUSE, "f16_bl50_kil", false}; {"F16_bl50_FIN_BORT_NUMBER_010", ROUGHNESS_METALLIC, "f16_bl50_kil_roughmet", false}; {"F16_bl50_FIN_BORT_NUMBER_010", DECAL, "empty", true}; --F16_bl50_FIN_BORT_NUMBER_100 {"F16_bl50_FIN_BORT_NUMBER_100", DIFFUSE, "f16_bl50_kil", false}; {"F16_bl50_FIN_BORT_NUMBER_100", ROUGHNESS_METALLIC, "f16_bl50_kil_roughmet", false}; {"F16_bl50_FIN_BORT_NUMBER_100", DECAL, "empty", true}; 4) Done! Just save the file and play! Important notes: 1) For other skins you may have to change a few other parameters that weren’t necessary for this particular skin. So I suggest you to study my code and compare with what Akatsuki publish (he published a complete code for more elaborated skins) to change different skins: https://forums.eagle.ru/showpost.php?p=4252394&postcount=4 2) It is optional, but I have added the following code at the end of the “description.lua” file: countries = {"POL"} With this code the skin will only appear for the Polish F-16 and not for all F-16 from other nations on mission editor. Hope I could help.
-
Don't worry, give me a few minutes so I will prepare an explanation on how to do it. One of this skin I have and fixed it. I will use it as an example.
-
Could you send me a screenshot showing the error? Did you create this skin?
-
I've just edited the Description.lua file. add the following code to the descripition.lua: --F16_bl50_FIN_DECAL {"F16_bl50_FIN_DECAL", DIFFUSE, "--NAME OF THE KIL.dll OF YOUR'S SKIN --", false}; {"F16_bl50_FIN_DECAL", DECAL, "empty", true}; {"F16_bl50_FIN_DECAL", ROUGHNESS_METALLIC, "--NAME OF THE KIL_ROUGHMET.dll OF YOUR'S SKIN --", false}; --F16_bl50_FIN_BORT_NUMBER_001 {"F16_bl50_FIN_BORT_NUMBER_001", DIFFUSE, "--NAME OF THE KIL.dll OF YOUR'S SKIN --", false}; {"F16_bl50_FIN_BORT_NUMBER_001", ROUGHNESS_METALLIC, "--NAME OF THE KIL_ROUGHMET.dll OF YOUR'S SKIN --", false}; {"F16_bl50_FIN_BORT_NUMBER_001", DECAL, "empty", true}; --F16_bl50_FIN_BORT_NUMBER_010 {"F16_bl50_FIN_BORT_NUMBER_010", DIFFUSE, "--NAME OF THE KIL.dll OF YOUR'S SKIN --", false}; {"F16_bl50_FIN_BORT_NUMBER_010", ROUGHNESS_METALLIC, "--NAME OF THE KIL_ROUGHMET.dll OF YOUR'S SKIN --", false}; {"F16_bl50_FIN_BORT_NUMBER_010", DECAL, "empty", true}; --F16_bl50_FIN_BORT_NUMBER_100 {"F16_bl50_FIN_BORT_NUMBER_100", DIFFUSE, "--NAME OF THE KIL.dll OF YOUR'S SKIN --", false}; {"F16_bl50_FIN_BORT_NUMBER_100", ROUGHNESS_METALLIC, "--NAME OF THE KIL_ROUGHMET.dll OF YOUR'S SKIN --", false}; {"F16_bl50_FIN_BORT_NUMBER_100", DECAL, "empty", true};
-
My first semi-successful AAR. Do you guys have wake turbulence on?
Bruce_D replied to S. Low's topic in DCS: F/A-18C
Great that the slider worked. Try positive curves. In my case, my throttle physically makes an arc so I have to compensate it. -
My first semi-successful AAR. Do you guys have wake turbulence on?
Bruce_D replied to S. Low's topic in DCS: F/A-18C
In your case you can not use curves. Your stick has a great similarity with the real plane stick. Just for a comparison my stick has half the arc of yours and 1/3 of the precision. Thats why I need curves and you don't. -
My first semi-successful AAR. Do you guys have wake turbulence on?
Bruce_D replied to S. Low's topic in DCS: F/A-18C
Hi, Here is a post where I asked the same question about slider: https://forums.eagle.ru/showthread.php?t=238778&page=6 The negative value was a tip that one guy gave me on the forum so I started to test. I compared the position of my throttle with the rpm of the plane. For example, on the f-14 I discovered that my best curve was -15 and the f18 is -14, which is very similar with the tip that I received. If you take a look on the movements of the throttle and the negative curve of the slider graphic you will see the similarity. I tested curves from -10 to -20 and compared the rpm movement. The curves on my rudder are because my rudder is on my stick, so I control it with my hand. Some times, during turns I saw that I was using involuntary the rudder, so I put a curve to prevent this undesired movement. Hope I could help.