Combat2468
-
Posts
45 -
Joined
-
Last visited
Content Type
Profiles
Forums
Events
Everything posted by Combat2468
-
Hey Dm, Yep, In the New Year is fine for me too.
-
Hey DM, is that the original lighting colour?
-
+1
-
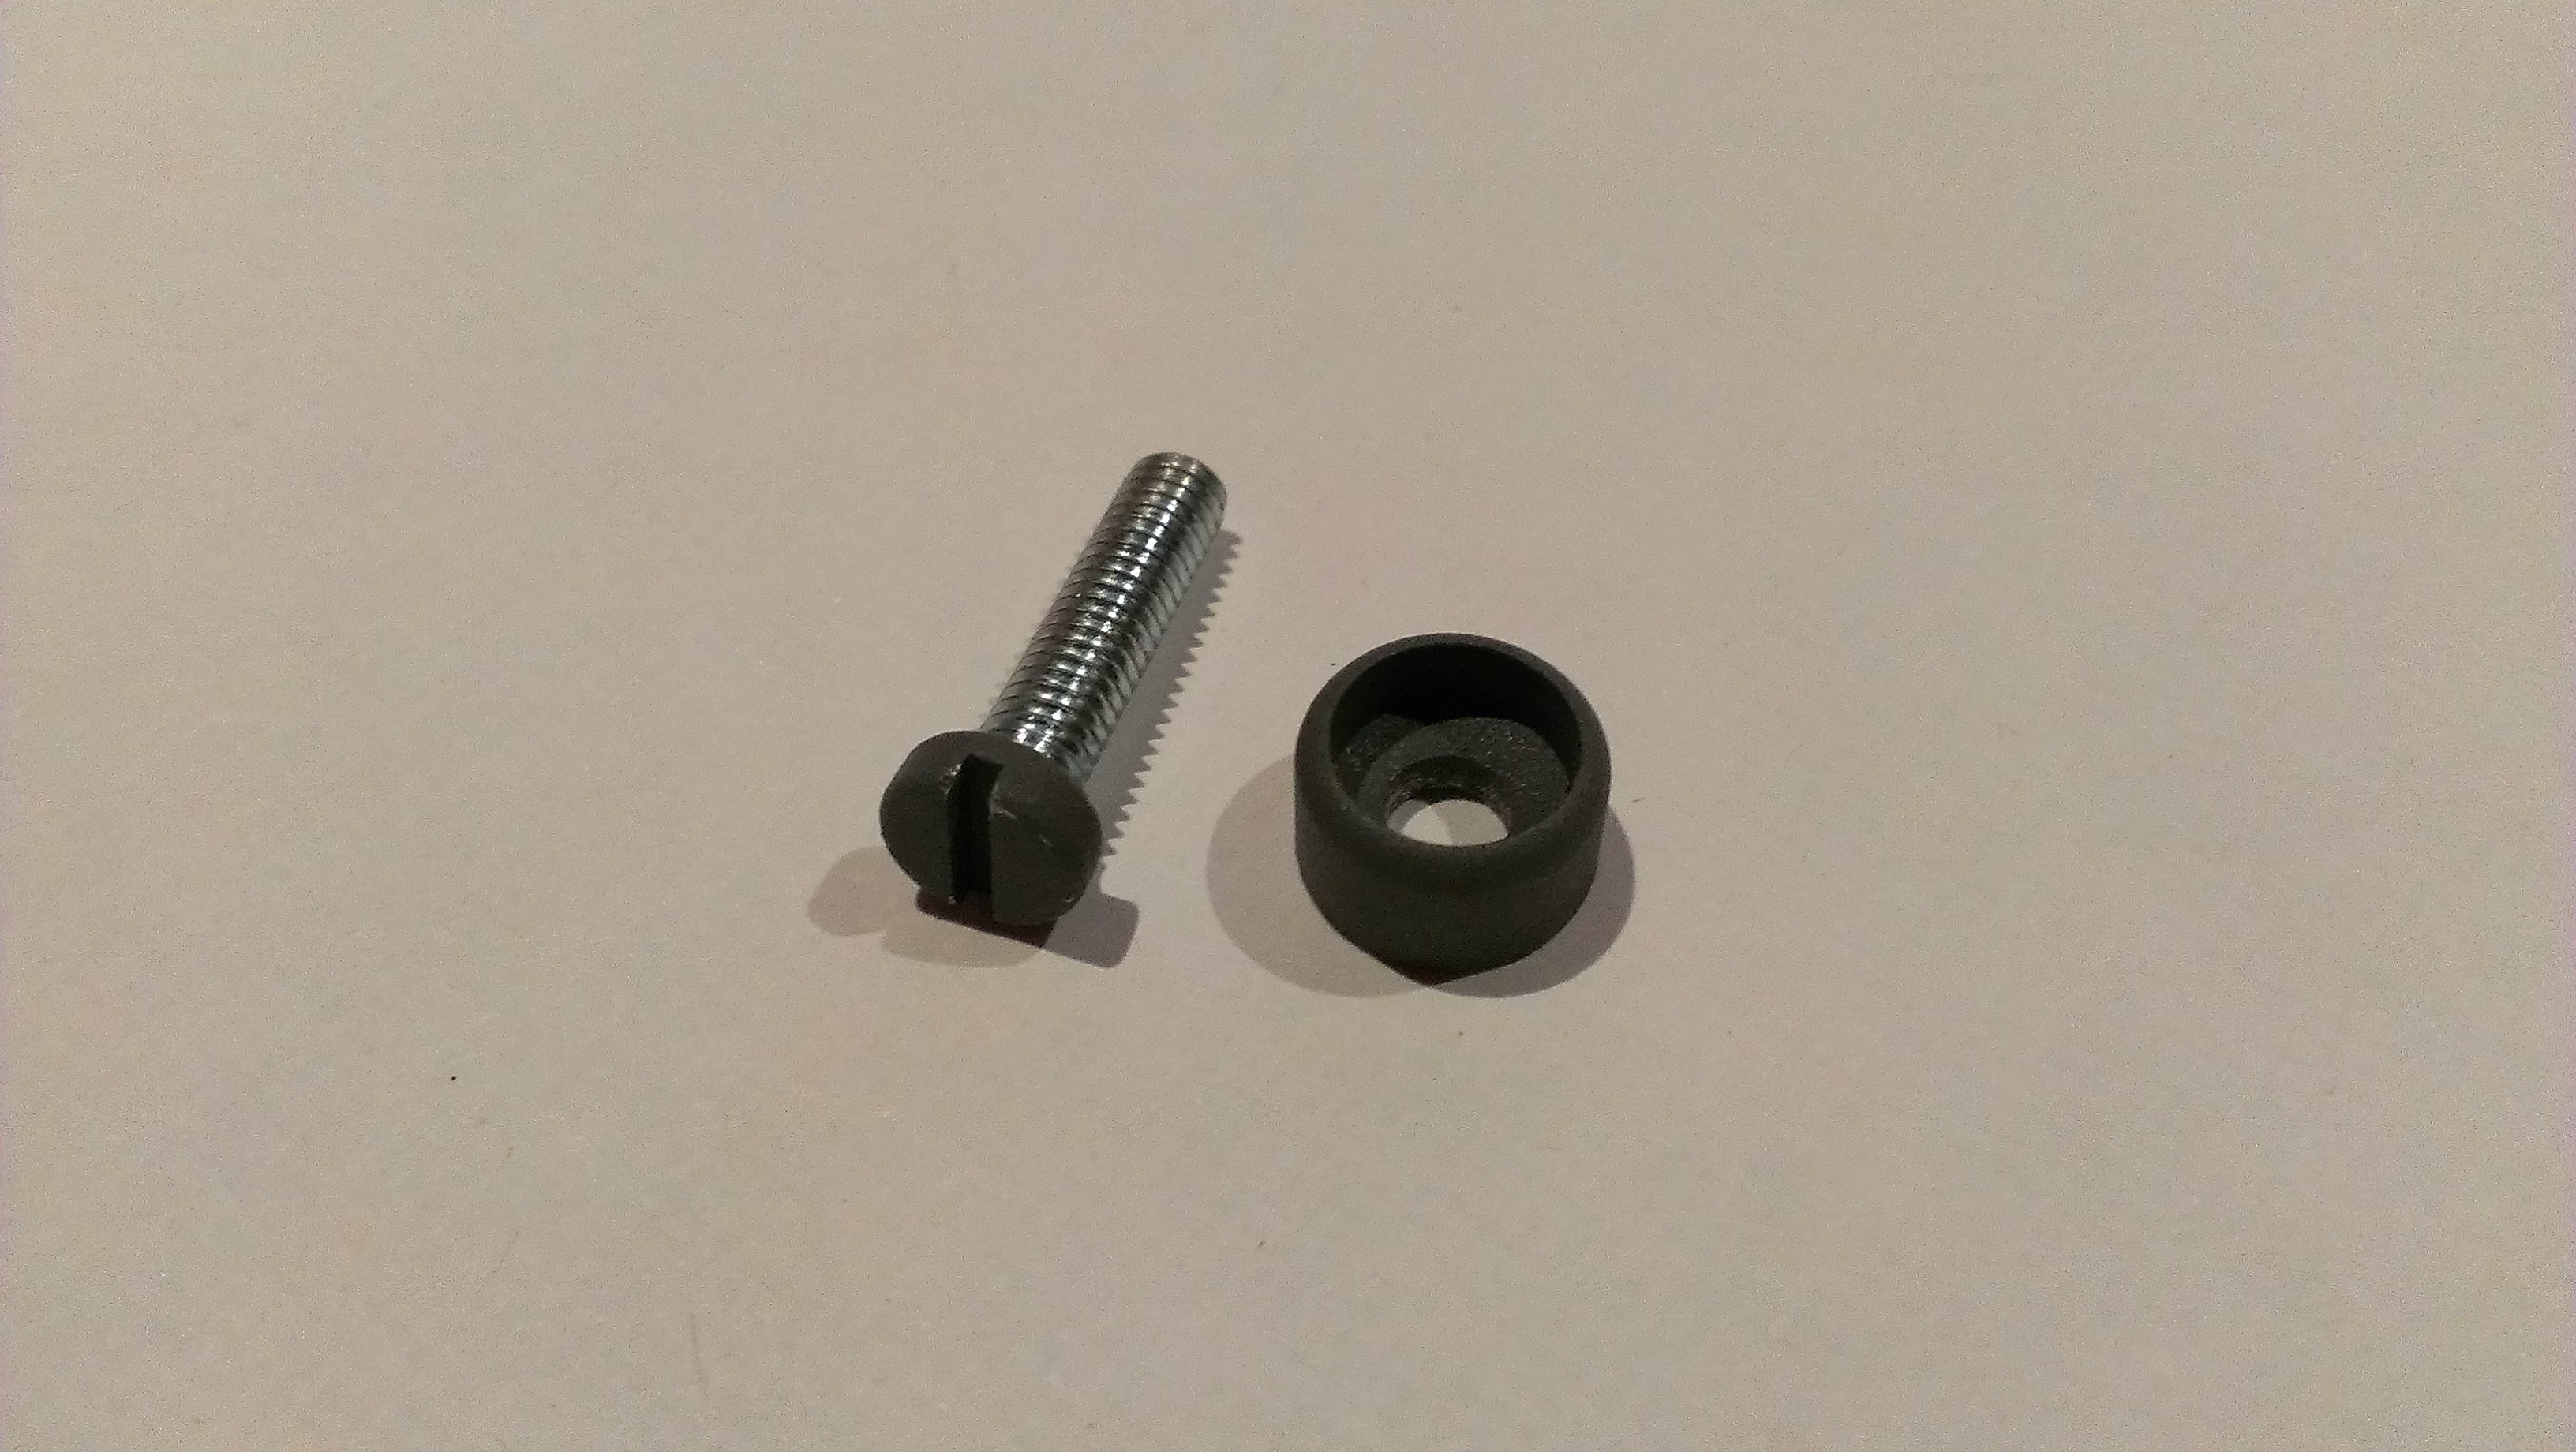
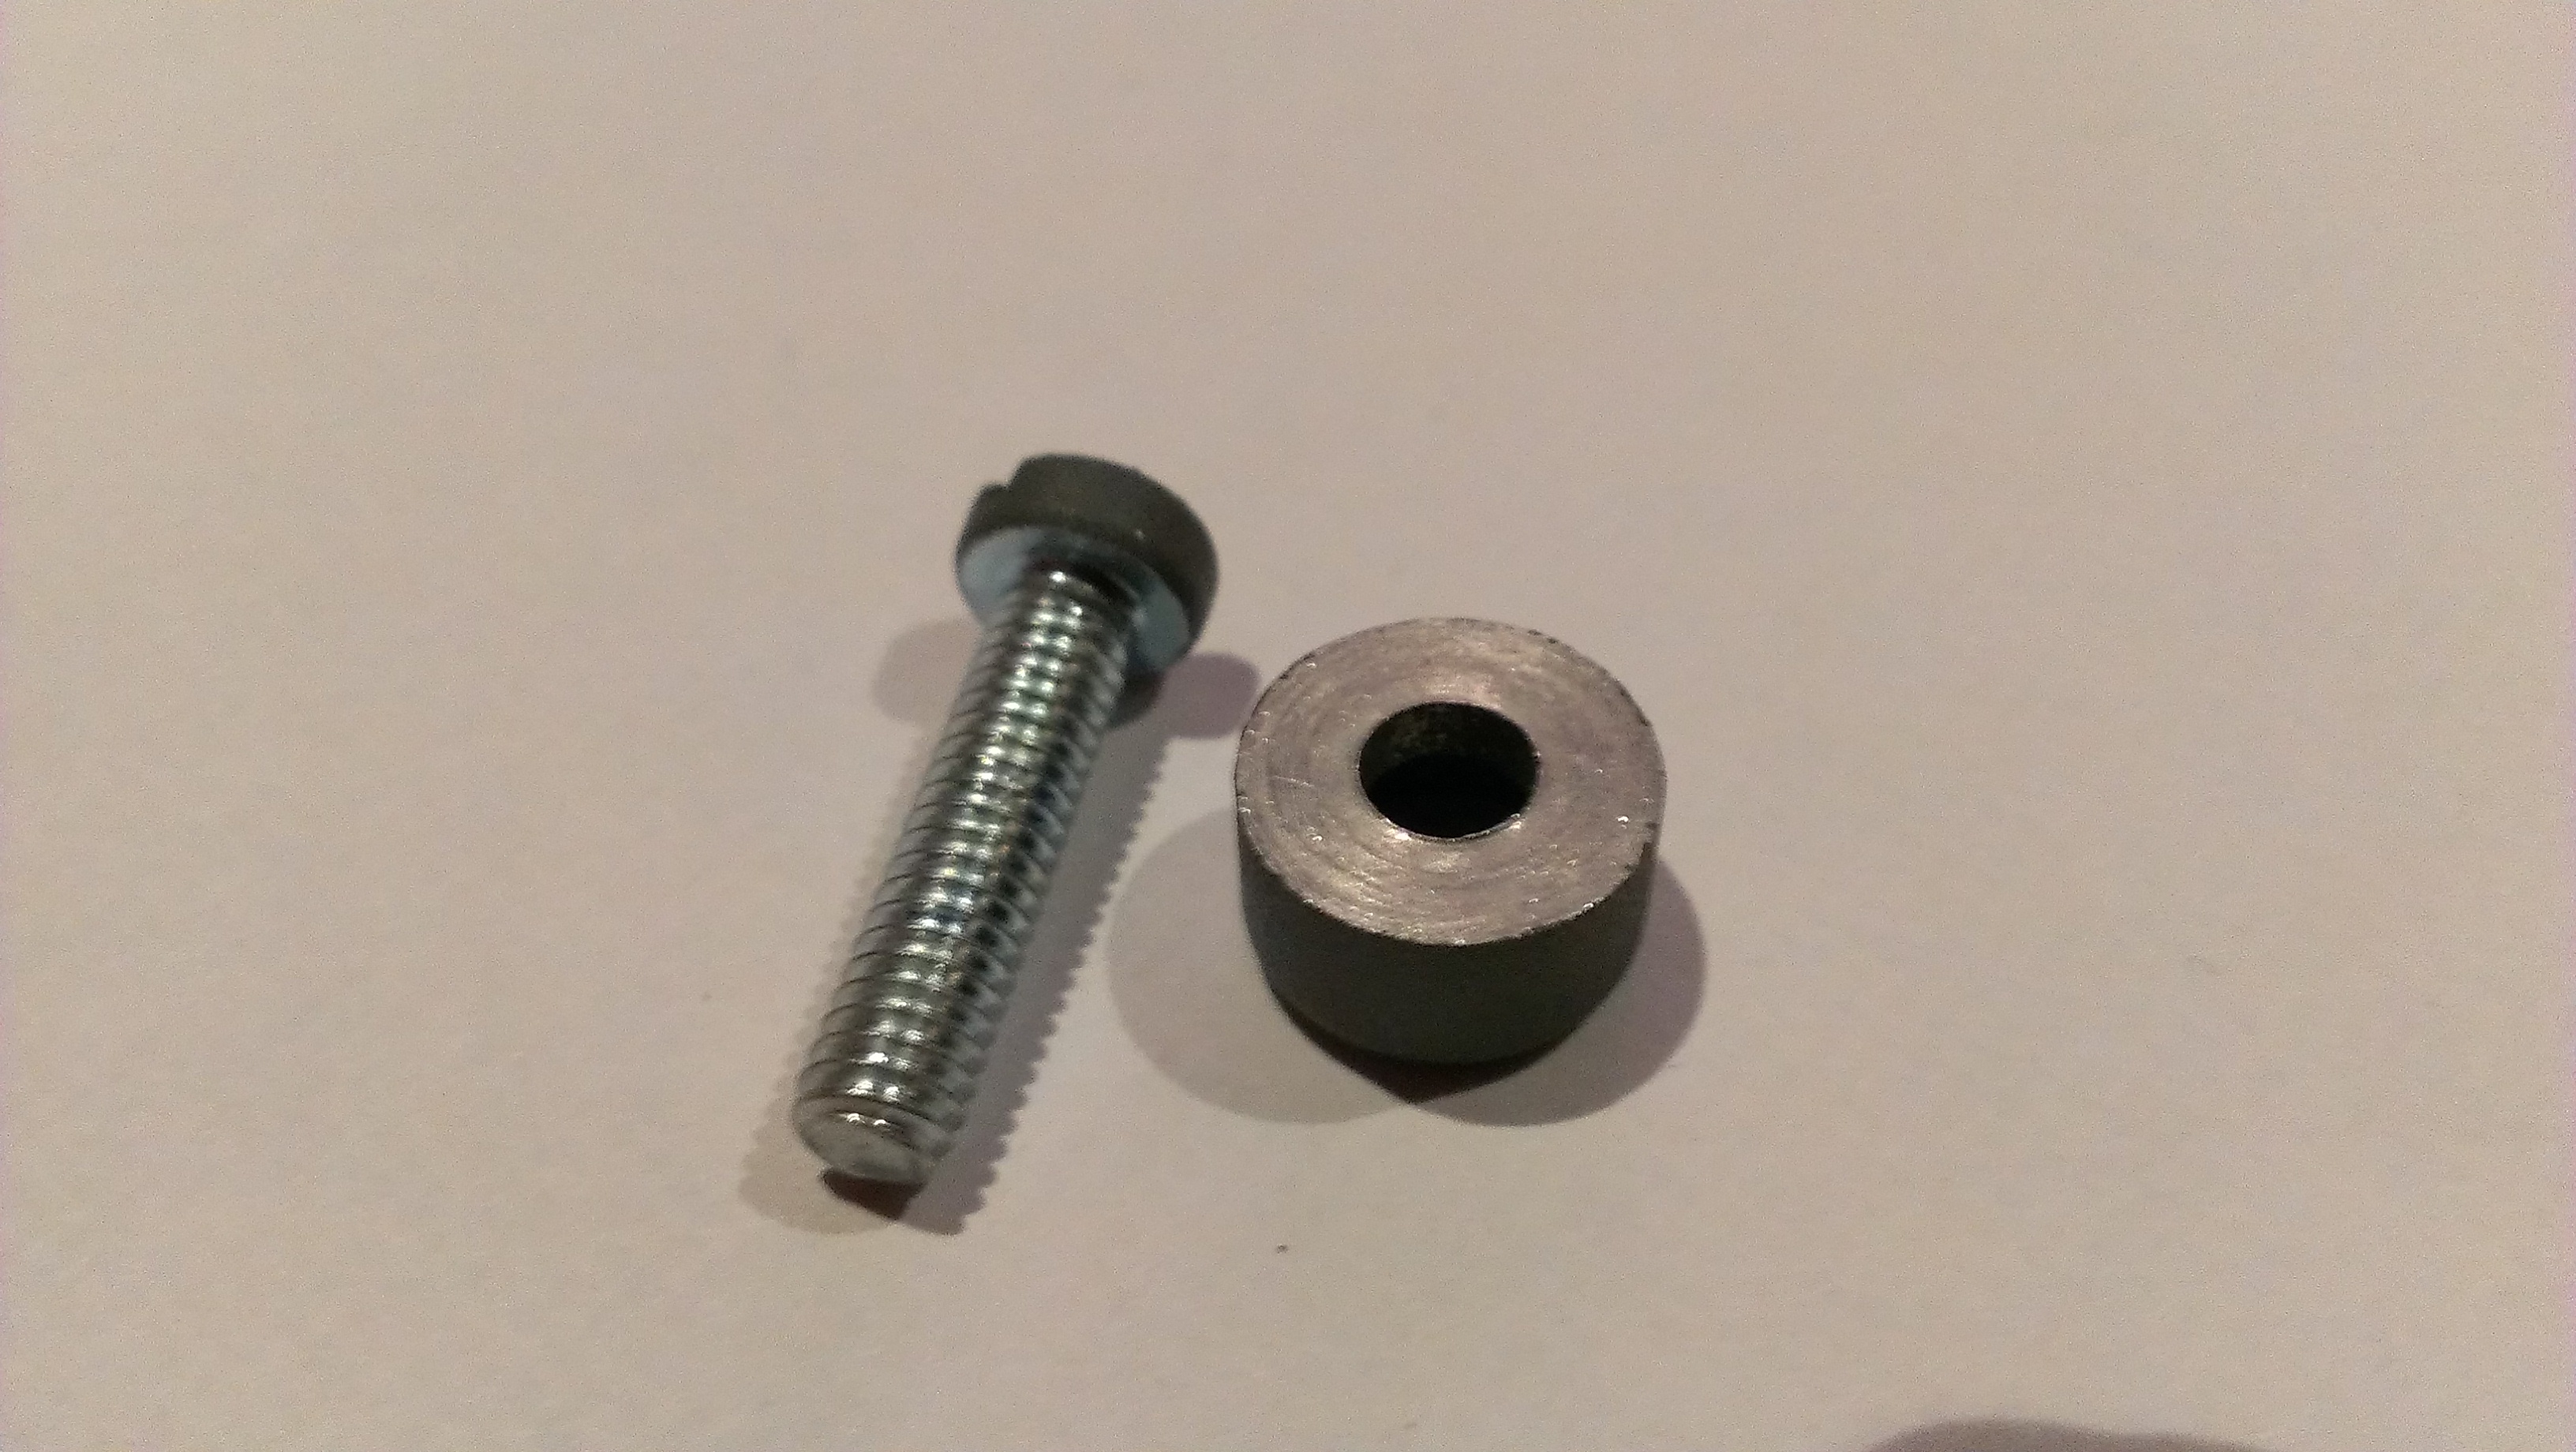
Got a batch of the DZUS from opencockpits pre-painted grey so the black went on fine. 6.00Eur for 6 or 5.00Eur unpainted, still figuring out if 1.00Eur less is worth the hazel of priming. To mount them i'm using 3mm Aluminium Angle and going to drill a hole slightly smaller than the nut and use a vice to push fit into the hole.

-
Cheers Gremlin, means a lot for a builder like yourself to take a tip. The pictures hadnt uploaded first time round so might want to take a look on the previous page.
-
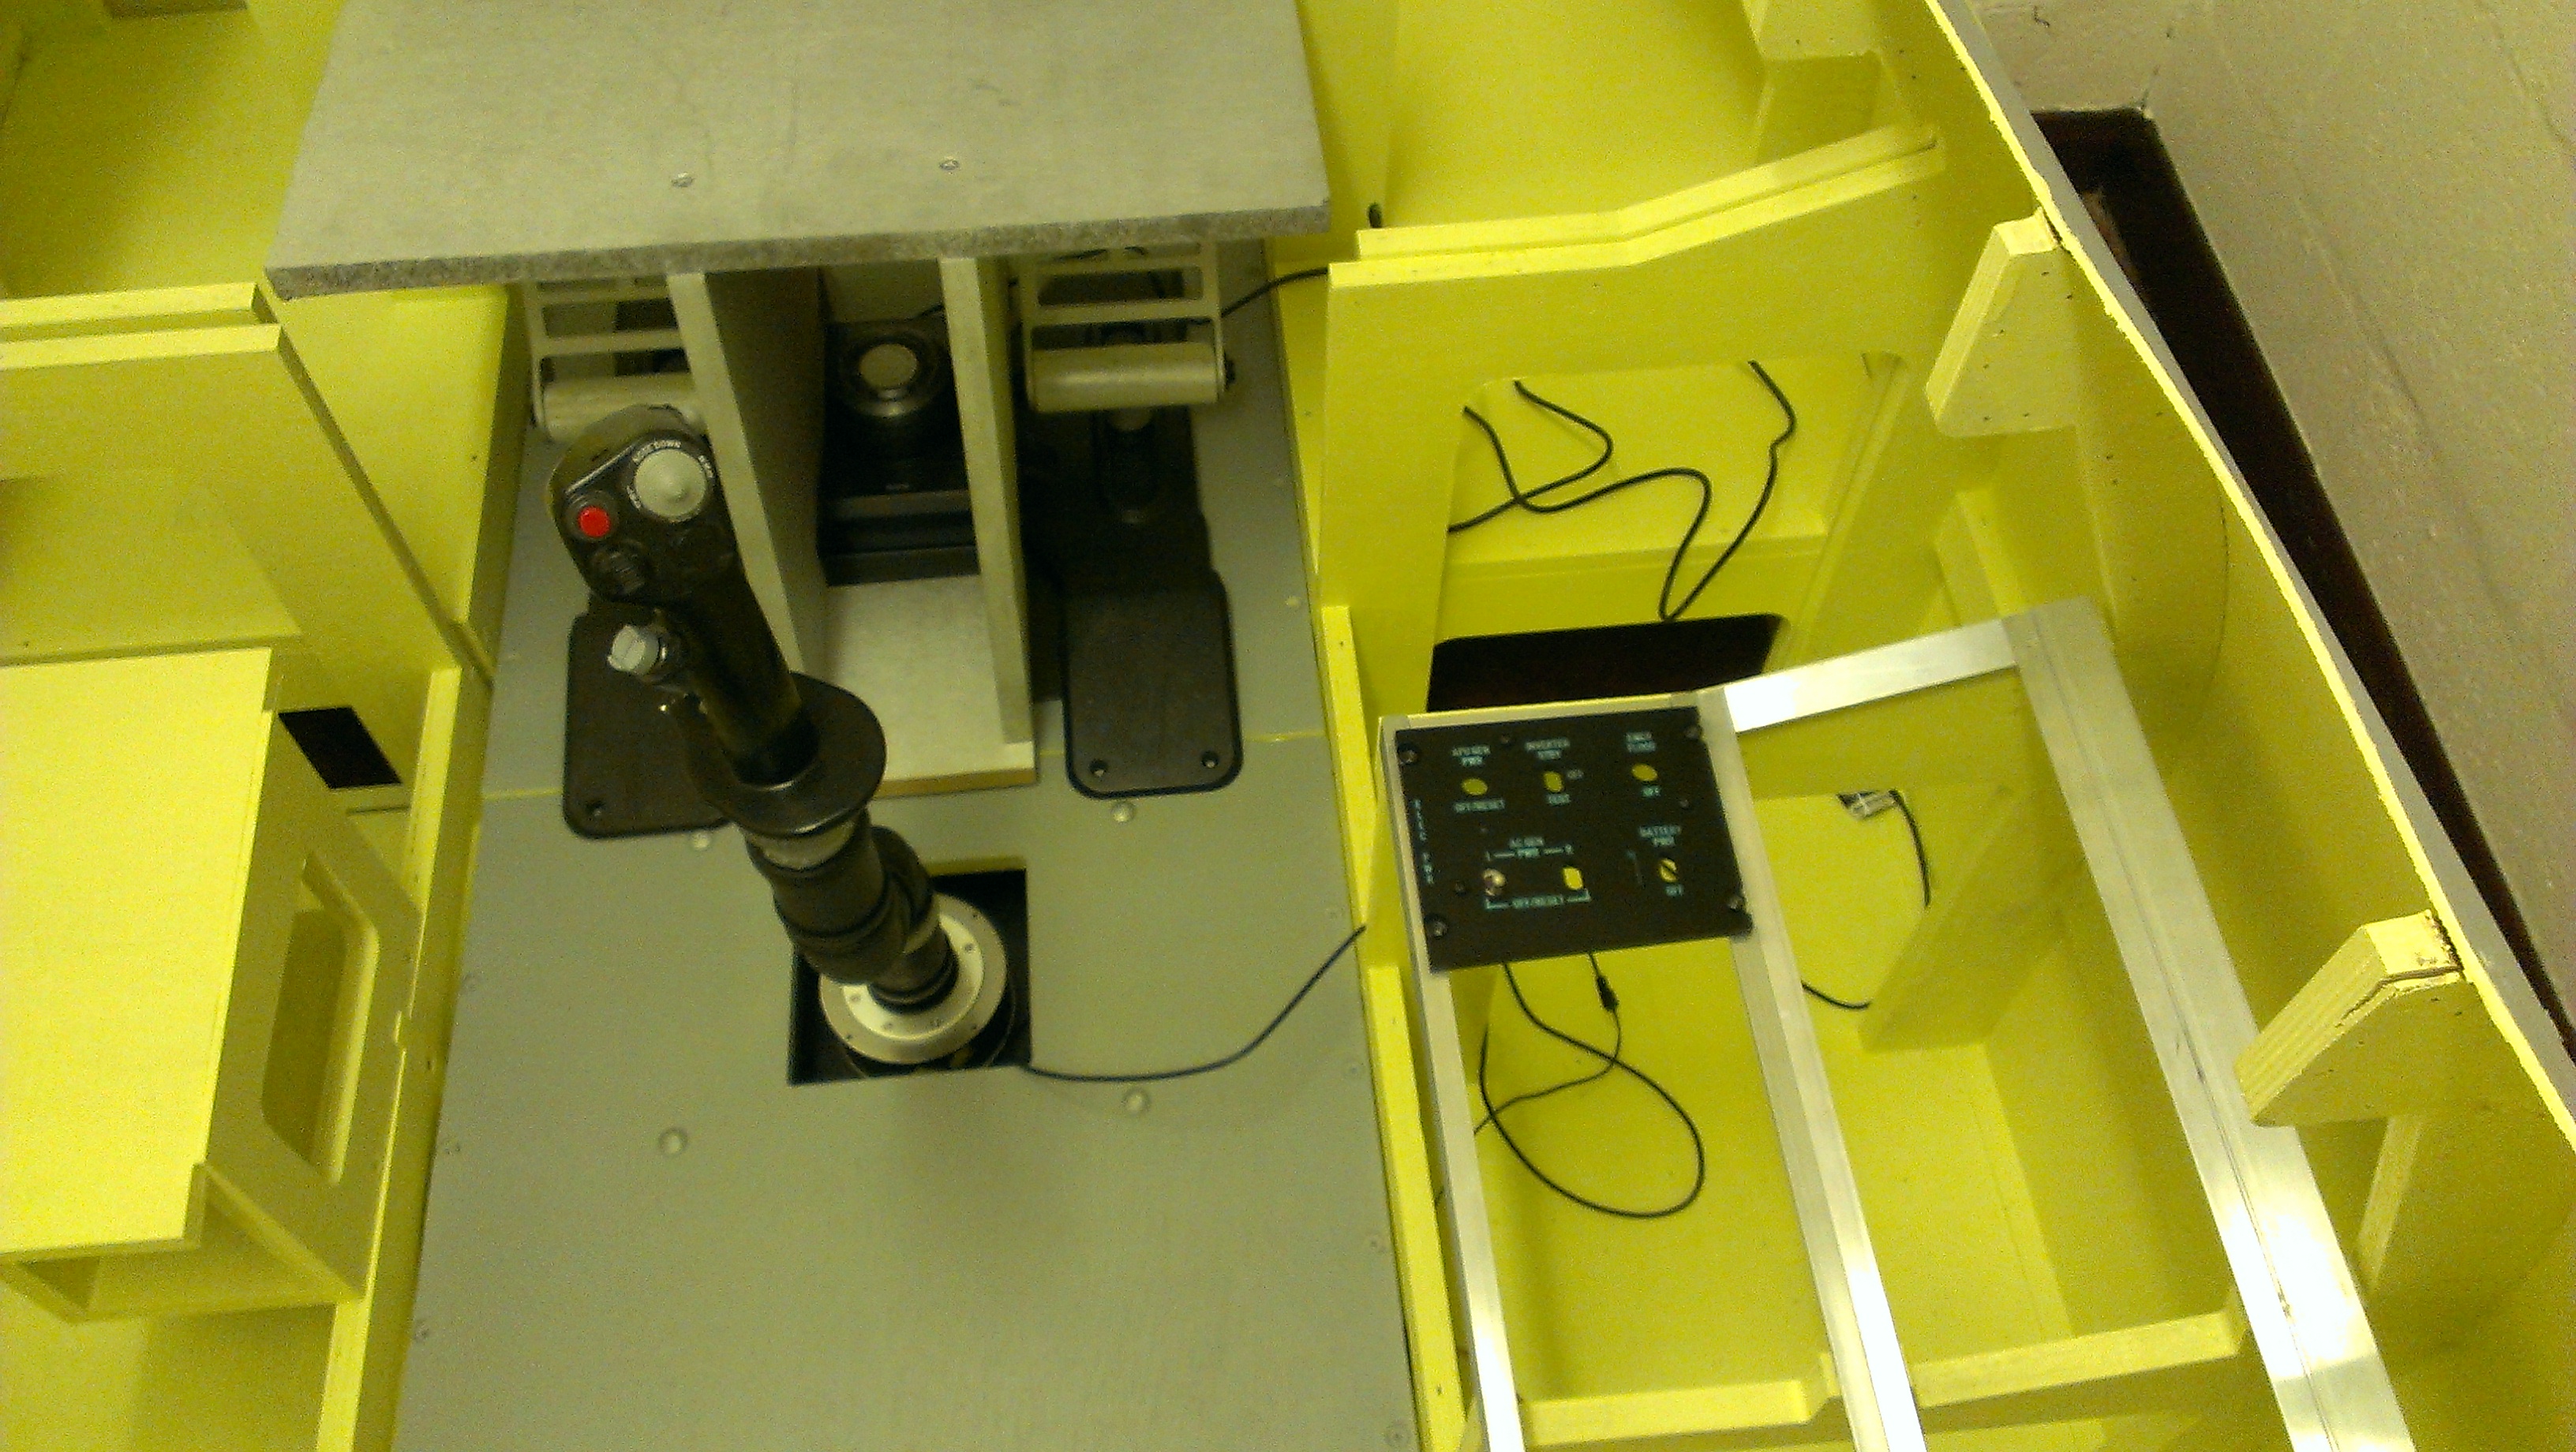
Only a day late this time. So got the frame painted finally, gave up on waiting for the weather to change so covered a room in plastic sheet and sprayed away. It was a bit more time consuming going for the realistic scheame but has allready paid off when i was under the floor mounting the control columb, was nice and bright underneath which should also help with the electrics once more panels go on. As it's been so long i could write a couple of pages, so rather than bore you all if you have any questions please ask away and all answer them all. I'l be posting a guide on how I made the stick extension, based on the familier gardner type attachements but with a karcher adapter instead. A few mods and a lot less shaving of parts. Just need to find some pics that have disapeared. Enjoy.
-
And i'm now officially jealous.:cry: How many USB's do they take up? is it one per dial or have they brought the pack together in some way.
-

What should I get (rudders and MFD)
Combat2468 replied to TonyStovepipe's topic in PC Hardware and Related Software
I got the Combat Pro and regreat it. As Nopileus says they are identical bar the pedel itself which admitidly is aluminium but is still attached to the plastic parts and hence still has a lot of free movement before registering. Also the resistence in the toe brake is vertually non exsistent, so half the time you could have the brakes on without knowing it. With the standard Pro Flight your intire foot has to move to brake and you can compensate with back heal. A lot more feel of control. Save the cash on the Combat and buy some switches:) -
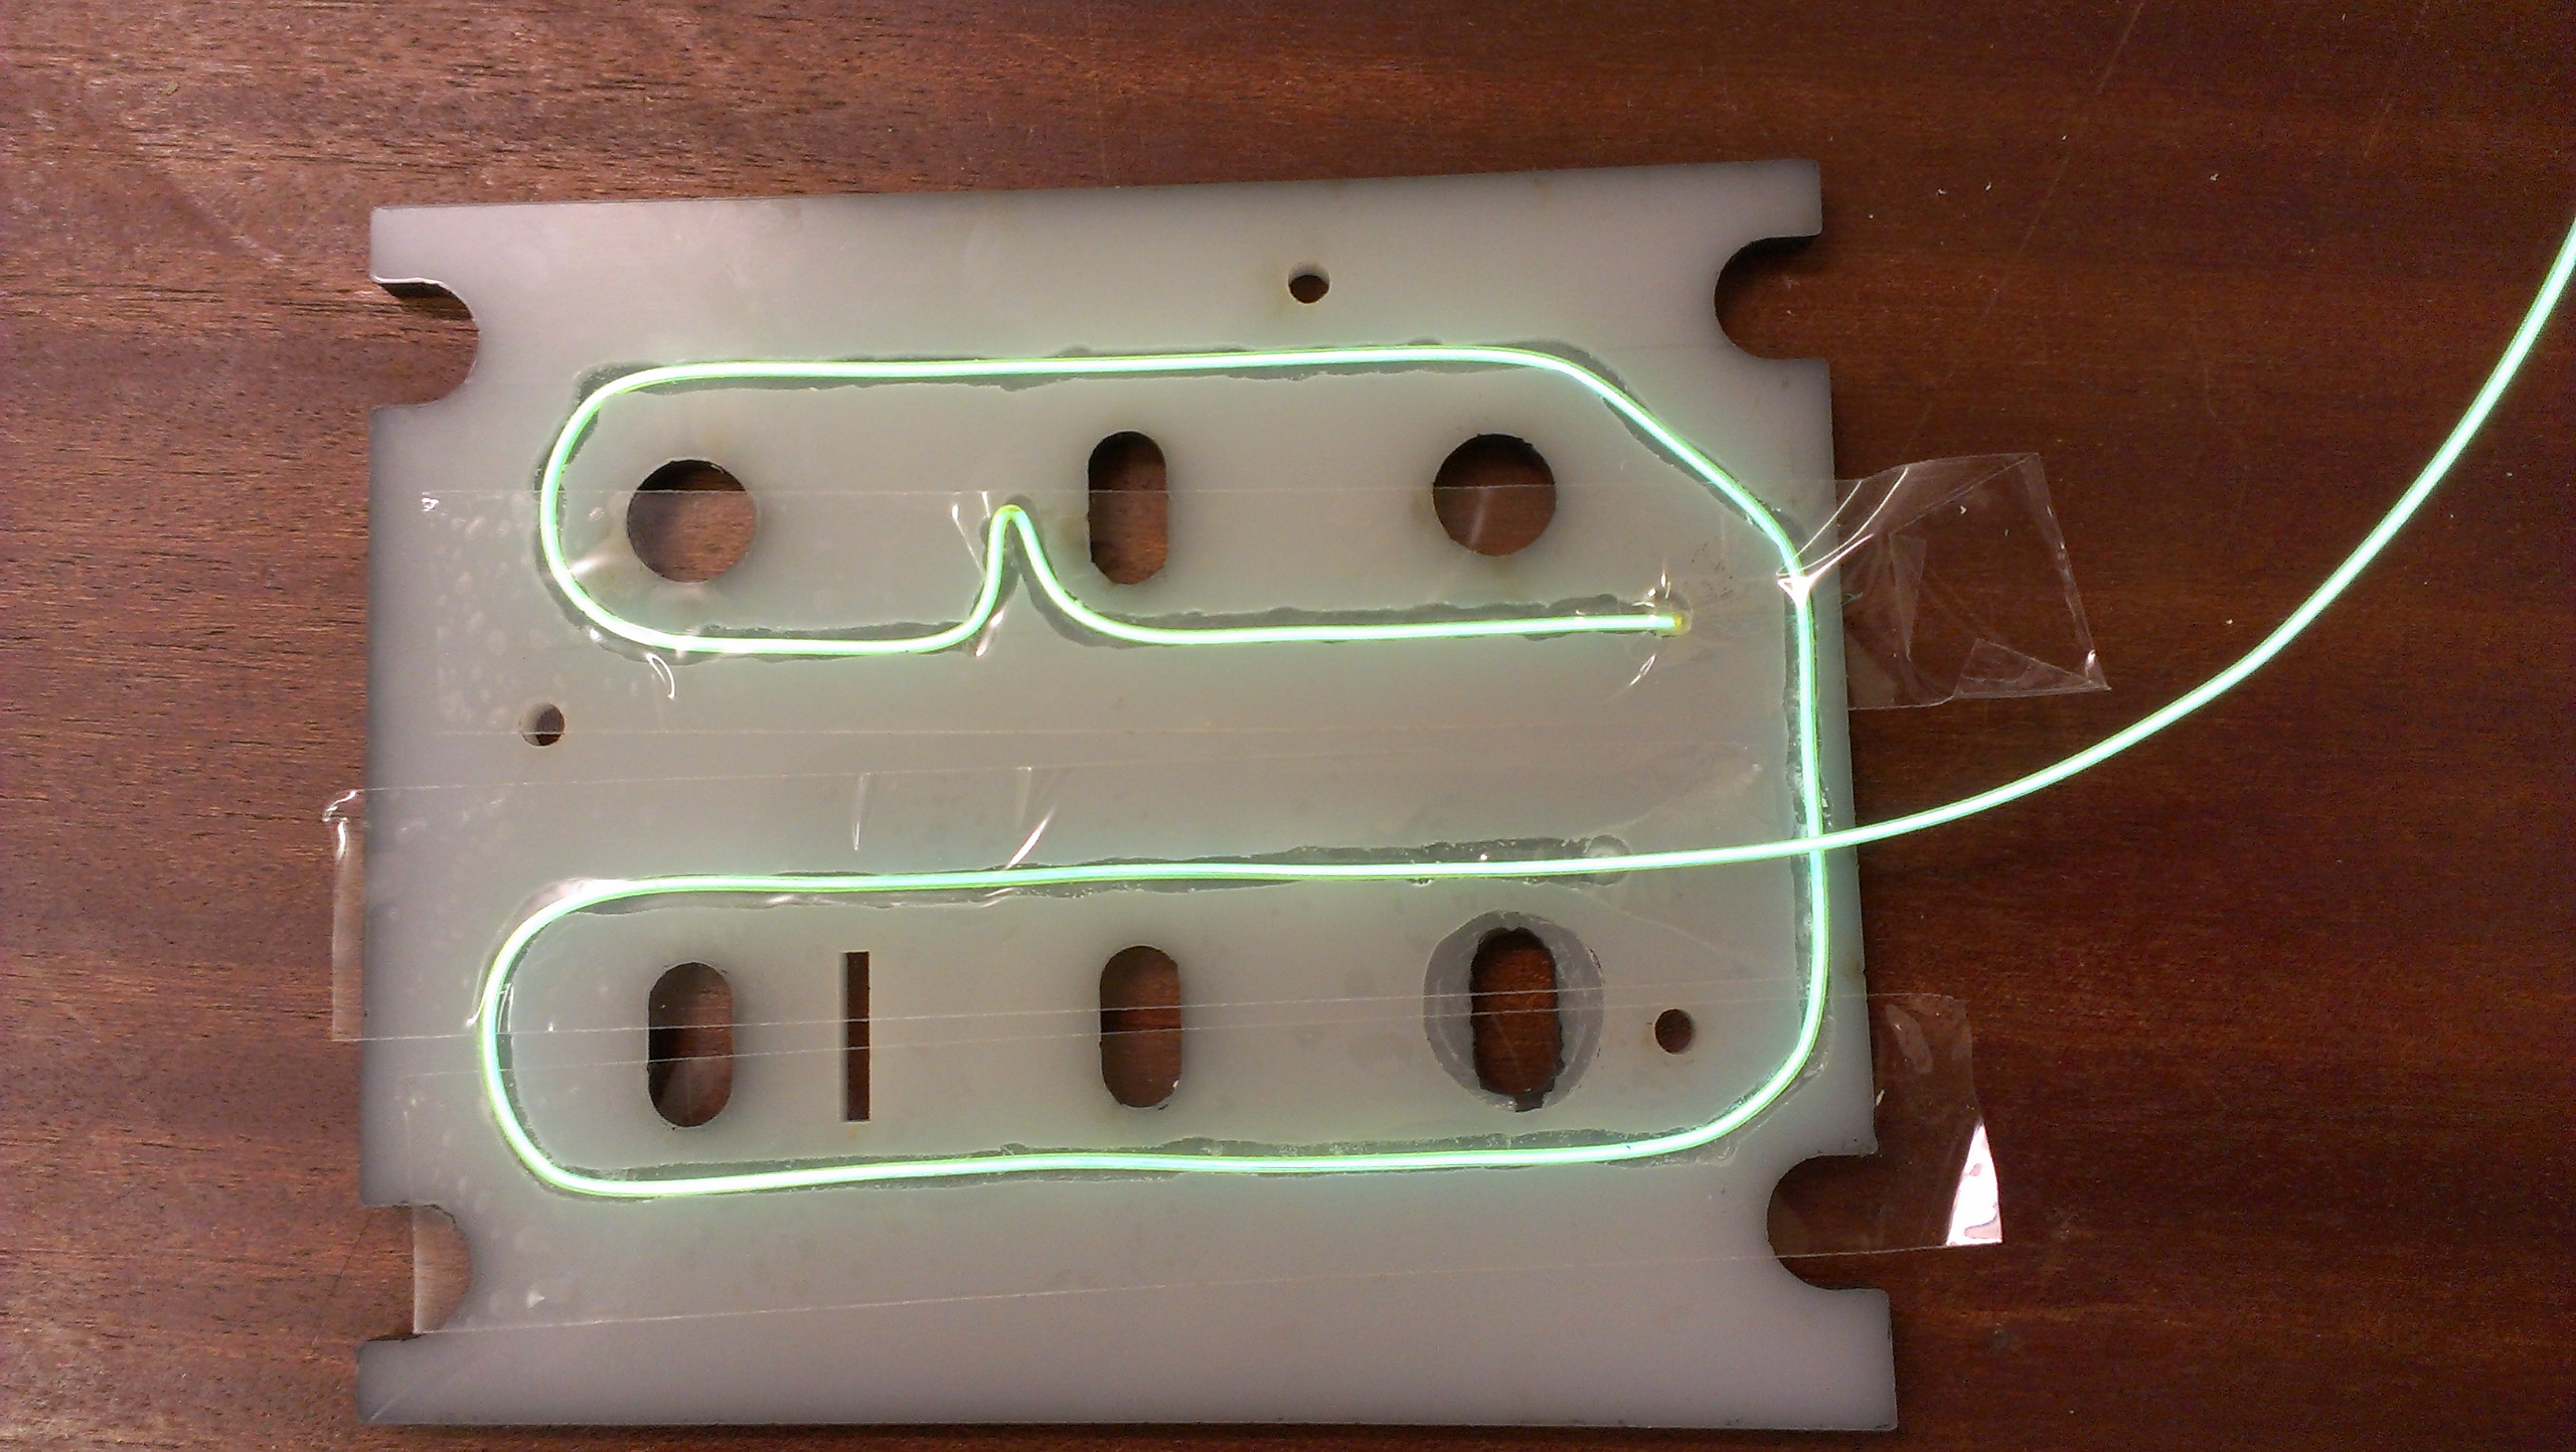
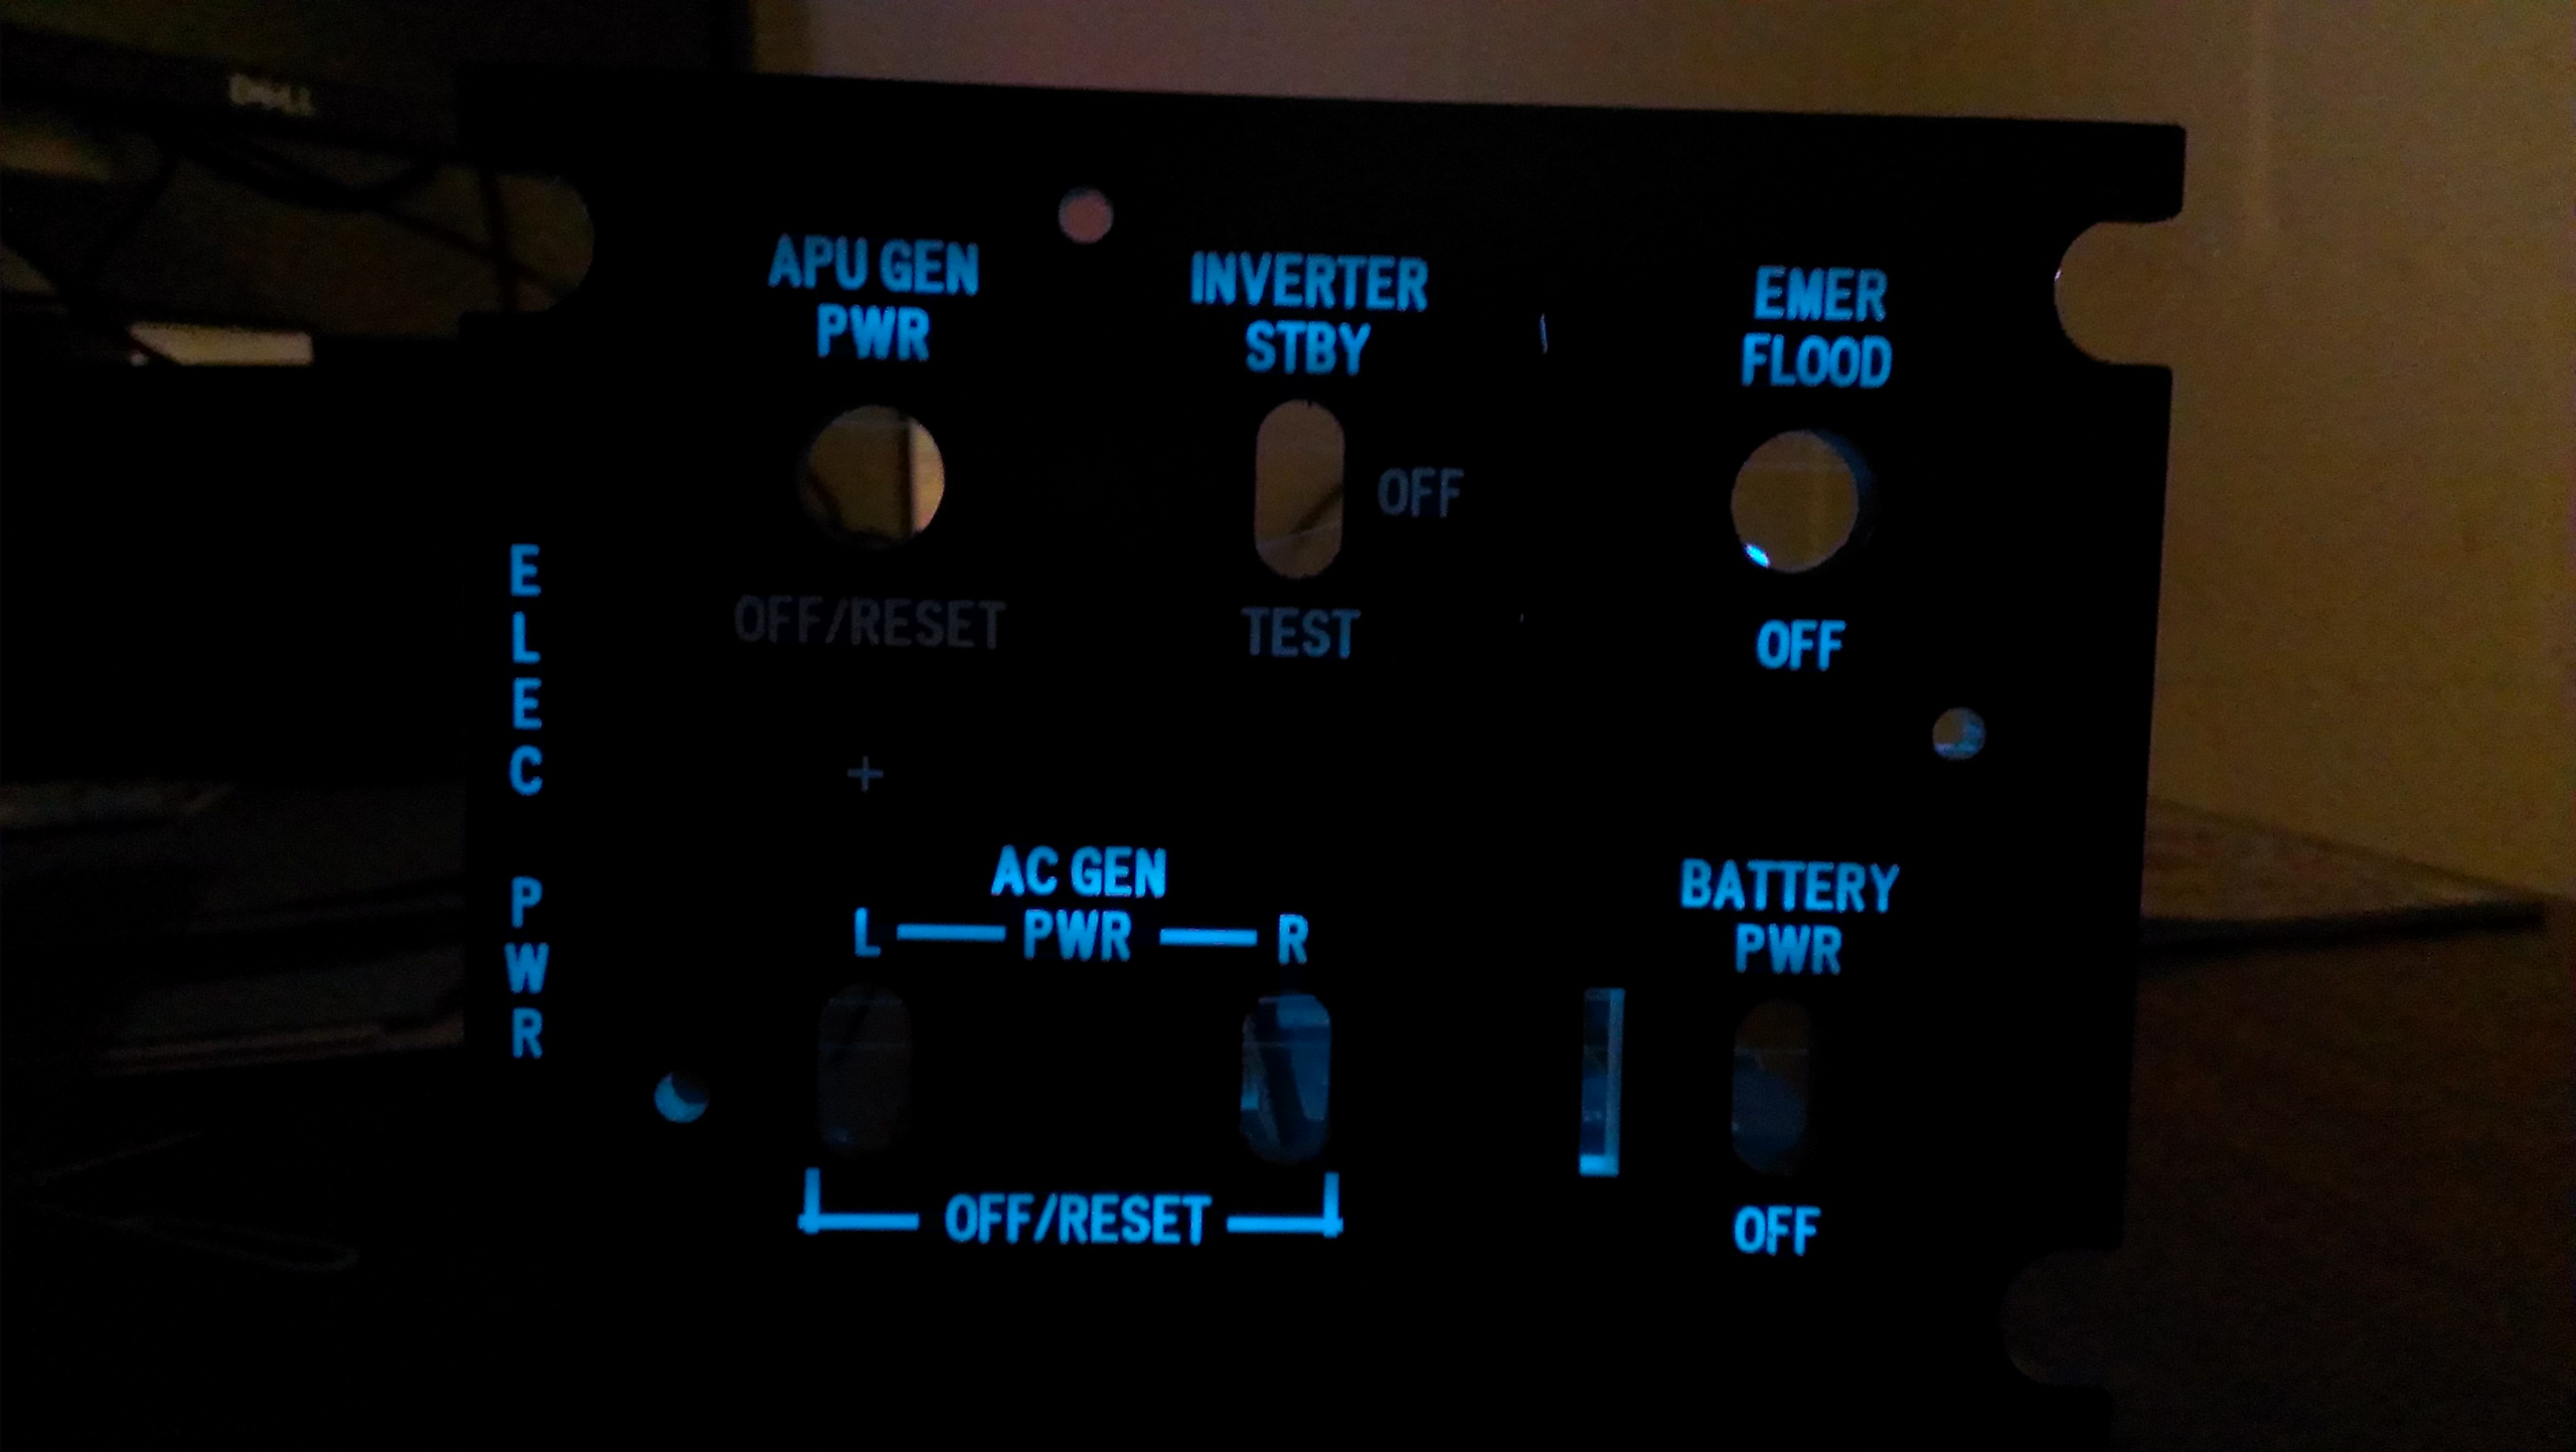
Hey all, Been a while since posting, just not had the time. But the build is still going, hoping to give a big update on Monday. Thought I should get this one in now tho as it could help a lot of people out. With regards to panel lighting I was dreading the prospect of all the soldering involved with LED's or more to the point preventing the cadets from burning themselves every minute so had been looking all over for cheap EL sheet which at best worked out at £20 a panel average. but keped seeing EL wire. Then the other day I noticed one of DM's pictures of a real Emergency Panel that was split from the switch plate and saw that the wire for the lighting was all recessed into the panel. This gave me an idea, I bought a few 1metre lengths of different size and colour EL wire, and with a panel I got from Linden I started to experiment. The colours from left to right are Turquoise Green, Lime Green, and Tron Blue altho this has come up more blue on camera than it actually is for some reason, hard to describe it but more of a true Turquoise. The second 2 were with the thicker wire and couldn't get it to fit in the channel i'd routered. Bottom line is on the premise that a 1 metre strip can be cut in half for 2 panels the cost would only be between £1.75 - £2 a panel depending on the size. At the moment these are running from a 9v Battery powered inverter, a mains inverter is only £30 which can run upto 50 metres of wire either in 1 go or daisy chained. Hope this has got the grey cells working for some of you.
-
The man is a machine.
-
That's some impressive speed that your making panels at. Was wondering how you'v managed to blank out the warning panel indicators but still allow the light to come through when their illuminated?
-
Yeah, works great Anton. Just allways been this way since I was kid. Love to take things apart to see how they work and how they were put together. Nothing in the house was safe. Plus, altho there are lots of good threads on here on how to build panels i'm more hands on, build, make mistakes and rebuild then doing all that design work thing. And i cant use CAD. So was good to see how Gadroc made his. I'v got a couple of Linden's panels on the way as well to compare, then will hopfully take the best aspects of both and start building my own.
-
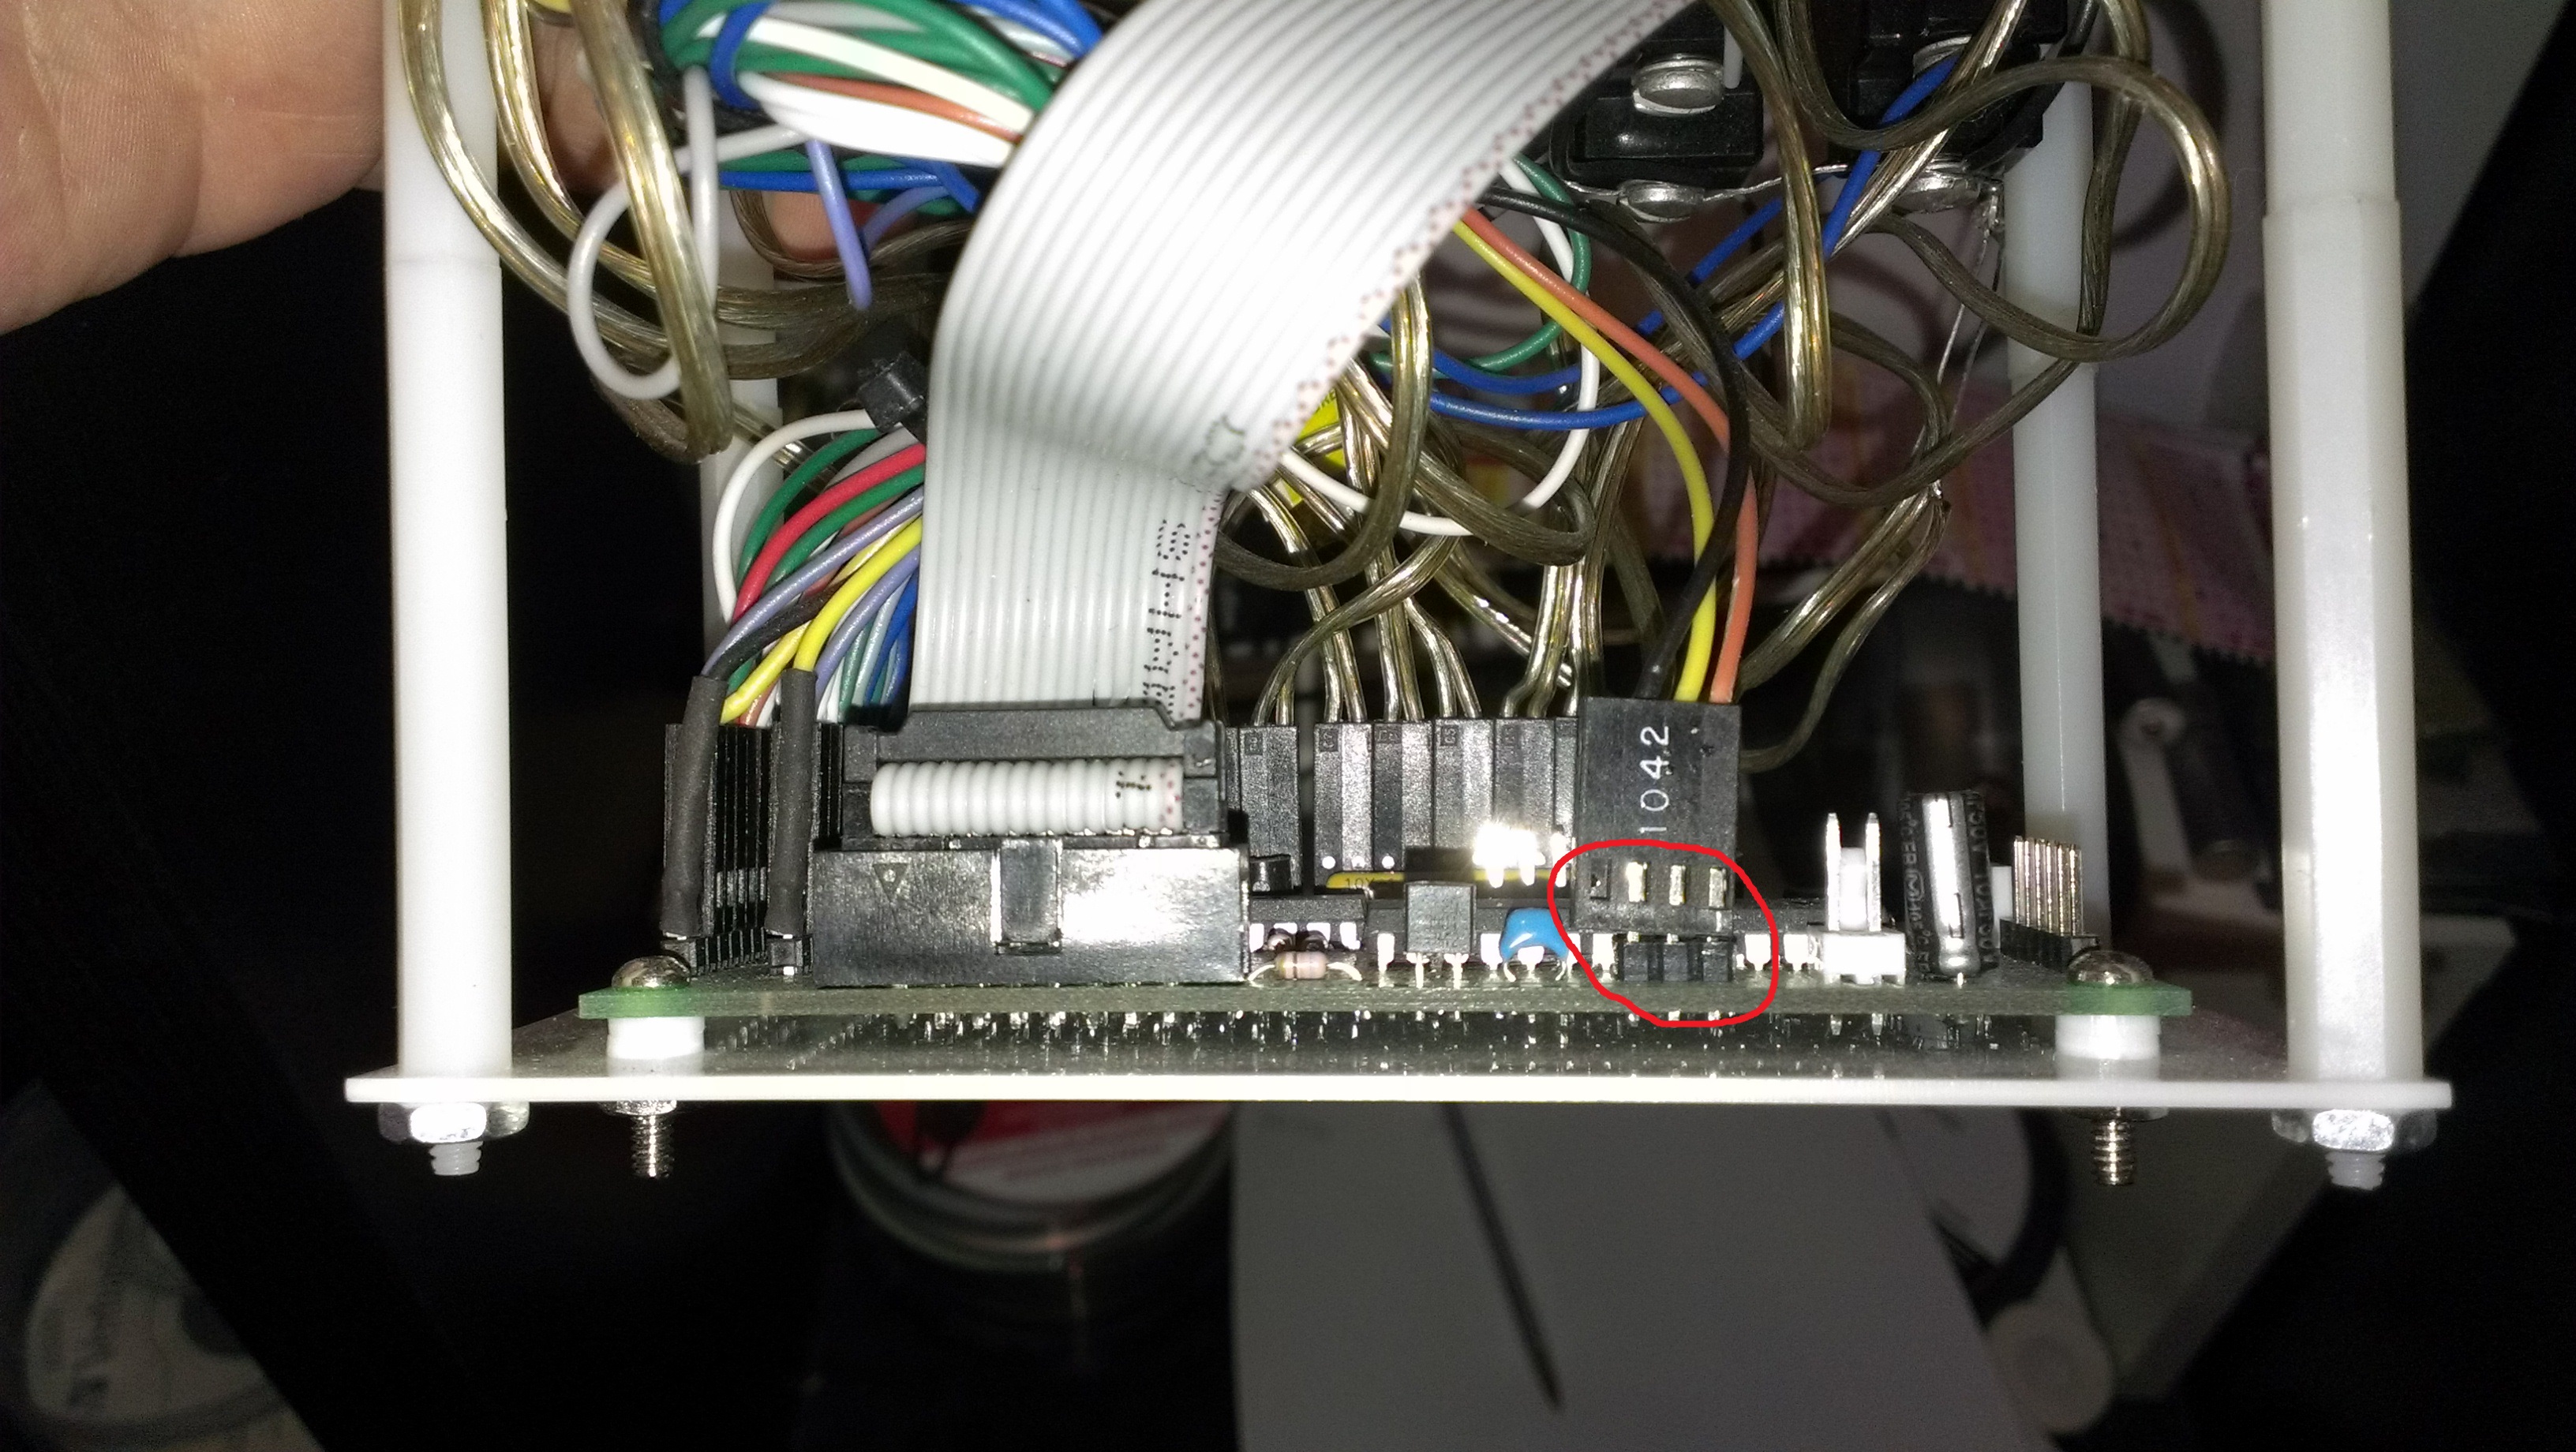
Luckily I took pictures before i dismantled mine. That connector actually goes on the black 3 pin block labbled "BRT". Nothing goes into the one you are pointing at.
-
But it would only vear off and go chasing after a caravan. :megalol:
-
And dont forget about good old British politics where some old fart gets a back hander from the manufacturer to top up his pension. :doh:Doh, did i say that out loud.
-
Nice point to raise about weapon balancing pyates, I've noticed I seem to get more hits with Russian A2A then with NATO. Also to digress on the Alarm, the mode your talking about was named it's Loiter Mode. It could also choose this itself after being fired when in Dual Mode if the active radar it was targeted at switched off whilst the missle was heading towards it. Then as you say climb high, deploy a chute and slowly decend loitering around waiting for the target radar to become active again, fire a secondary motor and bang your dead. There were 5 modes in all but cant remember the specifics. Just had somthing to do with wether you allready knew location/distence and if it was static or moblie. Would be nifty to see it work in game if any of the devs are reading. And not to seem like i'm issuing a challange:music_whistling: but for those who can remember "Tornado" on the Amiga the Alarm model in that did actually loiter.
-
In the real aircraft the control column bar is an emergency switch. If i remember right it's to disable SAS (Stability Augmentation System) in situations like aborted take off's or when you want the aircraft to do what you want it too and not involve a computer.
-
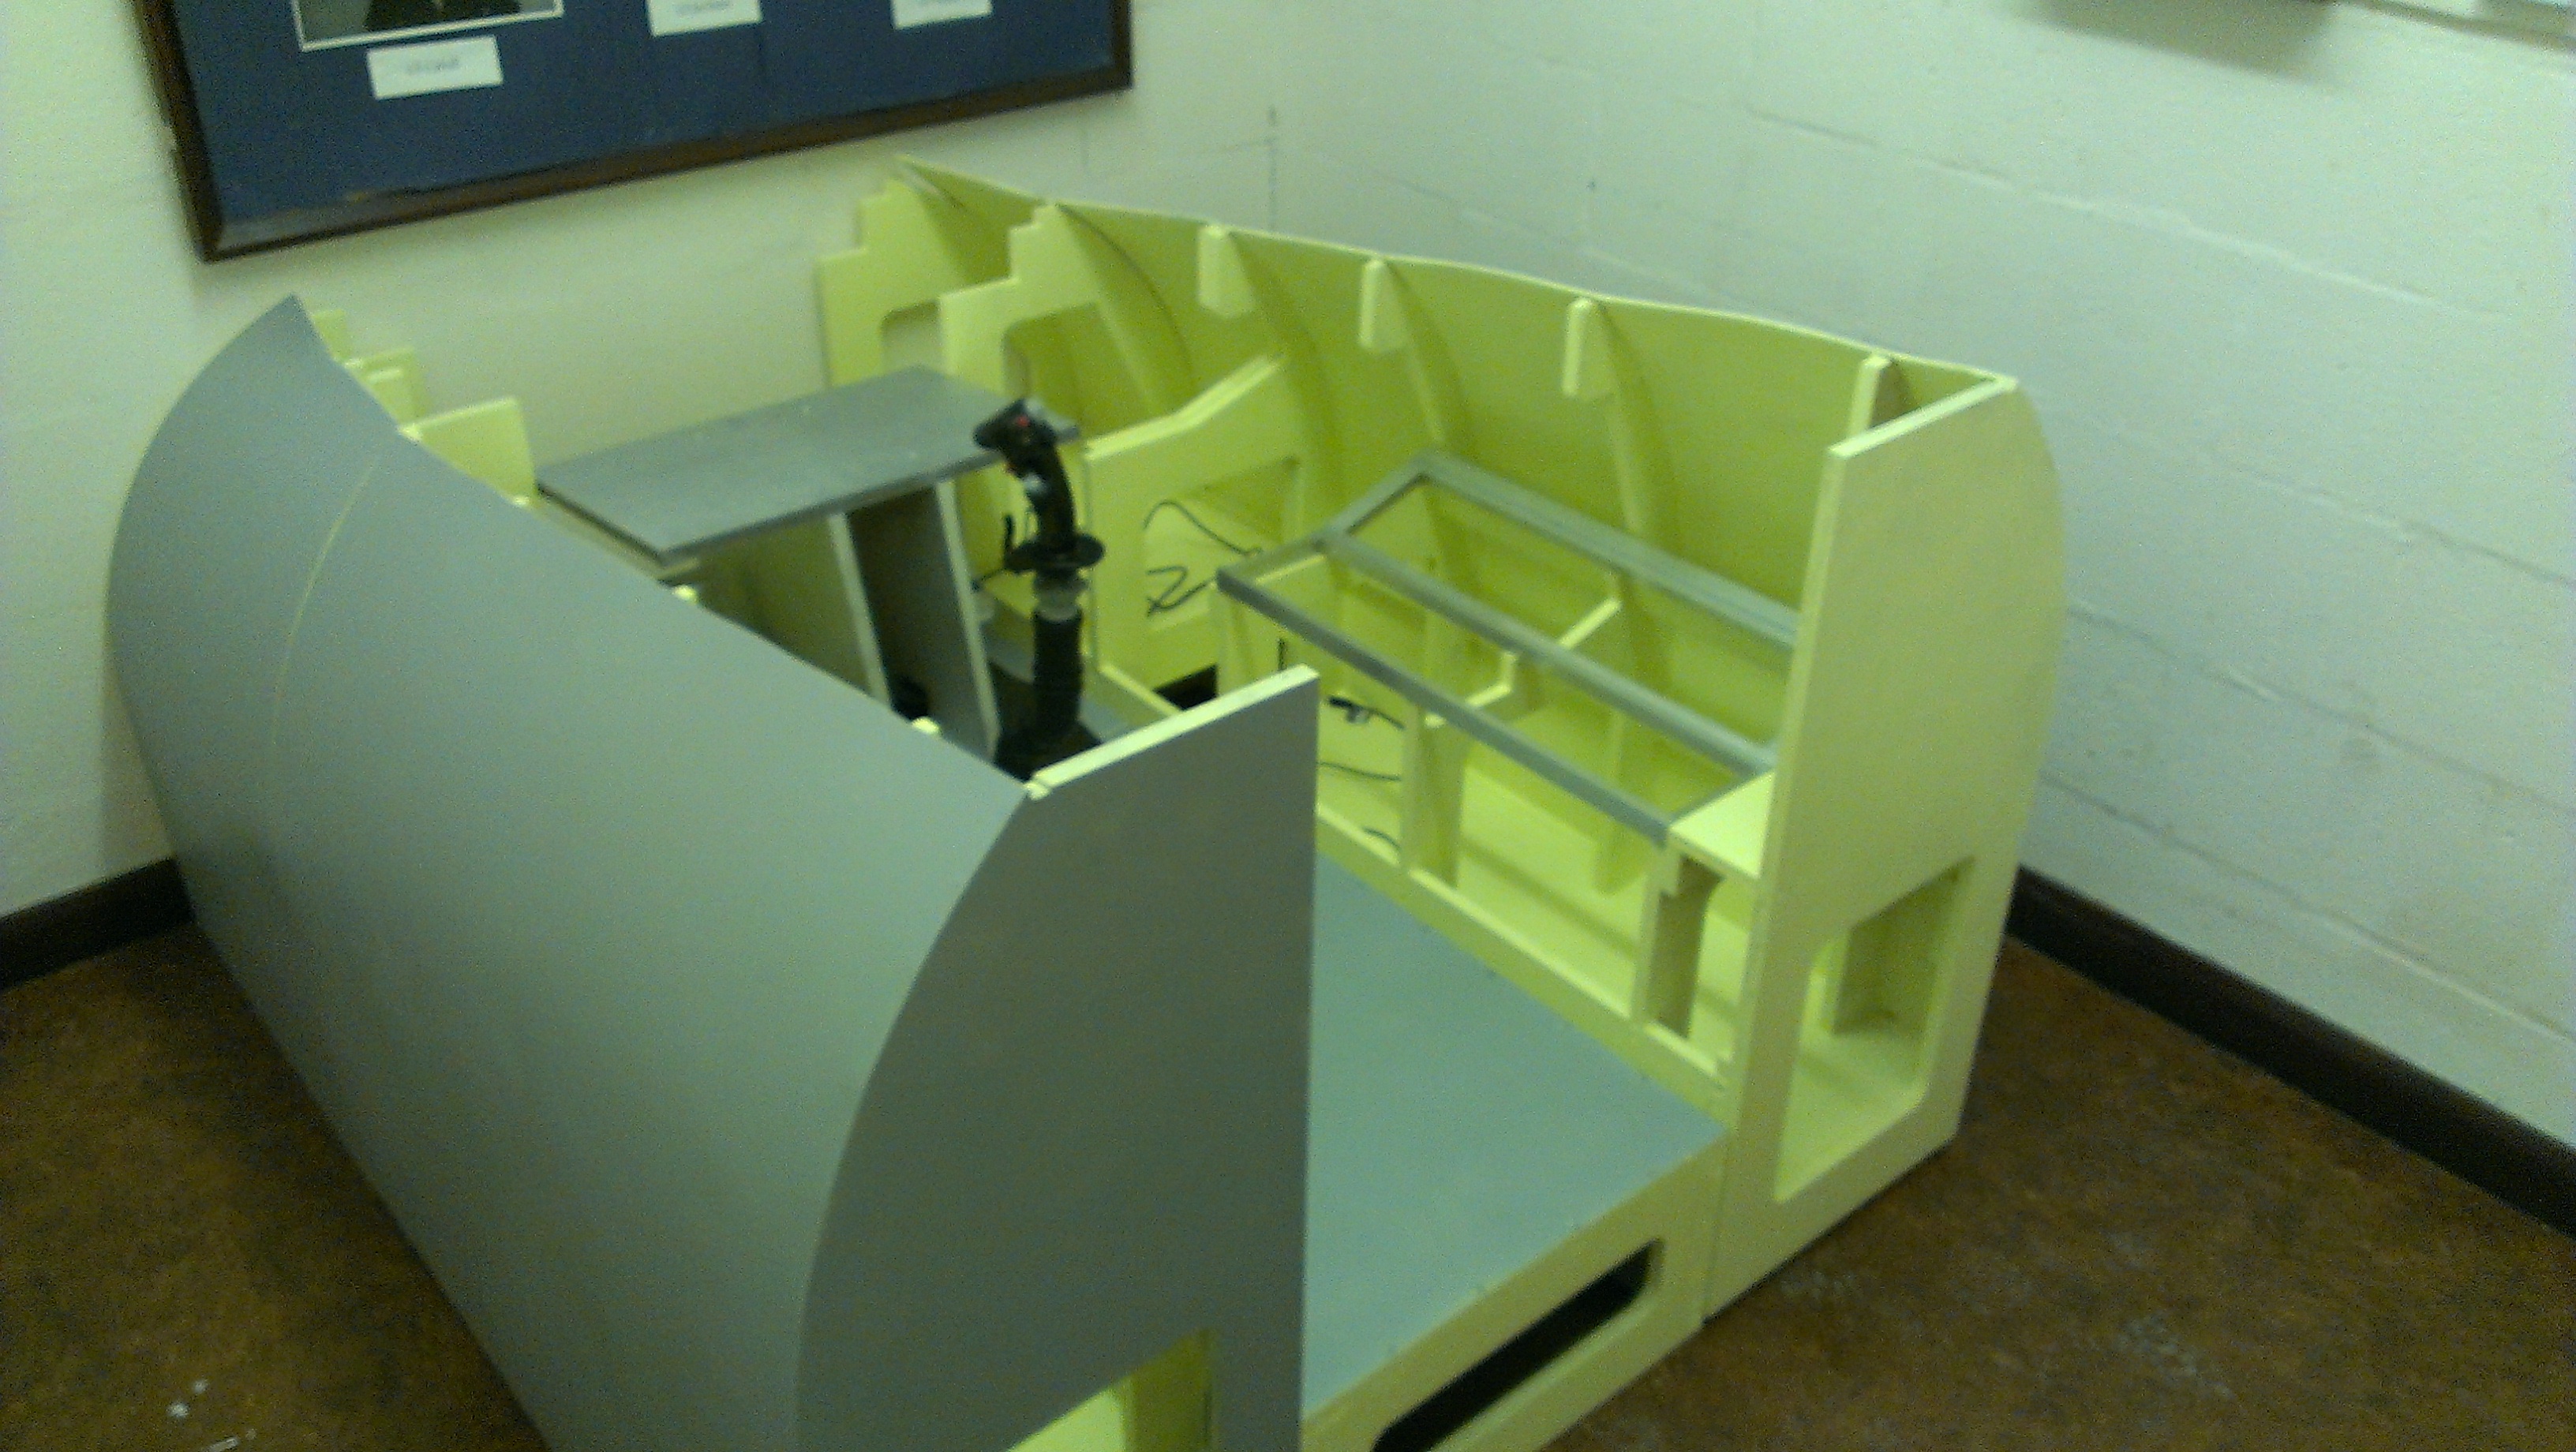
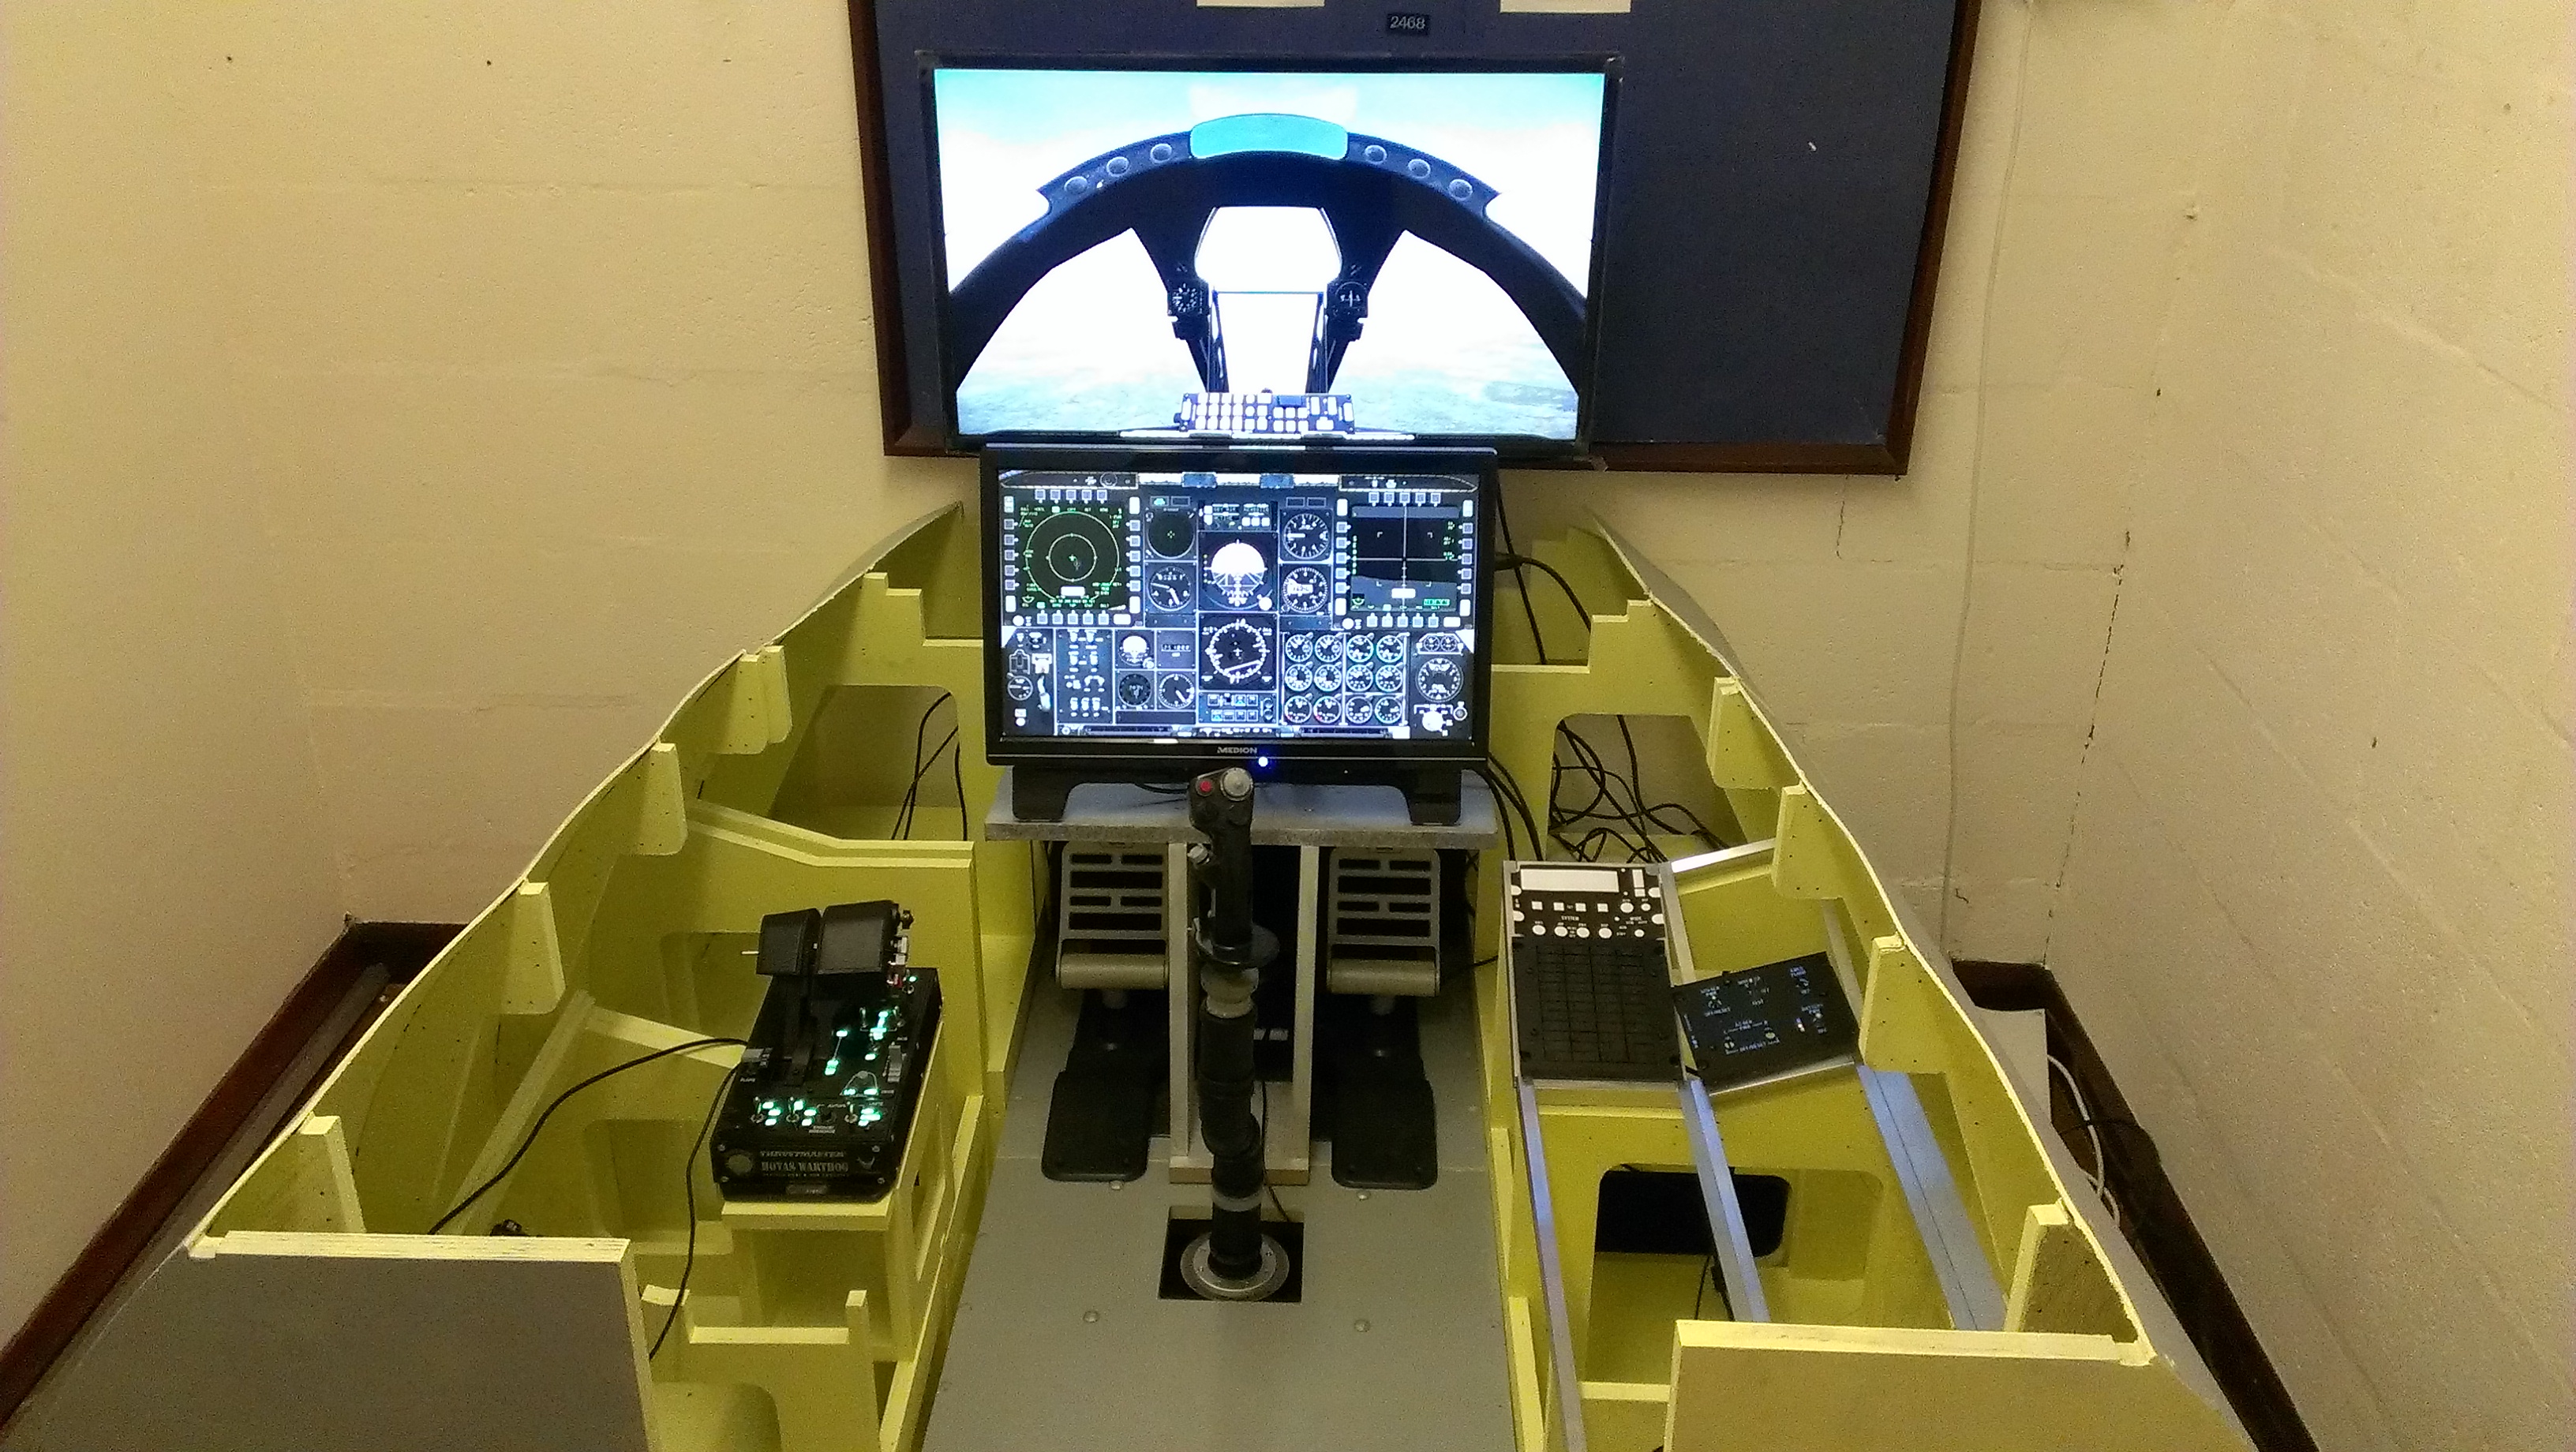
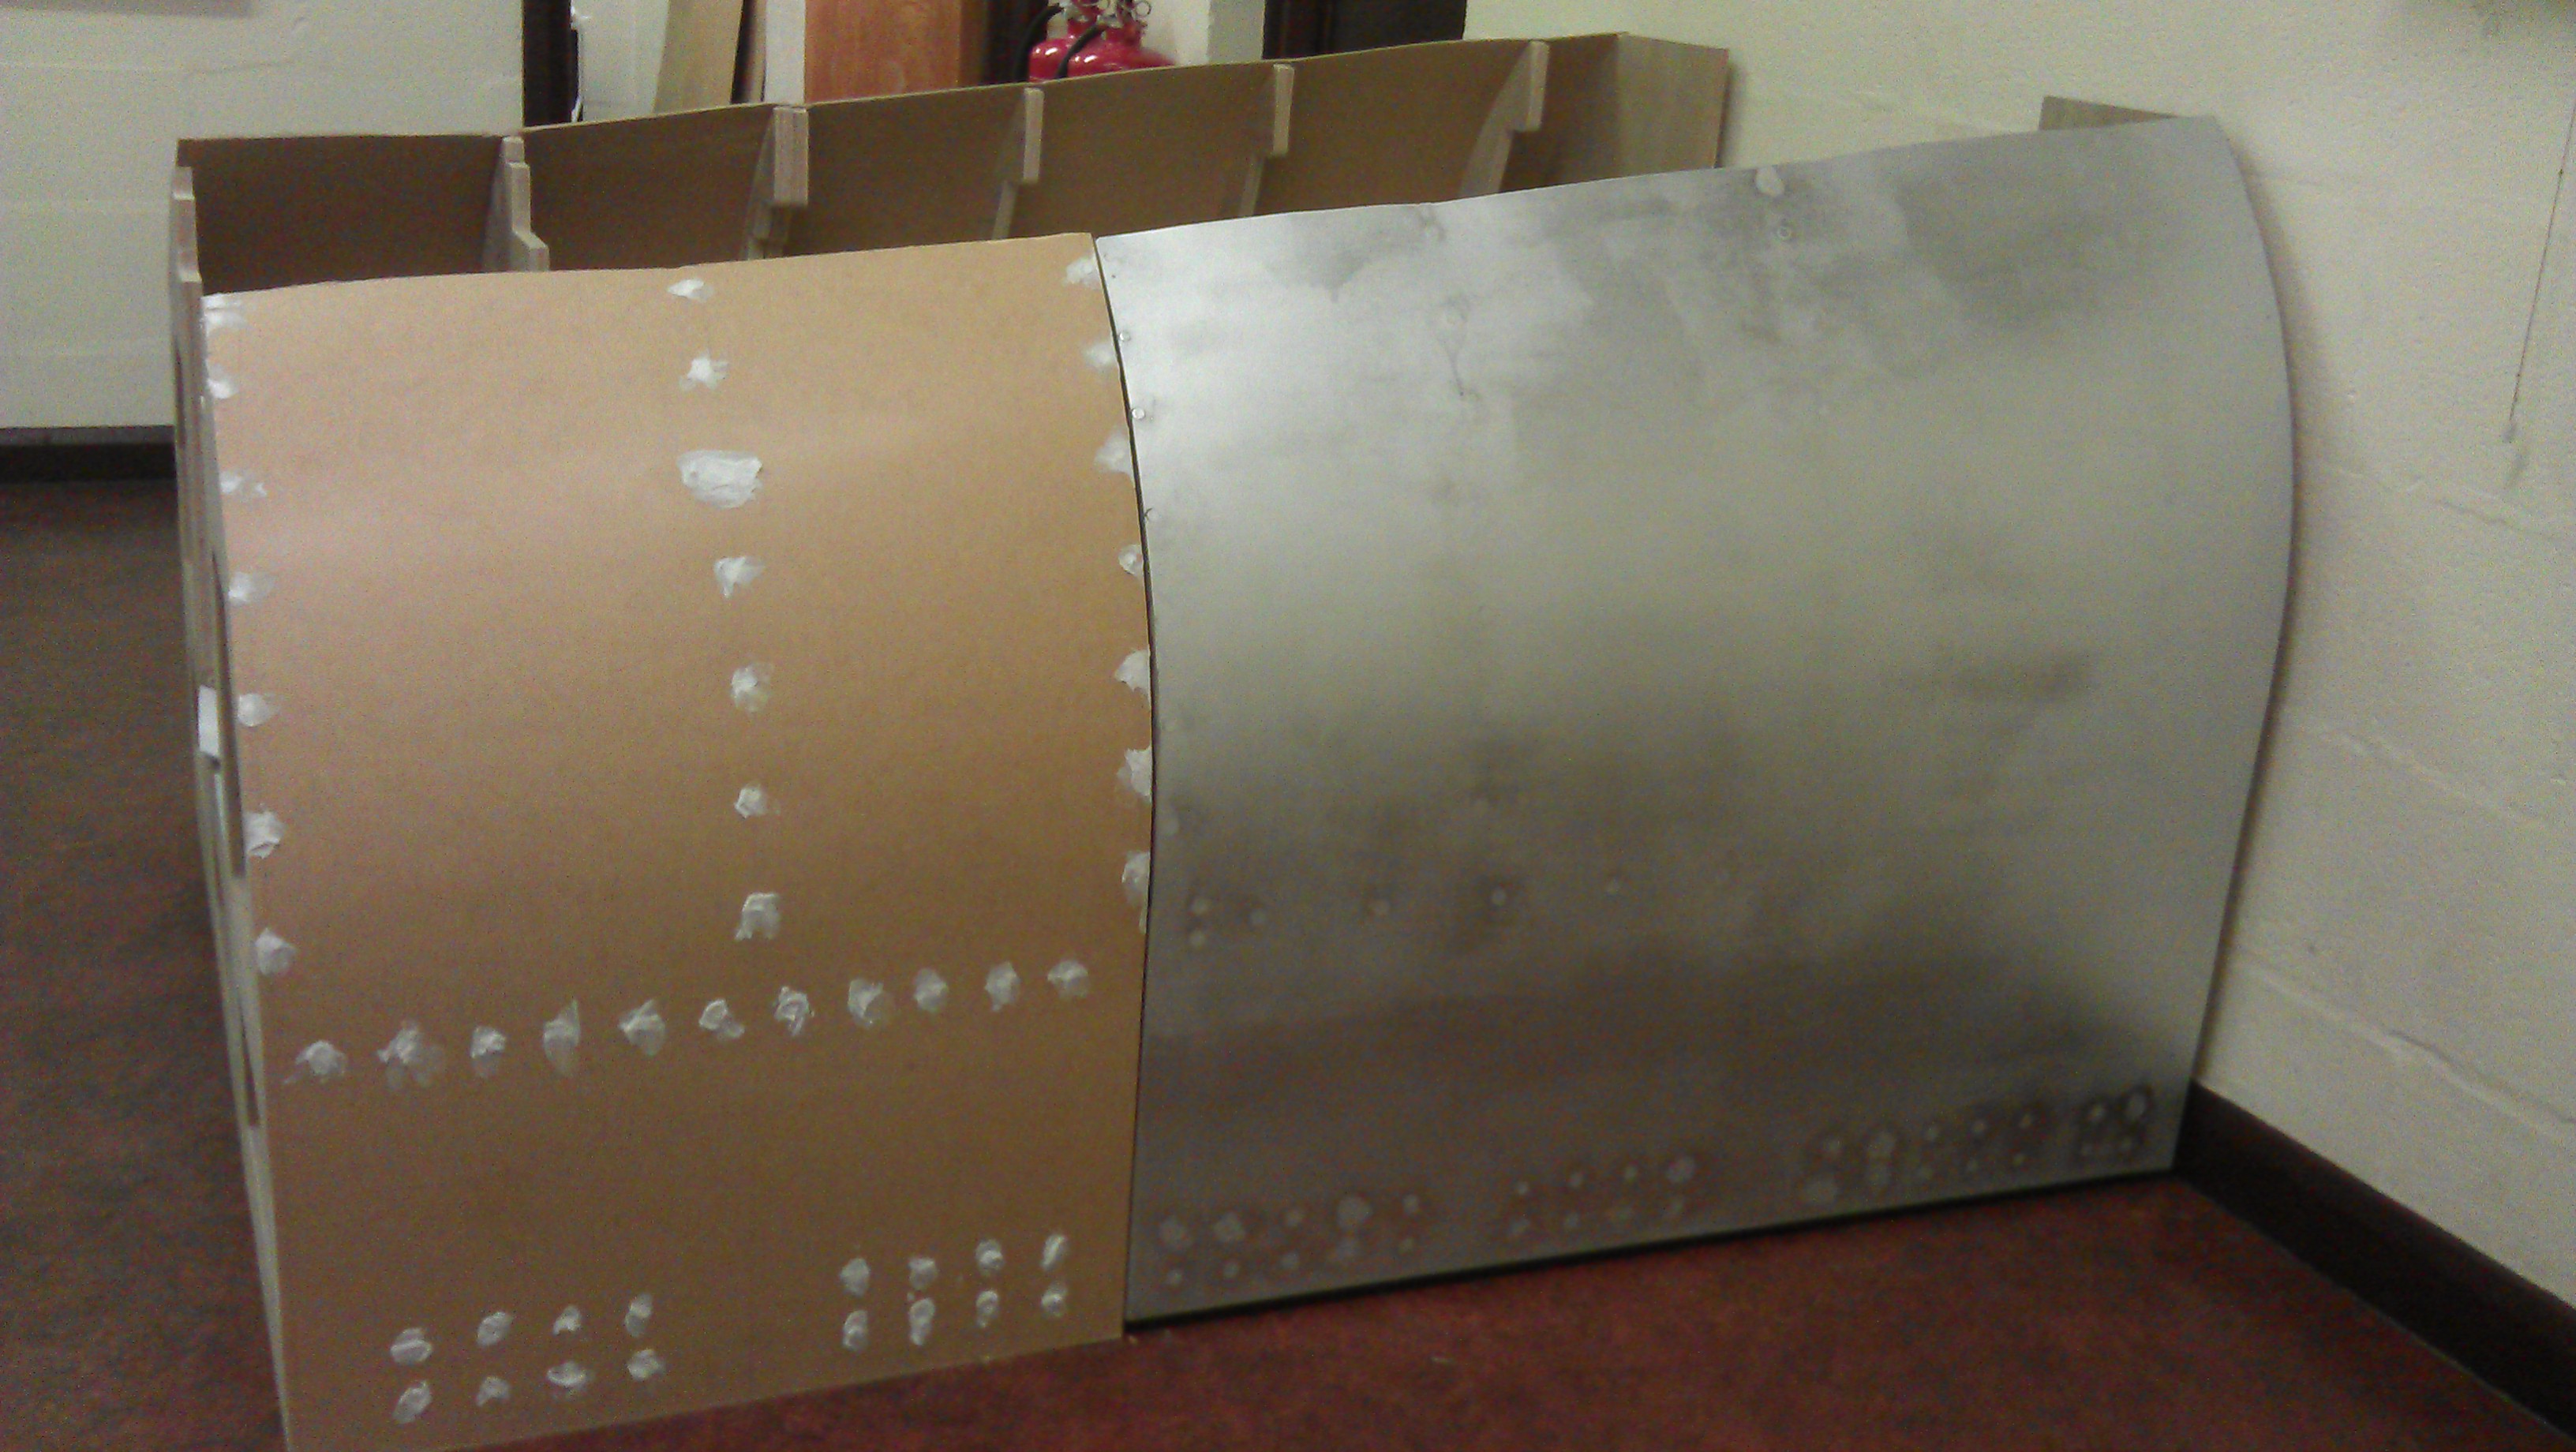
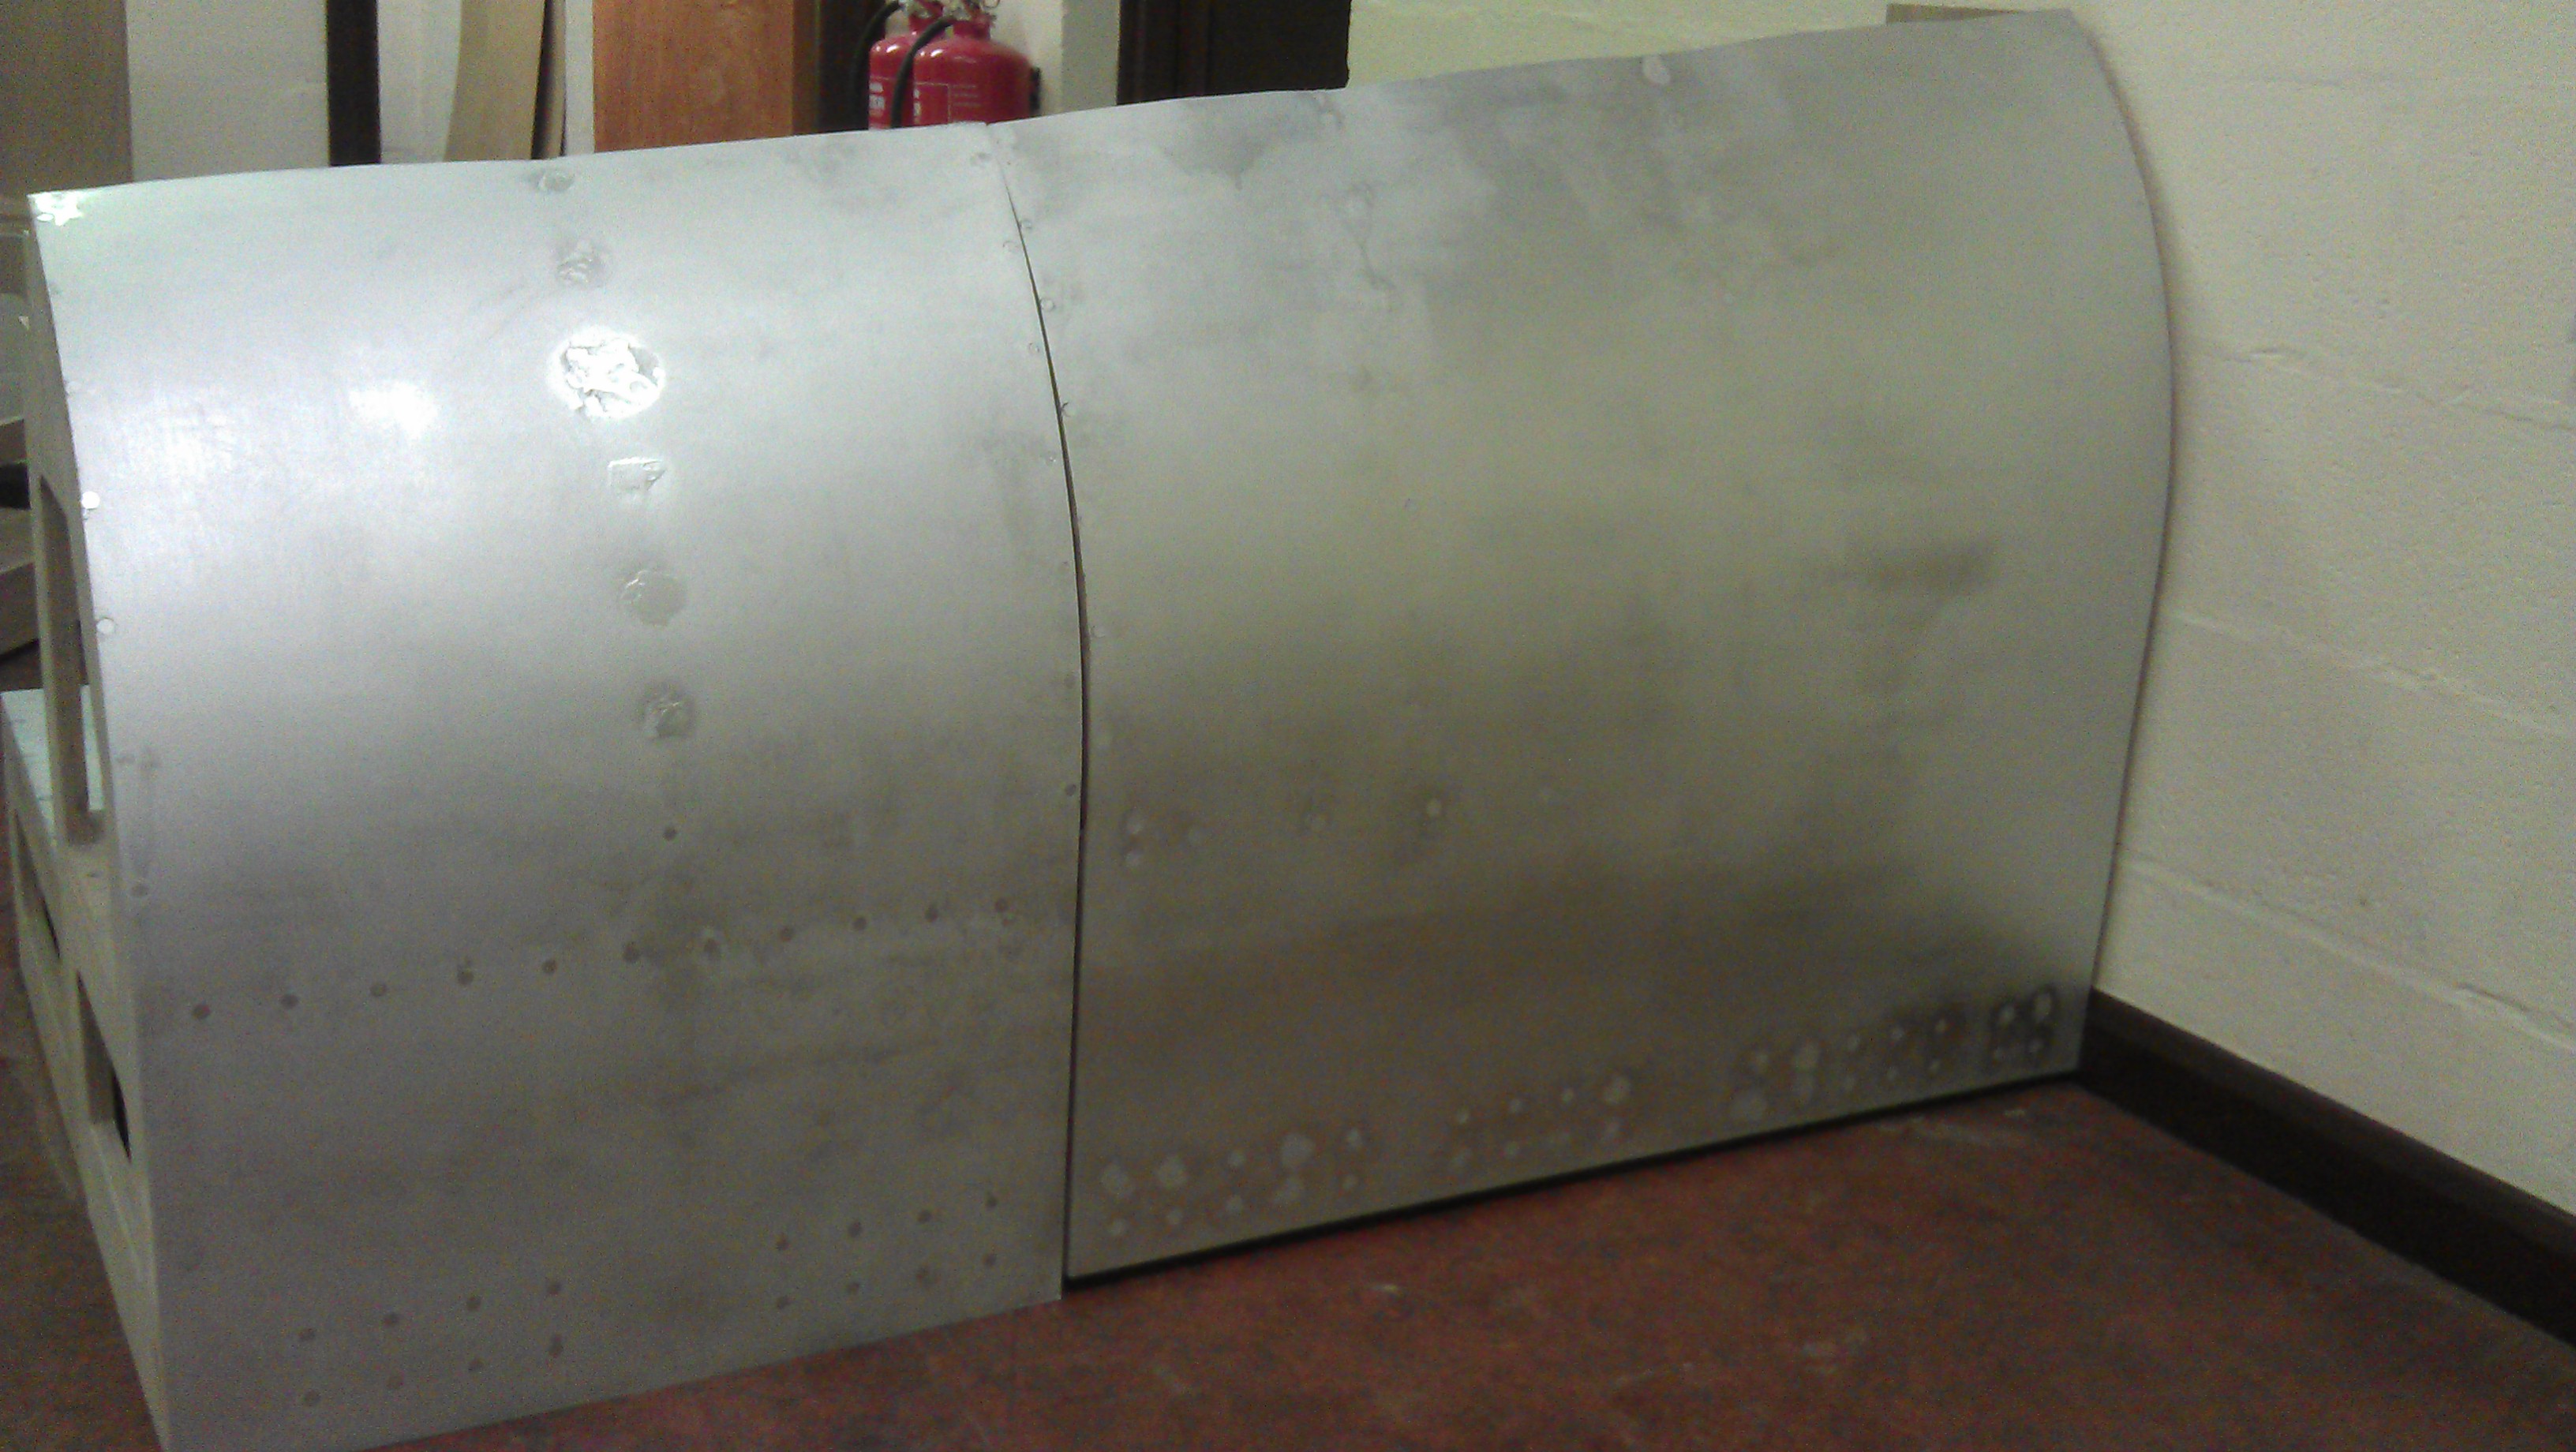
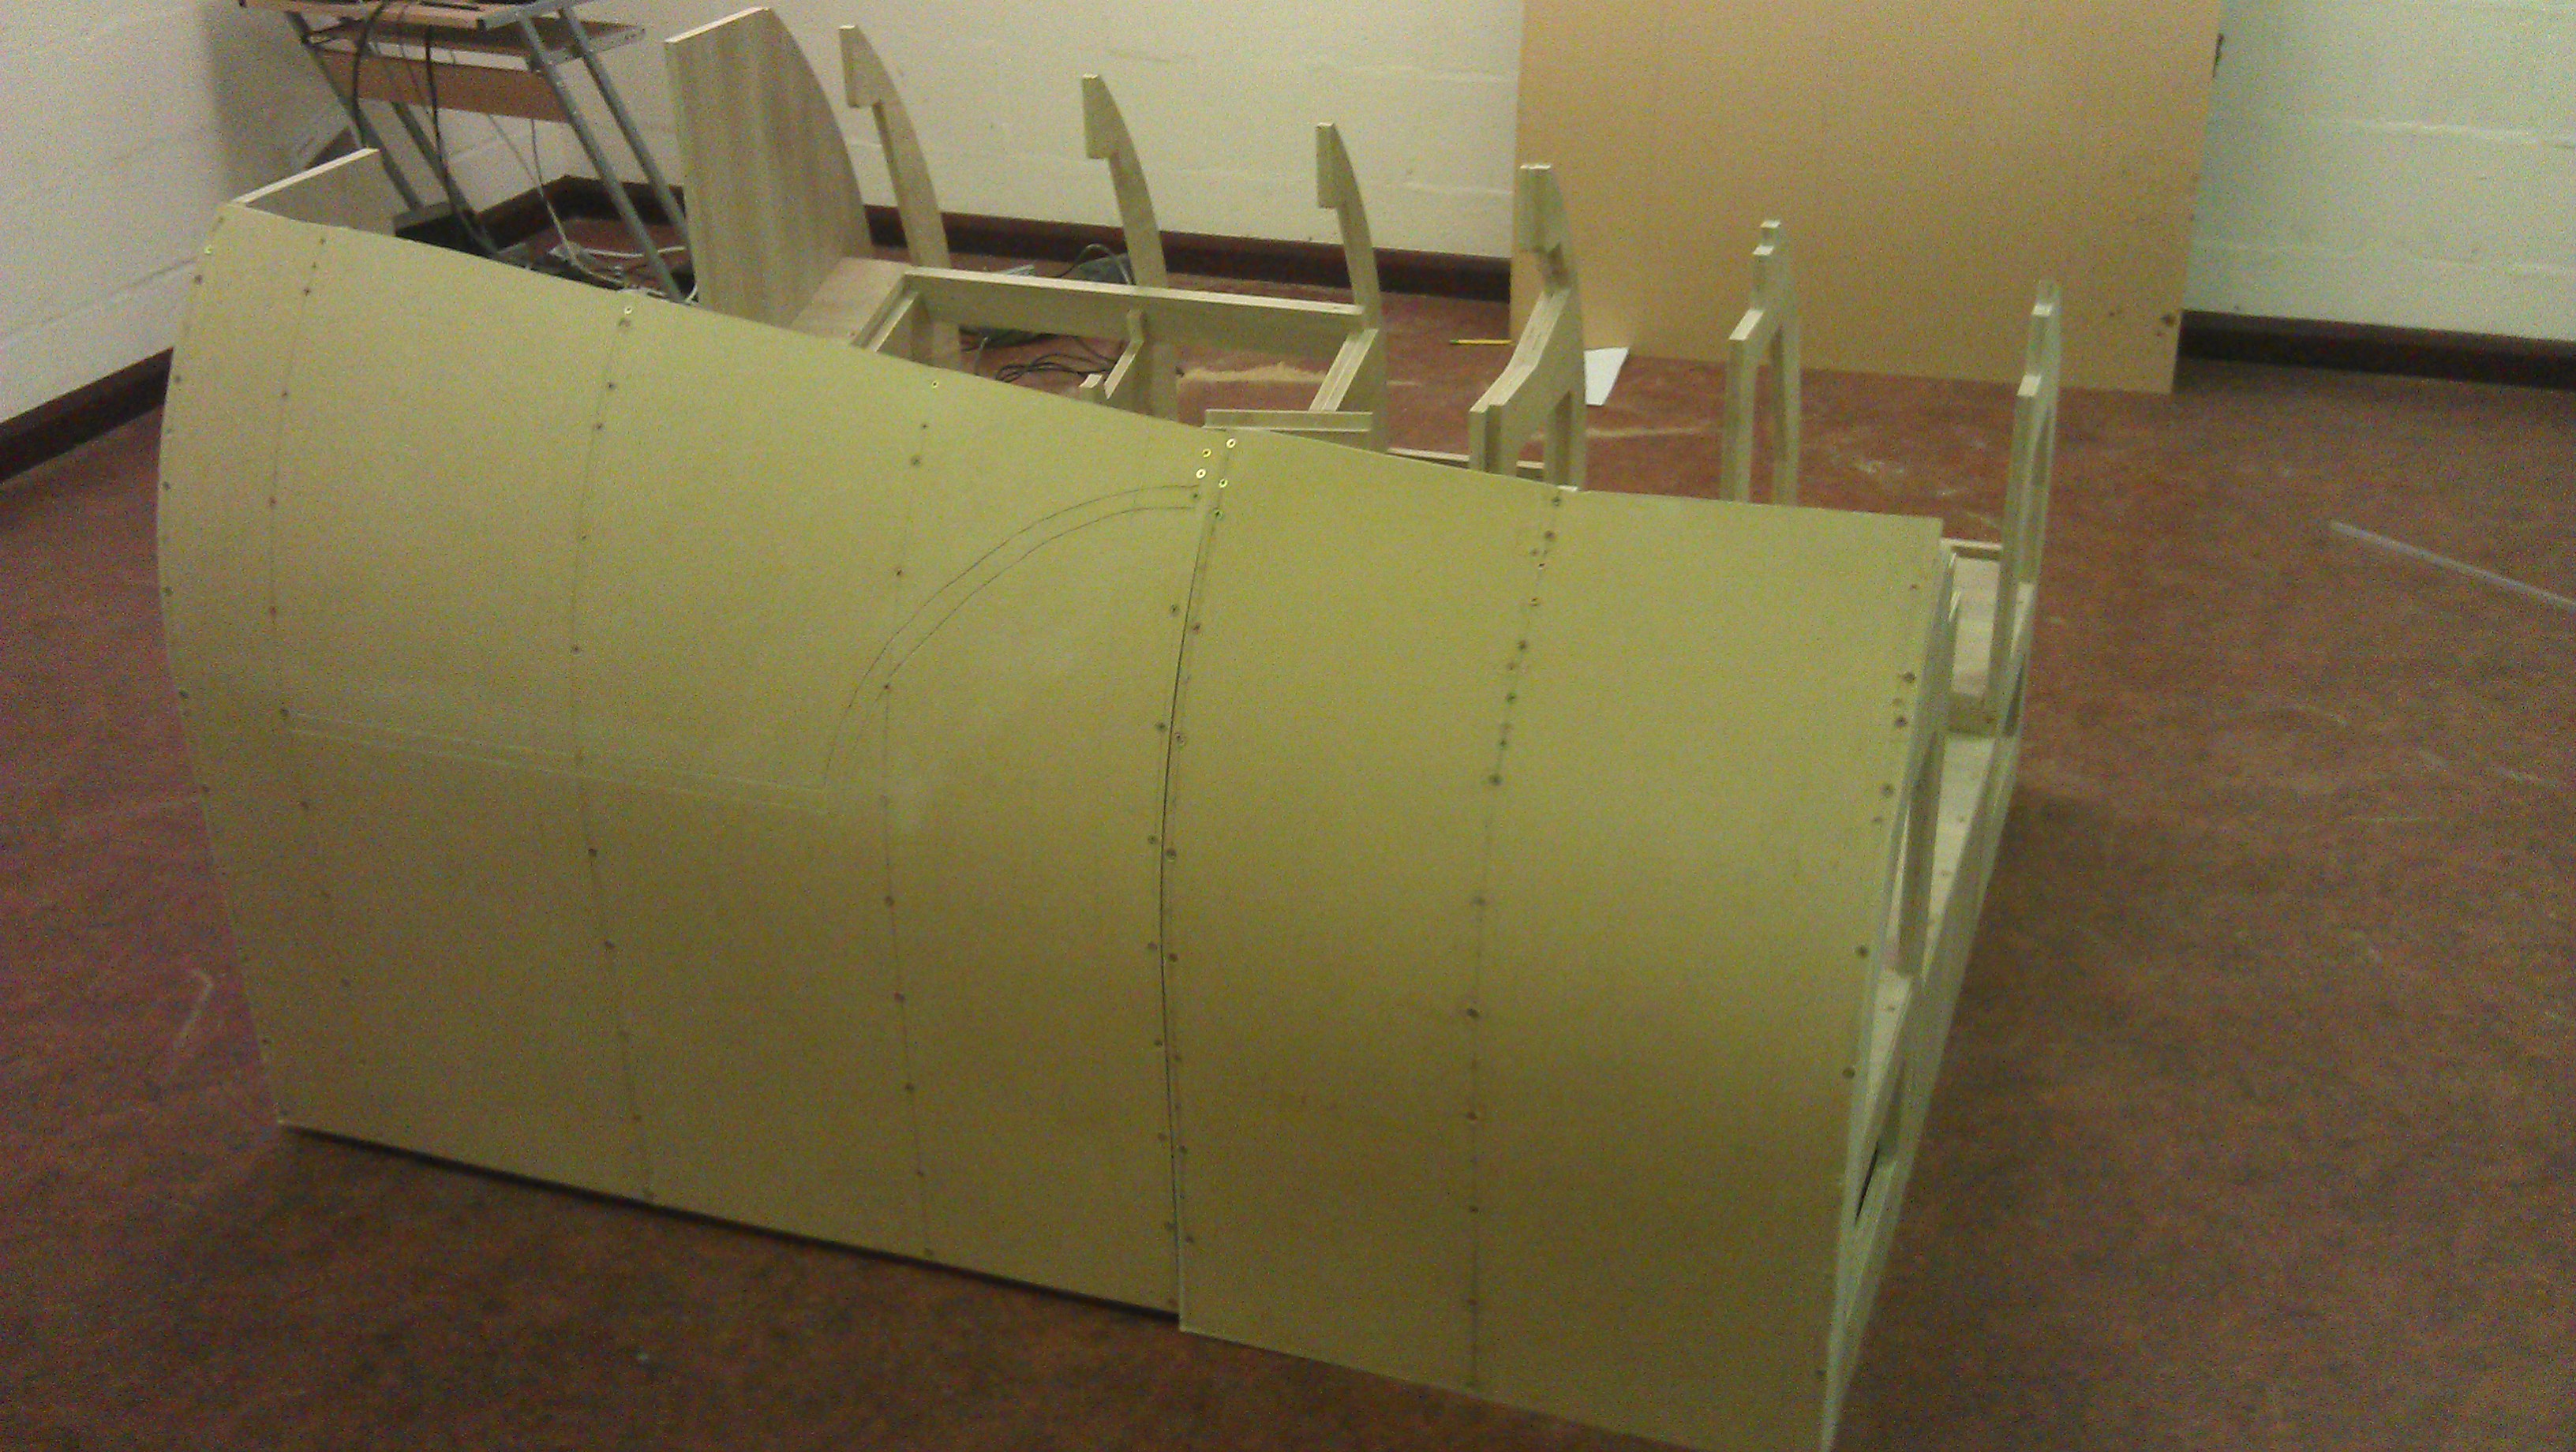
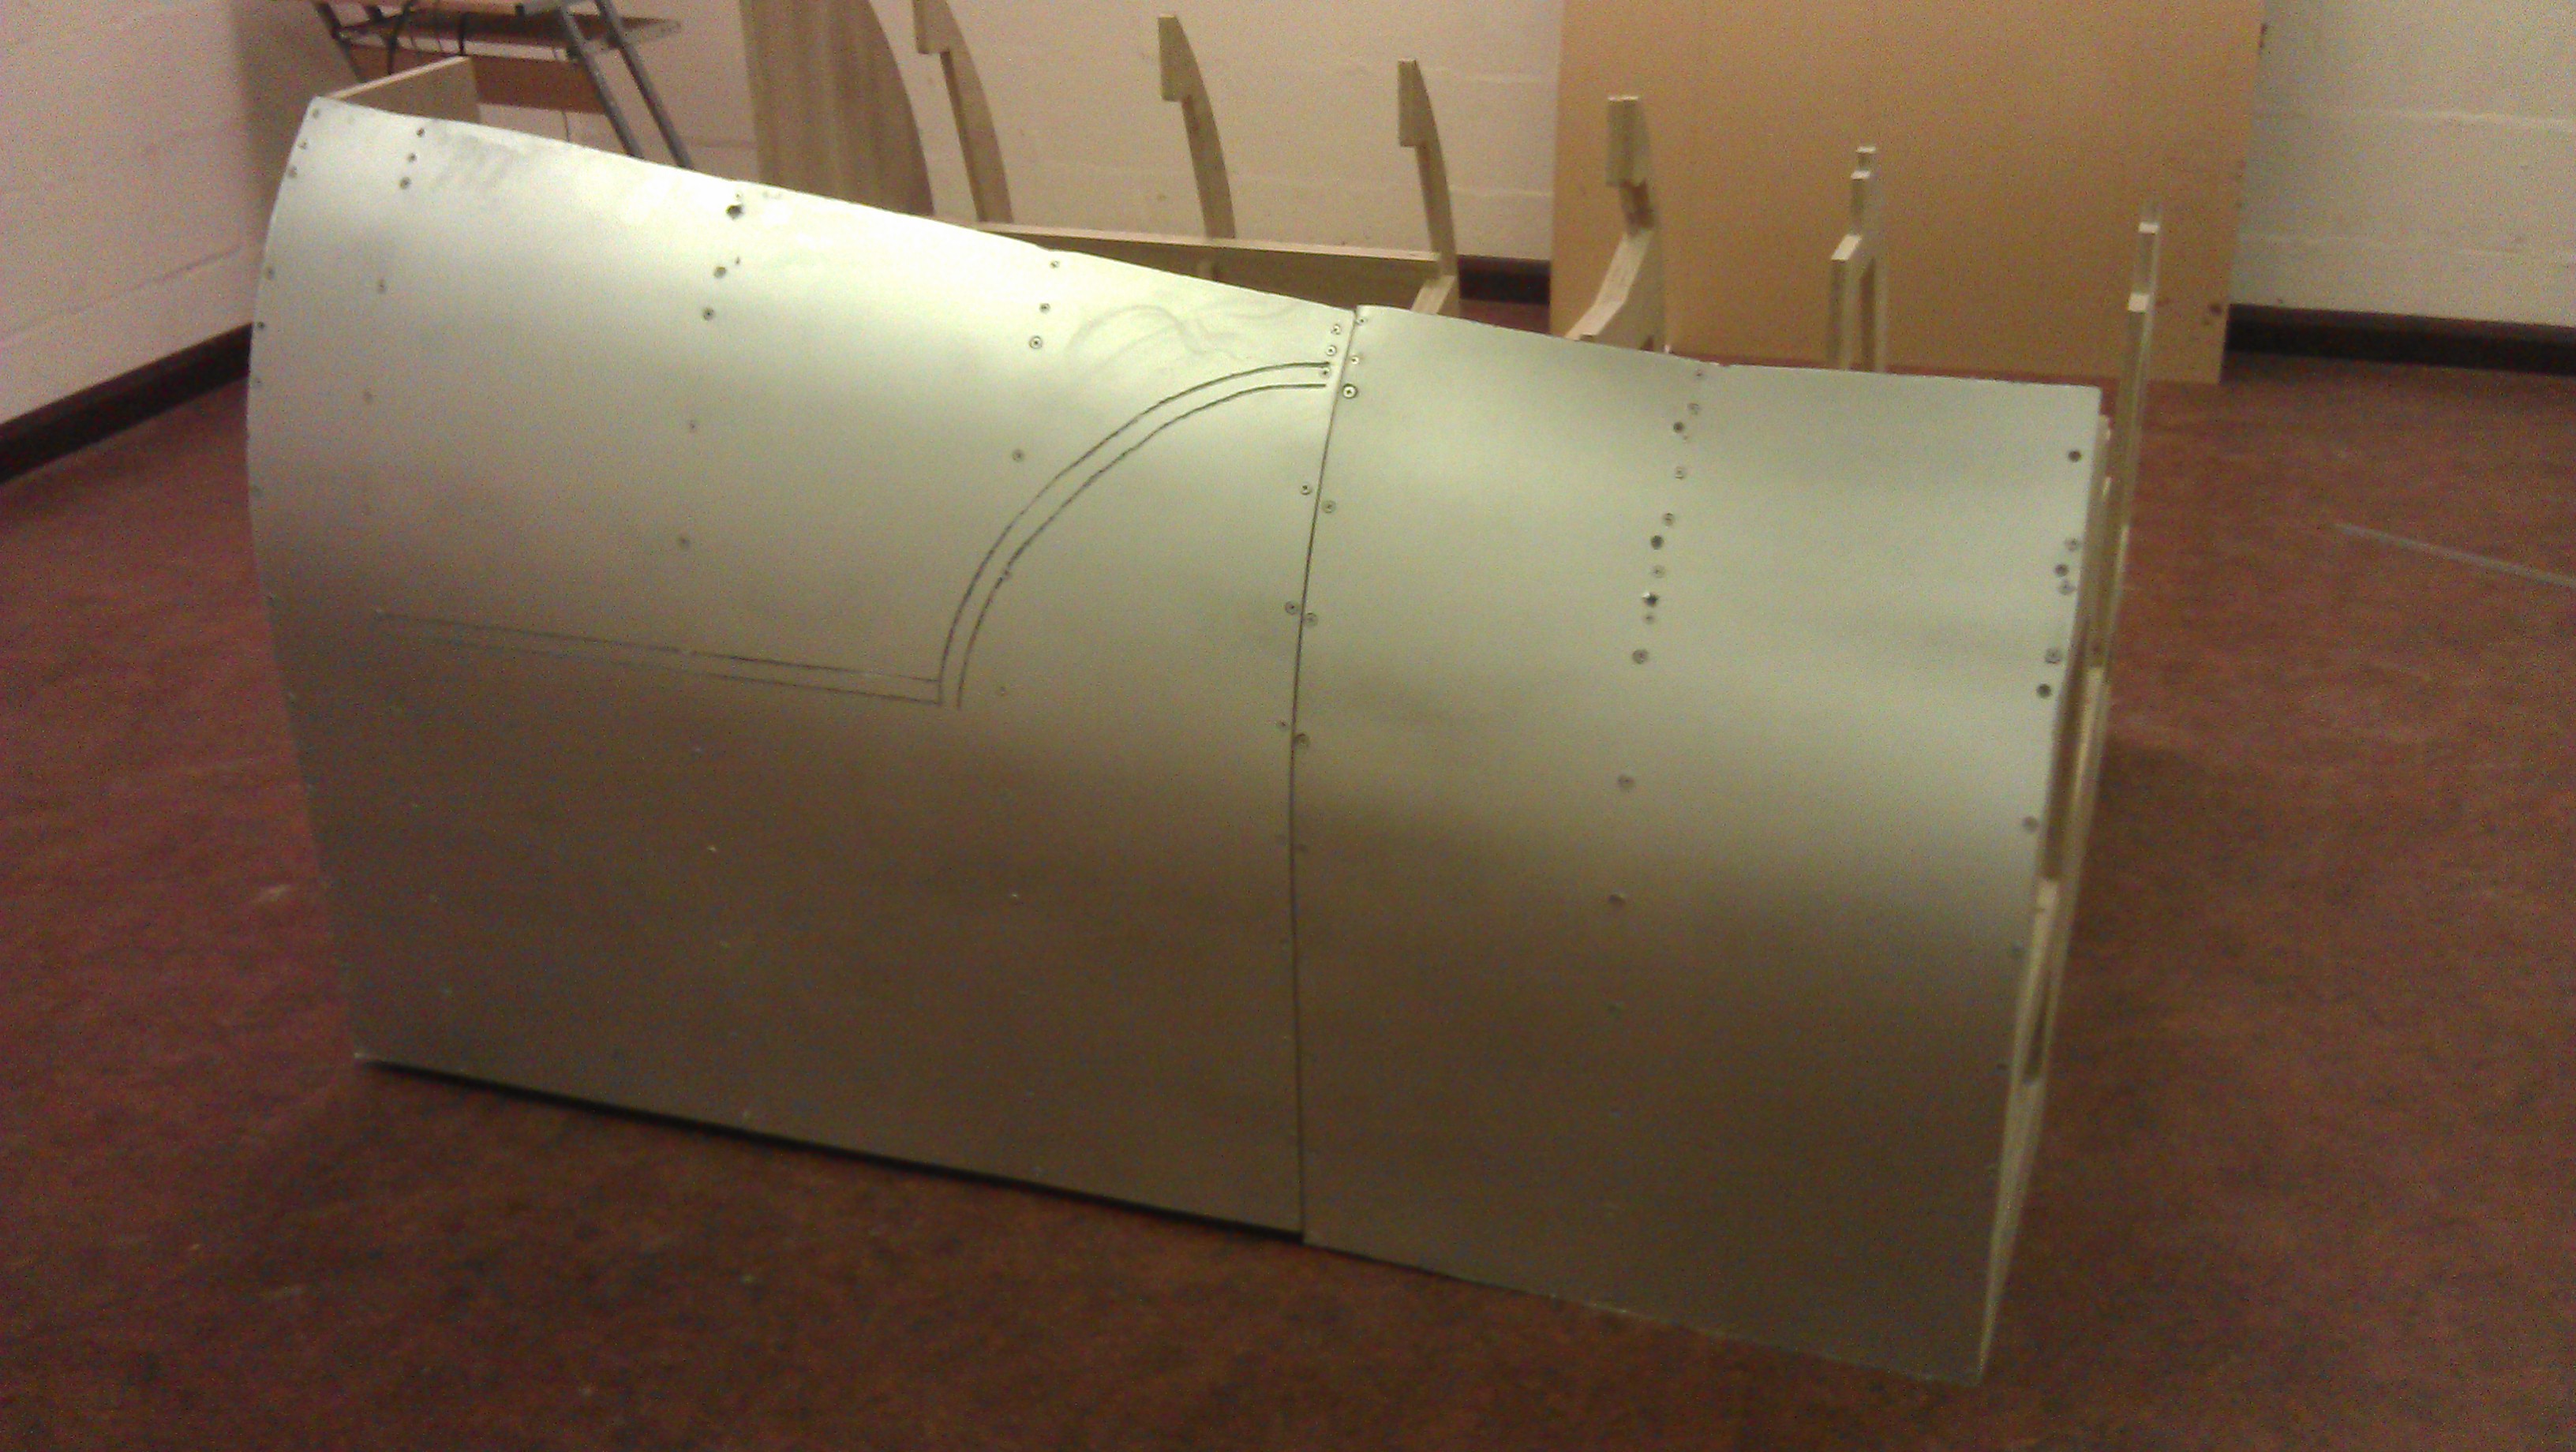
So 4 days to go before needing a phase 1 sim running. Cadets have put in their all and here are the pics to show. Centre console is temperary till the instrument panel is built. The monitor shown is touch screen and will run helios for the interim, got tommorow night to make another plynth for the main screen then install all the hardware. Yep the CMSP is in the wrong slot for those keen eyes among you, but dont know if gonna have time to make the upper rails before Thur so just for show for now. And thanks to Gadroc via AgrasyUK for that. Was hoping to have the full paint scheme done by now but got called into work a couple weekends and about a week behind schedule. We did get a bit more time to spend on the left skin with definate better results. Will probably re-visit the right side when it's complete. Some of you might be wondering why bother painting silver when it's all gonna be grey eventually. Figured as the Sim will be getting a lot of use and not nessicerally from caring individulas, i'm going to layer up the potential wear areas Silver/Yellow Primer then Grey to save having to patch paint in the future. Should hopfully give a bit of realism as well.
-
So which sides are you projecting?
-
Damn, knew you you were gonna say that. Can see others have registered and donated but cant see the option too. What am i missing?
-
5th? a cube has 4 sides. confused:book:
-
Thanks for the info, those LED's work great. I've put a drop of white paint on top of them to lessen the dazzle. How are you exporting to the display?
-
Nice modding. Where did you get the LCD from and what power LED's are you using?
-
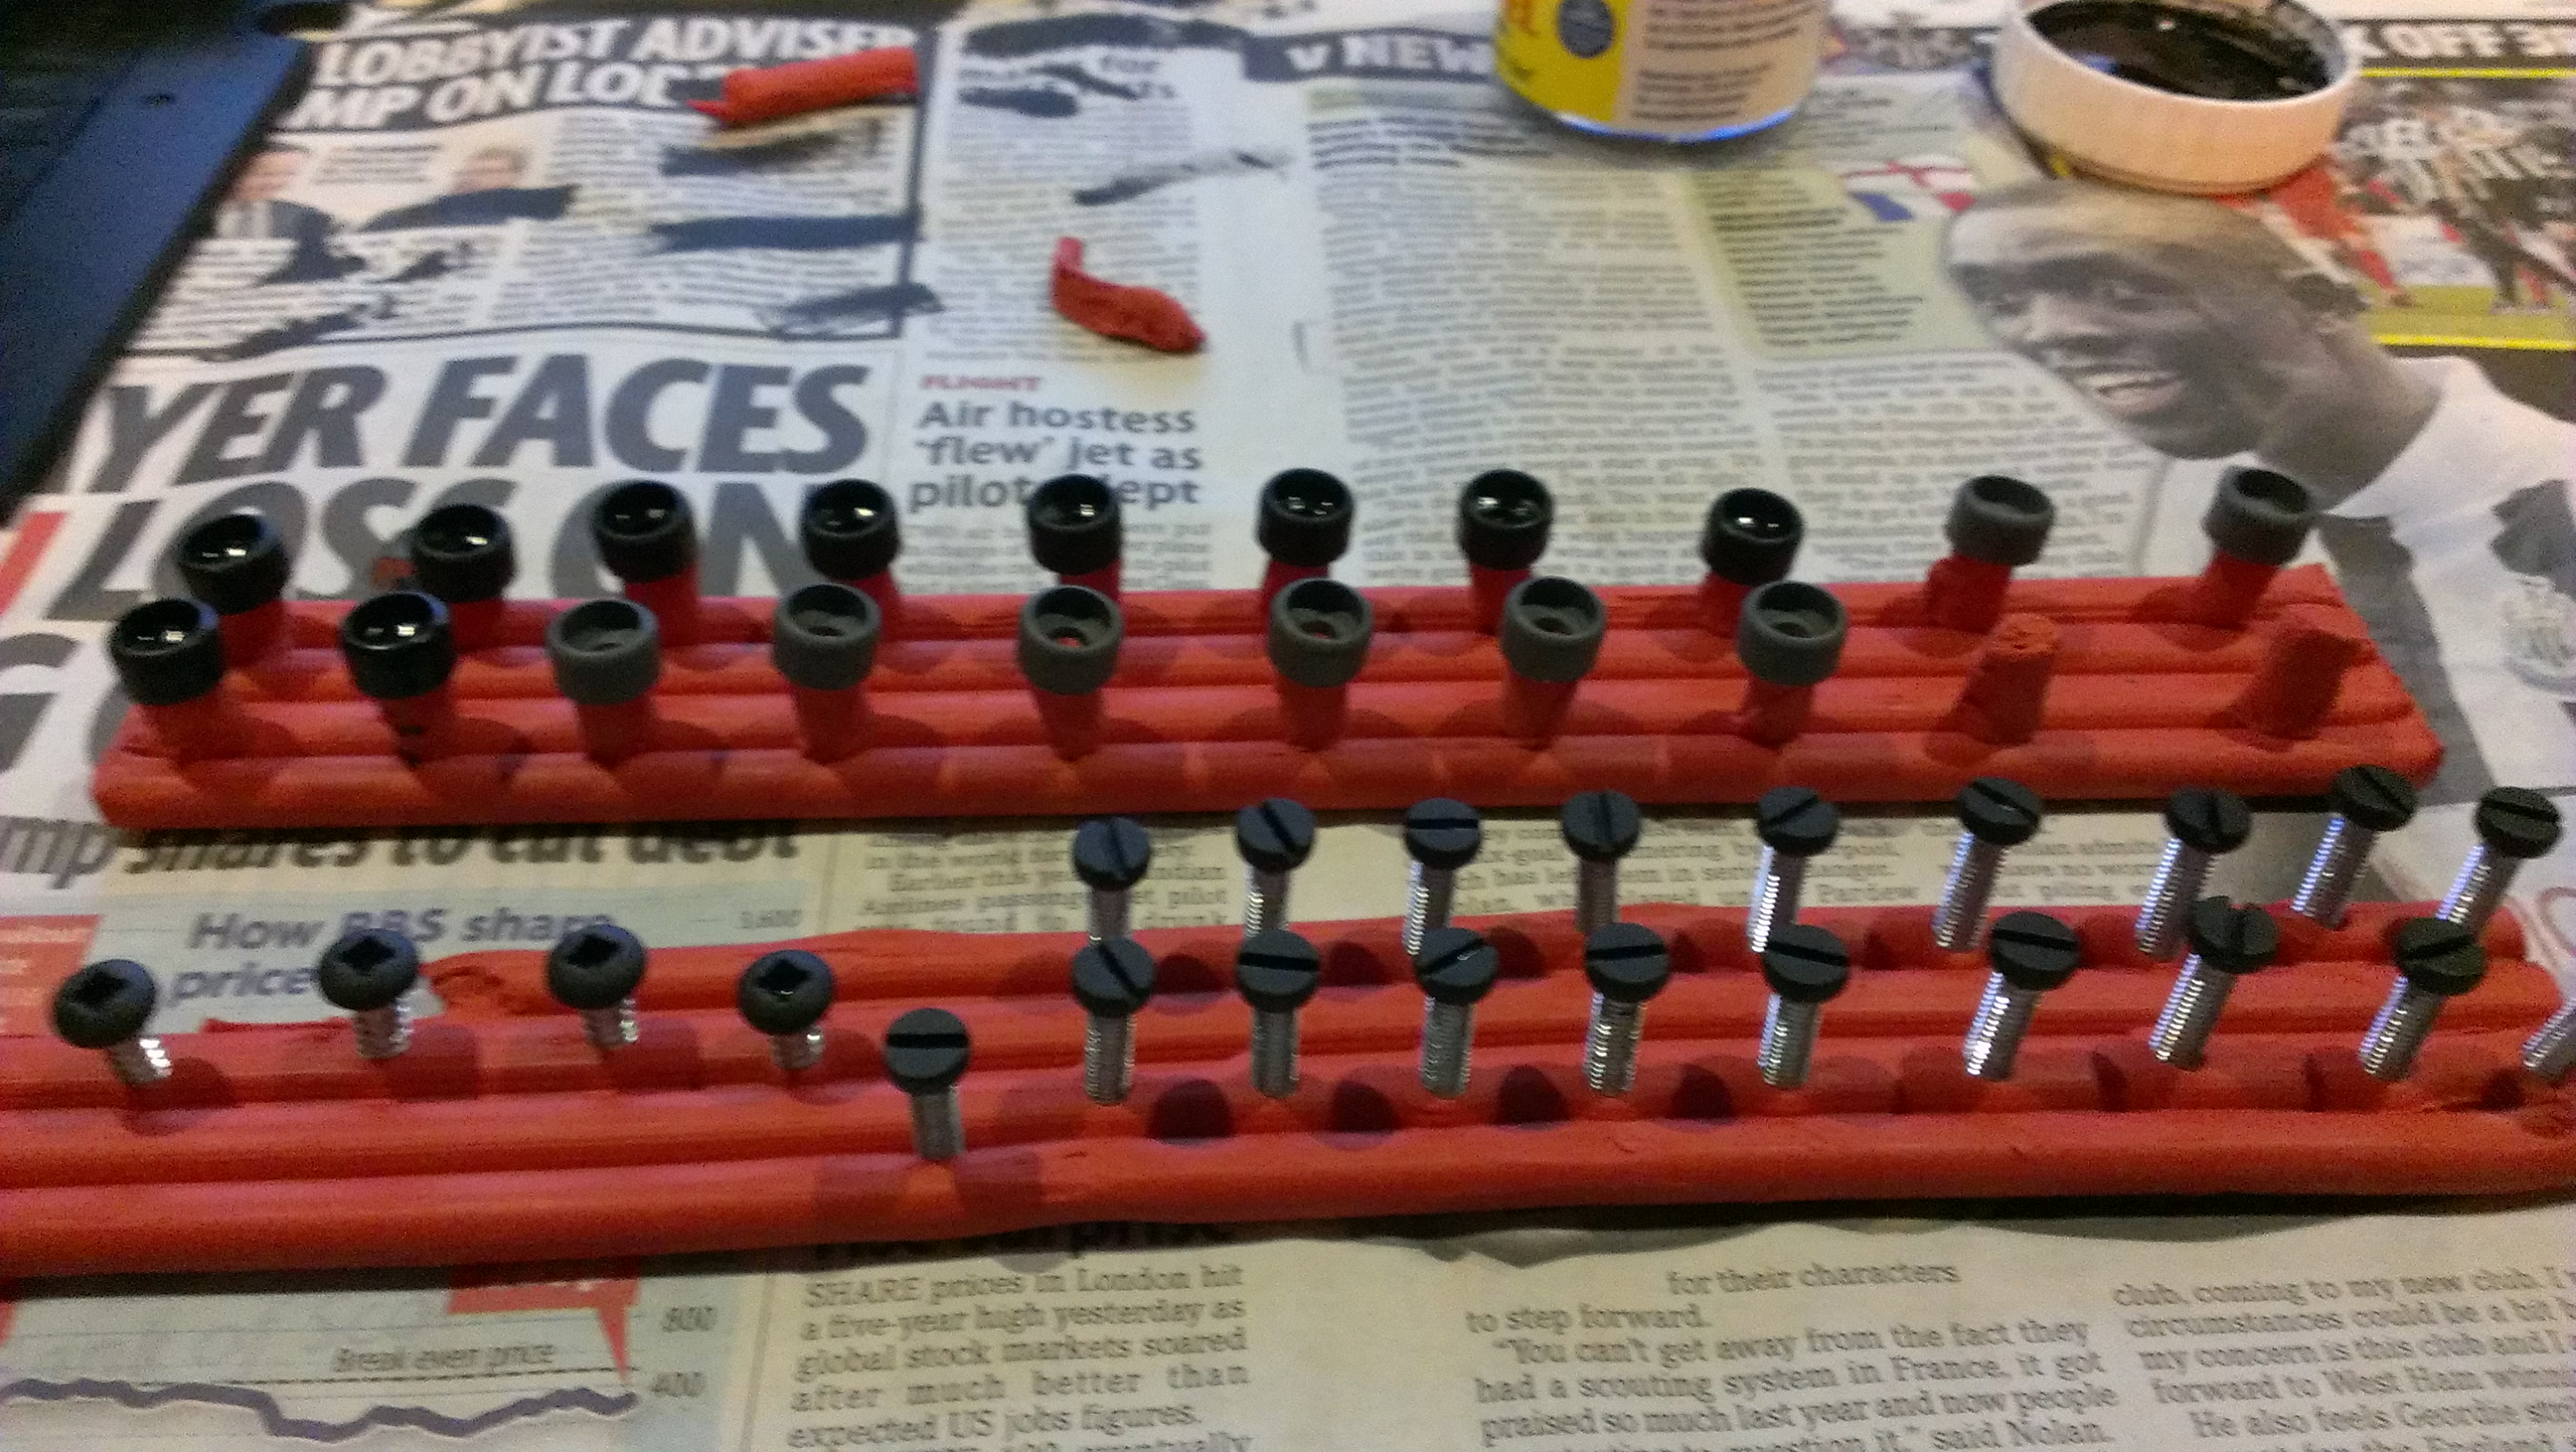
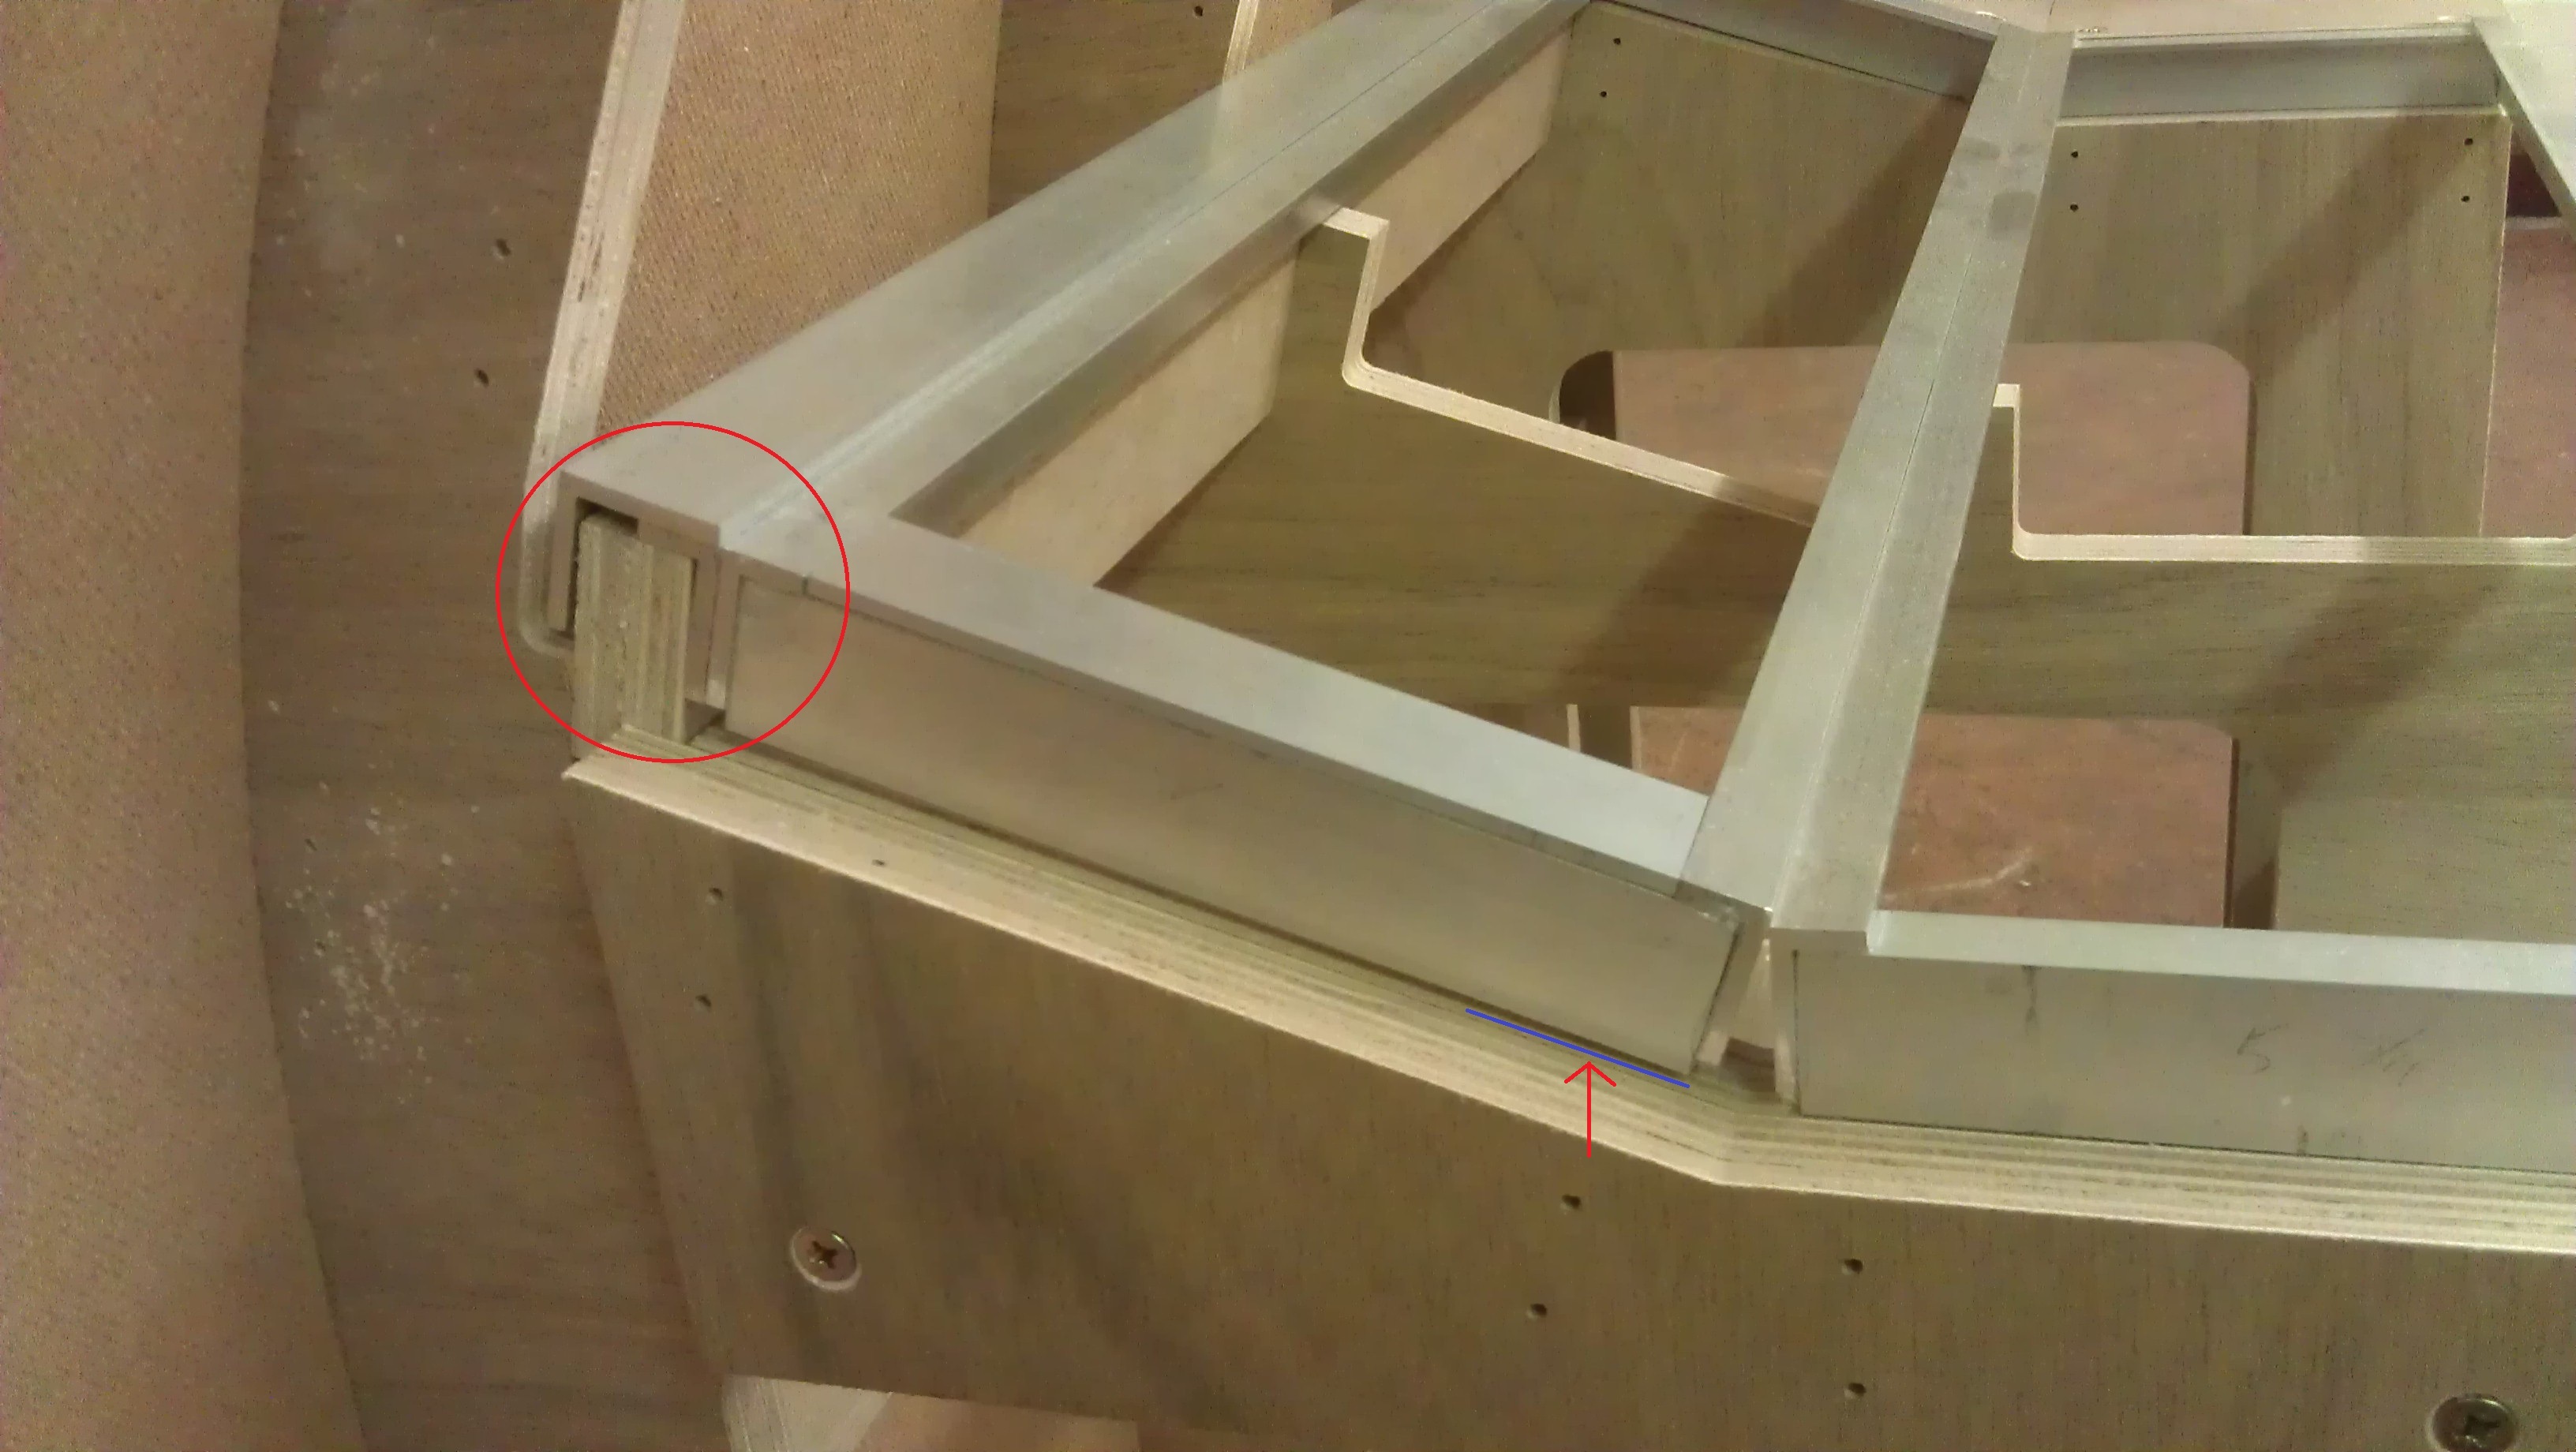
Weekend 3 and finally it's looking different from the 1st. After another box of 200 screws and cadets asking which way is the front have now got 1 side skined and started on the panel rails. A few updates for those using Y2kiah's plans. Theres not much in the way of tolerences with the rails so be ready with a file. Had some of the longer peices cut by the supplier but still needed to take a few thou off to sit right, smaller peices by hand to begin and now ordered a scroll saw, needed anyway as going to do the panels with it. Also the first pic shows how the upper panel rail sits proud on it's mounting so will need to router out a half inch width and 3mm depth for the assembly to fit flush all round. Had a play around with some detailing on the skin, hopefully as the paint layers go on it should smooth out a bit.
-
Got my knobs:lol: through today, thanks DM. A1 quality, just as expected:thumbup: