Terry Dactil
-
Posts
475 -
Joined
-
Last visited
Content Type
Profiles
Forums
Events
Everything posted by Terry Dactil
-
Thanks. That looks high quality and very well done, but the price is a bit eye-watering :( There are very affordable load cells and amplifiers available now, so it might be possible to make your own DIY version.
-

Cougar joystick gimbal repair. (3D printed)
Terry Dactil replied to Terry Dactil's topic in Thrustmaster
Perhaps we will see a revival of old/broken Cougar sticks and throttles now that the F-16 is on the way. :) -
Has anyone managed to modify the Cougar joystick by using load cells or strain gauges so it has very limited movement, just like the real thing?
-
I remember that somewhere during installation there is a warning that when moving about in the Oculus home environment do not sit down on the furniture - as there is nothing there!
-
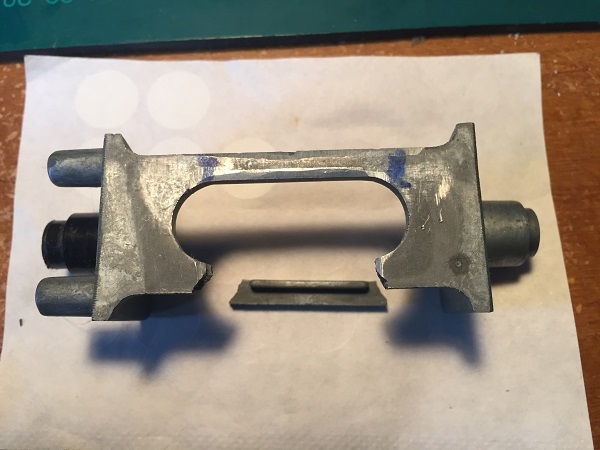
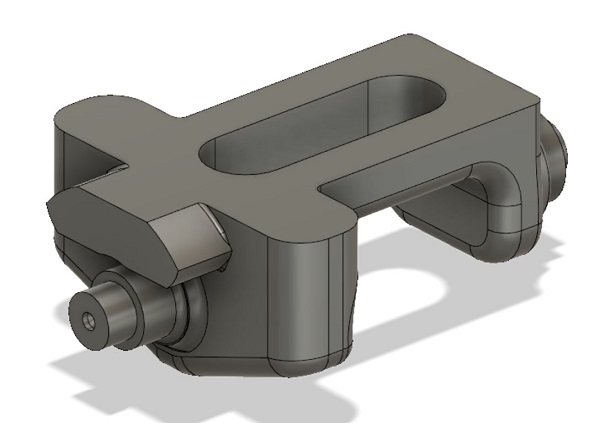
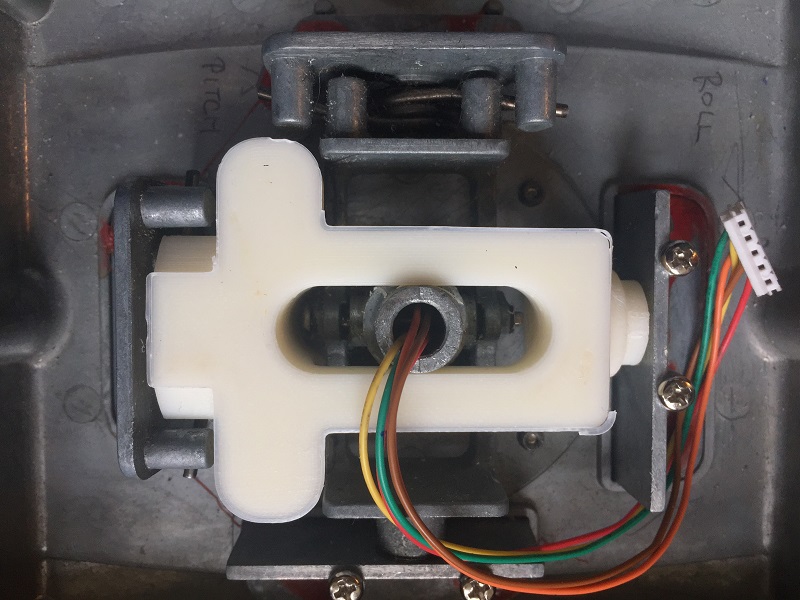
With the F-16 arriving soon it was time to dig out my old Cougar Hotas. I had previously converted the throttle and joystick to USB and Hall effect sensors, but the roll gimbal had busted and as I had moved on to the Warthog the Cougar had been gathering dust for the past few years. A perfect opportunity for another 3d printing project to repair it. It took several tries to get the design right, as the dimensions in the centering spring area are critical to avoid slop, and this is also the area of maximum stress and the layer direction there does not help. However, this was finally fixed by increasing the dimensions to maximum possible, increasing the wall thickness and infill percentage. For anyone with the same broken gimbal problem, here are the files (STL and F3D) Cougar joystick.zip Printed in ABS- top down on a heated base. Layer height 0.2 mm Top, bottom and wall thickness all 2.4 mm Infill 70% Brim and supports.

-
UI font is too small to read,how to fix it?
Terry Dactil replied to liliyaea's topic in General Bugs
Same here. 3440 x 1440 monitor and Scale Gui became inoperative several updates ago. Text is now too small to read. I used to be able to fix this by deselecting Full Screen, but that doesn't work anymore. -
About time. I keep seeing damaged Spitfires with wingtips on fire. There is nothing to burn out there - all the fuel is in the fuselage.
-
MatthlK: This could be what you want. (It works for me) ED Forums » English » DCS World Topics » Input and Output » Warthog joystick extensio - 3d printed (part 2)
-
Yes. I think it was standard practice in the real thing to raise the seat to get a better view for takeoff and landing. There is that lever on the right side of the seat for vertical adjustment, and the rudder pedals with two sets of foot rests is a big clue that it was designed for two seating positions. (unless that was just to improve g tolerance). In VR I find it is easy to move up a bit for takeoff and landing by sqishing yourself down to a lower position, re-centering the view point (button 'Y' on the Rift hand controller or I use a button on the hotas) then sitting upright again.
-
I would suggest not using the mouse for important switches. Have them on your hotas. If you are using the mouse/trackball you will need to take your eyes off the target to see what you are doing with the mouse.
-
I find this method works great in VR for operating switches and controls in the cockpit. In the UI setup, bind the mouse buttons and scroll wheel to your hotas. (I use one of the hats) In the VR setup, tick <use mouse> and untick <use hand controllers> Enter the game and use the mouse to position the green cross centered in the lower area of your vision, then leave the mouse alone and the cross will disappear. When you need to operate a switch or whatever, click a hotas mouse button and the green cross will appear. Then move your head to position the cross and click again to operate the switch. Pre positioning the cross low down makes it easy to operate switches on the side panels down near you hips. The hotas scroll wheel buttons do not scroll the control, but just move it in small increments, so multiple clicks are required. I thought the hand controllers were great once the right click function was working, but I now prefer this method as I can keep my hands on the hotas and not grope around for a hand controller. :)
-
https://forums.eagle.ru/showthread.php?t=236666
-
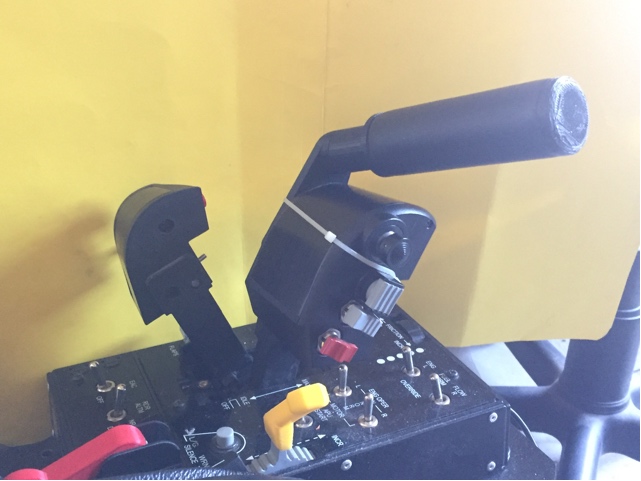
Here is a small mod to the Warthog throttle to make it feel more like the Spitfire hand grip and improves the VR experience when flying the Spitfire. I did not want to make any changes to the Warthog throttle, so it is located by projections engaging existing holes and simply held in place with a tie wrap. (The foam rubber tubing used is 1"ID that was left over from a previous project). STL files Spitfire Throttle.zip
-
Simple Collective Lever for Warthog throttle- quick change.
Terry Dactil replied to Terry Dactil's topic in Thrustmaster
Go to the two threads buried way back in this forum Warthog / Cougar stick - 3D print an extension for a better VR experience at https://forums.eagle.ru/showthread.php?t=209442 Warthog joystick extensio - 3d printed (part 2) (Multi-page thread at https://forums.eagle.ru/showthread.php?t=216183 2) -
Simple Collective Lever for Warthog throttle- quick change.
Terry Dactil replied to Terry Dactil's topic in Thrustmaster
RogueSqdn: The F3D files are the original Fusion360 design drawings that someone requested to be able to make modifications. The STL files are lurking at the bottom of post #1 and named HOTAS.zip You need only the first 3 files for the extension 50mm extension - Body.stl. 50mm extension - nut.stl 50mm extension nut retainer.stl Sorry for the confusion. -
Simple Collective Lever for Warthog throttle- quick change.
Terry Dactil replied to Terry Dactil's topic in Thrustmaster
Sorry, but I am not in a position to manufacture this. :( It was built from scrap material I had in the junk box, and designed around the layout of my control chair. The main idea was to show that a simple linkage could do the job, and to give others an idea for their own build. -
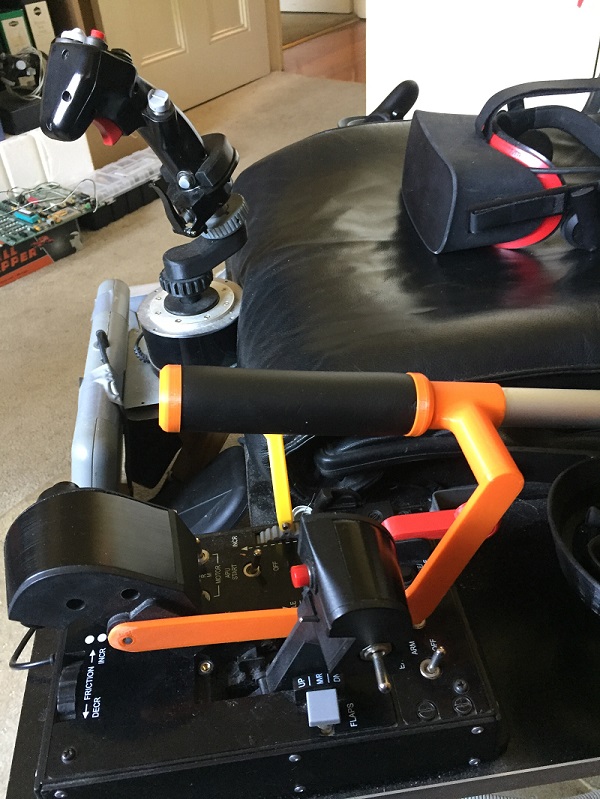
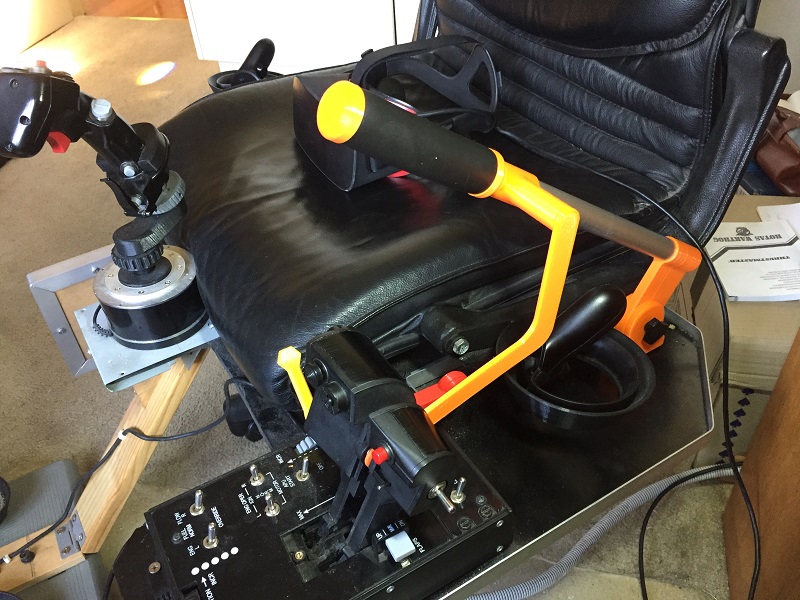
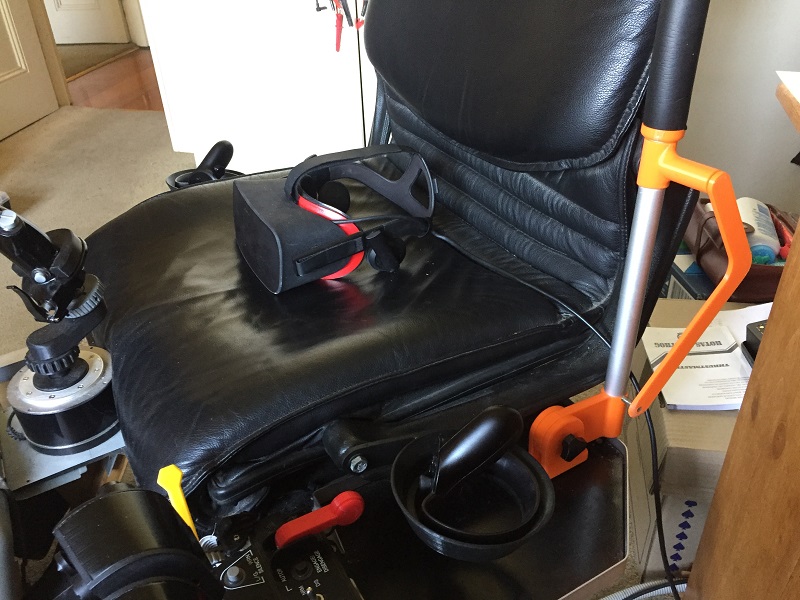
This works! It is much easier for me to fly a helicopter now that the up-down control is up-down and not fore-aft. There is just enough space between the two throttle levers (abut 4mm) and the magnetic connector hole for the pin used to join both throttles is perfect for for holding a a linkage to operate the right throttle as the collective control. With some tubing and a couple of bolts I had lying around I 3d printed some component to make this simple collective lever that can be quickly removed for normal fixed wing operation. Down Up Disconnected Some day I will get around to making a proper collective lever with all the buttons and switches, but right now this one works fine.
-
Yes. That is the way to use the trim. The idea is you set the attitude (nose position) you want by using the normal joystick control, and then use the trim to remove any force you are using. You should then be able to go 'hands off"and the aircraft will maintain that attitude. It is a bit hard in the Spitfire as it has neutral stability and does not return to the trimmed attitude if displaced. That is one of the delights in flying the Spitfire - it tends to go where you point it regardless of any speed change.
-
Same problem here. Scale GUI in both open beta and release versions does not work after last update. I'm using a 3440 x 1440 monitor and text is now just about unreadable.
-
The last update seems to have broken ScaleGUI on my system. It was working fine before the update, but now I see no difference if 'scaleGUI' is selected or not, and the text size is now too small to read. I have a triple monitor setup with only the center monitor used for DCS. The resolution of this is set to the recommended 3440 x 1440. I have checked the ... >Saved Games > DCS > Config > options.lua file and confirmed there is the correct ["scaleGui"] = true, entry present. Are there any other settings I should check?
-
I have no problems with VR. It works OK in both eyes for me.
-
after update I have no mouse cursor
Terry Dactil replied to 71st_Mastiff's topic in Controller & Assignment Bugs
I have had the same problem before. Two quick and dirty fixes that worked for me: 1. If multiple monitors, bur only using one for DCS, click somewhere on a non-DCS monitor them return to the DCS monitor. 2. CTL-ALT-DEL into Task Manager, then exit Task Manager. No idea how or why they worked. -
My update finally completed after several retries. Looks like Scale GUI is now broken.
-
Yes. It would be intentional. The pilot's notes have a 2 second delay before moving the lever.
-
Yes to all the above. I find it also helps to hold the brakes on until a lot of power has been applied. This gives good airflow over the rudder and makes it easy to catch the initial swing.