Terry Dactil
-
Posts
476 -
Joined
-
Last visited
Content Type
Profiles
Forums
Events
Everything posted by Terry Dactil
-
I always assumed I was flight lead in this mission. The briefing gives the wind direction as 269° which is arse about from convention (DCS tells you which direction the wind is going, not from where it is coming) ATC works, and will tell you to taxy to RWY 14 which is a left turn from your parking spot and will put you as the lead aircraft as you taxy to the runway. I suspect that if you finished up as #4 it would have scrambled up the program in some way. All I can suggest is make sure you are leading the flight, and if that doesn't work then try a repair.
-
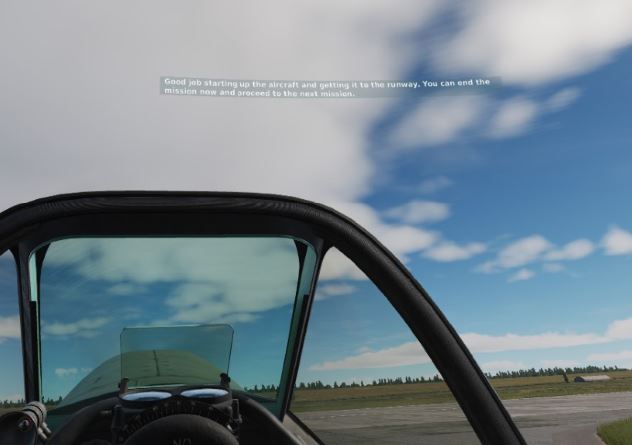
The first mission in the Challenge Campaign is just to get the aircraft started and to the runway. The mission ends there. You can take off and fly around if you wish, but you are on your own. You should have received an audio and visual message that the mission has ended when you get to the runway. (Note: If you turn right and go via the far taxiway near the C-130 you avoid the message trigger zone and won't get the 'end of mission' message.)

-

After this last update my modules have been deactivated!
Terry Dactil replied to SirBenn21's topic in Installation Problems
Same sort of problem here after the latest update. On restart it wanted to delete some modules and version number was unchanged so the Marianas map I wanted to look at was unavailable. A 'Repair' using the 'quick' option had no effect. However, the 'Repair' using the full or slow option did the job and all works OK now. -
investigating MSFF2 - Centre of axis/Trim
Terry Dactil replied to 312_JS's topic in Bugs and Problems
Did you try using DIView to adjust the center position? -
Auto-Rudder and Take-Off Assist Issue
Terry Dactil replied to Flatch's topic in DCS: Spitfire L.F. Mk. IX
The big attraction to me is the realism of DCS. Just learn to fly the aircraft like the real pilot has to. That's the way to go. Well done! -
Auto-Rudder and Take-Off Assist Issue
Terry Dactil replied to Flatch's topic in DCS: Spitfire L.F. Mk. IX
I suggest you turn off auto-rudder and take-off assistance so you get only the effects of your control inputs. You will quickly learn that you need to apply some right rudder and a smidgin of right aileron to counteract the torque and p-effect to get a straight and stable take-off run. It is quite easy once you get the idea, but it is a lot harder if you have "assistance" banging the rudder about. The Spitfire is an aircraft that generally responds best to small and precise control inputs. Check this forum for advice on control setup as the default values are way too savage. -
Rudder movement is always synchronized with the pedal movement (unless you have really, really loose rudder cables). I think there is some confusion between the response time and the rate of response. Slow down the initial rate of response with a curve. That's why we have curves. You can reduce the overall sensitivity by reducing saturation Y. If you really want a delay, put in a large dead zone. (Control theory is very interesting with feedback loops and gain control getting very messy when you put a human into it)!
-
So you want the rudder surface to move some time after you move the rudder pedals? Why? This does not happen in real aircraft. Having lag in a control system is the perfect setup for getting over controlling and pilot induced oscillation.
-
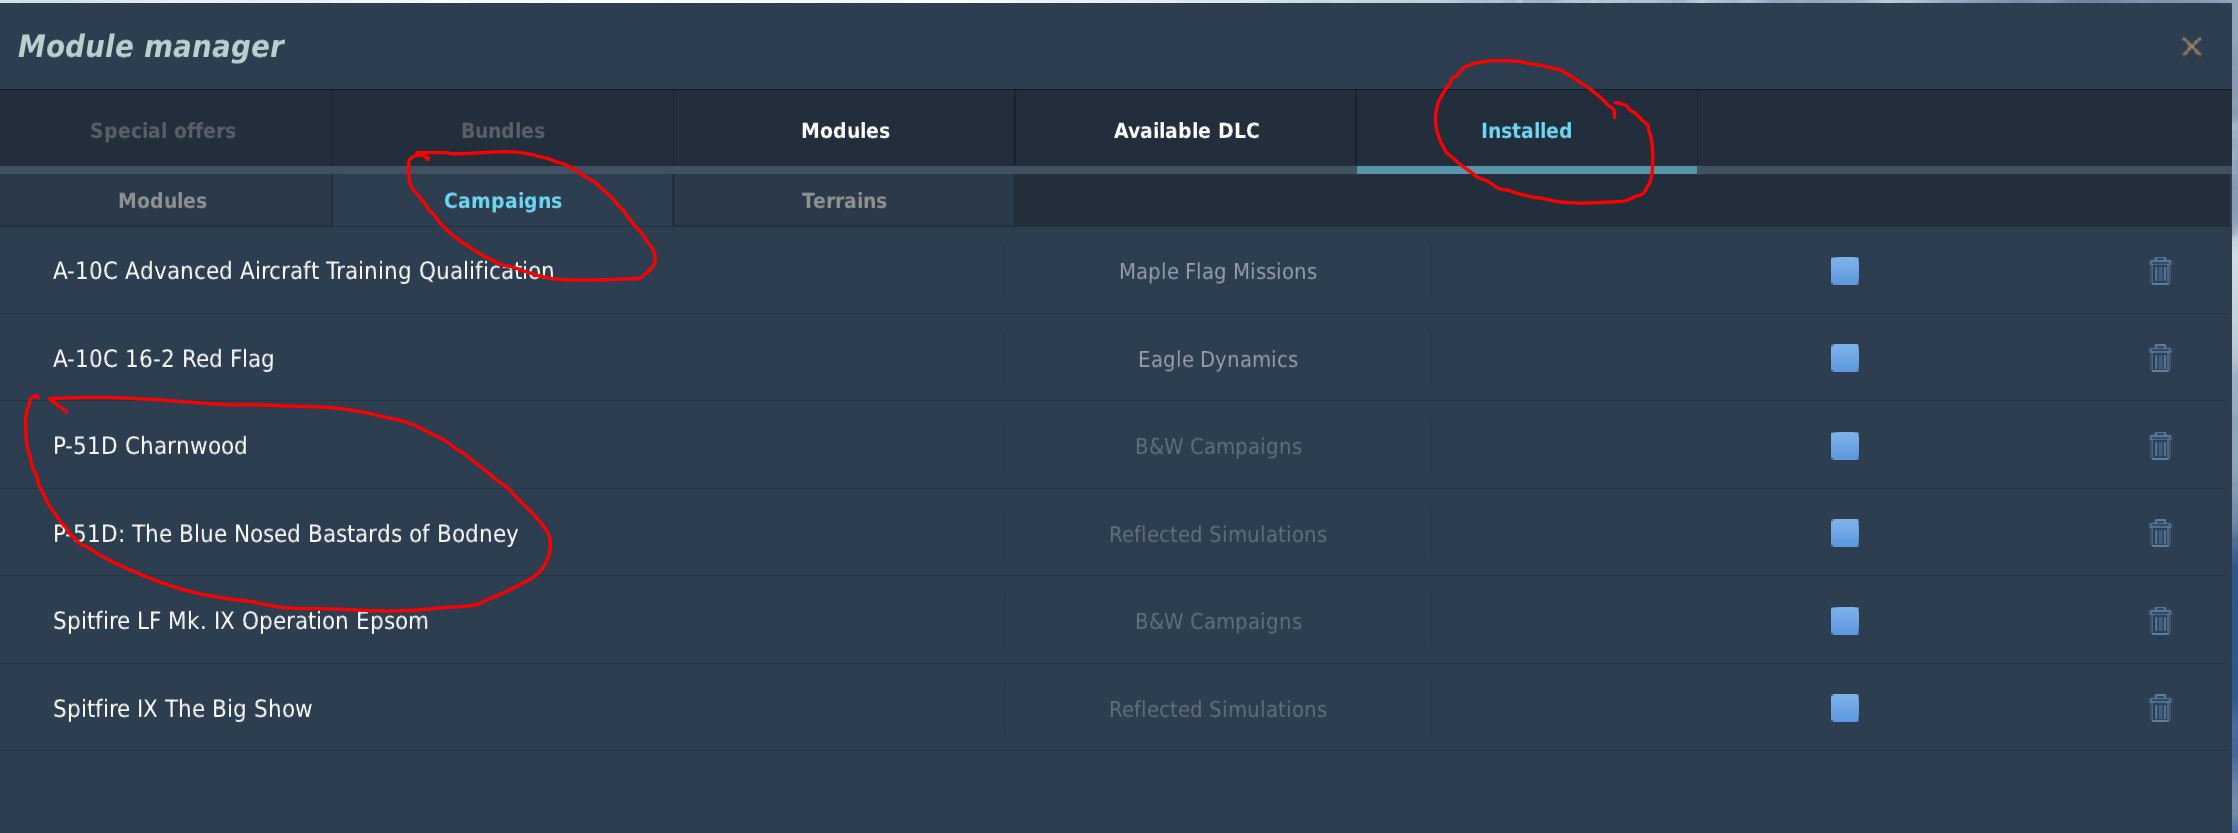
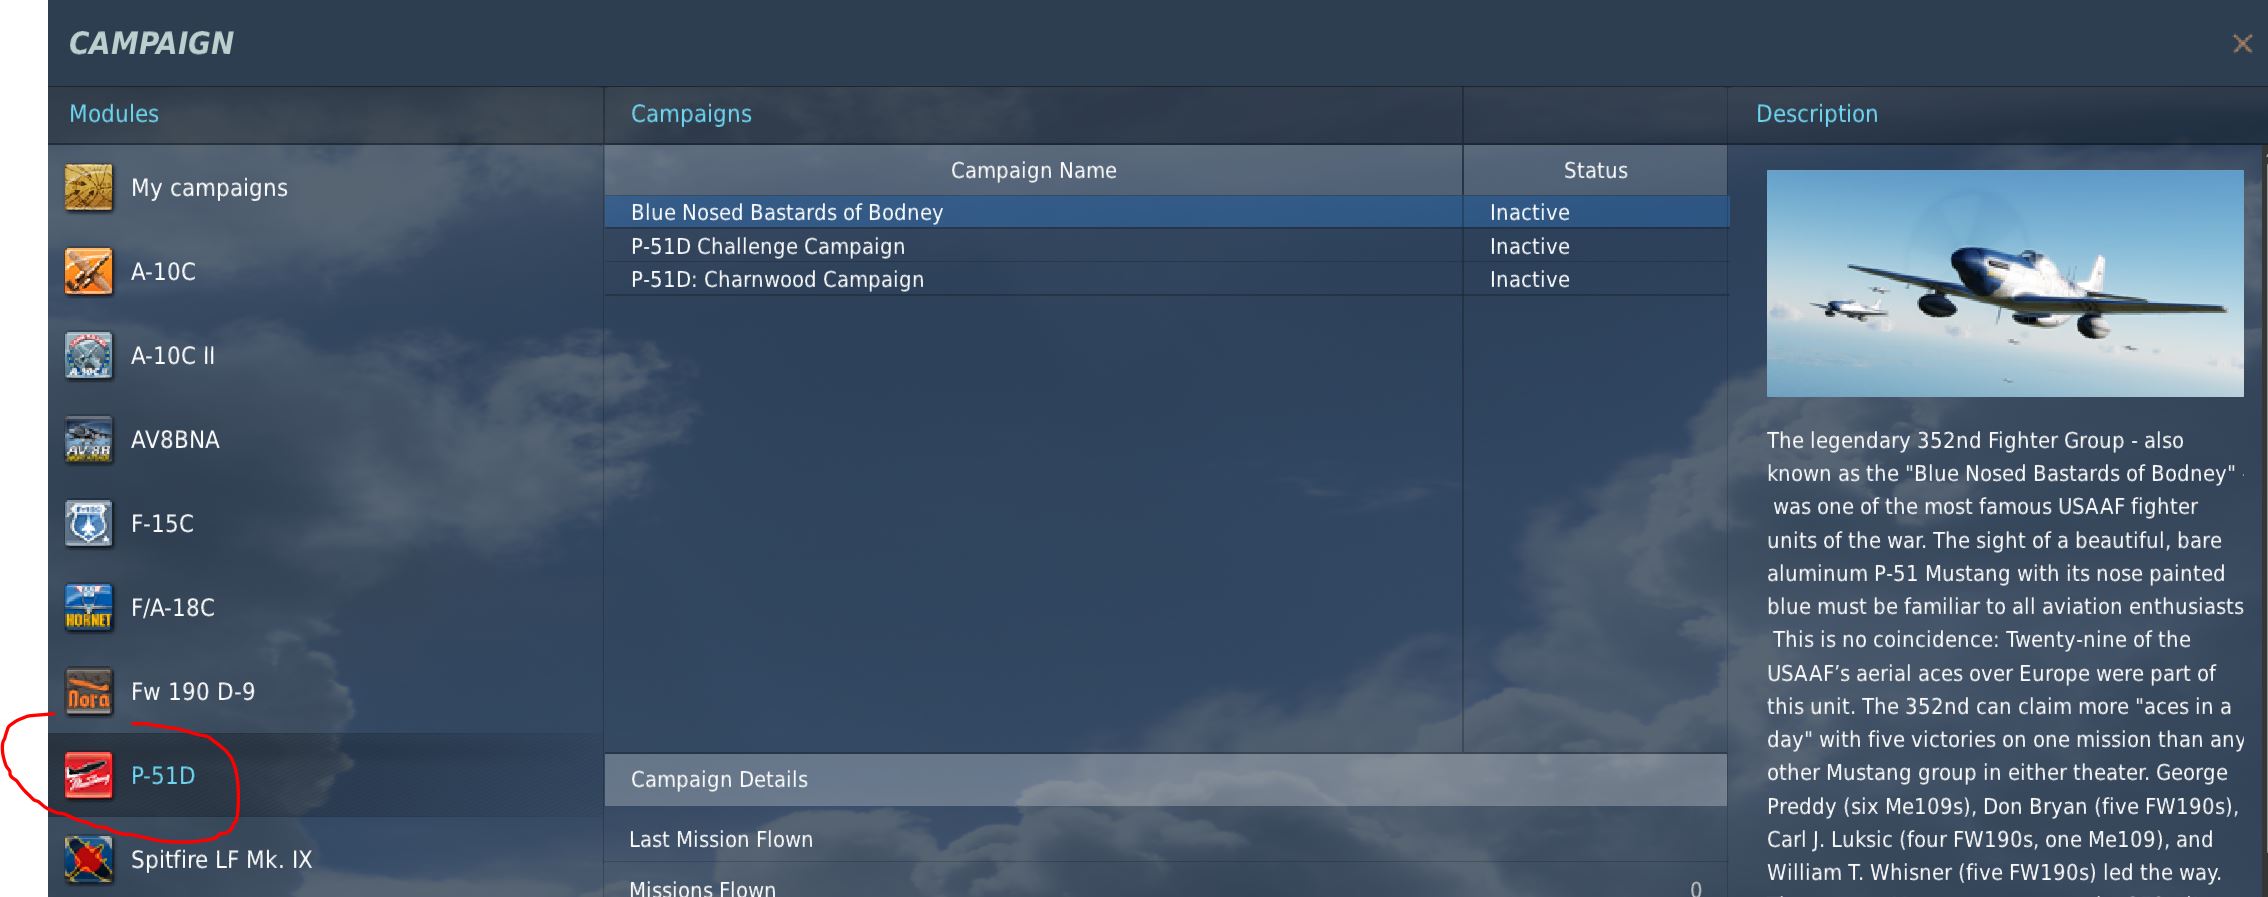
Yes. Is it actually on your computer? After you purchase, you should get a 'click to download' pop-up window. You should see this immediately after purchase or the next time you start DCS. You can check for a successful download with ... Module Manager > Installed > Campaigns To fly the campaign use the DCS Main menu ... where you should see ...
-
Have a look at this thread ... The Spitfire was designed as a short range interceptor with only about 200 miles range. (that is out and back, not a radius.) It is a bit over 100 miles from Tangmere to Le Havre. You can see why drop tanks were invented.
-
Vipergear Force Sensor for TM Cougar - is it any good?
Terry Dactil replied to sirrah's topic in Thrustmaster
Rigid joystick.f3d You should be able to extract individual components from this assembly file. If not, let me know and I can did out the individual flies. -
Voice Attack can be useful for this sort of thing. I have the HOTAS flap lever for incremental flap movements, but if I want to go directly to any particular setting I use a voice command. I had 'Betty' remind me of the limiting speeds when I was learning to operate the P-51, and this can be removed if no longer required. Here is the Voice attack command structure for anyone interested. ==================================== When I say: Flaps [UP; ZERO; 10; 20; 30; 40; 50; DOWN ] Variables used: Actual position, Selected Position ==================================== Start by checking if flap position value has been initialized Begin Integer Compare : [Actual Position] Has Not Been Set Start Loop : Repeat 5 Times Press Left Shift+F keys and hold for 0.1 seconds and release End Loop Flap lever must be at zero now Set integer [Actual Position] value to 0 Say, 'Actual Position value is initialized to zero' (and wait until it completes) End Condition ==================================== Now get the Selected (desired) position Begin Condition : [{CMDSEGMENT:1}] Equals 'UP' OR [{CMDSEGMENT:1}] Equals 'ZERO' Set integer [Selected Position] value to 0 End Condition Begin Text Compare : [{CMDSEGMENT:1}] Equals '10' Set integer [Selected Position] value to 1 Say, 'Limit 400' (and wait until it completes) End Condition Begin Text Compare : [{CMDSEGMENT:1}] Equals '20' Set integer [Selected Position] value to 2 Say, 'Limit 275' (and wait until it completes) End Condition Begin Text Compare : [{CMDSEGMENT:1}] Equals '30' Set integer [Selected Position] value to 3 Say, 'Limit 225' (and wait until it completes) End Condition Begin Text Compare : [{CMDSEGMENT:1}] Equals '40' Set integer [Selected Position] value to 4 Say, 'Limit 180' (and wait until it completes) End Condition Begin Condition : [{CMDSEGMENT:1}] Equals '50' OR [{CMDSEGMENT:1}] Equals 'DOWN' Set integer [Selected Position] value to 5 Say, 'Limit 165' (and wait until it completes) End Condition ==================================== Now calculate how many steps in what direction are required Set integer [Move] value to the value of [Selected Position] Set integer [Move] to [Move] minus [Actual Position] Now send the commands Begin Integer Compare : [Move] Is Greater Than 0 Start Loop While : [Move] Is Greater Than 0 Select down Press F key and hold for 0.1 seconds and release Set integer [Move] to [Move] minus 1 End Loop Else If Integer Compare : [Move] Is Less Than 0 Select up if negative Start Loop While : [Move] Is Less Than 0 Press Left Shift+F keys and hold for 0.1 seconds and release Set integer [Move] to [Move] plus 1 End Loop End Condition Set integer [Actual Position] value to the value of [Selected Position] Write [Blue] 'Selected {INT:Selected Position} Actual {INT:Actual Position}' to log Say, 'Flaps {CMDSEGMENT:1} selected' =========== END ========================
-
Vipergear Force Sensor for TM Cougar - is it any good?
Terry Dactil replied to sirrah's topic in Thrustmaster
OK. Here they are .Rigid joystick STL files.zip (If you need to make modifications and use Fusion360 I can probably find those files too). -
Yes. Seems that all the theme music files have been moved All of mine don't work anymore.
-
Which module of the second world war? Thank you
Terry Dactil replied to Ravent's topic in DCS: P-51D Mustang
My not-so in-depth analysis ... The P-47 has rather complex engine management issues. The Spitfire is great airborne, but a bitch on the ground. The P-51 has good handling both air and ground. Plus you get bombs and rockets to blow things up. -
More info that may be of interest. I stuck an oil rig platform in the sea to mark the position of a 10 mile final for RW 28 at Manston. Any time I called 'inbound' I receive an accurate heading and distance to that position However there was never any notification when I arrived there and I just overflew the position.. Next, I used visual sighting of the oil rig to turn onto the final approach heading Now everything worked! At 5 miles I was cleared for a visual approach and to call the tower. The tower cleared me to land when I requested landing. The tower also cleared me to find a parking spot at the end of the landing roll. The big problem is that WW2 aircraft with no radio aids have no way of knowing when they reach the approach fix. Real world ATC give an instruction to turn onto final with allowances for intercept angle, turn radius/speed etc. If ED could just tell me when I had one or two miles to run I could probably work most of that out myself.
-
Thanks for the replies. I set up a mission where I started on the runway center-line and 30 miles out. The vector I received was runway heading for 20 miles. It looks like the vectoring could be to a point 10 miles out on the runway center-line. I'll check from some other directions and see if that still applies. I guess there will be a few adjustments needed for magnetic variation and turn radius if not on a direct approach. It is starting to make more sense now.
-
I am in a P-51 with no radio navigation aids at all, so an initial approach fix for an instrument approach is useless to me. (even if it existed then - this is WW2) It can't be a visual reporting point if it is over the water. All I want to know is the direction to the airfied. So where do I find this 'any map' which will show me where I am being vectored?
-
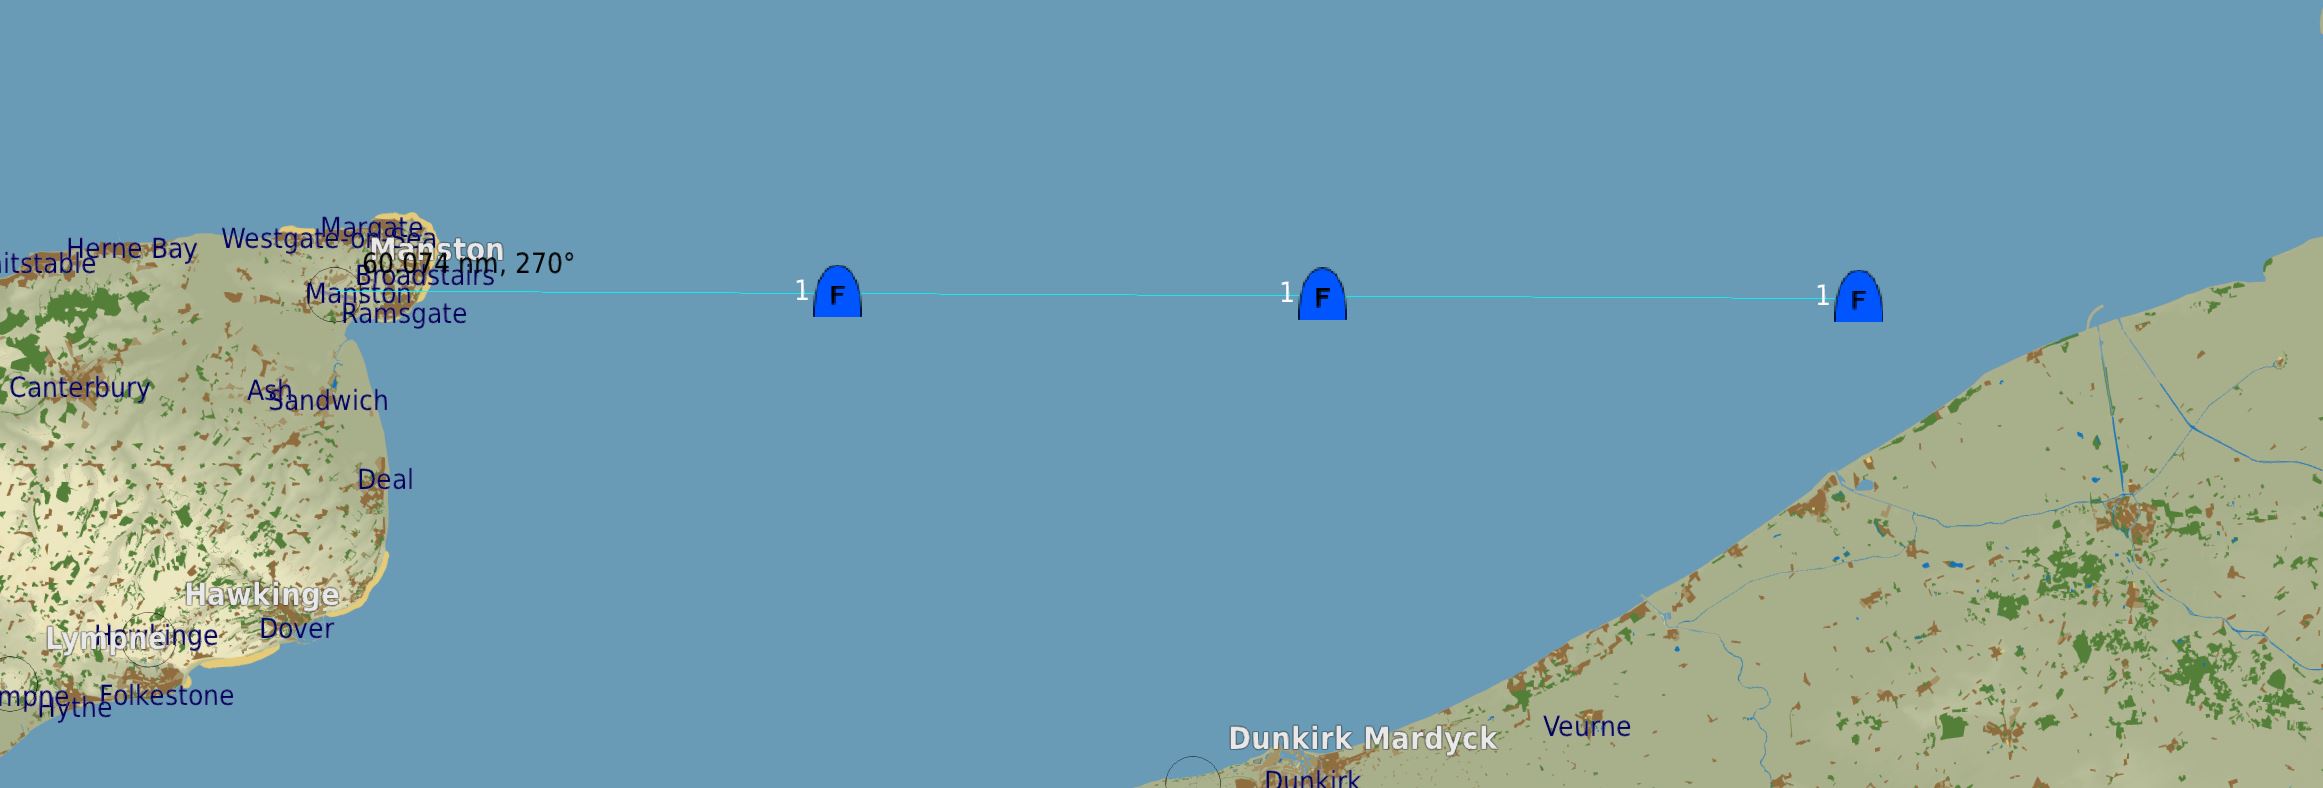
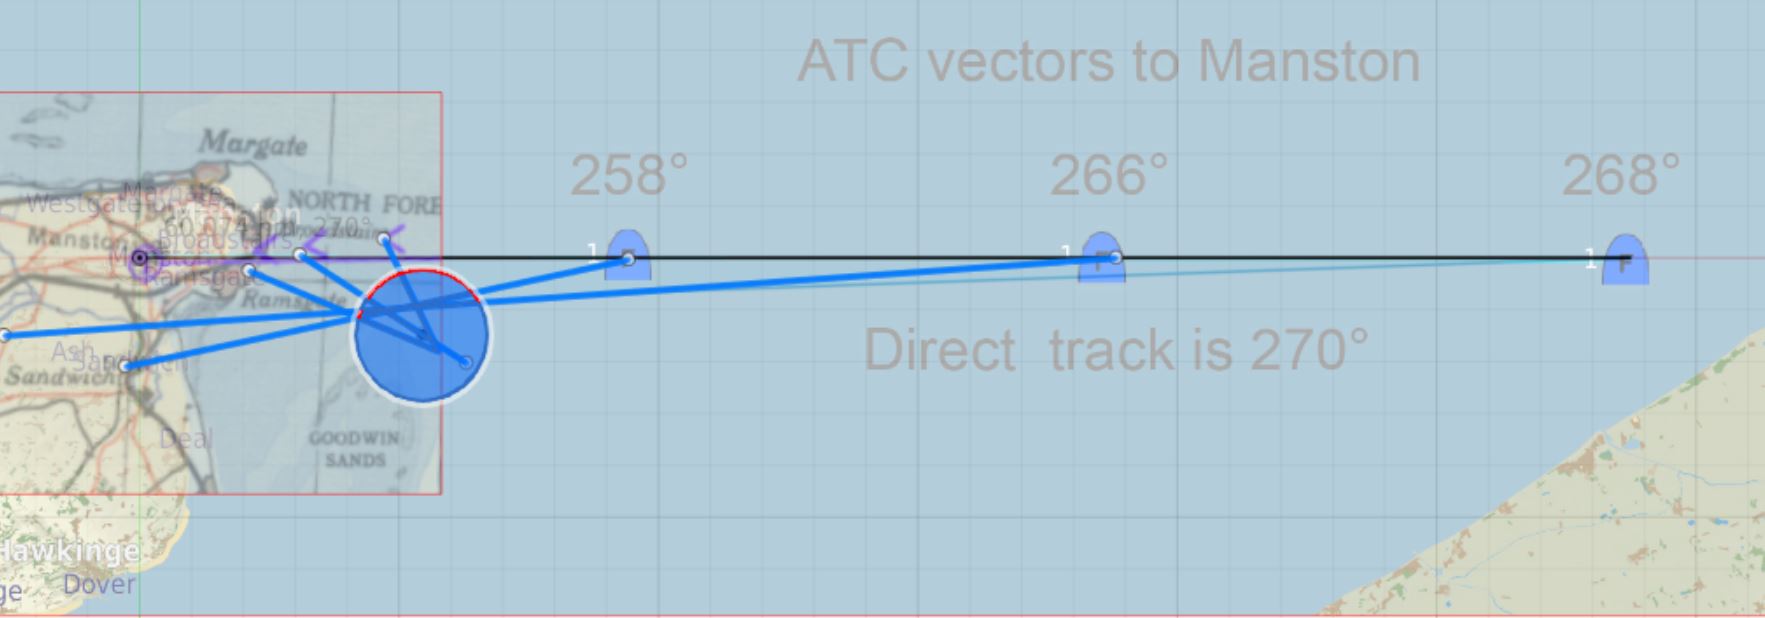
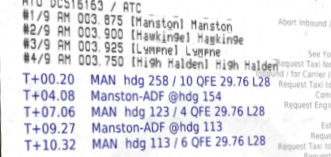
Some more information: I made a small mission where I flew on a track of 270° inbound to Manston. Along the way I announced I was 'inbound for landing' and also requested vectors. The resulting ATC vectors were OK at long range but rapidly deteriorated as the range decreased.. In fact, near the coast the vector was to go somewhere behind me! Here is a plot of the bearings I was given and which wanted me to go some distance to the South East of Manston. I checked the map coordinates for Manston and they are correct. However, DCS obviously thinks Manston is somewhere out to sea.
-
I have been exploring the channel map in a P-51 and preset 4 of the airfield radio frequencies using the mission editor. Communication with a selected airfield (using Vaicom) works fine, but if I request a vector (navigational assistance) or announce 'inbound for landing' then ATC will give me a completely incorrect heading to fly. The error is generally around 60° but can be 180° sometimes, and is never anywhere near being correct. It is not a great problem as the kneeboard and waypoints woks fine for navigating, but it would be nice to have ATC vectors working too. Is anyone else seeing this error?
-
Spitfire VR hands control stick grip non functional
Terry Dactil replied to Pelham 123's topic in Bugs and Problems
Over the internet? I am amazed. How do you do that? -
Modern Airfields on The Channel map please
Terry Dactil replied to viperpilot31's topic in Wish List
It is already there ! There is a 9000' concrete runway at Manston. You could use that. -
Cougar joystick gimbal repair. (3D printed)
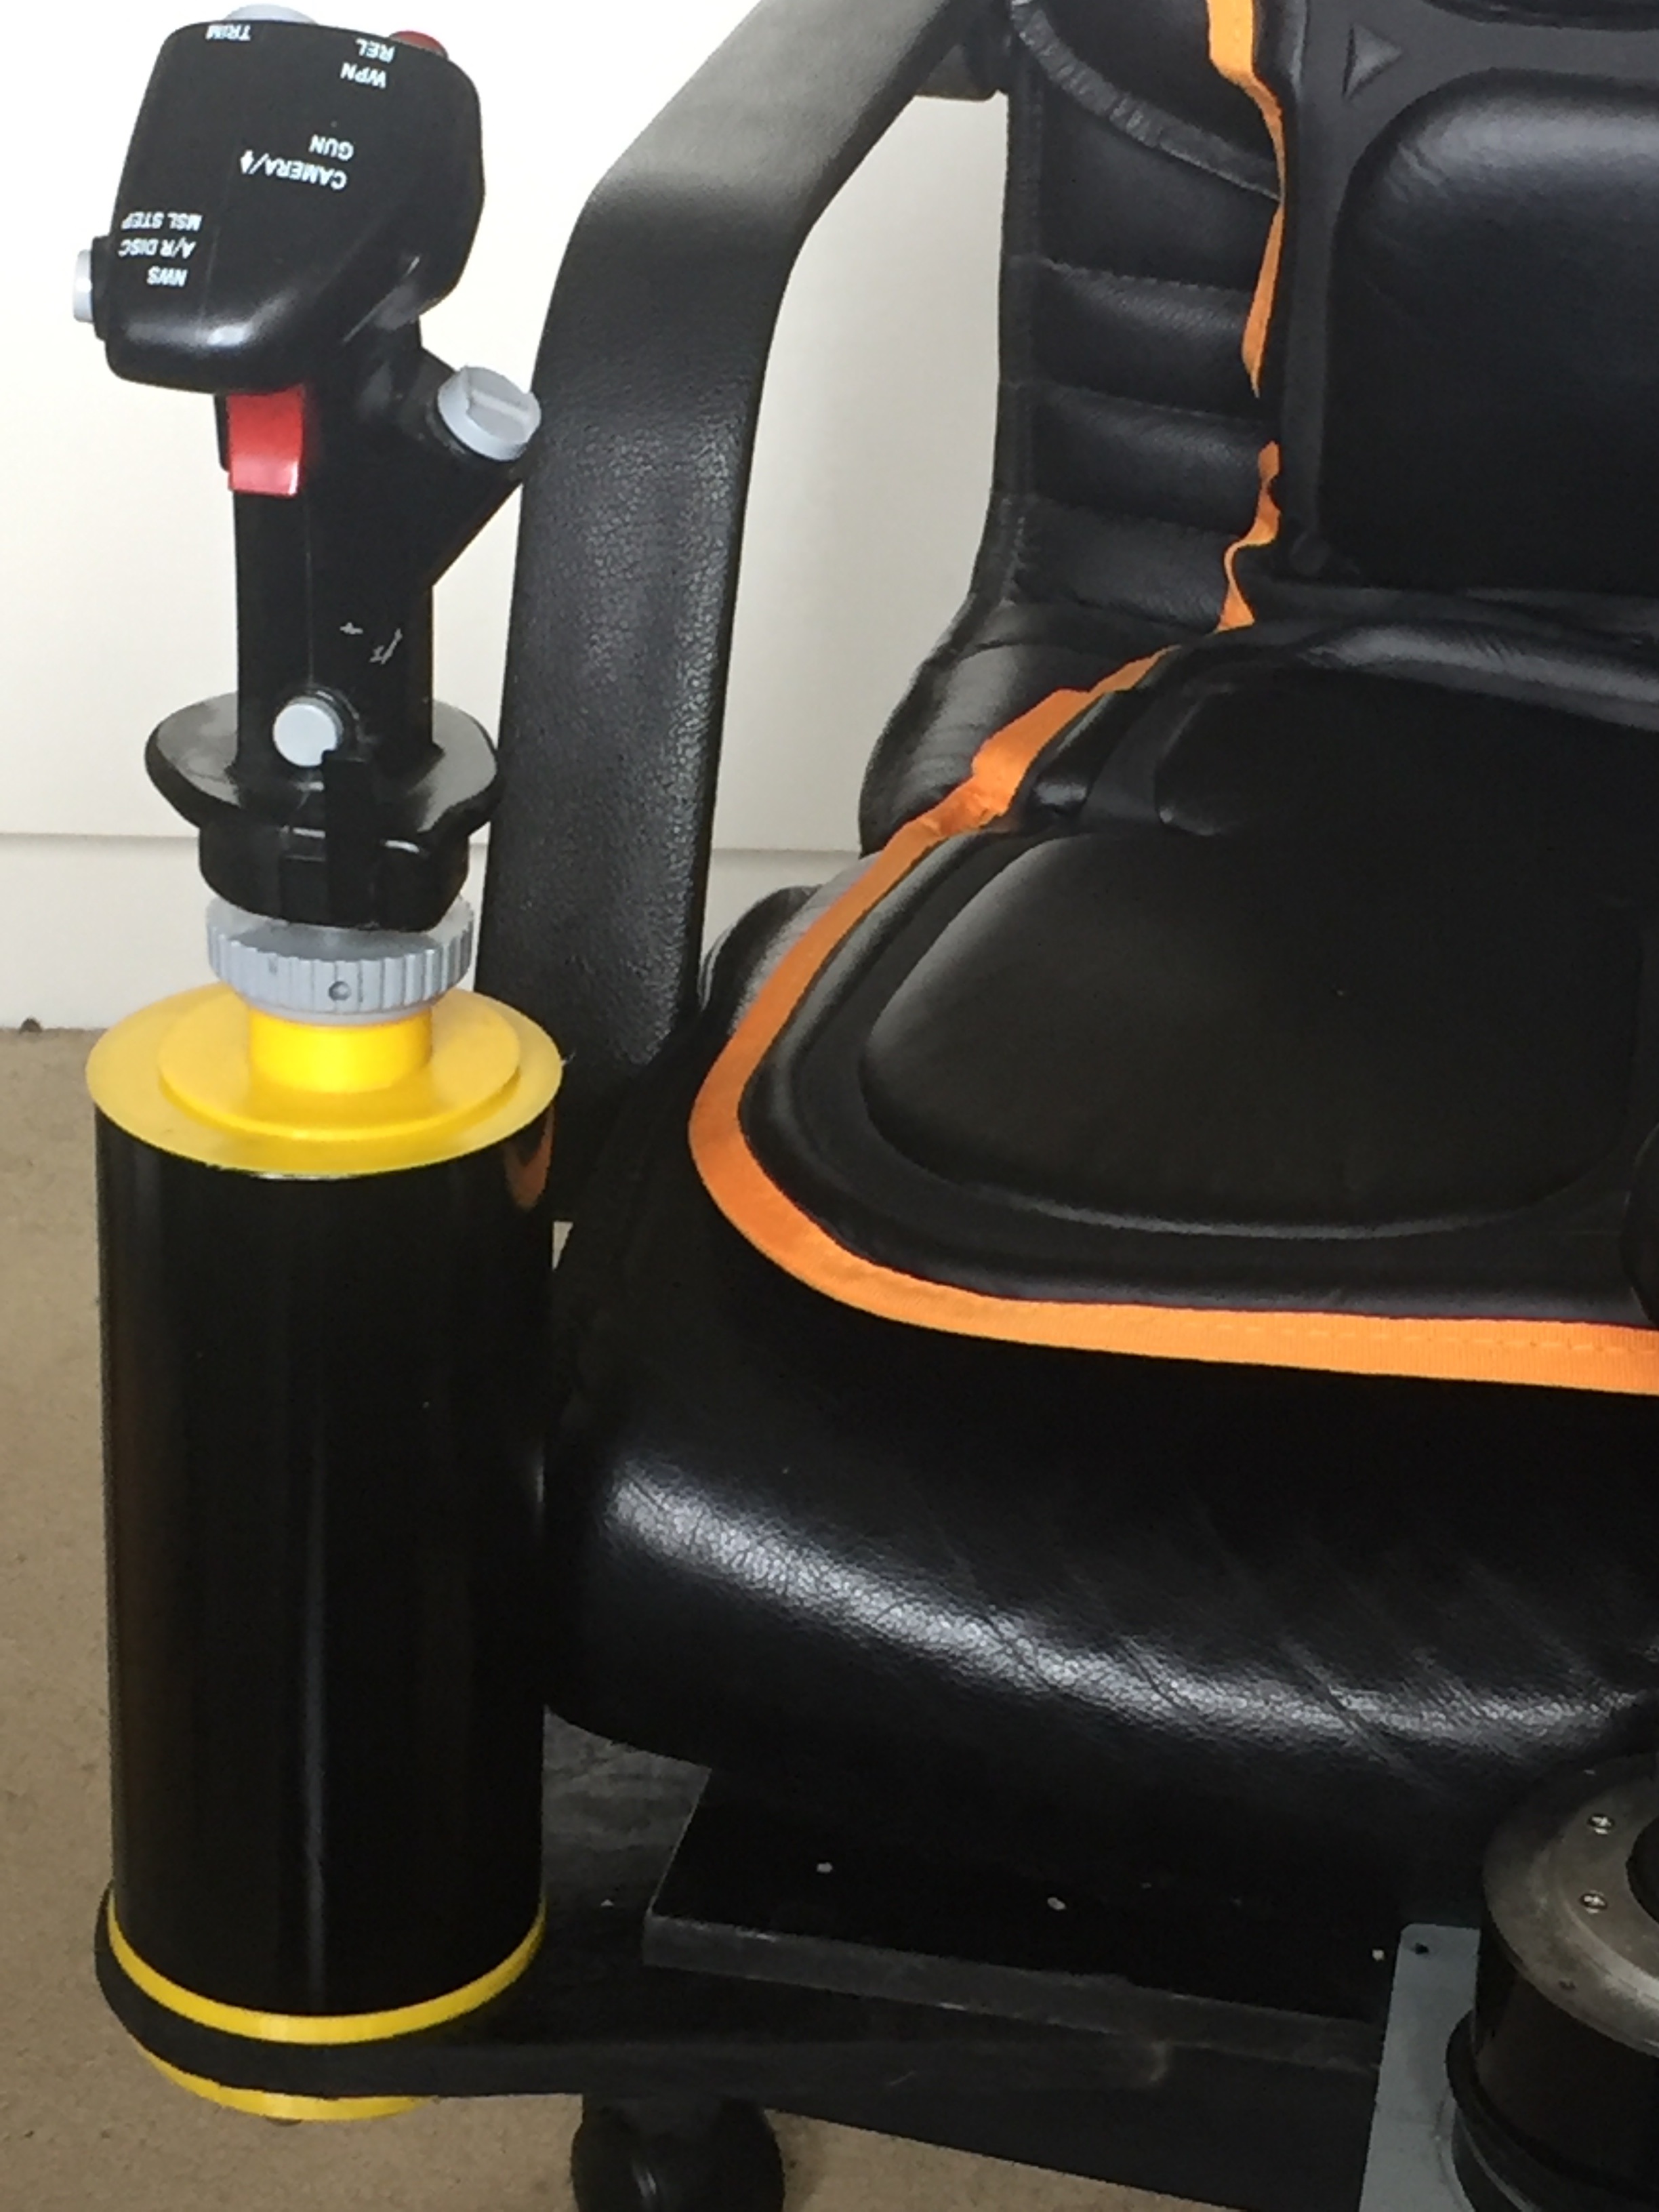
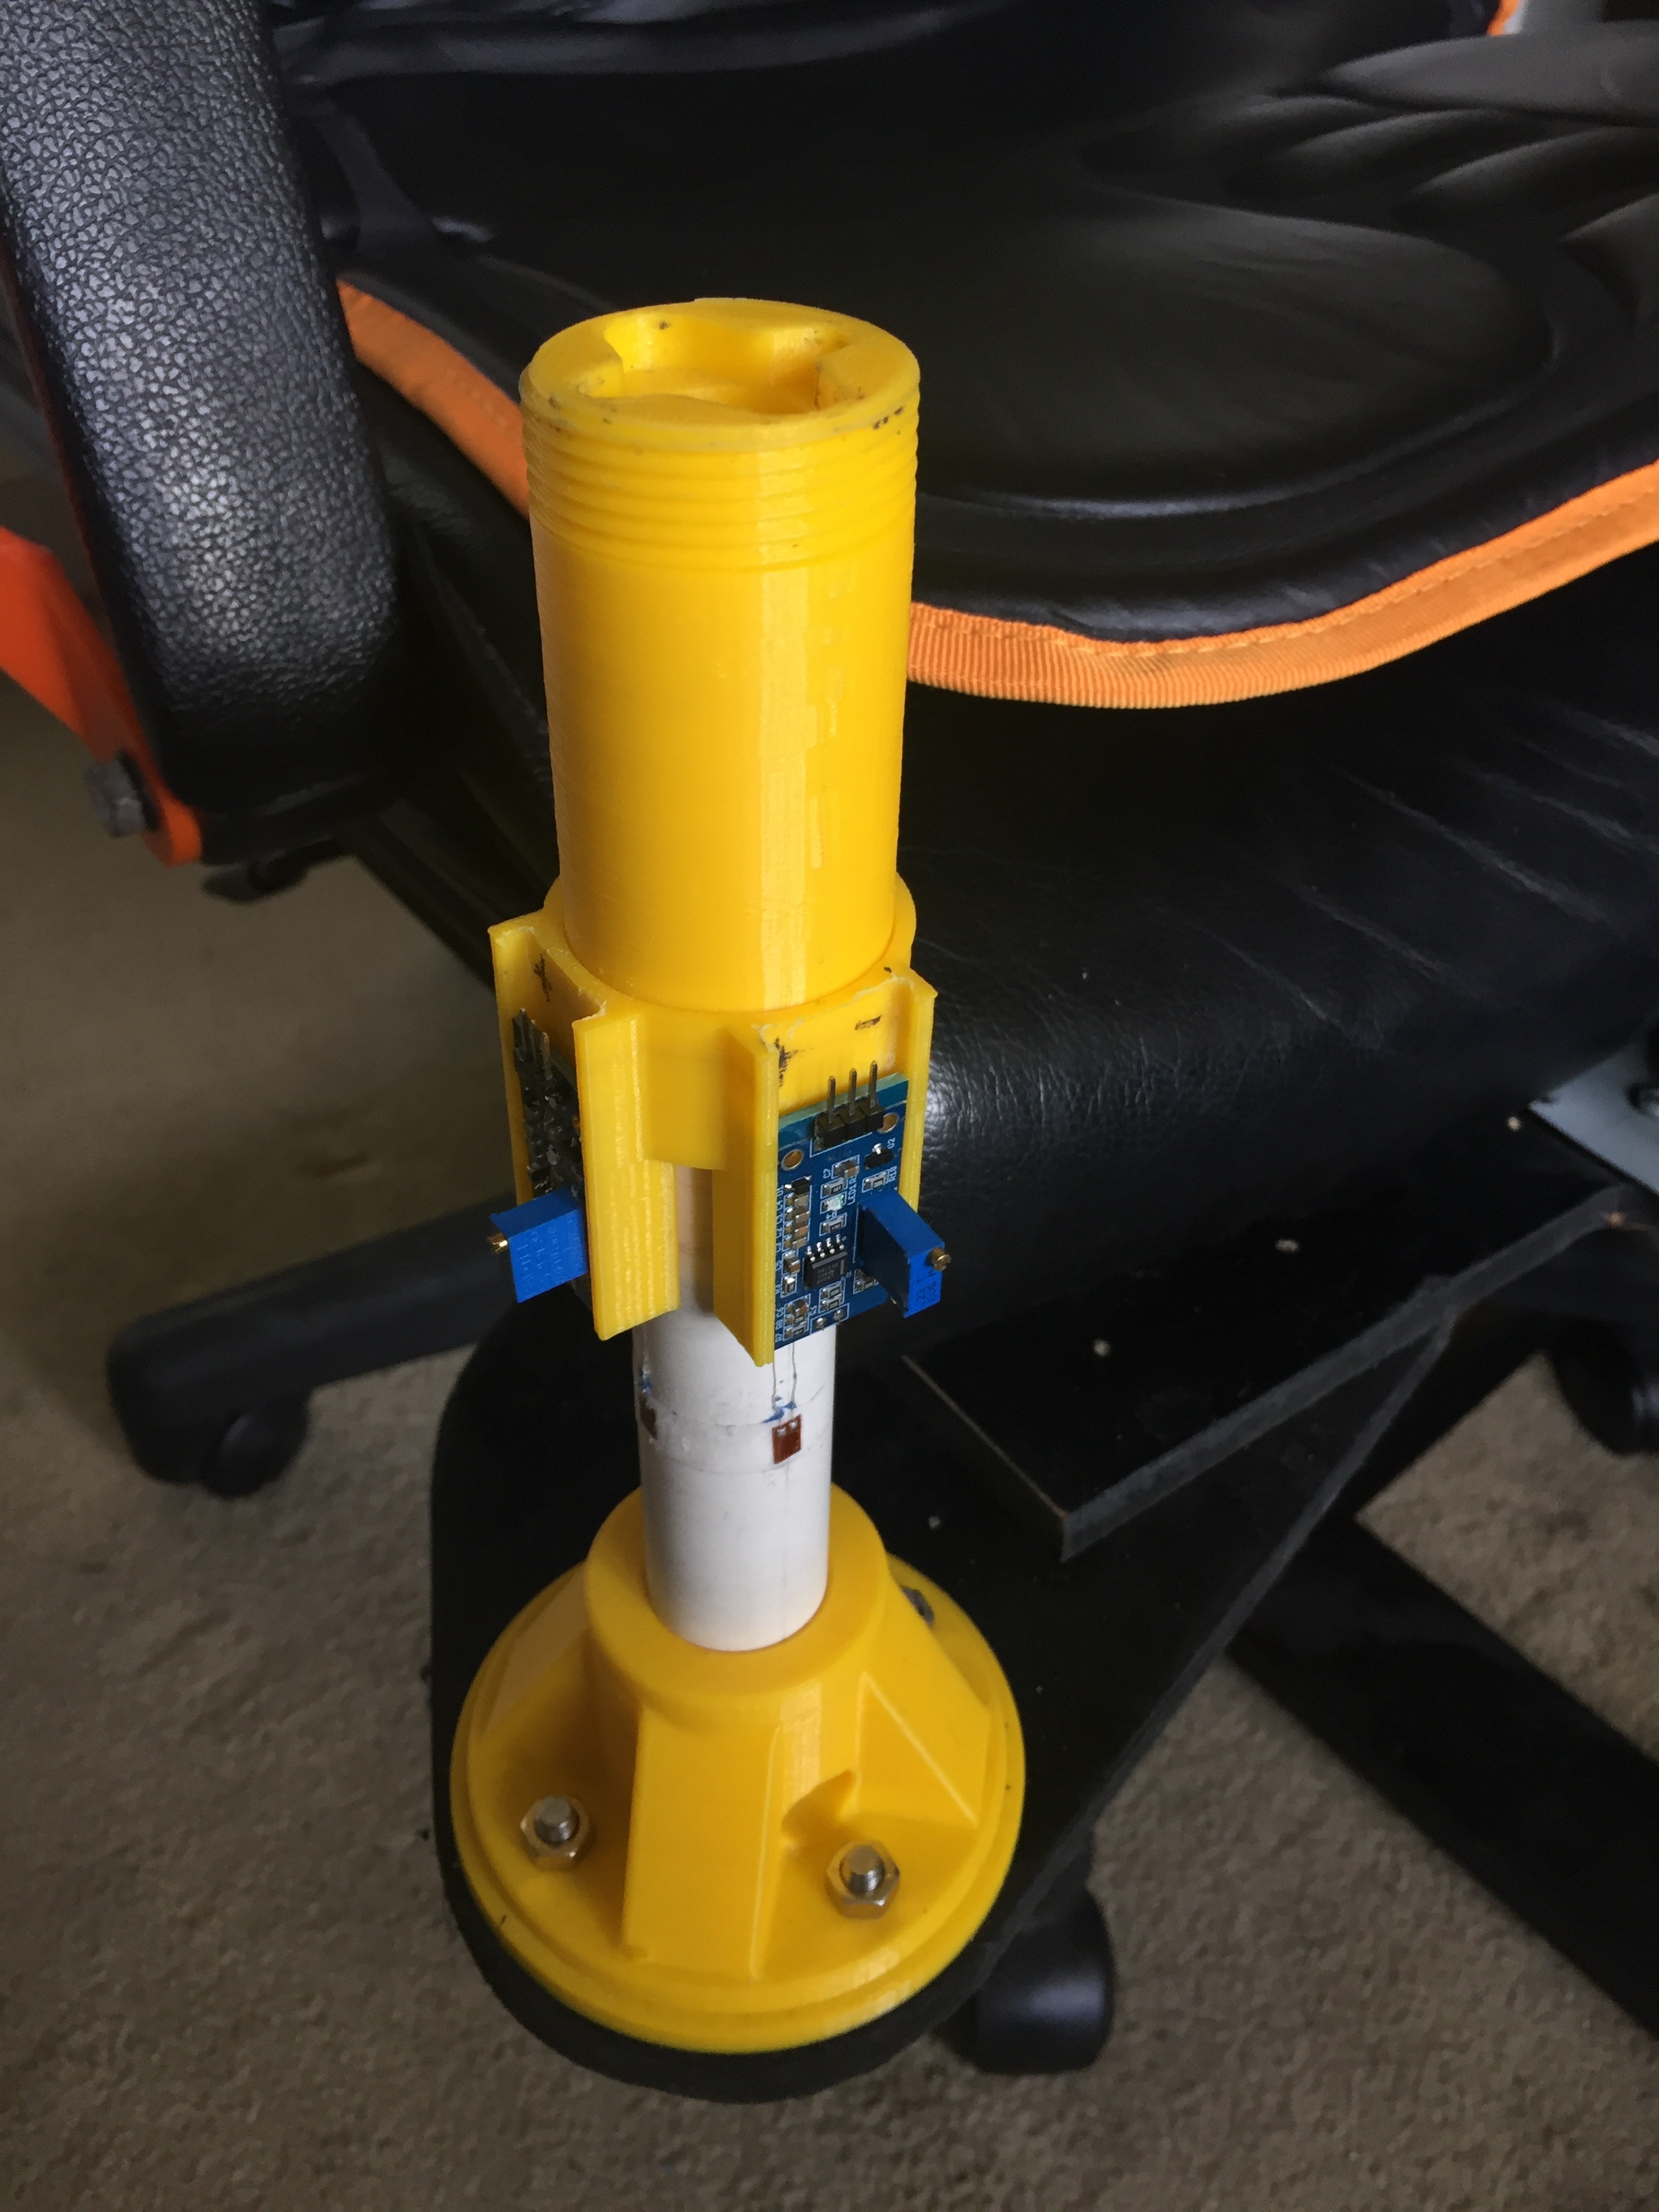
Terry Dactil replied to Terry Dactil's topic in Thrustmaster
Apologies to those that had a problem with the 3d printed replacement gimbal. All I can suggest is that you modify the Fusion360 file and make a new STL file with the clearances required. I did not have any problems, but then I did not use it for very long before abandoning it for a new project. As the F-16 module was now available, it was obvious that I needed a rigid side stick to go with it. I have completely removes all all of the base and replaced it with a length of plastic tubing and two strain gauges. (not quite finished yet, as programming the USB descriptor makes my brain hurt!)
-
Go to the topic below. It is exactly what you need.
-
You can also use batch files so clicking one icon on your desktop restores things to normal. Here are mine ... @echo off :: Shut down all the programs started by DCS Updater :: Use quotes if there are spaces in program name taskkill /IM "DCS Updater Utility.exe" /F taskkill /IM VoiceAttack.exe /F taskkill /IM OVGME.exe /F :: taskkill /IM joy.cpl /F taskkill /IM OculusClient.exe /F :: :: Move audio back from headphones to the computer :: Requires nircmd utility program installed "D:\DCS WORLD\UTILITIES\Windows Audio.bat" :: replacing ::C:\nircmd\nircmdc.exe setdefaultsounddevice "Acer X34" 1 ::pause :: See how it all went :: then cls exit .. and the other batch file that resets the audio to the desktop. I have made that separate now, but it can be included in the first batch file (Check device manager to find the name of the audio system on your desktop). ::@echo off C:\nircmd\nircmdc.exe setdefaultsounddevice "Acer X34" 1 :: exit