
Brother_Leb
-
Posts
92 -
Joined
-
Last visited
Content Type
Profiles
Forums
Events
Everything posted by Brother_Leb
-
Monstertech is probably the best and most straightforward option. But if you don't want to pay those prices, @Dragon 1-1's suggestion gets you basically the exact same thing. If you don't have access to a 3D printer (I don't), you can also purchase one of these on Amazon: https://www.amazon.com/gp/product/B07KJCC4Q7. It's very easy to customize (it's essentially a bag of parts you can build to suit your needs) and works well, provided you build it and set up correctly and tightly. Don't fear the reviews about sturdiness, just keep your physics lessons about center of gravity and levers in mind when you set yours up and you should be fine. (For example, my build for a simple F-18 setup using WW stuff is here. I'm guessing the speaker stand wouldn't be sturdy enough for you. My brother has the F-16EX stick though and is using the amazon-purchased desk mount for it, and he likes it). A Monstertech or Dragon's 3D printed version would probably be the most solid (short of resting it on cinderblocks or something), but the Monstertech is 3x the price and, as I said, I personally don't have access to a 3D printer so I couldn't do that. I also looked into building one myself using extrusion T-rail, but that was still more expensive than the Amazon one. If you've got the money though, I'm sure you could adapt the design from Dragon's post using t-rail and still save over buying a Monstertech one.
-
@Phantom711 Can you elaborate a little? I can see about 4 or 5 total plastic panels on the top of the throttle base (one across the top, one right of the throttle arms and two across the bottom). When you removed the screws, what happens? Does those plastic pieces come away from the base? Do the switches themselves prevent it? Are the screws just cosmetic?
-
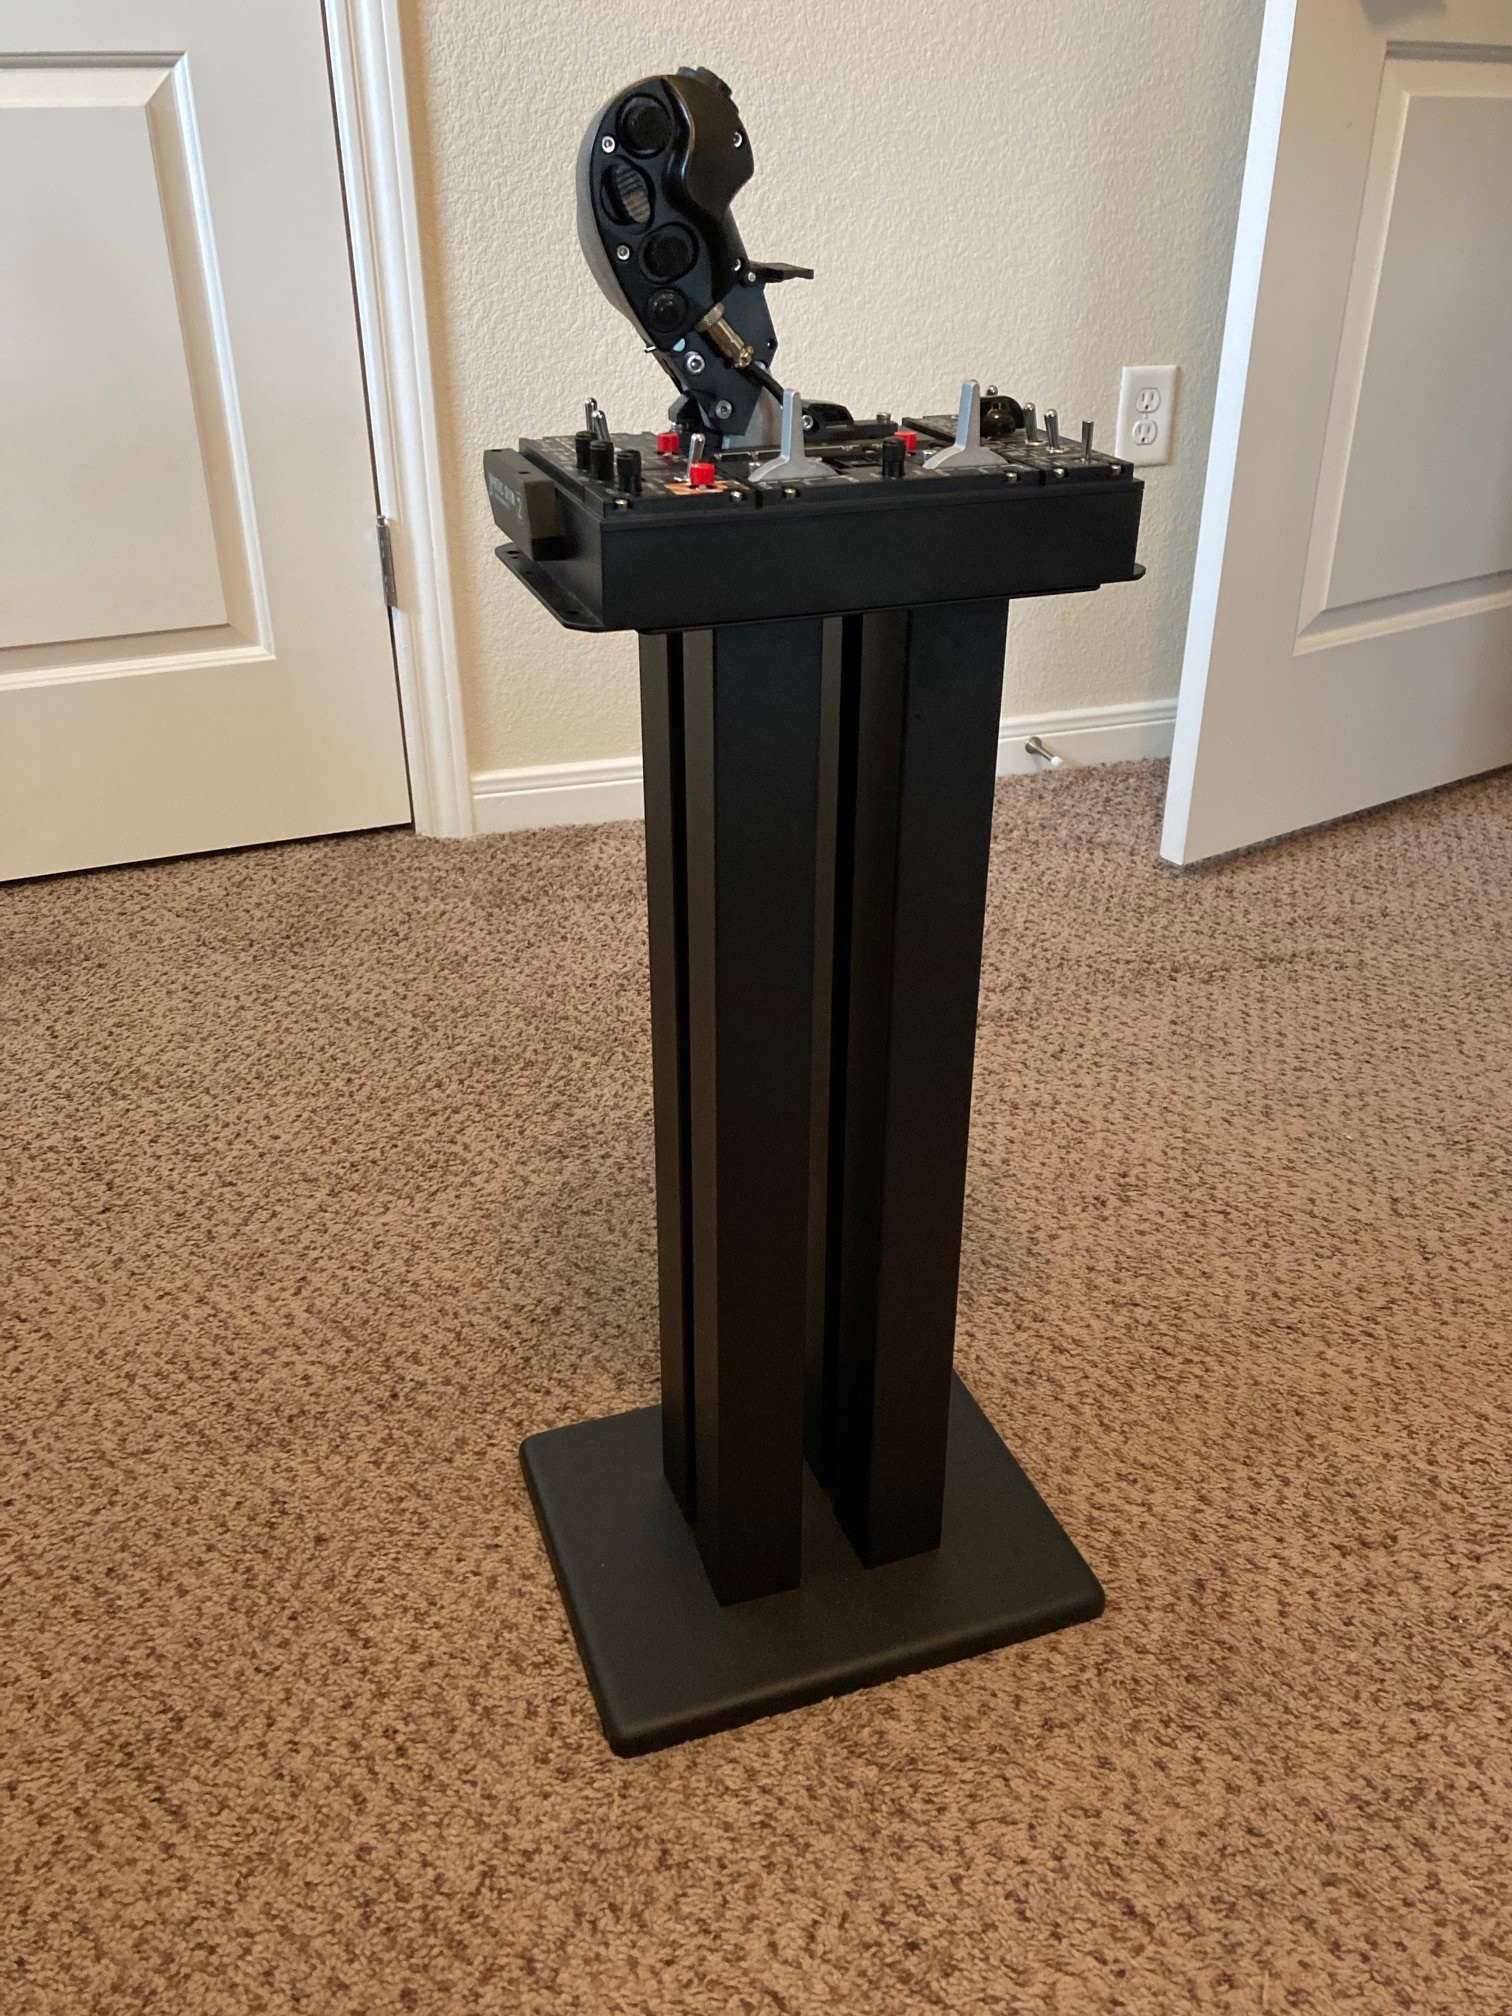
Hi fellow sim aviators! First off, I want to say that I'm inspired by everyone that builds sim cockpits in this community. What you guys do is incredible, and frankly, I'm jealous. BUT this post is for those who want a halfway option between having a HOTAS just sitting on your desk and having a full sim pit or even purchasing available mounting products (e.g. MonsterTech, etc.), which were out of my price range. I saved up and bought a WinWing Orion 2 to upgrade from my previous TM16000, but that left me with a limited budget for any mounting solutions or simpit setups. So my simple DIY build needed to meet these criteria for what I personally wanted: 1. elbow height throttle positioning 2. center mounted joystick attached to chair rather than desk (my desk has beveled edges which makes standard desk clamps tricky) 3. minimal construction or fabrication (I have no workshop and limited tools) 4. Removable (I work from home frequently, so I cannot have my sim gear set up all the time. My wife also thinks it's an eyesore, haha!). This also meant no permanent modifications to either desk or chair. 5. Inexpensive (the HOTAS itself was major expense at our current income, so I couldn't spend much more on the setup) I'm pretty happy with what I came up with and thought others who are on a budget might appreciate the ideas. I should also mention I did A LOT of scouring the internet and learning from other people. It would be impossible to credit all of them, but I learned a lot from other budget builds and they are easy to find on reddit and YouTube, if you want more inspiration. Throttle Stand: This is great because it's simple. I bought a single 24" stereo speaker stand off of amazon ($54.99 USD, https://www.amazon.com/dp/B076HX81WZ). It's rated for up to 100lbs and is plenty sturdy. My Orion 2 throttle sits on top nicely and the friction pads that came with the stand prevent it from sliding. If I wanted even more "hold" I'd get some 3M wall hanging velcro strips and attach them to the stand top and throttle bottom and voila! Joystick Center Chair Mount: Lots of guys like side mounted joysticks, but I'm a Hornet and Tomcat driver and I wanted mine in the middle. I also wanted it on my chair. I looked into making my own DIY Monstertech from extrusion T-rail but that got expensive quick. Luckily I found this cheap deskmount on amazon ($59.99 USD https://www.amazon.com/gp/product/B07KJCC4Q7) which is EXTREMELY modular. They just give you a bunch of bags of parts. It's great! (One caveat with this mount, many of the reviewers on amazon felt that it was not sturdy enough for the lateral force of X-axis joystick moves. My rearrangement mitigates a lot of that, but standard desk mount buyers beware!) Looking at the pieces of the mount, I was confident I could invert the standard design to clamp to my chair (see below): All I needed was a sturdy flat surface underneath the front of my chair to attach it to. At my local hardware store I bought 2X 12" polished zinc mending plates (roughly $5 USD/per) a piece of sanded 2 by 1/2" board (the piece I got was about 6' long, but it was scrap that I bought for $1 USD in their scrap wood bin). I also bought a package of L-brackets (roughly $4 USD) and the appropriate screws (I used a bolt with a wing nut that passed easily through one of the pre-cut holes in the mending plate and the L-bracket). After careful measuring, I cut the board at the length I needed, attached the hardware and then slid the ends of the mending plates between the chair seat and where the arms attach to the seat and tightened the chairs arms back on. (This is specific to my desk chair, a Secret Labs TITAN XL, and actually one of the reasons other DIY mounts I'd researched wouldn't have worked for me, because my chair was different than theirs). I added some foam corner covers (found in the plumbing and piping section of the hardware store) to protect myself from the pointy corners and screws. Now I had the solid mounting surface I could attach the clamp to! The additional clamps in this picture were purchased later to add more stability...which hasn't been a problem, but I wanted a solution ready to go if it was. These clamps only kinda achieve their intended goal (partly because they don't clamp flush with the board because of how they are hooking to the underside of the chair), and from my observations so far they are probably not necessary. They were $18.99 USD for a pack of 2 on amazon. I've been using the whole set up for about month now and it's working great! I occasionally have to tighten the screws on the mount I bought from amazon and adjust the tension of the clamp, but other than that, I just set my throttle next to my chair, pop the joystick on and fly! One obvious and easy adjustment I could see others making to this build would be to use a hacksaw to saw off the extra length of rail (sticking forward in the picture above) on the mount because they do get in the way a bit. I've chosen not to because I want to be able to reconfigure the mount in the future potentially (a benefit of this mount). When I'm not using it, I just move the speaker stand off to the side and clamp the joystick to the windowsill next to my desk. You could also clamp it to the side of the desk (again, damn those beveled edges on mine) or to a nearby shelf. Easy to set up, easy to put away. Anyhow, I hope that is helpful for folks on a budget. You can build a decent setup without breaking the bank. My total cost (HOTAS not included) was a little under $150 USD. Happy flying!

-

Aligning AB detent and Throttle Calibration (How to)
Brother_Leb replied to MustangSally's topic in Winwing
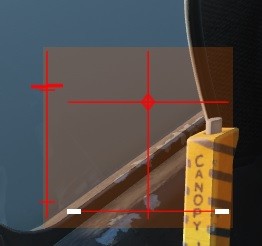
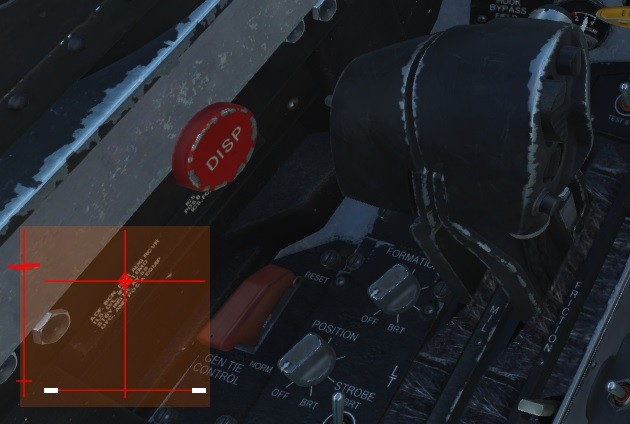
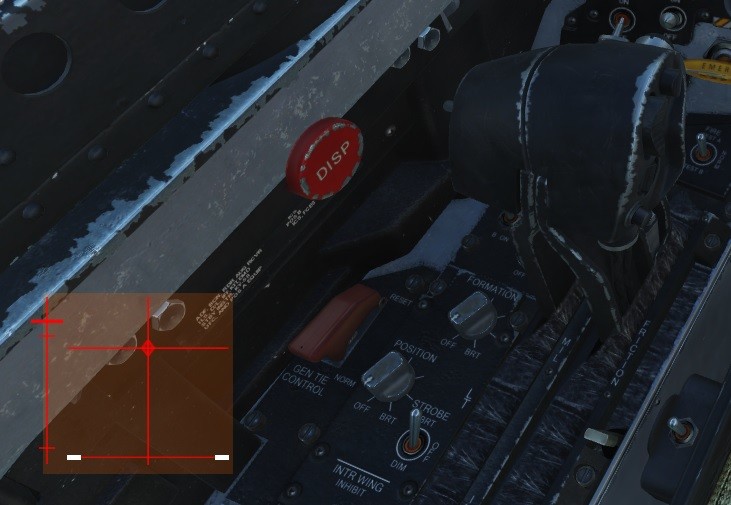
Well, here's what it looks like when I have the throttle set to 84%: Here's what I get when I go based on the AB always on method (I'll give the numbers so you can check my math if you want): RX: 16257 -> 1 - (16257/65535) = 0.75193408102 rounding that is 75% RY: 16230 -> 1- (16230/65535) = 0.75234607461 rounding that is 75% And when I set the throttle to 75% I get this: The thottle position marker is slightly below the AB line. So I guess I was confused before. Nevertheless, it's off. Realizing that I had an AB ratio set when I tried it the first time, I recalibrated in SimAppPro, set the AB ratio to 100% before taking down any numbers and repeated the process: RX: 16763 -> 1 - (16741/65535) = 0.74454871442 rounding that is 74% RY: 16563 -> 1- (16910/65535) = 0.74196993972 rounding that is 74% Setting the the AB ratio in SimApp pro to 74% after all that, I get this: Which is nearly identical to when I had it set for 82%. . . So now I'm just confused. This is the throttle position it takes to get the cans to light by looking at them at 7830 ASL (which is quite a ways through the detent): So, I guess at the end of it all @EXPENDTripwire I suppose it doesn't matter too much to me one way or the other, I'll just set it to my preference, BUT is it normal to have to push through the detent so far to select AB? Thanks for even caring!
-
Not a bad idea, but I'd guess the folks that really would want that are already interested in making their own. Put another way, I'd expect that to be an aftermarket solution. Having said that, the Orion 2 appears to be much more modular in design than the Orion 1 and you have easy access to the hex screws that hold the various panels onto the Throttle base. WW additionally provides you with the hex key needed to remove those screws. So, you could conceivably remove and replace the panels on the throttle base and from the design it appears that WW intends that to be possible. Whether they would provide alternate panels...well, we'll have to wait and see. I should clarify, you can't adjust the switches themselves or their positioning (unless you are willing to do some electrical engineering), only the label panels that surround them. I have not personally tried this because I'm happy with the way things are and I'm not great with electrical work. I also don't want to mess anything up, haha.
-
@HILOK Thanks for the explanation. Yes, you should be able to change the labeling if you wanted, though you'd probably have to custom fab the pieces (if you have access to a 3D printer, it would probably be easy). As for the throttle postioning, it won't help you with the Orion 2 ergonomics, but if you have an Orion 1, I assume you know about or perhaps even own these custom, aftermarket throttle arms? https://simstix.com/products/winwing-orion-angled-throttle-plates
-
I said I was going to provide pictures once mine arrived and I forgot to do that. Sorry. That said, I don't think pictures are necessary, as it's clear that WW is still using the same manufactured parts for both the F/A-18 throttle grips and throttle arms (you can see the old detent protrusions on the throttle arms from the way the Orion 1 did the AB detent). So, since the parts have not been updated (the fab for the Throttle base and the addition of the plastic finger lift kit are the upgrades, the rest of the build is identical from what I can tell), the ergonomic issue is unchanged. After owning it for two months and flying with it a lot, I stand by what I said previously, it doesn't bother me at all. BUT, I recognize it bothers some folks here and it IS NOT strictly identical to the real hornet throttle grip angle. I respect those concerns even though I don't share them. For you guys concerned about the ergonomics, you'll want to stick with the Orion 1 and buy @01G8R's aftermarket throttle arms. Note however, they won't work with WW's new finger lift kit. Maybe 01G8R and his company will come up with a clever 3D printed alternative, but for now, that's the tradeoff you'll have to make.
-
Aligning AB detent and Throttle Calibration (How to)
Brother_Leb replied to MustangSally's topic in Winwing
I thought this was very clever (and thank you for posting) and tried it. got 75%, but that did not match the behavior of the AB sounds, effects by watching the engines, or the thrust the plane appeared to be getting (using this method the plane entered AB long before the detent). Now, I freely admit I may have done it wrong, but nevertheless, I went back to the original method from the OP (with some tweaking), which puts me around 83%. That's a really big swing and I'm curious if ppl who know the Hornet engineering (or ED's modeling) better might know why that would be? To clarify, why would there be such a big discrepancy between modeled throttle position in cockpit and engine behavior? -
Not sure exactly what you mean, but I assume you are referring to how all the switch labels and backing appear modular. I haven't personally tried removing them or changing their arrangement, but the hex screws are visible and accessible from the top of the throttle base so conceivably you could remove them (you'd need the right hex key, I'd guess it's metric and most of them look pretty small, 1-3mm I'd guess). I would guess it has more to do with streamlining manufacturing and construction QA and for easier repair and access for the user rather than for swapping out panels, but maybe they intend them to be modular or have that option down the road? So, shorter answer: Yes, I think so, but I haven't tried or seen a reason why you'd want to beyond repair wiring or something (which is beyond my competencies). EDIT: Looked a little more closely and there are 2 different sizes of hex screw. Some look to be the same size as the hex screws on the new removeable AB detent fitting. The others are smaller but the smallest hex key provided with the unit fits them. So you could certainly remove them if you wanted to. Still not sure why you would, but you could.
-
Nooo! Bummer dude. I hope they attempt redelivery tomorrow.
-
I don't have an F-16 throttle myself but the WW instructions are admittedly confusing. Some friendly advice: Help others help you by giving a bit more information. Can you put all the parts you have on a light colored surface and photo them and upload the picture to this thread so people can see what you have? Have you experimented with putting it together? What went wrong? Where (specifically) are you confused or running into problems? If you give a bit more info, I expect you'll get a bit more help.
-
@Phantom711Makes excellent points. I would only add this as a general thought: The Super Taurus is clearly the superior product, BUT not by that much AND it is also a more specific product (namely for the F/A-18). That means it will be perfect for a Hornet (and likely the A-10, as well), but less so for other air frames (esp. the F-16). And, as Phantom said, it's a lot bigger and heavier (which means higher shipping costs) than an Orion 2 (which is still about the size and weight of a university science text book). So, as far as quality goes, the Super Taurus can't be beat, but the Orion 2 is not far off, so it depends on your budget (Super Taurus is probably twice the cost, once you factor in shipping) and what airframes you intend to be flying. I also have an Orion 2 and have no complaints thus far. All reported problems I've seen (with one exception I can think of) have been resolvable be the user and are typically related to the screws on the new finger lift kit (how tight/loose they are, general alignment, etc.).
-
Based on what I've seen on other forum posts, I believe that is normal and indicates that the unit is communicating properly with the computer. There may be a way to adjust a lua file somewhere that turns this off, but that's above my paygrade. I've had my Orion 2 for about a month and that light has consistently blinked when it's plugged into USB power. I've had no problems yet. I think it's normal.
-
Also, make sure you are running the program as an admin. It could be that Windows is waiting for you to grant permissions to run the app. Whenever I run it, an admin dialog pops up asking if I want to let the app make changes to my device and I have to click "yes" before it will run.
-
As I've said before, overall I'm quite happy with Orion 2, etc. One gripe I do have, however, is the rotary knobs/switches. Near as I can tell, you can only assign one to actually be a rotary knob at a time in SimApp Pro because they all assign to the same axis (Rz). I'd love to be proven wrong about this and I'm far from an expert, but it seems like you have to choose 1 of the 3 to work as as rotary and the other two are just switches. Is that true?
-
Most folks do not use SimApp Pro. There's a variety of reasons for this but the biggest one is that it is a pretty big resource drain when the app is running. This is a bummer and everyone wishes WW would fix that. Hopefully they will. Since you can map everything in DCS though, it's totally unnecessary to use/run most of the time. Make sure you calibrated your gear in SimApp Pro initially though. After that you can leave it off, but most troubleshooting starts with making sure it's calibrated. SimApp Pro is also the only way to set your AB detent to match both sim and gear.
-
Best guess for you guys is probably 3-4 weeks unfortunately. Worth the wait tho, IMO.
-
Yes, I think he was asking what you map to the toggle. I had the same question. I can map either the rotate or the push/stow, but not both and I think you need both, right? I have take to using that switch for something else, but I was curious how you would do it if you wanted to.
-
Aligning AB detent and Throttle Calibration (How to)
Brother_Leb replied to MustangSally's topic in Winwing
Thanks all. I wasn't having an issue. Just curious if @Nuggetz had solved some issue that hadn't been described yet. If he had, I figured it would be helpful if he shared it. I find all the discussion on these help threads useful when I'm trouble shooting. Followed @MustangSally's instructions (thank you) + some additional testing/tweaking, but I've got my AB set now (don't recall off the top of my head right now, but I think it was around 80%). -
Aligning AB detent and Throttle Calibration (How to)
Brother_Leb replied to MustangSally's topic in Winwing
@NuggetzWould you mind sharing how you resolved your issue? I'm sure it could help others out. -
@rob10 Do you recall if there's a button or option in the software needed to confirm a change to the hardware settings or does it just do it? Put another way, if I open SimAppPro, change the pulse length, and then exit the software, do I need to do anything else (assuming I configured DCS controls correctly)?
-
Huh, that sucks. I'm surprised that neither company provides extra hardware that is compatible. Seems like an oversight. Were you able to get what you needed at hardware store?
-
@EXPENDTripwireSimilar to other folks with an Orion 2, mine is working just fine so far. No noises like in the video. It's not perfectly silent, but there's only a slight clicking noise. I haven't noticed any of the creaking sounds you can hear in his video, but I do wonder if a bit of grease might alleviate that. I'm still fine-tuning my AB calibration, etc. but the hardware works as expected. As @Dragon 1-1 said, it's not perfect, but I'm happy with it so far. I do feel bad for the OP. It seems like those finger lift kits would be easy to produce. Hopefully WW does a make-good and sends him a new one. One other note, as others have noticed with both Orion 1 and 2, one throttle arm (the left one for me) was scraping ever so slightly right out of the box and this was exacerbated by the finger lift kit. It was a simple matter of adjusting a few bolts here and there to solve this, however. So, it's not a defect but it is a known issue.
-
@paschonYeah, saw that. Sorry you are having a bad experience and that you are unhappy with the product. I'm not a WW rep or anything, just a dude, so all I can say is "bummer, sorry."
-
Yes, in fact. In the FedEx tracking data, the expanded shipping history included receipt by FedEx from WW, processing in Chengdu (including a minor delay to one of the four pieces), Guangzhou, Sennan, and eventually routing through Anchorage, AK and Memphis, TN before arriving at the "destination facility" (and another minor delay) for truck delivery to me. I specifically signed up for updates, but I'm pretty sure the tracking number logs that stuff regardless and should be accessible using their website. Don't know how "meaningful" any of that is, but there was stuff and I saw it before delivery.