FoxDelta
-
Posts
468 -
Joined
-
Last visited
Content Type
Profiles
Forums
Events
Everything posted by FoxDelta
-
SteamVR Beta 1.7.10 Motion Smoothing Changes
FoxDelta replied to Twwhitey's topic in Virtual Reality
just tried it. yes motion smoothing is ok again but still not as good as the oculus one. too much warping imo. regarding the actual performance troubles i am having when coming close to F18s eg parked on the carrier, which got worse few patches ago, i can t see any improvement here. i assume this is an DCS issue. INDEX user -
F-18C jettison selector switch
FoxDelta replied to Sierra99's topic in PC Hardware and Related Software
BLUE73 has published his files https://forums.eagle.ru/showthread.php?t=239718 -
VR Shaders mod for better VR experience
FoxDelta replied to Kegetys's topic in Utility/Program Mods for DCS World
this MOD is so much improving my performance on the index i can thank u enough. just a quick question. several players do see fps cut to 1/3 when coming close to parked F18 F14 s, with your insight in how dcs renders, do u have any idea what can cause this or a way to improve it many thx in advance -
u can use an external cable hose. as the real thing has. might look relly cool and is closer to the original:smilewink: have a look here https://forums.eagle.ru/showpost.php?p=3564627&postcount=48 .
-
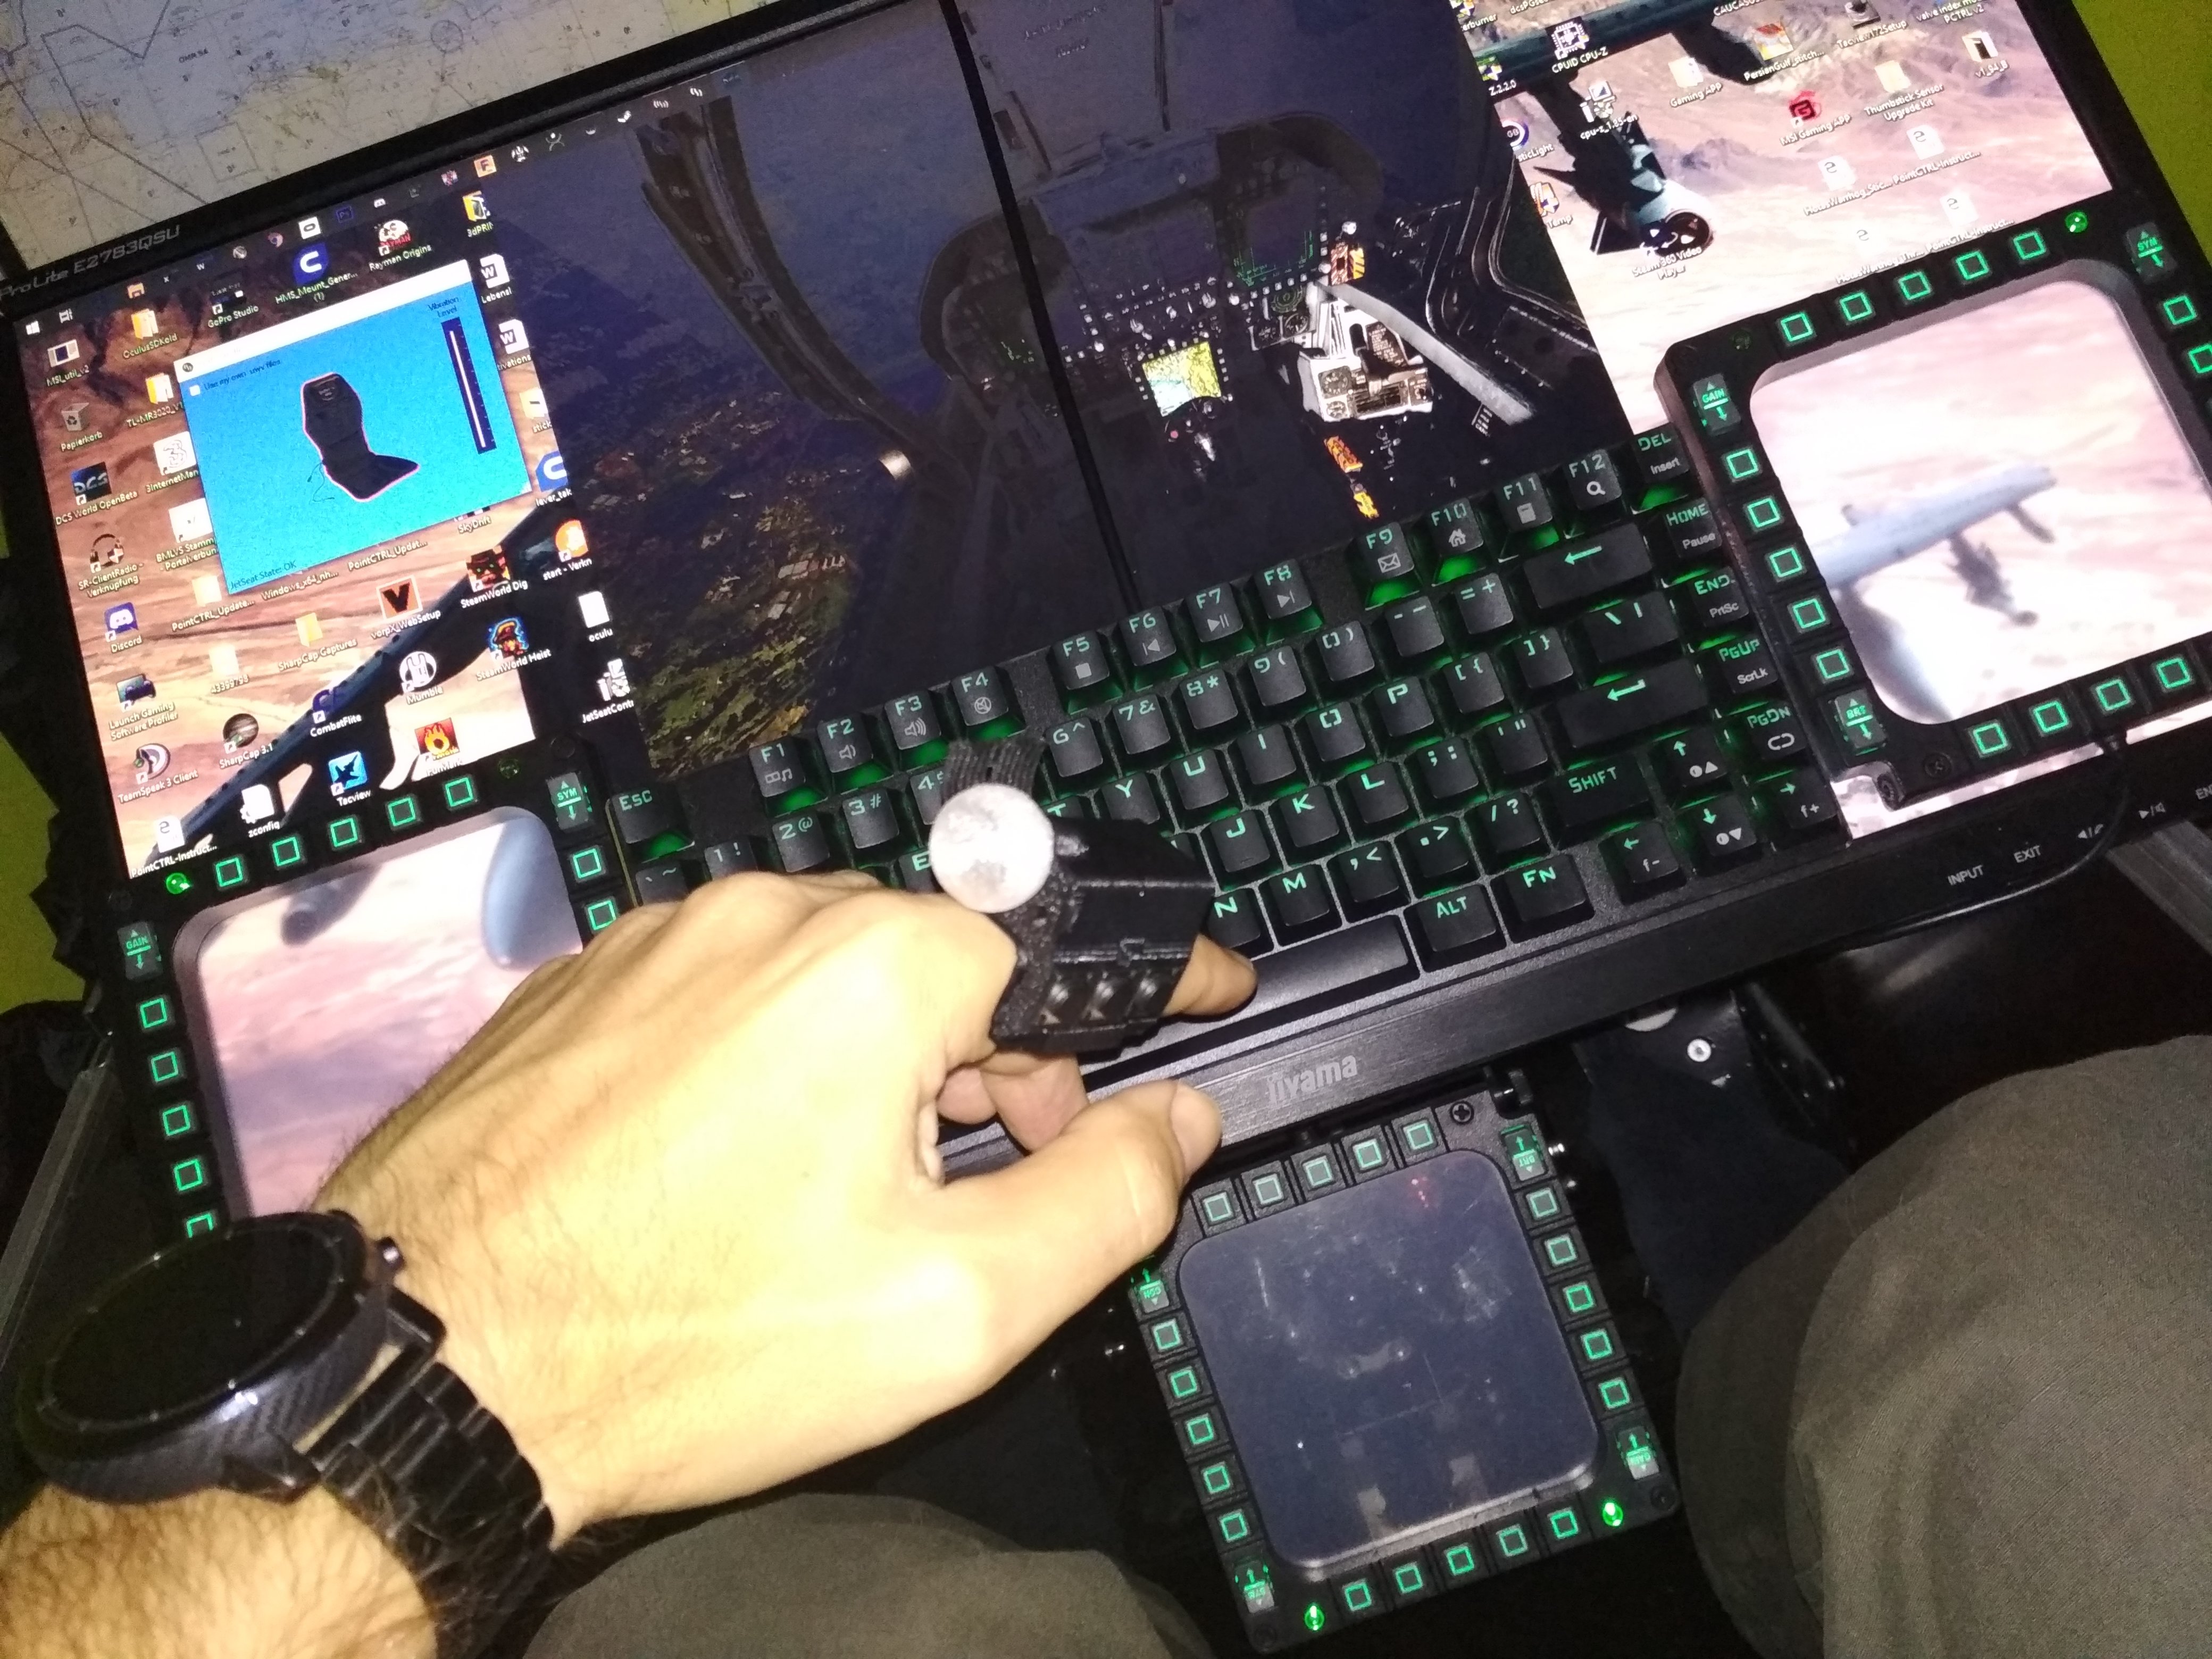
PointCTRL - Finger Mounted VR Controller
FoxDelta replied to MilesD's topic in PC Hardware and Related Software
Miles has changed the type of the chargers, the pdf is outdated. join the discord channel to get more infos about. your charger should be good to go https://discord.gg/fKgdxP -
added Fingerlift.stls without the "F18C Hornet" lettering
-
files added
-
hi arturo! good to hear from u again, how is your 3d printing going. thx for the praise:music_whistling:
-
PointCTRL - Finger Mounted VR Controller
FoxDelta replied to MilesD's topic in PC Hardware and Related Software
Miles u are a real hero for me, u could have kept it for your own but are sharing it with the community, which does need so much work and TIME. so inspiring. don t waste your time sending me the STL, i have already drawn it and combined with the bubble, this should be easy to print. i will do a filament change when printing the endversion at apprx 2.5mm(height) black to transparent to provide a good face see also the video . pctrl bulbs.zip
-
PointCTRL - Finger Mounted VR Controller
FoxDelta replied to MilesD's topic in PC Hardware and Related Software
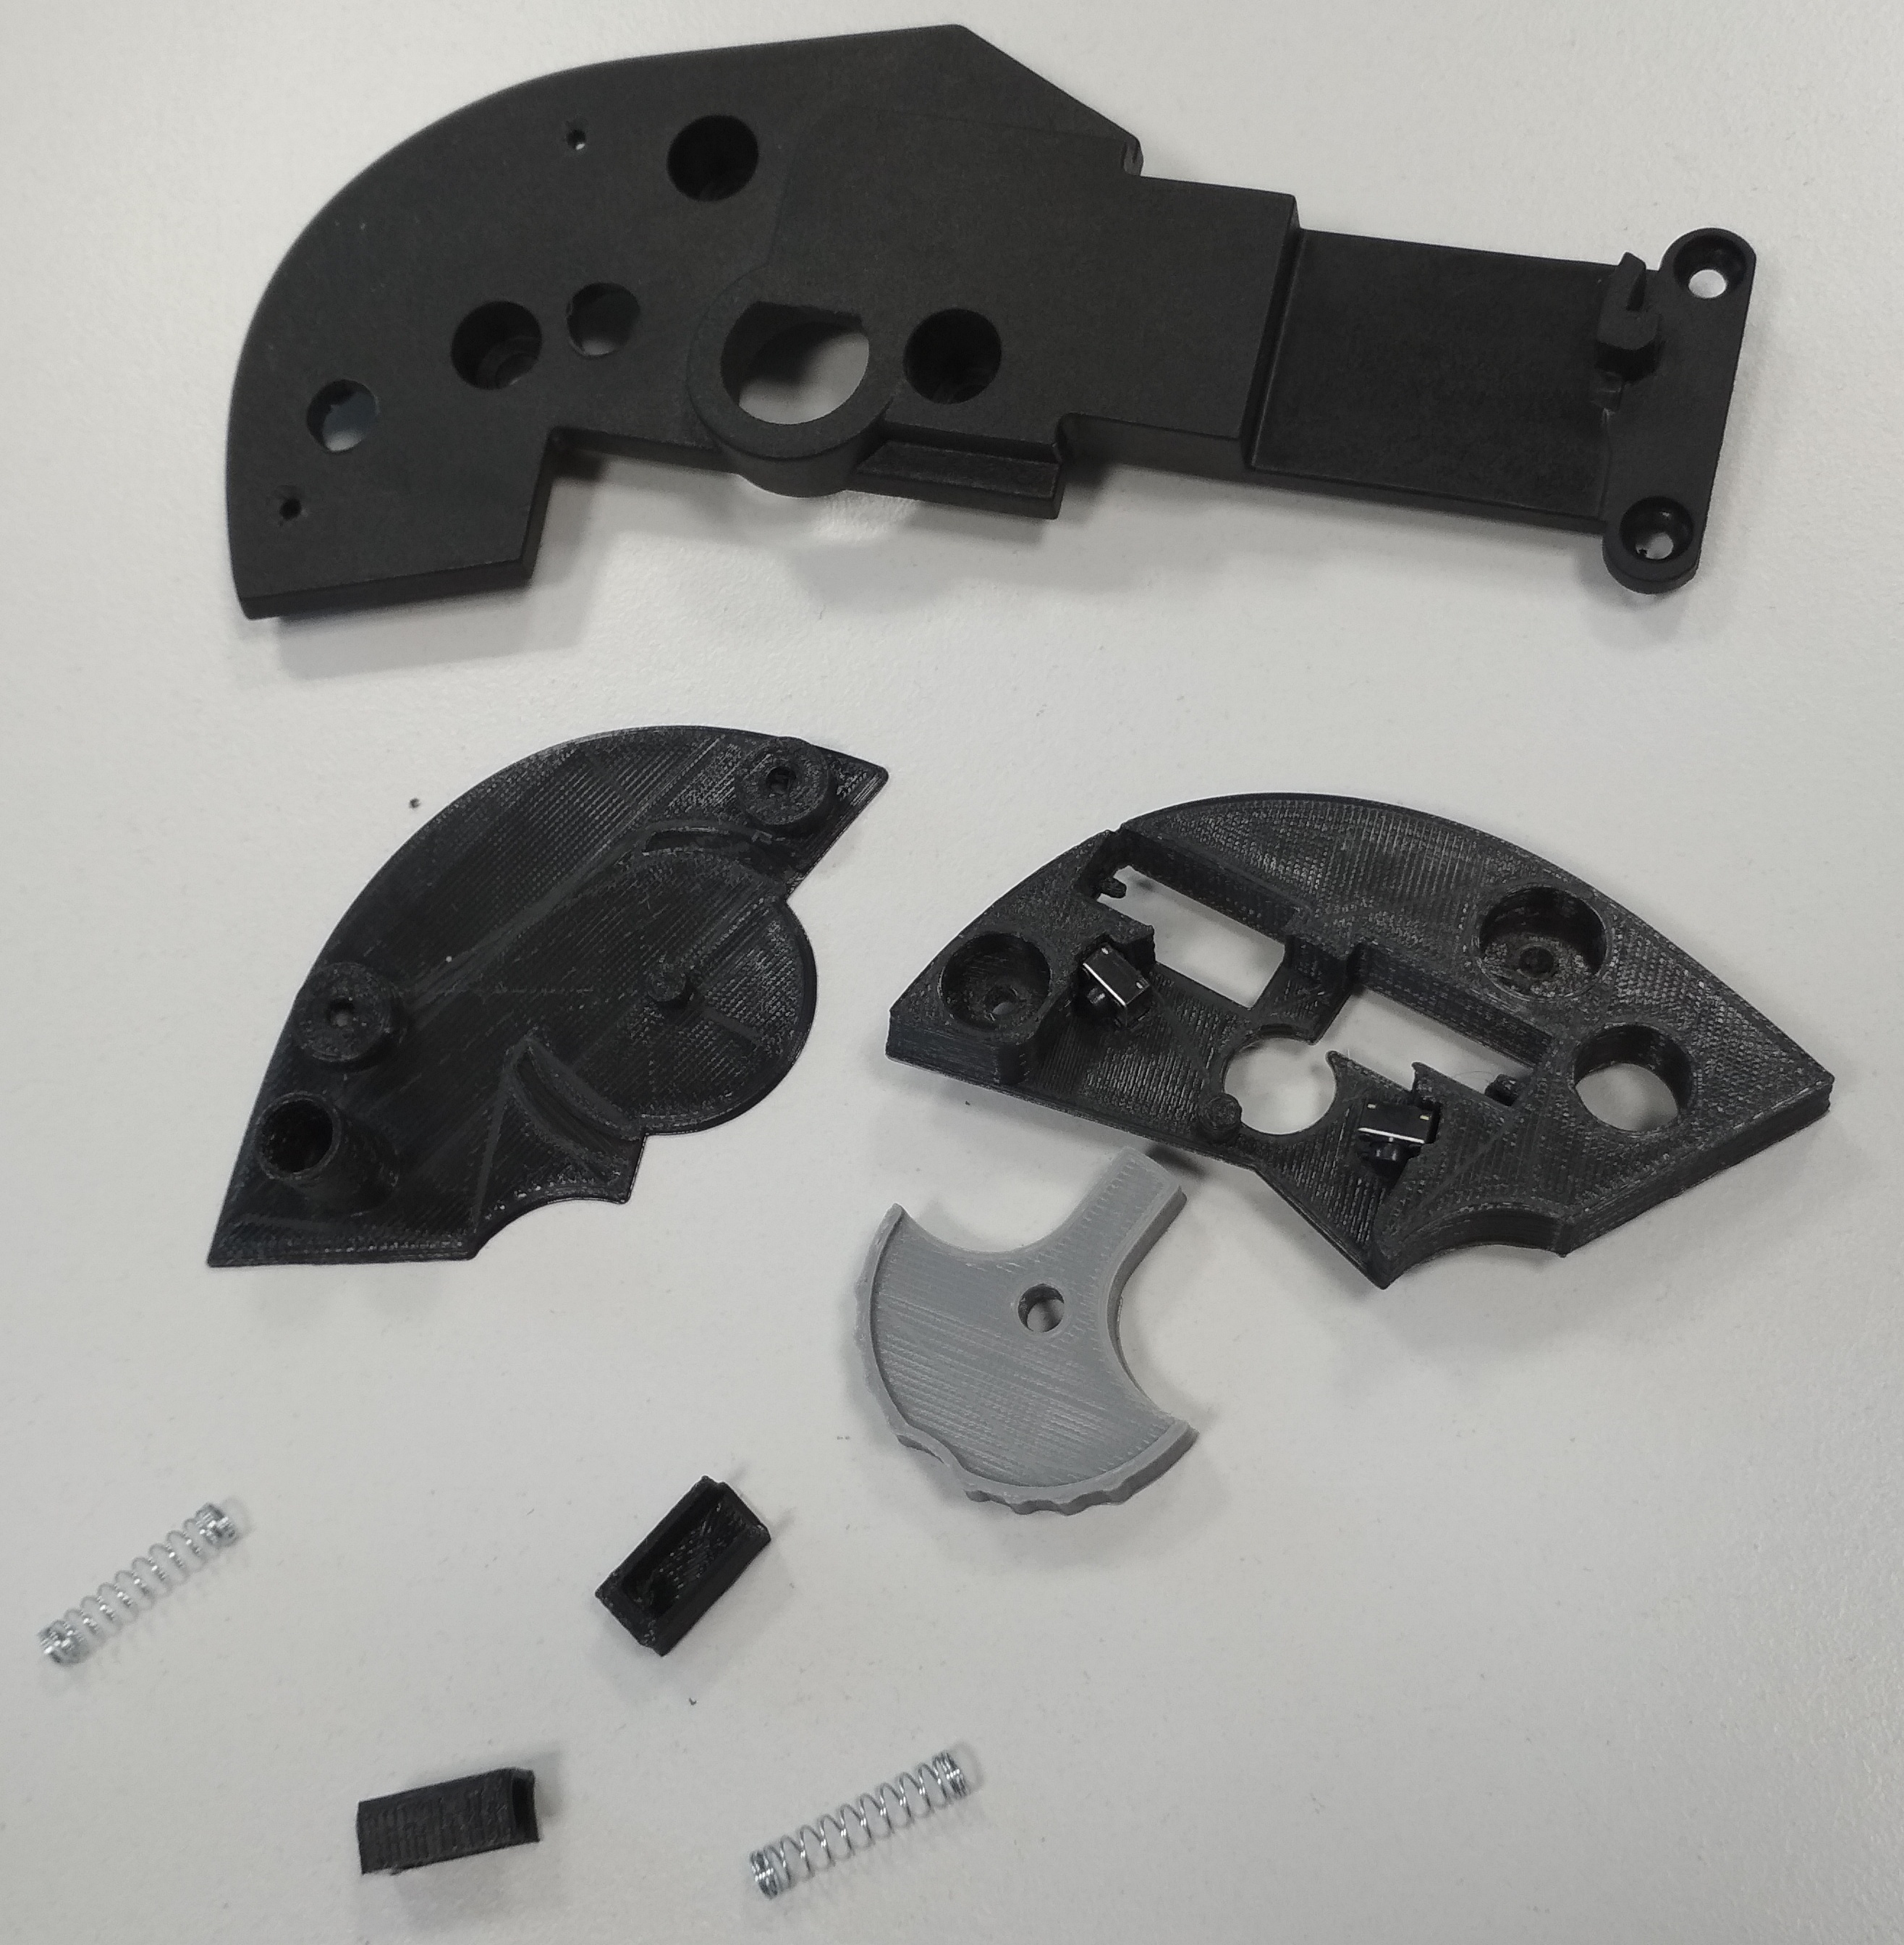
i ll try to attach it, be aware slicing a hollow bubble is not as easy as u might think, added a big as in the picture and a smaller one, i prefer the tiny one
-
PointCTRL - Finger Mounted VR Controller
FoxDelta replied to MilesD's topic in PC Hardware and Related Software
just 3d printed a bubble with transparent pla, with that diffusor tracking is perfect also when holding it 90° off. (Miles u should really include 2 of them.) scratch that, the better way would be to integrate those transparent part somehow into your FCU design. for the next gen
-
PointCTRL - Finger Mounted VR Controller
FoxDelta replied to MilesD's topic in PC Hardware and Related Software
Miles, regarding diffusors, u mean like these made of fimo? Will transparent PET, or PLA also work?
-
u should do that, thx. will try to make them available this weekend.
-
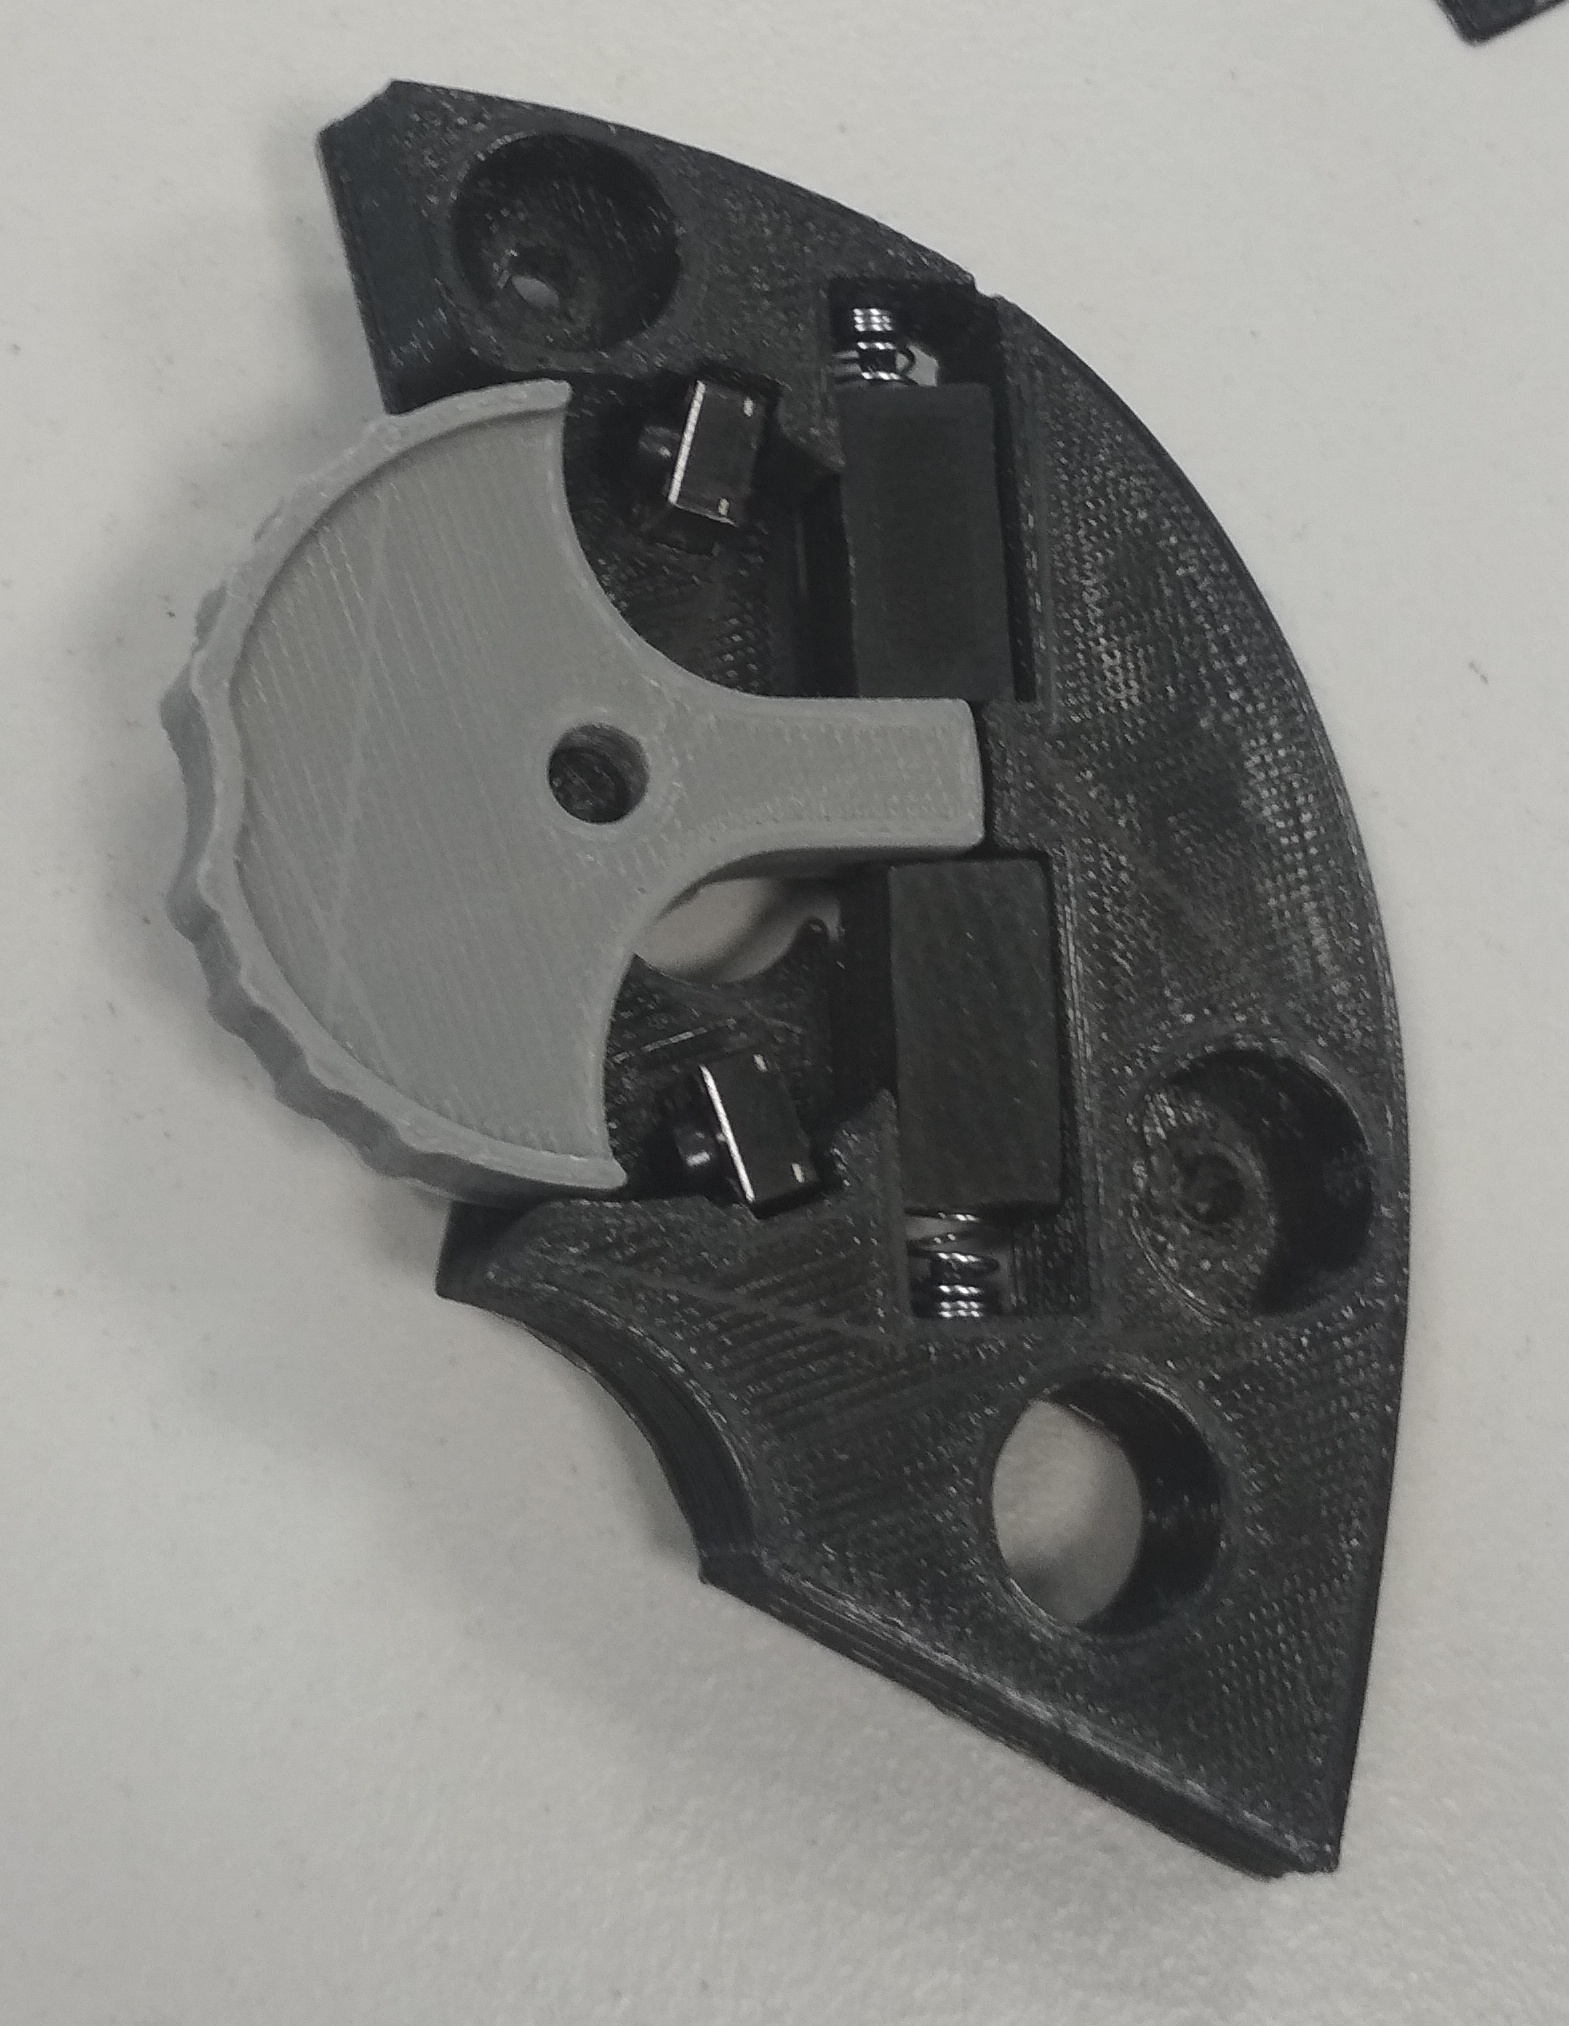
of course, this can be done, 45 degrees are recognized when two nearby of the 4 coolihats internal buttons are pressed at the same time. so just solder 2 additional wires to the buttons and it will work the way u want it
-
ya i remember u already mentioned that, using buttons was ok for me as long as that handling in principle keeps close to the real one. my wheel is self centering and the antenna remains at the angle it was moved to despite the wheel recenters. as far as i know thats the real ones behaviour.
-
finished, video added .
-
finished, just needs to be wired and mounted
-
it will be combined with the cooliehat so up and down on the cooliehat will be triggered by this wheel/buttons, so hte cooliehat remains fully functional for other modules u can of course, but i won t , see above as far as i understand it , and regarding what i found on the www. - its like a one axis slew, not like a potentiometer, means turning the wheel will slew, hands off and it will self center but radar remains at slewed angle. thats why i have gone the button way and because the cooliehat is not necessary as u do have slew hat there as well. yes its size is sufficient to press the buttons yes, but not with my approach using the cooliehat no, see above side note, the cooliehat already just contains 4 buttons like the ones i will use
-
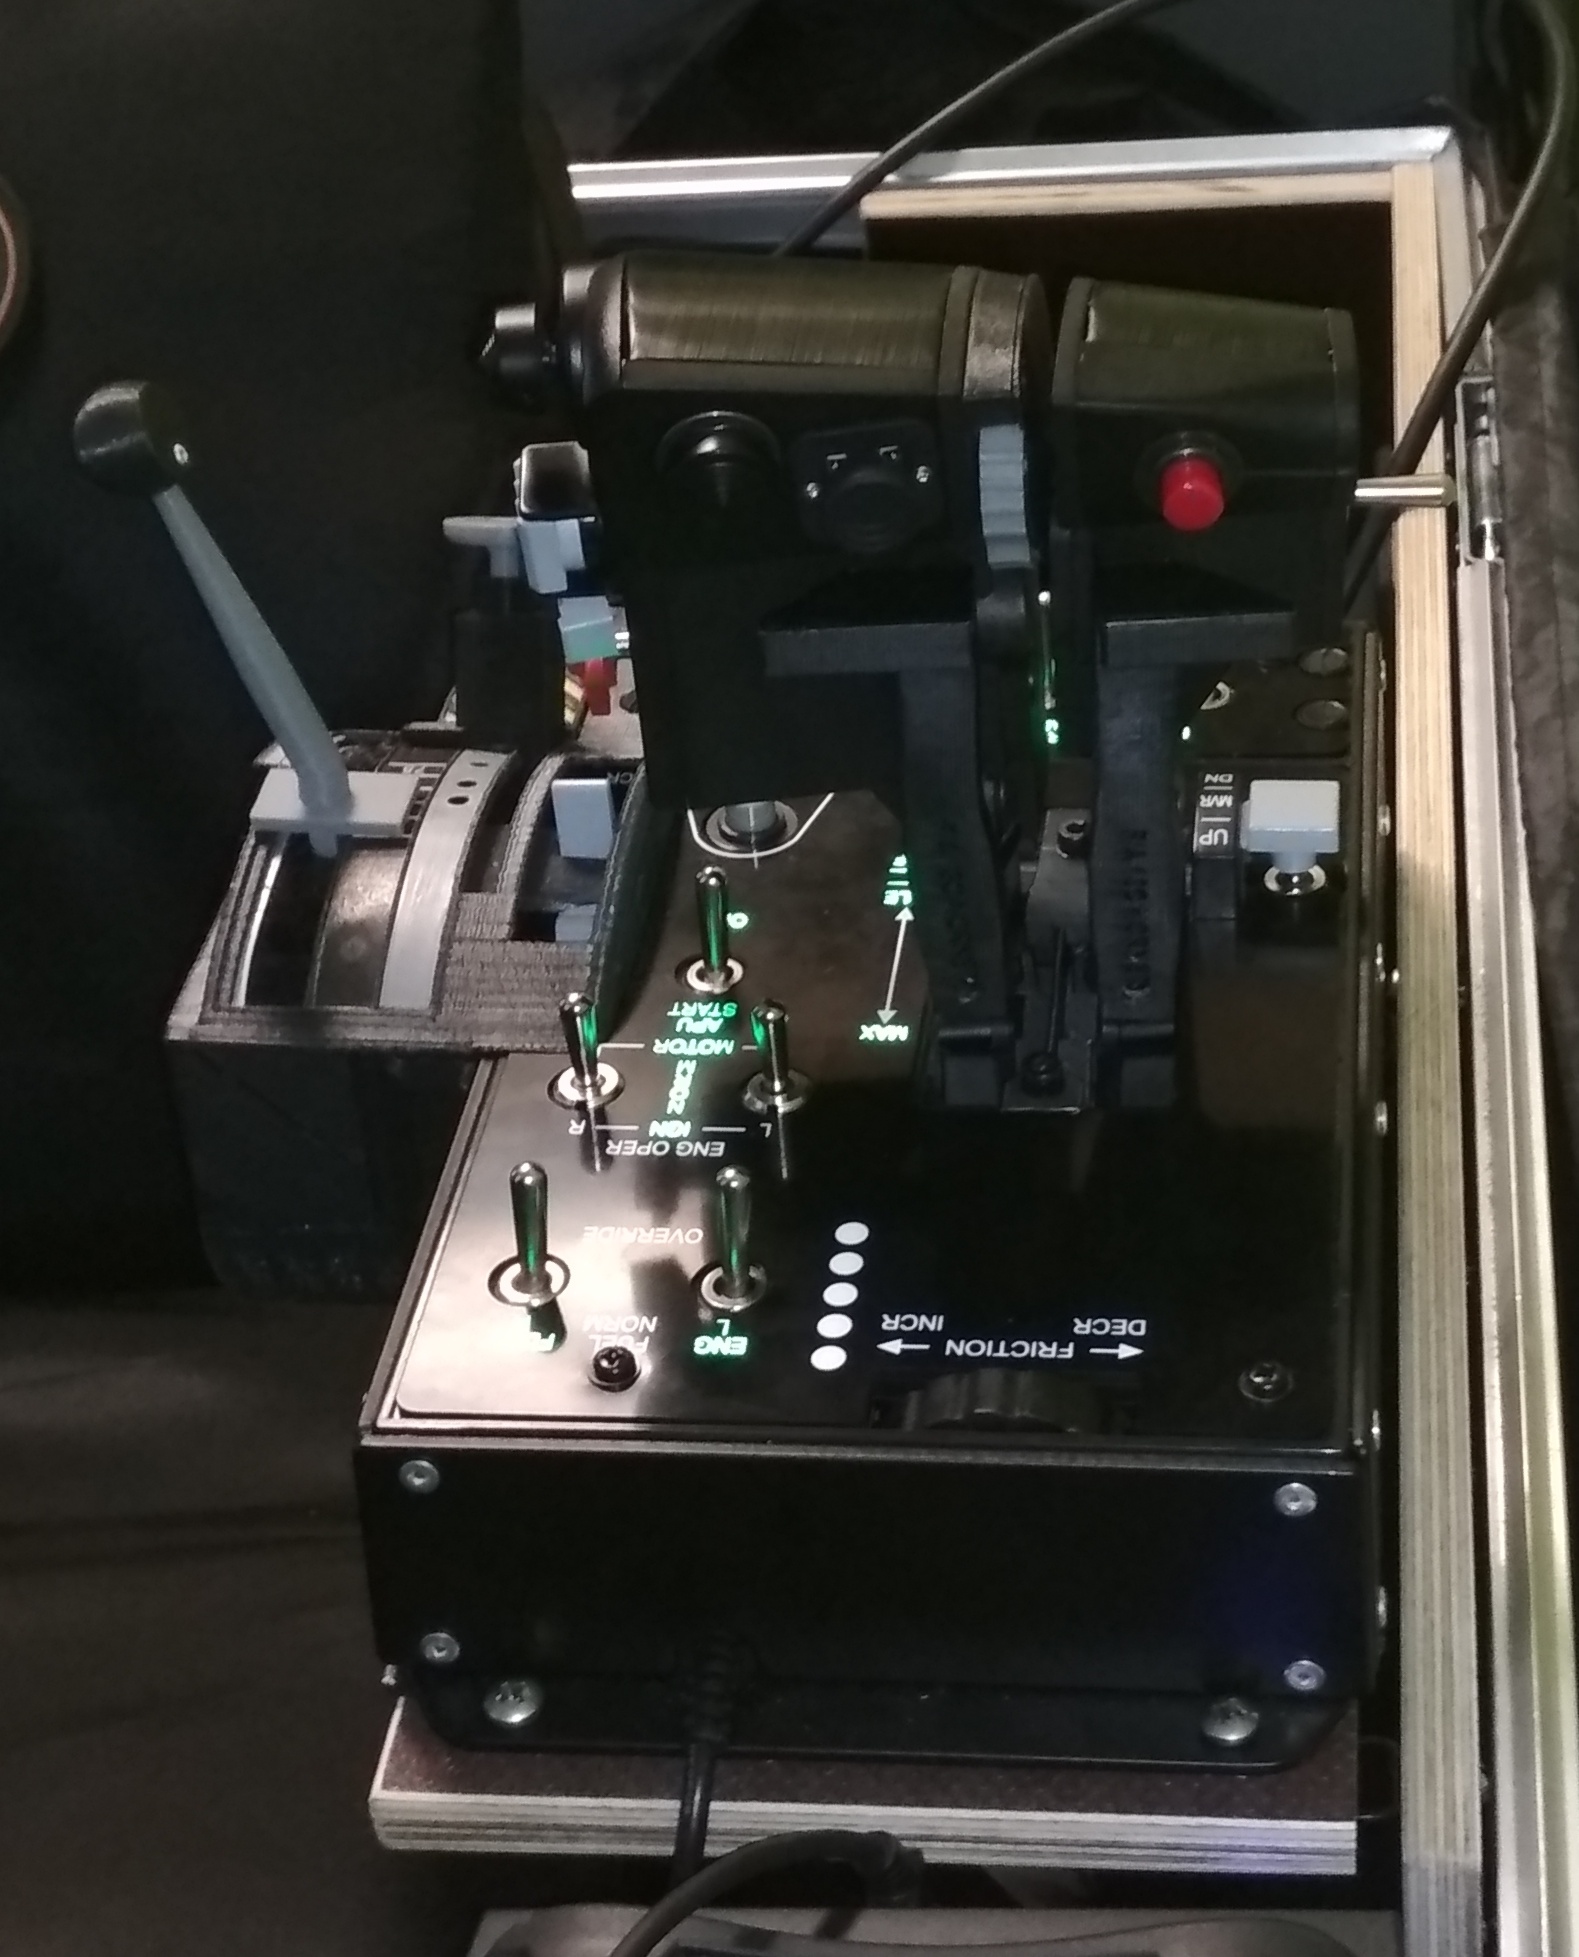
case with button
-
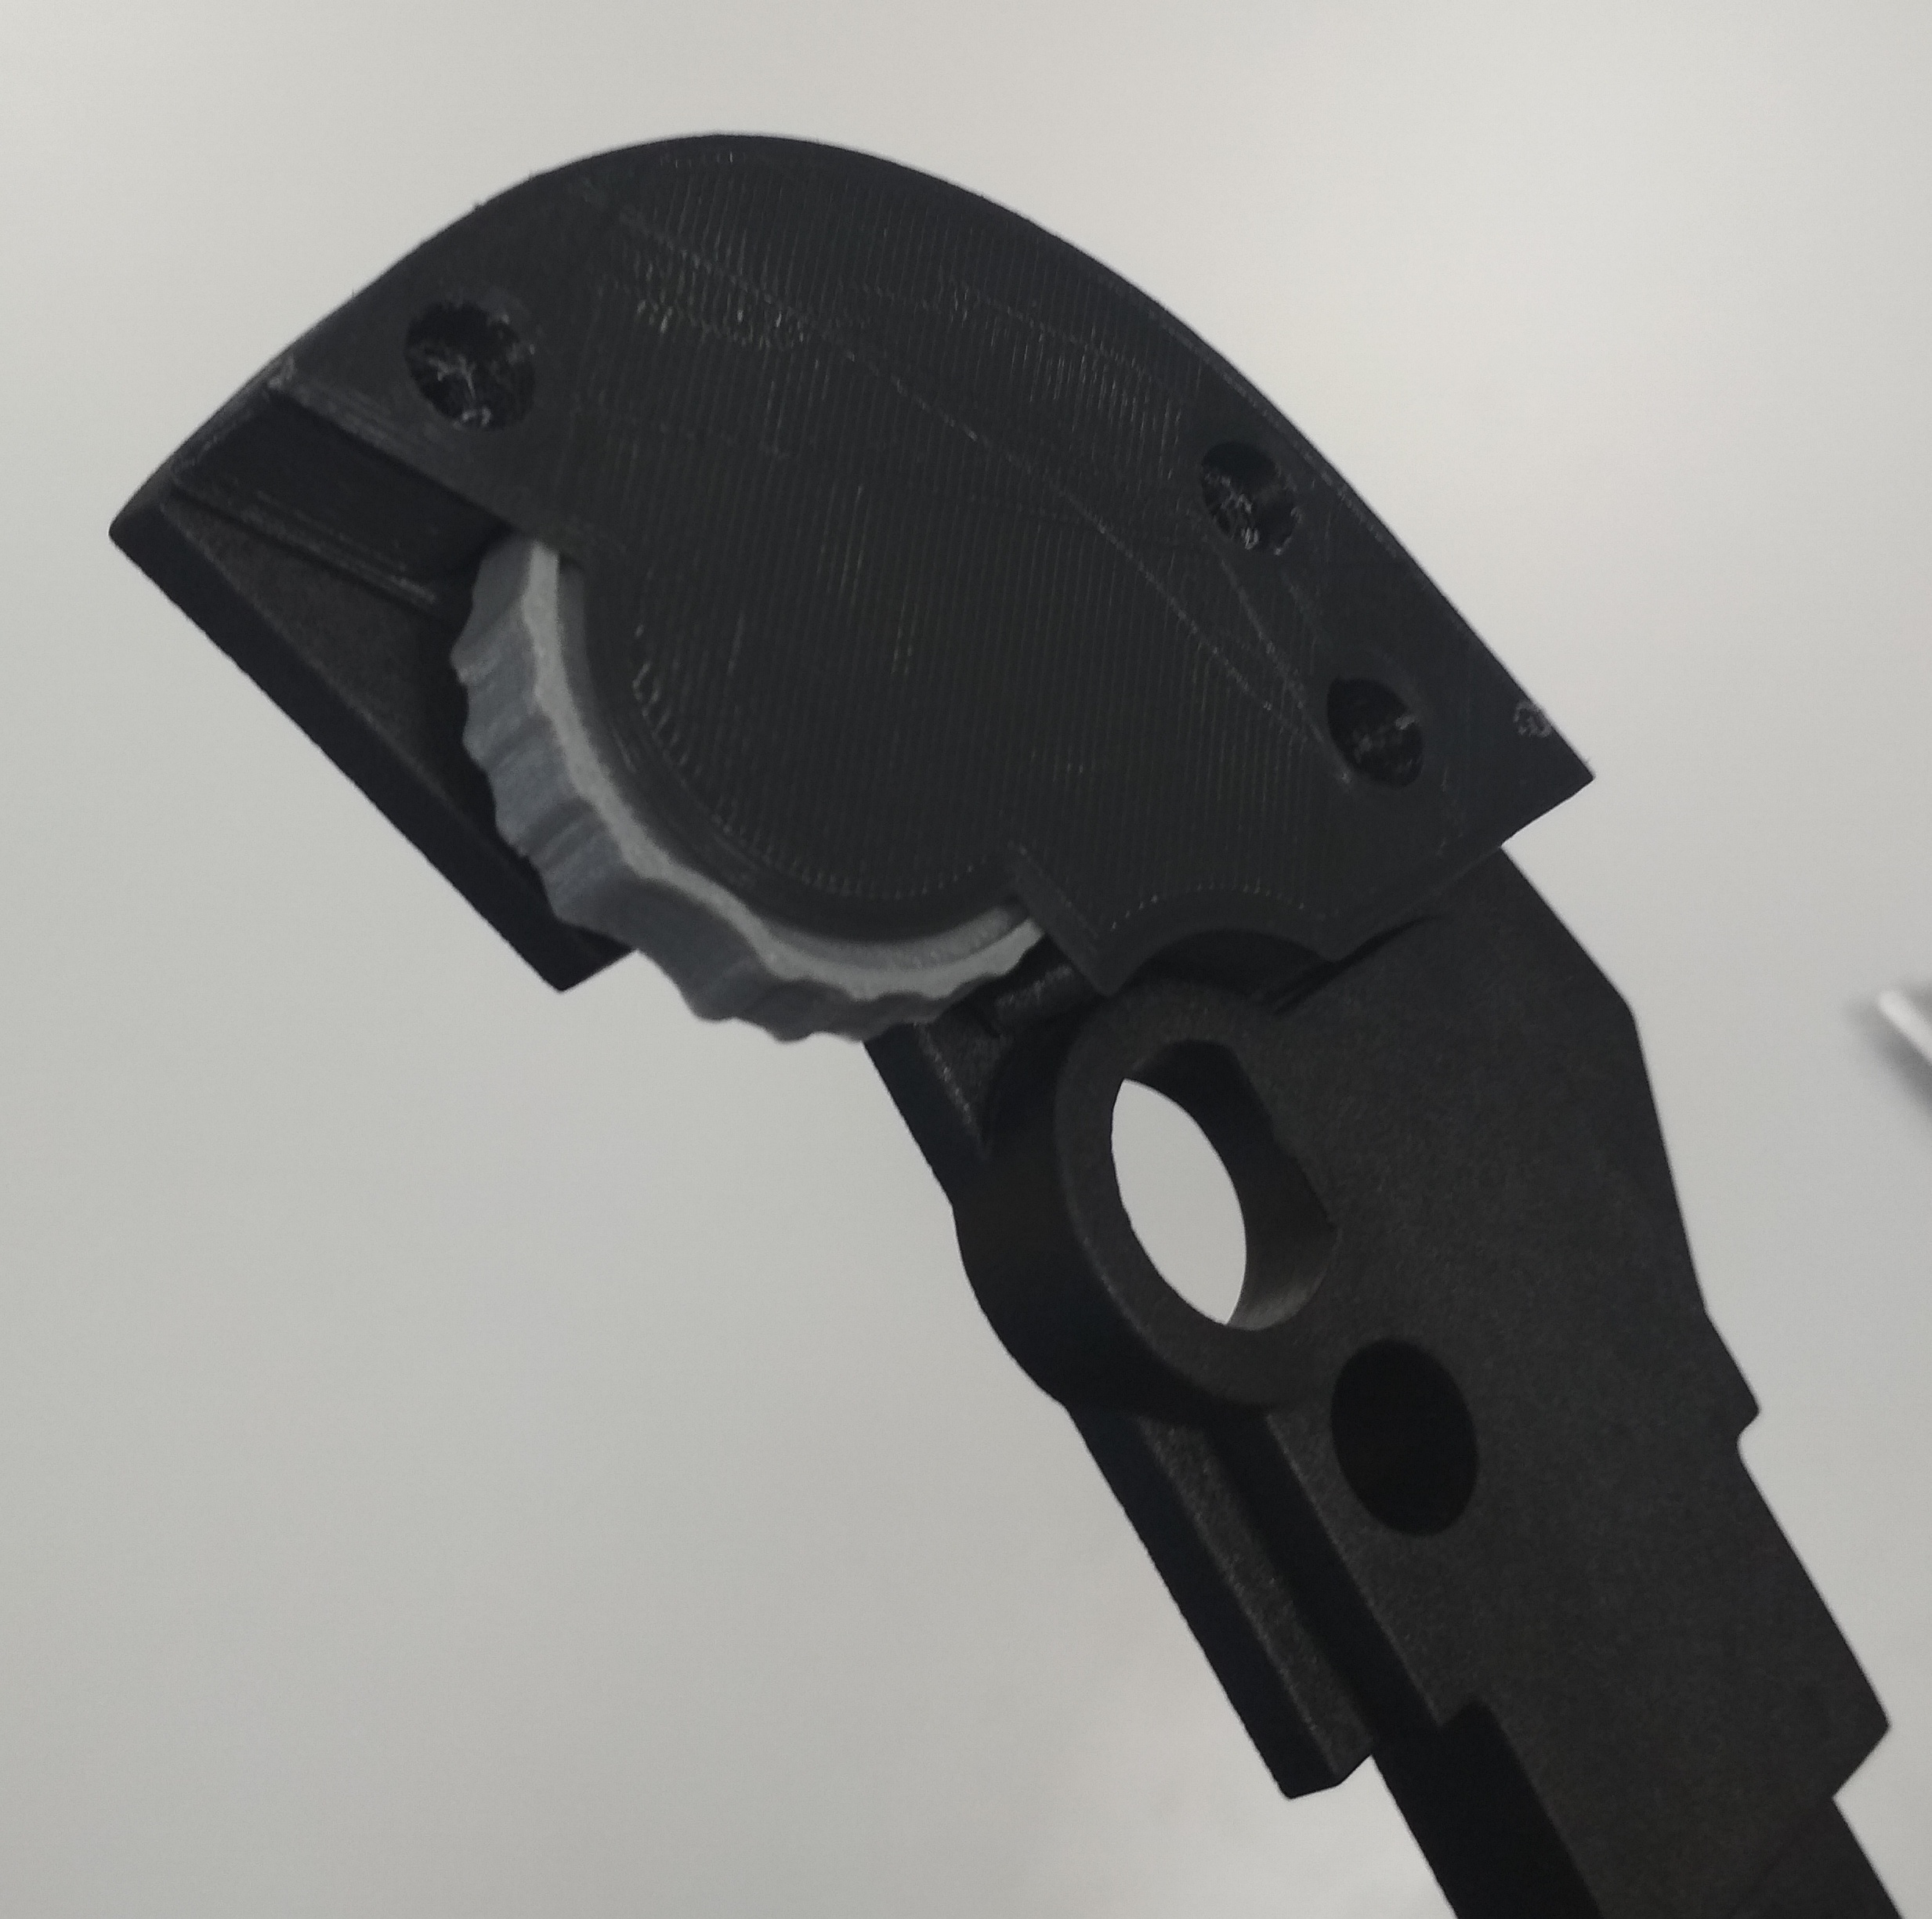
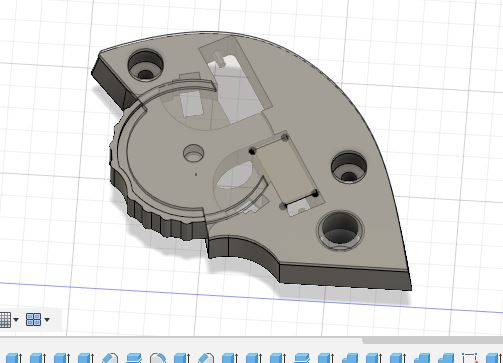
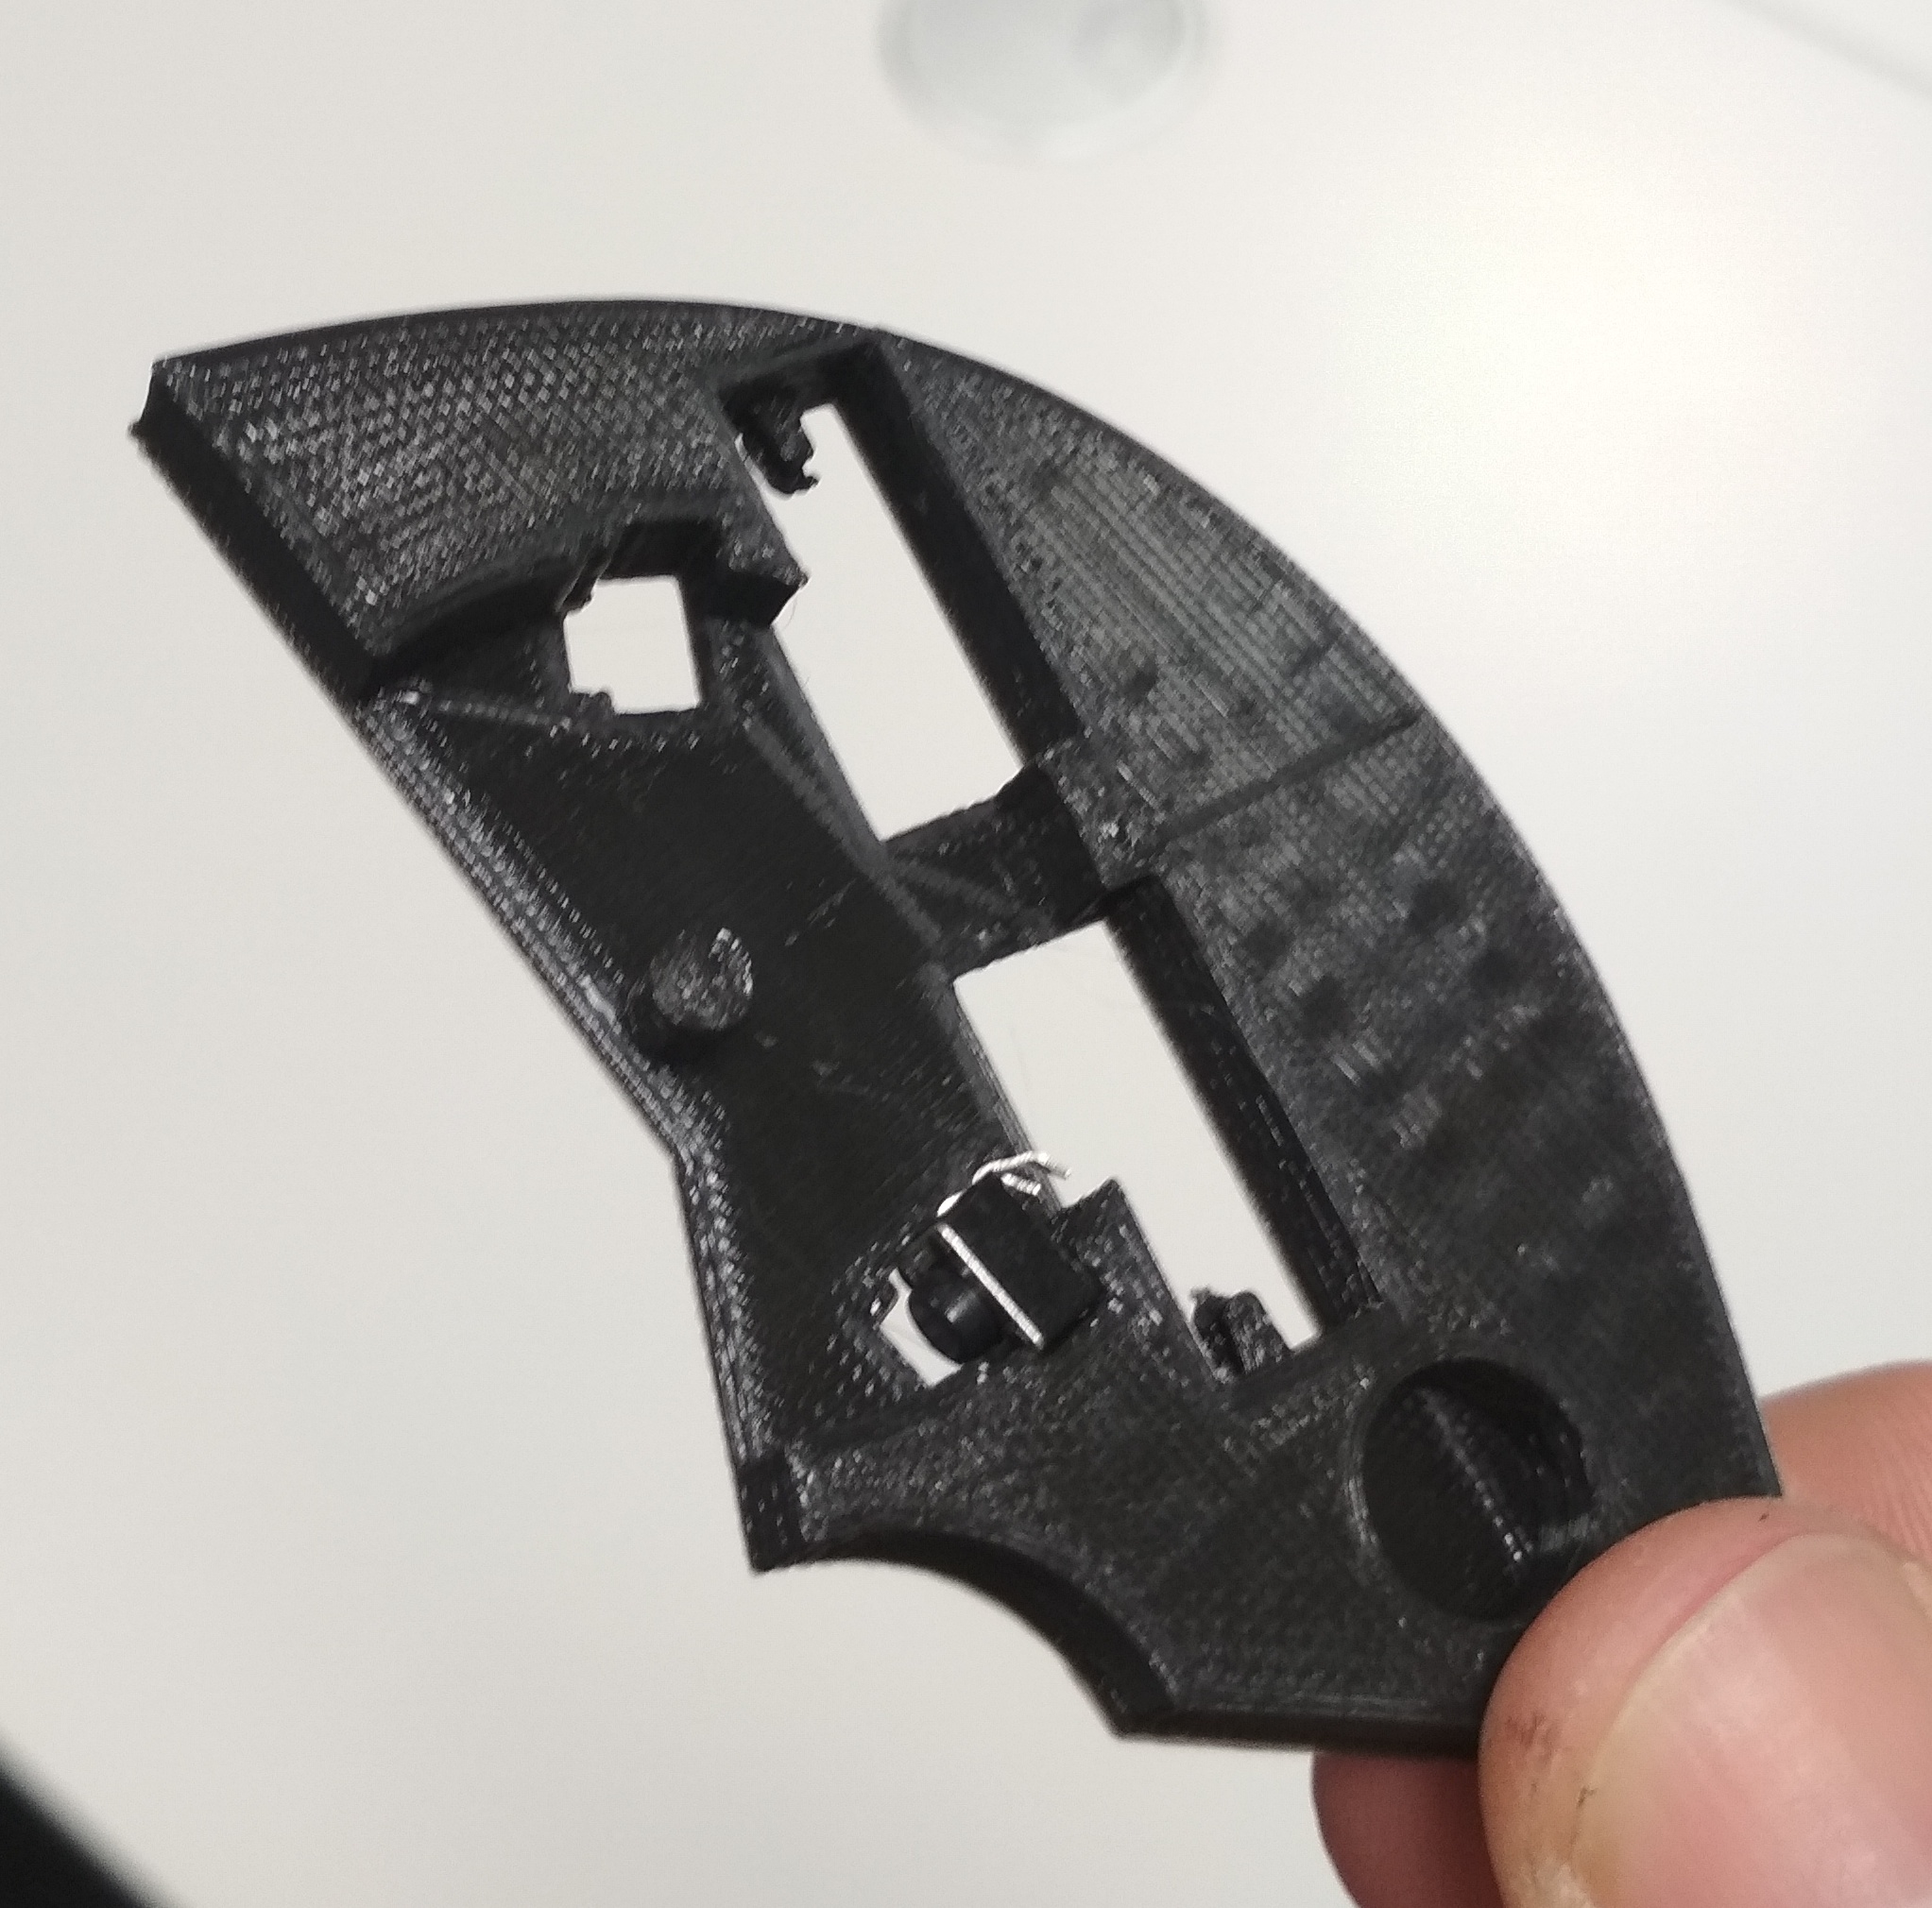
STL files for download https://www.dropbox.com/sh/dctsac67egwlzzk/AADQRie7ggOyvsE54mQnepWda?dl=0 DISCLAIMER: appplying this MOD will definately VOID your WARRANTY, be aware! all parts are again divided into "EVERYONE can print that" parts, so u should have no troubles printing them, no supports needed, i used PLA. I own a GEEETECH A10 which is quite good for its price. u will have to use a seperate usb board or just solder those 4x4mm buttons to one of the warthog s coolie hats, u can use the standard directions 90° then u will need two yellow and 1 orange and 1 brown cable, if u want to use the 45° just solder two more coloured cables to the buttons, 45° directions are registered when two buttons(yes those coolie hats just use 4 buttons) are pressed at the same time. UPDATE Nopileus was so kind to post his solution for the 45° soldering for the springs i used a rollerpen s , u will need some screws, which i got from an old harddrive and other parts i am sure u will find some applicable. u will have two drill two holes into the sidecover for the buttons/wiring and another two for screws into the levers sideplate i am not a professional constructor , i used FUSION360. u might have to cut some parts for better fitting, mine fitted quite well do well NOTE: Federschieber.stl needs to be printed twice https://www.paypal.com/cgi-bin/webscr?cmd=_s-xclick&hosted_button_id=LT5HG625K52DA&source=url if someone wants to sponsor my next projects filament:music_whistling: video showing functionality .
-
project finished Starting to draw a F18 radar elevation wheel for the THRUSTMASTER WARTHOG HOTAS. at the end it should be - selfcentering, springloaded - designed to have two micro buttons soldered to the right lever^s cooliehat next to its slew control - easy mountable - easy to print
-
[REPORTED]parked F18s cutting frames by half in VR
FoxDelta replied to FoxDelta's topic in Game Performance Bugs
u ve read the 1st post??? -
[REPORTED]parked F18s cutting frames by half in VR
FoxDelta replied to FoxDelta's topic in Game Performance Bugs
not for me, it was like that at the beginning of the F18era but a lot better for months. i am flying this mission as it is at least every 2 weeks on mondays so i would have noticed that maybe any kind of regression or unintended rollback. -
see two missions attached , one mission stennis with F18s one without and a tarawa with cobras and harriers on. observation: since the OB update that introduced the TPOD for the F18, or the update befor, iam getting just half the frames when coming close to the stennis in my standard F18/F14/Av8 flight training mission, compared to before please check mission 1 without the "test" in its name flying F18 ,F18s parked on the deck , doing a touch and go frames drop from min 30 to 15 from short final till passed the carrier. trz a touch and go on the tarawa with lots of AV8s and Cobras NO FRAME DROP and remaining at 30fpsplus. mission2 (with test in its name) flying F18, doing touch and go on the carrier with seahawks and other A/C BUT without F18s. constantly 30fps plus , NO FRAME DROPS looks like static F18s are causing massive frame drops, at least for me, despite other static A/C do not!!! THX for checking VR , vlave index, 1080ti, most settings on medium, PD in DCS at 1.0, steamVR 140% CBG_Template.miz CBG_Templatetest.miz
-
f14 wing sweep remains on hold but other things to come