FoxDelta
-
Posts
468 -
Joined
-
Last visited
Content Type
Profiles
Forums
Events
Everything posted by FoxDelta
-
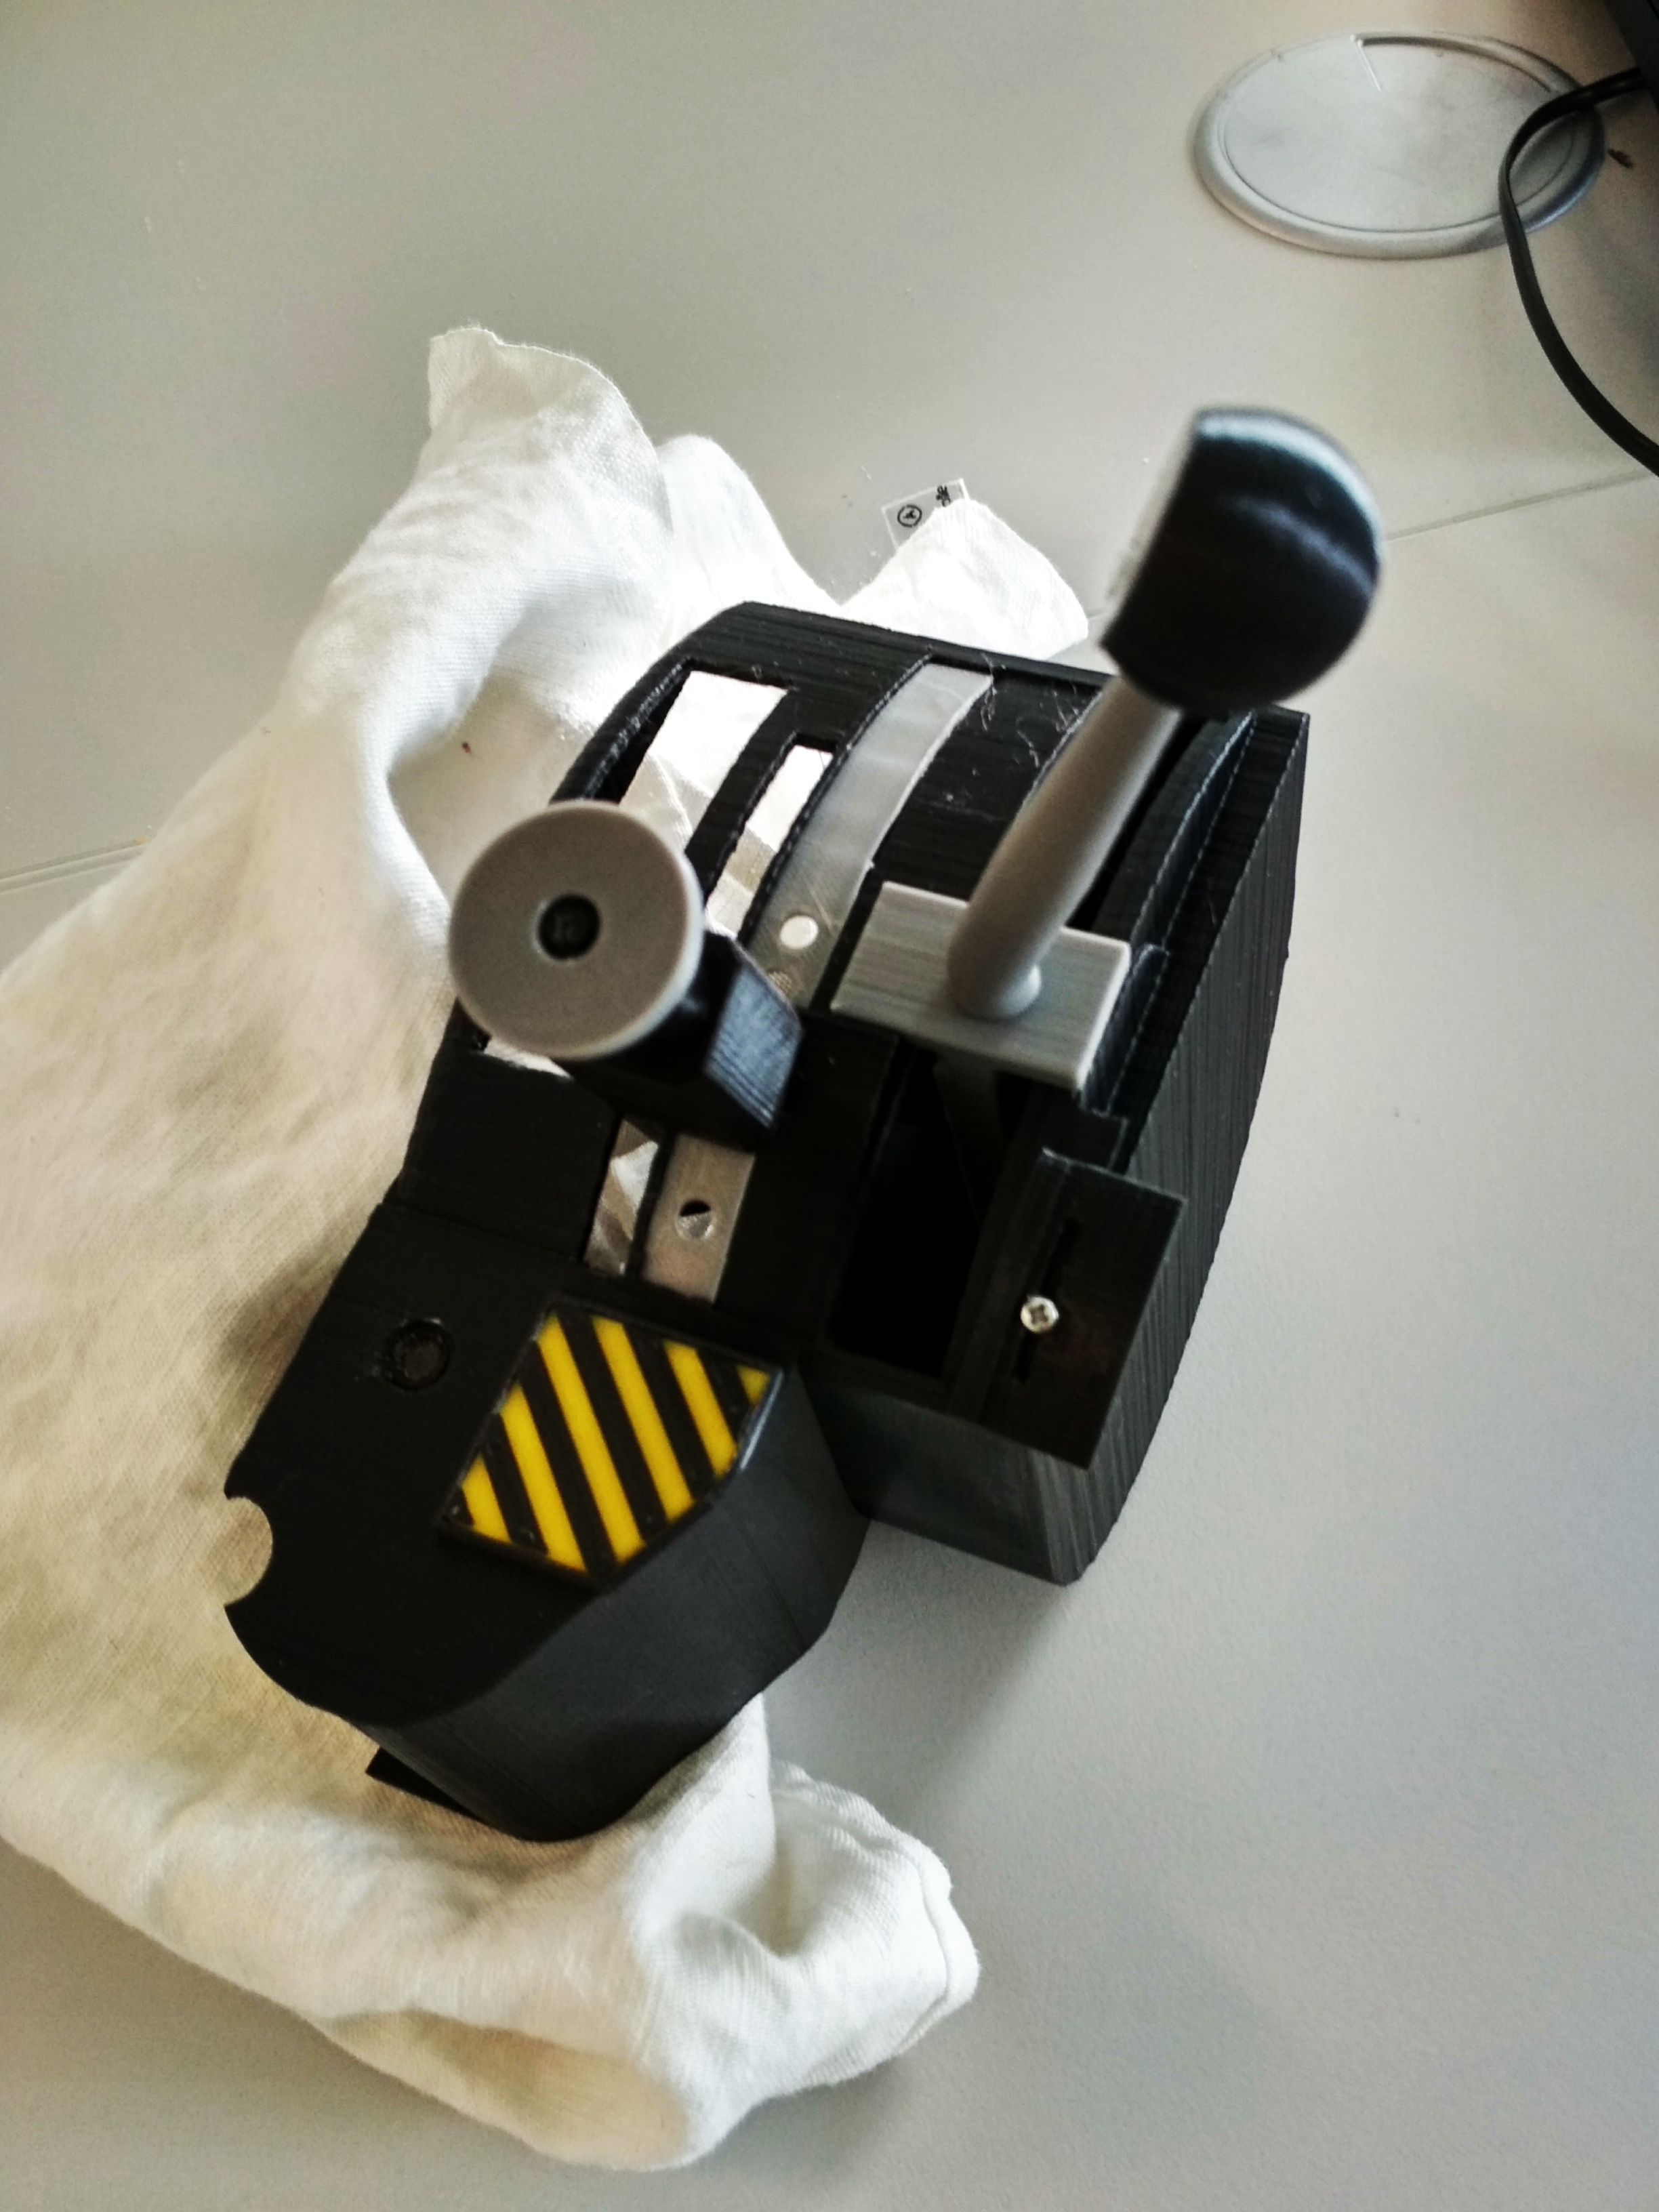
AV8 3d printed nozzle lever for warthog throttle
FoxDelta replied to FoxDelta's topic in Home Cockpits
u r welcome -
polishing the return mechanism

-
looks really cool and solid, hopefully this throttle will be affordable for me, just some thoughts regarding your throttle. looks like u made it straight and not oriented towards the pilot? is this production related? (thrustmasters a10 throttle grip is oriented a few degrees towards the pilot as well) also the radar elevation wheel looks like a scrollwheel, will it act selfcentering as the real one does?
-
thx for this, i guess thats as it is in the f18c as well, at least looks like on some photos i saw, i might do a mod for this later, if i will do i most likely will use 2 buttons of the base for this.
-
yah already thought about adding something there, but i don t want to have to use an additional usb board just for one single function, and i am still a bit unsure wether this acts as a scroll wheel or more like a 3pos switch
-
testing and refining the return mechanism, using again a rollerpen s spring, looks okay so far
-
cool, will it fit into BRUNs UFC? https://forums.eagle.ru/showthread.php?t=218874
-
checking the measurements
-
but its not as cool!
-
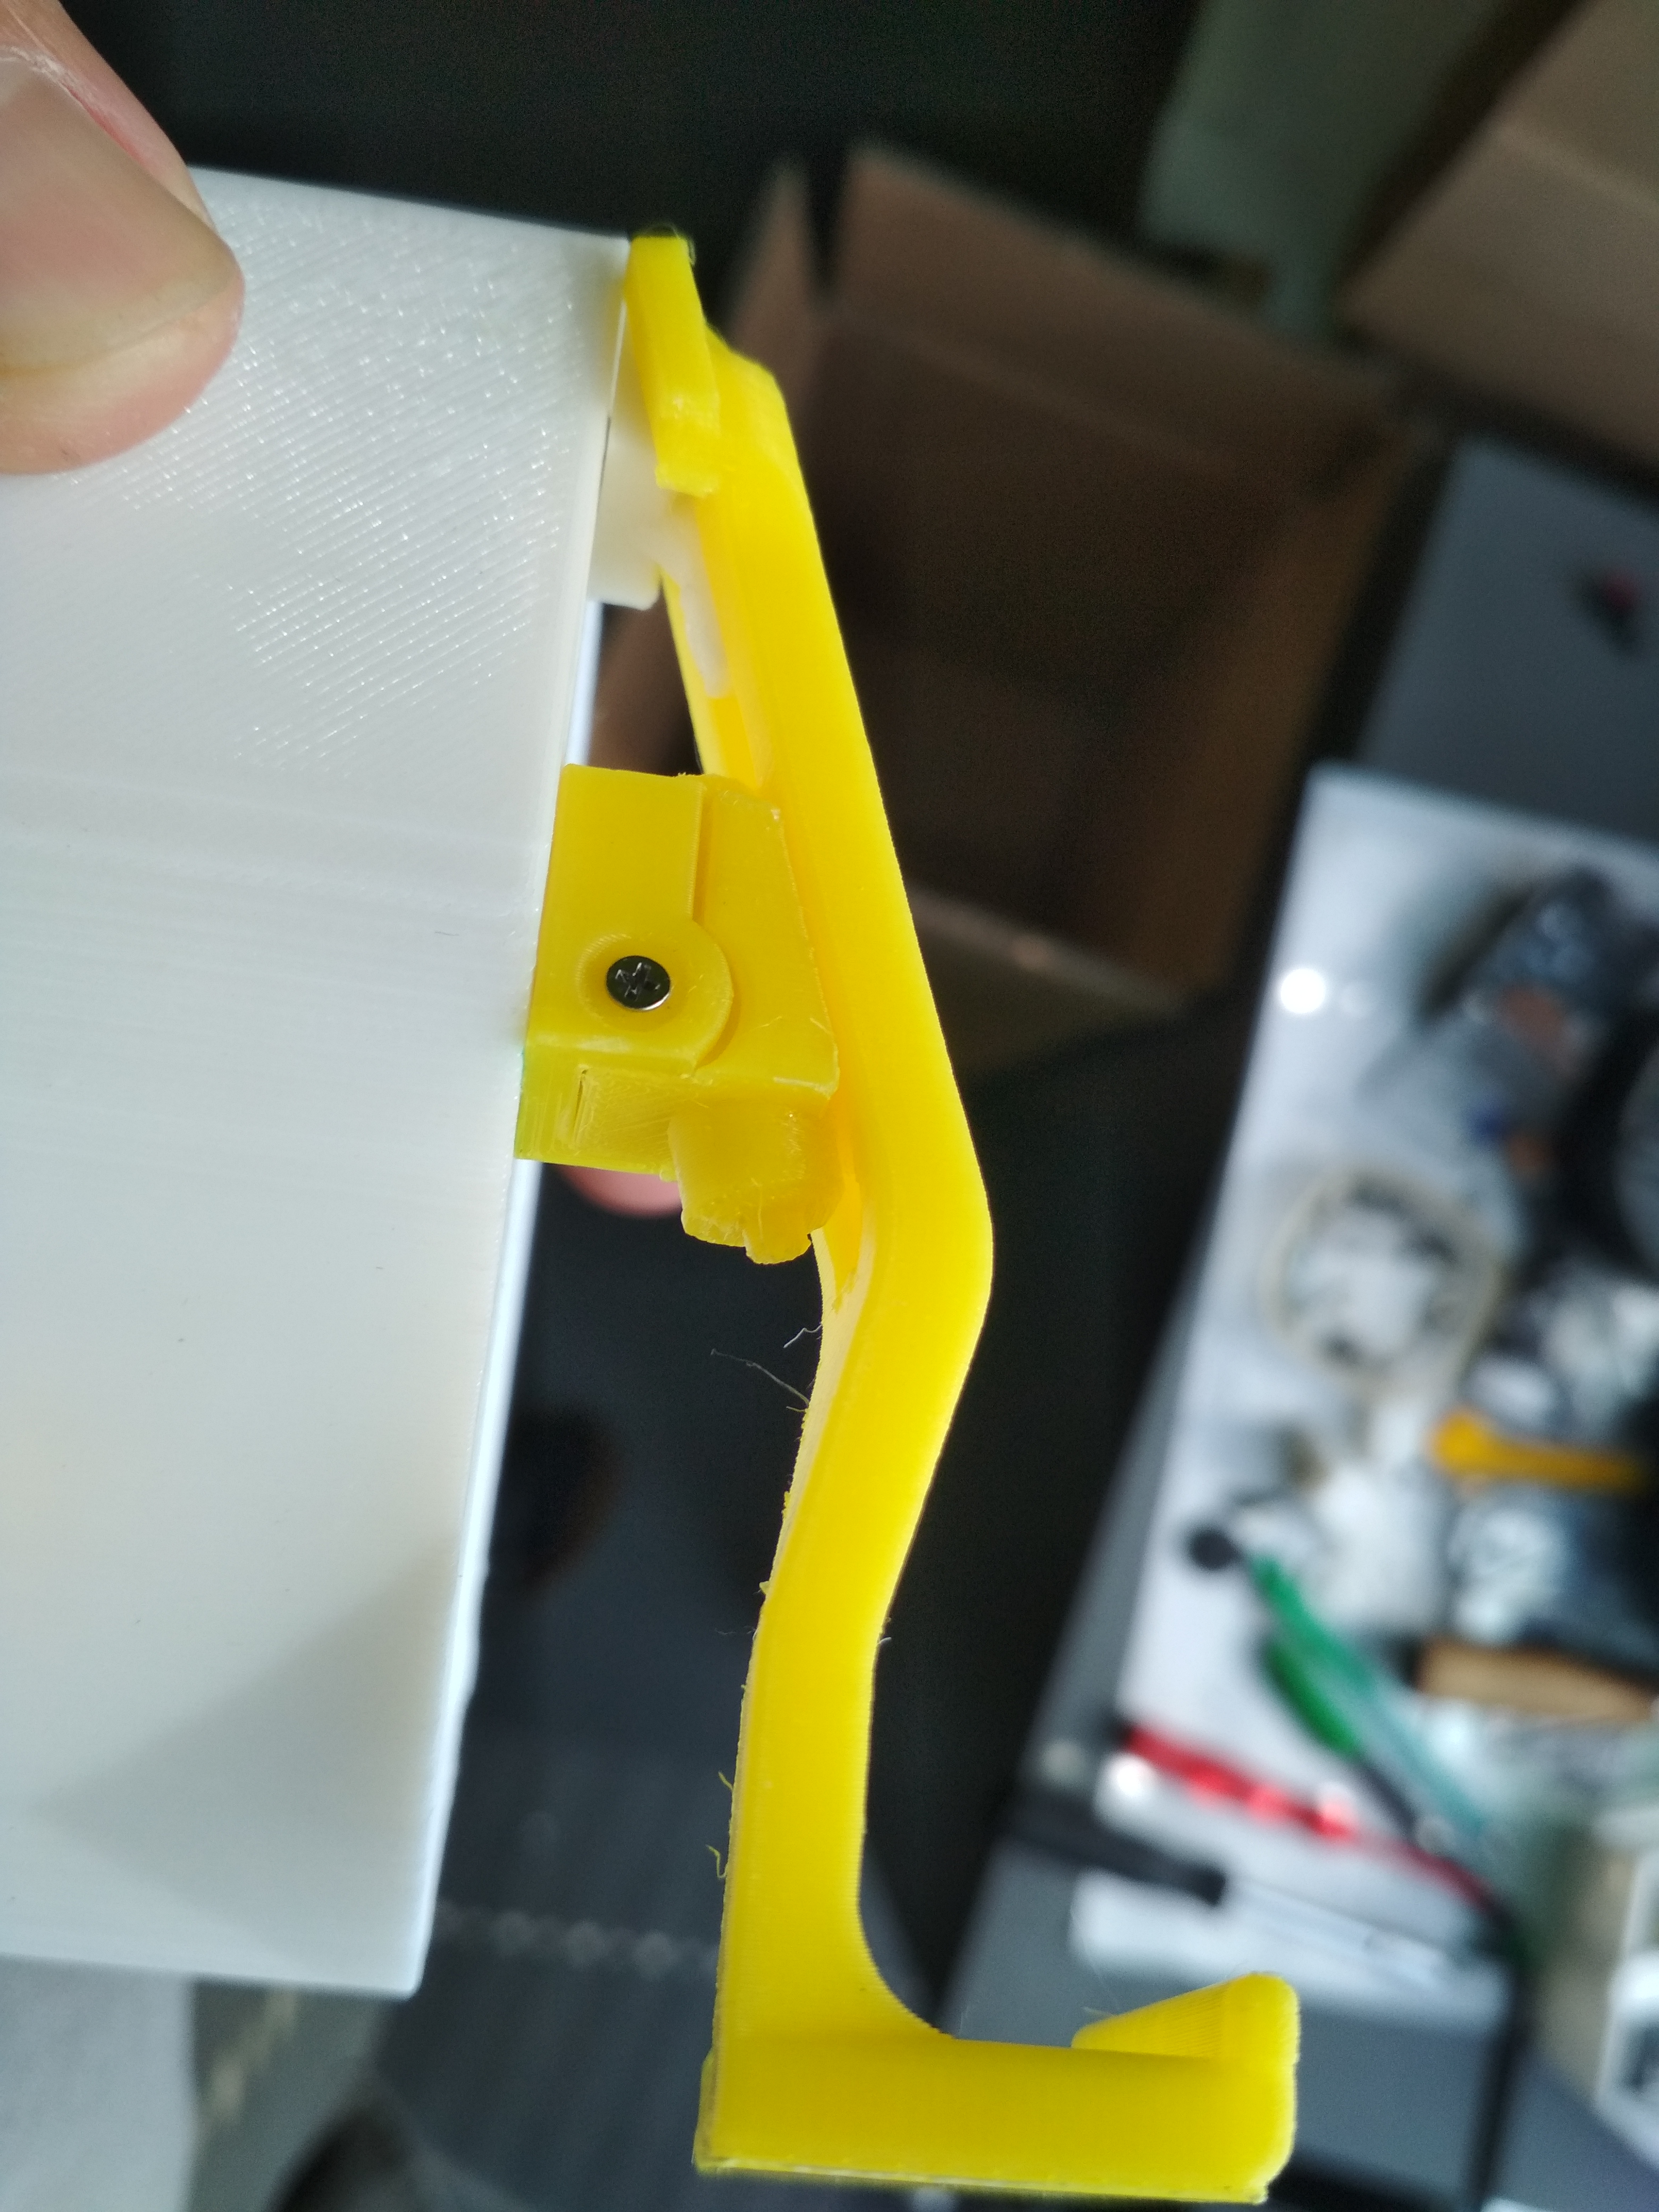
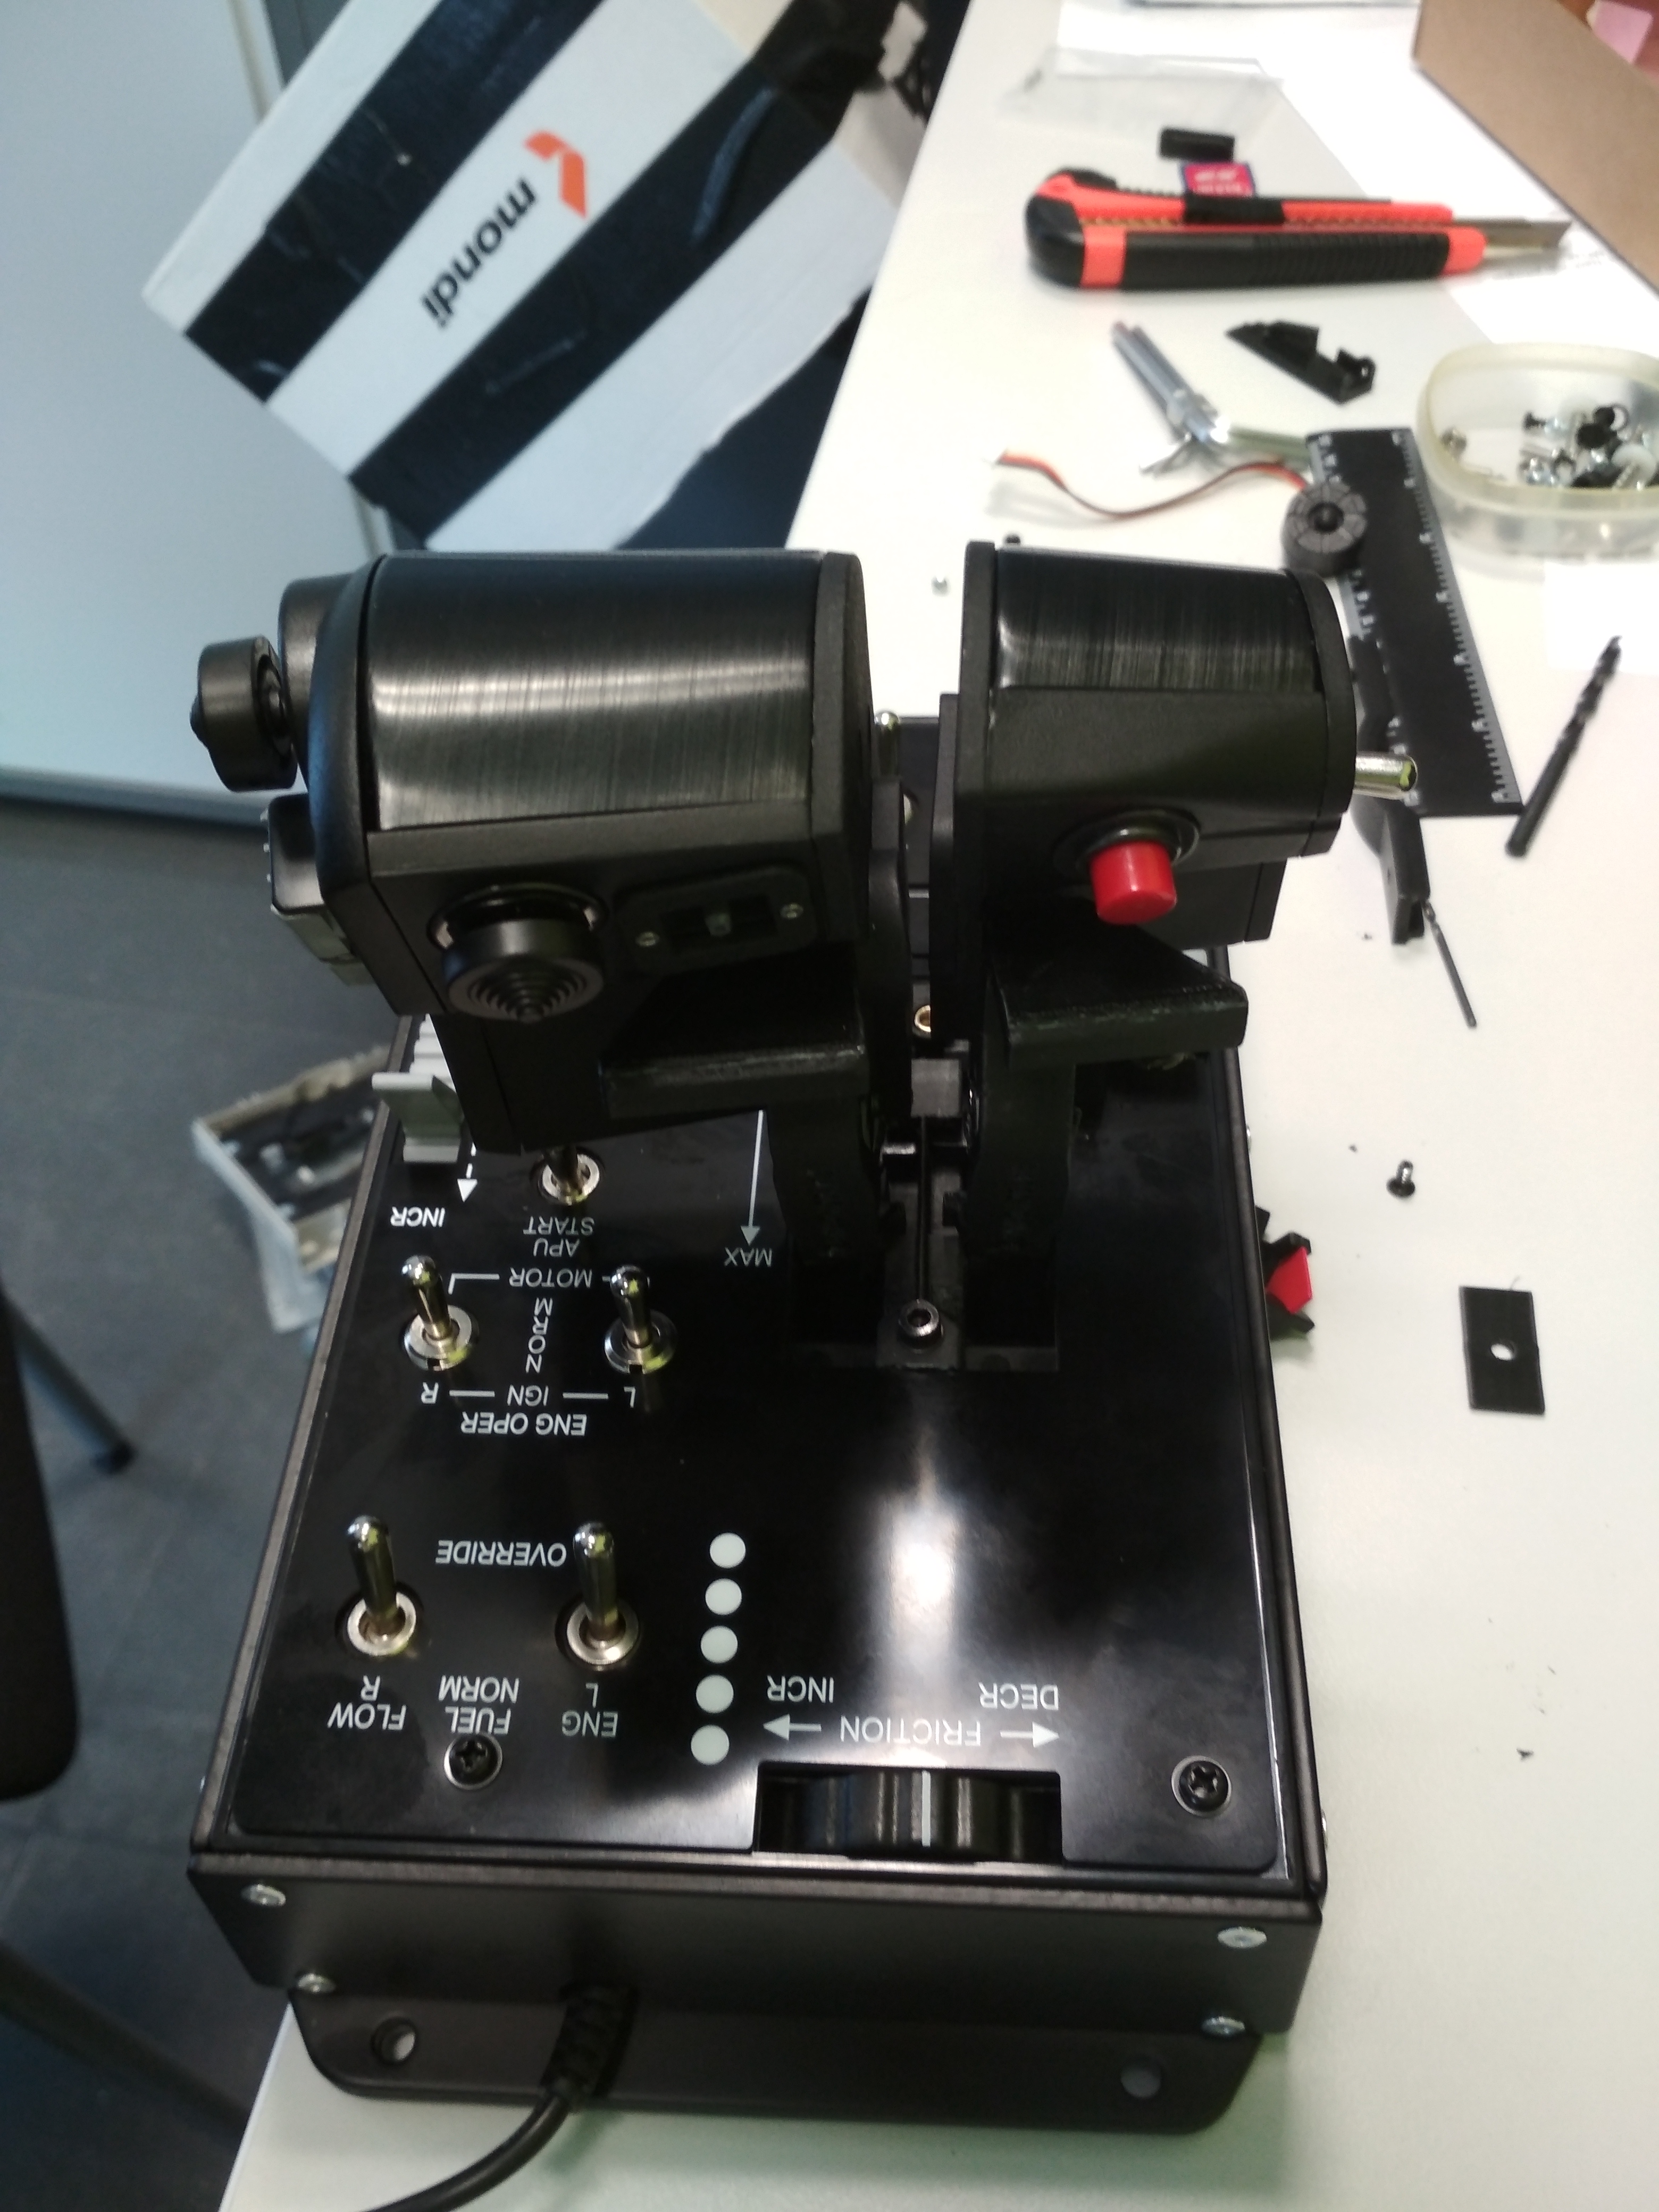
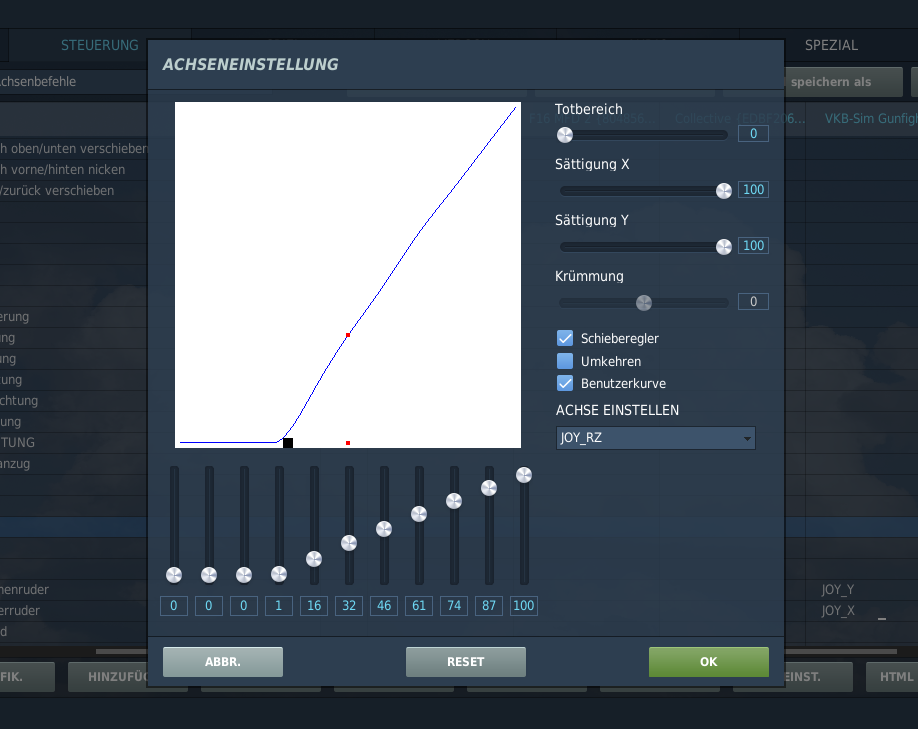
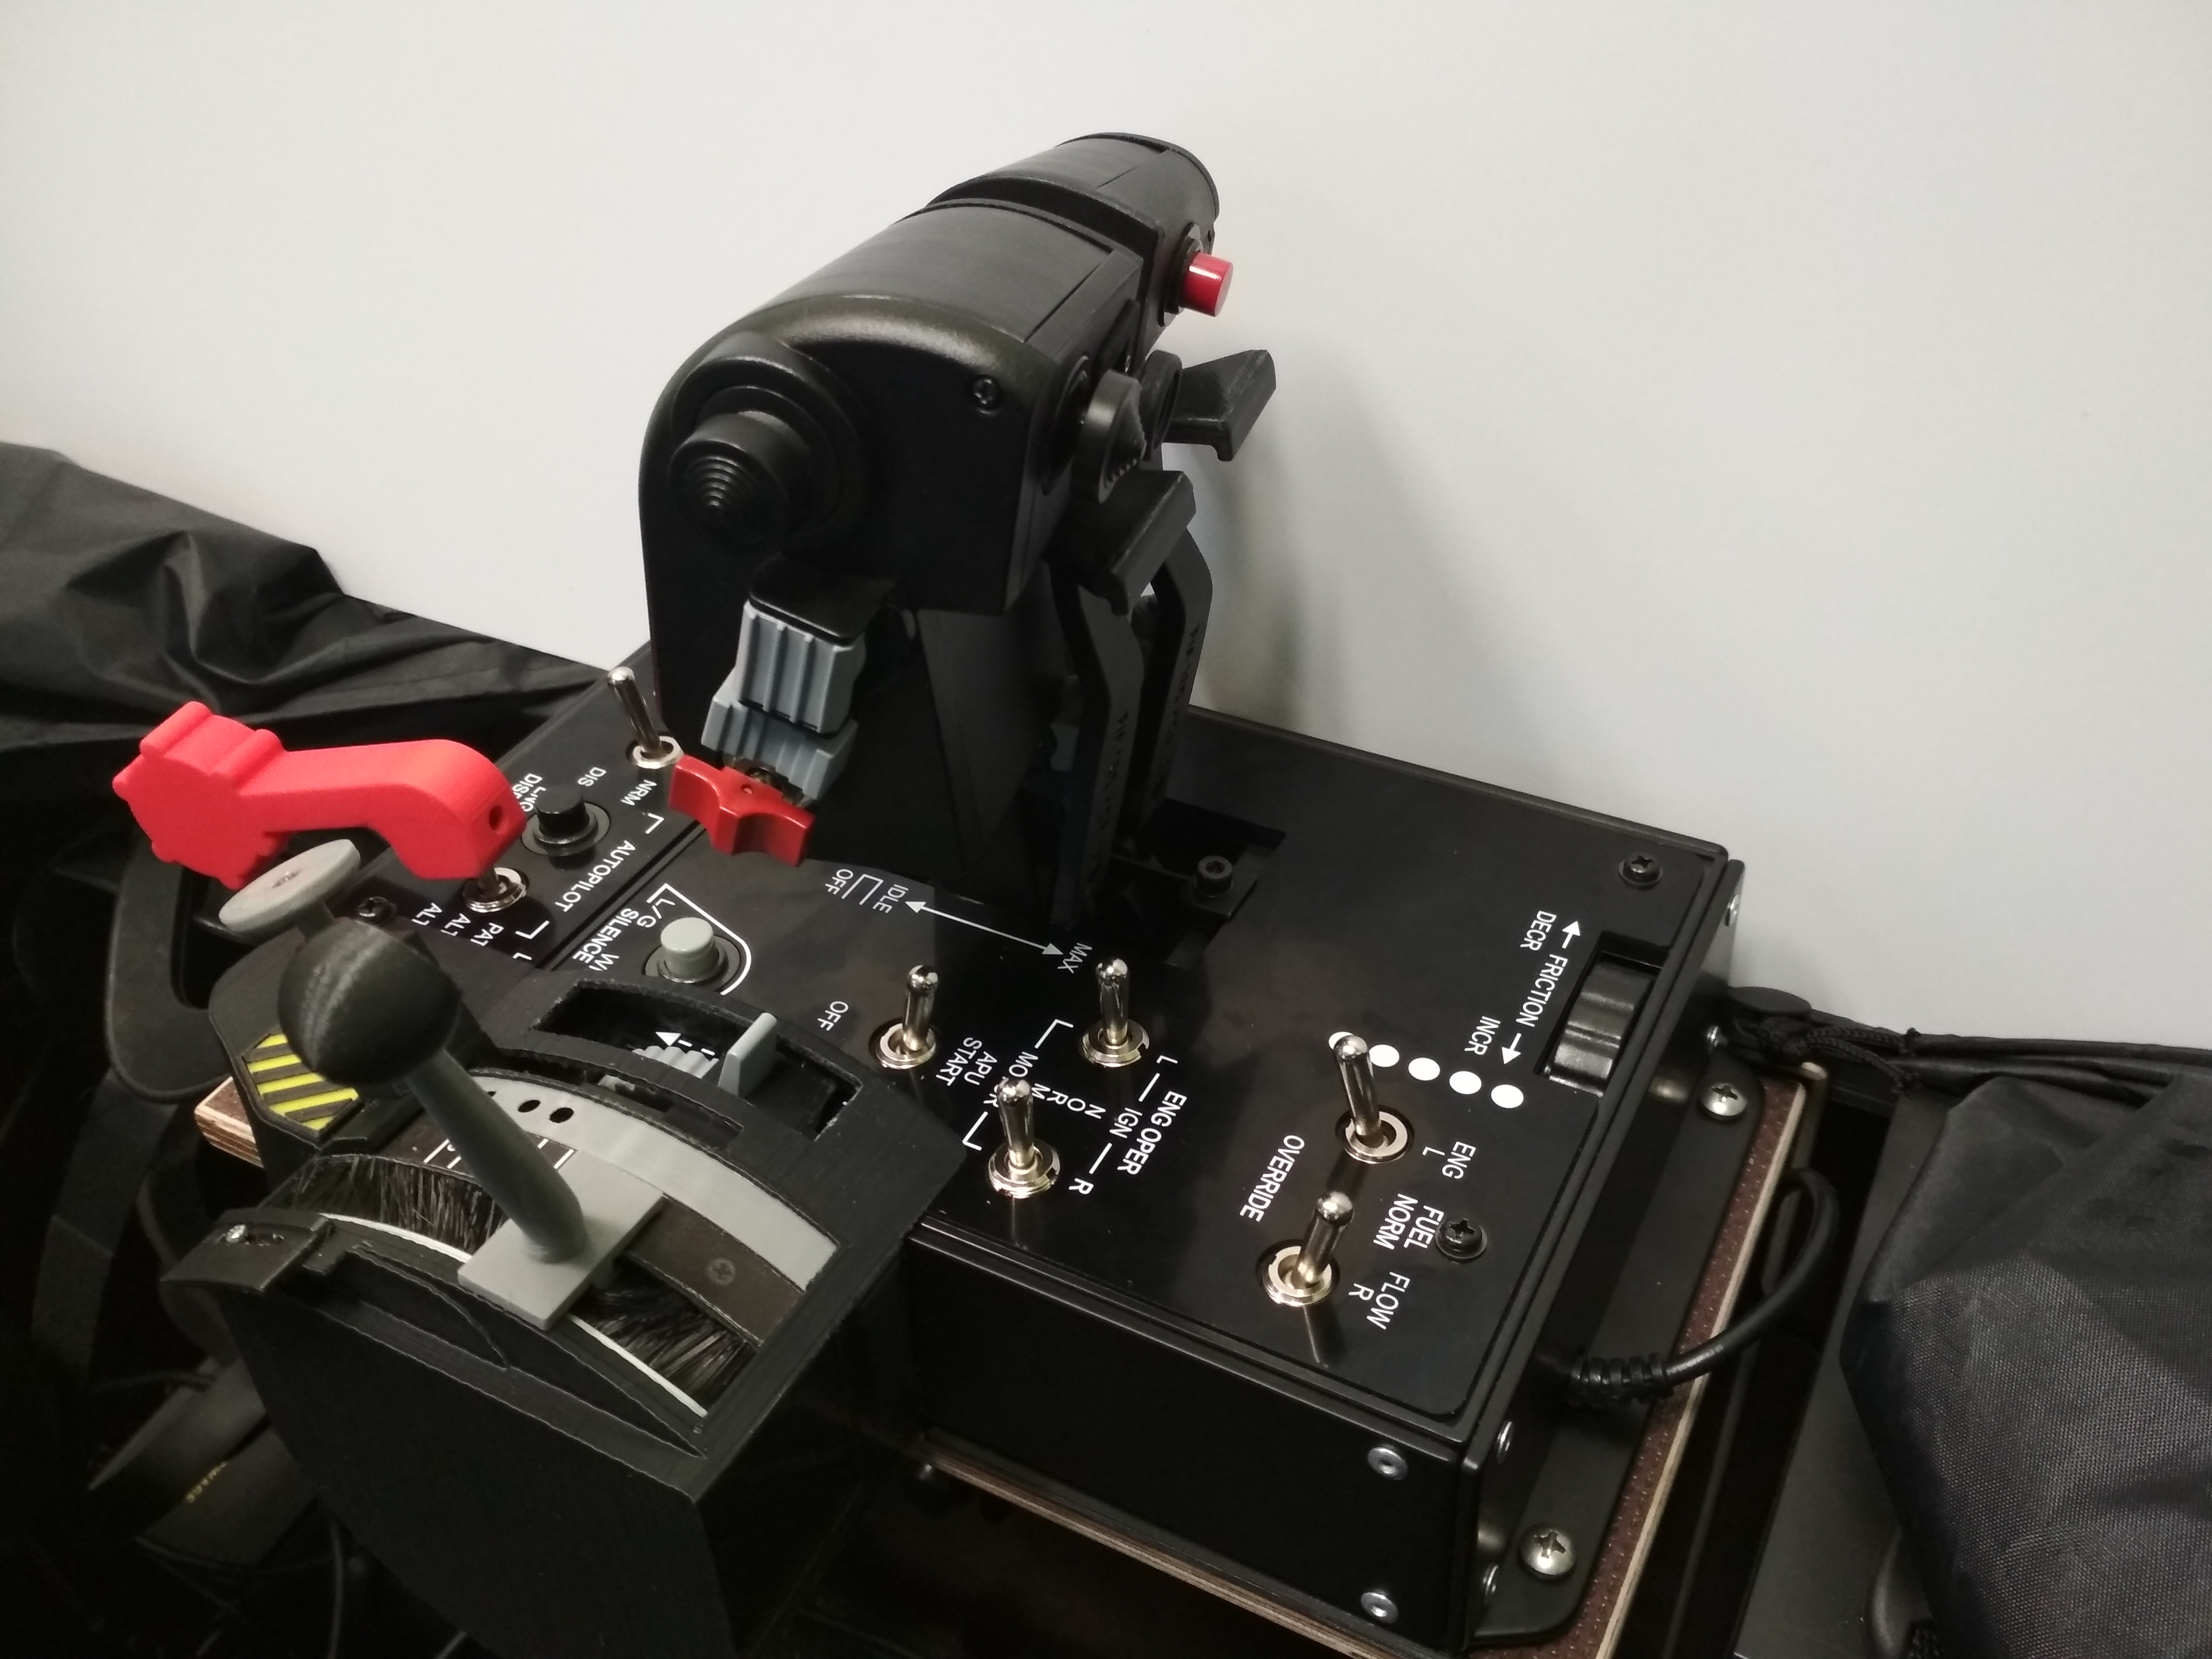
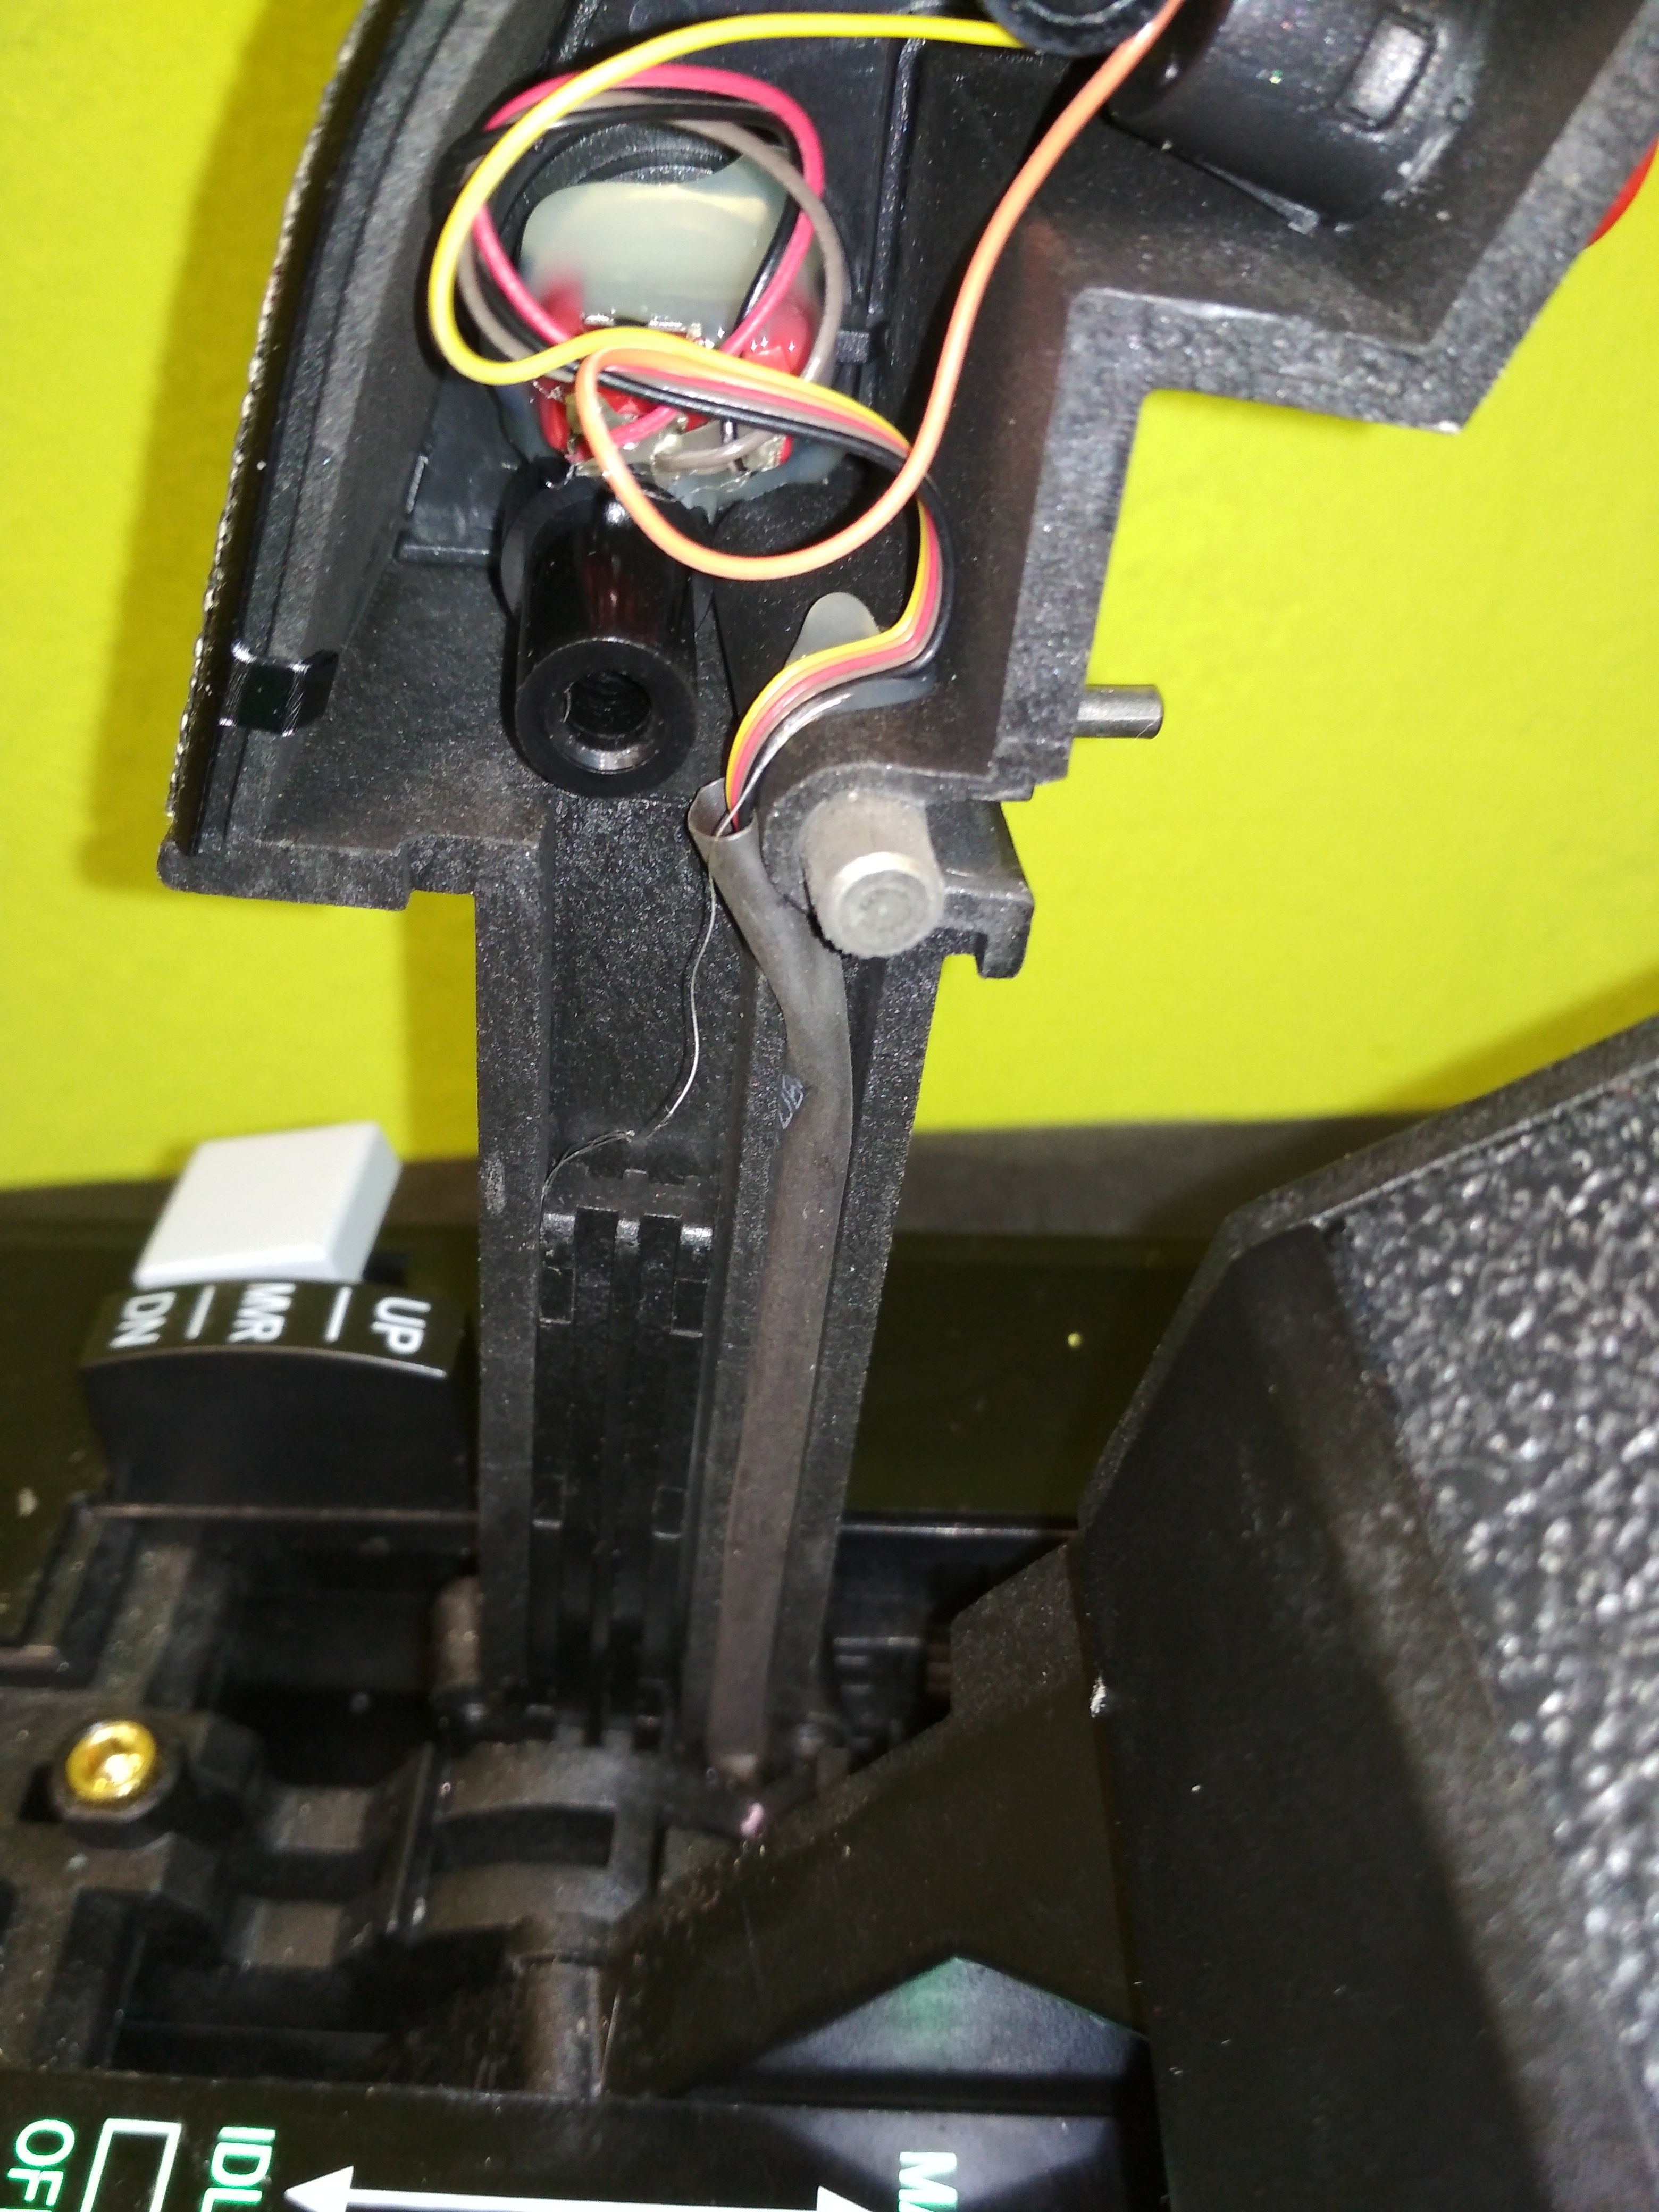
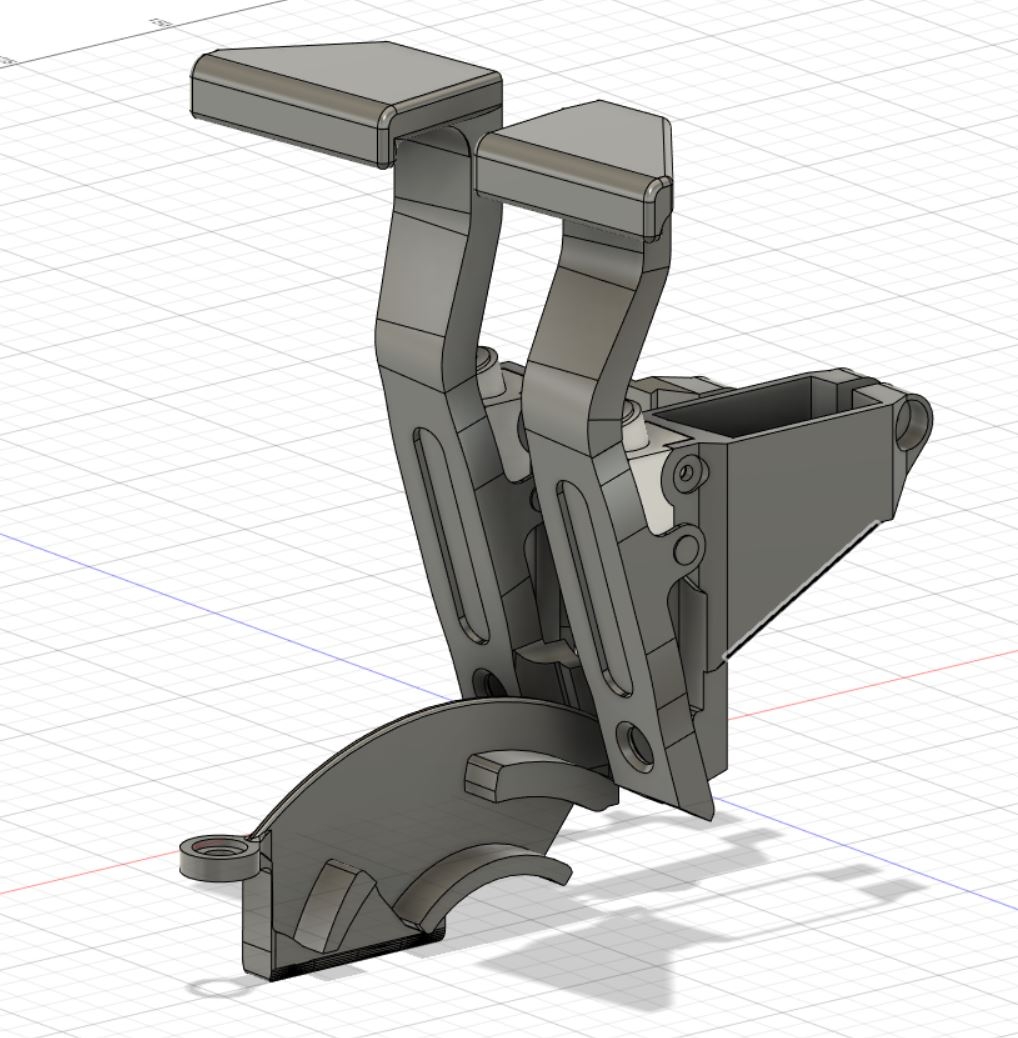
files and instructions https://www.dropbox.com/sh/9wz0cizsj6cc0w6/AABKLdCXbucvjYUUsw8COXuwa?dl=0 added the Gcode as well but be aware Gcode is always very printer specific i would not recommend to use mine, STL files are included of course DISCLAIMER: appplying this MOD will definately VOID your WARRANTY, be aware! all parts are again divided into "EVERYONE can print that" parts, so u should have no troubles printing them, NO ELECTRONICS NEEDED most parts do need supports !!! and .. align them intelligent when slicing, i used PLA. I own a GEEETECH A10 which is quite good for its price. If you use a printing service u will get a nicer surface and better movement. Ideally the rail parts should be made of metal, the fingerlifts of plastics. for the springs i used a rollerpen s , u will need some screws, which i got from an old harddrive and other parts i am sure u will find some applicable. look at the photos carefully, for the drilling u SHALL disassemble the levers (see the pictures, just the inner panels, no need to open the HOTAS itself) because of the wiring behind the levers fronts. BE CAREFULLY when applying these holes (template is included to meet the perfect distance as this is essential for a smooth movement). i am not a professional constructor , this was my second more complicated project, i used FUSION360. u might have to cut some parts for better fitting, mine fitted quite well video showing functionality with better lighting, when i am not speaking the autogain goes insane, sorry for that in DCS u have to apply a custom curve under "axis settings" to meet the exact detent positions. ( Do not calibrate your hotas after applying this mod, use the custom curves setting under dcs. If you calibrate it under windows the button 29/30 wont work till u calibrate again without the mod mounted. If you don t mind a correct idle/off behaviour u may calibrate it under windows, then no custom curves will be needed. ) Assign buttons 29 and 30 to to the corresponding engine START/STOP (idle/off) to get a realistic behaviour as in the video. Because of the newly designed detent, both hotas levers remain lifted for their whole travel way and when raising the fingerlifts and moving the levers to the off position button29/30 get recognized. there is no need to lift the levers itself anymore, just the fingerlifts. have fun https://www.paypal.com/cgi-bin/webscr?cmd=_s-xclick&hosted_button_id=LT5HG625K52DA&source=url if someone wants to sponsor my next projects filament:music_whistling: __________________ my projects: AV8B https://forums.eagle.ru/showthread.php?t=233670 F18C https://forums.eagle.ru/showthread.php?t=234747 .
-
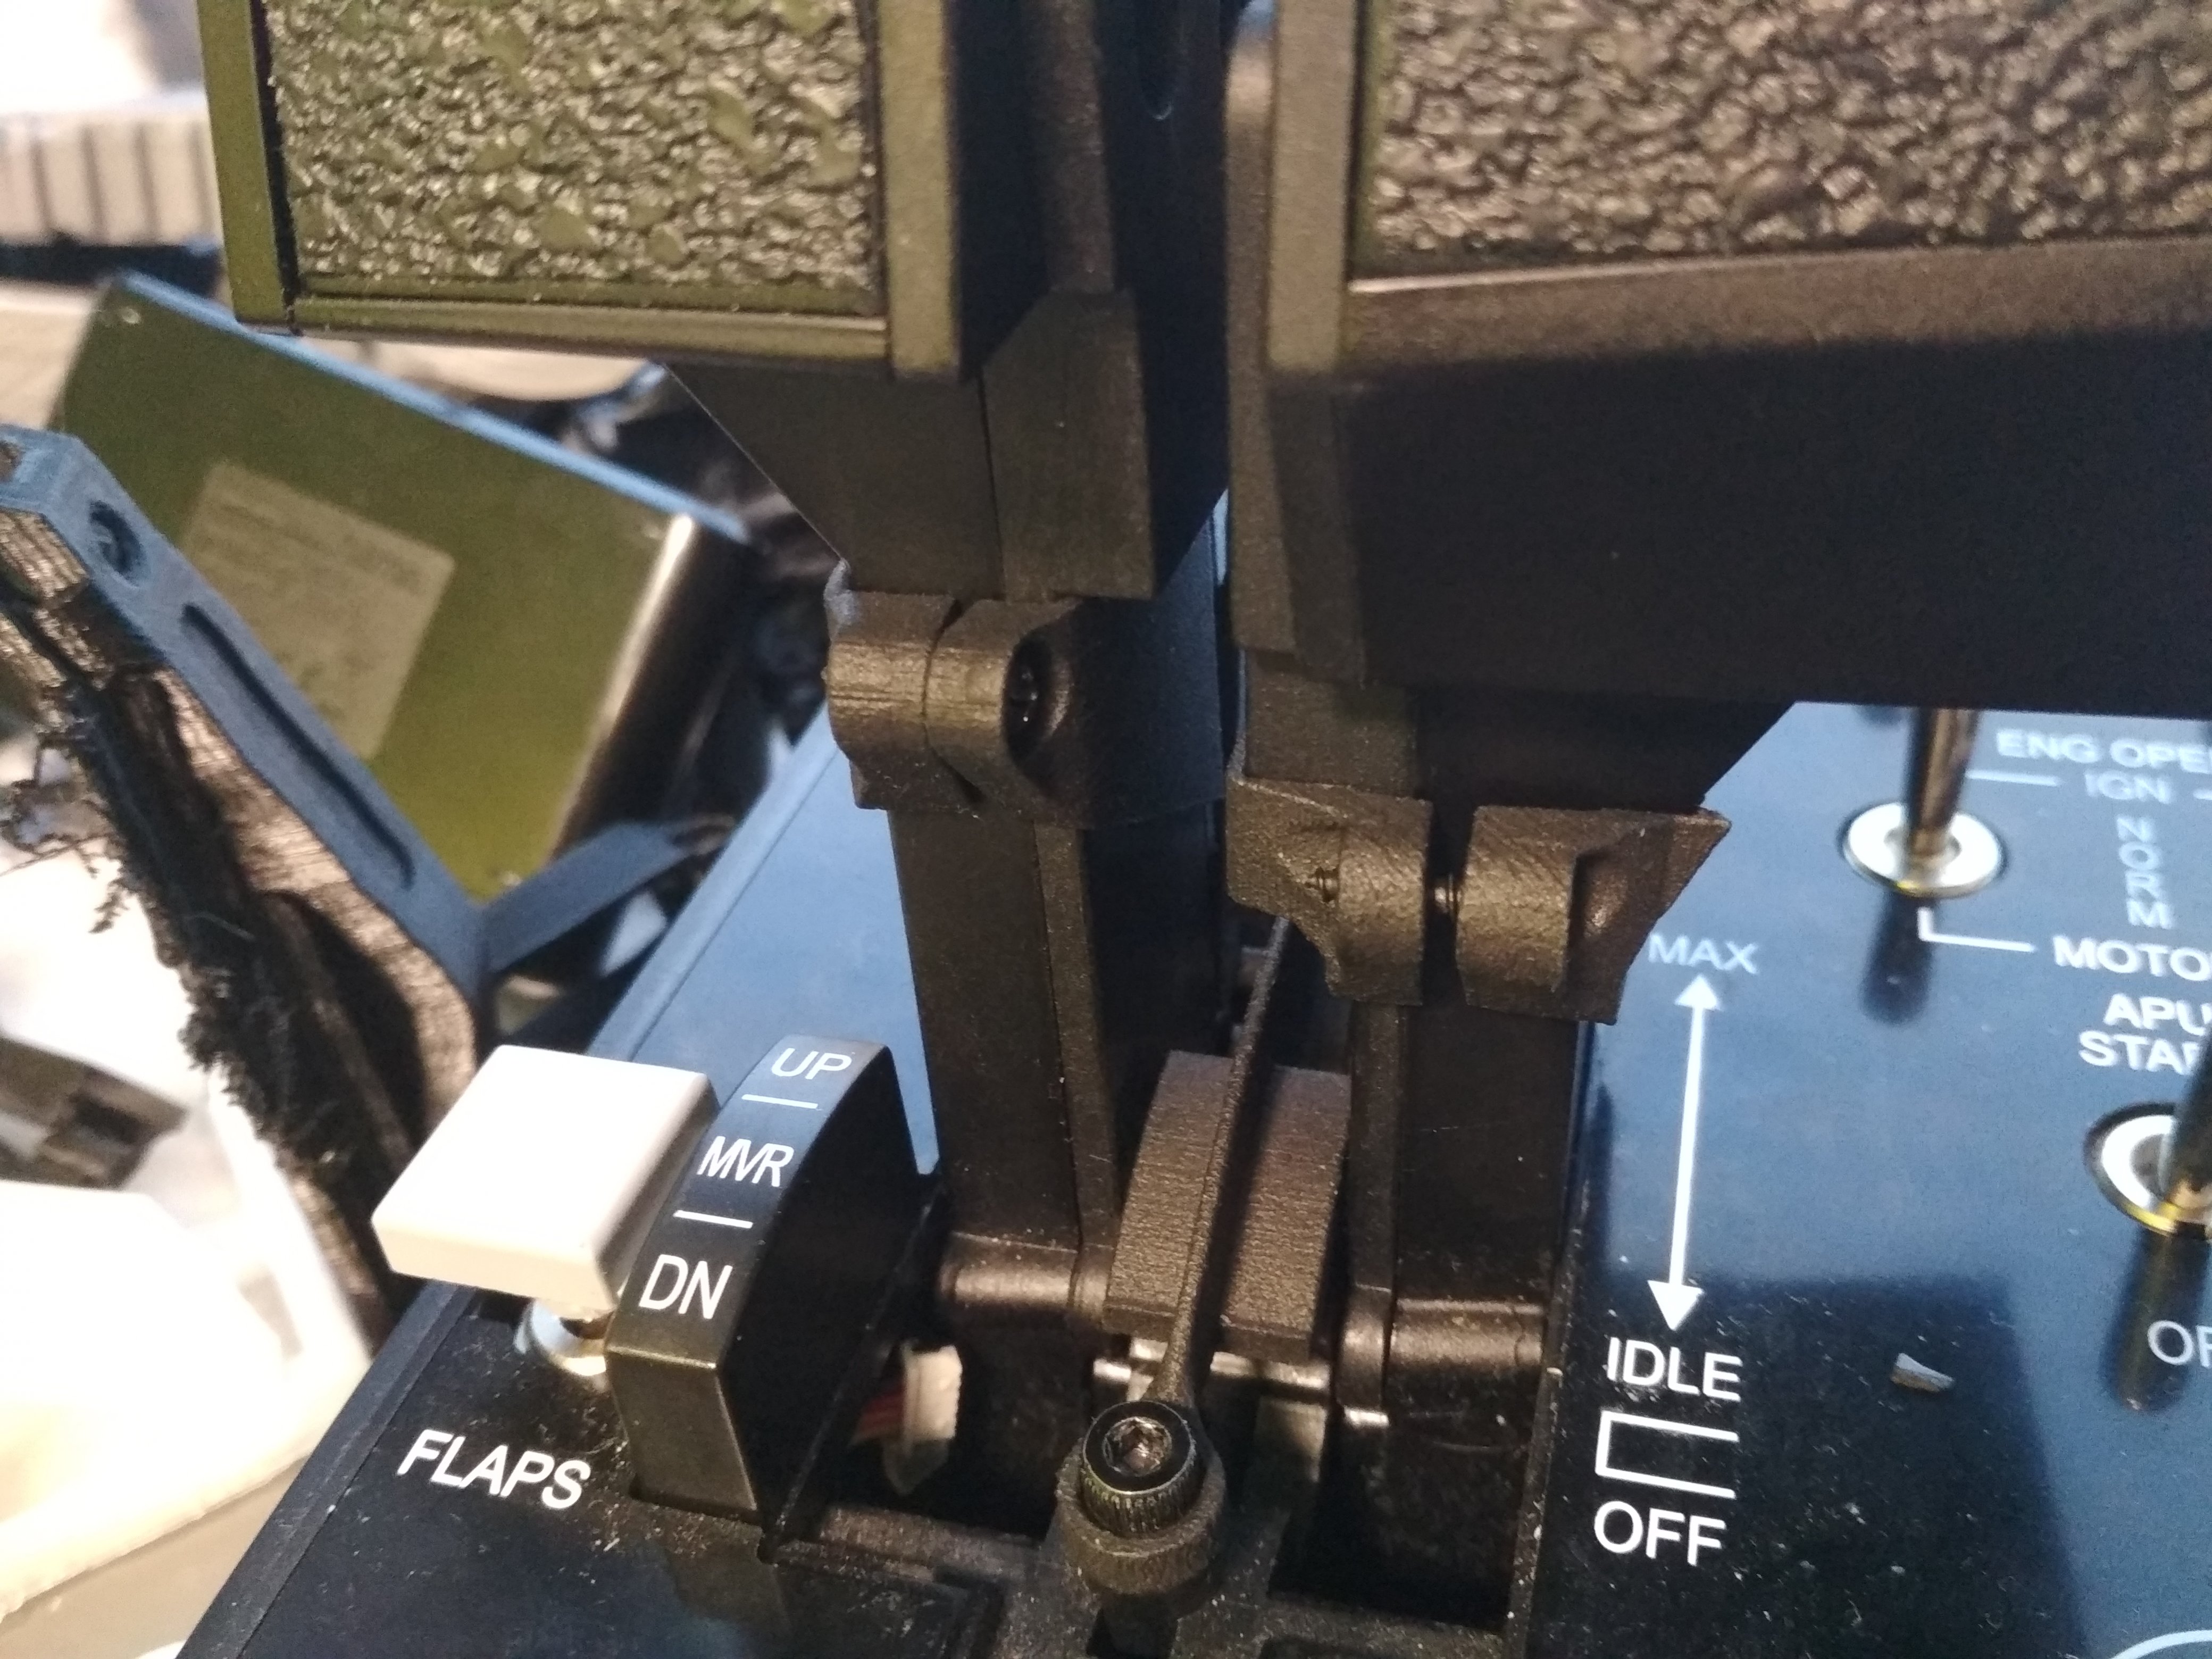
F18 fingerlift MOD for the WARTHOG HOTAS I ordered my MODs parts from a 3d printing service printed in MJF NYLON. My original MOD (invasive with the need to drill holes into your hotas) will remain online free to download. Just because several people asked, and i have been shocked regarding 3d printer service prices for a single set, i decided to do collective orders and offer them to anyone interested. I set up a SHOP to make handling of the orders easier and less time intense for me as spare parts and paypal handling is way more convenient that way. RESTOCK COMING SOON https://www.sim-addons.com/ email: contact@sim-addons.com https://www.youtube.com/channel/UCgoKDER5GRIi6ttNfWfocyw Installation inctructions https://www.dropbox.com/sh/6zwkl4xy83n48cp/AAD0d7StY1G6M9EMP0emVK0ya?dl=0 this MOD is made of NYLON because a full metal version is not doable at an affordable price, plastics can brake so don t be way to rough with them, i use mine(invasive ones) now for nearly a year and they are still alive:smilewink: flexibility test where i try to brake one other vids regarding mounting and behavior UPDATE 11.11.2019 shipment is always and only done mondays, as i just learned diffrent batches of Thrustmasters HOTAS are not exactly accurate in dimensions, and or the built in fingerlift noses are often worn out i suggest to start mounting my MOD without trying to find the sweetspot for pushtrough (as shown in the video). (of course u can sand or trim the leading edges of the fingerlifts noses so they raise themselves easier for pushtrough, at your own risk) UPDATE 13.11.2019 please take care when mounting the clamps, left side comes together till touching, but the RIGHT SIDE NOT there will remain a gap. Tighten the screws only till the clamps stay in place. Be careful. please. I added a photo of the clamps from behind. UPDATE 15.11.2019 suggest to add some friction to your hotas to avoid pushing it forward too hard/fast UPDATE 14.01.2019 added the noninvasive V1 files, be aware that printing those files with a FDM printer is quite hard if not impossible, ordering from a printing company will be quite expensive i will start to do a Version2 this weekend, so anyone interested into V2 can send me a mail and i will put him onto my list, when there are enough interested to get a reasonable price i will come back to you then OLD POST PROJECT is FINISHED check below [Hi trying to do a F18 fingerlift MOD ,3d printed, for the WARTHOG HOTAS now, used to prevent me from activating the AB unintended (i know that this Fingerlifts are used for IDLE-CUTOFF,AB and AB can be done with pushthrough as well). this is the progress thread for it, i expect this to be finished till end of march] __________________ my projects: AV8B https://forums.eagle.ru/showthread.php?t=233670 F18C https://forums.eagle.ru/showthread.php?t=234747
-
AV8 3d printed nozzle lever for warthog throttle
FoxDelta replied to FoxDelta's topic in Home Cockpits
added a short video -
https://forums.eagle.ru/showthread.php?t=233670
-
AV8 3d printed nozzle lever for warthog throttle
FoxDelta replied to FoxDelta's topic in Home Cockpits
download avbl DOWNLOAD online , check 2nd post -
PointCTRL - Finger Mounted VR Controller
FoxDelta replied to MilesD's topic in PC Hardware and Related Software
looking forward to get this great device, i guess there are several people on that list owning a 3d printer themselves. i would be completly fine printing the enclosures myself if u are willing to ship without -
AV8 3d printed nozzle lever for warthog throttle
FoxDelta replied to FoxDelta's topic in Home Cockpits
THX, and it remains in position like built as one piece thx to your connection solution:) -
AV8 3d printed nozzle lever for warthog throttle
FoxDelta replied to FoxDelta's topic in Home Cockpits
FIN
-
VIPER, i agree, its a shame, nothing more to say, i already surrendered regarding bug reporting and the lack of minimalistic tests before rolling out features or bugbugbugfixes. btw, just recognized your profile s location
-
AV8 3d printed nozzle lever for warthog throttle
FoxDelta replied to FoxDelta's topic in Home Cockpits
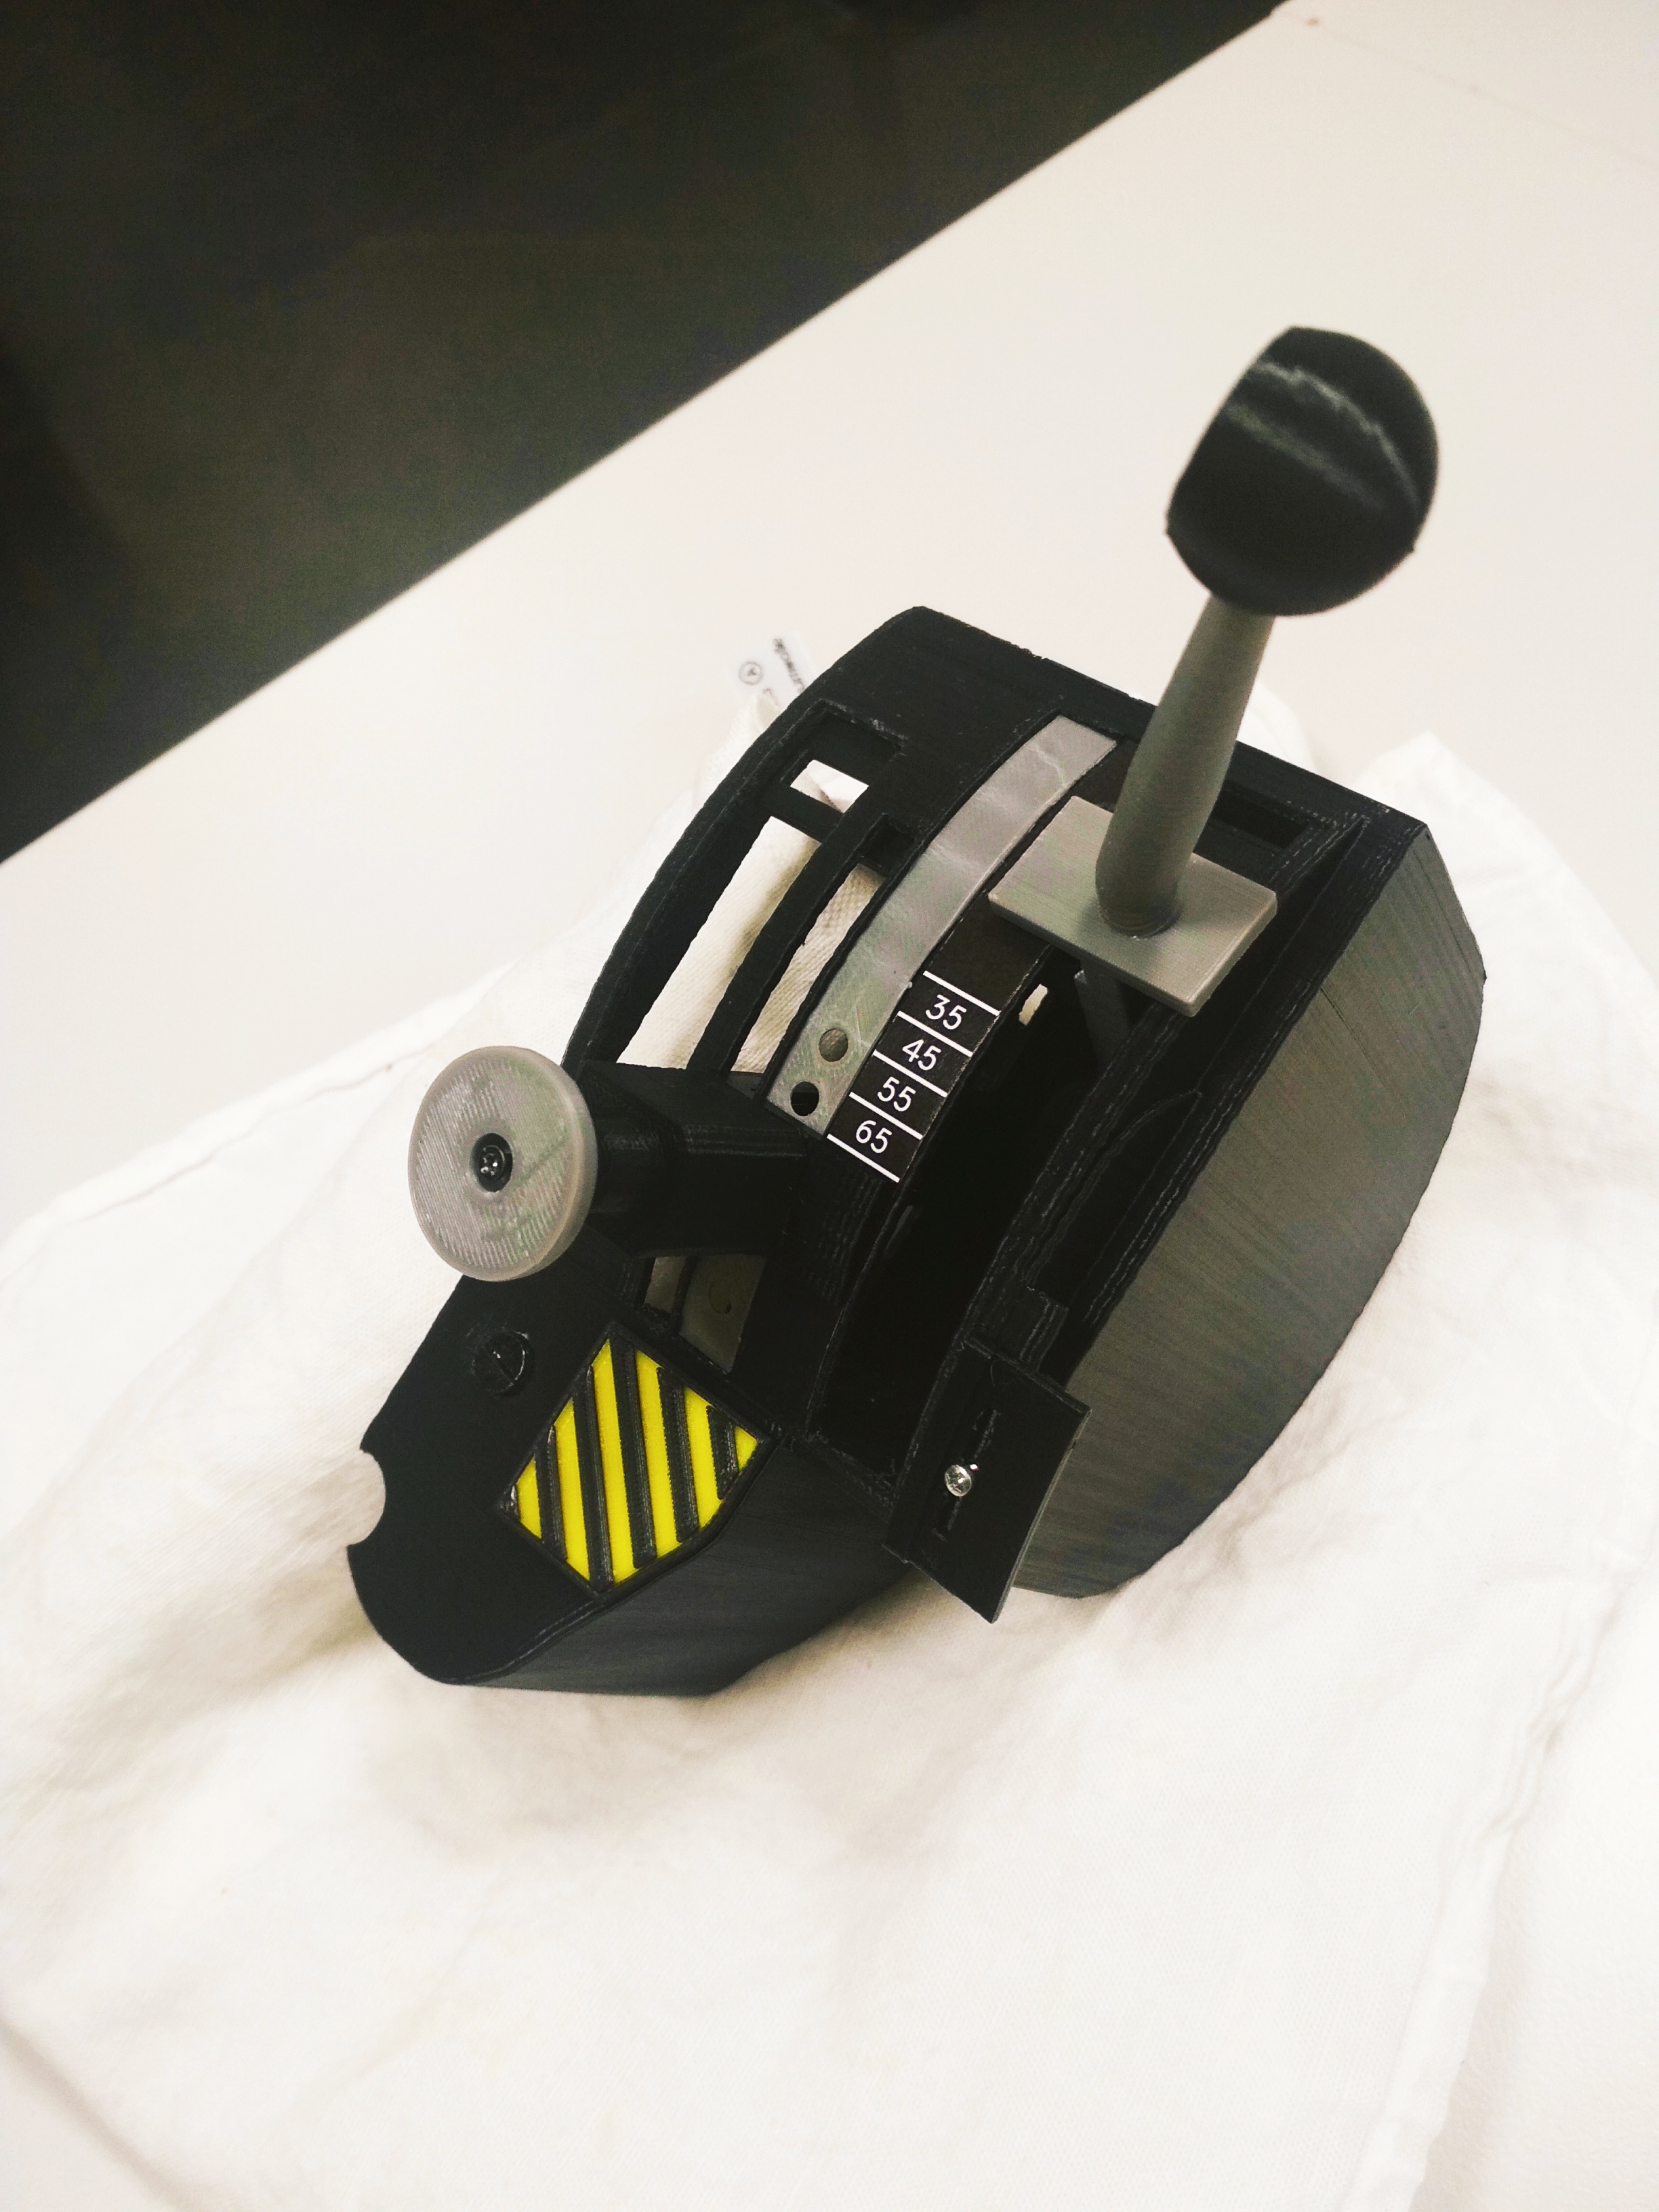
now with detent hole strip
-
AV8 3d printed nozzle lever for warthog throttle
FoxDelta replied to FoxDelta's topic in Home Cockpits
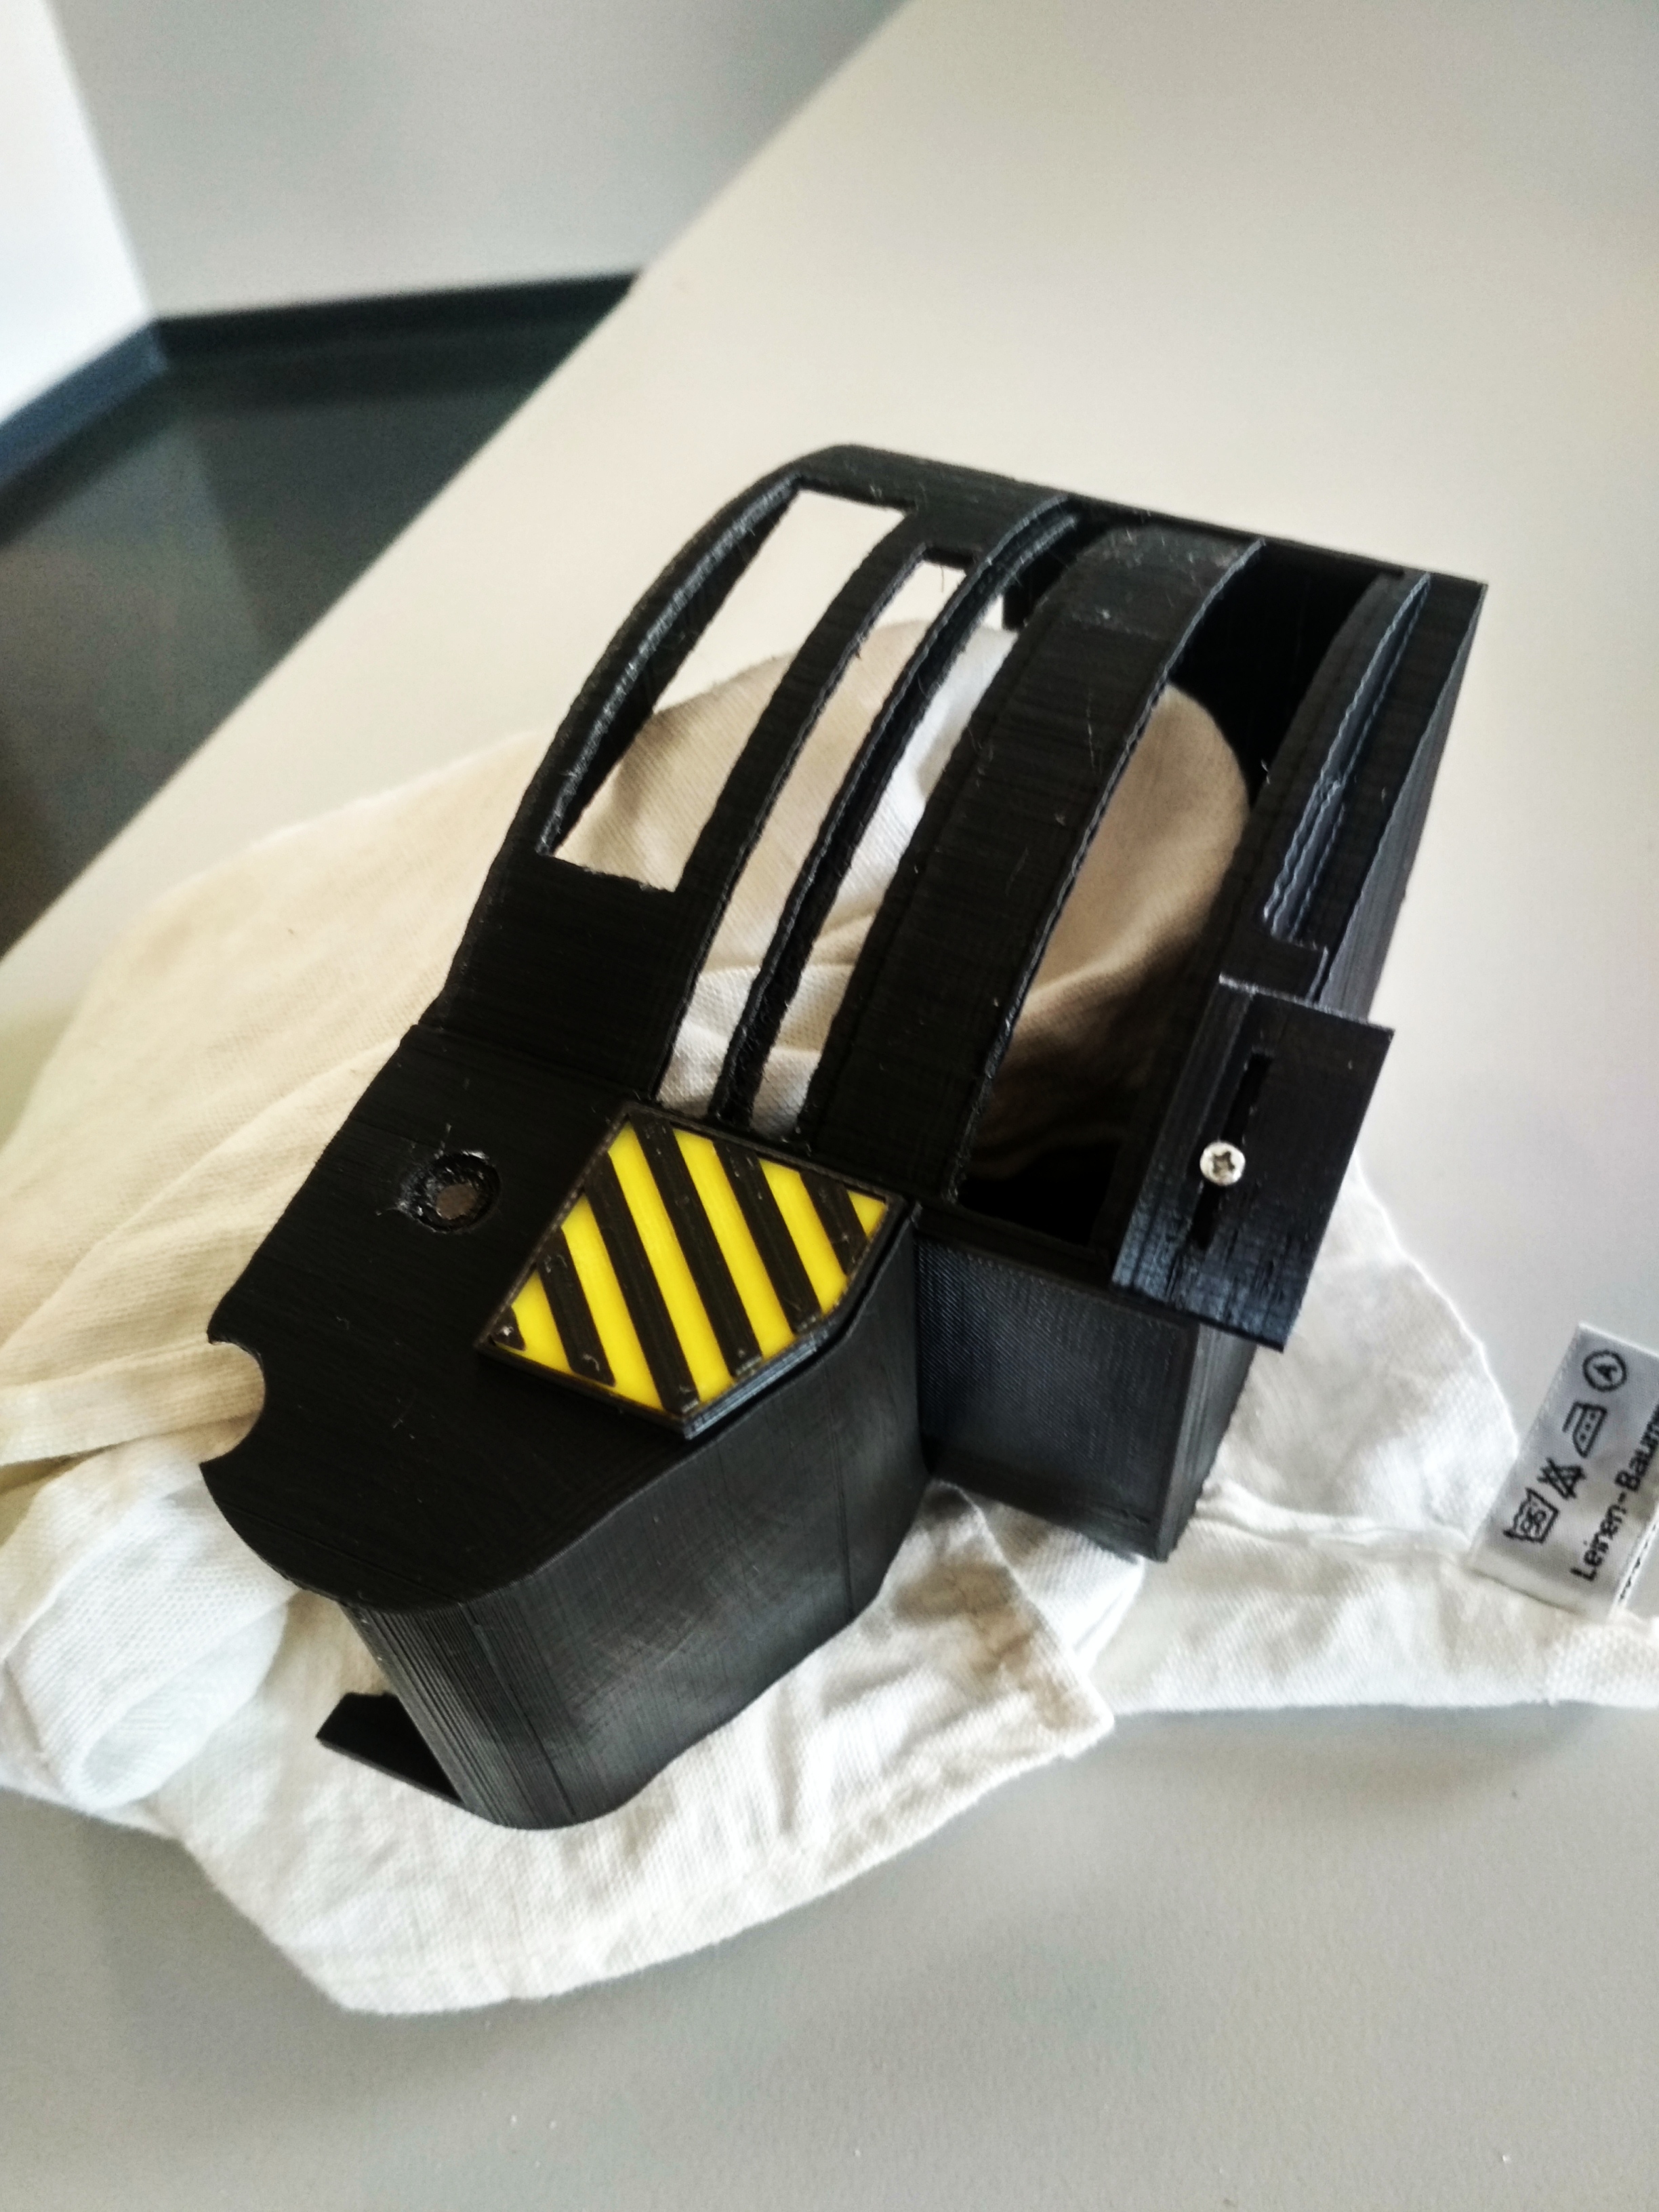
housing missing the customizeable holestrip for the STOL
-
AV8 3d printed nozzle lever for warthog throttle
FoxDelta replied to FoxDelta's topic in Home Cockpits
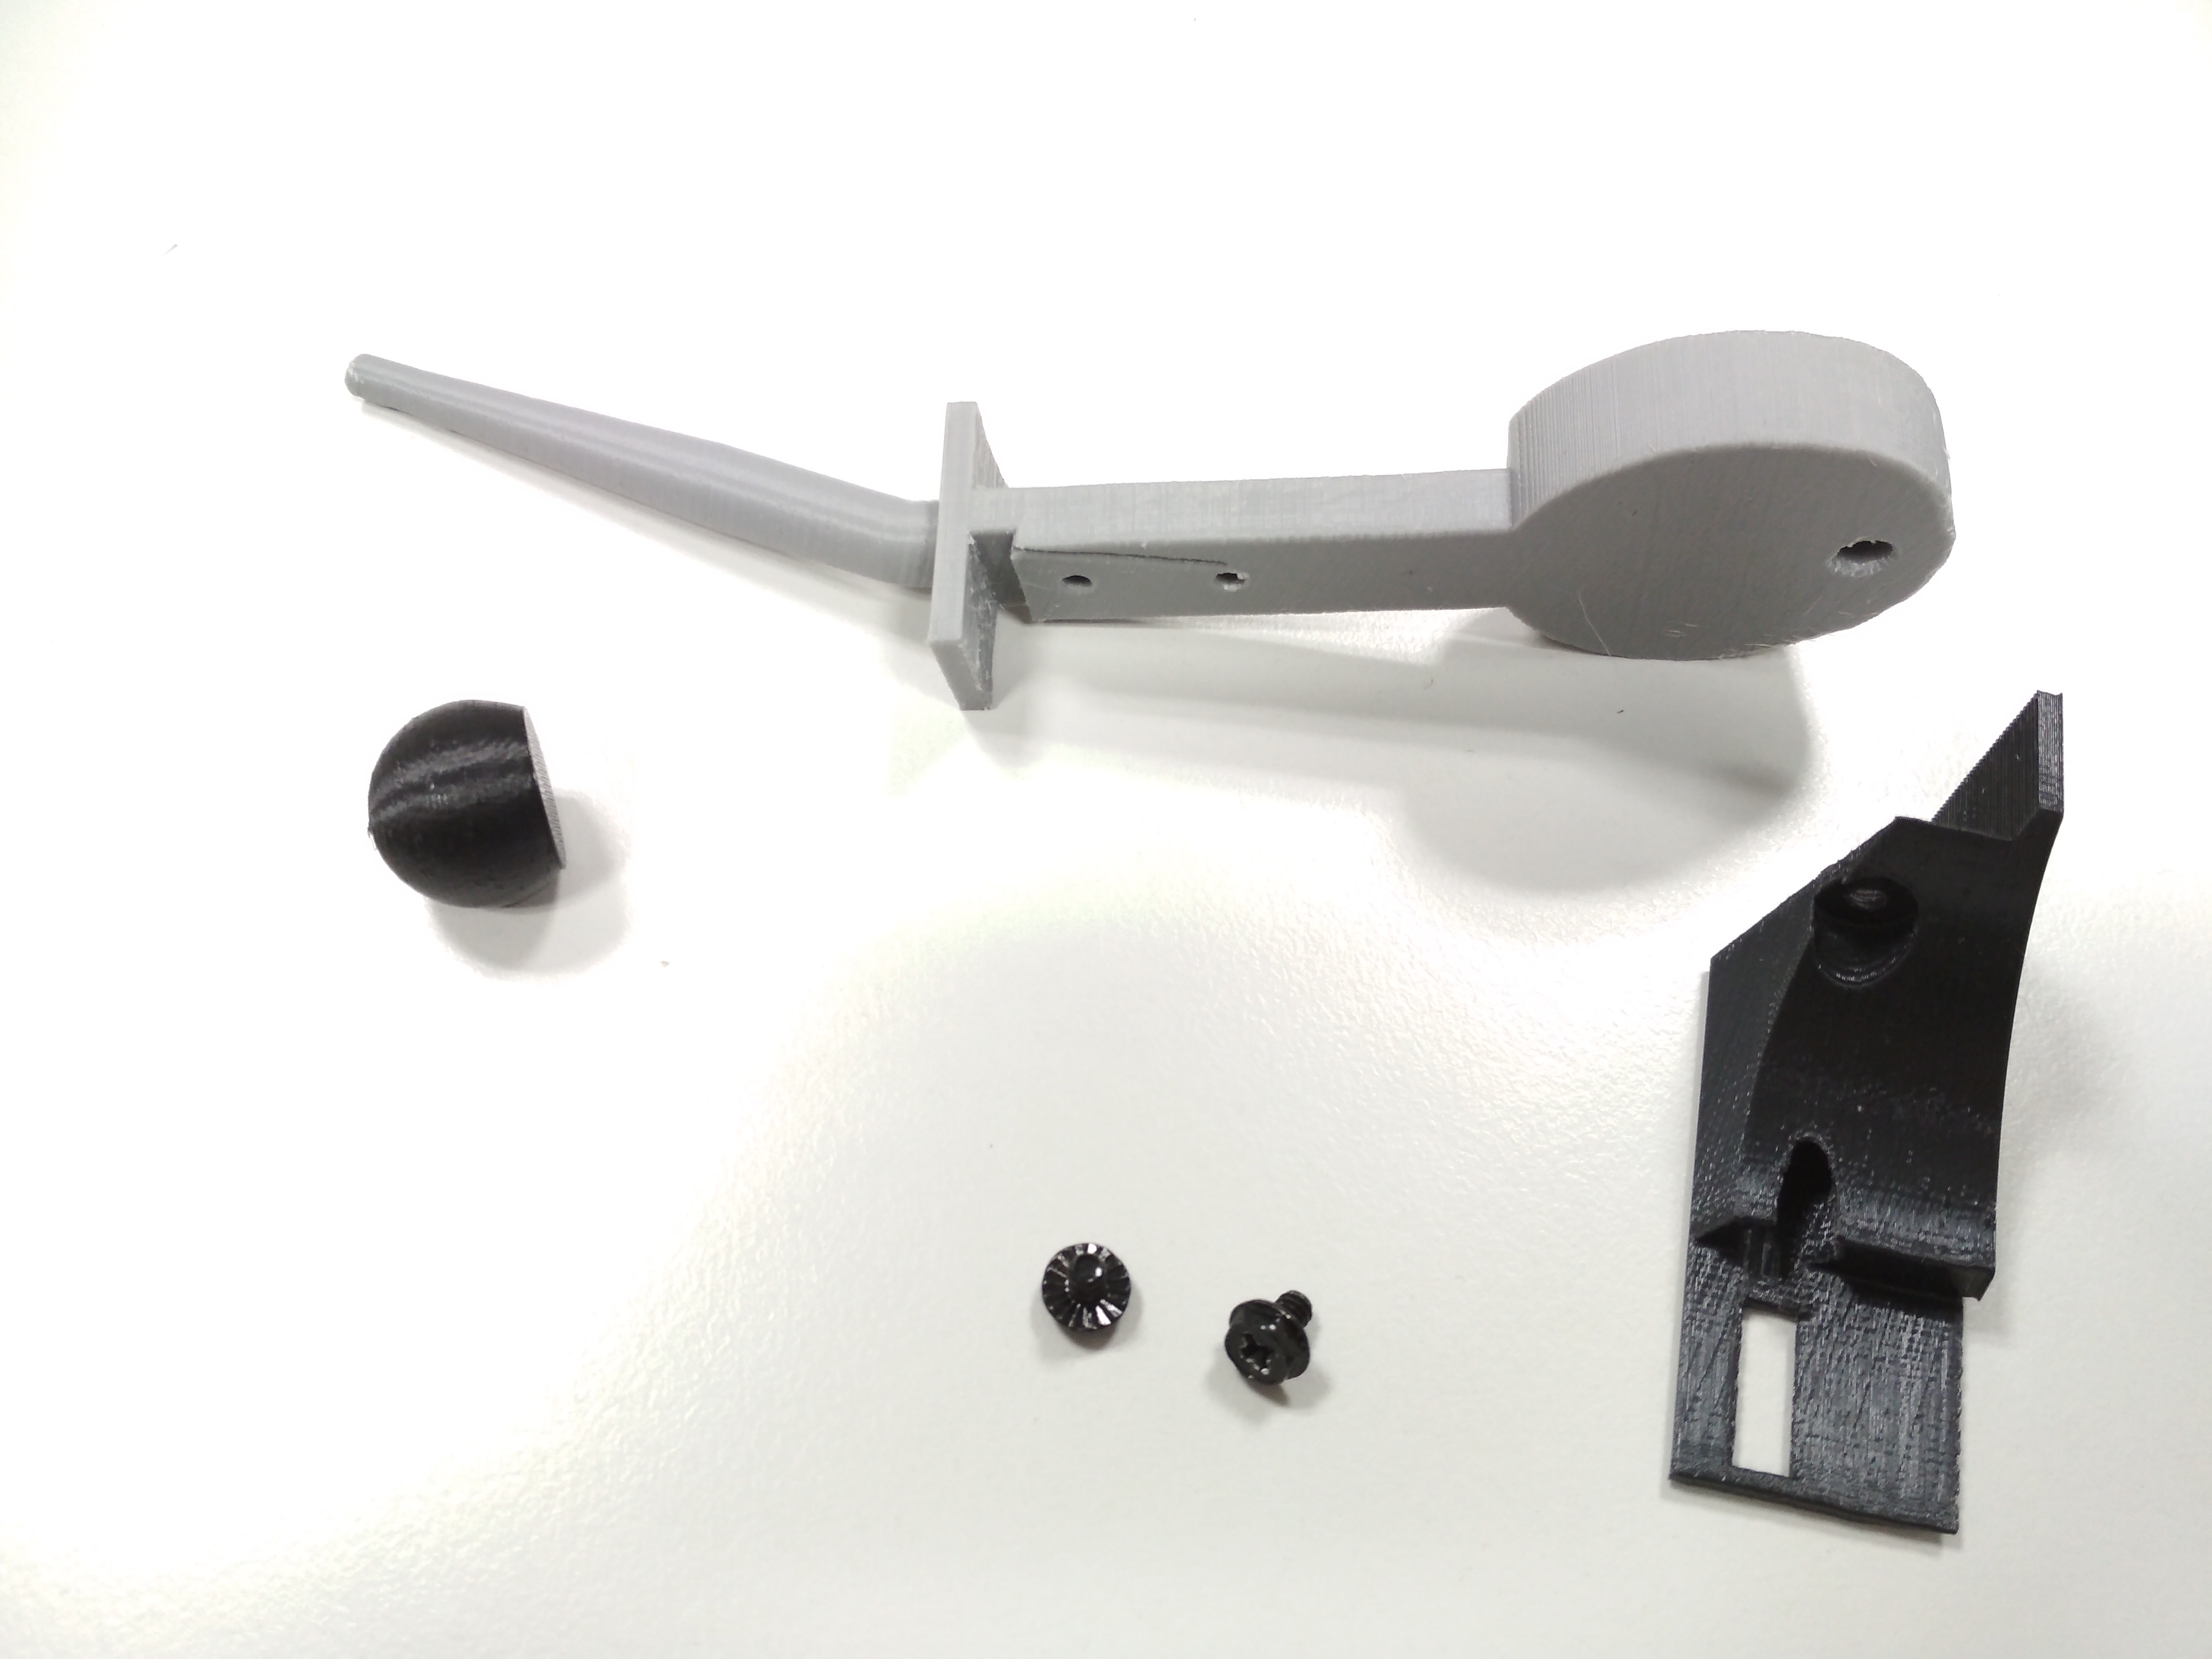
lever + connector, housing is in the printer now
-
AV8 3d printed nozzle lever for warthog throttle
FoxDelta replied to FoxDelta's topic in Home Cockpits
STOL is ready -
AV8 3d printed nozzle lever for warthog throttle
FoxDelta replied to FoxDelta's topic in Home Cockpits
hah, next month i will try to do a fingerlift mod for the HOTAS. so no more time for the harrier then
-
AV8 3d printed nozzle lever for warthog throttle
FoxDelta replied to FoxDelta's topic in Home Cockpits
still needs some polishing , be patient guys, hope to finish this till end of next week -
AV8 3d printed nozzle lever for warthog throttle
FoxDelta replied to FoxDelta's topic in Home Cockpits
no, distance is quite comfortable i will post new photos tomorrow, there u will see