MacFevre
-
Posts
461 -
Joined
-
Last visited
Content Type
Profiles
Forums
Events
Everything posted by MacFevre
-
That screen looks amazing Anton. Very nice upgrade!
-
Seems you nailed the sweet spot! Nicely done. Looking forward to seeing how you placed them. Buttons aren't toys! :smilewink: My Pit so far: A-10C Simulator Pit "The TARDIS." Dzus Fastener tutorial, on the inexpensive side: DIY Dzus Fastener
-
Ha, yeah that would be pretty cool. I think there were someone on here earlier that was going to try using rear projection for their panel. Don't know how that ever turned out. As far as the items available now, it looks like Lynx is the man! Lynx, I've got a large order for you, so be expecting a PM. I'm getting excited knowing that I can finally make progress on my pit. I know a lot of this stuff usually winds up as vaporware, so it's exciting to see it actually being offered. :) Buttons aren't toys! :smilewink: My new Version 2 Pit: MacFevre A-10C SimPit V2 My first pit thread: A-10C Simulator Pit "The TARDIS." Dzus Fastener tutorial, on the inexpensive side: DIY Dzus Fastener
-
Thanks for the info! One thing is for certain, that extension is really a work of art. Can't wait to see where you go from here.
-
Hey Lynx, I was thinking I might have to try and find an older monitor that was still in the 4:3 format. That way it might cut down on it being too wide. Also, are you taking off the bezels and back? Sometimes by just doing that you can lose up to an inch on the sides and top. Just a thought...
-
Hey Bubbles, got a couple questions for you if you don't mind. Been looking at your pics and great pit so far, and like to ask about your TM extension. You know, pretty much the usual. How did you make it, without springs, how does it return to center, how did you attach it to the Cougar, etc. And on your screen setup, something I've always wanted to know but really never got around to asking anyone. (Always just thought I'd cross that bridge when I came to it, but this is a perfect opportunity.) How do you set up DCS to not show the cockpit? It's probably easily done, but I also noticed the HUD on yours Is missing that most others I've seen still show it. Is that just for the photos or do you not fly with it? Anyway, thanks for the great ideas. Wayne
-
Wow! What a setup! Very nice. Buttons aren't toys! :smilewink: My Pit so far: A-10C Simulator Pit "The TARDIS." Dzus Fastener tutorial, on the inexpensive side: DIY Dzus Fastener
-
Thanks Hans. Good to be back. Bit scary there for a bit, but feeling much better. Can't wait to see what you've got in store yourself.
-
Can't wait to see more Anton. Nice job indeed.
-
Thanks Lynx. Just don't look too close. ;) Buttons aren't toys! :smilewink: My Pit so far: A-10C Simulator Pit "The TARDIS." Dzus Fastener tutorial, on the inexpensive side: DIY Dzus Fastener
-
Lynx, the center piece for the MIP has worked out better than I ever expected! Thank you! Expect another PM, except this time with a whole shopping list full of items! ;)
-
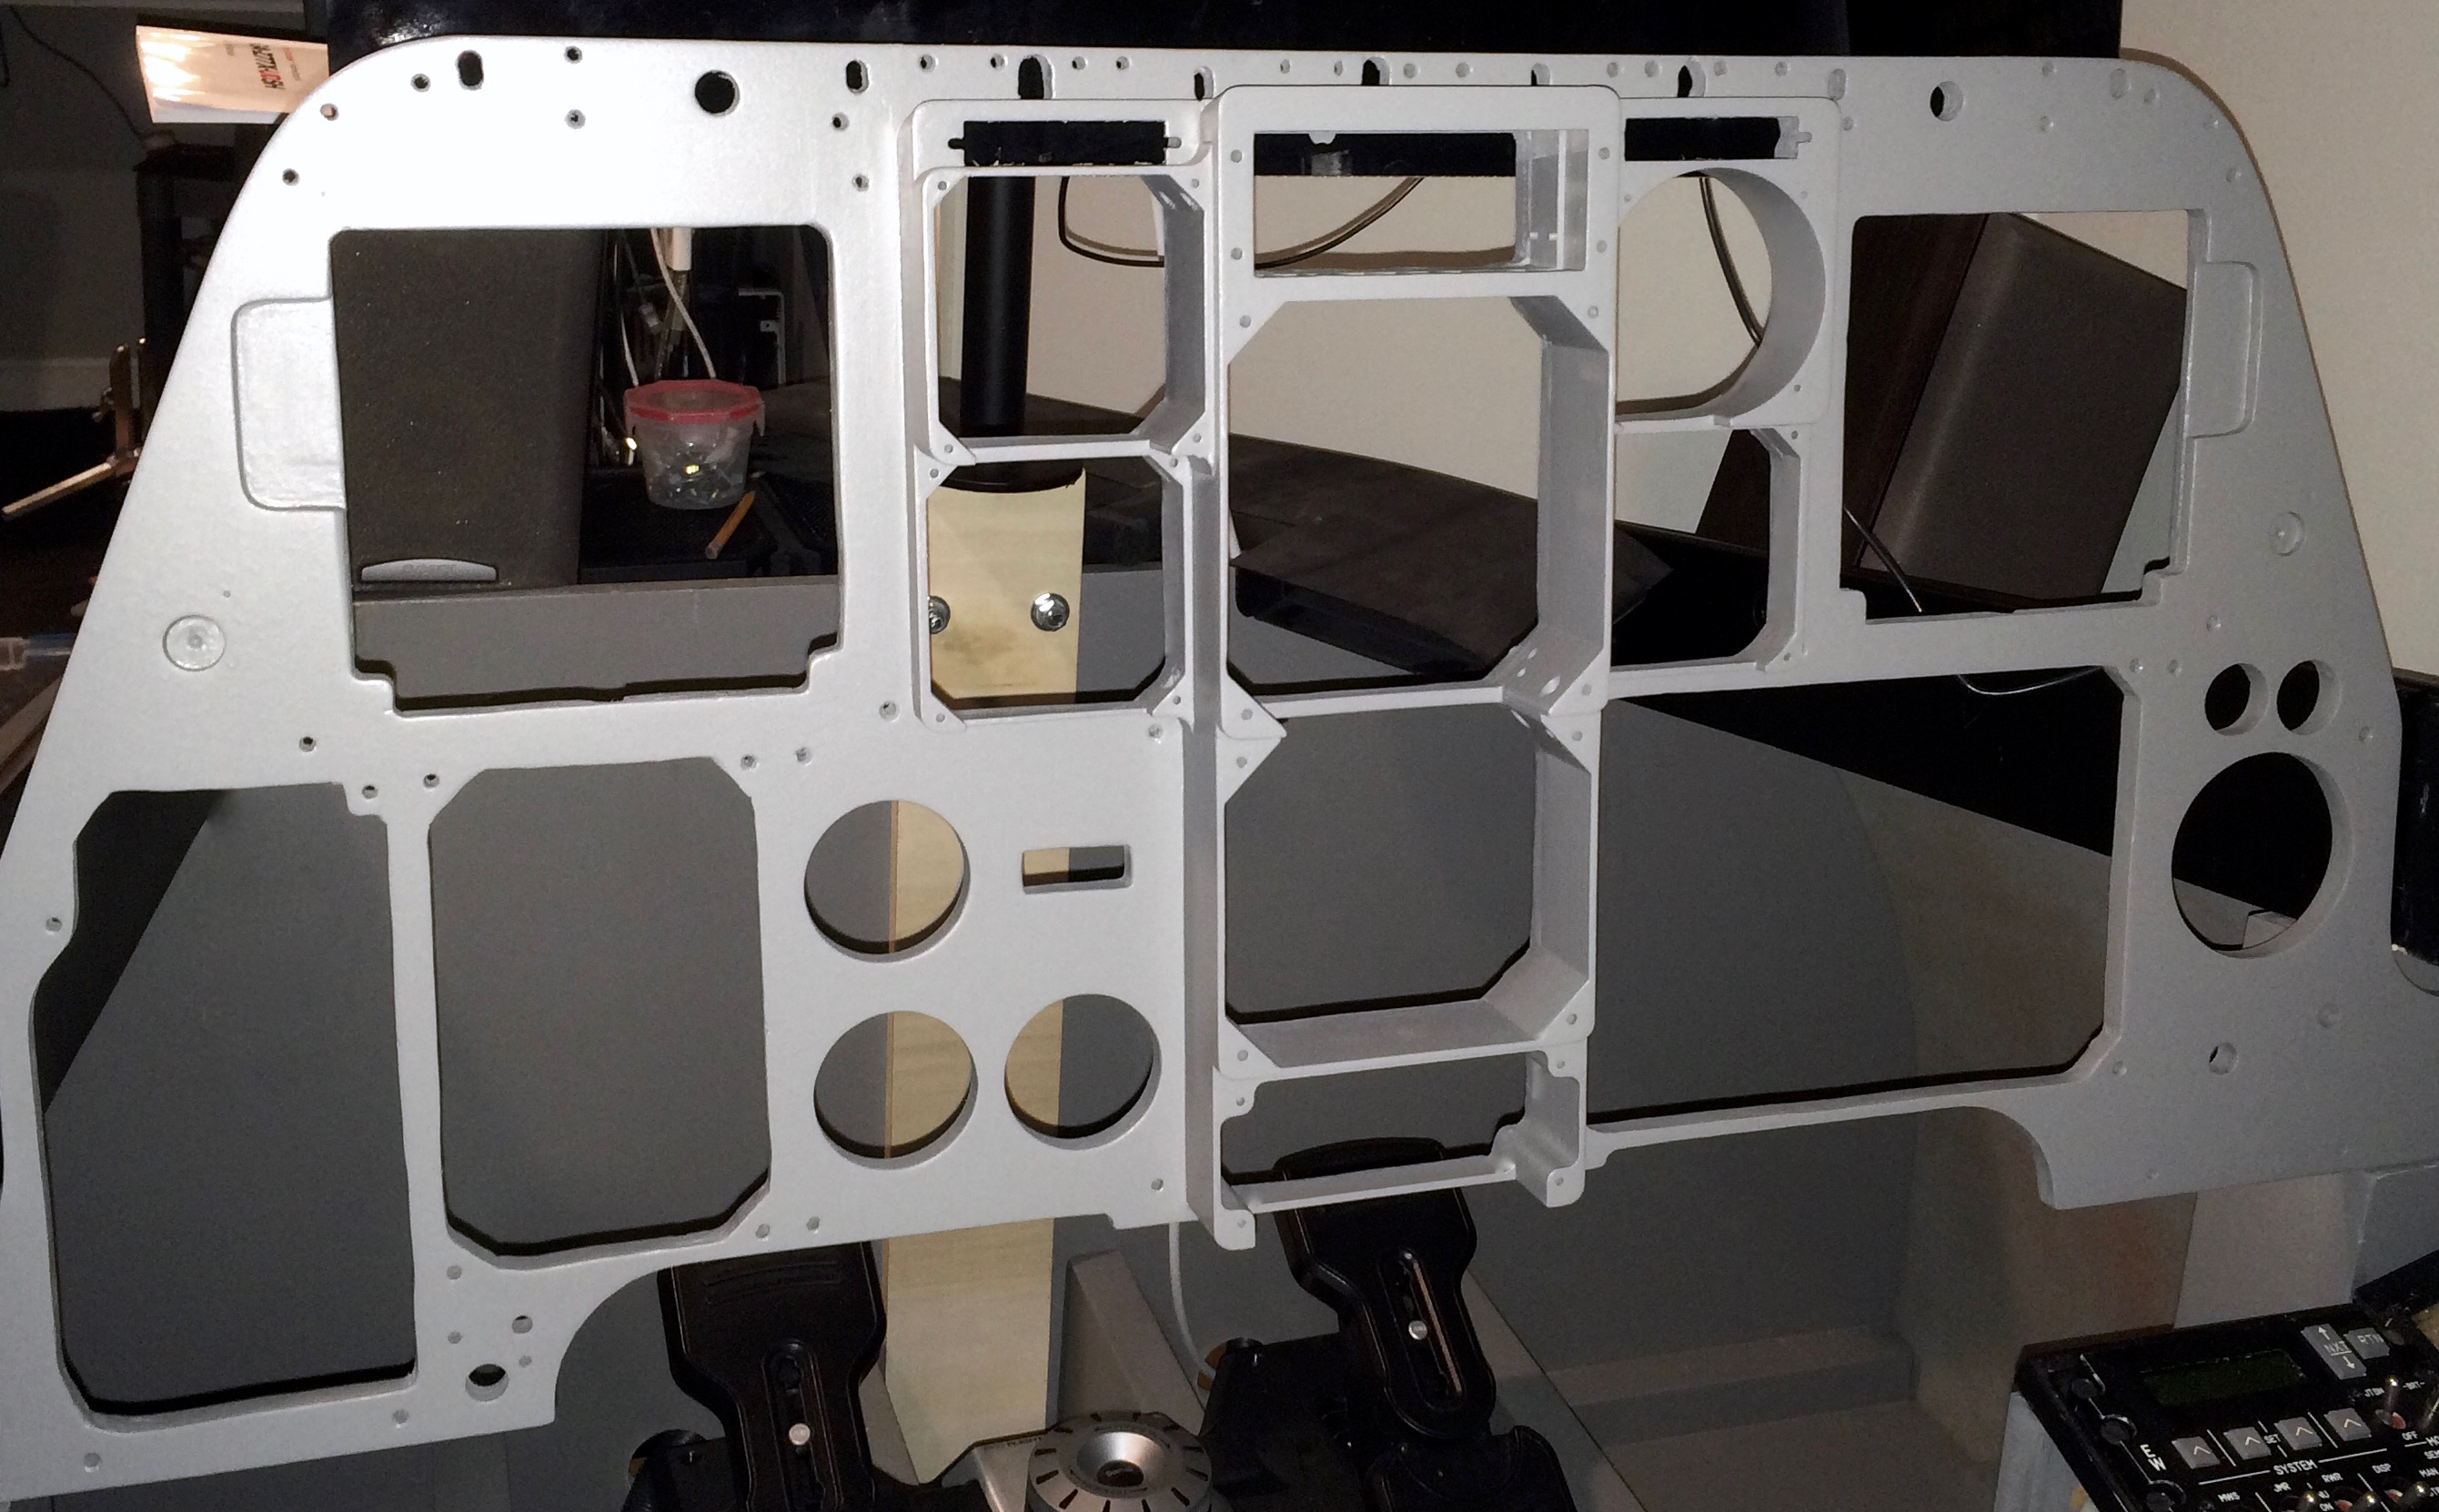
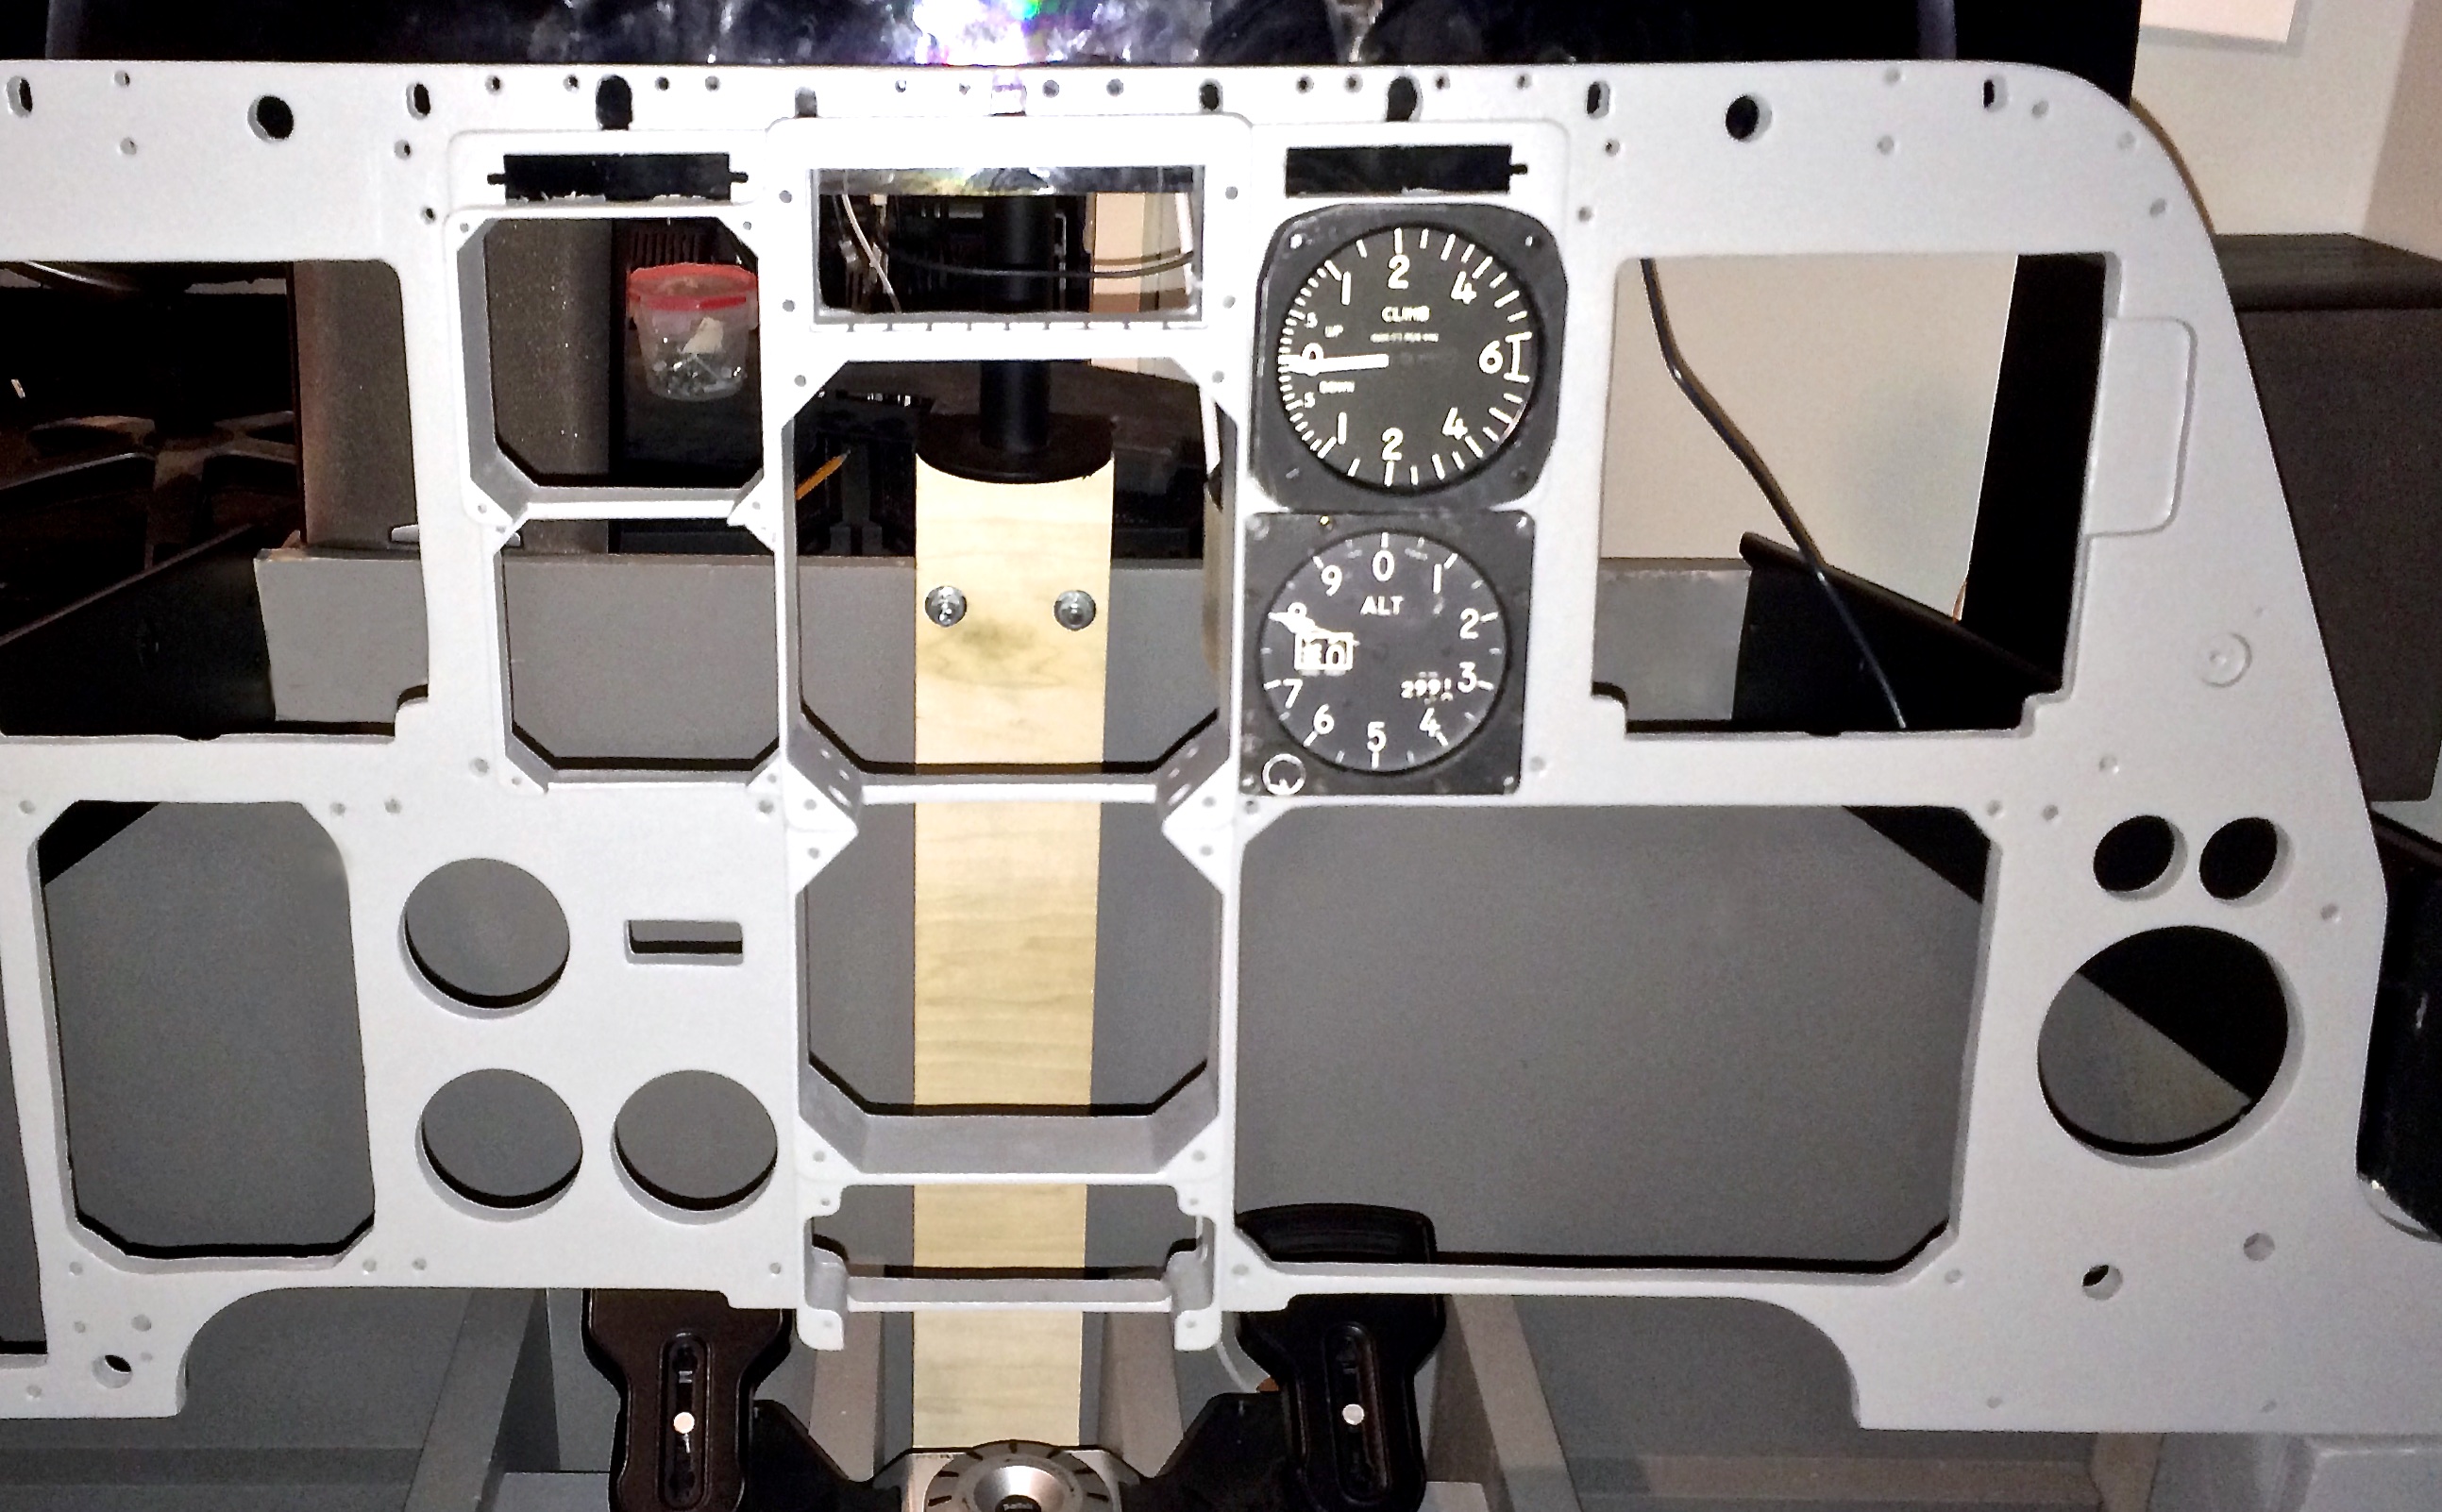
Greetings All! I'm glad to get back to pit building after a summer long hiatus. Medical problems, hospital stays, and unfortunately, what I am guessing is a falling out with a forum member that I had great respect for and really thought of well put my desire for building my A-10 pit on the back burner. But I could only stay away for so long before the "need for speed," so to speak, has brought me back to the fold. I thought about continuing on with my last build thread, but after seeing Agrasyuk's new pit post, he has inspired me to create a new thread, as this really is a Version 2 Pit, and not a continuation of the last one! Unfortunately, the main tub of my build has been built on another's plans, so until he says it's OK to show off, I will keep the pics to only showing what I've done otherwise. There has been some incredible updates since I last posted. One that I was particularly interested in was LynxDK's stuff. Wow! Nice job Lynx! I've before been cautioned against 3-D Printed items as a commercial item, instead of just something to print to make sure it will really work before you make it in another material, so I had my doubts. But it really looked good. So throwing caution to the wind I PM'd him and had got one of the MIP Center Build-Ups. So that's where I will start posting my new A-10C Version 2 Cockpit! When I received it, he also sent along plans for his Main Instrument Panel, which he says he will be releasing shortly to the forum. I had been anxiously awaiting DM's plans for it, but wasn't really sure when he'll be putting them out, so decided to go ahead and make Lynx's out of 1/2" Plywood. I will be putting this MIP in front of a LCD screen. My plans will be to get another MIP for real instruments. While I am putting that together, I can fly with this one. Yay! Back to flying! (When I created this tub at the beginning of the year, I took apart my first cockpit.) This MIP is entirely had cut with only a jig saw and hole saws. (And plenty of sanding.) I attached LynxDX's center piece and painted. Finished today, so this is what I ended up with. It's apparent that it's no CNC job, but what can you do? ;) I was still worried about how the 3D Printed center piece would hold up, but this thing seems really robust! So I may just have to order another one for the other MIP that I do put real ones in. Just to make sure though, I installed what ones I had. Now to put in the TM MFCDs and place a LCD screen behind it and finally will be able to get back flying in a partial pit, anyway. Thank you everyone with all your ideas, and special thanks to LynxDX for his great MIP center and MIP plans. Lynx, expect a PM shortly with a list of more stuff I want to get from you! :D

-
Hi DM. I'm interested, of course. Apologies, I just saw the post. If there's anything I can do for you, please let me know.
-
Absolutely fantastic. Very nice work. The gear handle is superb. Nice job on the side consoles also. My first pit was built using Dimbug's plans. Then Deadman got me into using real panels, and they simply don't fit with the wood consoles as the wooden frame interferes when installing them. If you keep using metal and keeping it thin like you're doing, it will work out great whether you use real panels or your fantastic made ones. Please keep us posted!
-
Thank you DM for the heads-up on the intercom panel.
-
Definitely happens. When I was a mechanic at Delta, we had to adjust the compasses away from terminal, (they usually have a compass rose painted on the tarmac in the middle of nowhere,) and we would have to adjust it with a brass screwdriver. A pain, but necessary.:)
-
Good find Hans!
-
Fantastic Callum! Kudos!
-
Forgot to say thank you DM. Means a lot to me. Truly. Only two more surgeries scheduled for the future, but should be back to pit building in a few days! (Getting frustrated with wife forcing me to do what the Dr. says to recover.)
-
Looking very nice. Keep updating! (Something I'm being very lax in.)
-
Very very nice! What did you use for your templates? Is water jetting a hobby of yours? ;)
-
I used plain 1/8" masonite, or hardboard. Cut it and painted the smooth surface. It was very inexpensive, under $10 and turned out very well. Just had to watch the screw holes though and use a skin washer underneath the screw. Otherwise the head of the screw may pull through the board. Boltz - You're correct, the large surface area of the floor with it being 3/4" makes for a very solid surface. Fastening to it the joists made from 2x8 boards makes it almost indestructible. The whole thing once it's put together is very sturdy, no worries about anything getting broken. The first pit I did was off Dimbug's plans, and though very good, I made it from MDF. Huge mistake on my part. It was not only heavier, but on occasion pulled a few screws out. MDF is not a material that likes things screwed into it. ;)
-
I guess since they are out, Hans has asked if I will share a few more views. This one from the US. I too have been delayed much to my chagrin and embarrassment. I've had health issues and quite a scary surgery that has put me down for a bit. Recovering now slowly. Mine also is complete, minus the side consoles, MIP, and of course, the ACES II. It's taken a little more time than Hans, in the high 80 hr. range. Cost wise was very inexpensive in relation to material wise. Hans has made some incredibly detailed instructions that I could not improve upon to save my life, so thank you for that. Also thank you DM, for without you I could have never made something so lifelike or nice. Again I apologize to you for the time delay.
-
Very nice job! Keep us updated.
-
Hi DM. Just saw this myself. Been a bit busy lately and haven't been checking the forums. You know I'm always going to be a yes for your projects, so count me in if you don't shelve it. You always have top notch stuff that's second to none in price/quality. Thanks.