EvilBert VR
-
Posts
227 -
Joined
-
Last visited
Content Type
Profiles
Forums
Events
Everything posted by EvilBert VR
-
Thanks mate! This is only my "home" setup. I have also a compete cockpit section that is currently undergoing work into a complete Huey flightsim. That is going to be a fully functional 2-seat sim for use in VR/ MR or screen. For that reason all of the instruments will be working. Cheers
-
Even more in the works..... These are pics of the first prototypes. Further development is in progress!

-
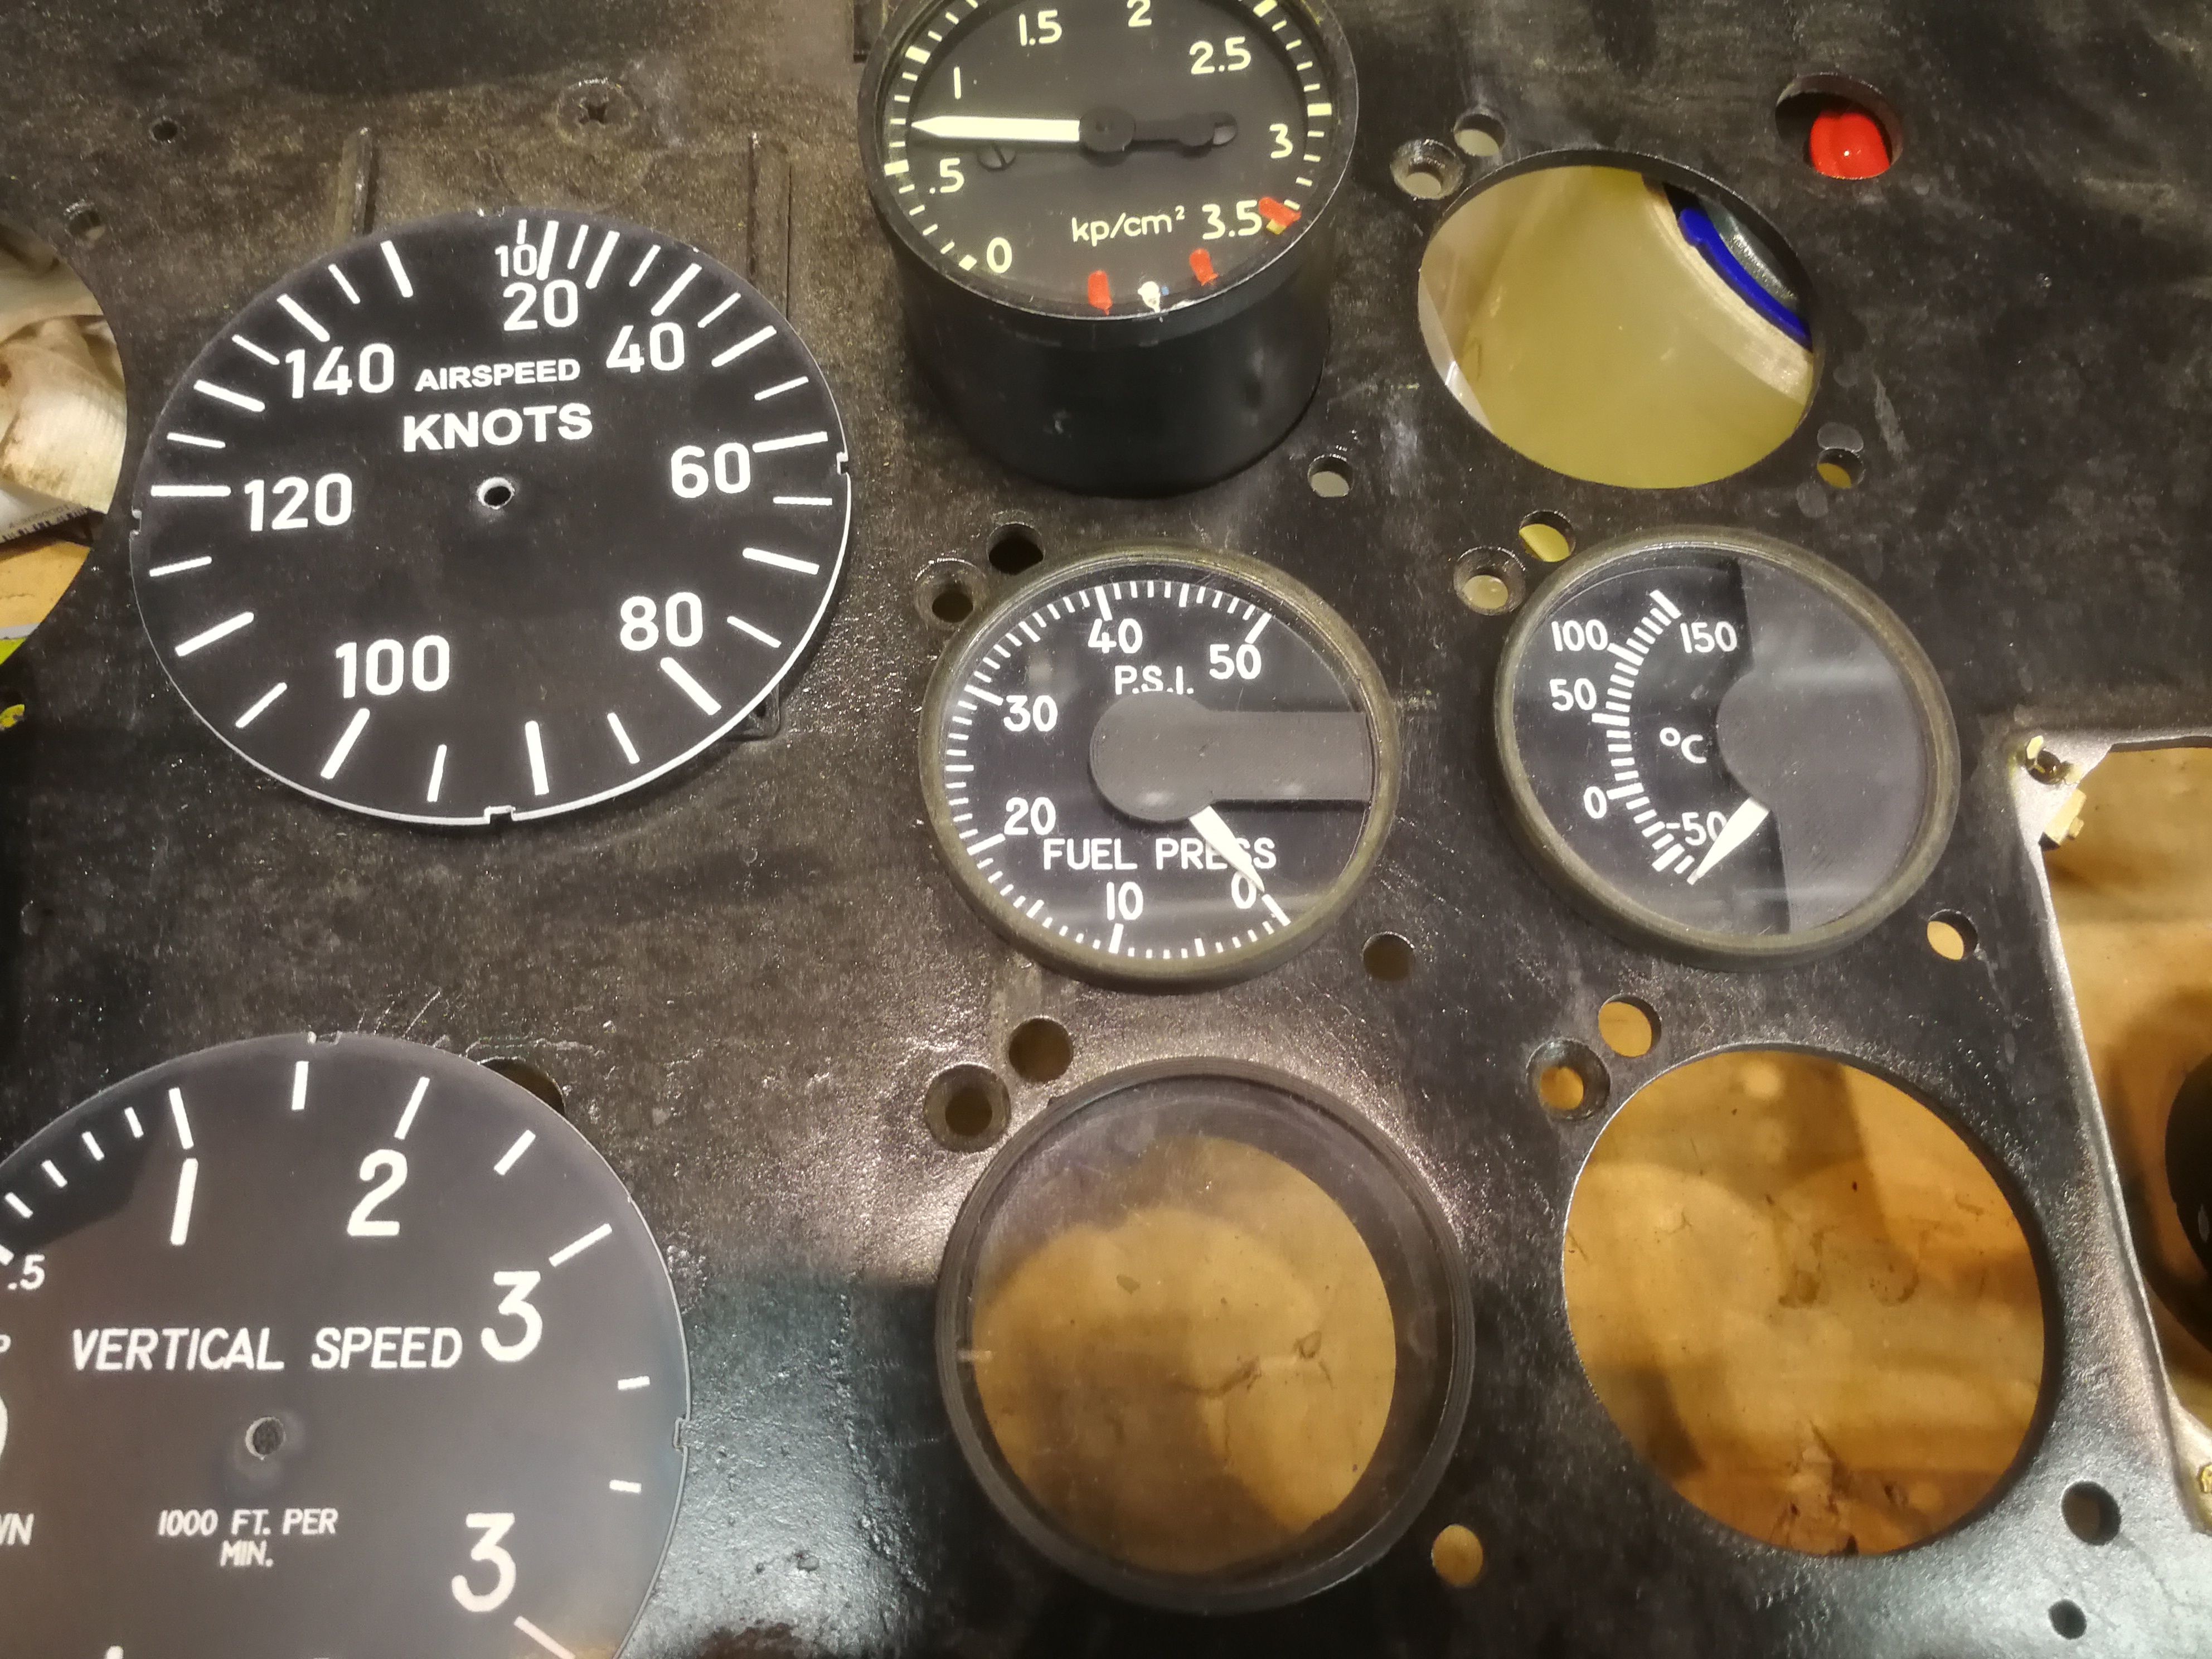
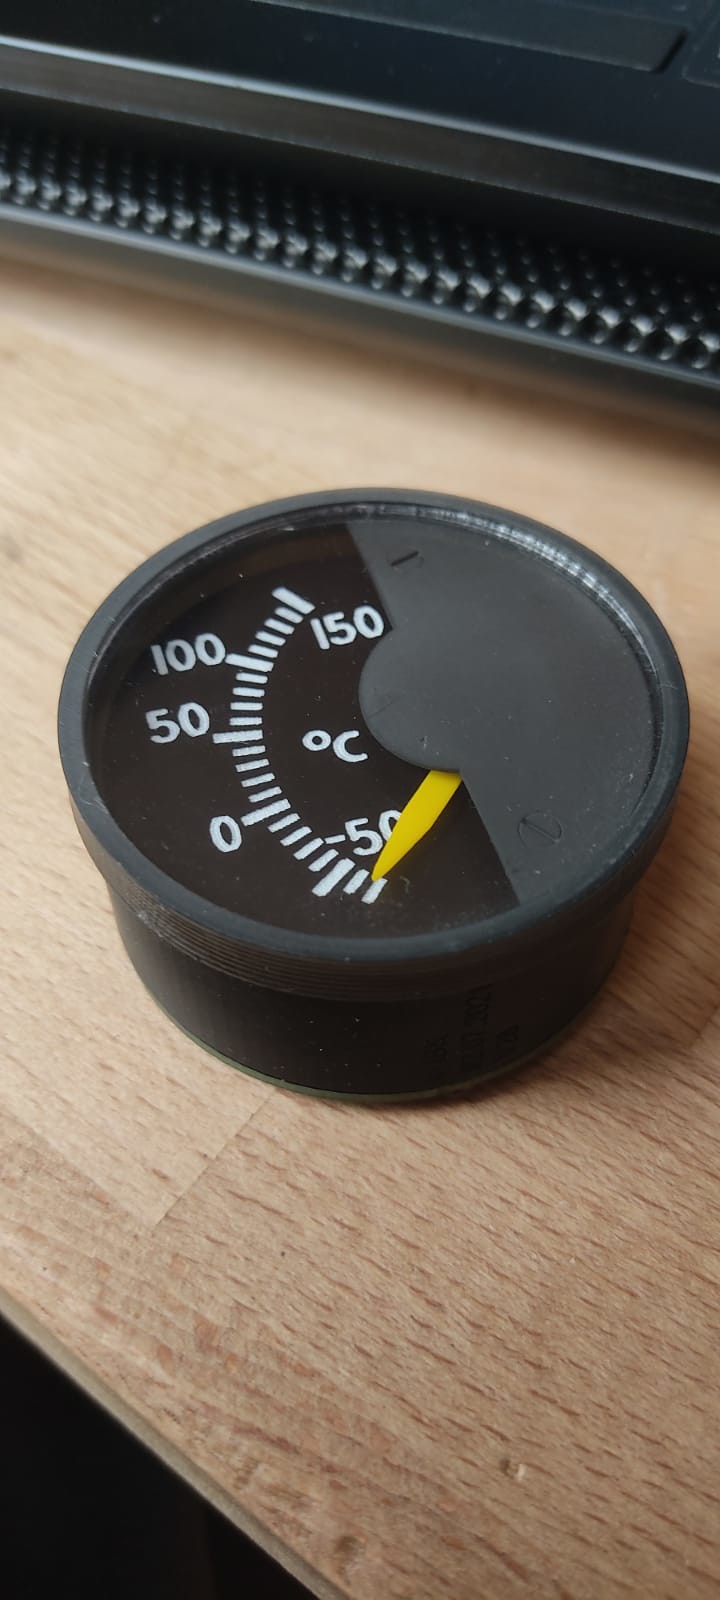
Well, sort of I deal with this in the real world. So it is not that uneasy for me to get a hold on those little bits. For what the project concerns: I am currently in the process of split-wiring the control panels for dual use. I wanted them to work in DCS and I wanted them to function with the Hueys 24V system. That gave me a headache at the start. But working with relays now is the best solution. Besides that me and some friends started to work on reallife replicas of all of the instruments. We fiddled a lot and started with mounting the new controllers into real instruments. What turned out to work nicely showed it limits in pricing. It is also considered to be a waste of resources. No one rally likes to tear apart hard to get and pricy real aircraft instruments. So the idea was to replicate the instruments as close to the real thing as possible. The results are just stunning!!! This is an example for an temp gauge.
-
Nice work! Thanks for your effort. One thing that caught my attention was that the turning rate main vs. teil rotor is something you might look after. Roughly the ratio is 1:3. So you should make the tail rotor spin faster accordingly. Keep up the work! RGDS
-
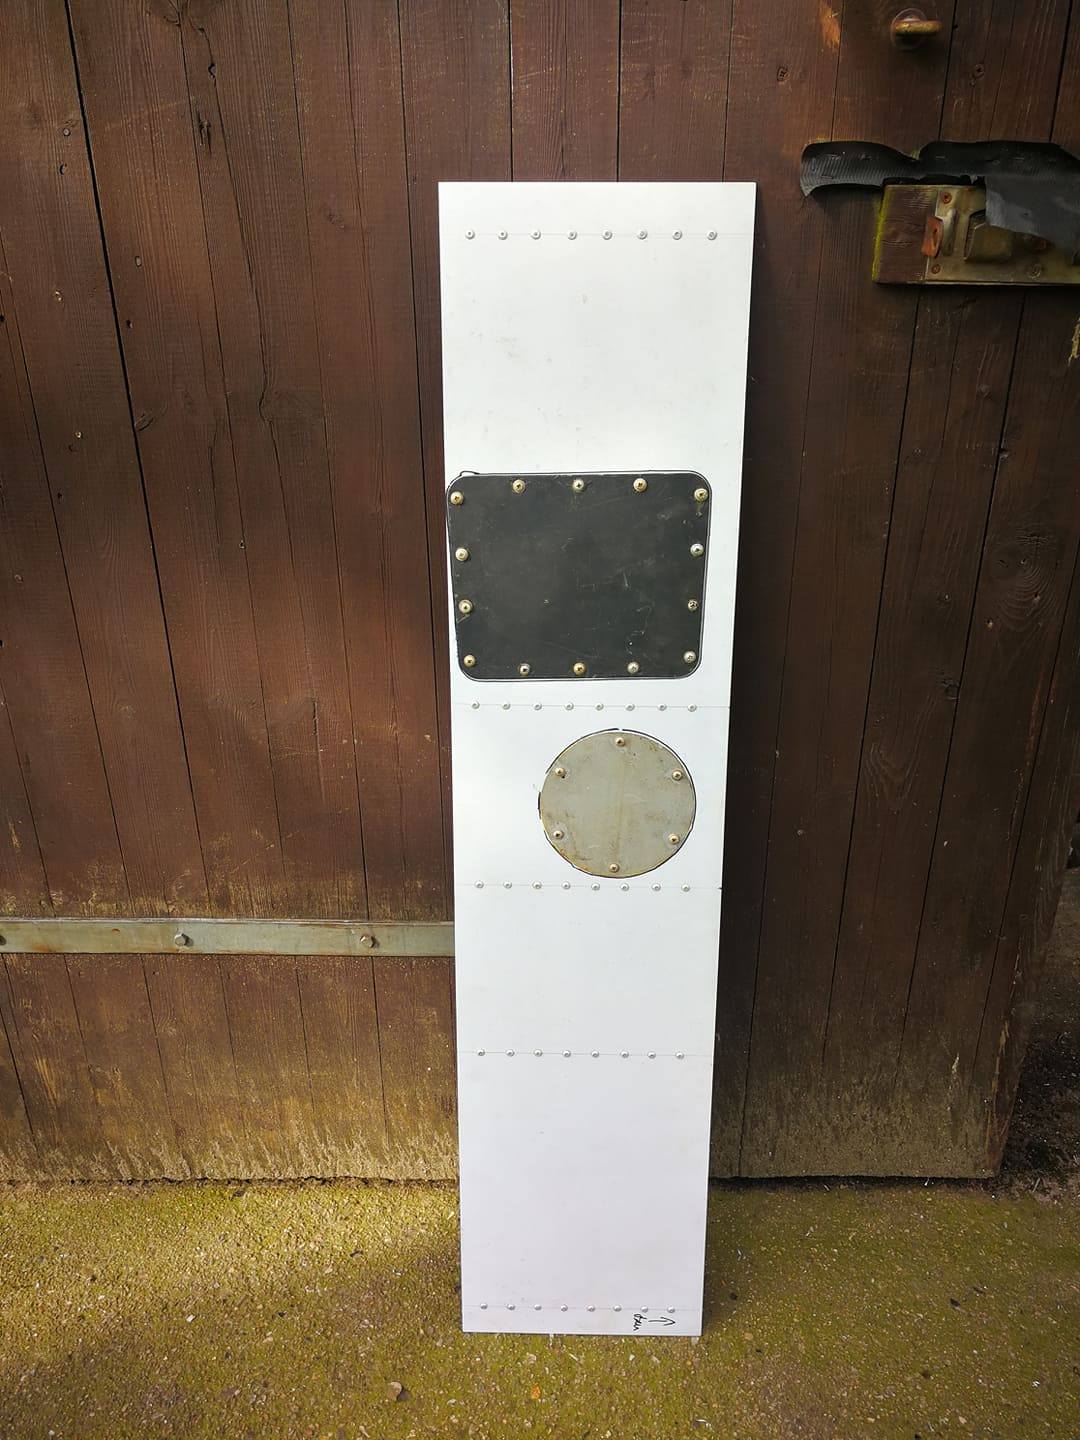
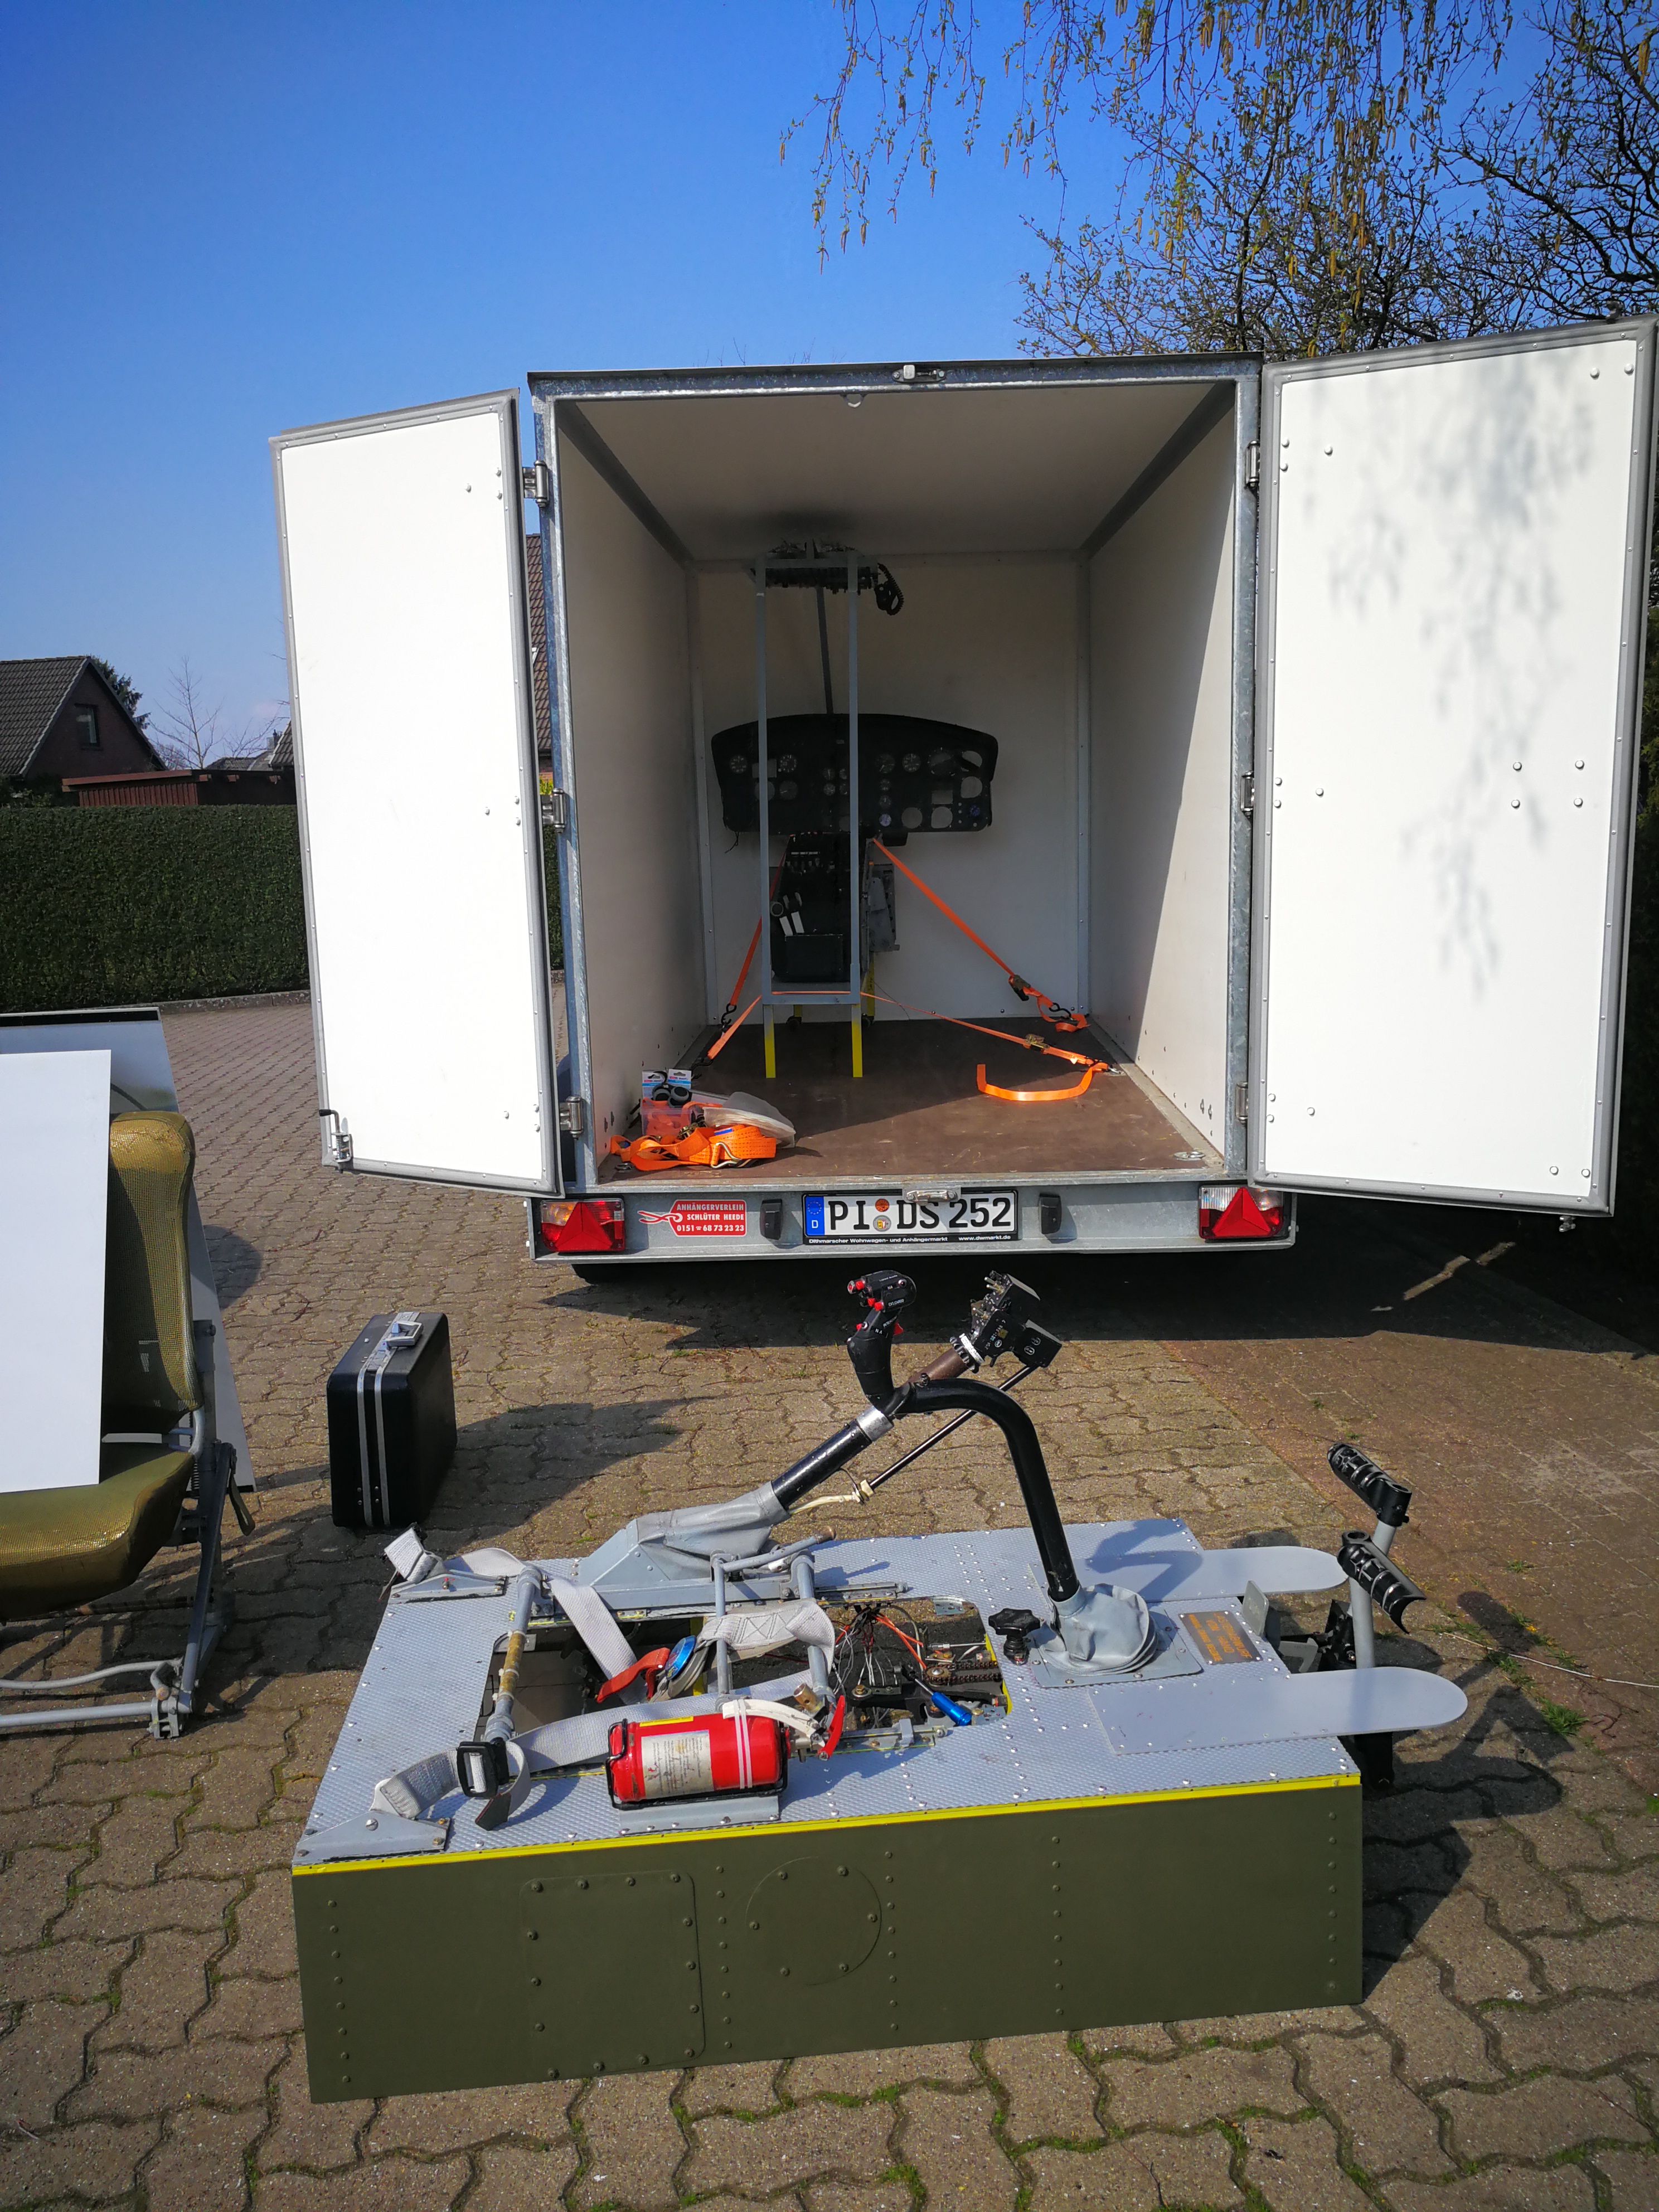
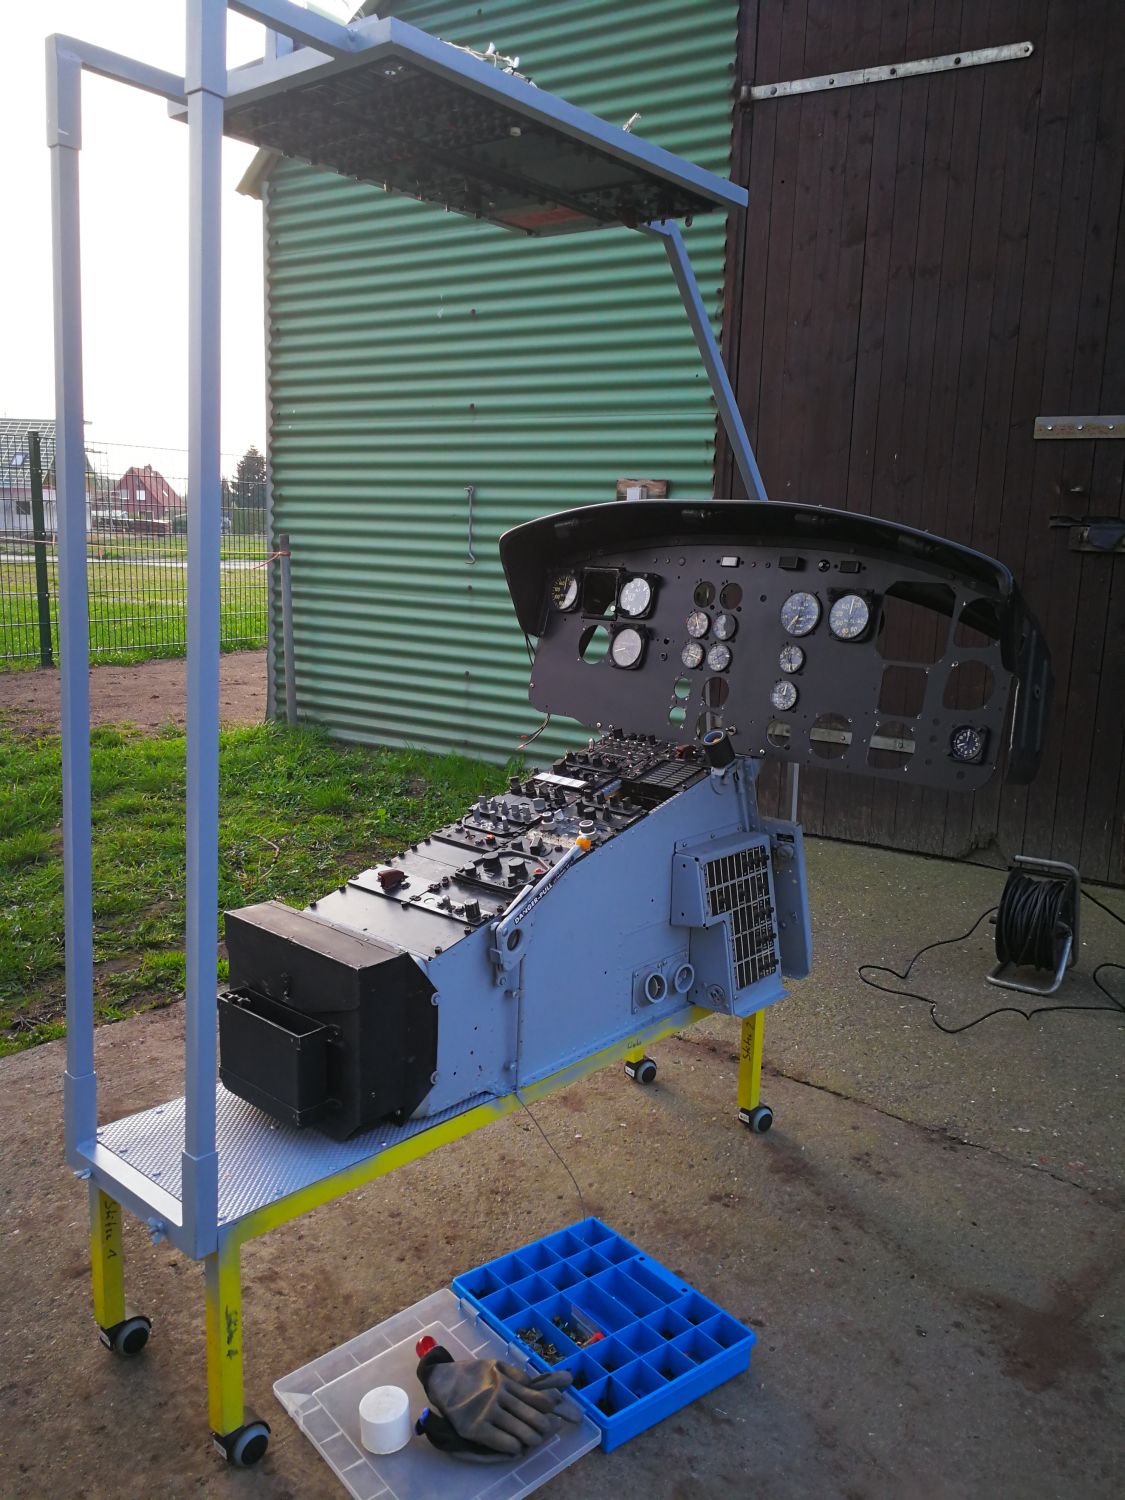
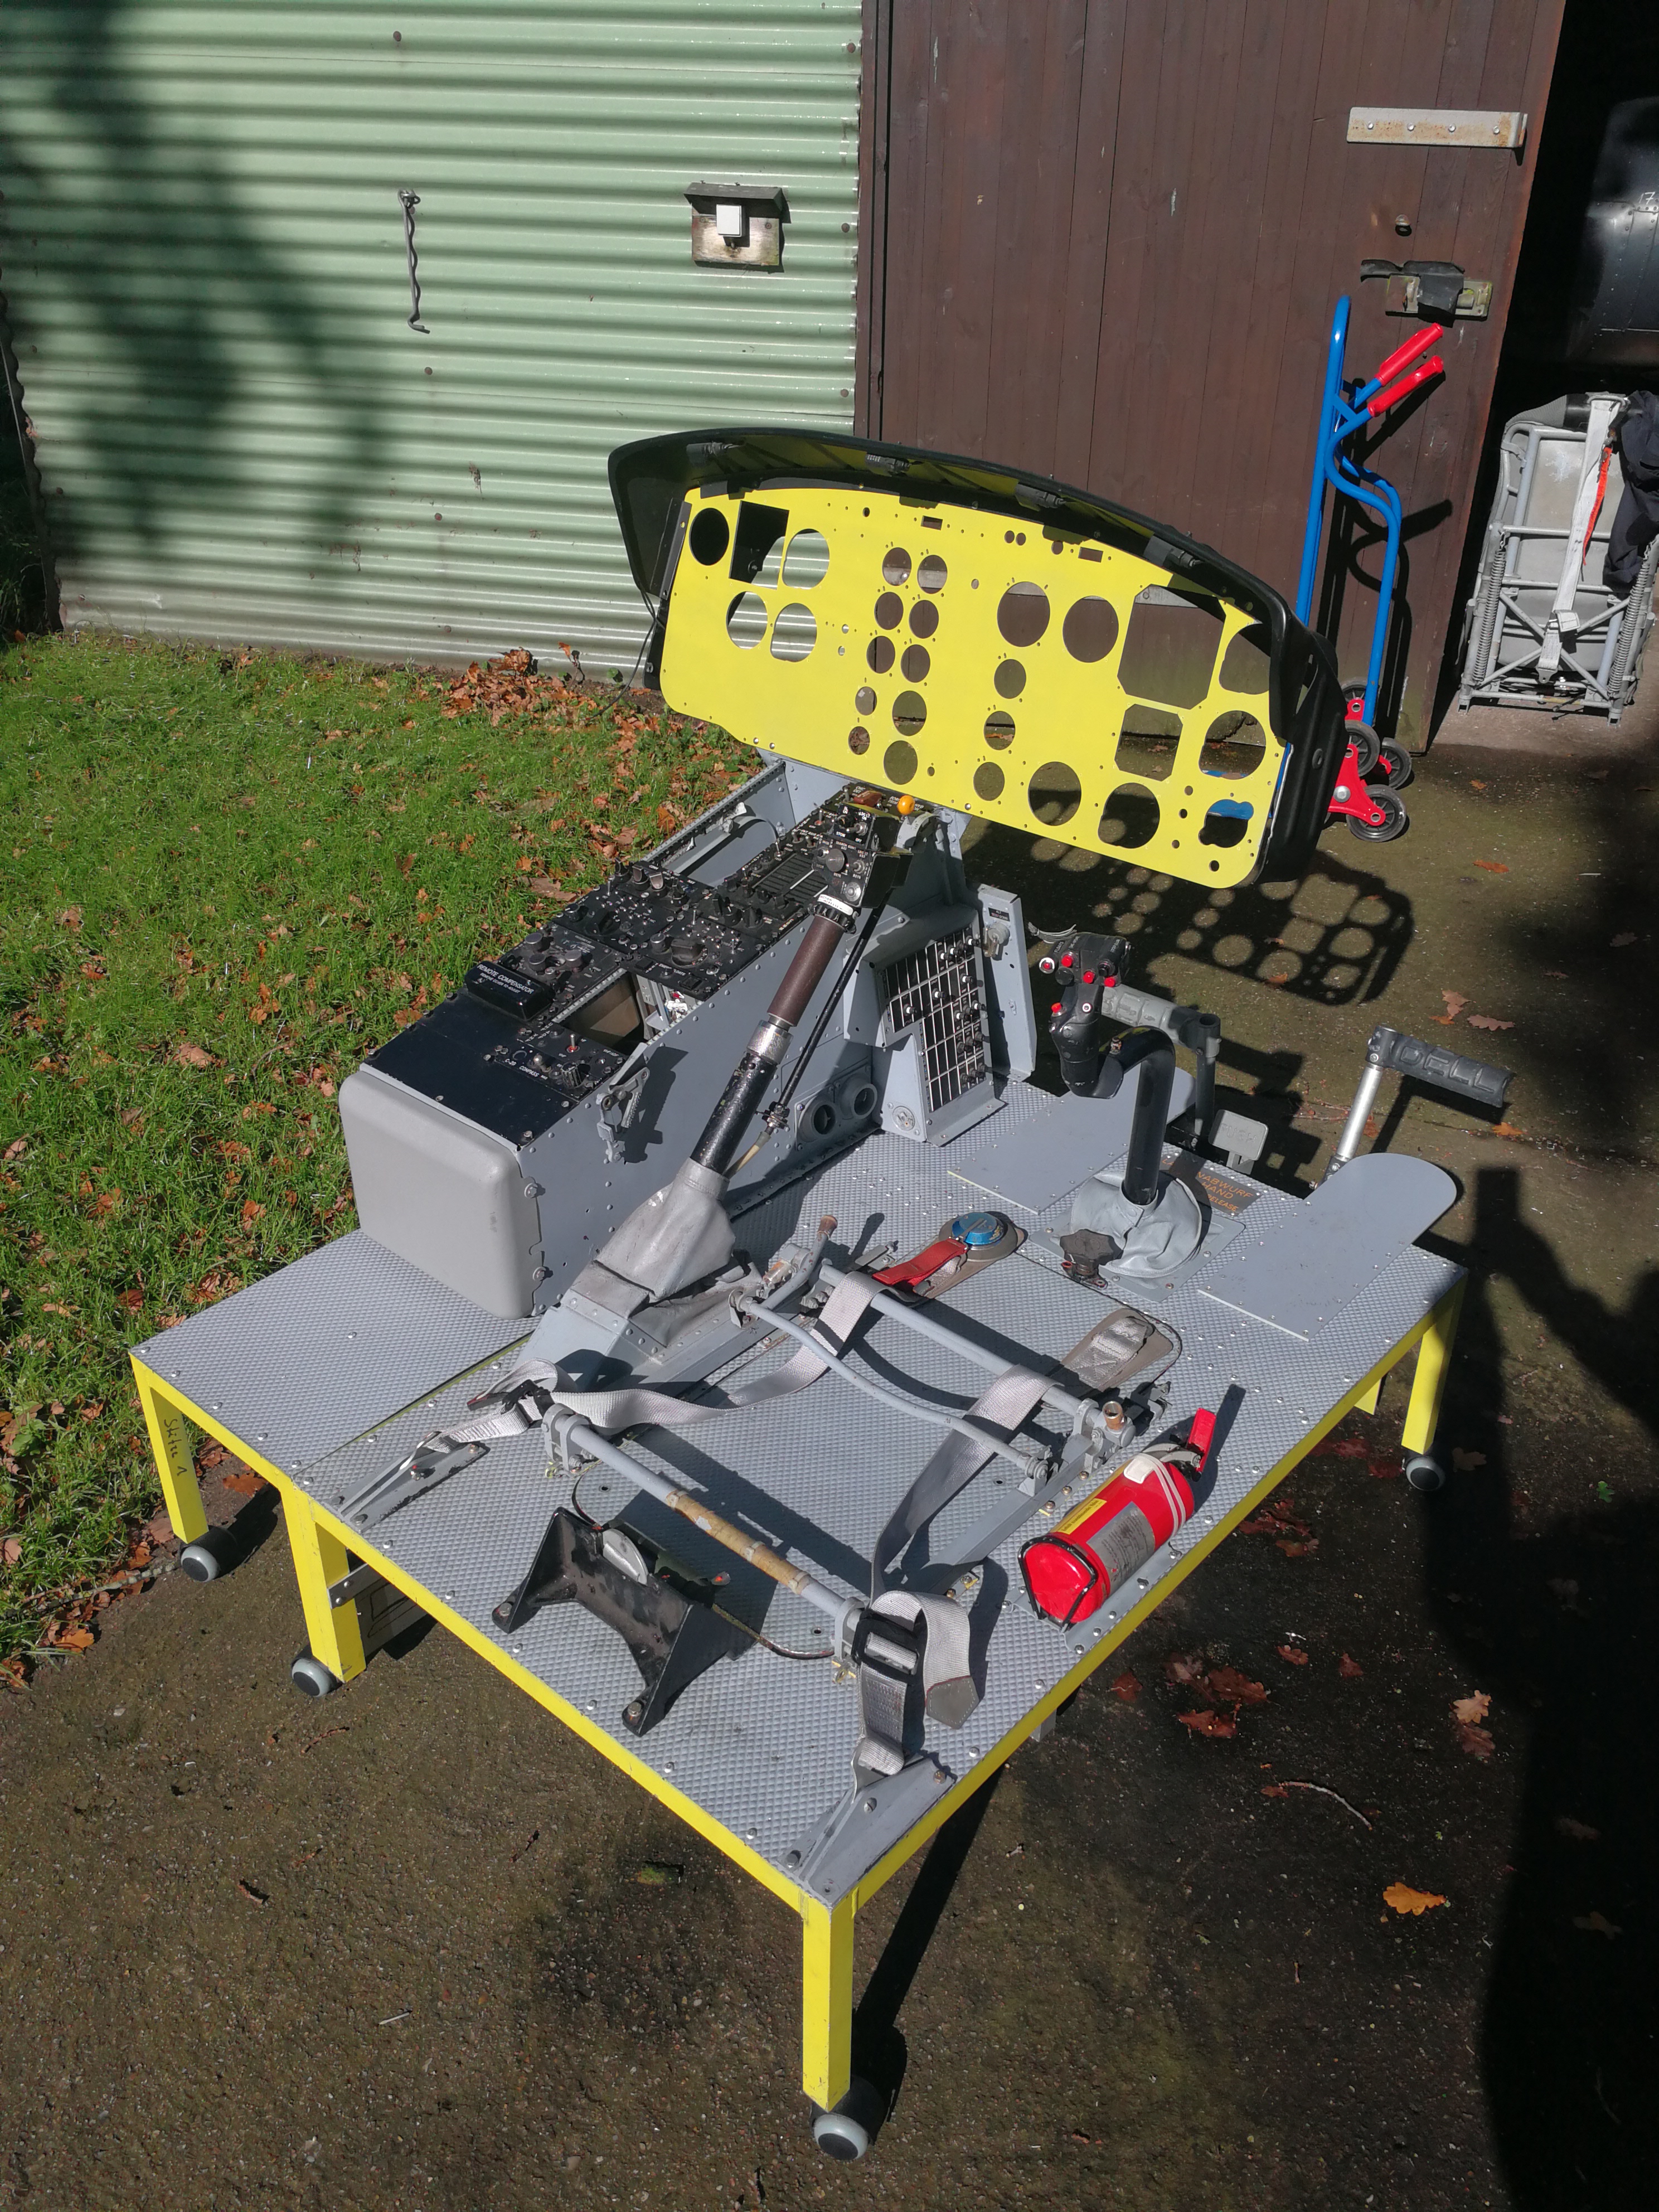
Just for the look and to shield the framing and the gadgets underneath the rig I constructed a skin plate out of aircraft aluminum using the correct Huey cover plates to replicate the fuselage skin on the pilots side of the bird: For quick mount/ dismount I used velcro stripes to hold the panel in place. After some paint the panel slipped into its place. The pictures shows the rig prior to deployment to the AERO fair at Friedrichshafen. Unfortunately not all of the instruments were ready to be installed but it was good to go and in working condition. Cheers!
-
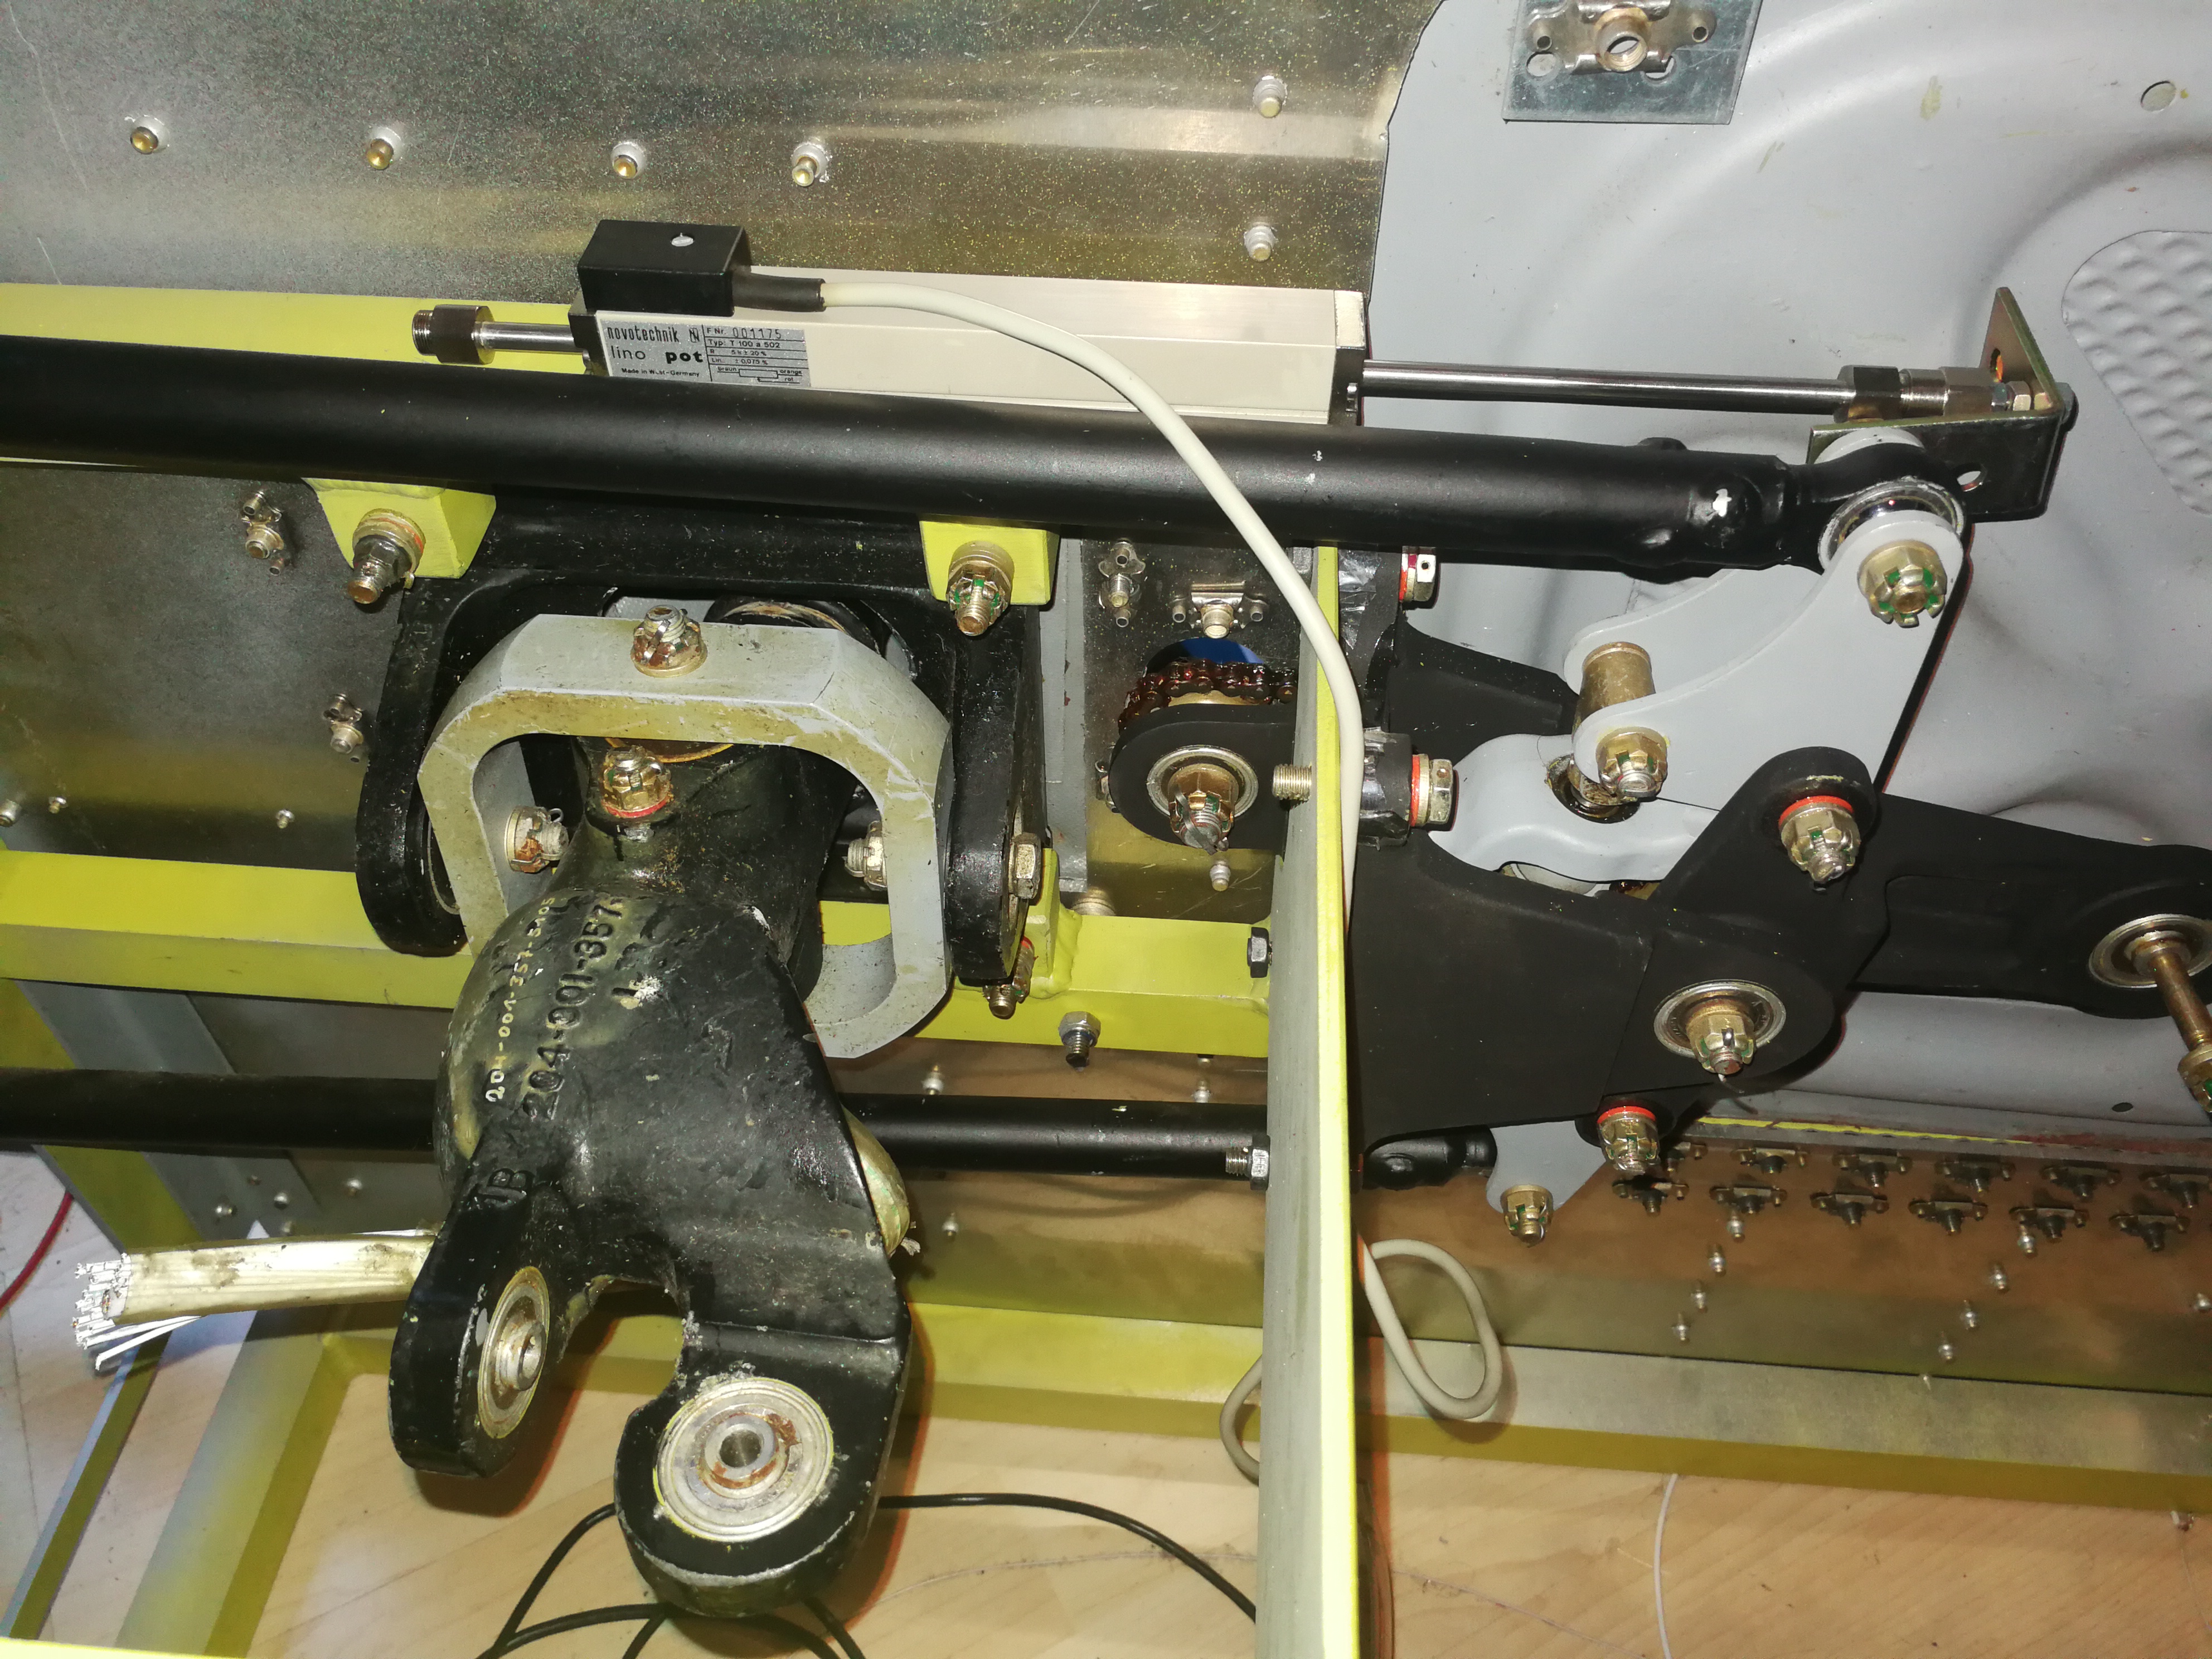
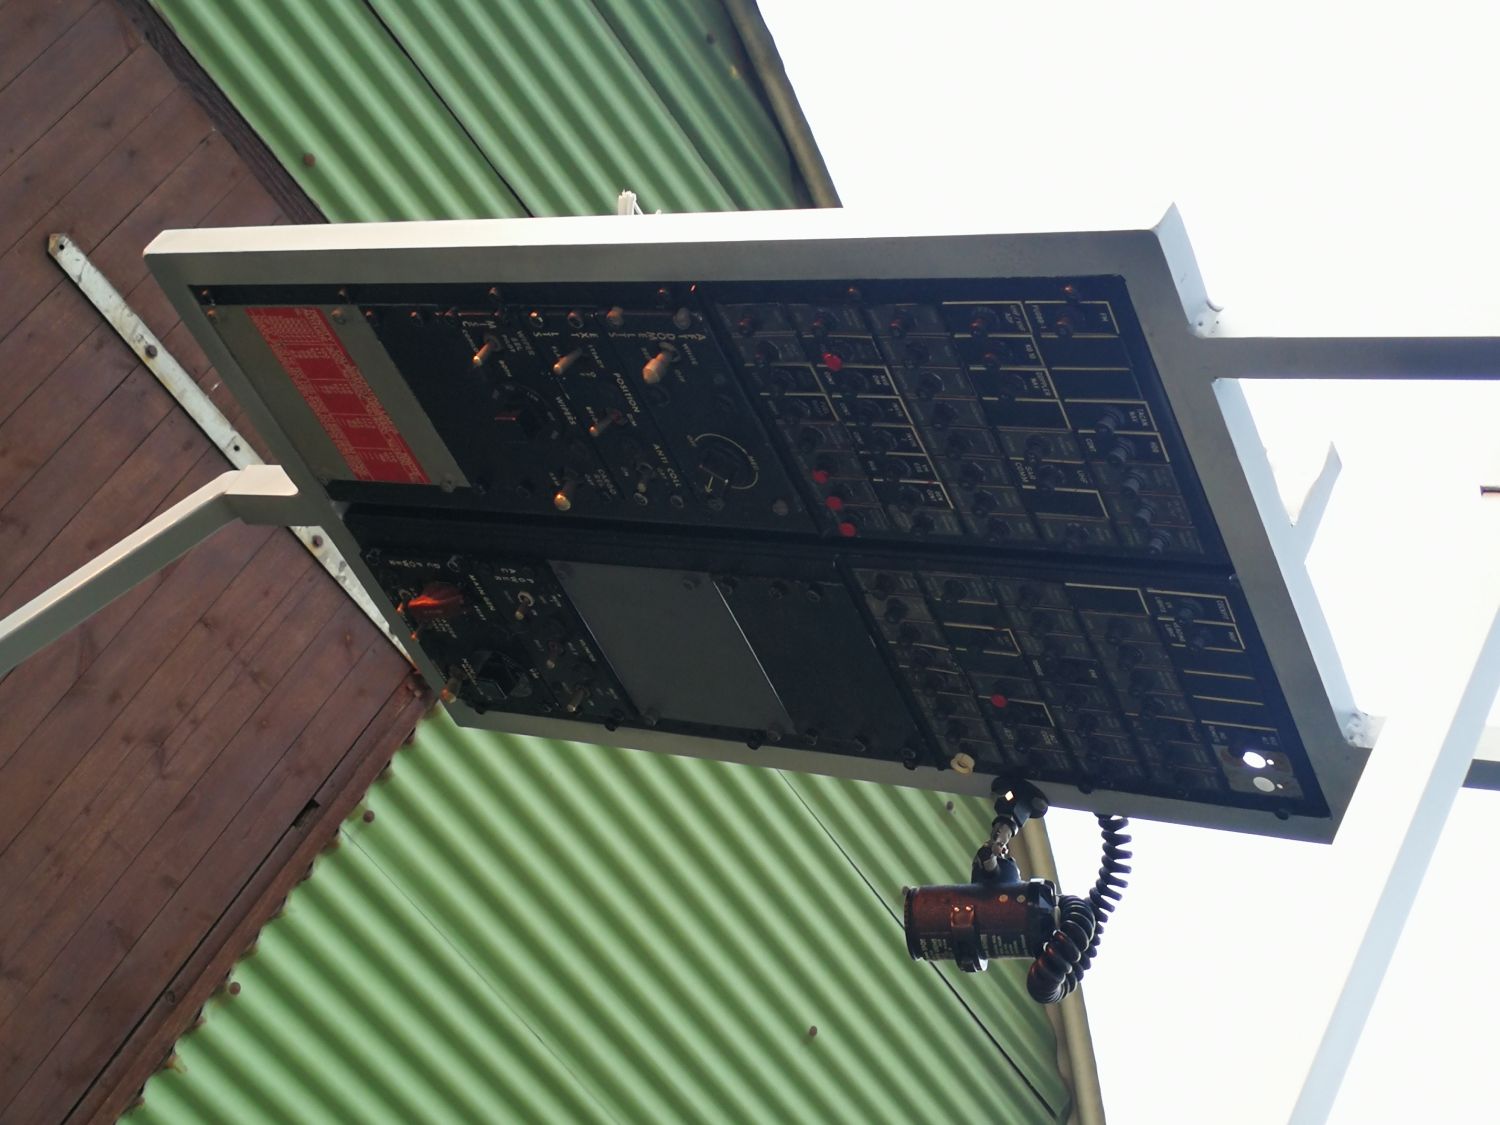
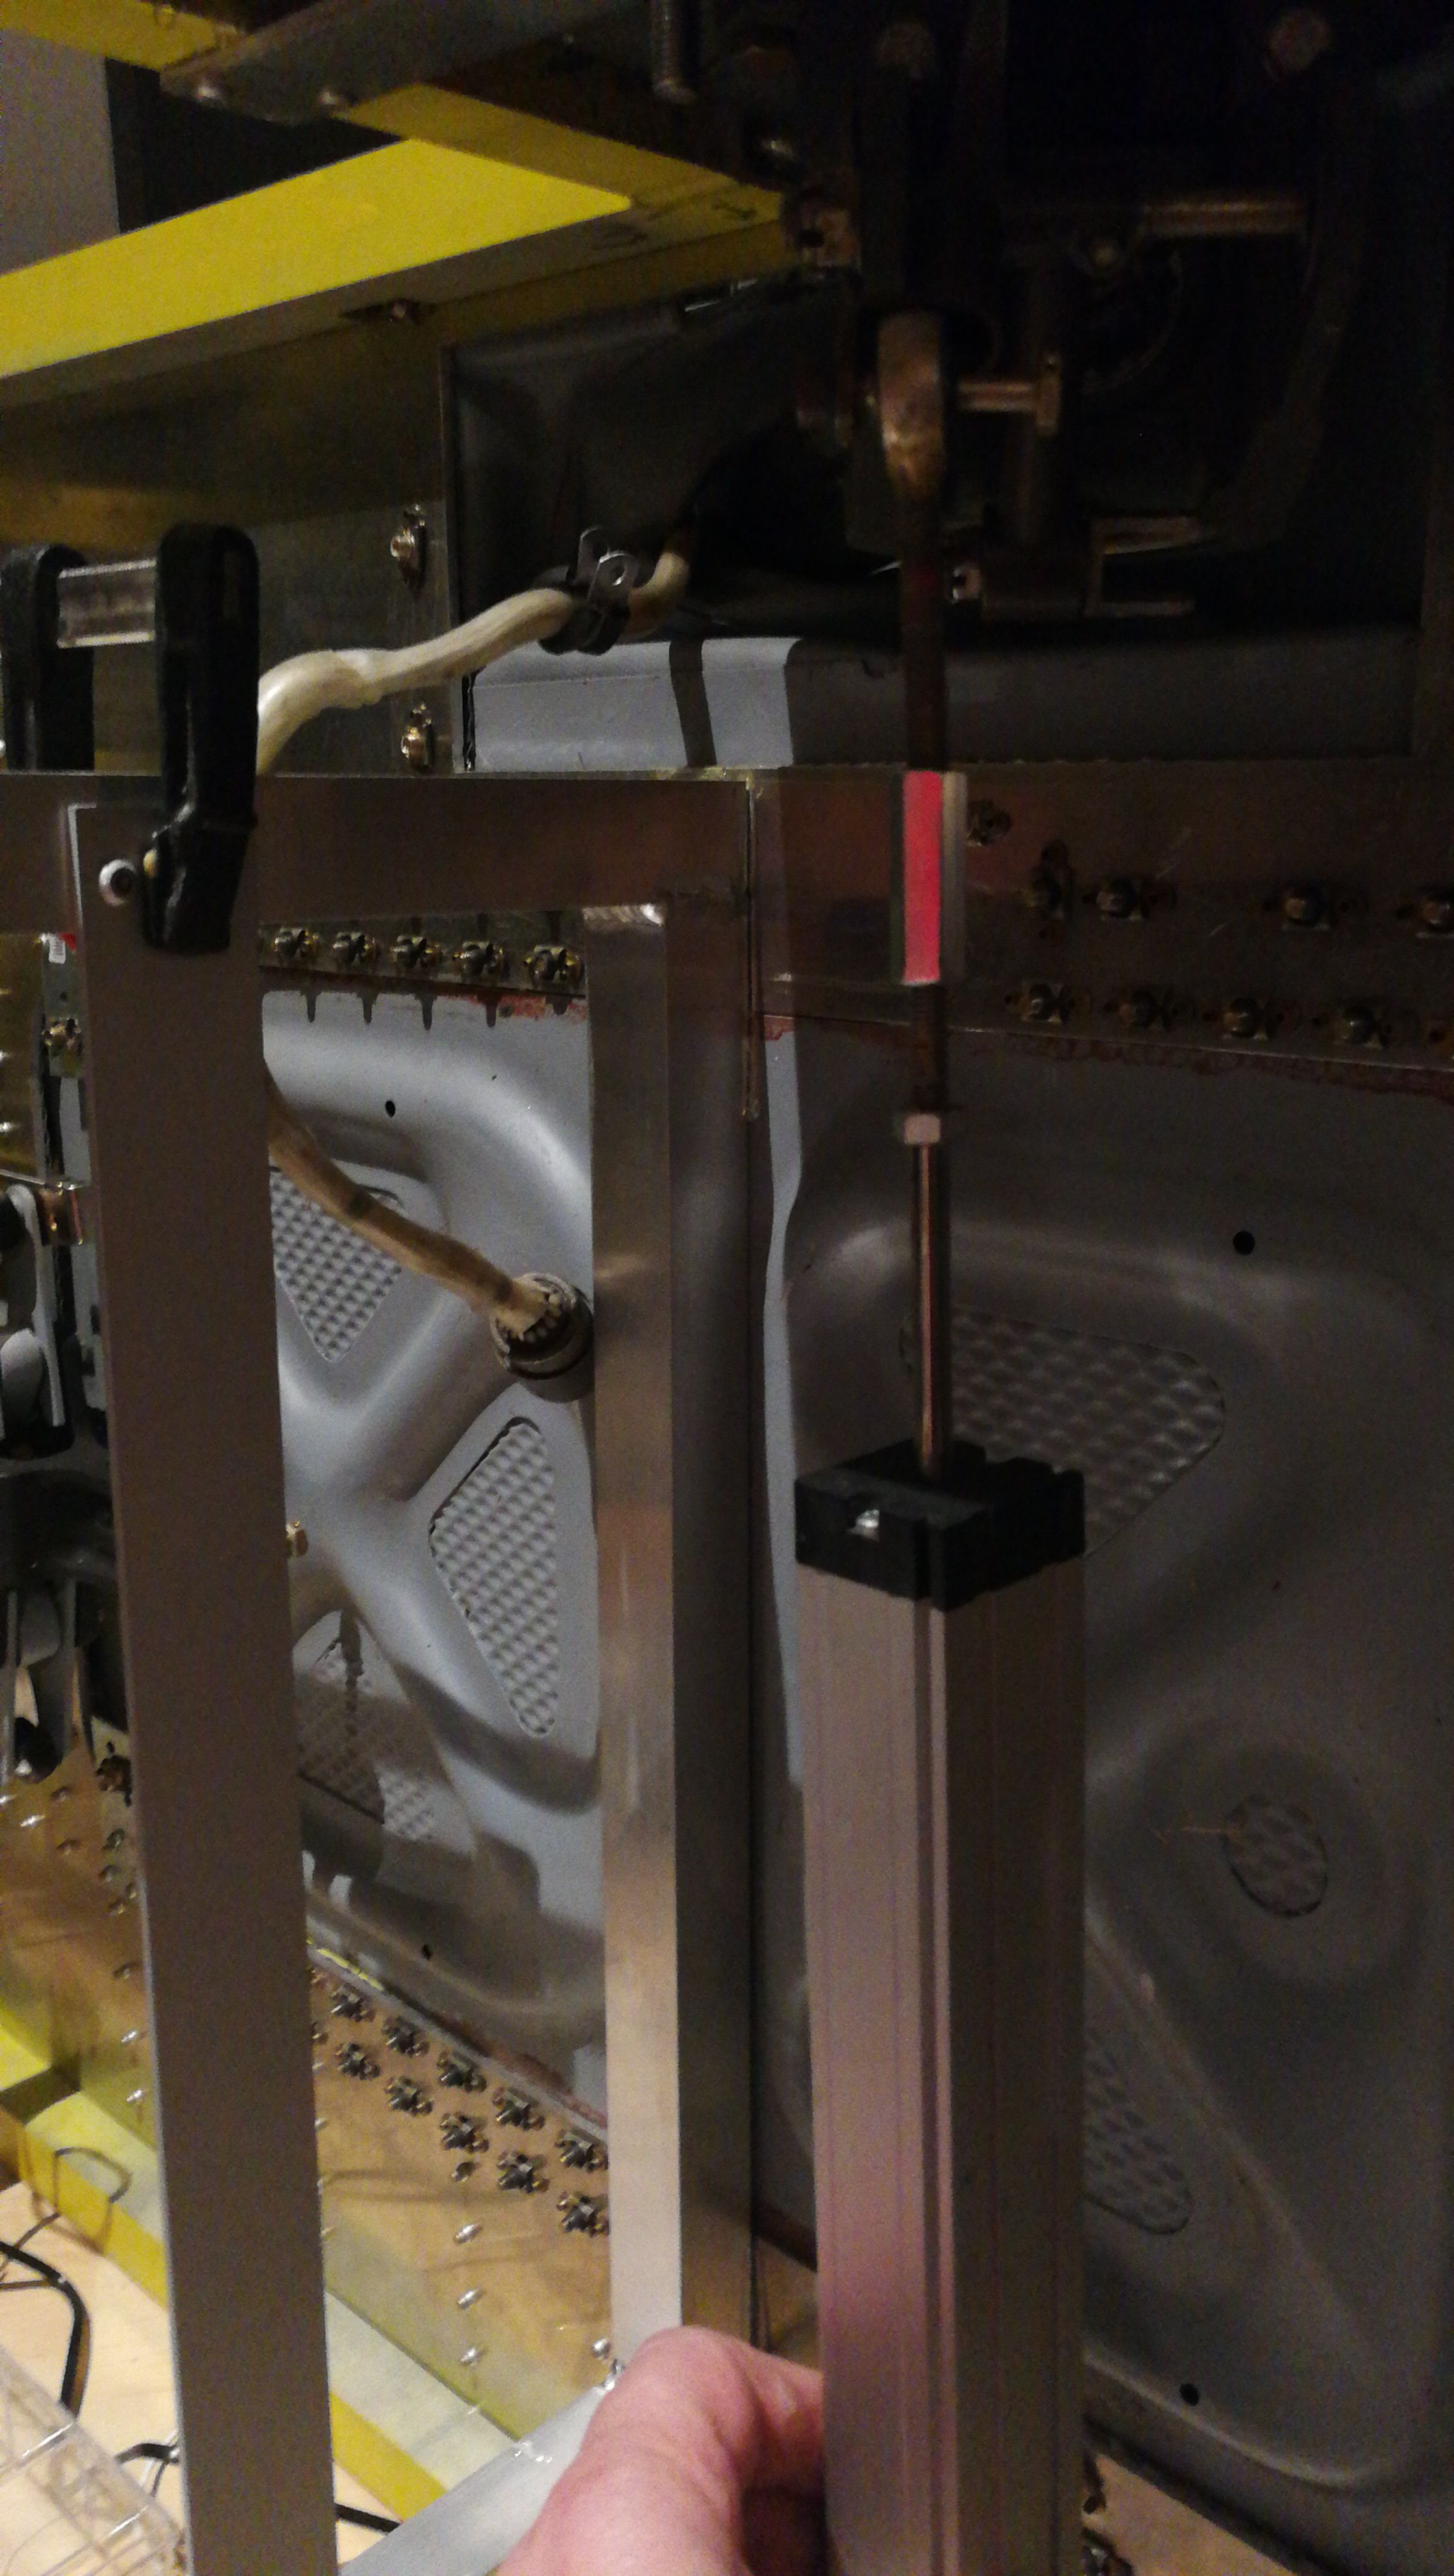
This is how the linear poti has been connected to the yaw axis (pedals). Don's mind the cables from the stick. Those are from the first version without using the US type with complete connectors. And of course I was in need of the upper console that houses all the AC/DC distribution panels as well as the panels for lighting and other features. Therefor I decided to use a frame construction into which I had to fit my original console that accommodates the panels. The forward center structure also replicates the beam between the windshields in the correct angle, height and distance as in the real helicopter. The picture shows the first version though with the center beam still in its vertical layout before switching to the angled type. And here after the correction: With the panels installed: Cheers!
-
He made those on his own as well as some other goodies that make work a lot easier! He is a very talented guy and provided lots of help during my building progress. Also for my current project that pushes my sim-boundaries a little further. But that will be another topic here soon ;-) PM me and I will get you guys in touch. Cheers!
-
You mean something like this: This has been crafted by a friend of mine. Makes it a lot easier connecting the wires without having to struggle to fiddle them on the tiny board pins. Cheers!
-
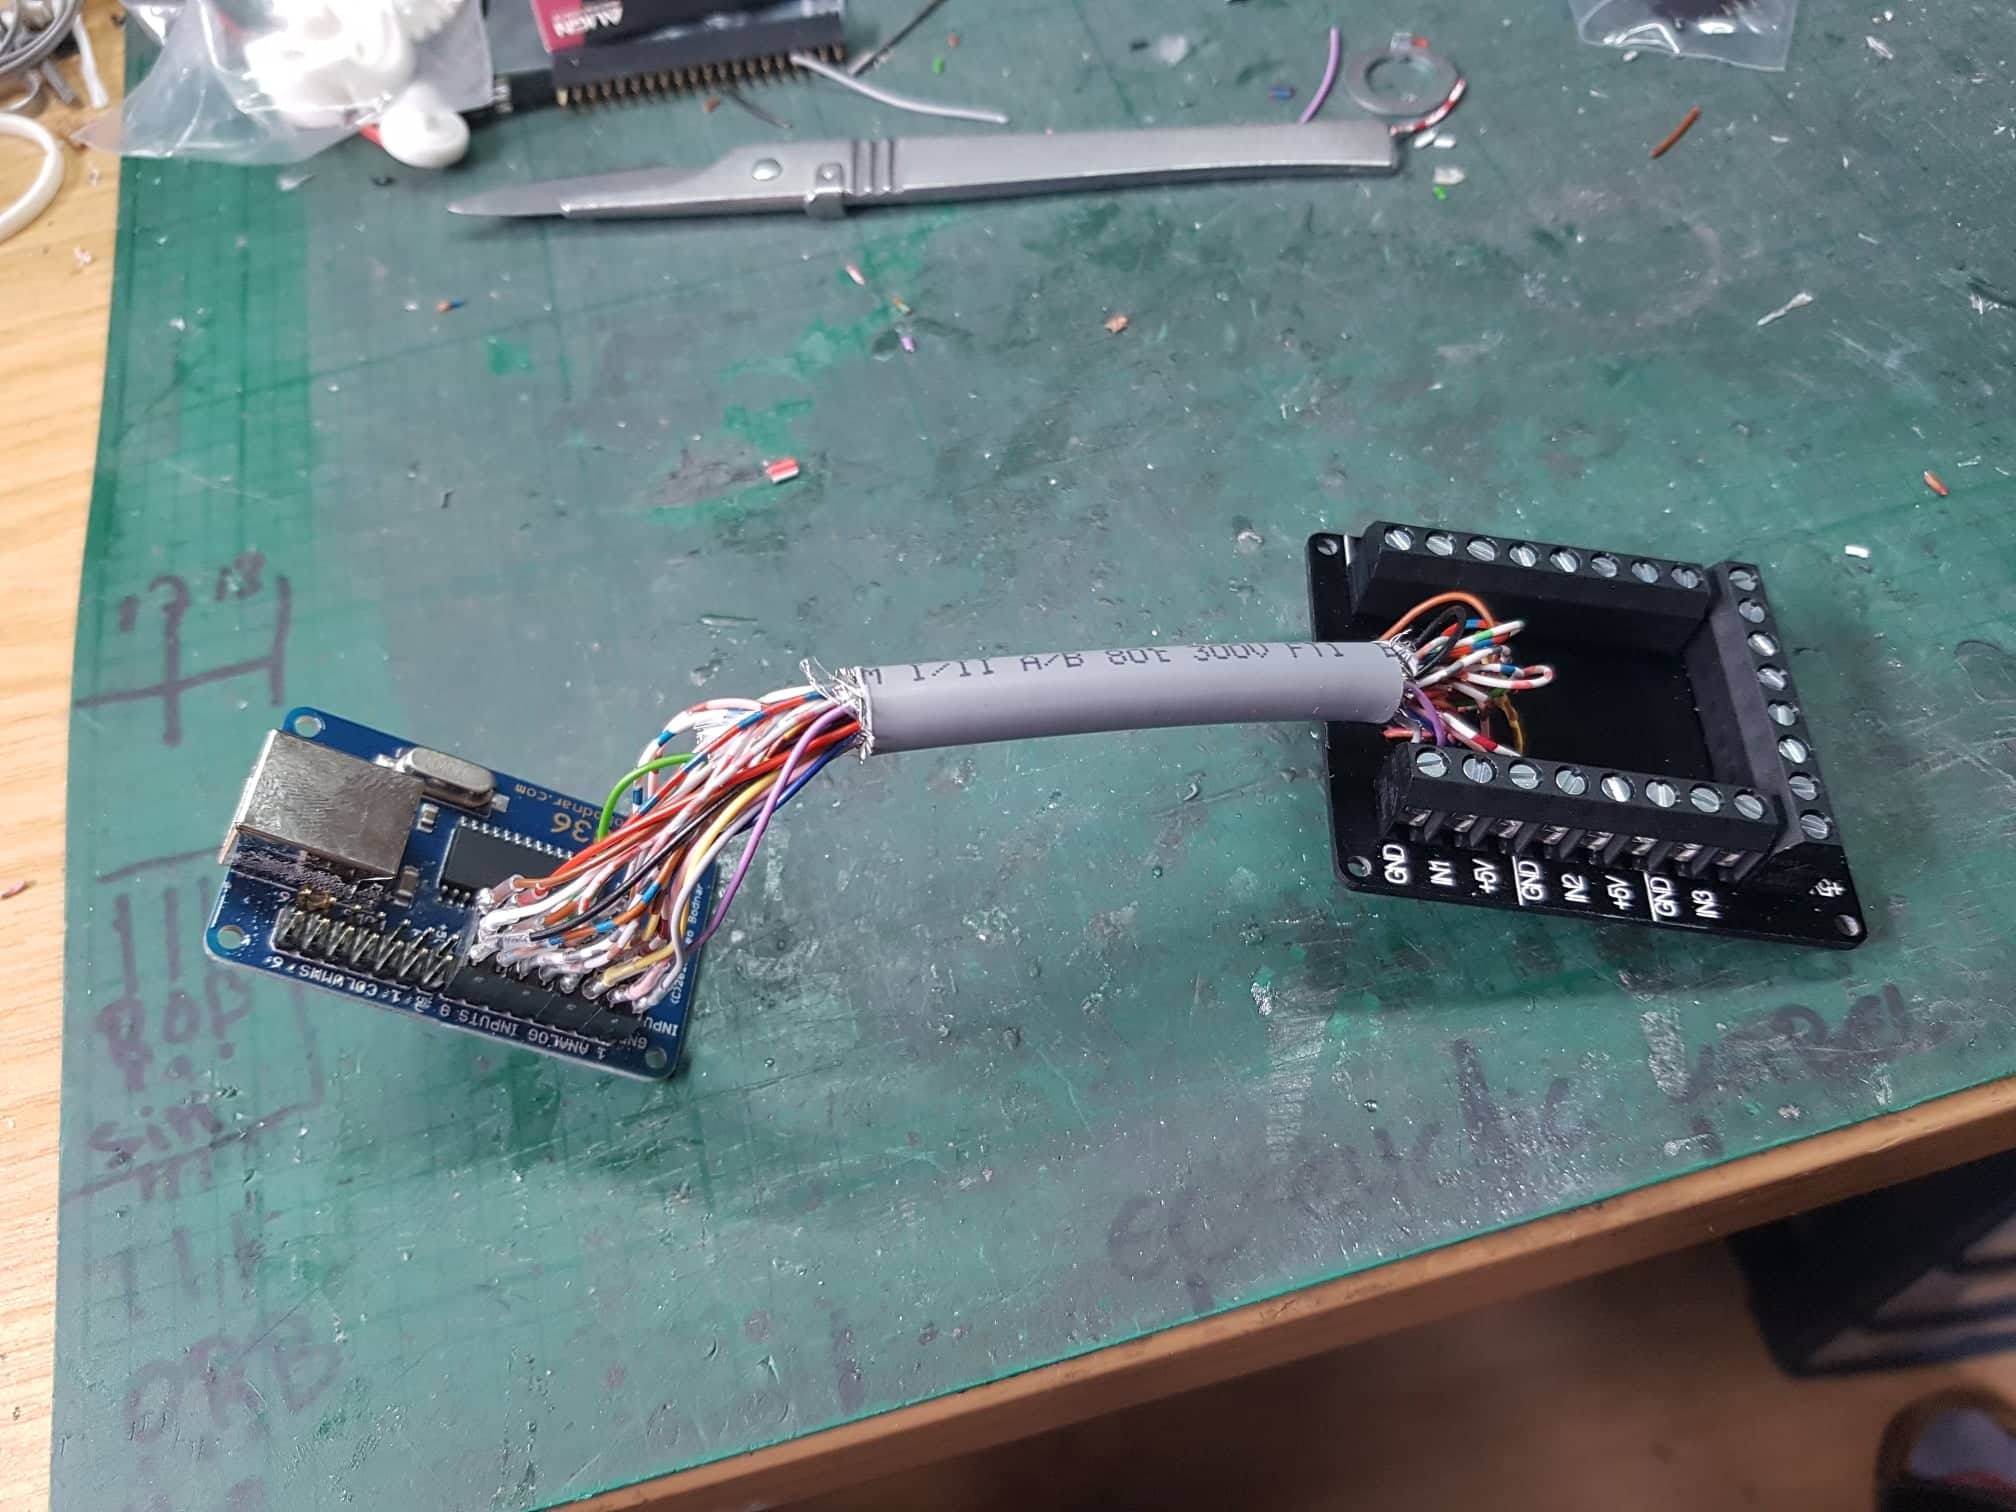
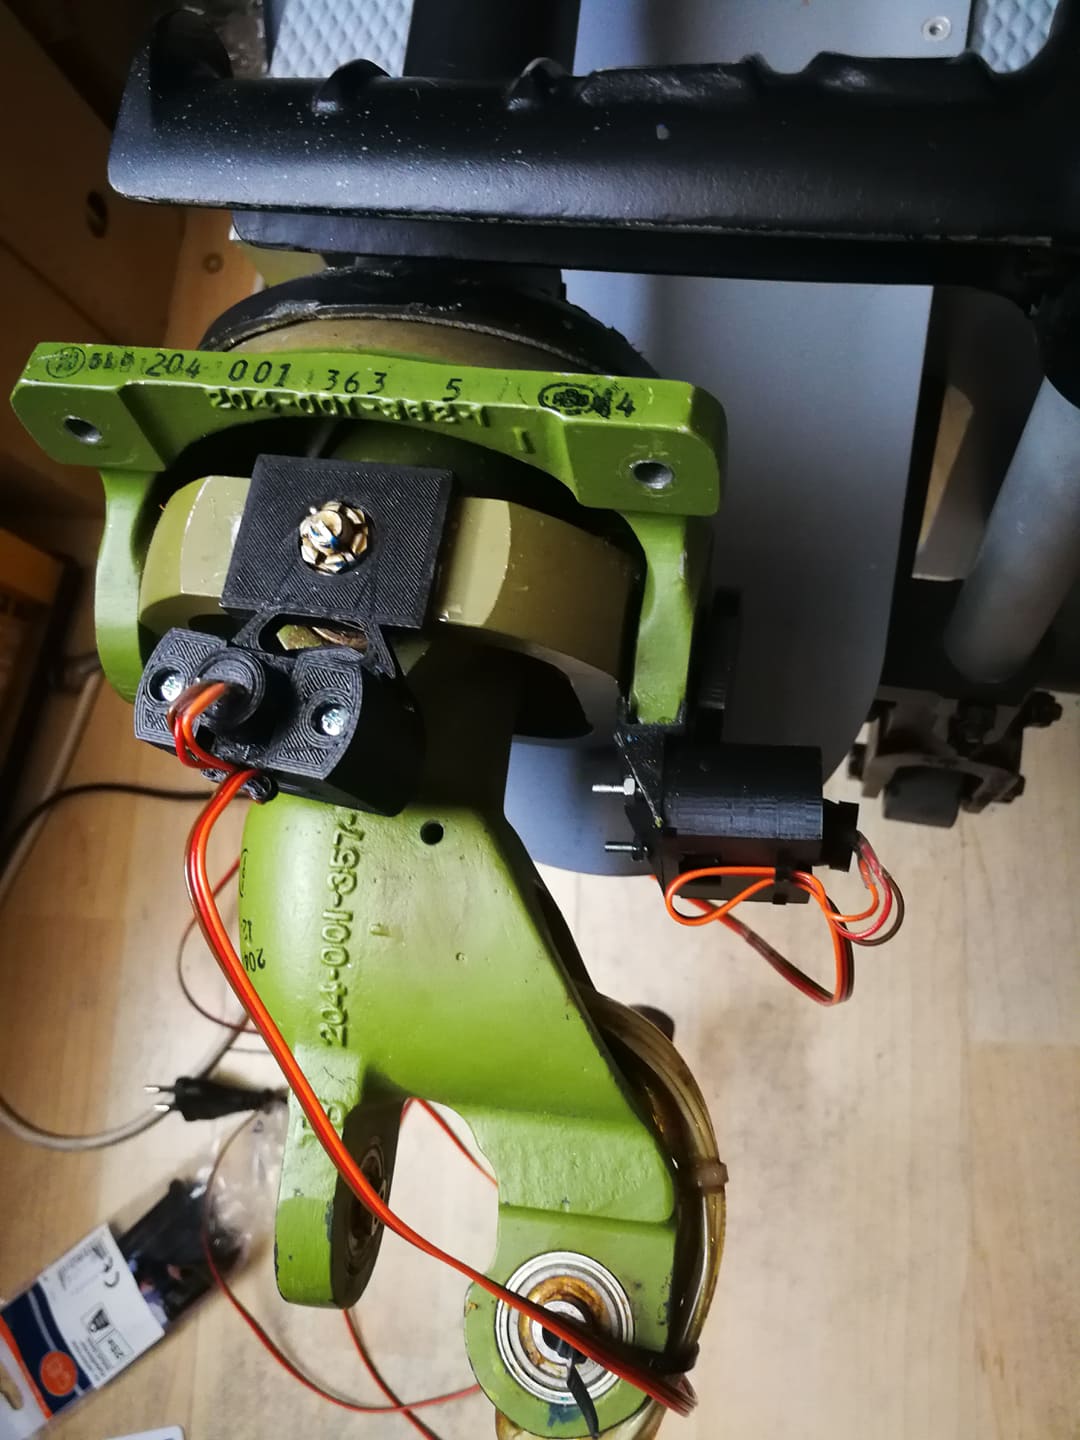
Thank you sir! Here's a little glimps of the inside of the box: Nothing really special, just some connected wires. As mentioned earlier, I am using both; hall sensors and linear potentiometers for the axis control. Nick, roll and collective are hall sensors, pitch, throttle and yaw (pedals) are linear potentiometers. I am using different types, just what I was able to get a hold on. The hall sensors were mounted on the bearing frame of the stick base and later connected to some plugs that go into my box. The fittings were 3D printed for an exact fit: Here's a pic of the linear sensor that is responsible for the throttle input: More to follow! Cheer!!
-
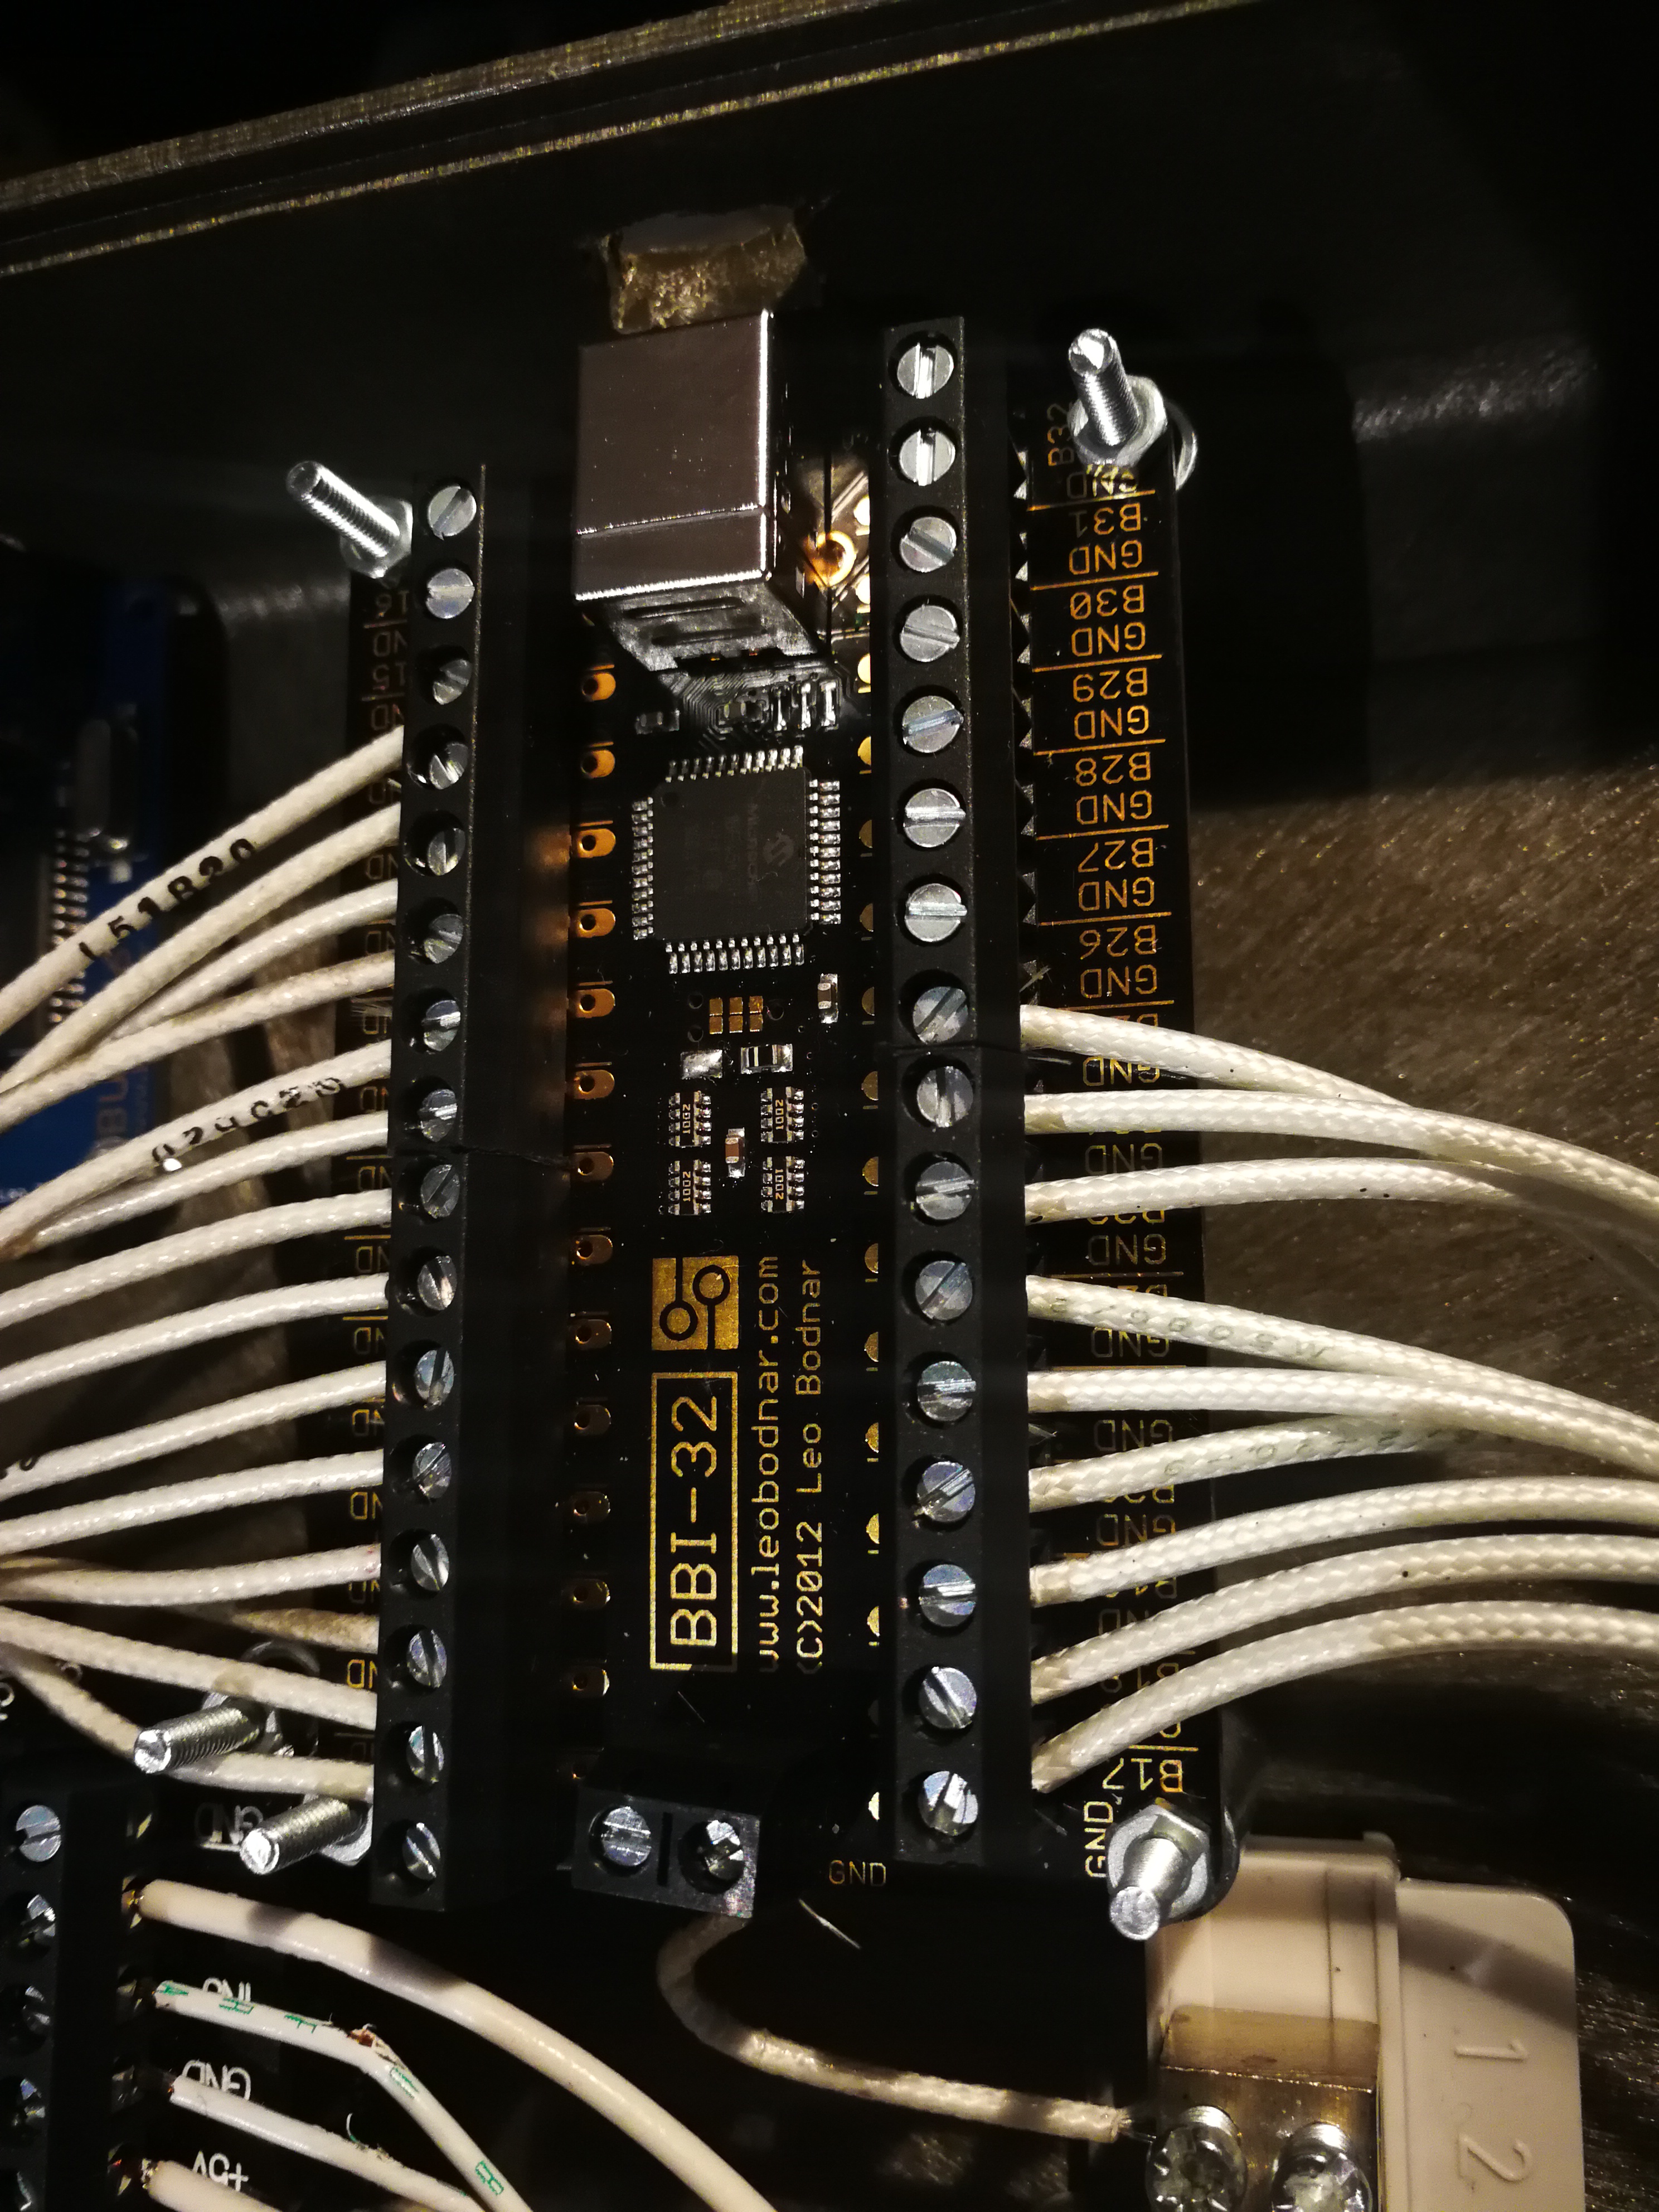
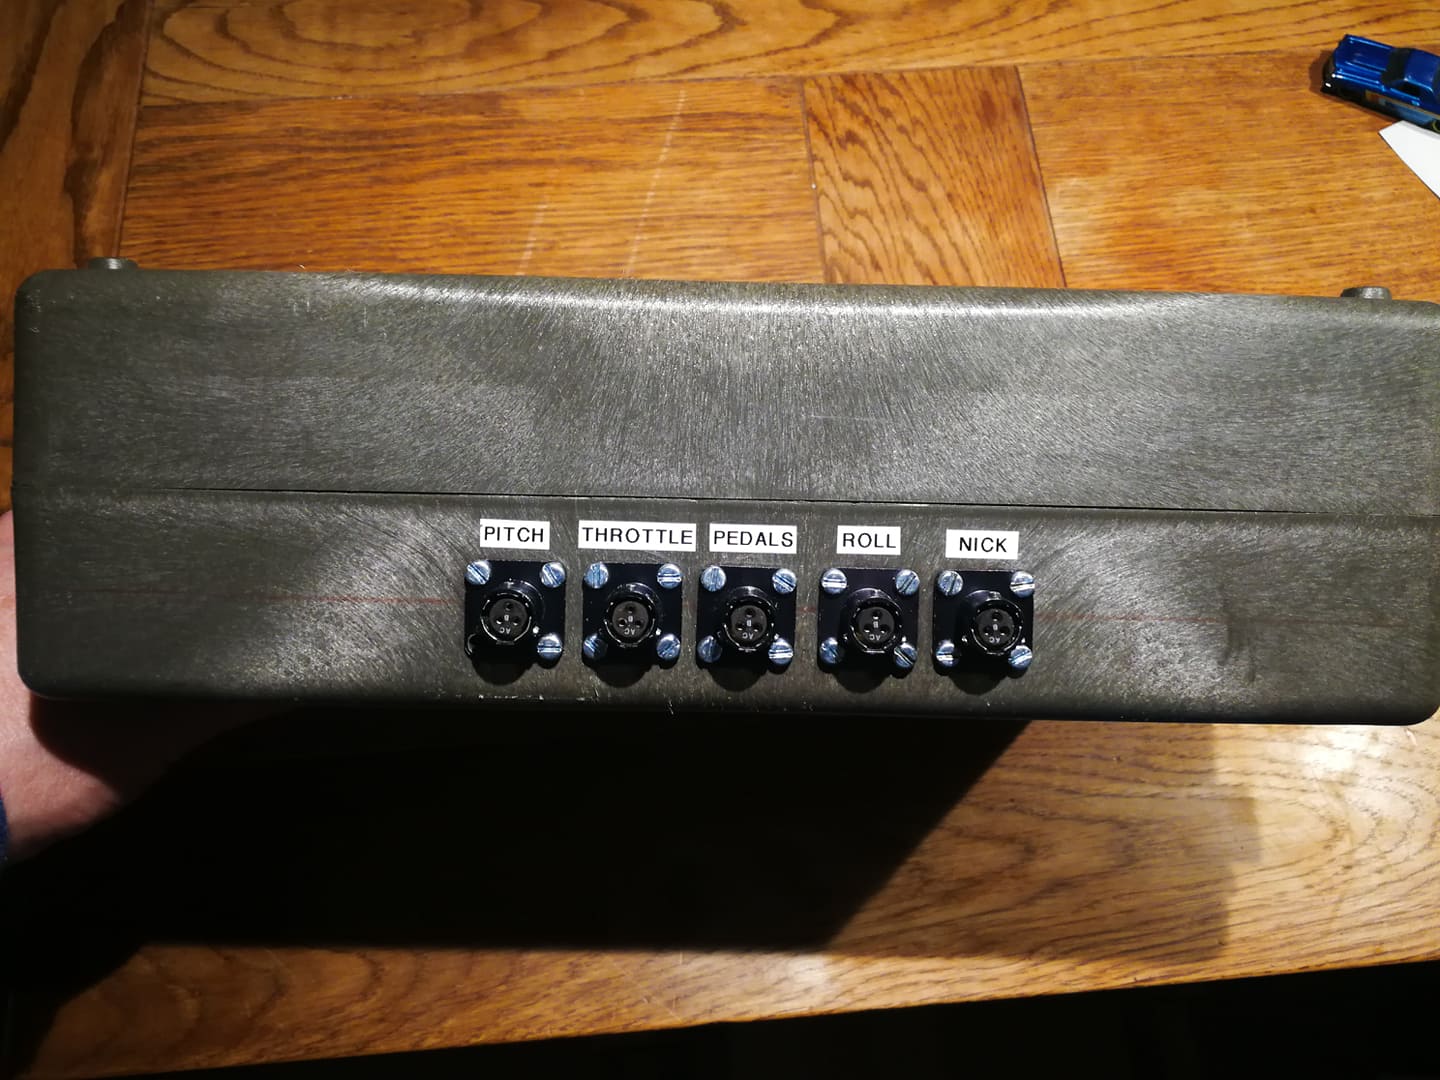
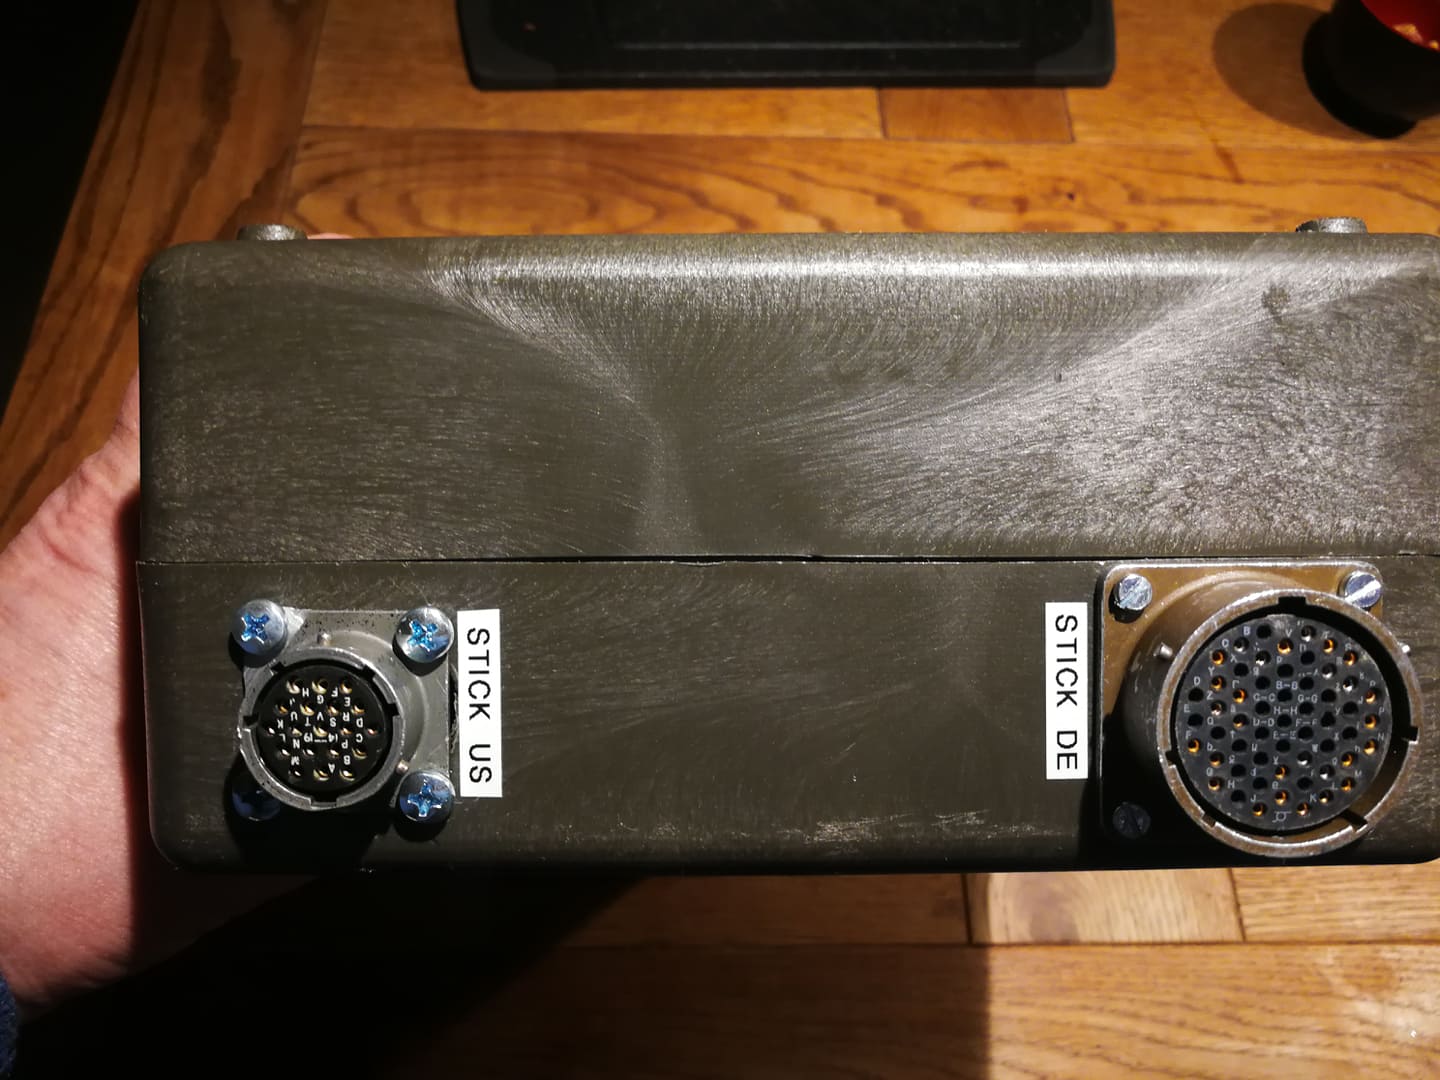
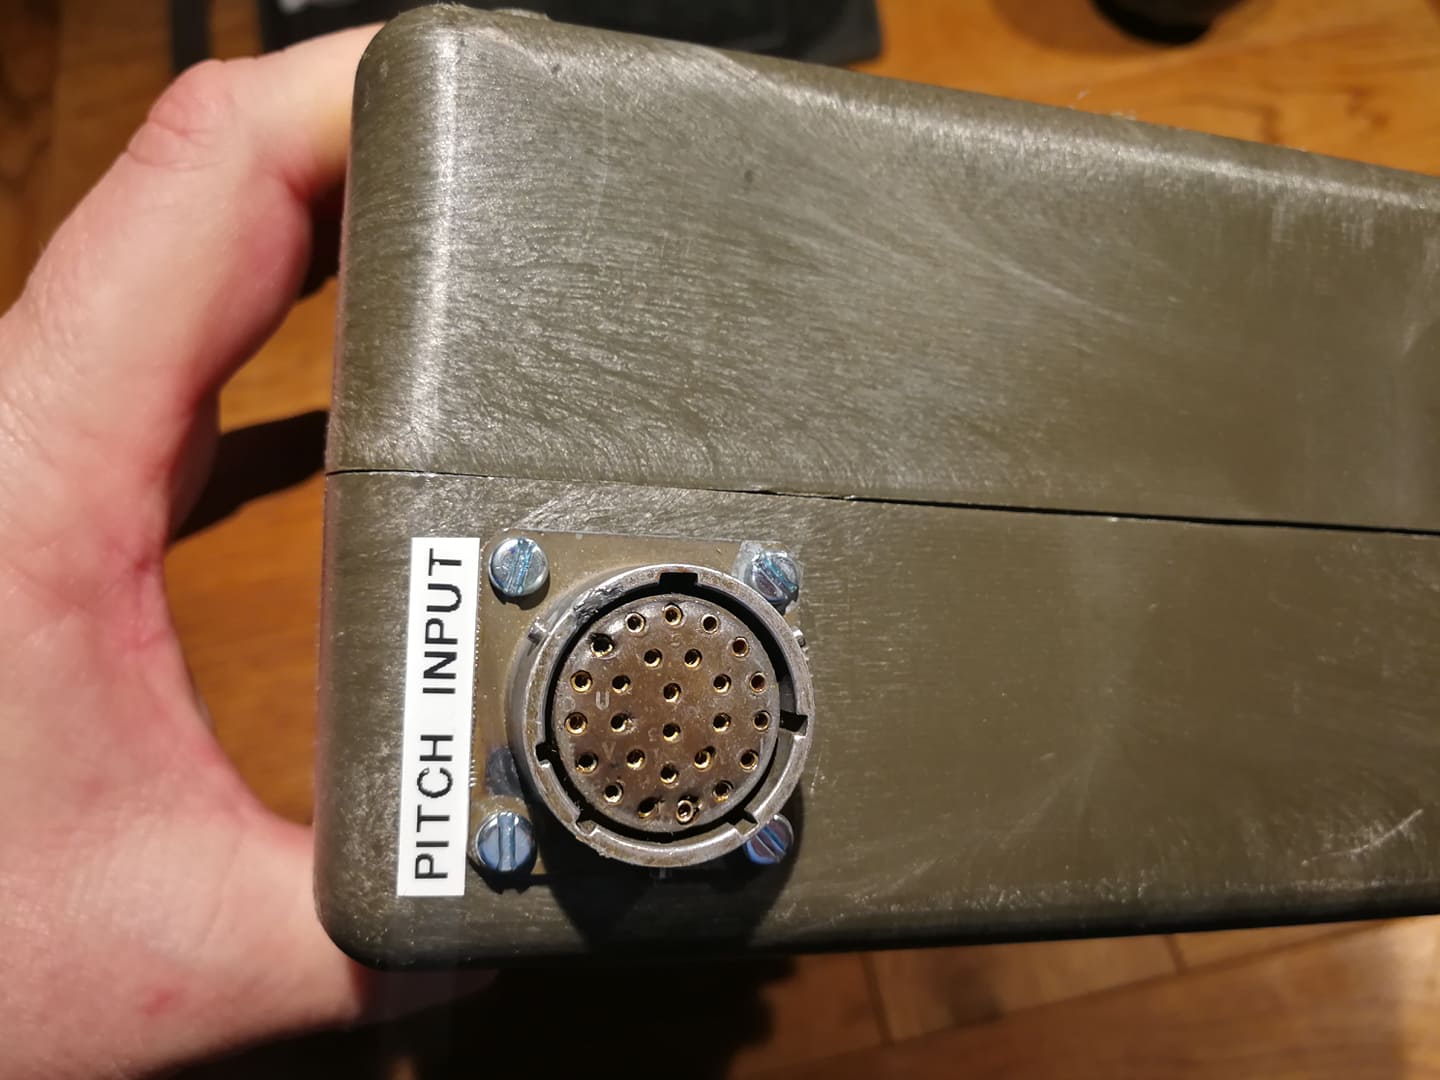
In the meanwhile: As for the connection from the inputs to the computer I decided to go a different way. I wanted to keep the original plugs with the stick and the collective and was eager to send the trigger signals from the buttons to the Bodnar board. I have chosen the Leo Bodnar just because of its simplicity and Plug-N-Play features. Additionally the board also offers the ability to read the axis commands that are sent via linear potentiometers as well as some hall sensors that I used for the axis outputs. Since I wanted to keep the option to use either the US B-8 stick as well as the German modified stick (with plenty more functions --> see first pic), I installed to connectors to my "box" so that I am able to change the sticks without having to struggle getting the cables newly connected to the Leo Bodnar. So here's what I ended up with: Connectors for the axis: Connectors for the 2 version of the control stick: Connector for the collective: To be continued....
-
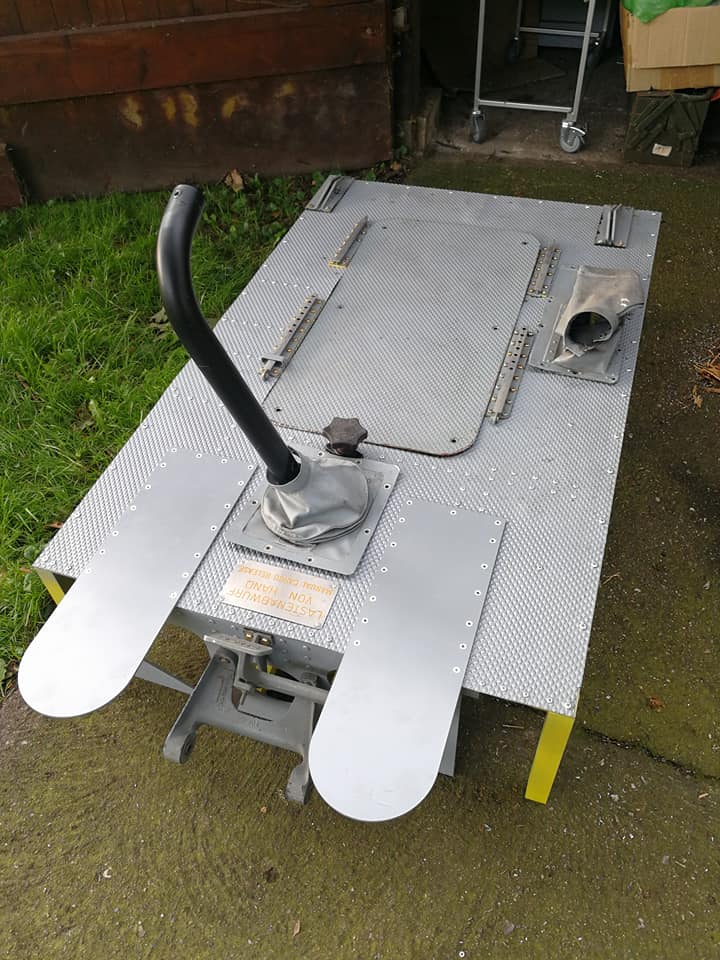
Turned out to be a smooth fit!
-
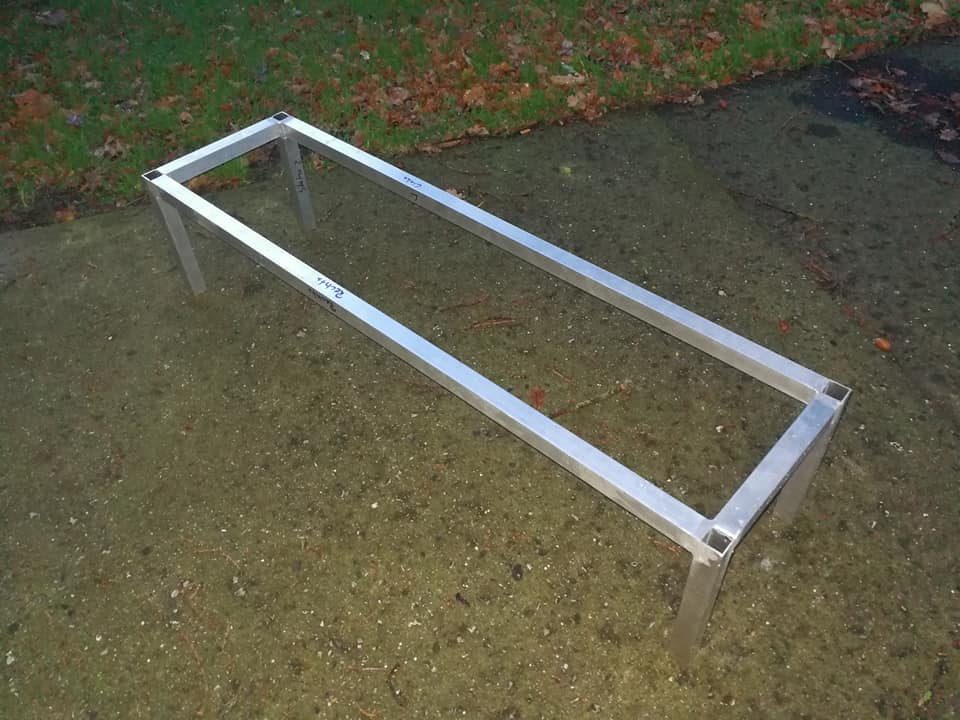
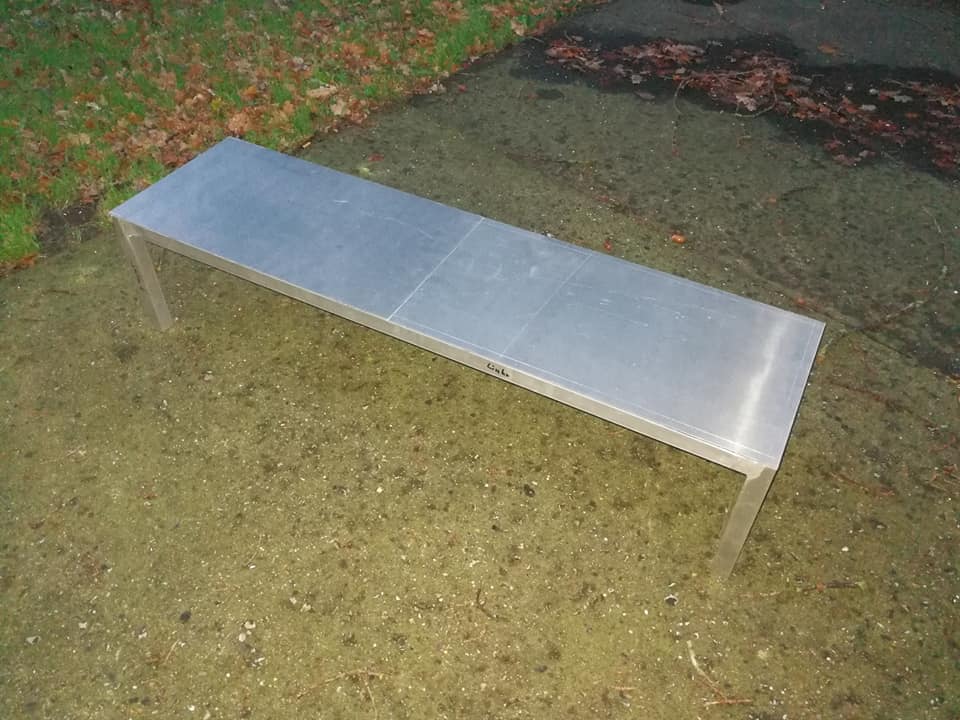
Since I wanted to use the Pit in a modular way in order to save space in my little office at home, I decided to create a side module that houses the center console as well as the dashboard. Measurements on my Huey and some spare parts made that task easier than the rest: First the aluminum frame: Fitted with the same floor structured panel:
-
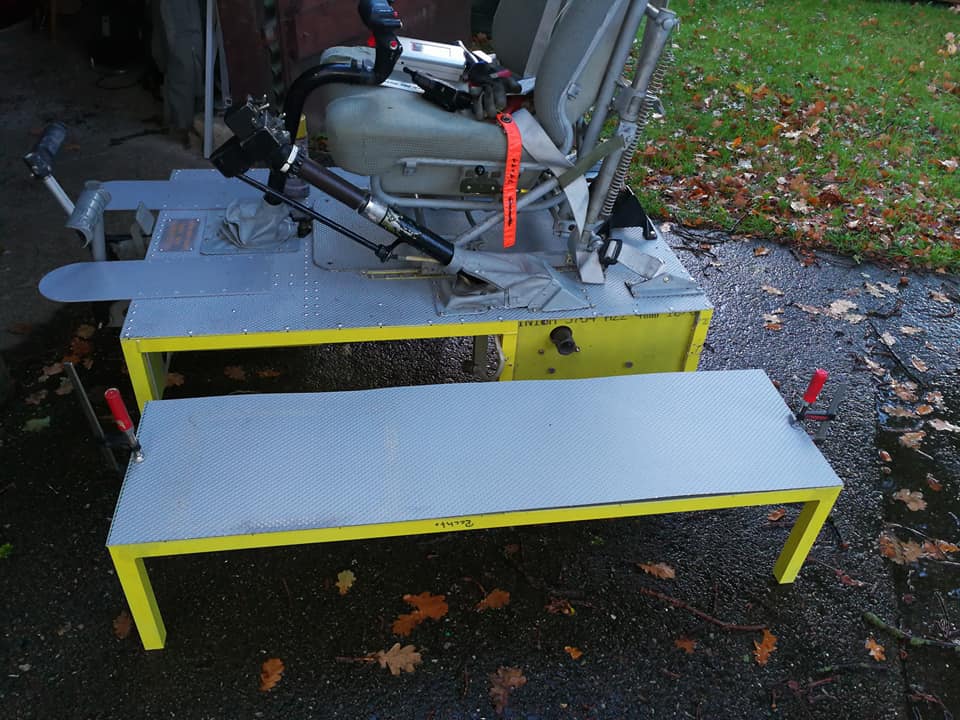
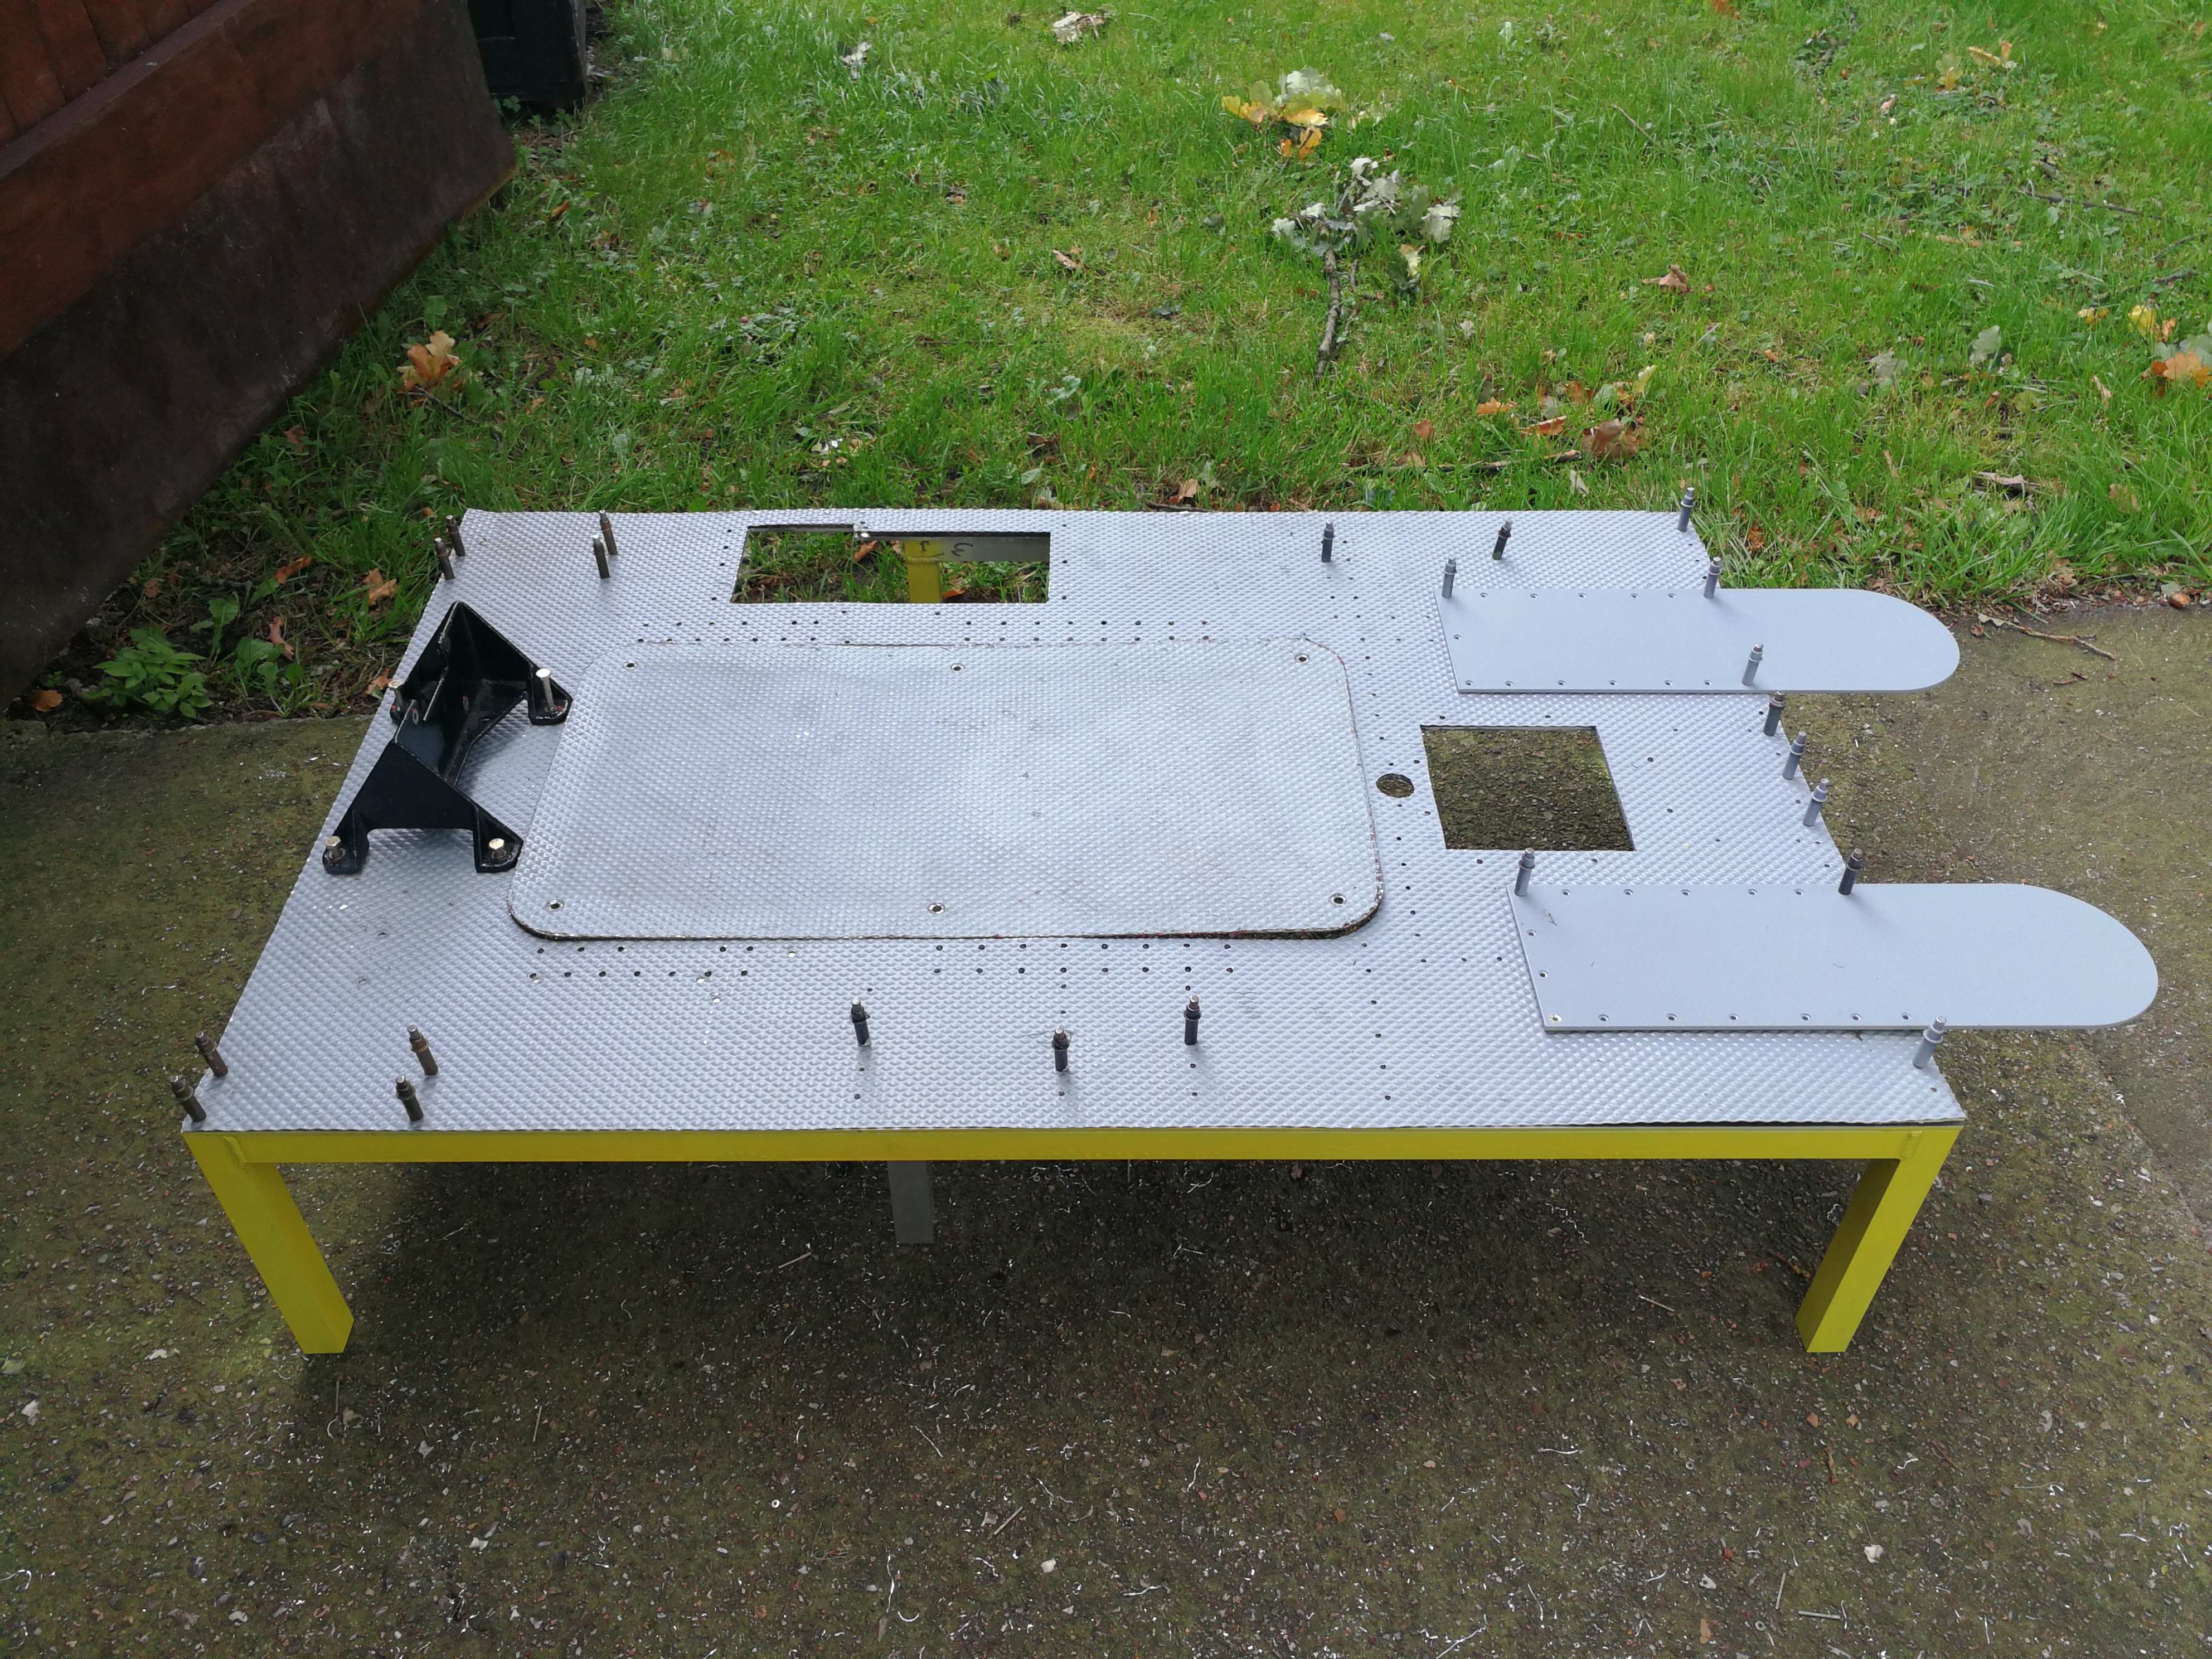
Hey everyone, long time.... I promised some fellows to post some more pictures of building of the pit (which is finished since more than a year now). Here the structured cabin floor has been cut in order to fit on the construction: Seat rails, pedal blocks and other bits put in place to test if my measurements on the real bird had been adopted correctly. And to my surprise everything fits perfectly and smooth in the desired place!
-

OH-58D Kiowa Throttle axis range below idle detent?
EvilBert VR replied to HipoxiK's topic in DCS: OH-58 Kiowa
Hello everyone, in my opinion HipoxiK is right. Something like this is absolutely nedded. I do not know much about programming but there should be the posibility to add such a feature for people like me as well as for others, that are using SimPits with idle stop capabilites. I assume that those are quite more than just 1% with an increasing number due to progress in available sim controls in the not too distant future. Cheers! -
[Official] SimShaker for Aviators
EvilBert VR replied to f4l0's topic in PC Hardware and Related Software
I will check on those. But meanwhile something else has occured! Somehow I managed to get things working (using a Buttkicker2 atm). Vibrations felt fine again and signals were from the .luas and not from the sound part. Everything felt ok when flying with the Huey. After changing the plane (switched to the F-16) the Buttkicker went dead. And the effects did not come back when I was switching to the Huey again. I did NOT use VB-Audio this time and kept the standard settings from DCS and SSA. Will check tomorrow and report. Cheers -
Hey Greekbull, is the headset still available? Cheers
-
[Official] SimShaker for Aviators
EvilBert VR replied to f4l0's topic in PC Hardware and Related Software
Good day evereyone, especially f4I0: I upgraded and updated my rig and something weird has occurred: When starting the SFA my shaker "only" plays back the audio files and obviously NOT the .lua files from the aircraft chosen. I am using Voicemeter to use audio-out options for getting the audiosignal to the headset and I tick the box in SFA for the signal to the amp for the shaker. Somehow I got confused with the audio options in DCS since I am facing trouble getting everything to work simultaniously (SFS, DCS-audio and shaker). Any suggestions for that? TIA! -
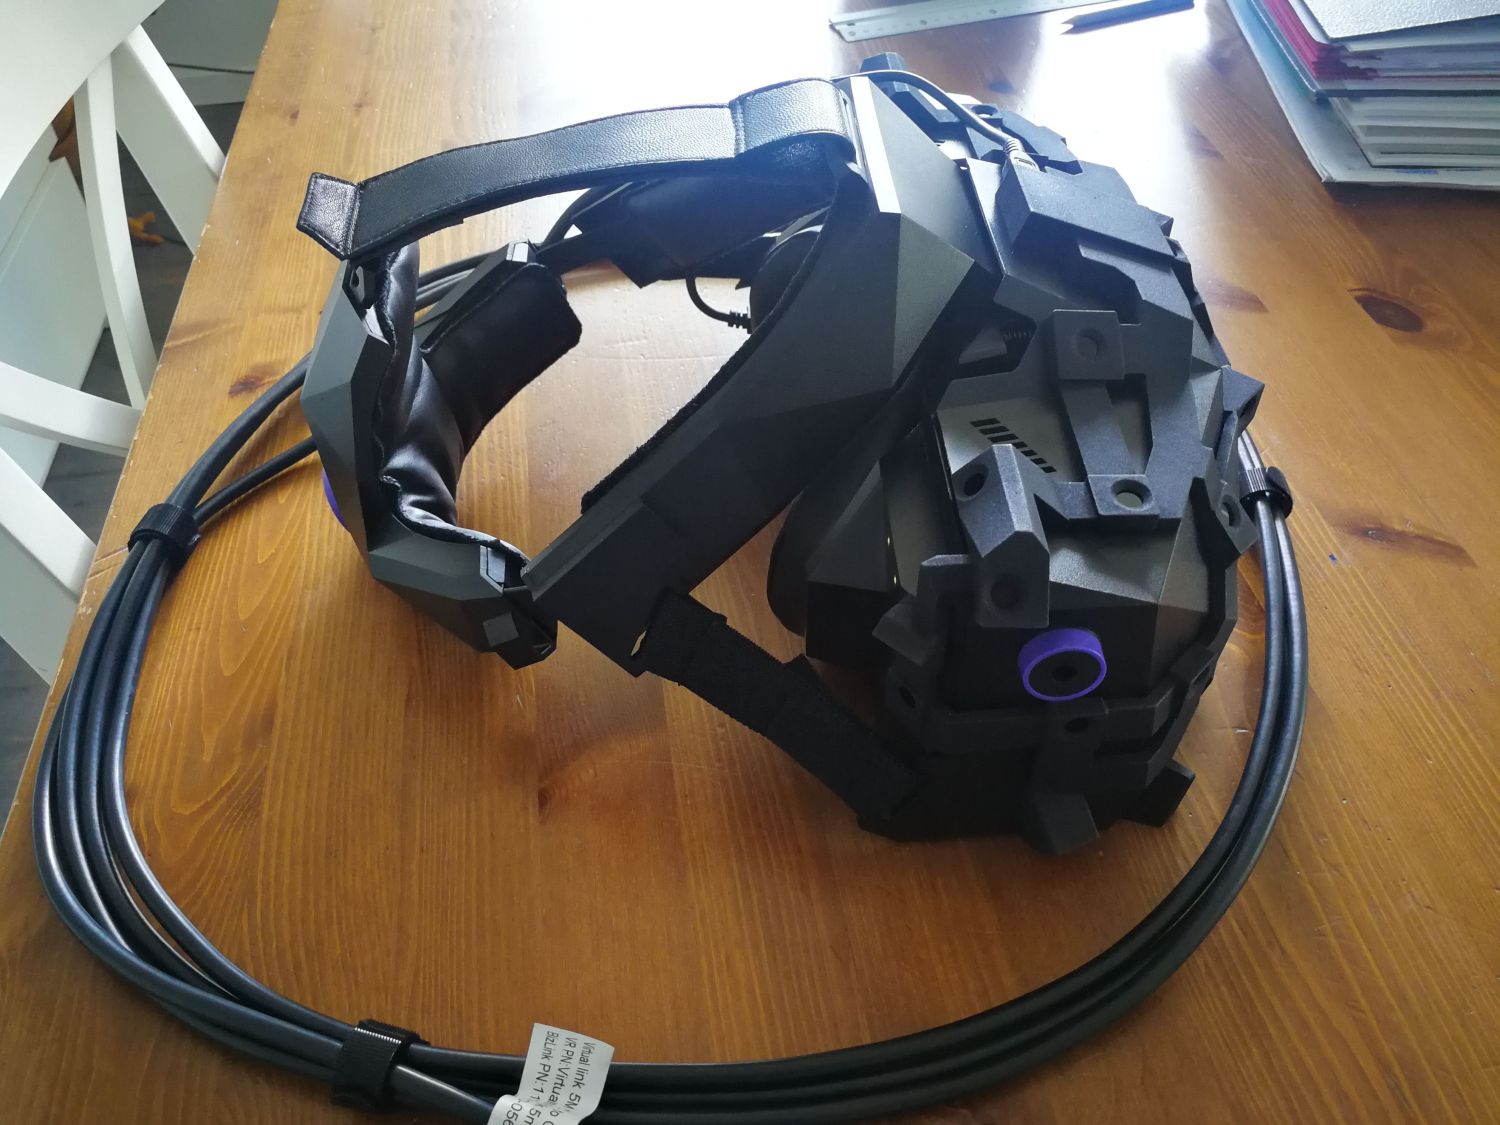
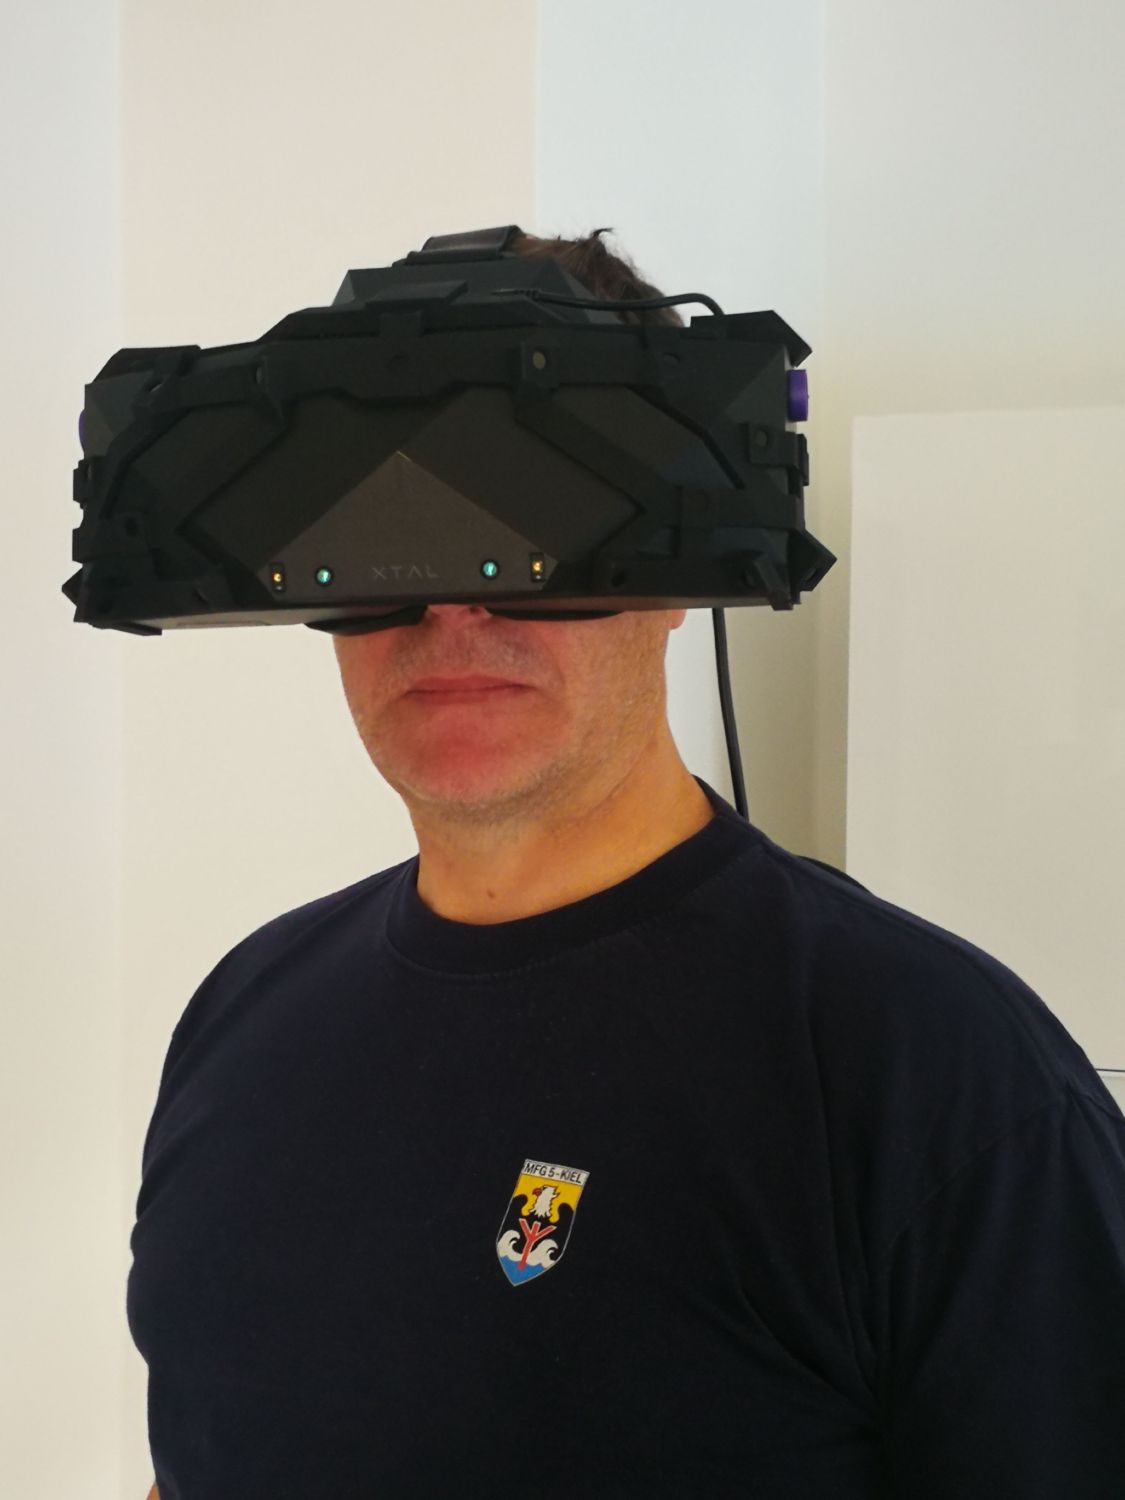
I am usually using the 5K so that's my comparison model. With the XTal I am running on either 5K with 2x 2560x1440 at 120Hz or 8K with 2x 3840x2160 at 75Hz. Cheers
-
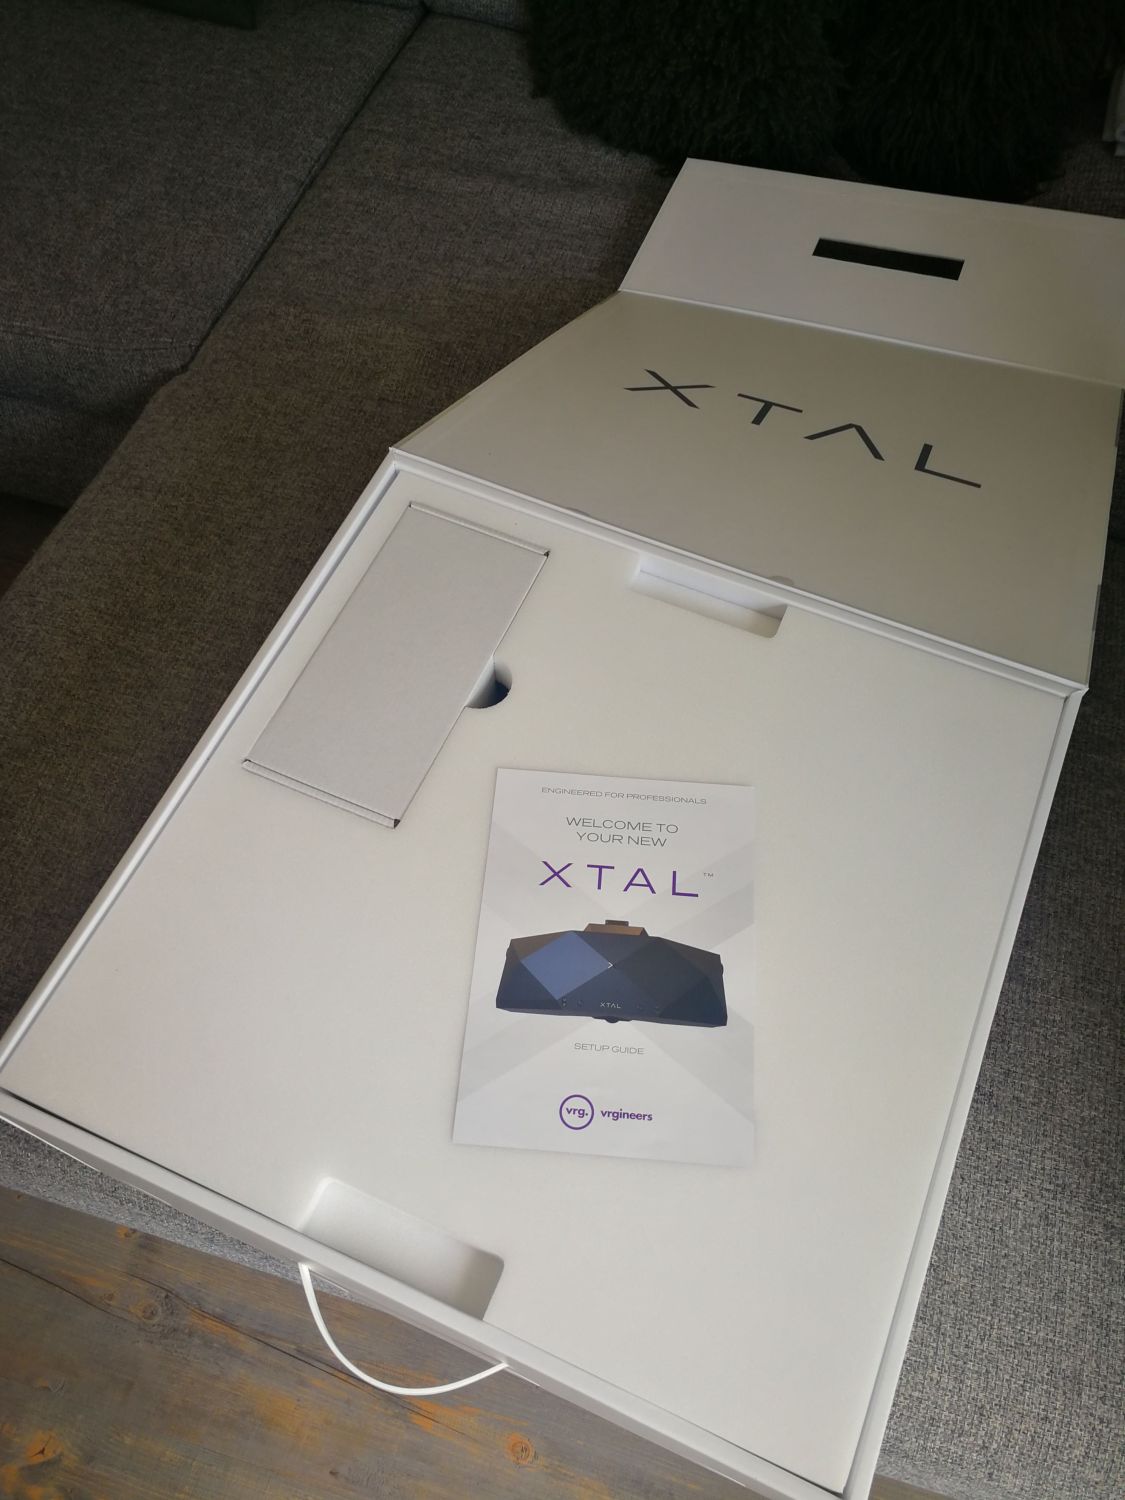
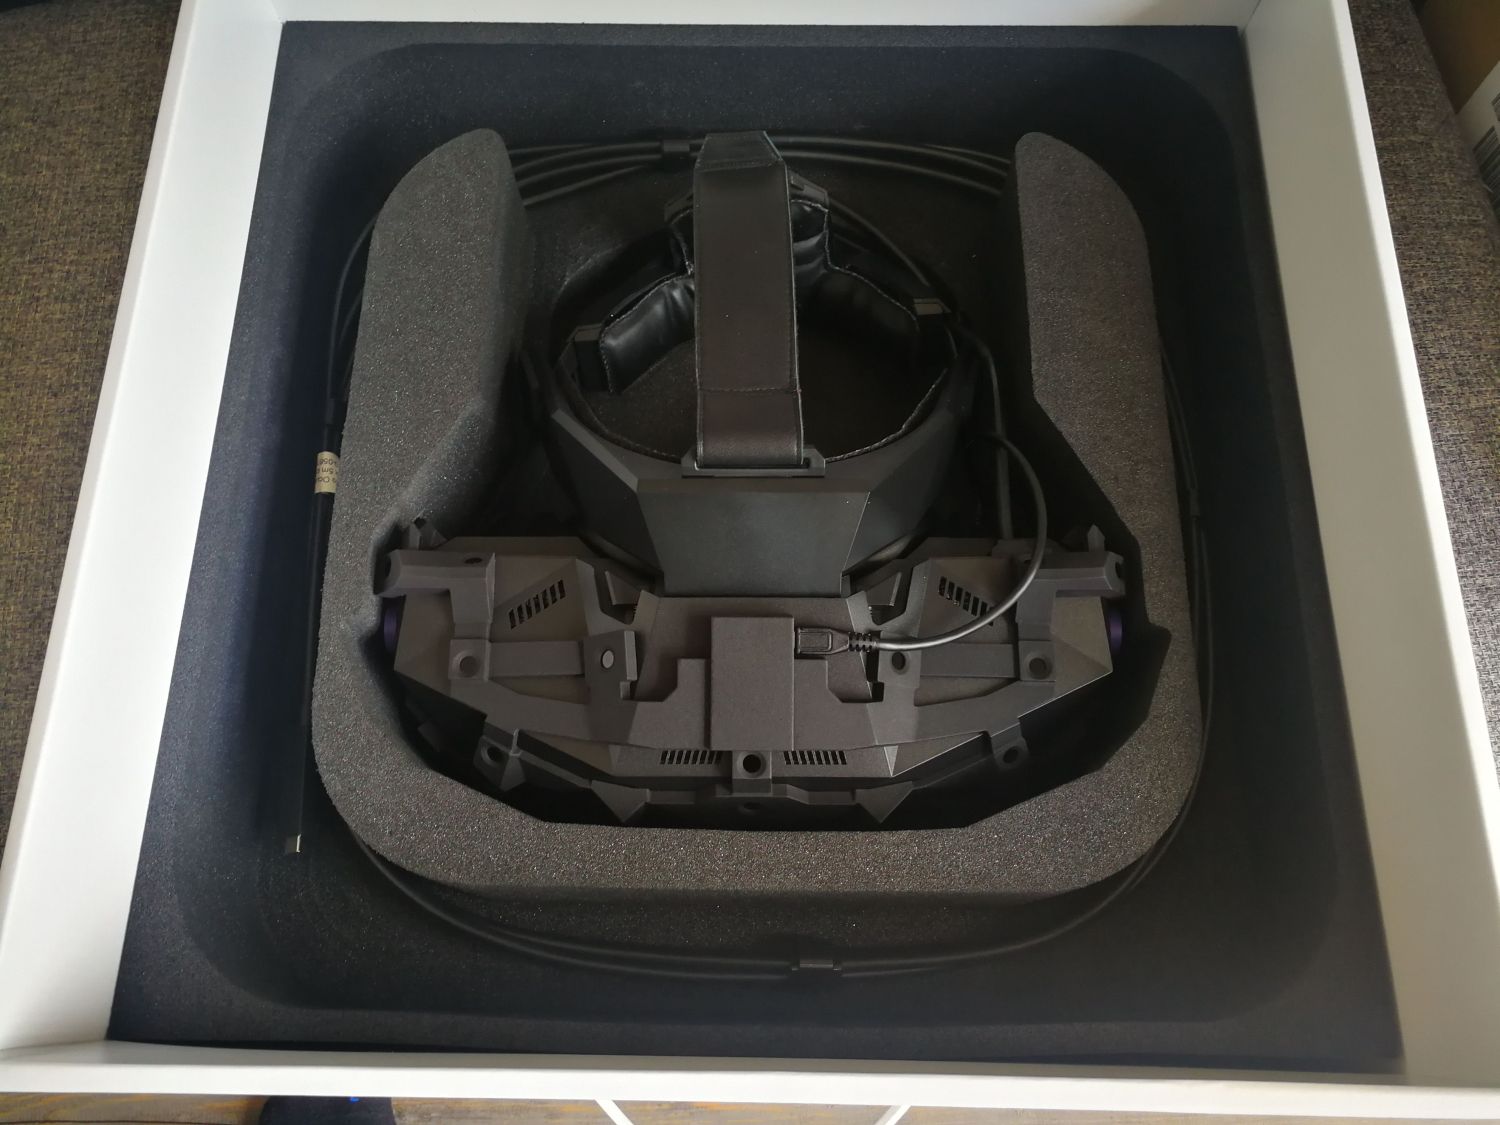
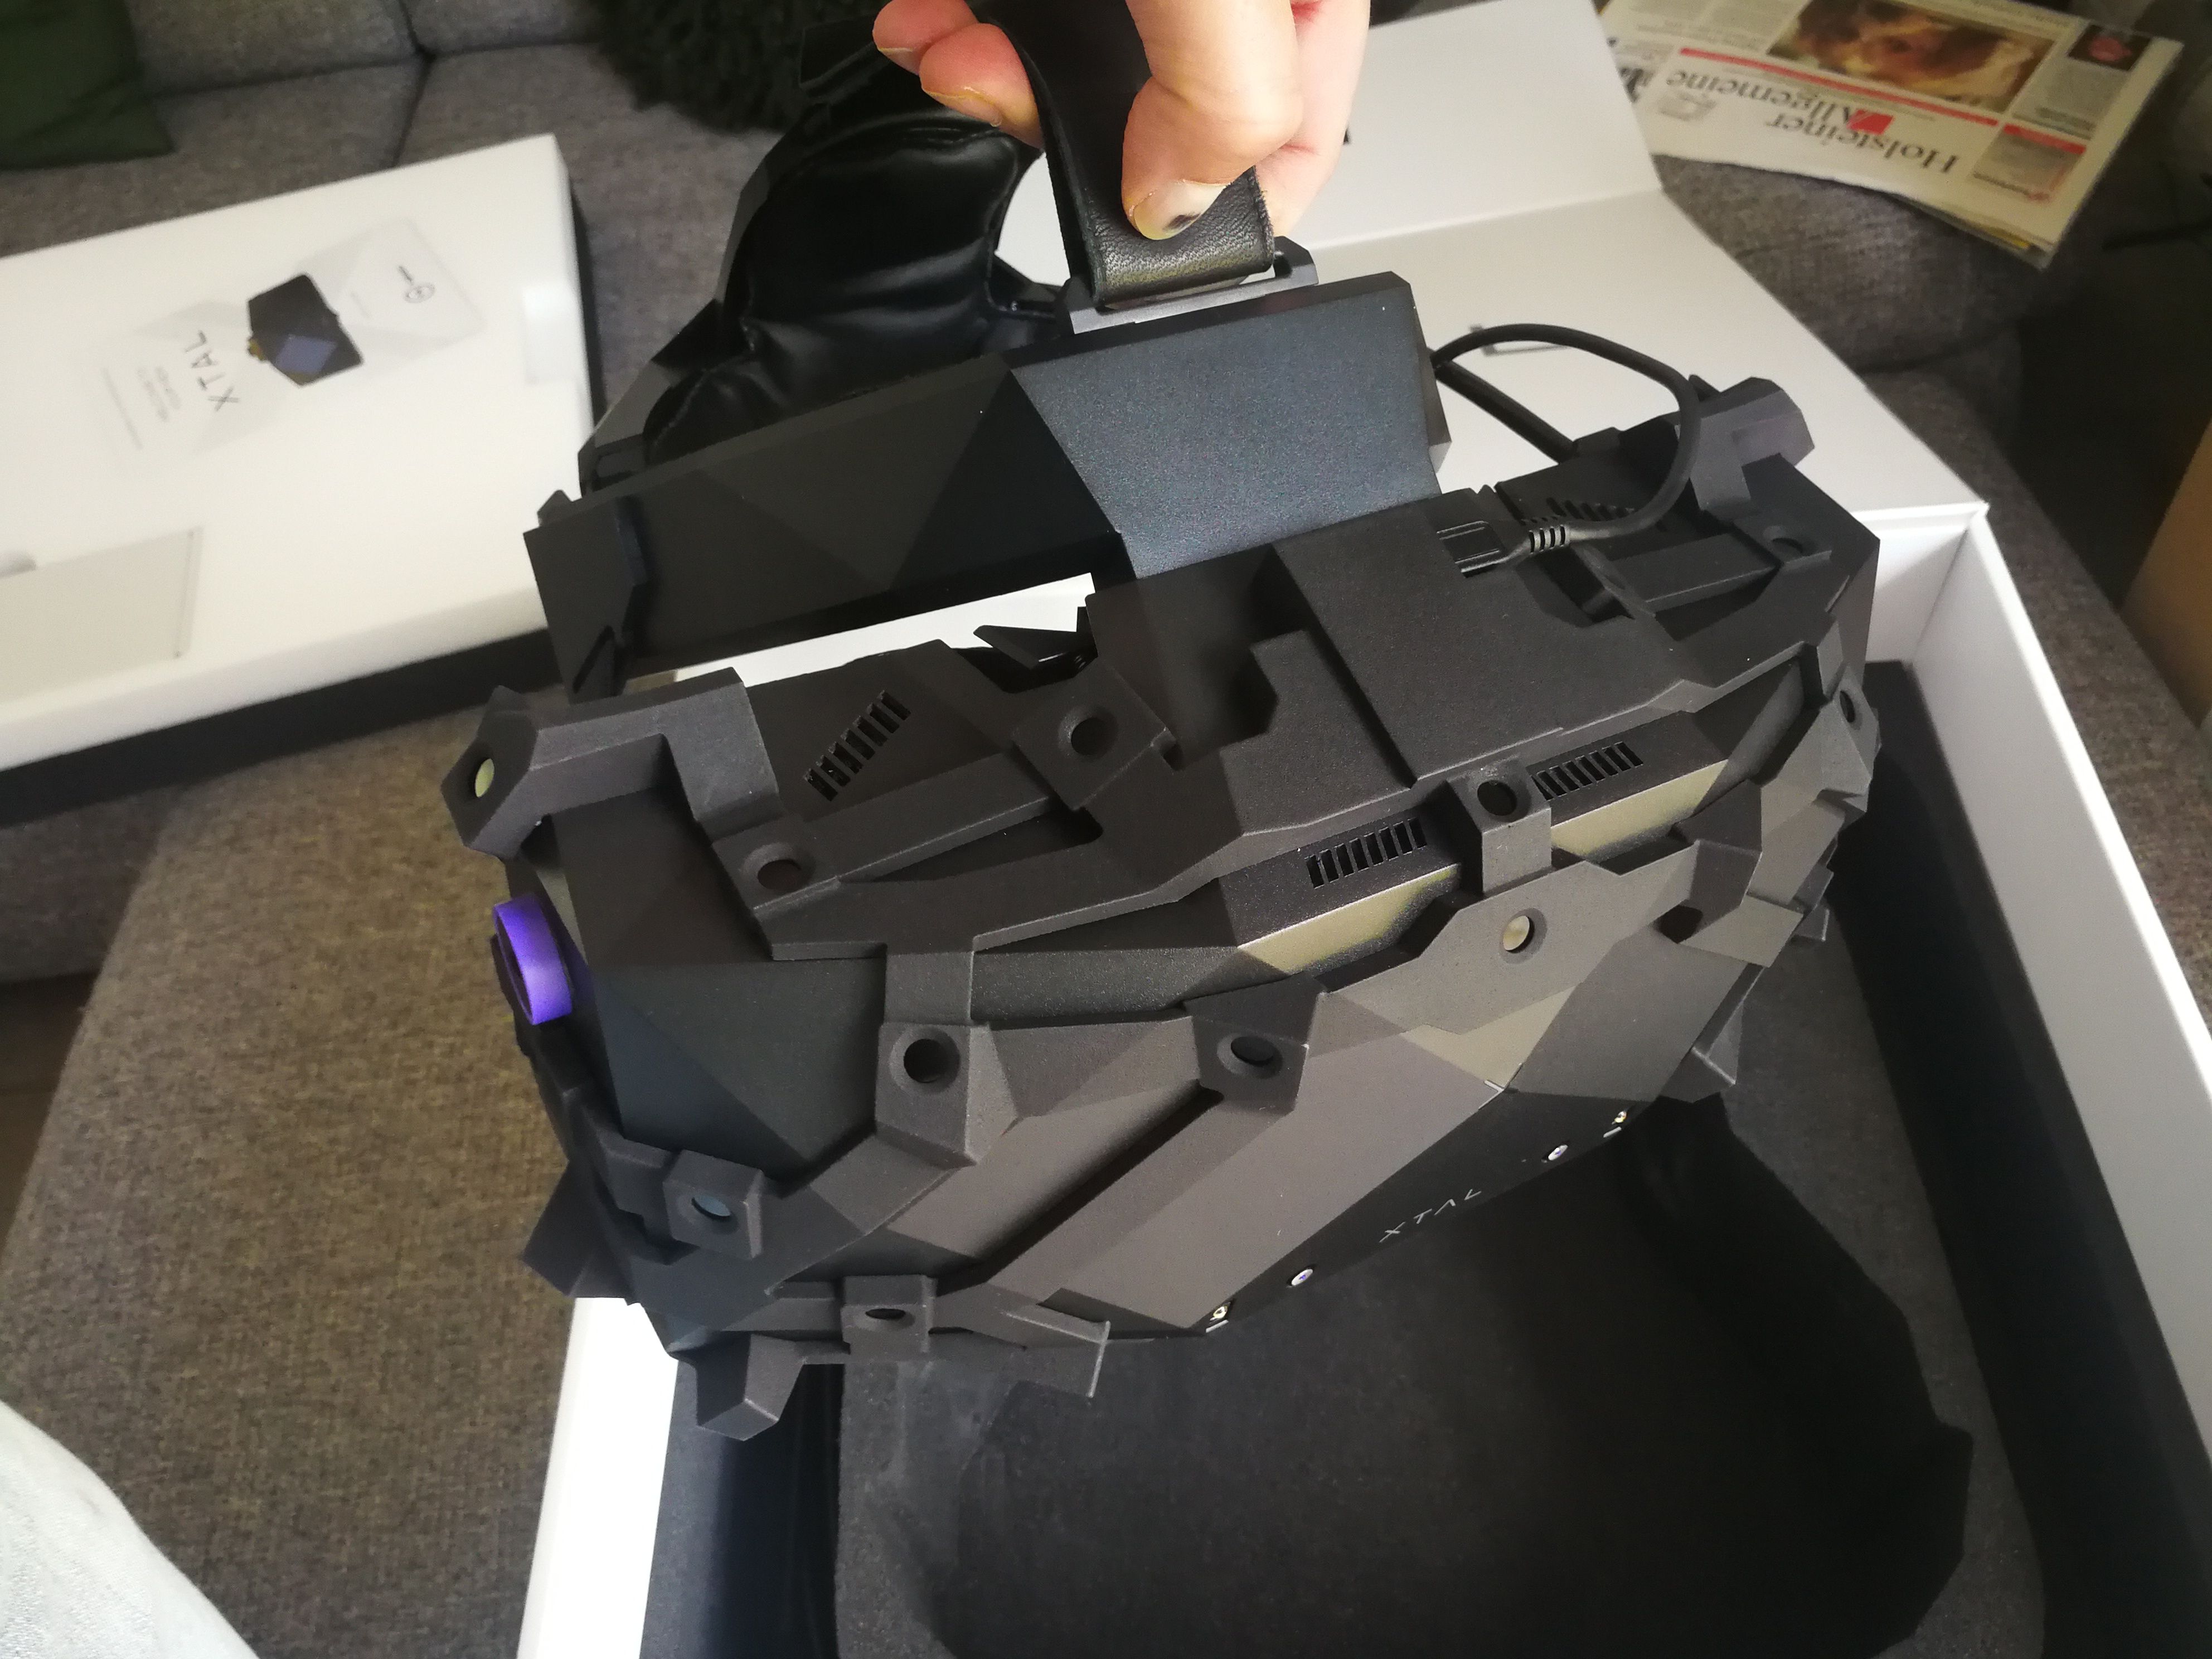
Hey everyone. I've been pretty busy the past weeks but I thought that it was time to give you a brief review of the XTal VR headset made by VRgineers that I had been using for quite some time now. I know that the headset has been discussed here and there but no review has been put online on this forums. So here we go but without diving too deep into technical details. I received the headset a couple months ago for testing purposes within my helicopter simpits. Thanks to Marek from VRgineers.com:thumbup: The first impression was overwhelming! Just by the looks and the packaging you could tell that this is the real deal! The headset is high-quality and is made of very solid and rigid plastic. The version that I was given is called the C3 with a single virtuallink plug that snuggs into the USB Type-C port on my 2080Ti video card. Speakers are not built-in but there's a standard plug on the side of the headset. (Two USB dongles are also utilized but I have not figured out the use of them so far) And: That thing is massive!!! Once plugged in you need to download a dedicated software for the headset named "VRG VR Tool". The software guides you through the installation process and once everything is set and done you're ready to go. It took me quite some time to get all the settings adapted to my comfort and after a lot of struggling I finally figured out what the best settings were. For using the headset with DCS you need to install some .dll into the bin directory of DCS and then you should be good to go. Here it gives you the option of either using static foveated rendering or not. The latter affects your systems efficiency so a lower resolution is recommended. More on this later. Steam VR is mandatory to use the headset in most games. A guide of how to use the headset with Steam VR and how to set the system up for DCS is provided by VRgineers. After setting everything up you're good to go. My impressions so far: - the image quality is the best I have ever seen in VR! I've never seen such a crisp and detailed cockpit and there are no grid lines visible!!! - The FoW is somewhat smaller than the one of my Pimax but by far larger than on the other common headsets available. As you guys know: FoW is the key to immersion to me! - The headset is pretty heavy and even with its very comfortable strapping system it gives me a pain on my nose after a while. - It took me very long to get the best adjustments to my eyes (I guess the problem here was the grey part behind my eyes :megalol:) ... More to follow... Cheers!
-
Hey everyone! I downloaded this mod and installed it just as described. Unfortunately it doesn't show up in the main menu as a choosable aircraft. What am I doing wrong? I am using DCS 2.5.6 OB Cheers
-
Solved! I had painfully to update to 2.5.6 and all worked. Btw: You have to look for "Search And Rescue" instead of "SAR". "Sea..." is enough to find the server. Nice server with nice missions. Cheers!
-
Ping is working OK. I think the problem is that I went back to OB 2.5.5 for obvious reasons. I might give it a try. Cheers
-
Strange. Just opened the port but for no avail. What version of DCS are you guys using? I'm with OB a.t.m. Cheers
-
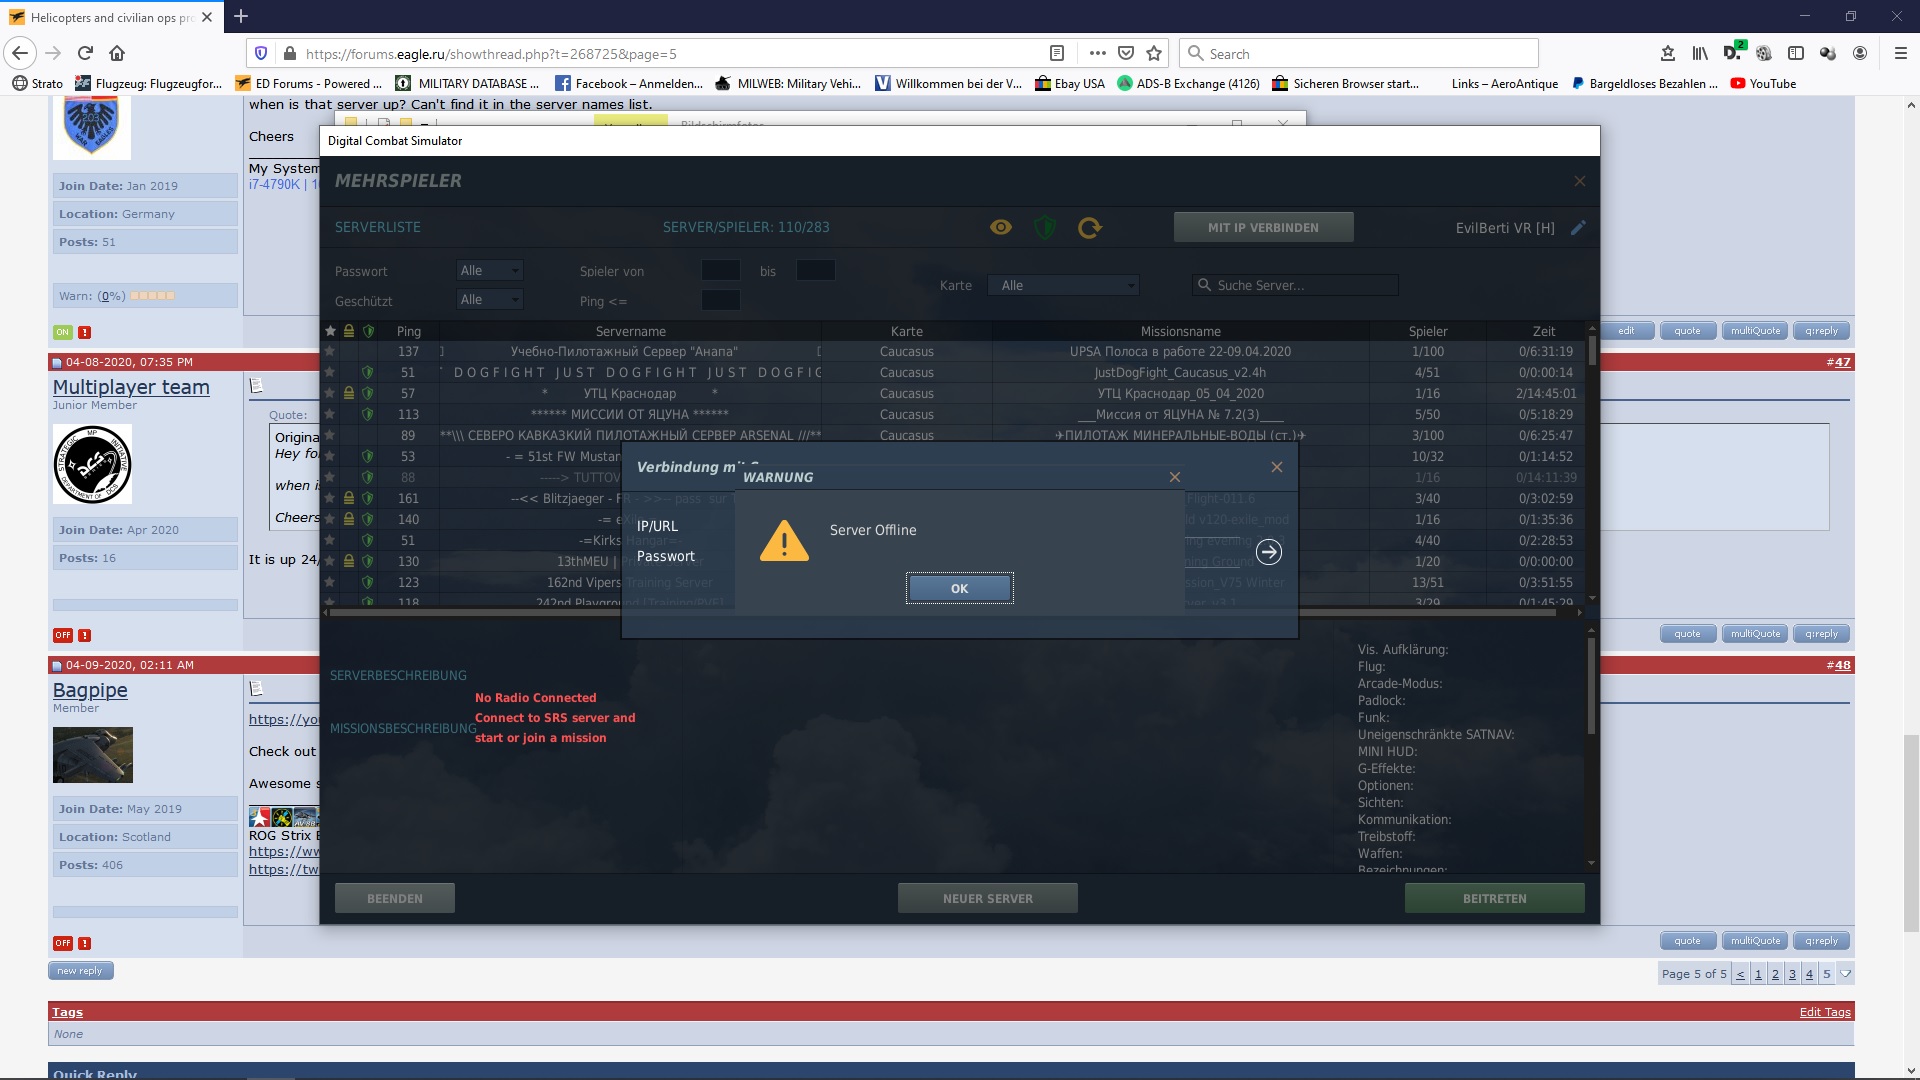
Somehow I keep getting this message:
-
Hey folks.... when is that server up? Can't find it in the server names list. Cheers