No1sonuk
-
Posts
1601 -
Joined
-
Last visited
Content Type
Profiles
Forums
Events
Everything posted by No1sonuk
-
I just went for a drive from the Houses of Parliament in Westminster, along Whitehall to Trafalgar Square, then through Admiralty Arch and up The Mall to Buckingham Palace. So for a start, London isn't close to being that hilly. The buildings along Whitehall are not right - there's no 10 Downing Street (the Prime Minister's house) and no Cenotaph on Whitehall. Coming out of Downing Street at the St James's Park end, the aforementioned inaccurate hilliness resulted in the road being considerably higher than the park, when they should be at the same level.
-
You need specific code to properly compare the states of the rotary encoder inputs to determine which button to "press". Rotary encoder example: https://github.com/jssting/ButtonBox I don't think you can extract the bug data from the F-16, or any other aircraft that has an electronic HSI because there's no "physical gauge". DCS uses display driver code for that, rather than model animation, which is what DCS-BIOS picks up on with gauge position code.
-
That looks like it might be a problem with your computer output to the monitor. How are you connecting the second monitor to the computer?
-
Is there a way to make the page change buttons stay at the top of the screen when the page changes orientation?
-
Nice job. Especially with the limited tools. Setting the pin modes is something else I forgot. DCS-BIOS does it automatically when it's a built-in function, but the code within the onchange functions doesn't. This is because it's a normal Arduino code function. Having said that, I think there's a difference in the analogue pins.
-
If you try to wire two switches to one input, you'll massively complicate things. Like requiring binary step resistor networks. You'll turn a 10-position switch and a 3 position switch into a 30 posiyion switch hidden in 8192 possible combinations... A 10-position switch has 2048 possible combinations if each position could be on or off. That is significantly reduced if only one can be on at a time. Add a second switch, and the numbers go higher. HOWEVER, if you only use one switch per input, you can use linear potential dividers which are easier to decode. Check out this video, but note the comment by Kinnik Kinnick about simplifying the code with a map function:
-
Coupling the servo and lever with a spring doesn't preclude detecting a mismatch in the servo and lever positions. And don't limit your definition of "servo" to purely RC devices. You could easily make a suitable servo with a geared motor or even a stepper motor...
-
Maybe couple the throttles to the servos with springs. Like "servo savers" that are designed to protect servos if the mechanism jams. Then drive the servos to the position you manually select so that they follow the manual input. I don't know how DCS defines the throttle servo position, but if it's no different from manual input, that driving part could be as easy as just using the throttle position output. The only problem I see is that the servo moving the physical throttles might disengage the auto mode because it thinks you're trying to override it.
-
Sorry, I forgot the == thing. As for the dim light, it might be turning on and off very quickly for some reason, rather than staying on. Try !=1 in the if statement and switching the HIGH and LOW.
-
"LEDpin" is the constant for it. You can either replace that with the number, or put this at the beginning of your code: #define LEDpin 3 // 3 is the LED's pin number
-
Be careful that you don't do it to the detriment of your relationships. It HAS been a risk for at least one member here.
-
3 wires.
-
OR: void onSelJettKnobChange(unsigned int newValue) { if (newValue = 1) { digitalWrite(LEDpin, LOW); } // 1 is the value for SAFE else { digitalWrite(LEDpin, HIGH); } } DcsBios::IntegerBuffer selJettKnobBuffer(0x7480, 0x0e00, 9, onSelJettKnobChange);
-
Which version of DCS-BIOS are you using? Hub or Flightpanels? Flightpanels has a function: DcsBios::LED cmsdJetSelL(0x74d4, 0x8000, PIN); Does that do what you want?
-
You can't put the "DcsBios::LED" thing inside the other functions. The "onEngineCrankSwChange" function returns the position of the crank switch - 0,1, or 2. You should use that and read the value, then turn on or off the LEDs as appropriate using digitalWrite in a switch / case function. Yes. Do the same as with the crank switch, but just turn on the LED for every position except SAFE.
-
No. The part INSIDE the parenthesis ( e.g. "SEL_JETT_BTN" ) is the part that has to be as it is in the control reference. That's the message that gets sent to DCS with the parameters.
-
In the places they're used, they're function class name declarations. They have to be unique. BUT, they're not fixed in the code. You CAN rename them. e.g. /* PIN 2 */ DcsBios::ActionButton selJettBtn("SEL_JETT_BTN", "1", 2); // // // /* PIN 15 */ DcsBios::LED selJettBtnLED(0x7480, 0x0100, 15); Note "LED" added to the end of the second one. It could easily be a number, but "LED" is more indicative of its function.
-
I just did it. It DOESN'T say "Normandy 2.0" in the map list, just "Normandy". I thought it might be an error, so I selected that and went to look at Westminster, Trafalgar Square, etc. and they're there.
-
When you run the Hub installer, it does it for you. On the Tek Creations link, there's another to the DCS-BIOS Hub installation instructions. I don't remember exactly what happens with the install, and I don't use Hub any more as it's woefully out of date. It looks like they created their own Hub plug-in too.
-
Did you get the HUB version, or Flightpanels version of the panel? They often use different addresses, so might not be compatible. Additionally, you need the scripts/DCS-BIOS folder and export.lua (don't remember the exact names) in the saved games folder for DCS.
-
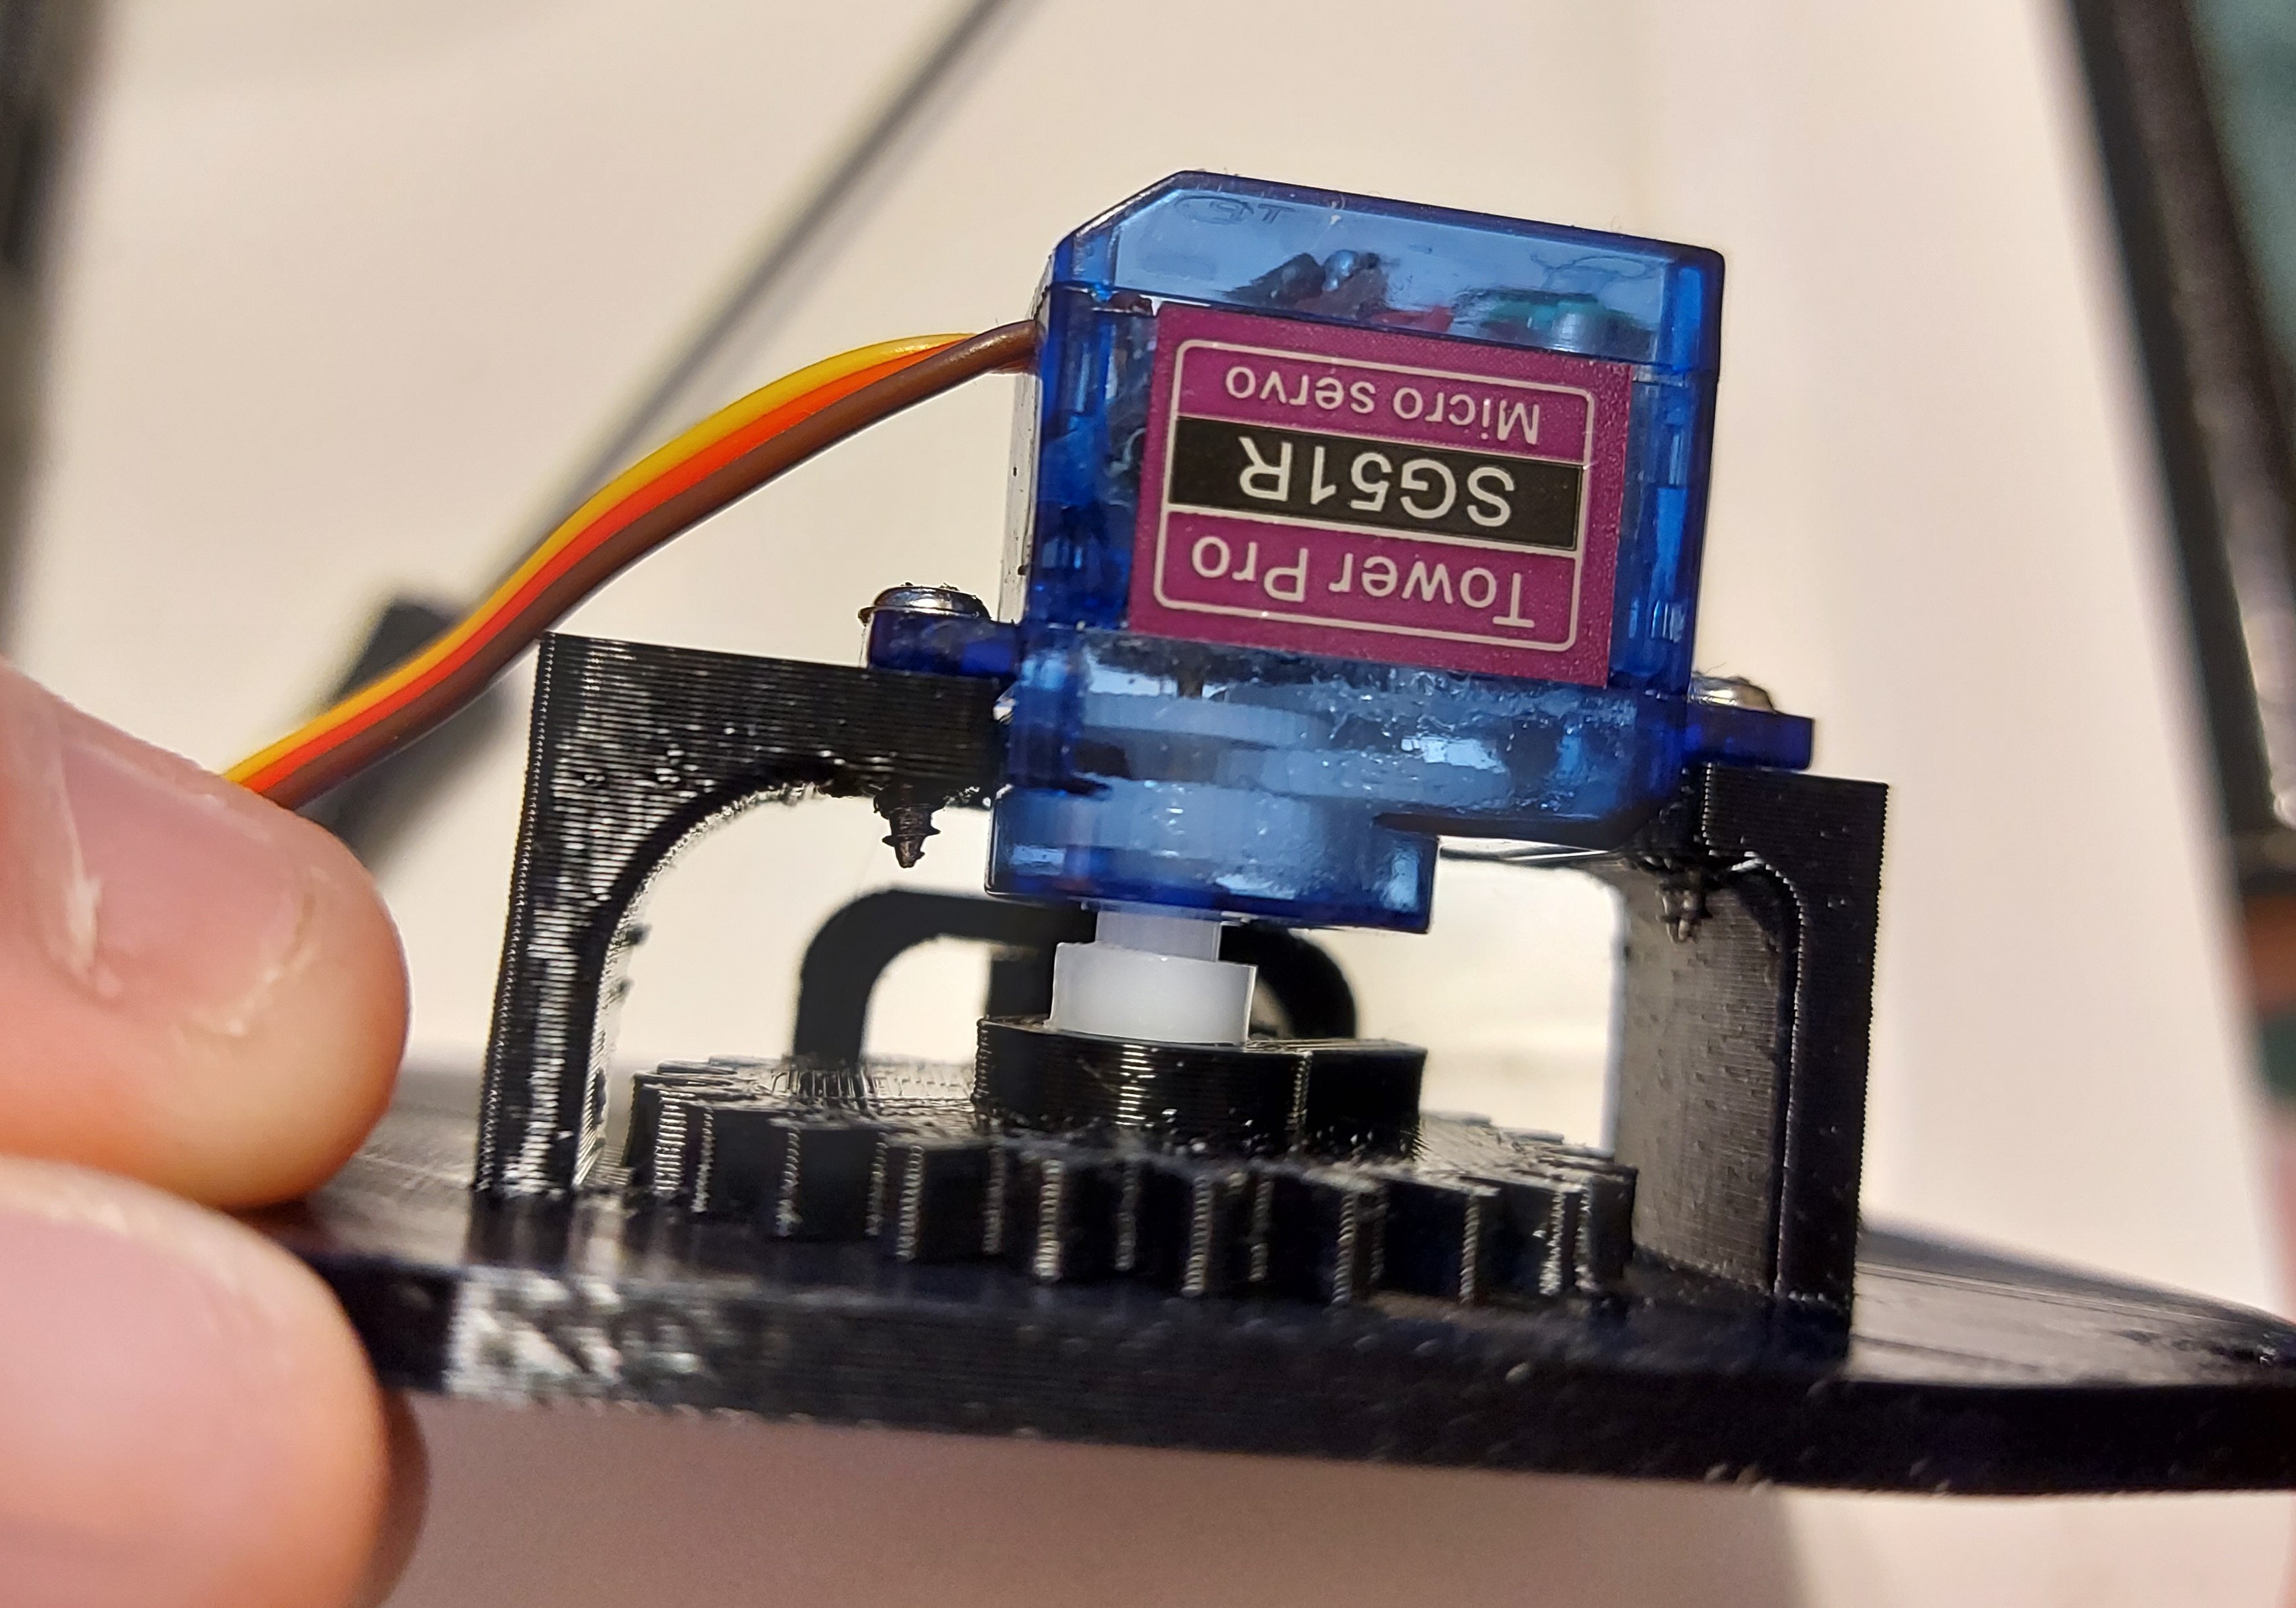
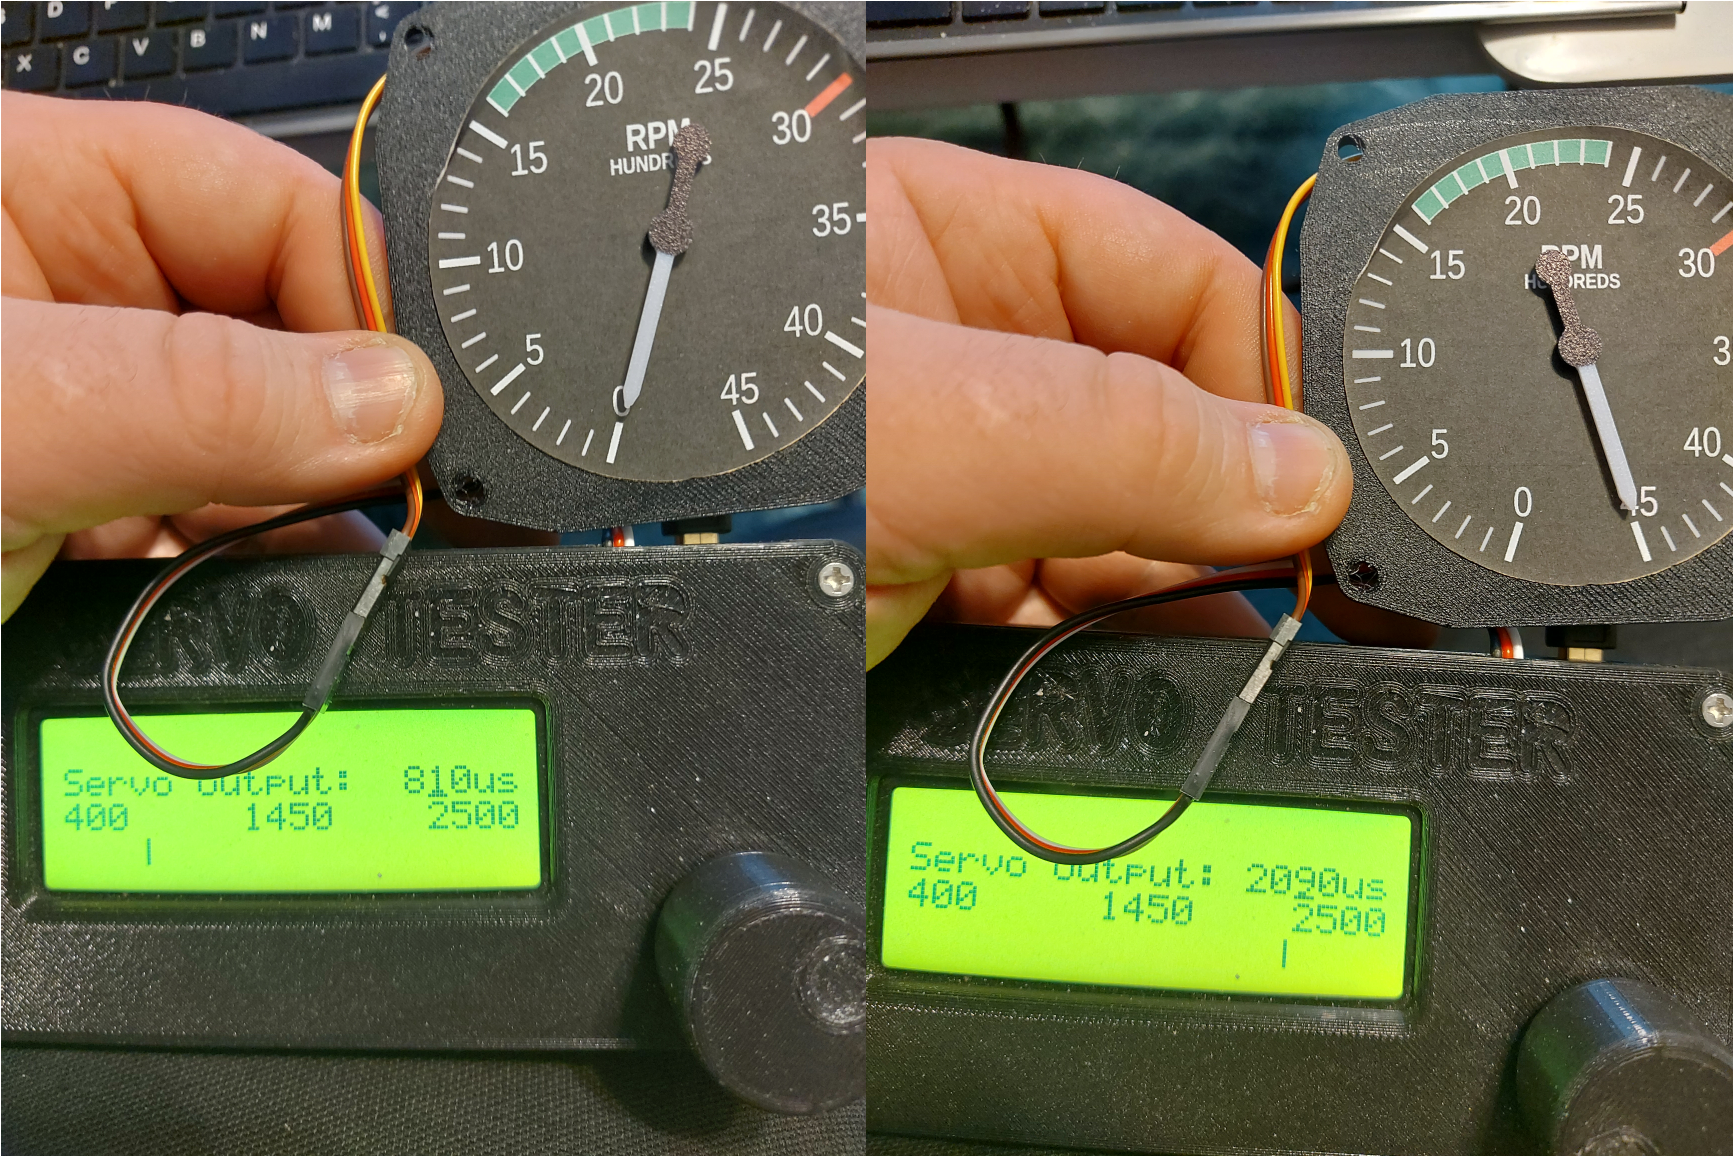
So maybe it slipped again... BUT, here it is: First I built a gauge mechanism that can travel greater than the normal 180 degree limit of the servos I used. To do this, the needle is attached to a gear with 9 teeth, and the servo horn sits in a "socket" on a gear with 24 teeth. This gives a ratio of approximately 1:2.66. Next, I used my Servo Gauge Calibration Tool to determine the us times for the 0 and full travel points to put in the servo code line: So 0 RPM is 810us and full travel (4500 rpm) is 2090us. You can find these by trial and error, but I find the tool I made easier. For details of the tool I made, see my thread here: https://forum.dcs.world/topic/272571-servo-gauge-calibrator/ This is the code for the gauge. I used the P-51 RPM gauge as it's a module everyone has access to: /* Tell DCS-BIOS to use a serial connection and use interrupt-driven communication. The main program will be interrupted to prioritize processing incoming data. This should work on any Arduino that has an ATMega328 controller (Uno, Pro Mini, many others). */ #define DCSBIOS_IRQ_SERIAL #include "DcsBios.h" /* paste code snippets from the reference documentation here */ //P-51 RPM gauge servo code line: DcsBios::ServoOutput engineRpm(0x5072, 3, 810, 2090); // Pin 3 is a PWM pin on the Uno I used for this demo void setup() { DcsBios::setup(); } void loop() { DcsBios::loop(); } And here it is working: The main limitation of this teechnique is that it cannot be used on gauges that require continuous rotation, such as altimeters, etc. Some people don't like the noise or jitter, but the simplicity fo the coding probably makes up for that. You can also combine two servos in one gauge if they need less than 180 degree travel:

-
On the second question (Throttle lifts): DCS-BIOS doesn't handle some of the controls, so you'd need some form of HID device, e.g. the "right kind of Arduino" if you want to automate some of that. An arduino Pro Micro or Leonardo can be made to act as a HID as they have the 32u4 processor, NOT the 328 "normal" arduinos have. In this case, you could manually read the switch and send joystick button signals. You CAN do this in the same device as DCS-BIOS. Look here for an example:
-
On the first question: Yes - This would work: DcsBios::Switch2Pos ufcMasterCaution("UFC_MASTER_CAUTION", 2); // A-10C / A-10CII Master Caution Reset DcsBios::Switch2Pos masterCaution("MASTER_CAUTION", 2); // F-16 Master Caution Reset DcsBios::Switch2Pos masterCautionResetSw("MASTER_CAUTION_RESET_SW", 2); // FA-18 Master Caution Reset You have to be careful, though - The arduino would send all three commands (in quotes) in sequence, so you need to make sure there's no conflicts that would cause problems. If two aircraft use the same command, you only need the line once. e.g. DcsBios::Switch2Pos gearLever("GEAR_LEVER", 3); // A-10C, A-10CII DcsBios::Switch2Pos gearHandle("GEAR_HANDLE", 3); // F-16 DcsBios::Switch2Pos gearLever("GEAR_LEVER", 3); // FA-18 - NOT REQUIRED AS SAME AS A-10C In this case, the third line isn't required because it's the same as the first. It would actually give a compile error if it's left in there. Reading LED, etc. statuses could be tricky. That uses addresses, so you'd need to test each case individually to make sure there are no conflicts.
-
ISTR it's cheaper still if you already have Normandy AND the Channel
-
They're new. Last time I saw a square screen that size on Aliwhatever, it was over £200...