=475FG= Dawger
-
Posts
1933 -
Joined
-
Last visited
-
Days Won
1
Content Type
Profiles
Forums
Events
Everything posted by =475FG= Dawger
-

Where did all the WW2 people go?
=475FG= Dawger replied to flygav's topic in Western Europe 1944-1945
DCS WW2 just isn't up to par. Wildly inconsistent damage, engine and flight modeling make it thoroughly unenjoyable. For now, my group (Historically, a WW2 group) is flying Cold War 1947-1991 for the most part with some holding their nose and flying in Enigma as well. -
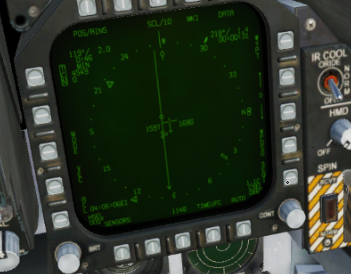
You are misunderstanding aspect angle, which is what is being displayed.
-
-
Alpenwolf's Cold War 1947-1991 server, beginning around 18:30 UTC today (14:30 US Eastern) Join the Cold War 1947-1991 Discord for more information and notification of future events and missions https://discord.gg/cmvxug89eV
-
Alpenwolf's Cold War 1947-1991 server, beginning around 18:30 UTC today (14:30 US Eastern) Join the Cold War 1947-1991 Discord for more information and notification of future events and missions https://discord.gg/cmvxug89eV
-
Keep missing the base leg approach to Final
=475FG= Dawger replied to rocky's topic in Guides & Tutorials
Its all about learning what the "picture" should look like when abeam your landing point on downwind. It doesn't matter how you get to that point. If you arrive at the correct spot on speed and altitude, your turn to final will work out. And once you know what it looks like, you will know when you are out of position and what you need to do to correct it. And remember you are a virtual fighter pilot. Pull at least 4 G's in every traffic pattern and never, ever fly a straight in approach in a healthy aircraft when you can see the ground. Ideally, supersonic at the IP, 10 feet off the deck and a 6 g break -
Keep missing the base leg approach to Final
=475FG= Dawger replied to rocky's topic in Guides & Tutorials
This is what I mean about getting wrapped up in procedure. Fly the airplane. If you need speed brake, use it. If you don’t need it, don’t deploy it just because some diagram says speed brake. -
Keep missing the base leg approach to Final
=475FG= Dawger replied to rocky's topic in Guides & Tutorials
It really isn't an airframe specific issue. It's basic airmanship. Learning to fly the overhead by rote procedure specific to one aircraft isn't the best path forward. -
Keep missing the base leg approach to Final
=475FG= Dawger replied to rocky's topic in Guides & Tutorials
There are several basic errors occurring. First some geometry. The overhead pattern is two half circles and two parallel lines. In order to achieve the desired result, the two half circles must be the same radius and the lines must be parallel. If you insist on using a 30 degree bank turn to final, the break turn MUST be equal to the radius of that turn to final. Errors in the initial break that will result in an overshoot on the final turn are any combination of too slow and too much G. If you arrive out of the break turn the correct distance from the landing runway, you can still screw the pooch by not flying parallel to the runway. Most people naturally cheat towards the runway, resulting in getting too close and a subsequent over shoot on final. You are doing all of the above. In the Hornet (actually, any airplane flying a 30 degree bank at a similar speed), your distance from the runway on the downwind leg is about 1-1.5 nm. One of the aids available in the Hornet is to put up the HSI page on scale 10 with a course line set to the base recovery course (BRC). With this setup, placing your wingtip on the DDI on the course line gives you the approximate correct distance from the runway on downwind. null Don't get too wrapped up in precise numbers and procedures to the exclusion of flying the aircraft. All flying is constant error correction. The difference between a good pilot and a bad one is the speed and magnitude of the required error correction. An example is your use of speed brake in the break turn. You are extending your speed brake prior to initiating your break turn. You are already on speed and altitude so doing this is actually causing you problems. It is contributing to your excessively tight break turn by slowing you down too much, resulting in a small radius. Speed brake as necessary. It is not necessary for a 350 knot level break to downwind. Do everything for a reason and the reason is not because someone said it was the proper procedure.
-
can you experience the saber dance in the F-86F?
=475FG= Dawger replied to WelshZeCorgi's topic in DCS: F-86F Sabre
Any swept wing aircraft has the possibly of at least starting a "Sabre dance". Few have the power and wickedness to do more than the first step or two before smiting the earth. -
Multi-ship tactics against equal or superior numbers is exactly where they shine the most. Pre-merge formation and maneuvers are designed to divide and conquer and are very effective against superior numbers flying without coordination. Thinking of a multi-ship merge as a bunch of 1 v 1's makes you easy to kill. Most of the time in a multi bandit merge, the bandit you merge with is NOT the one you are engaged with. An example is a 2 v 2 bracket. If you and your wingman have managed to get to the outside at the merge, both bandits will be giving their sixes to one or both of you. Both bandits usually die in the first 180 degrees of turn.
-
Mach Tuck occurs prior to the aircraft going supersonic and can occur well below Mach 1. Mach tuck happens when local airflow over the airfoil exceeds Mach 1, no matter how fast the aircraft may be going.
-
DCS customers dynamic PvP-servers cooperation poll
=475FG= Dawger replied to D4n's topic in Multiplayer
-
Hopefully, this involves un-screwing some recent screws.
-
The standard lapse rate is 2 °C per thousand feet up to 36,000 feet…
-
It's going to be more hazardous to fly a Blue Helicopter. With no human GCI to ID and the possibility of R-60M, visual ID of a helo prior to engaging is going to be very unpopular (At least for those of us in VR). Seeker tone and launch the Aim-9 before you get in the R-60M WEZ will be the safest path.
-
I am not too concerned with whether or not the A/A capability of the Hind will result in unbalance. However, hiding helicopters from radar is extremely unrealistic as they are extremely good radar reflectors. So, the reason to do it is a concession to their vulnerability from attack by fixed wing aircraft. If they can shoot back, they should be visible on radar. Otherwise, they are, effectively, highly mobile SAM batteries.
-
In missions with R-60M's on Hinds, perhaps they should be visible on radar.
-
There are aircraft the world over defying your understanding of physics on a daily basis.
-
Fix the lateral before the vertical. The most common mistake for the wingman is to use pure pursuit (pointing at lead). If you point at lead in a full throttle climb, you will never catch him or be able to get into formation. Instead, you fix the lateral before the vertical. Go level or climb at a lower deck angle than lead, generating more speed than he has. Do that until you are AHEAD of lead's 3-9 line, then start climbing or climb harder than previous and you will be able to slip into your proper formation position.
-
Yes, our standard procedure in the F-5 is 450 knot afterburner climb to our chosen ingress altitude (usually above 20 for fuel) Its pretty simple to stay in combat spread if you understand the geometry of joining and staying in formation. BTW, one of the major reasons air forces teach formation flying is because it is the learning laboratory for BFM. If you cannot close, join and maintain formation on someone who WANTS you too, you will be hopeless trying to do it on someone actively trying to prevent it. The quickest way to evaluate someone's basic skill level at BFM is a very short formation flying hop.
-
Actually, head movements are visible in VR but we still use discord. No hand movements... yet. In a fight we (my wingman and I) don't need to talk much pre merge and post fight, but we have been flying together a very long time and know what to expect. Makes it hard work to fly with someone without that shared experience unless they have had some serious training.
-
While giving the wingman a little power is good form, there are ways to maintain and regain formation position without touching the throttle. Every turn or climb is an opportunity for the wingman to fix his position. And an effective wing pair need to be able to maneuver in combat spread pre-engagement with minimal comms. Tactical turns need to happen completely automatically so they need to be practiced constantly. Post engagement rejoins need to happen quickly and smoothly without the need to communicate more than the egress heading.
-
QNH is the local pressure corrected to sea level. What you see on the altimeter is your altitude above sea level QNE is pressure referenced to the International Standard Atmosphere. What you see on the altimeter is termed “Flight Level” QFE is uncorrected local pressure. The altimeter indicates Height above the reporting station. All aircraft in the IFR structure above the transition level/altitude will be using QNE.
-
While I cannot speak directly regarding the F-16, 210 knots is maximum tire speed for every jet I ever flew.